
Let me answer the first question you have. Customization. THAT's why you should build shelves as opposed to buying them from Ikea, Home Depot or any other store.
By building shelves yourself you can make sure to use every inch of space that you have and even build your shelves around the boxes you know you're going to be storing on them. No wasted space, no fits when you find out your massive stock pot is ½ " taller than your biggest shelf.
Now that we have that out of the way, I'll give you an idea of the sort of thing I was dealing with when I built my basement shelves. My basement is a nightmare. A place where demons dance. It's creepy and old and built out of rubble.
My basement is 175 years old and is home to an equally aged band of centipedes.
What is has going for it, is it's dry, fairly large and seems to be ghost free.
My basement is a bit of an odd shape with a weird cement ledge all the way around it. This made installing store bought shelves kind of useless. It's hard to describe, but by putting up high shelves, I'd be losing space behind them. Many, many square feet of space.
So. I never put up shelves.
Instead I dumped stuff upon stuff upon stuff. I'd find old shelves at garage sales or on the street and throw them down in the basement hoping they'd help solve my storage problems. They did not. They did not help at all.
When I had my basement sprayed with foam insulation this summer, I had to move every single thing down there into the middle of the basement so they guys could have room to work spraying around the outside walls of the basement. It was such a huge job I figured while I had everything moved I might as well think about building actual shelves.
It took $100 and 1 day.
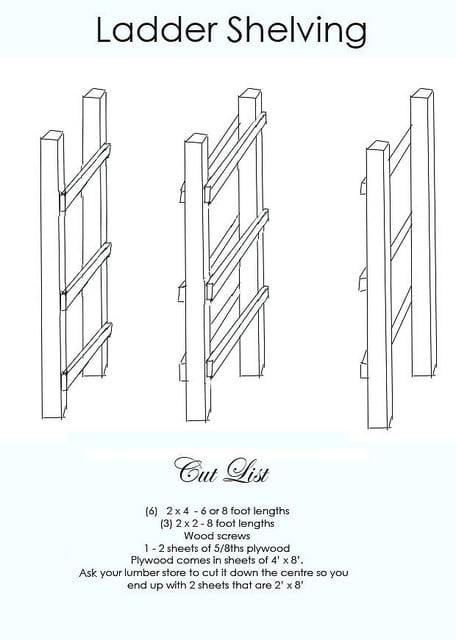
That's right. All you need to do is basically build a series of rudimentary ladders. I've drawn the plans up so it involves the minimum amount of cutting on your part as possible.
This project is simple enough that someone with a basic knowledge of tools and building can make them in a day.
To do this you will need a few tools though.

The wood you use to build your shelves will depend on the height of your ceilings and the size of your wall. But if you follow the general plan I've given you in the picture above you can adapt them to build shelves to your heart's content.
The only thing you have to remember is to install one "ladder" for every 3-4 feet. This will give your shelves the proper support they'll need and prevent them from sagging. Also make sure to buy ⅝ths plywood and nothing thinner. Thinner will sag over time.
The 2x4 s will be the tall supports of your ladder shelves.
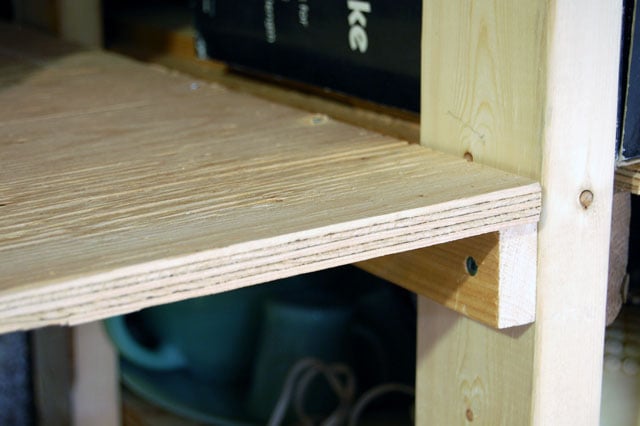
The 2x2 s will be what the plywood shelves rest on. (You can use almost any wood for this. I used a bunch of 1x4 s I had hanging around for instance)
The plywood will be your actual shelves. The more shelves you plan to have, the more sheets of plywood you'll need.
These plans will make a shelving unit that's 6' long, 6-8' high and 2' deep.
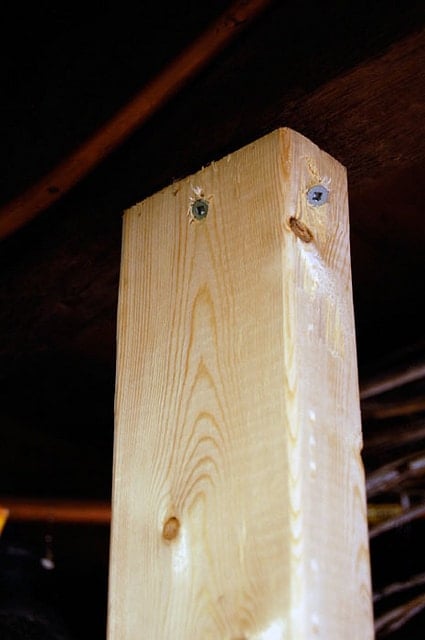
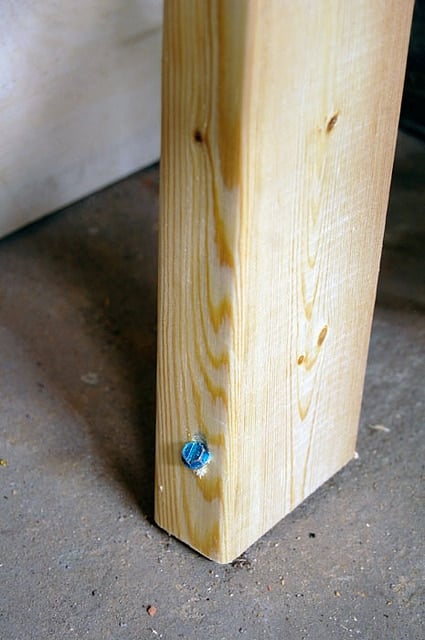
Your tall supports will be attached to the floor joists at the top (floor joists are actually in the ceiling) and into the concrete floor at the bottom.
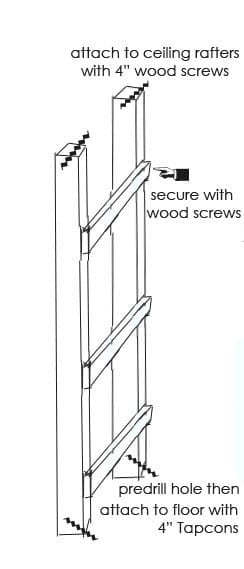
To attach into concrete you need to use special screws called Tapcons. Tapcon is actually a brand name like Kleenex. When you buy a box of Tapcons they usually come with the drill bit you need for pre-drilling the concrete so you don't need to guess at what size of bit to use. It's all ready to go.
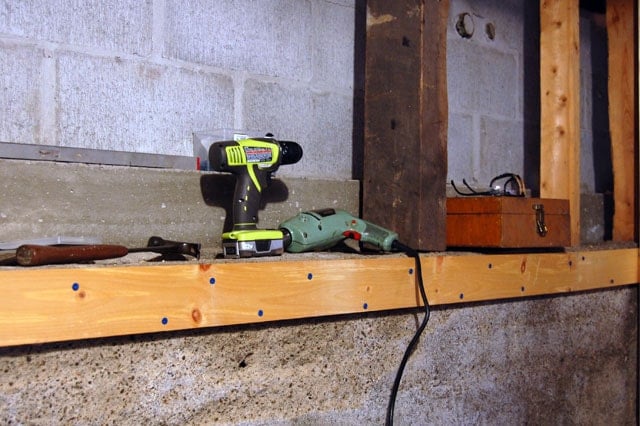
That by the way is part of the reason I say it's best to have 2 drills if you can. Even if you have to borrow one.
One drill for the pre-drilling of holes ... and one drill for setting the screws.
Otherwise you're constantly wasting time having to change back and forth between bits.
To attach the wood to other wood, you just need to use 4" wood screws. I had leftover decking screws, so that's what I used. I used up a lot of crap doing this project actually.
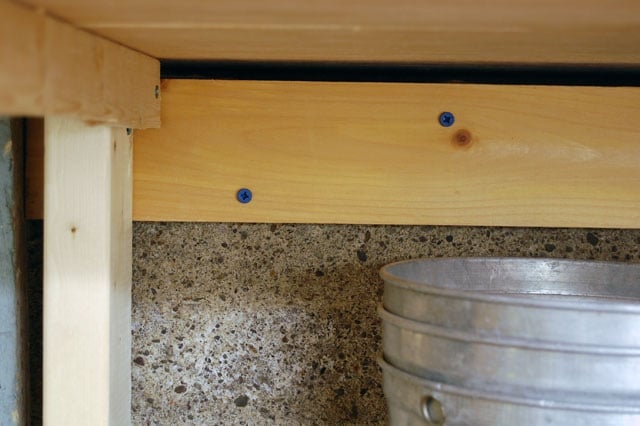
For extra, added security you can run a length of wood across your wall. If it's cement, attach the wood with Tapcons.
This will give you something extra, along with the ceiling and floor to attach the tall supports to.
Again, for this I used an extra length of 1 x 4 I had laying around.
So you'll be securing your supports in 3 places.
#1 ... the floor joists in the ceiling
#2 ... the floor
#3 ... the wall
You can either build your entire ladders first, including the shelf supports and attach them to the ceiling, floor and wall,
or
You can build your ladders with one shelf support a few inches up from the bottom, and one at the very top, attach them to the ceiling, floor and wall and then attach the rest of the shelf supports once the ladders are up and secured. Doing it this way is useful if you want your shelves to be at custom heights for big boxes and such.
Just measure you biggest box, then measure up from your lowest shelf support. Cut your plywood shelf to fit, and then do the same with the next box and shelf support.
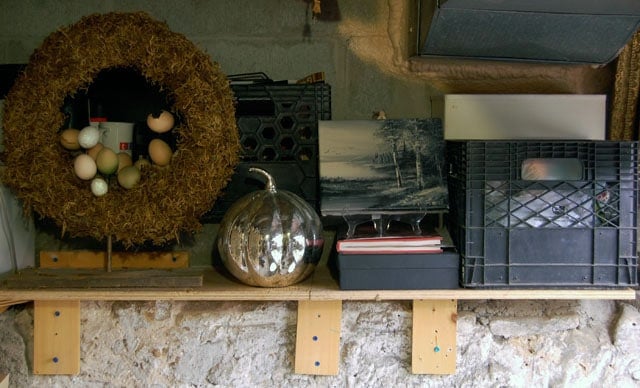
As you can see, I did a variety of shelf heights to accommodate the variety of boxes and things I had to store. This way I wasn't wasting any space at ALL.

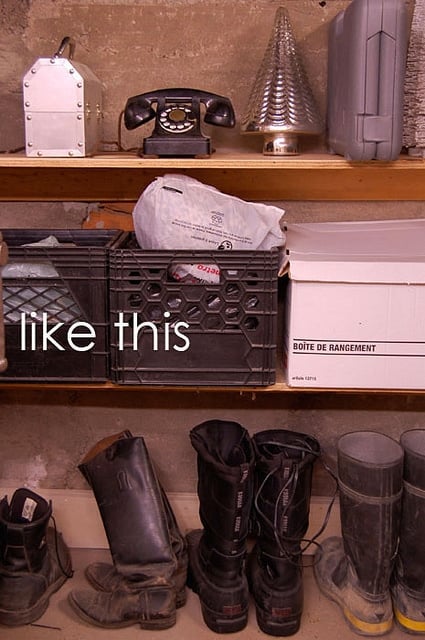
When I first started to take the after pictures of my basement for you it wasn't looking so hot. So, I styled my shelves and got them looking pretty by putting stuff in baskets and boxes.
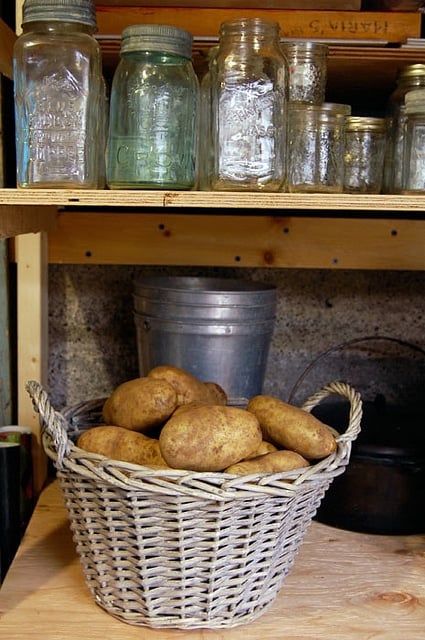
I recommend you do the same. I love going into this basement now, not only because of how organized it is, but because it looks half decent. Take your garbage bags out of their ugly cardboard box and put them in a nice basket. Ditto for storing potatoes or anything else.
I never would have done this if I wasn't taking pictures and I'm so glad I did.
So that's my word of advice for the day. If you redo your basement, do it like someone's going to come in and take pictures of it. It'll make you happy every single time you go down into that hell hole.
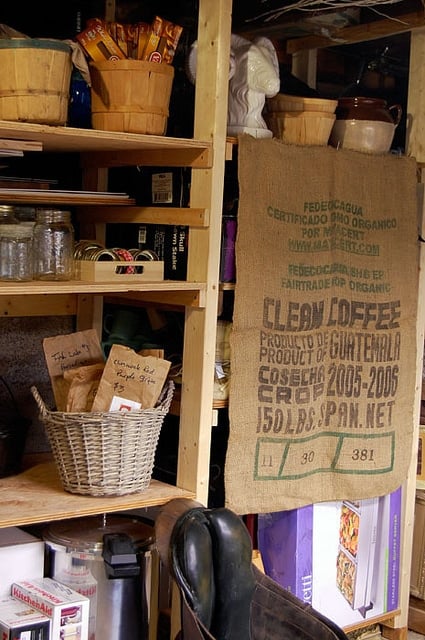
One section of my shelving unit is devoted to Halloween and random house accessories that aren't in rotation at the moment. Those 2 shelves look really messy and ugly so I covered them up by tacking up a burlap coffee bag I scored from my local health food store. You could do any kind of drape or a length of plain cotton fabric. Just tack it in place and lift it when you need to get into that area. It just helps to get rid of some visual clutter.
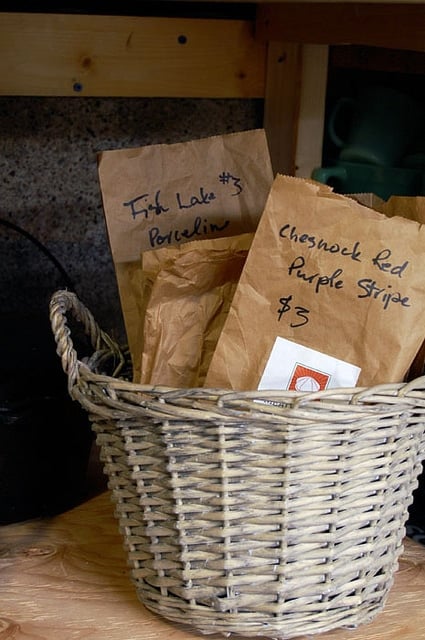
Bags and bags of heirloom garlic courtesy of my super-fantstic neighbour Jane who picked it up for me when she was on vacation this summer.
Just waiting to be planted in late October.
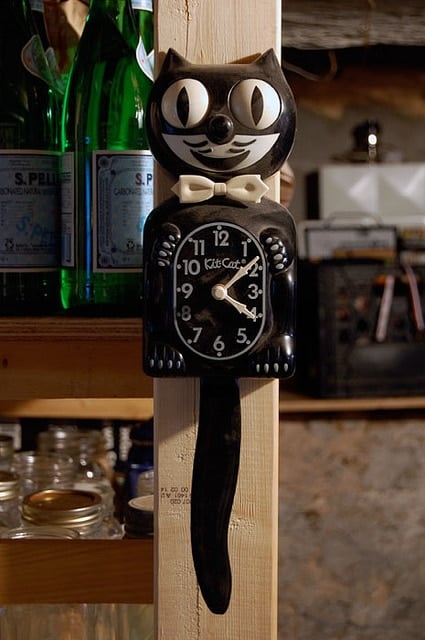
Getting organized allowed me to make use of a few things that were just thrown into the original messy basement.
Things like my kitty cat clock were pulled out and hung up.
By the way. You haven't lived until you've gone to Costco and bought the jumbo packages of paper towels and toilet paper because you actually have somewhere to PUT them.
I feel like a princess.
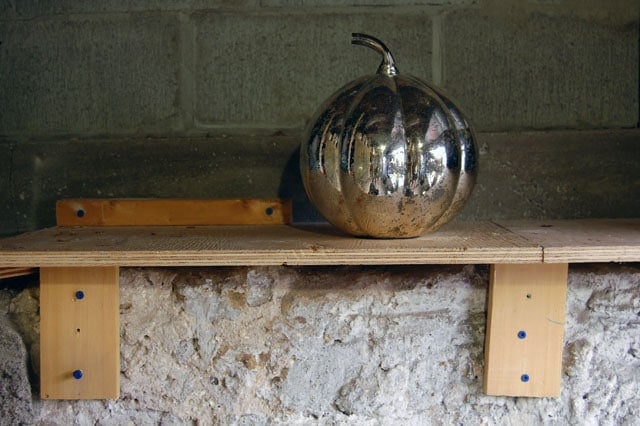
Once I got the hang of it I was putting shelves everywhere I could fit them.
This one isn't exactly pretty, but drilling into boulders is a LOT harder than you would think.
This area is a work in progress ... I'll be showing you how to build a handy little basement table in this very spot in the near future.
And now onto the other side of the basement.
The workshop area.

The one shelving unit I saved from all the pieces of crap I'd collected from the side of the road over the years was this one metal shelf.
It's very narrow and has a lot of shelf space.
Perfect for my canned goods, extra paint cans and craft supplies.
I actually have an entire shelf dedicated to my moss collection.
Yes. Seriously.

It's only been a week or so since I finished the basement and I've already used it for projects I could never use it for before because I just didn't have the room.
Plus everything was all over the place and disorganized and I was always knocking something over ... bleh.
Now? It'll make reupholstering this little footstool a breeze.
You can't see it but I have a small television hooked up in the corner and also installed a phone line.

Tools? Got em. Whadda need? 'Cause I know exactly where it is.
It's right there. On the wall.
Unless it's a drill or something larger, in which case it's in the cupboards below.
Yup.


I searched all over for jars to put my assorted deck screws in but decided I liked them in their paper bags, so I just rolled down the edges and hung the bags.

Nowhere to put the antique fishing creel? No problem.
Hang it on the wall and fill it with ribbon and bows.
Definitely one of my favourite things.
The ribbons are all on a dowel so they spin. I can just pull out the length I need and cut it.

I realize this may not look like the makeover of the century but I've already gained back the time it took me to rebuild this basement. I've saved 17 hours in the past week just by knowing where my duct tape is.

The best part of all of this is I found my old saddle. I love that saddle.
Now that I have so much time on my hands, maybe one day I'll go for a ride if I can manage to strap it on one of the centipedes.


Now I want a basement.
We don't have basements in Texas even though we're smack dab in the middle of tornado alley and they would be really handy for not getting killed and all. Something about the soil and being so close to sea level, I think. The type of soil makes it cost prohibitive, but not possible death prohibitive.
So I guess this means you didn't turn your entire basement into a giant walk-in refrigerator after all. Will you please tell those of us (and I know I'm not the only one) dying to know where you are keeping your milk and other refrigeration-required food items?
I'm in Texas too! When I was in Fort Worth, we were right on top of the Barnett Shale. We had to water our foundation because the ground was shifting so much because of the shale underneath us. Apparently watering the house foundation helped it stay more flexible to shift with the ground and not crack. I can't imagine what a problem a basement would be there. Every spring during the storms, we'd wish for one though!
Oh I forgot! The odd dead or alive mouse might be wandering around too!
What about the troll who lives in my creepy old stone basement along with the millions of spiders, centipedes and stone dust? I would love shelves like that but it's scary down there and I tend to pitch stuff down there from the top of the stairs and hope the troll finds a spot for it! Eek! :-)
Hah! Trolls are good like that. I'm sure you'll be fine. ~ karen
Great dustpan.
I'm back to coveting and which means i'm going straight to hell from infraction on commandment number 9. I covet your mucho sexy tool system. My "shove them in a laundry bin" tool system is the equivalent of Ukranian grandmother underwear ... not so sexy.
Karen,
Please tell us you did not put the shelves up before you did the foam work in the basement.
Or is the foam work done in another area.
You do have some interesting stuff down there.
Terry - No, I had the foam insulation done first and THEN did the shelves. :) ~ k
Is Nicole Richie/Macy's one of your sponsors? Her ads pop up so many times while trying to read your post that I had to give up. Has this been a problem for anyone else? They keep flashing on and off and cover up your writing.
Susan - You should be able to click the ad closed. If you get the chance ever take a screen shot of it for me and I'll forward it to my advertising network. They are the ones responsible for putting ads up on my site. Since I'm in Canada I don't ever see the ads that you see in America so it's important people let me know what's going on. Thanks! ~ karen
This has been happening to me too. On my screen (an iPad) I don't see anywhere to click to close them. Very annoying! I'll try sending a screen shot.
Thanks Brenda!
Wow! My house is 207 years old, so I know about creepy and cluttered. We do have some work benches, but the shelves for storage you built would be great here! I will be showing this article to my salad bowl today! Thanks Karen!
It looks awesome. I did the same thing in my old house. I totally agree that bought shelving just doesn't cut it. As soon as hubby's gone, I will finish my storage room. I have one wall left. Organization is the best time saver in the world. That, and duct tape! Cheers
Fantastic! It's the perfect solution for all my Christmas decorations that are piled willy nilly in a back corner of the basement. I'm inspired, thank you for the great idea.
Karen, thanks for posting this. I'm now inspired to organize our basement! It's only 100 years old so maybe it will be even easier. I love your humour and writing style. Thanks for the post!
You're welcome Laura ... now get building. Or organizing. Whichever! ~ karen
We're traveling in Paris right now (oh la la) but will when we get back!
You did a great job! I hope those centipedes don't play the drums in the band. Those jars of canned goodies even look pretty. Amazing what you can find when things are organized. Both of our garages are.
I think I own your basement's sibling...The Dungeon. Hasn't been cleaned in years, hubby don't want me to go down there (I have seizures and he doesn't want to come home and find me at the bottom of the steps). It's worse than hell. Friends were visiting last year and wouldn't you know a tornado came to visit, too. THE MOST EMBARRASSING MOMENT OF MY ENTIRE LIFE! I wanted the tornado to suck me right out of there. As we're crowded into what we figured was the safest room....I see a small pile of petrified cat poop. OMG! They haven't been back since.
LOL! ~ karen
Wow, that looks amazing. I can't believe it only took one day to build all those shelves. I would love to have something like that in my basement. Problem is, our basement floods every spring so everything is build up off the floor. It's half dirt and half cement. Even the cement half floods in the spring. Our sump pump runs full tilt in the spring. We've spent thousands to fix the problem but nothing has worked. Consequently any wood that touches the floor eventually rots at the base. I wonder what a person could use to sit the 2x4's on that would be secure enough. Any ideas? It would have to be probably 4 inches high. I can just imagine all the storage space we could have. It makes me excited. :o)
Hi Moe - Yup. Just use bricks. Secure the 2x4s to the wall and the ceiling and slip bricks underneath the 2x4s. (make sure you cut the 2 x 4s to accommodate the bricks of course). Your supports will rest on the bricks but won't be secured into the floor, but it will be fine. They're secured up top and from the side, plus the weight of the stuff on the shelves and the shelves themselves will give you the support you need on the bricks. ~ karen!
Awesome blog, Karen! I have a very nice basement but the stairs to get down there are awful. They curve and have very narrow triangle steps. Then they change to concrete. Better? No, because every step is a different depth so you don't know how far down you are going. Totally crazy. I have a lot more stuff plus a work bench in my garage so that is where I need to build shelves. When my late hubby built shelves in our first house they were so crooked stuff would roll right off. When I carefully mentioned that they were off a bit he said,"Oh, you wanted them level?" LOL He came a long way from those as we eventually owned a construction company and he was a master carpenter. I have wondered if I had not gently criticized that first project what he would have been instead. LOL
Remember that behind every great head of the house is the neck that turns it! When I asked for another shelf in my closet, I was thrilled to find it done when I came home from work until my head of house showed me - he had removed another shelf I was using to make the new one! Thanks for the funny memory, HA
I think it's beautiful! You must be so proud of yourself. I love that feeling of getting something organized, it's almost like you can breathe again! Great job!
Excellent way to describe it Wendy! ~ k
Looks like a project I could tackle when my fella goes moose hunting with the guys :) Could even take this project one step further and white wash the shelve. Thanks for the inspiration and the instructions! Cheers! PS - I scored five 1-quart crown jars complete with lids this weekend for $0.10/jar!!! Want one or two?
SK - I thought of painting the shelves, but then thought ... no. LOL. They'd look great whitewashed. It is incredibly generous of you to offer to ship me some jars but I am officially loaded up with jars, LOL. Unless they're a great colour or unusual in some way I don't have room for a single other one. Not even in my reorganized basement! :) ~ karen
This wonderful! I'm having a new house built over the winter (not nearly as grand as it sounds) - and I'll have a brand-new non-creepy basement to store stuff in. Inspiration!
Lesley - A non creepy basement! Show off. :) ~ karen
OMG! I have a brand new non creepy basement too...
(now)... but it still has that GD ledge!
BUT... my last basement...SCARY!
my daughters called "the tomb"
& no matter HOW BAD their sibling rivalry got, they had an unspoken agreement... if one of them had to go to "the tomb" (always spoken like it was in quotes of course) the other would accompany her.. which was often, as the washing machine was in "the tomb"
Amazing! We have the same ledge - so irritating! Things are stacked up on it until the cats come along & knock somthing down in the middle of the night.
I think I actually have most of the materials to build these shelves on hand! Now I'm getting excited and want to go look, but I have to work in the morning & should really go to bed.
Laura - I wouldn't normally say this, but I vote you don't go to work and build shelves instead, LOL. It took one day to build them and ... another 2 days to put everything in the basement back in order. Totally worth it. Sometimes I just go downstairs, look around and smile.
I was just working on the same thing, clean up/out the storage shelves and junk. Its amazing how it collects. The riding boots and saddle got my attention, mine have collected in the living room, or the horse room as my mother calls it. I guess that is the next place to clean.