Lithium ion batteries are a wondrous invention that are lightweight and long lasting. But it's infuriating when the battery won't recharge. You stick the battery in the charger and ... nothing. Guess what? You can fix these batteries that appear to be completely dead. Read on ...
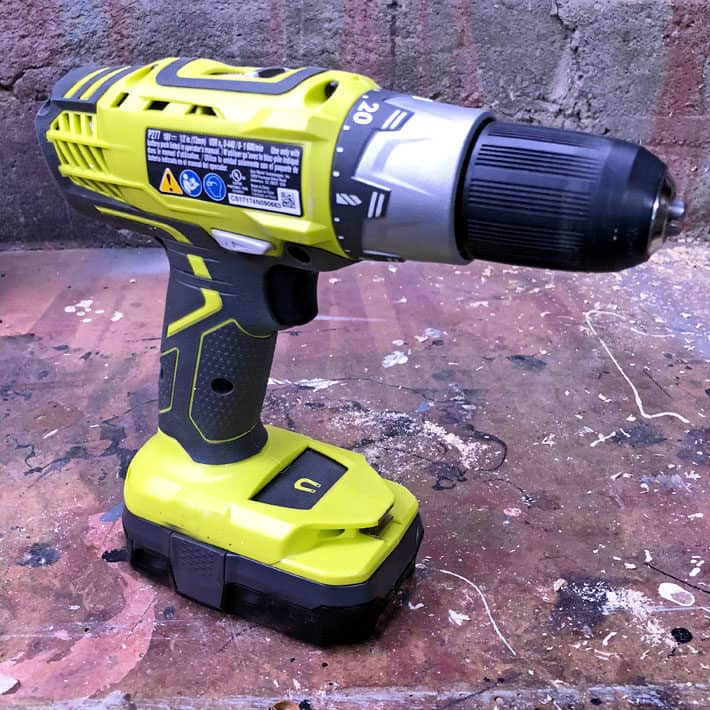
This post is NOT sponsored by Ryobi. They do not approve of or endorse this method for fixing a Ryobi battery. AT all.
Jump straight to the tutorial and how to video.
One of two things are going to happen as you read this post. You will either unfollow me due to my pathological boringness or ... you will propose marriage. So get ready to act accordingly.
If you have any sort of cordless power tool, but especially one powered by a Ryobi 18V battery, you have no doubt encountered the dreaded flashing red charger light.
And if you haven't ... you will.
It inevitably goes like this - you run to the basement to grab your cordless drill because after 10 years of thinking about it, you're finally going to build that 4 level, Tudor style treehouse with kitchenette.
Or you're going to hang a picture. (I can teach you how to hang a picture too)
Either way you put your battery in the charger and all you get is a flashing red light, which according to the label on the charger means your battery is defective. It isn't just dead. It's "defective".
I'm here to tell you it isn't. You probably left it in the charger too long which drains the battery.
Your battery is fine. It just needs a little boost.
This is where you want to go if you're looking for how to boost a car battery.
Table of Contents
You Can Fix a Rechargeable Battery That Won't Take a Charge.
You heard me right. You do NOT have to buy a new $50 battery. You do not have to call the company and swear at them because this stupid "defective" battery is only 2 weeks old. (although by all means feel free to do so) You do not have to wait until they ship you a replacement battery to finish your project. You can get that battery up and working in about 5 minutes.
NOTE: First try pulse charging.
Pulse charge your battery by plugging and unplugging your charger (with the battery in it) for 10 seconds. Try this a few times. If it doesn't correct the problem, continue on with this tutorial.
How to Fix an 18V Battery
What You Need
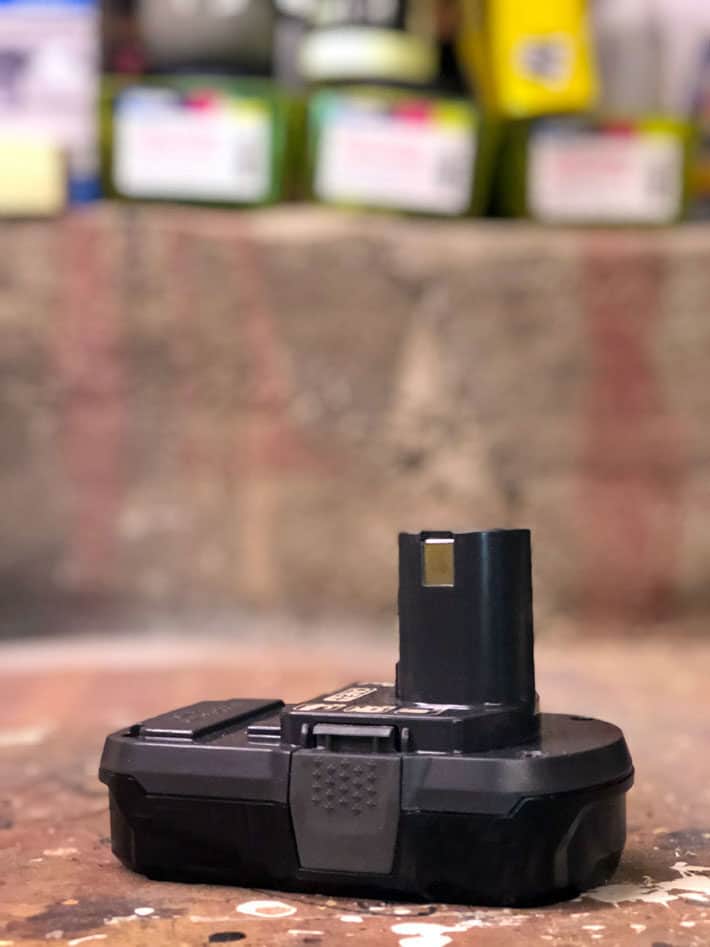
- A lithium ion battery that won't charge
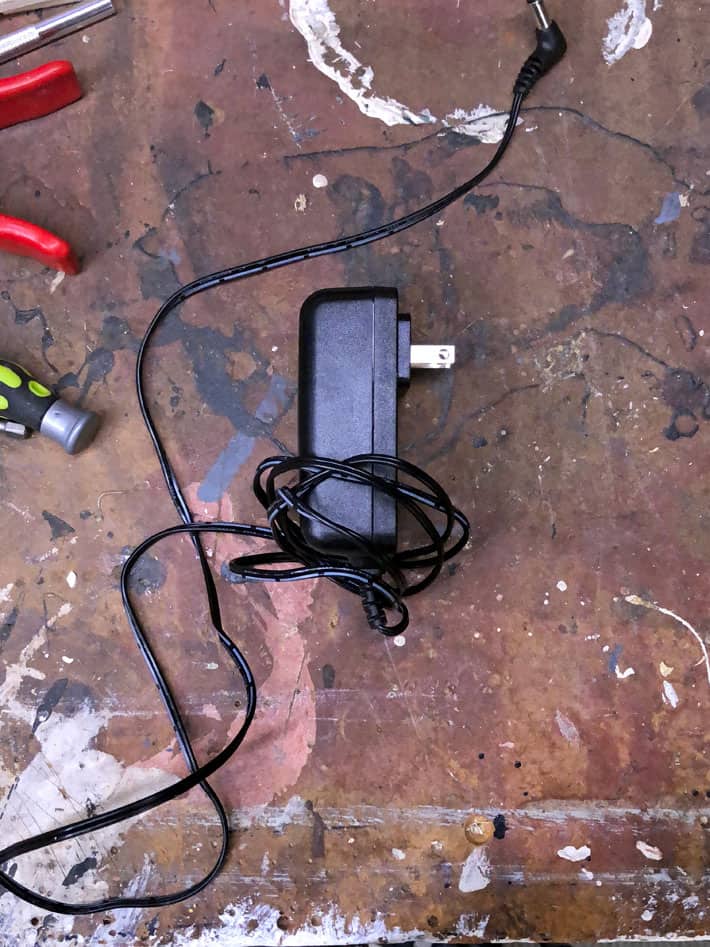
- An AC adapter (an old phone charger for example)
- A multimeter. (this is actually optional but helpful ... if you don't have one don't worry, you can still fix your battery)

Note: If you aren't used to doing this sort of thing, or using things like a "multimeter" this is going to seem crazy hard and way out of your DIY league. It isn't.
Steps
Step 1. Cut the end off of your AC adapter. That's right. Just cut it off. It's for a 10 year old cell phone, you're never going to use it again anyway. It's frankly kind of weird that you saved it to begin with.
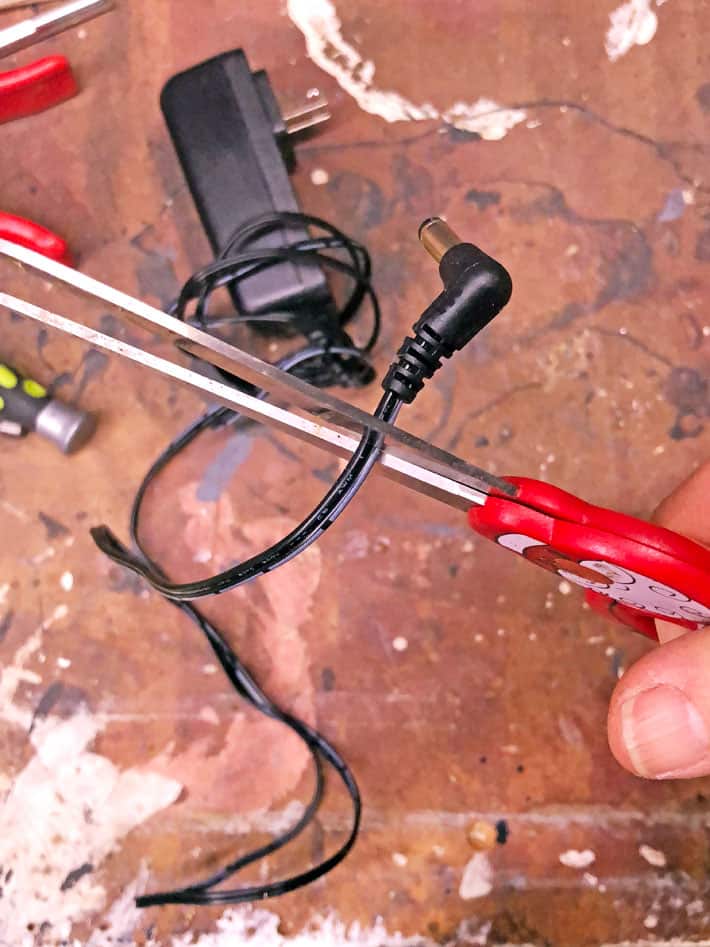
Step 2. Separate and strip off 1" of each wire. You have *just* made booster cables! Good for you.

TIP:
Black wire = negative Striped or solid white wire = positive
IT IS VERY IMPORTANT TO NOT MIX THE TWO UP.
Step 3. Remove the screws holding the battery together.
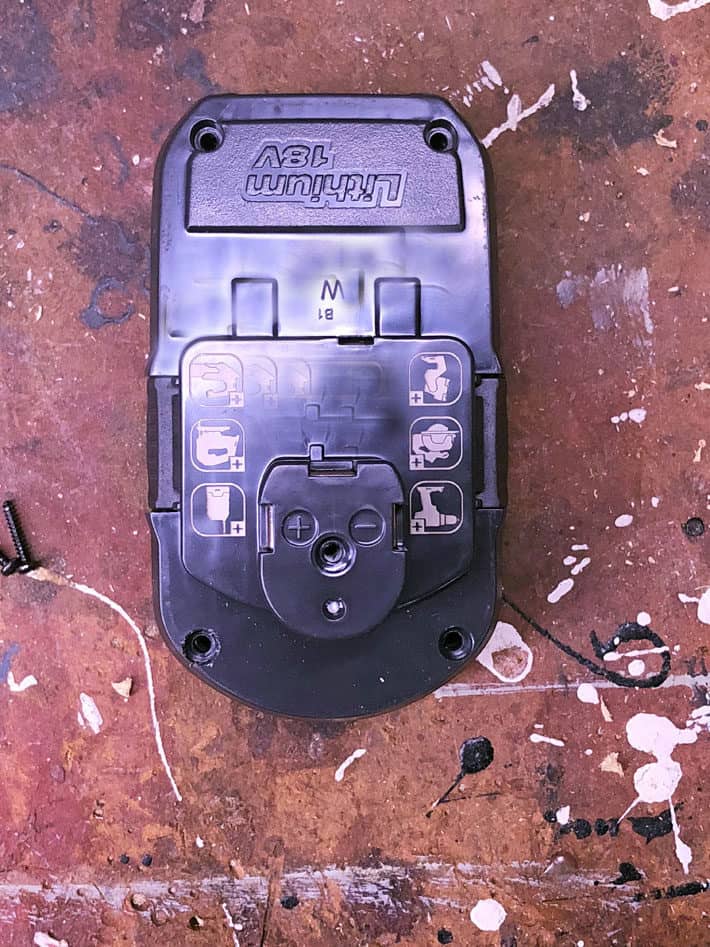
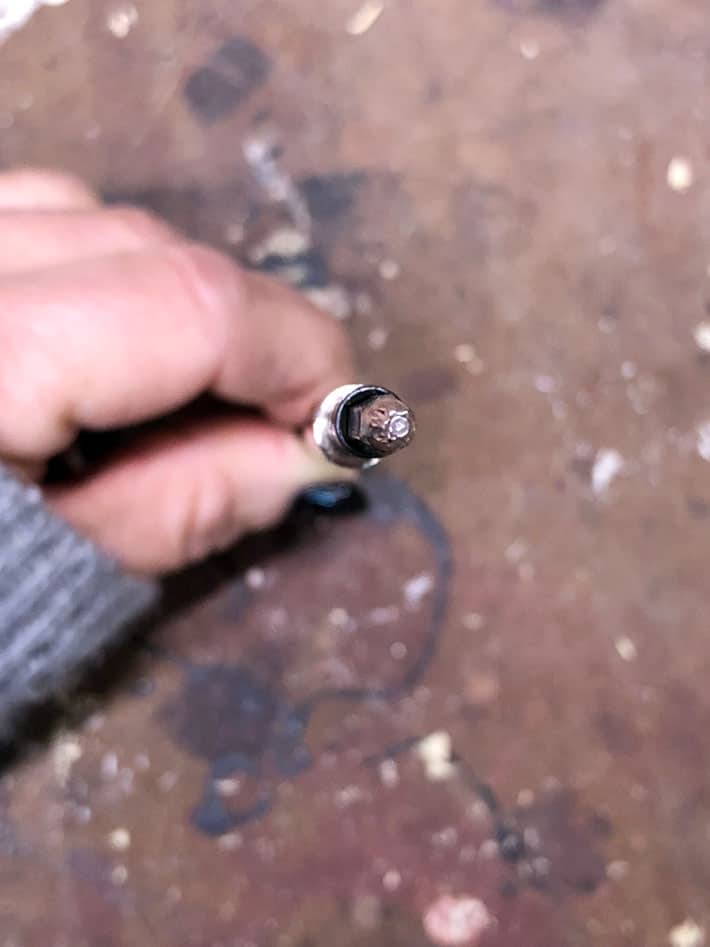
For Ryobi batteries it's a star shaped screw head like the one below.
A few years ago I bought a kit of small screwdriver heads from Amazon that has every small, weird, head you'd ever need.
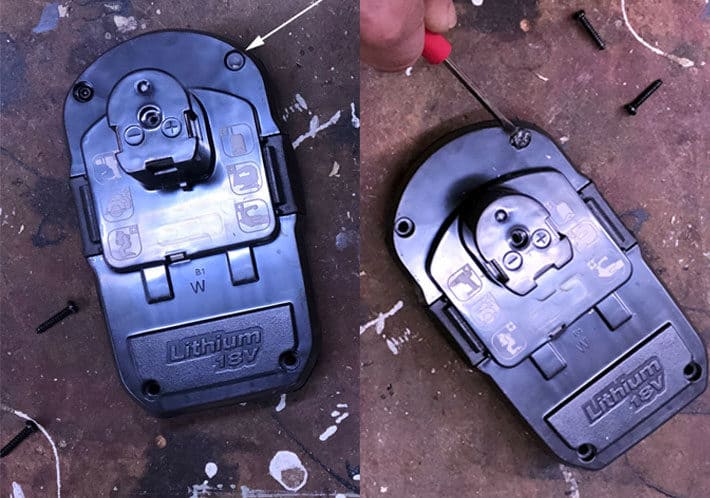
TIP:
There's a hidden screw under a piece of plastic. You need to pry the plastic off to get at the screw underneath. I used a very thin screwdriver to pry it off.
Step 4. Pull the top off of the battery case.
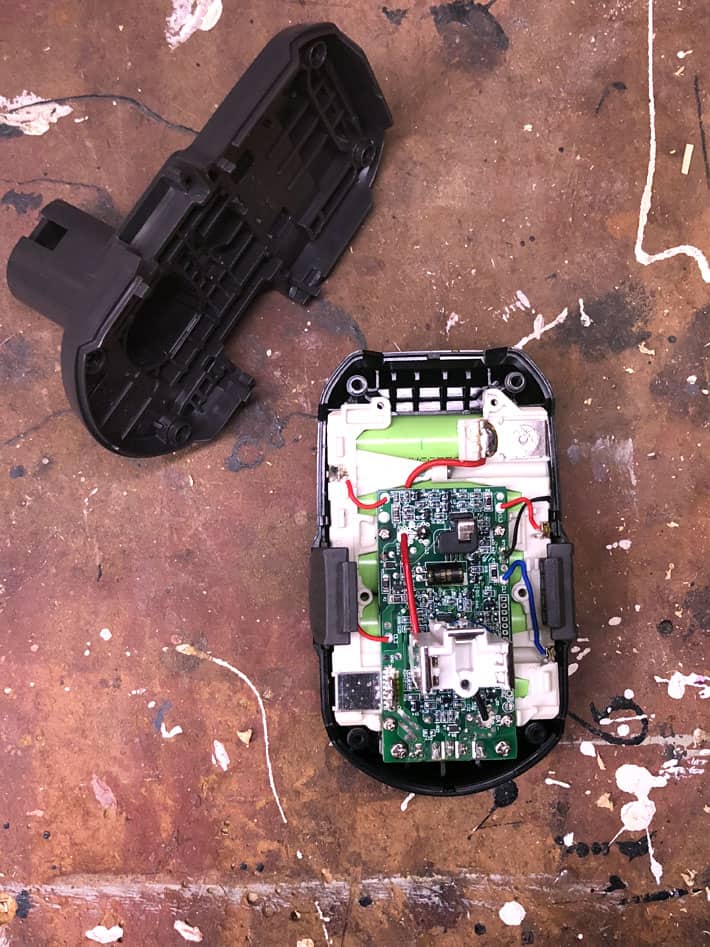
Step 5. Remove the 2 plastic side pieces. They're the things you press in to remove your battery from your drill.
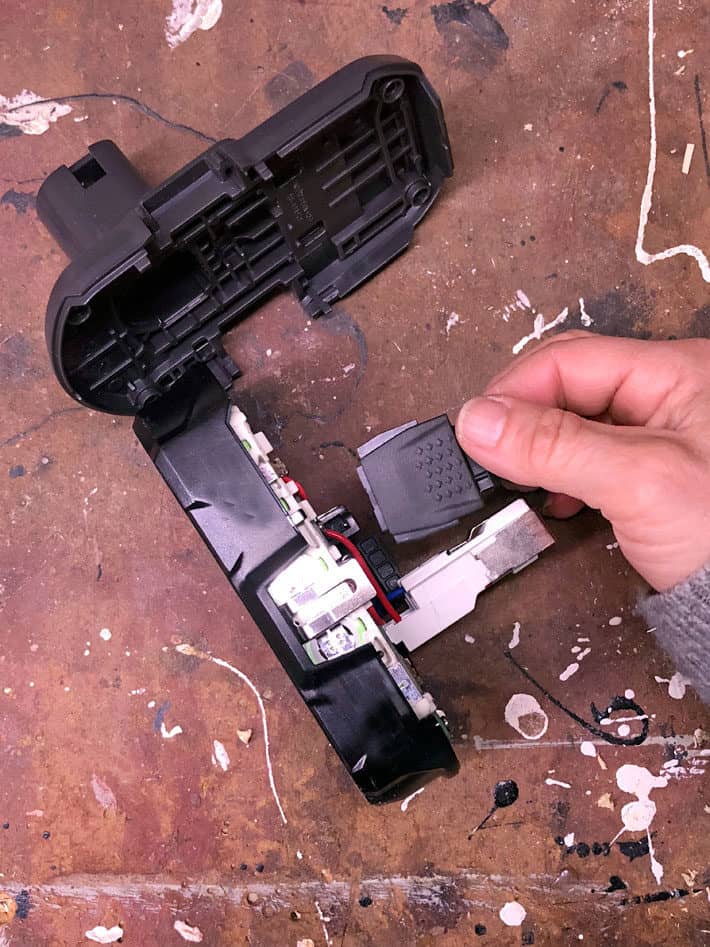
Step 6. Lift the battery pack out.
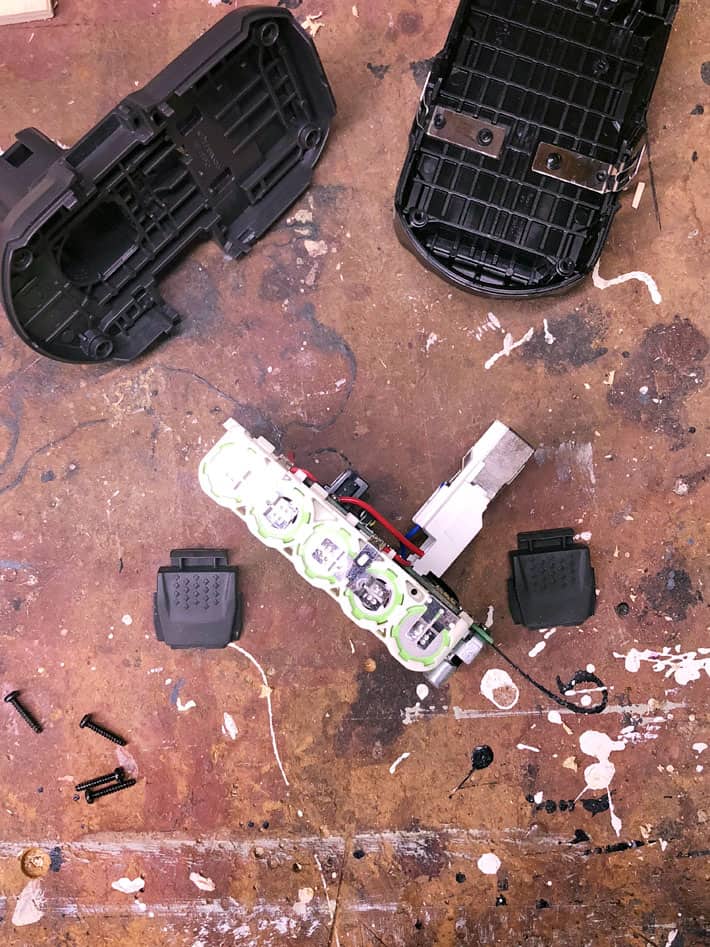
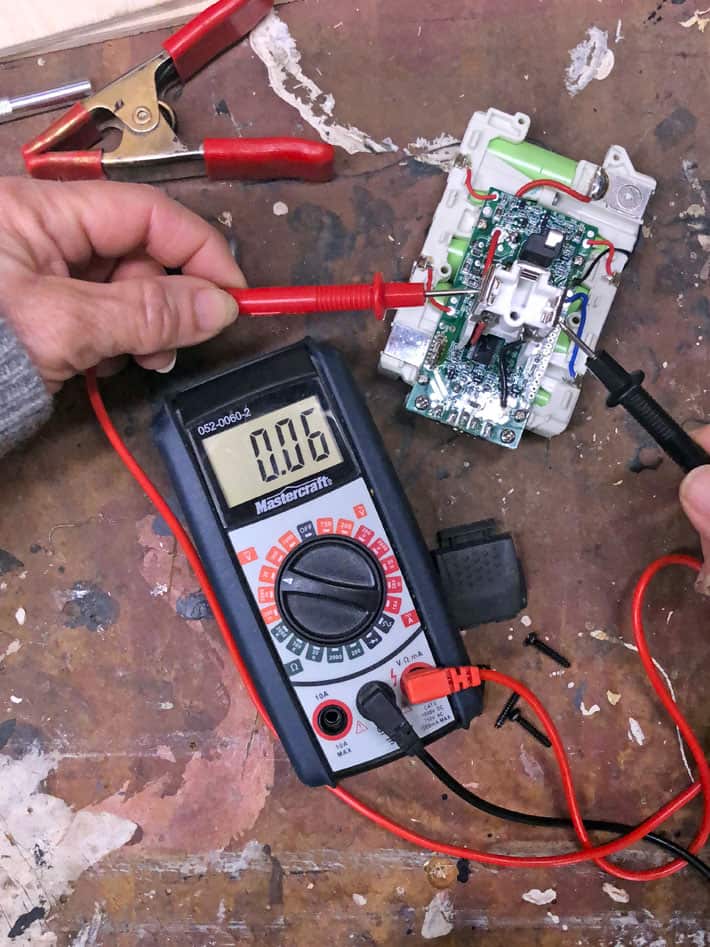
Step 7. Set the Multimeter to read volts. For testing an 18 volt battery choose the 20 volts setting. This will give you the most accurate reading. (If you don't have a multimeter skip to Step 9 and hope for the best)
TIP
Volts are symbolized by a "V" with one or two straight lines over it on a multimeter so it's that section of the multimeter that you use. The section under the V with the straight line(s). Not the squiggly line. The straight line.

Step 8. Touching the red probe to the positive (red) terminal and the black probe to the negative (black) terminal, read the voltage shown on the multimeter. In my case the battery was carrying a charge of 0.06 volts. Which is *almost* nothing, but not completely nothing.
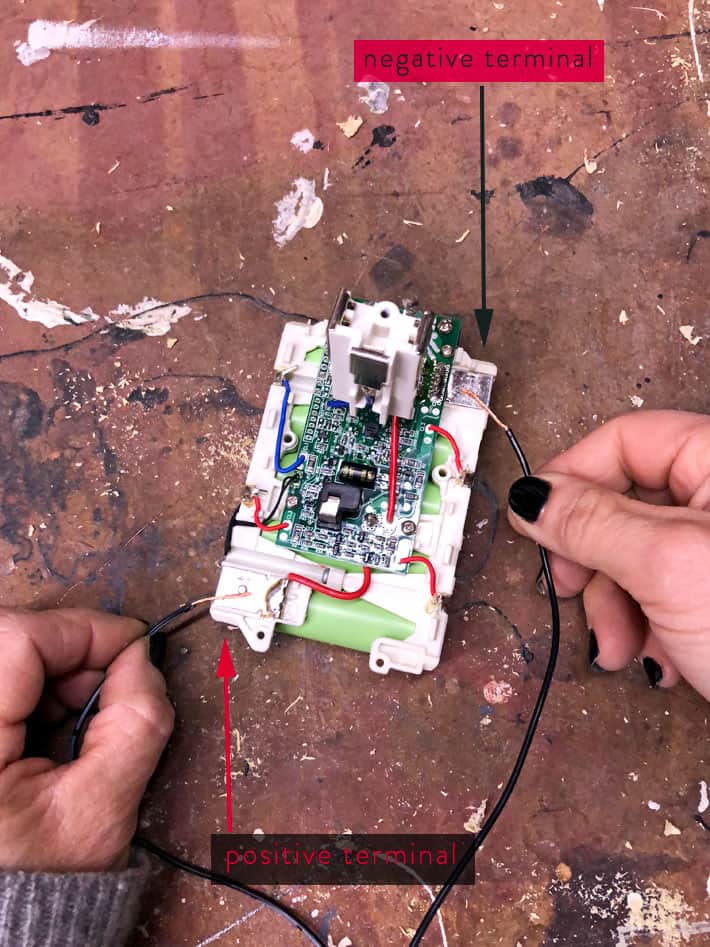
Step 9. Plug your AC adapter in and using the wires, boost your dead battery. Just touch the black wire to the negative terminal (the one with the black wire going to it) and the white wire (or striped wire) to the positive terminal (the one with the red wire going to it). Do this on and off for approximately a minute.
TIP
Apparently lithium ion batteries should be "pulse" charged. Which means you hold your wires down for 15 seconds or so, then release them. Then hold them down again. Over and over.
DOUBLE CHECK THAT YOU ARE TOUCHING POSITIVE TO POSITIVE AND NEGATIVE TO NEGATIVE.
Step 10. Test your the voltage on your battery pack again. It should be higher than it was before boosting. (Again, if you don't have a multimeter don't worry about this - you'll just have to press on without one)
Mine went from 0.06 volts to 7.58 volts after a minute long boosting session.
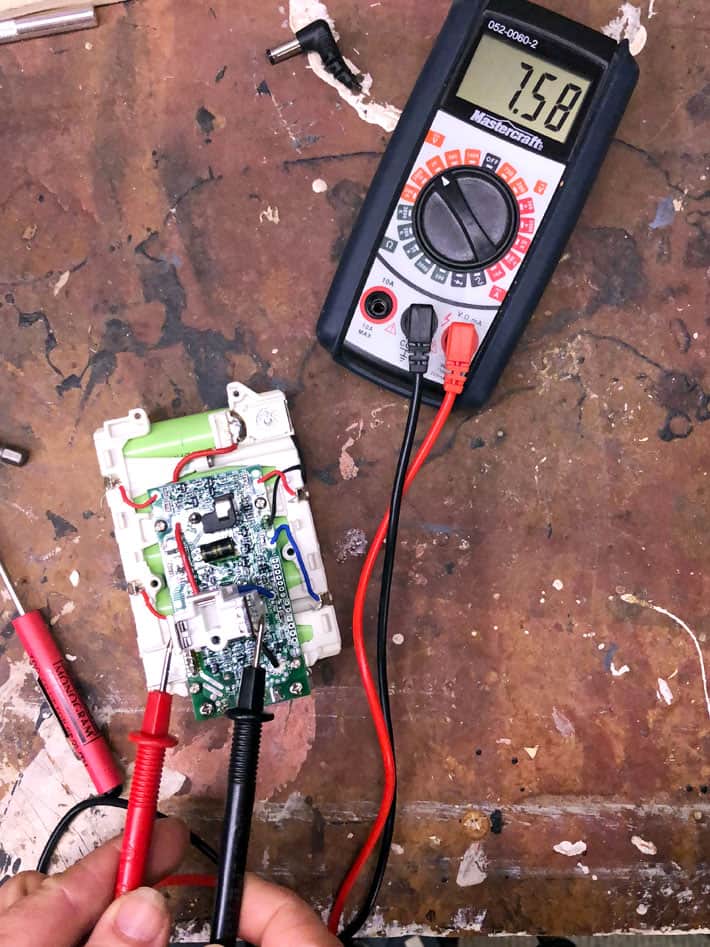
Step 11. Put the plastic cover back on the battery pack (just the part that goes into the charger) and set your battery on the charger to see if it will take a charge.
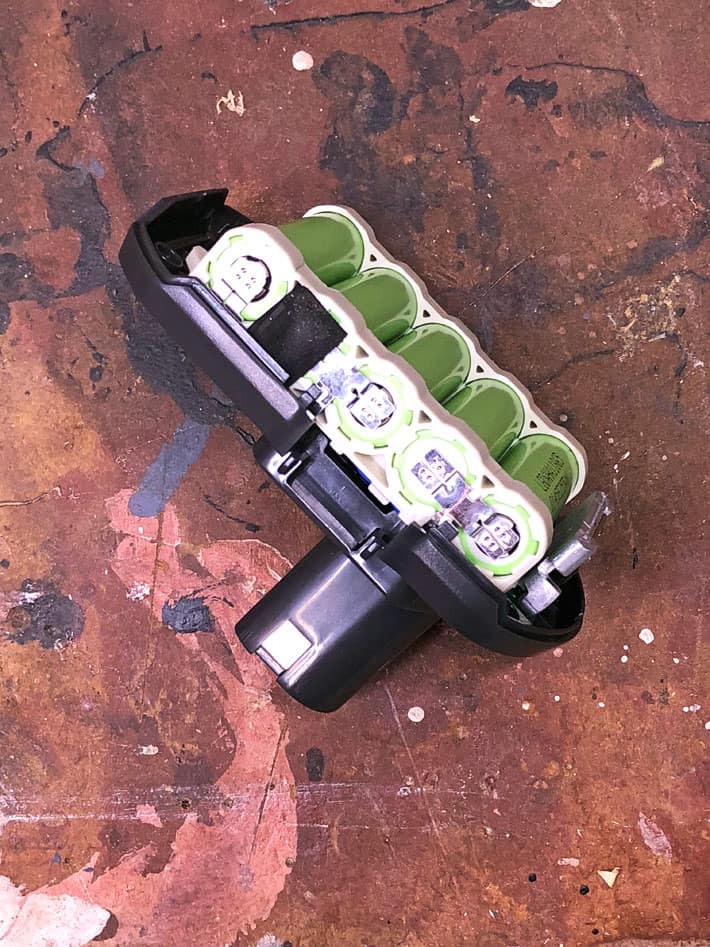
If you still only get a red flashing light and the battery won't charge, boost the battery some more. I find the battery charger will recognize that the battery is good again when you boost it to between 10 and 14 volts.
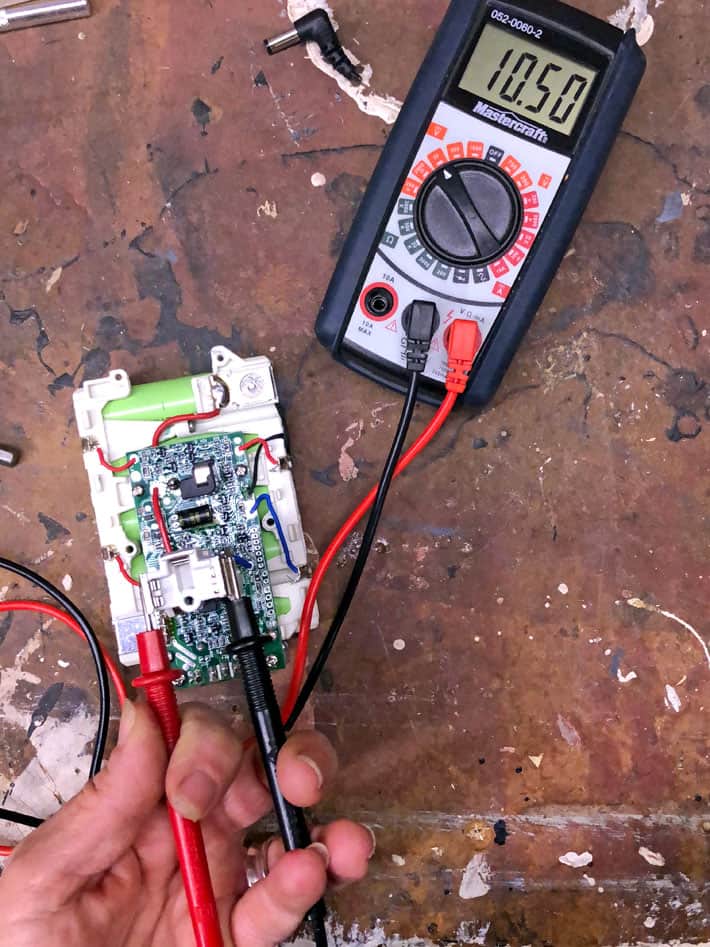
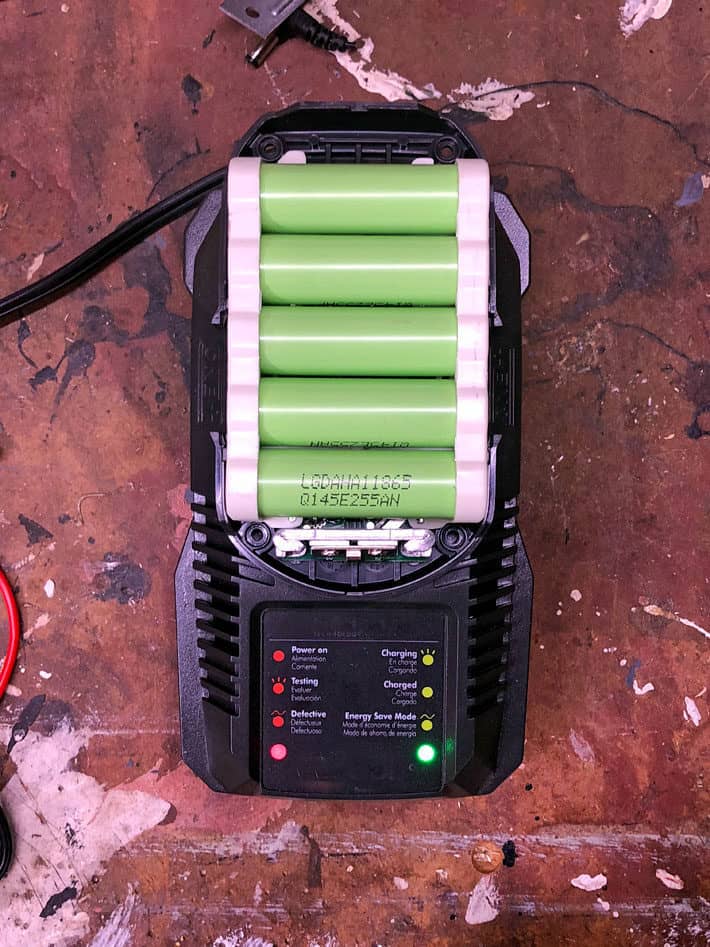
Just keep repeating the "pulse" boosting and testing the battery until it will finally be recognized by the charger and you get the green light.
To those of you who found this subject matter to be on par with spending 3 hours in a waiting room, sorry 'bout that.
For the rest of you? I know exactly how you feel. I felt the same way. Let me know exactly how elated you were after you brought your first battery back to life in the comments section.
Here's a 3 minute tutorial video showing me as I fix my own battery.
How to Fix a Ryobi 18v Rechargeable Battery
Instructions
- Cut the end off of your AC adapter. That's right. Just cut it off. It's for a 10 year old cell phone, you're never going to use it again anyway. It's frankly kind of weird that you saved it to begin with.
- Separate and strip off 1" of each wire. You have *just* made booster cables! Good for you.
- Remove the screws holding the battery together. There's a hidden screw under a piece of plastic. You need to pry the plastic off to get at the screw underneath. I used a very thin screwdriver to pry it off.
- Pull the top off of the battery case.
- Remove the 2 plastic side pieces. They're the things you press in to remove your battery from your drill.
- Lift the battery pack out.
- Set the Multimeter to read volts. For testing an 18 volt battery choose the 20 volts setting. This will give you the most accurate reading. (If you don't have a multimeter skip to Step 9 and hope for the best)
- Touching the red probe to the positive (red) terminal and the black probe to the negative (black) terminal, read the voltage shown on the multimeter. In my case the battery was carrying a charge of 0.06 volts. Which is *almost* nothing, but not completely nothing.
- Plug your AC adapter in and using the wires, boost your dead battery. Just touch the black wire to the negative terminal (the one with the black wire going to it) and the white wire (or striped wire) to the positive terminal (the one with the red wire going to it). Do this on and off for approximately a minute. DOUBLE CHECK THAT YOU ARE TOUCHING POSITIVE TO POSITIVE AND NEGATIVE TO NEGATIVE.
- Test your the voltage on your battery pack again. It should be higher than it was before boosting. IF IT IS NOT, THEN STOP. YOUR CELL COULD BE DAMAGED AND CONTINUING COULD BE DANGEROUS.
- Put the plastic cover back on the battery pack (just the part that goes into the charger) and set your battery on the charger to see if it will take a charge. If you still only get a red flashing light and the battery won't charge, boost the battery some more. I find the battery charger will recognize that the battery is good again when you boost it to between 10 and 14 volts.
- Repeat the "pulse" boosting and testing the battery until it will finally be recognized by the charger and you get the green light.
- Reassemble your battery. Your rechargeable battery is now fixed.
Video
Notes
- Black wire = negative Striped or solid white wire = positive It is very important to not mix the two up.
- There's a hidden screw under a piece of plastic. You need to pry the plastic off to get at the screw underneath. I used a very thin screwdriver to pry it off.
- Volts are symbolized by a "V" with one or two straight lines over it on a multimeter so it's that section of the multimeter that you use. The section under the V with the straight line(s). Not the squiggly line. The straight line.
- Lithium ion batteries need to be "pulse" charged. Which means you hold your wires down for 15 seconds or so, then release them. Then hold them down again. Over and over.
Please direct marriage proposals to my publicist. A certain tool company is *not* interested in proposing marriage to me. So I'd like to make a point of saying I love these tools and use them all the time. Their batteries and chargers on the other hand, could use some improvement.
OTHER WAYS TO FIX THINGS.
- How to Unclog Your Central Vacuum
- How to Sharpen a Push Mower
- How to Replace Carbon Brushes on Any Motor
- How to Mend a Broken Fingernail (because you're surely going to need it after replacing carbon brushes)
Questions & Answers
- Is there an easier way to do this? Possibly. Some people have had success with putting the battery in the charger and waiting for the red light to come on. Then you pulse charge the battery by quickly plugging and unplugging the charger.
- What voltage does the charger need to be? A 12 volt charger will do the trick.
- Isn't this dangerous? There is a small chance of BIG danger. So proceed with caution. If a cell doesn't immediately charge a little bit with this technique, stop. If anything (charger, cells, wires) starts to heat up, STOP.
- How long will the battery last after fixing them this way? Until you accidentally leave it in the charger too long again, or until the battery's natural death.
Seeing as you're the sort of person to make it all the way down here to the end of this post, you might like to learn how to install a battery operated electric fence around a home vegetable garden.

*Proceed with caution and follow instructions exactly. Failing to do so could lead to injury.*





In an effort to correct some erroneous numbers, each 18650 cell is not 1.3V, but more like 3.7V. Five cells in series (end to end) produces a roughly 18.5V battery pack, when fully charged. With the short-period contact with the output of a 15V wall charger, it is not likely that you will cause any damage to the battery pack. The charging can also be done with a 5V charger just by intermittently connecting the appropriate leads to the + and - end of each cell (the green tubes in the battery pack that look like small "C" size flashlight batteries). Be careful though, because you CAN overcharge each cell with a 5 volt charger. Check the cell voltage frequently, and make sure it doesn't go over 2.6 volts. If you have any doubt with this way of charging them, DON'T DO IT! It could be dangerous. Go out and look for a 15V charger instead. It should only cost a dollar or two at a thrift store.
Although it is wise to check the charger to make sure the output is DC and not AC, there aren't many that output AC anymore. Look at the label on the charger - it will say something similar to "Input - 100 - 240V" with a squiggly line after it (which denotes AC voltage), and maybe" .2 Amps", followed by "Output 5V" with a straight line with 3 dots underneath (denotes DC voltage), and maybe 1.2 Amps. The "Amps" numbers can be different from source to source, and indicates the amount of power the device uses and puts out. If it has the squiggly line (AC) after the output voltage, don't use it to try to charge the batteries.
Do you mean that these batteries are DC, and we are not to try to use an AC charger to pulse them?
Wooooooooooooo! Nice save on the little line with 3 dots is safe. The proper tell is actually power is watts, energy is volts, work is amps. Any current cell phone ZTE, GOOGLE, SAMSUNG will work any will see long as not more than bat., Preferably ¼-½ 3v use 3v-1.5v-.5v will work. I worship the ground you walk on Karen!
You my friend are a genius !! Keep up the great wrk
I found you when I needed to change the motor brushes in my washing machine. I've stuck with you because you're helpful and cheer me up. I've now fallen in love with you because of this post. Be still my heart.
I'm there for ya. ~ karen!
How strong does the AC adapter need to be? I have a 5V one.
Thanks
Those are 18650 batteries! I use them in just about everything these days. LED flashlights, Vape boxes, Makita chainsaw, Honda RoBo Lawnmower, every laptop I have ever owned, and all my USB chargers.
Wow, I wonder how I can revitalize my batteries used in everything else (yes, I have a Ryobi cordless). I usually just buy new batteries and authentic 18650s are expensive. I prefer the higher mAh, the highest I have found is Panasonic 18650B, which are 3400 mAh high drain. Anything higher than 4000 is likely a fake- and there are lots of 18650 fakes out there, about 99%.
The Ryobi appears to have Samsung 2250 with that shade of green casing. Those are a standard in many electronics.
So what do you think? How can we recharge these batteries NOT in a battery holder?
Thanks Karen; It made it even moor clear as I viewed you video. Great job
That's genius you are remarkable thanks for the great information.
I need the inverse- my multimeter was dead even with a new battery :(
Darn, wish I had seen this a month ago. I took the battery for my Swiffer vac in to a battery place where they will rebuild them - much cheaper - the guy put the leads on wrong, so when I plugged it in, blam blew up the circuit board, and out went a vac that was only a year old. I got a refund for the battery from them, but a new vac is $50 - I bet this would have worked. Whelp, I guess I will be using the ol broom again. I will show this to hubby though - he uses DeWault drills for work, but still good info!
Thanks for this Karen - I love how you make these intimidating jobs look so manageable! One thing though- I tried to order the screwdriver kit you mentioned (one for my husband and 3 for gifts) but it links to amazon.com and I’m in Canada. Could you please link something similar from Amazon.ca? Thank you :)
This is kinda sketchy... Charging damaged (which can happen if voltage is too low internally) or unevenly charged lithium cells can cause them to heat up and burst and then spew out flaming melted plastic and violent torch like flames. Charging voltage is also important as putting 18-20 volts from some random wall adapter into a single 1.3v cell could lead to the same disaster. Not all AC Adapters are created equal, some are AC output, be sure to read the printed data on the charger. A little more reading into lithium cells might be a good idea to better understand what state your cells are at before attempting to try this.
Pretty dangerous to try this. There is a high likelihood of fire or explosion depending on the state of the battery. What is described here is a very specific situation, and thinking this will work in general is msiplaced.
As an engineer developing battery packs, I urge you not to attempt this. These can explode into flame, and burn you or your home. All those electronics you're bypassing are there for a very good reason.
^This guys right!
Hi Micah! I appreciate your comment. It will serve as a warning to those who choose to not follow the very specific instructions I have included for this very specific situation. ~ karen!
With the method shown, and following comments that I made, it's pretty safe...main thing is to limit the amount of current that could be delivered to the battery pack, and a small "wall wart" is not about to blow up an 18650.
But, one MUST avoid short-circuiting the "open" battery pack!
No, it's not safe. A wall wart can easily charge a 18650 cell to above 4.2 volts which at best will just shorten the life of the cell, worst case you have a fire on your hands.
Keep in mind the cells get more dangerous as you charge them. It's not about current, even a 1 amp charger can blow up a battery. If the charger that's designed for the pack isn't working, there's probably a reason for it. Just jump starting it isn't a good idea.
Micah, I agree that directly applying an uncontrolled charge voltage to a Li-ion cell can be disastrous, and that charging above 4.2 V per cell is definitely bad, probably dangerous, BUT, the whole idea, as shown here, does not involve continuous application of the charge, it does not bypass the thermal protection, it does not connect directly to the cells, and the wires are definitely not "designed" to connect continuously to the contacts...moreover, Karen specifically suggested short pulses, and continuous monitoring of the pack voltage, and only providing enough voltage level to "turn off" the UVLO circuitry...if one ignores every part of this process, and connects directly to the points shown, this is still at a point where the primary safety mechanisms of the pack are functional. With the additional voltage point information that I provided for the pack UVLO (hopefully these numbers meet with your approval?) circuitry to properly activated/deactivated, there is a vanishingly-small danger of any significant adverse event occurring.
Micah, when all is said and done, a statement like this:
"There is a high likelihood of fire or explosion depending "
is just plain wrong, misleading, sensationalist...
I really don't know how much experience you have at this technology, but this level of rhetoric is well beyond what is appropriate... maybe, something like:"not following the recommended procedure, or connecting voltages to points other than suggested, can result in damage to the battery pack, and danger of the battery pack catching fire"
Wow, as another engineer and physicist I would have to say there is a very low likelihood of fire or explosion from this activity.
Working from first principles you are ignoring what is happening at the load end of the battery during normal use, tickling a internally challenged cell with milliamperes of this magnitude with all other connections intact is not likely to cause explosion.
But hey, apply an x voltage to a y battery and get z result is I guess what can happen at the end of the day...
Hi Karen - you're fantastic - I read almost every one of your posts, and the great comments as well. You have a very entertaining following ;-)
Re the video, when it didn't work on Chrome, I got it to work on Firefox. Then when I went back into Chrome it showed up.
I also want to commend you for not having the background music on at the same time you are talking. Very often I stop watching videos because the "background" music drowns out what the person is saying.
Keep 'em coming!
Audrey
hmmm I will try this. thanks
Even if you only have a 5v phone adapter, you can do the same thing, but go across the individual battery cell not the whole series of batteries...
What I'm really wondering here is about that "tutor" treehouse. Is it one where a really smart owl in glasses lives, and people can go there to have him answer questions about stuff? (Forwarding this tutorial to my farmer husband for use in his shop. Very useful indeed.)
I know, I know, lol. My fingers often work faster than my brain. ~ karen!
You never fail to amuse me!
Bloody brilliant!!!!! Thank you.
I love my Ryobi to death. It's not the big "muscle" kind like Karen's, it't the lil' one that has the battery inside (i.e. it's not removable). (It think it cost $19.99 or $29.99). It's not the best thing since sliced bread - it is better than sliced bread. I hope it will not die on me; I am always amazed how long it holds charge.
I put my entire IKEA kitchen together with it.
This is definitely MacGyver worthy! If my husband wasn't so anal about not over charging our batteries I might get to try this...