Halloween is coming up so I thought today I'd focus on the scariest place in everyone's home. Not the basement, no. Or the attic. That's so cliche. No, I'm talking about the ACTUAL scariest place in your house. The cabinet under your sink.
The one thing you never hear in realtor home listings is a glowing description of the cabinet under the sink. They can get away with calling a dilapidated shack "a charming blank canvas waiting for your special touch in Olde town." But it's hard to talk up the torture chamber of death under the sink.
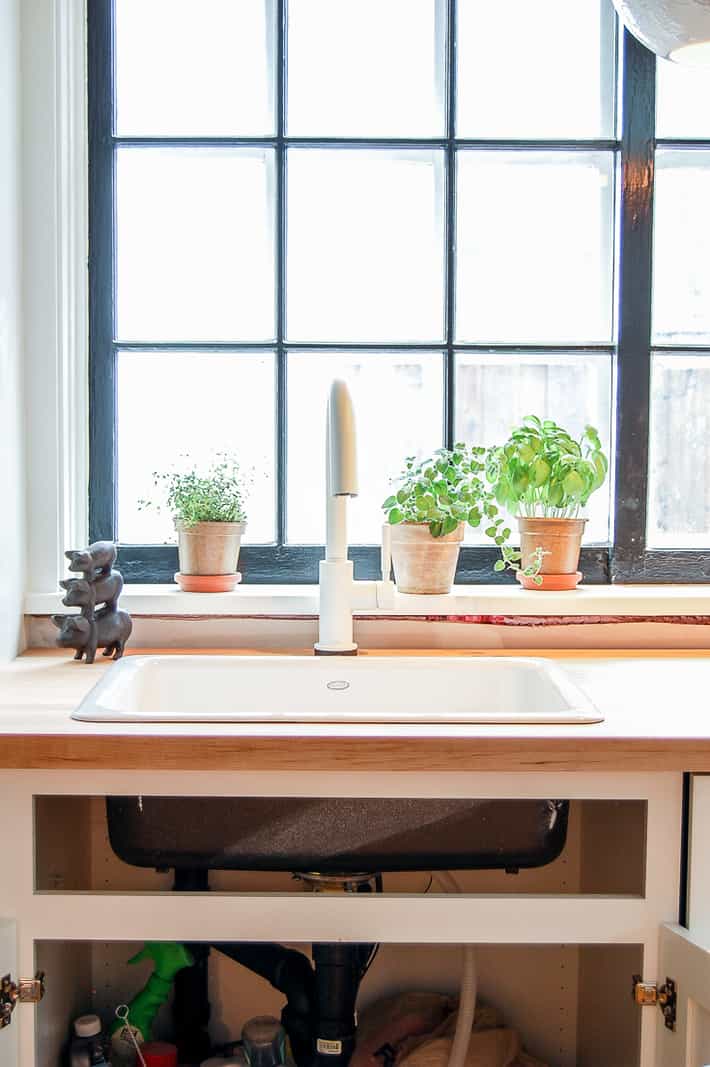
A crispy J cloth in the original crumpled up shape shoved in the back corner, musty sponges, sticky soap drips, crumbs and guck all laid out like an adventure park with buffet for rats, mice, and centipedes.
As such, I like to avoid reaching into the cabinet under my sink which commonly houses things that crawl and sometimes bite me. Or *could* bite me. Nothing has actually bitten me while reaching under there but that's probably only because I always give my sink cupboards a few warning roundhouse kicks accompanied by a throaty devil sound before opening them.
Just to let 'em know I'm coming and am bigger than them.
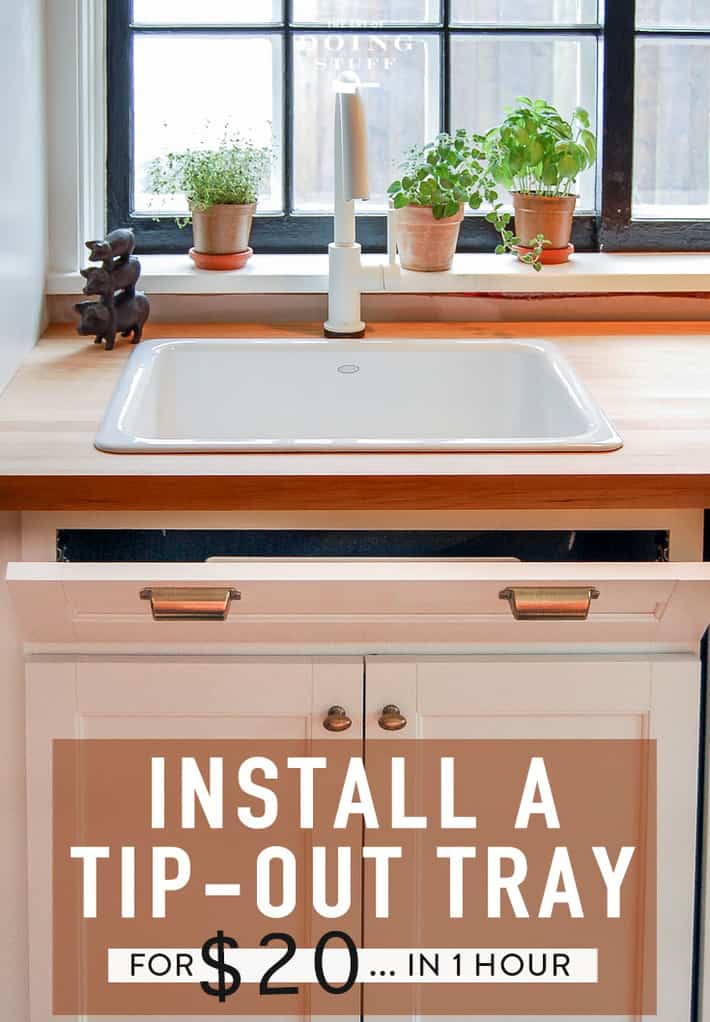
Because of this aversion of mine (either to sink cabinets or cleaning under there depending on which way you look at it) I installed a tip out shelf.
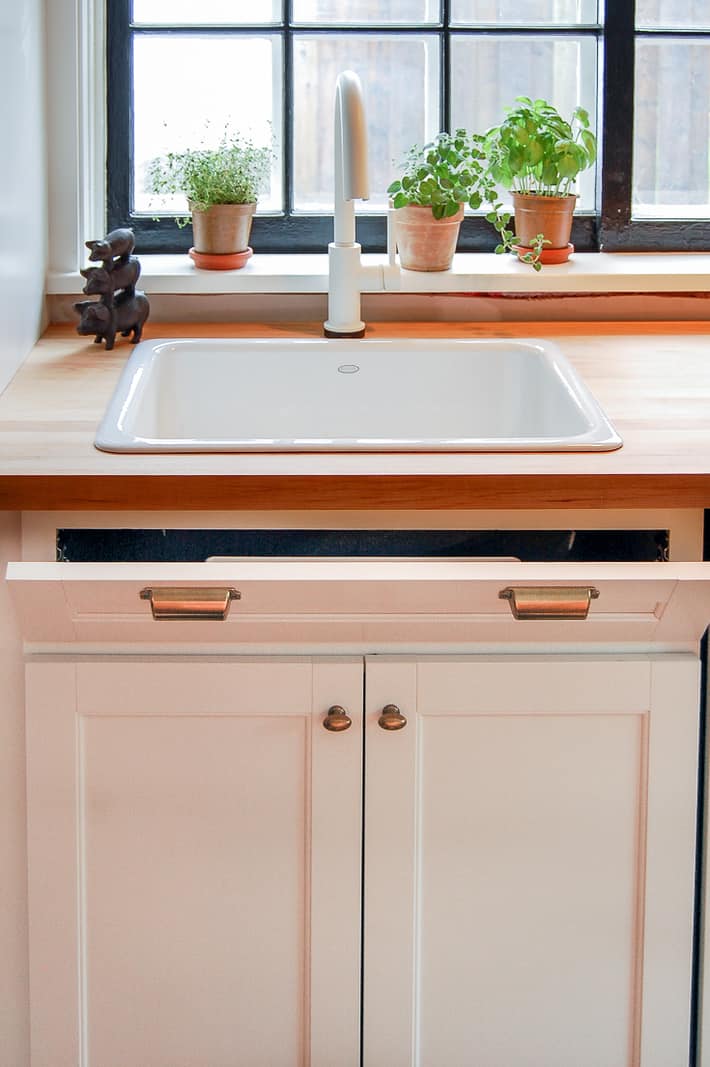
That little spot underneath the front of your sink is the holy space. A clean, scare free, UNUSED space for keeping your counter tidy and your hands out of the sink cabinet.
Sure it can't hold a lot but it can hold a cloth, a scrubbie pad, a pot scraper and a little vial of dish soap. Those are 4 things that we use all the time but don't really want to leave sitting on the counter.
Table of Contents
How to Install a Tip Out Tray (Rev-A-Shelf)
I know DIYers like myself always say things are easy when really they're only easy for us and everyone else thinks a) it's hard and b) bloggers are assholes.
So. I would like to reiterate this really IS easy if you're comfortable with a screwdriver and bending under the sink.
Materials
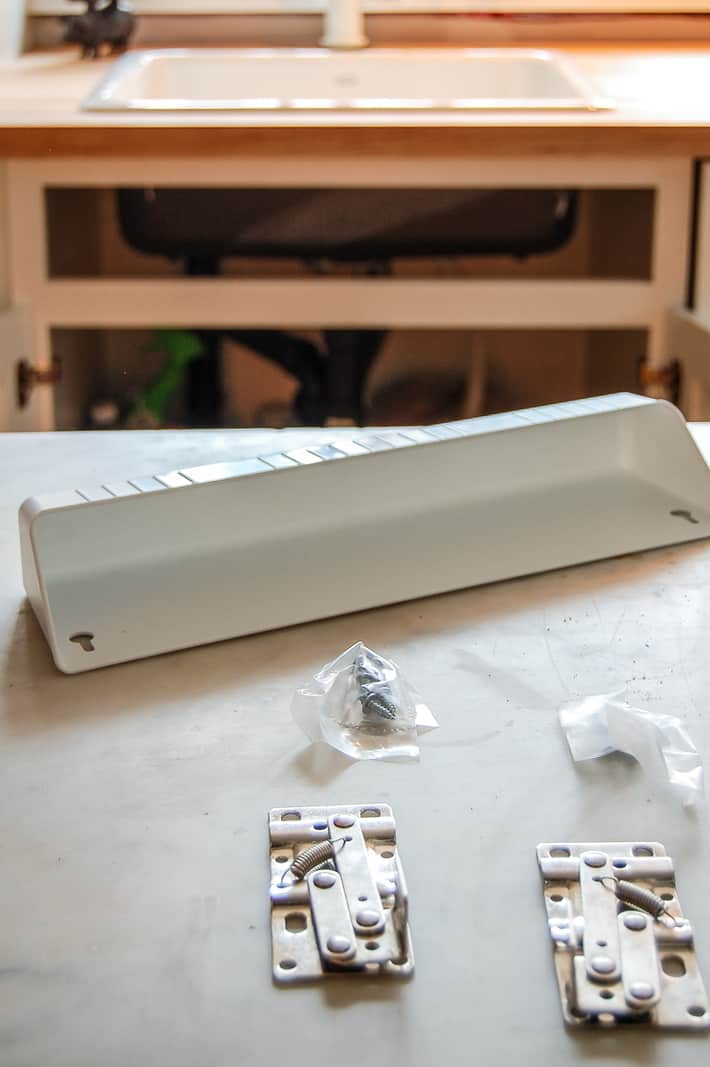
- Tip out Tray - will include all necessary hardware
- Screwdriver
- Pencil
- Drill
- 7/64th drill bit
- Ruler or tape measure
Instructions
- The first step is to take your false front off. There will either just be plastic clips holding it on (like mine) or screws. Either way it's easy to remove.
2. Once you remove the screws or clips pull it off.
3. Clear out under your sink EEP a bit so you have room to move under there.
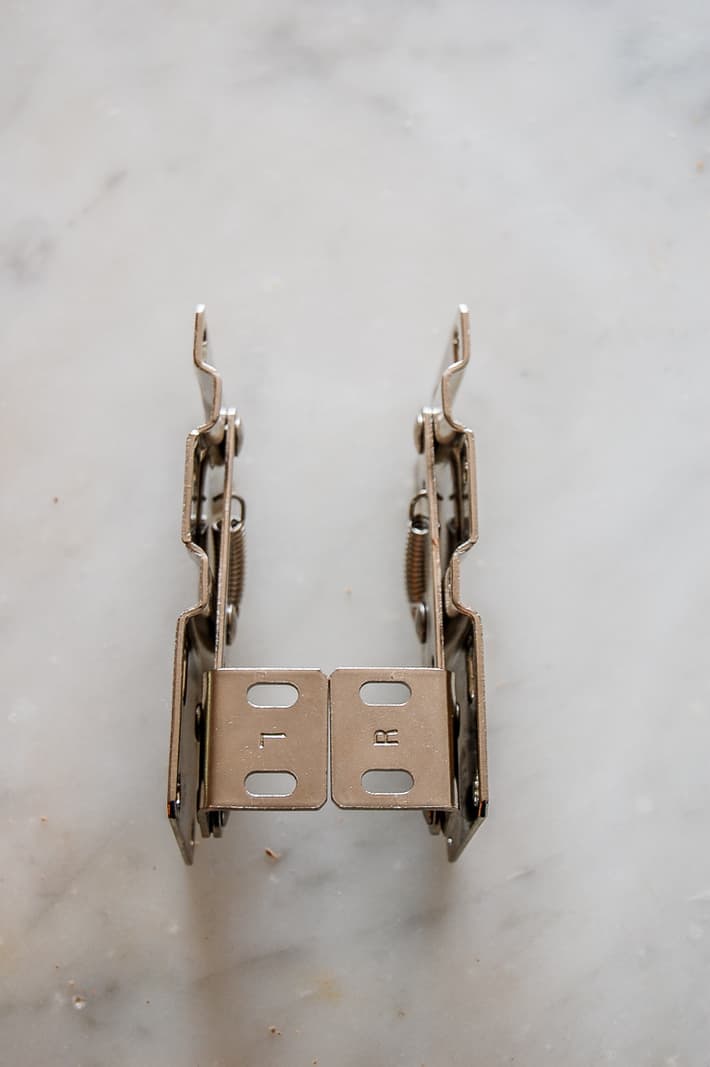
4. The tip out tray will come with very elaborate looking hardware. Don't worry. They're easy to install.
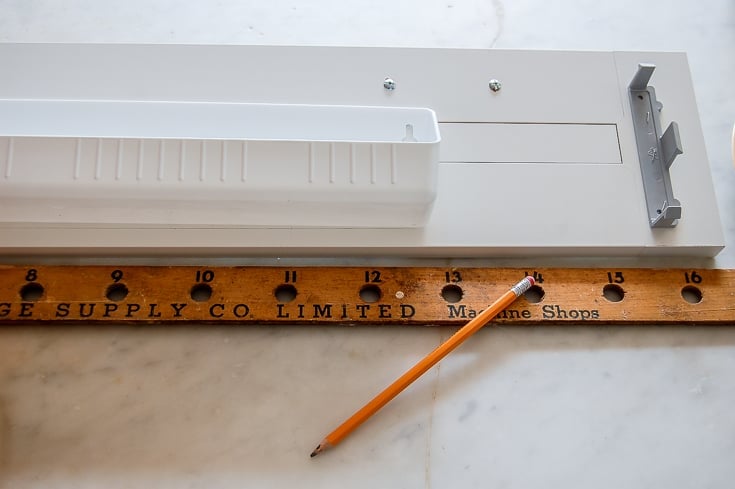

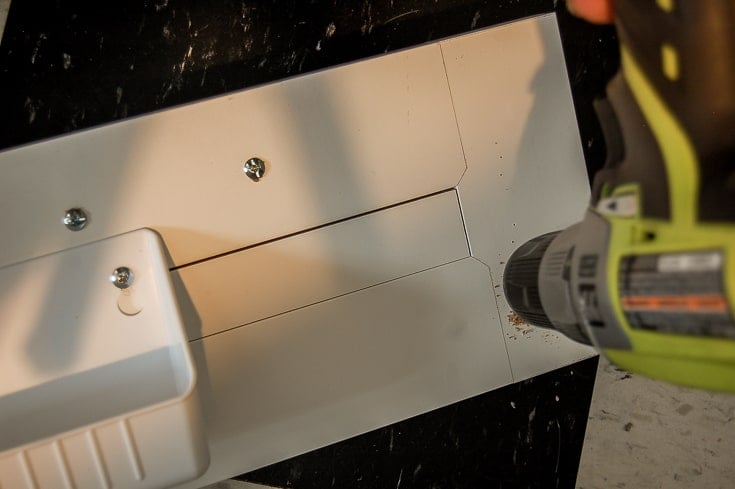
5. Centre your tray on the back of the false drawer face and screw it in place.
6. Test it by placing the panel back into position at the sink to make sure the tray doesn't interfere with the opening and closing of the tip out.
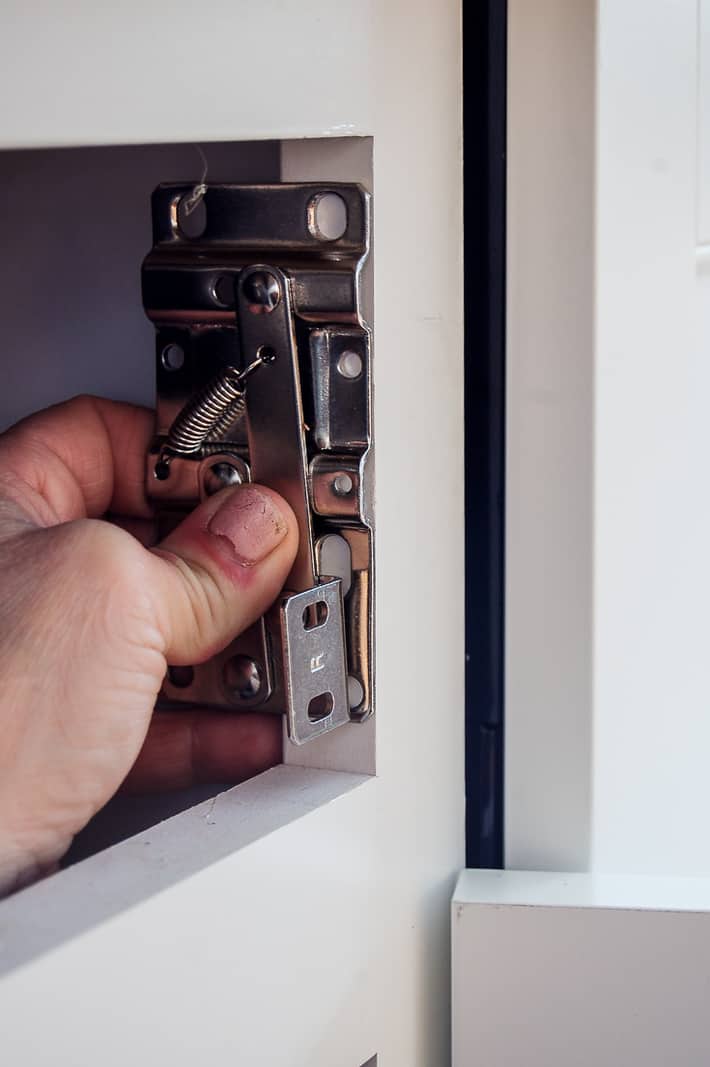
7. Place the right hinge against the right side of your opening so it is centred in the space and flush with the front edge.
8. Pull the hinge away and mark with a pencil where you want to screw it in. Pre-drill your hole. Screw the hinge in. Repeat for left side.
TIP: Pay attention. The hinges will be marked Left and Right.

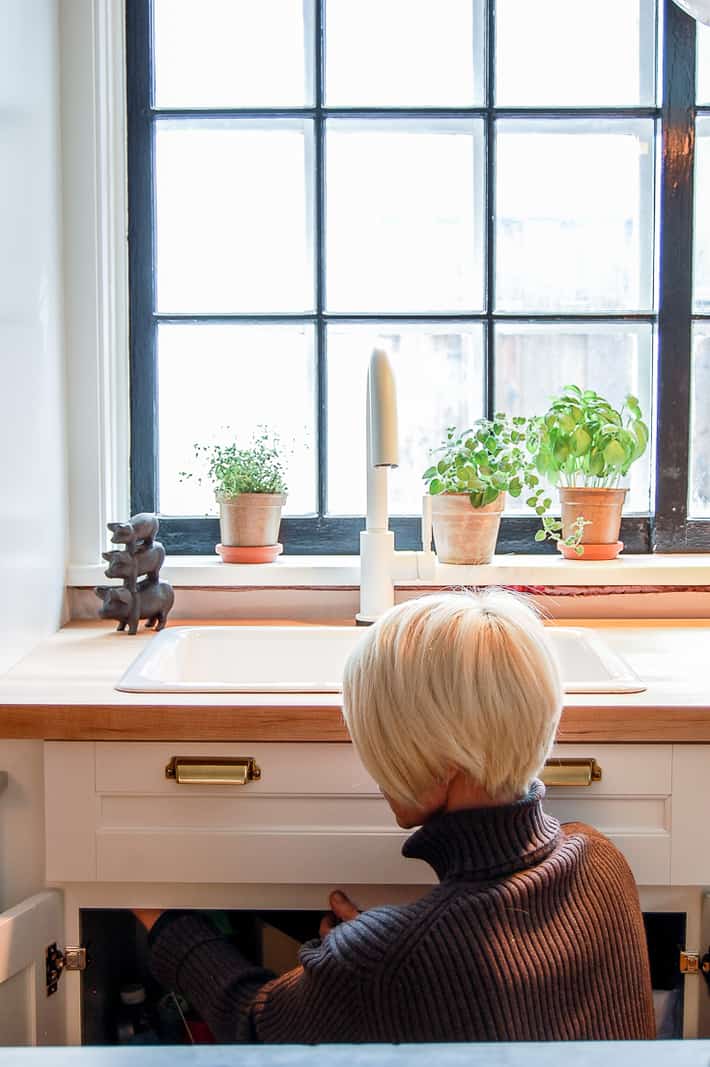
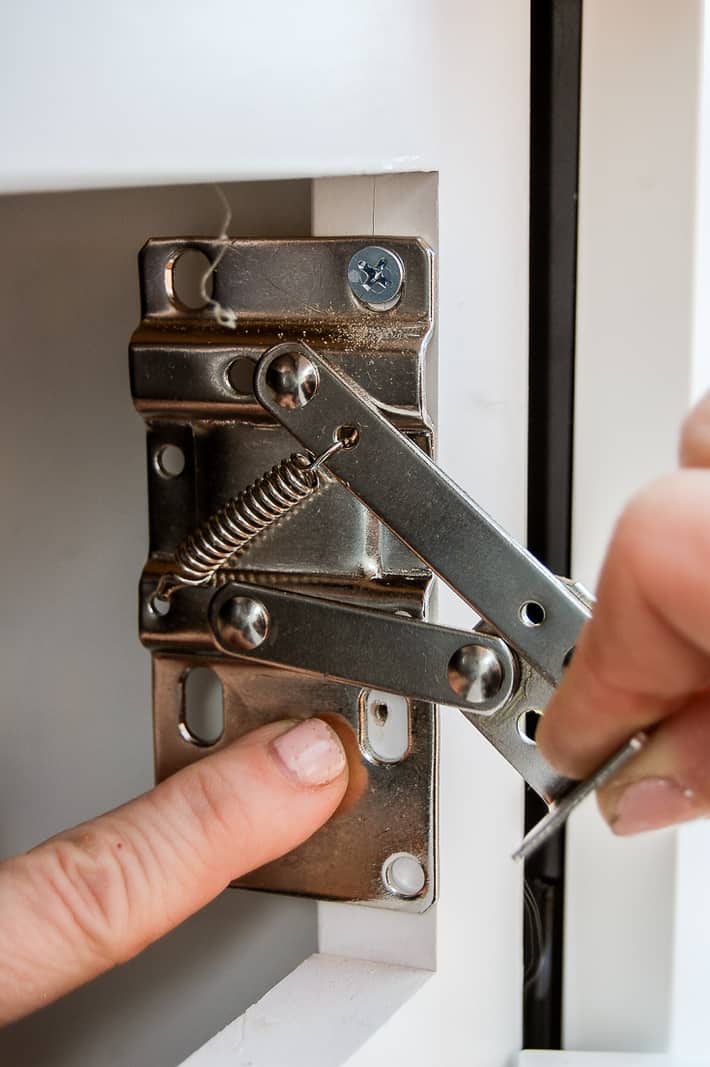
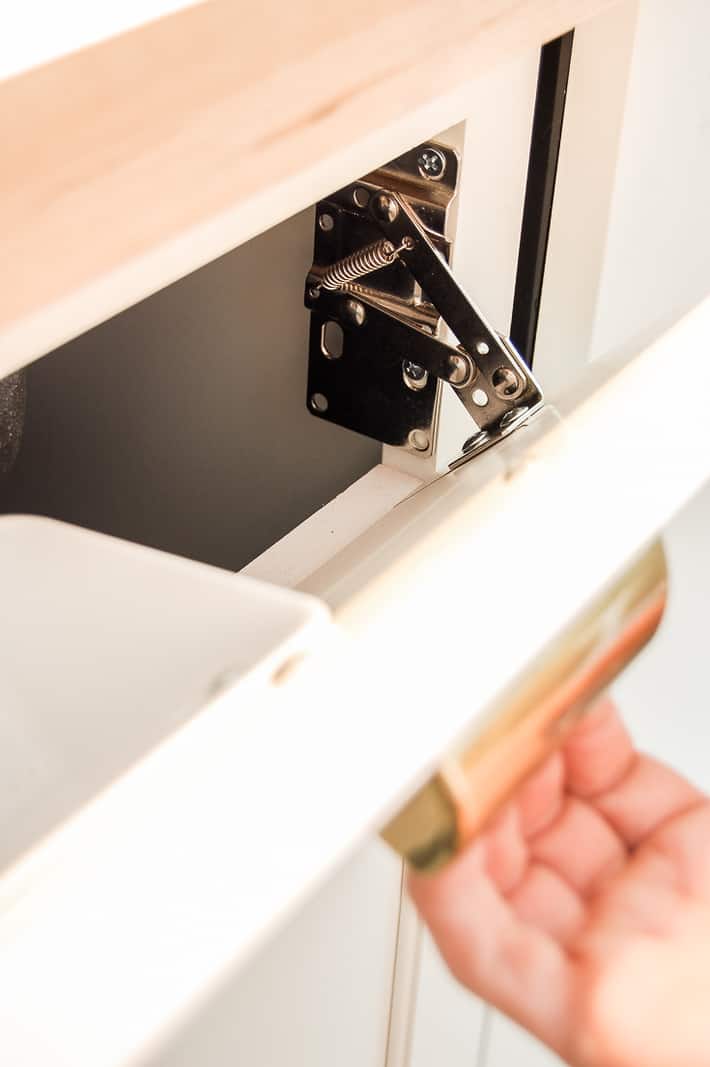
9. While holding your front panel in place with one hand, slide under the cabinet and mark where the holes that attach the hinge to the drawer front are.
10. Pre-drill those marked holes.
11. Hold the panel in place with one hand like you did before and then from underneath the cabinet, screw the hinge into the drawer front. You will be contorted and squished but it shouldn’t be too difficult.
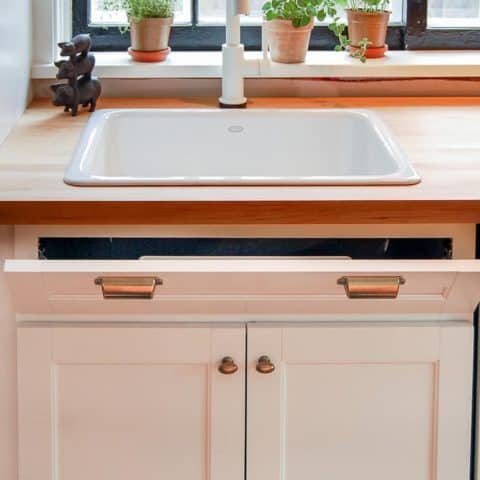
And you're done.
You'll soon be inviting friends and neighbours over for the sheer joy of making them jealous. Then you'll bonk them on the head to induce a little harmless short term memory loss, so you can show them all over again.
You can get the exact ones I have here online but most hardware stores carry some variation of it. This particular tip out tray is by Rev-A-Shelf.
TIP: If you buy a kit make sure it comes with the tray AND the hinges. The trays are also sold separately sometimes.
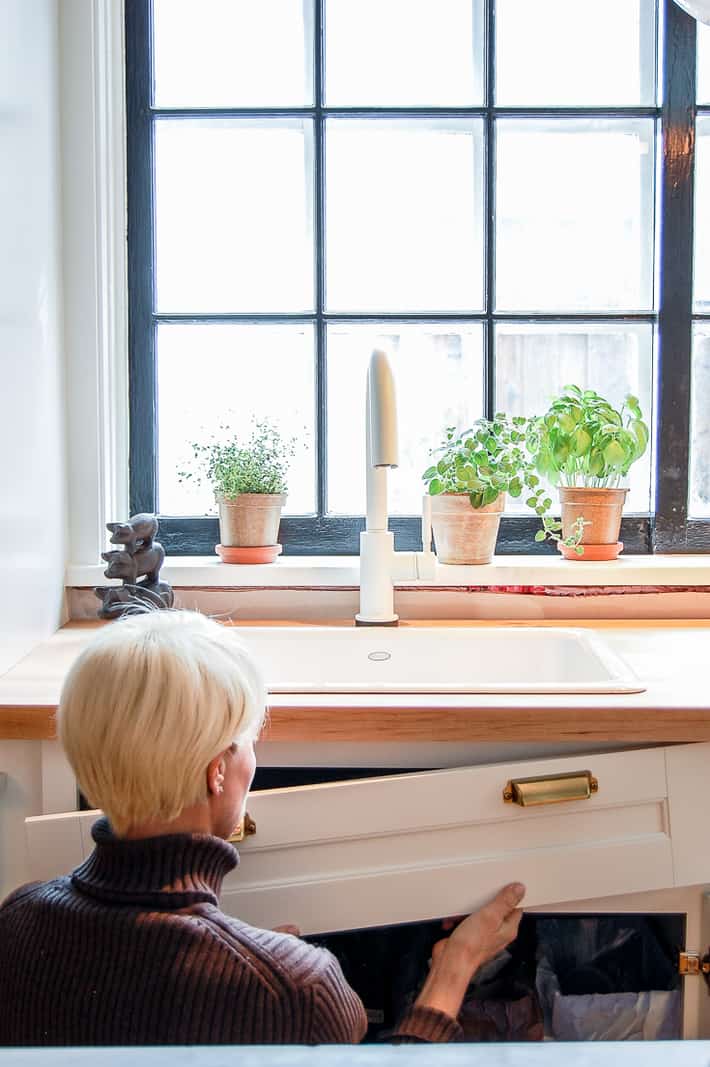
Any time you see me in my kitchen about to wash dishes I will be pleasantly using my tip out tray and avoiding all things under my sink.
As proof, here is an action shot of me pretending to casually reach for a plant to water it. That plant is now dead.

How to Install a Tip Out Tray
Turn your sink's false front into a useable storage space with a tip out tray kit.
Materials
- Rev-a-Shelf Tip out Tray kit (or similar)
Tools
- pencil
- screwdriver
- ruler
- drill
- drill bit
Instructions
- Remove the face of the false drawer. Most false drawers are easy to remove and are just attached with clips so you can pop it right off. Others might be attached with screws.
- Centre your tray on the back of the false drawer face and screw it in place. Test it by placing the panel back into position at the sink to make sure the tray doesn't interfere with the opening and closing of the tip out.
- If your panel originally had clips to hold it into place, remove those.
- Place the right hinge against the right side of your opening so it is centred in the space and flush with the front edge. Mark your screw holes with a pencil. Pre-drill your holes.
- Install your screws. Repeat these steps with the left hinge on the left side.
- While holding your front panel in place with one hand, slide under the cabinet and mark where the holes that attach the hinge to the drawer front are.
- Pre-drill those marked holes.
- Hold the panel in place with one hand like you did before and then from underneath the cabinet screw the hinge into the drawer front. You will be contorted and squished but it shouldn’t be too difficult.
- You're done!
That's all there is to installing a tip down tray. No mystery. No real effort. No real explanation as to why cabinet makers don't just make them standard other than to anger me. And you. All of us really.
As for those mice under the sink - this mouse catching post will help you out with that. In the very near future I'm going to do what I should have done when I first renovated my kitchen - I'm going to install LED strip lights in that sink cabinet.
Because if you can SEE the scary stuff at least you know which direction to kick in.
→Follow me on Instagram where I often make a fool of myself←


EEEEEE!
Rhubarbcrisp, rhubarbcrisp!
All one word.
Thanks for perfect timing.
I love you, really I do.
Aw heck. I love you too Sia. ~ karen
Re: the holes in the yardstick - could be to draw accurate circles? Stick a pin on the end hole and marker on the size of the circle you want and move the marker around for a circle?
Nice and, as per usual, very precise and useful instructions. I have to agree with Laura. I sure wish I could fit under a sink like you do!
"Place the hinge in the centre of your edge and mark your holes with a pencil. Drill your holes."
I always mark and drill one hole first, then drill the second. That way the second hole is correctly positioned in case the first hole's location shifted a bit. BTW, if you are installing more than a couple of hinges or other screw fastened items, this is well worth the price if 1 1/2 Iced Peppermint White Chocolate Mocha Grande drinks. And their "Nickel-plated steel construction" will look good with that pink drill!
Oh, and what is that (and can we see more pictures) "measuring stick" in the sixth photo?
Done! And no problem. And yes, that's an old measuring stick. :) ~ karen
Thanks. What is the lettering on the stick? Maybe I can track what it is and what the holes are for…
You are too cool for school! I worked for a large kitchen supplier for years and sold these many times but didn't think I could ever install one. You make it look easy. So long cabinet installer....Hello me!
You can ABSOLUTELY do this DIY Karen. ~ karen!
Love your yard stick! What are the holes for besides marking inches!? My Great Aunt Norma gave me hers when she downsized & I use it for sewing mostly, just love it. My Aunt Mary gave our Nana`s to my sister....but I still love her. My sister was the one who asked our Great Aunt if she could take hers for me :)
My theory on the thumb - you whacked it & lost the nail.
I have no idea what the holes are for, lol. ~ karen
Because I had to know...
https://www.etsy.com/listing/191755343/vintage-wood-yard-stick-mechanics
You're right, lol! I didn't even realize that one particular yardstick was a mechanics stick! ~ karen
This almost makes me want to re-think my desire for an apron front sink.
Hi Shauna - The other thing about an apron front sink is it takes up much more space in the cabinet below. So you may not have room for a garbage can. That's why I ended up going with this drop in sink. :( ~ karen
hmm, good food for thought. I don't keep my trash can under the sink, but I do keep some other stuff including the tall pots that don't fit with the other pots. But, there's a beautiful copper apron front sink at Home Depot that I just love!
!!!!! I'd give up garbage for a copper sink! ~ karen
I know, isn't it so purdy? http://www.homedepot.com/p/ECOSINKS-Apron-Front-Dual-Mount-Hand-Hammered-Pure-Copper-33x22x9-Double-Bowl-Farmhouse-Kitchen-Sink-in-Antique-Copper-K2A-1005ND/202734448?MERCH=RV-_-RV_search_plp_rr-1-_-NA-_-202734448-_-N
I have two of these on the front of my kitchen sink Karen..they came with the house and I never knew they existed until I bought this place..They are very handy and a great use of wasted space!
I also have a set of those pink tools that came in a pink canvas tool bag..
Just because you never know when the trap on your sink might spring a leak... not that it will...I suggest you store your Raid upside down on its cap. Plastic doesn't rust.
Okey doke. ~ karen
Great tip! We have one of these, and it is a fabulous place to store little brushes and sponges. We love it!
Neat idea Karen in utilizing that space behind the dummy drawer.
Speaking of "Raid" and centipedes. I found a dead one laying, belly-up , on the bathroom mat the other day. It must have been a senior one. It had a zillion legs and was about two inches long. I think that maybe it was killed by my new cat who prowls around the house at night when I'm asleep. Probably "pawed" to death.
And why did the plant on your windowsill die?So close and yet so far from the faucet.
LOL. Yeah I know. ~ karen
My parents little ranch style house in the middle of Louisiana in the 50s had these in the kitchen and in the (only) bathroom. My mom's sewing machine cabinet had one also. Every time I look at the blank fakes around me, I curse them. Now instead, I can light a candle. You know ... instead of cursing the darkness...
I like how "unintentionally" your rolled your sleeve on your shirt. You are so effortlessly cool Karen! And everytime I see your cast iron pigs in the photos I always wonder where is their permanent home before they come out for the photoshoot lol
That is a great idea, and I had thought of doing same thing with my sink cabinet, however I have the same fear that it won't fit under my sink, because I have sink that fills in the whole base cabinet, and also I have two fake drawers that are screwed together instead of one (I don't think my sink cabinet is an actual sink cabinet).
Before the drawer front, I bought a 2"dx6"w plastic box at Karen's (and mine) fave store ($1 store), and attached it to the inside of the cabinet door with a Command Strip. I now use that little box to hold the dish washing gloves (the hand part goes in the box, the sleeve part folds and hangs outside the box). Neat, clean dry cabinet interior. PLUS, the Command Strip allows for easy removal for washing the box, and re-attaching.
I cannot for the life of me figure out why I didn't do that when my ex and I were building our kitchen 16 years ago. The fact that I have two sinks with no drop down drawers in front of them drives me crazy - especially the sink on the island where I have absolutely NO WHERE to put sponges and scrubbies other than on the surface beside the sink. Maddening.
This is a very timely post because it is on my list of to-dos in the very near future and I was just pricing the drop down kits from Lee Valley over the weekend.
I found mine at Lowe's - or - Home Depot. They had 2 kits, one with 2 trays, really inexpensive too.
You totally outdid Martha! When can we see the whole kitchen??
What kind of camera remote do you have? I imagine that's what you're holding in the last photo...
Here let me help:
A. Your bicep in the first photo. Also your long graceful neck!
B. Your perfectly styled hair in photo 3, also your sweater with the high collar that just so gracefully reaches your hairline and doesn't make it stick out awkwardly.
C. Arm muscle definition in photo 13
D. Bonus points for looking this good while installing a drawer and using power tools.
Your pictures have me wishing I was blonde!
Macaroons, chips and Rhubarb Crisp, really and look the way you do? Oh how I love Rhubarb crisp. My Mom used to make Rhubard Crisp and Rhubarb sauce. Thanks for the informative post.
Everybody's missing the most important bestest tip in this whole article - "shape of an “L” is your left hand". Wow! Just Wow! How have I not heard that in all of my 58 years? Sure could have helped me teach the kiddos way back when. Thanks Karen, I never know what I'm gonna learn when I pop in here.