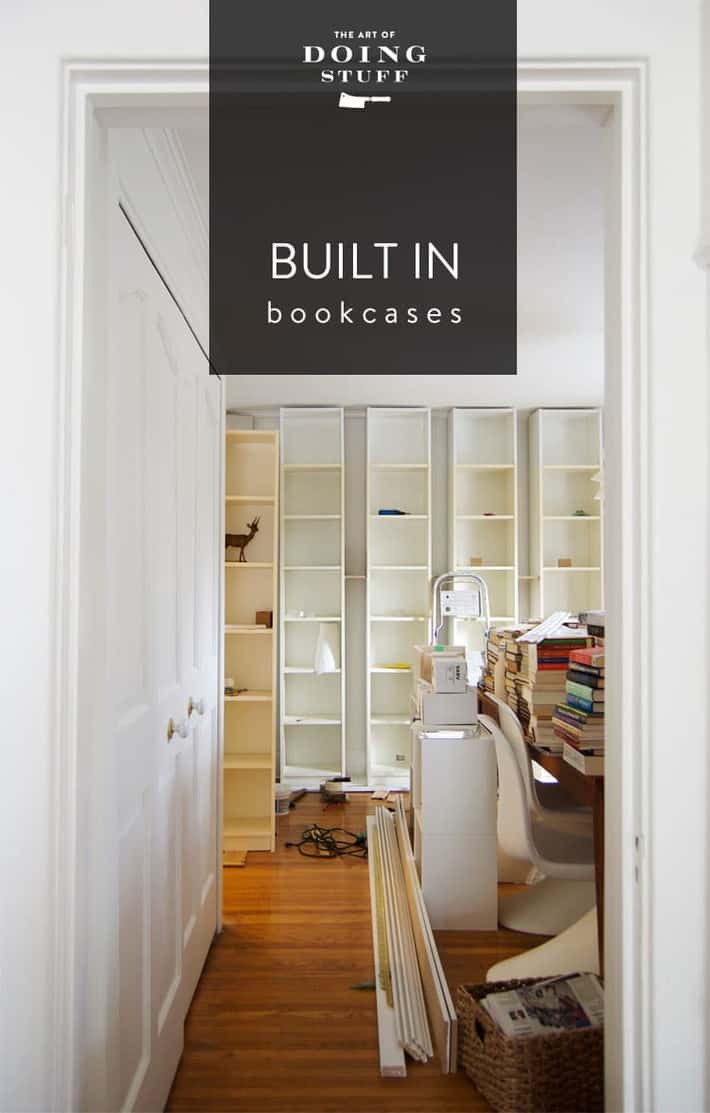
Turning regular box store bookcases into custom, built-in bookcases is super-easy!!
Step 1. Assemble your bookcases.
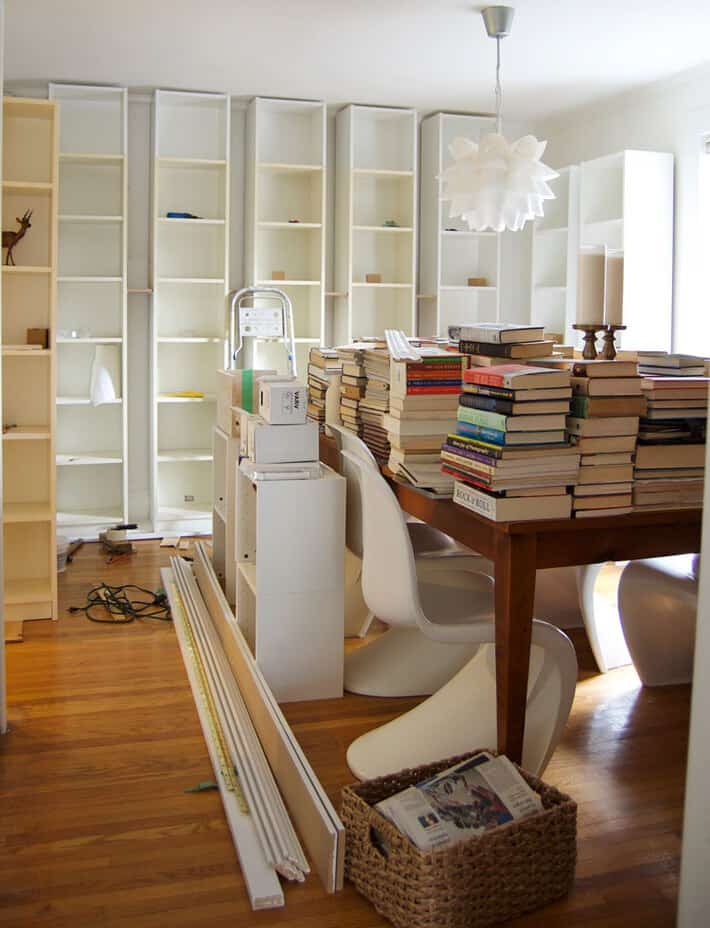
Step 2. Put bookcases in place.
Step 3. Stare at lopsided bookcases.
Step 4. Lean a little to the left to see if that makes bookcases look straight.
Step 5. Decide you might need a measuring tape.
Step 6. Measure spaces in between bookcases so they're evenly spaced.
Step 7. Marvel at how even though they're all on the same floor, and evenly spaced, each bookcase is still leaning in a different direction.
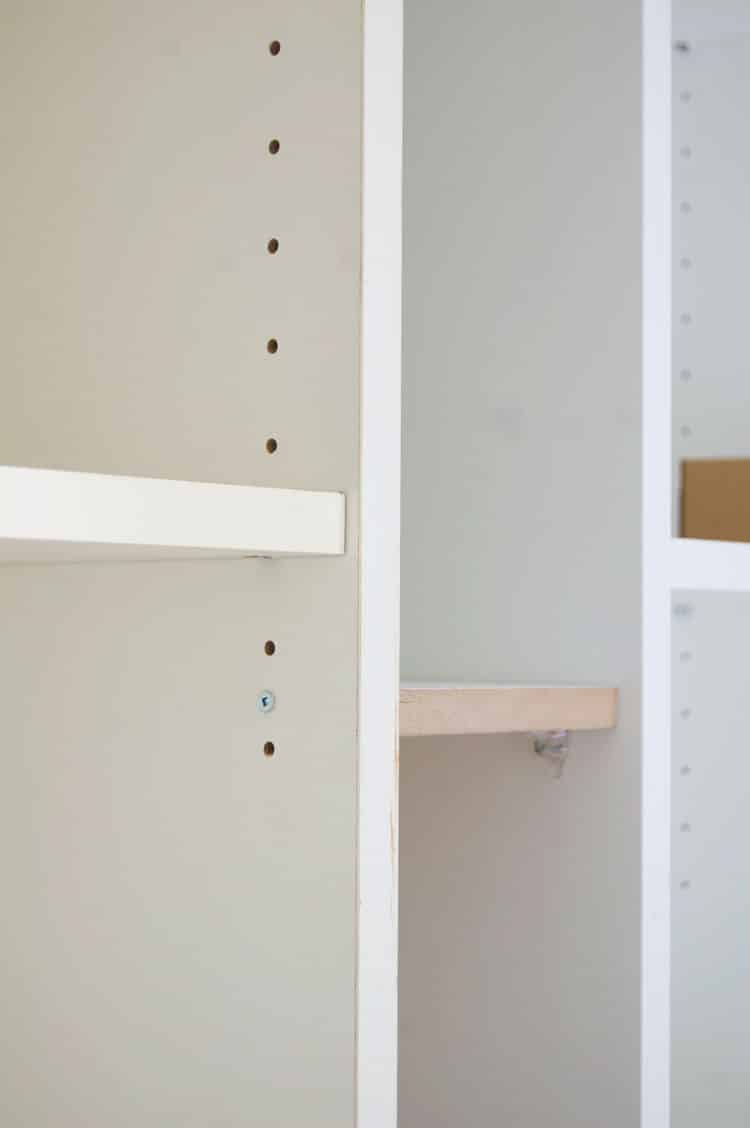
Step 8. Decide you might need shims.
Step 9. Shim bookcases.
Step 10. Stand back and stare at bookcases guessing if maybe they might be straight.
Step 11. Decide you might need a level. And a drink.
Step 12. Drink lots.
Step 13. Drink more. Eat a jelly bean you found in the corner, nestled in cat hair.
Step 14. Drunk call your friend in a panic to make sure she knows how GREAT jelly beans are.
Step 15. Drink again. Realize this would all be going much more smoothly if you were wearing a bathing suit.
Step 16. Put on bathing suit.
Step 17. Stumble a bit.
Step 18. Stare at bookcases again, wonder why you ever thought they were crooked. They look perfectly straight.
Step 19. Barf.
Step 20. Stand on your front porch to get some air. Wave at neighbours who are pointing at your barfy bathing suit. Fall into bush.
On the upside I've decided if I never get these bookcases done I actually really like how all my books look just stacked on the dining room table.
Now's probably a good time to announce that installing built-in bookcases isn't as easy as I've made it sound. It's hard.
It isn't a matter of just attaching them to the wall and adding trim to them. Well it is actually, but that's a lot harder than it sounds.
Your bookcases have to be installed so that they're level and plumb. So they have to be level in all directions and there are a lot of directions. They have to be level from front to back, left to right, and then all the faces of them have to be level to each other.
To get them level you have to use shims. Once you have them level you have to attach them to the wall at which point they're probably going to end up not level again so you have to recheck and re-level them.
Once they're attached to the wall it's a good idea to attach all the bookcases to each other to keep them from twisting and moving. It'll just stabilize them. If your bookcases are tight to each other all of this is much easier and you can just screw right through them, but if your bookcases are spaced apart like mine are, you'll have to add some wood in between the cases and screw it into place. This will keep everything from shifting when you drop kick them out of anger for being so disagreeable.
At this point my goal is to get these bookcases done before December 1st because December 1st is traditionally the day I do all of my interior Christmas decorating. It's the last step to getting ready for Christmas.
I thought it would be superhandy if I wrote a list of what I had to do to finish the project and posted it here on the blog so if I ever became unsure of what my next step was I could just head to my computer, type in my web address and then click on the Pinterest button in the upper righthand corner and browse for how to make a nice herringbone noose.
Steps to complete bookcase project.
- Finish installing bookcases on the left and right wall. (the centre ones are done.)
- Install flat piece of trim along the top of bookcases.
- Cut crown moulding and install. (this is where the noose will come in handy.)
- Measure and cut trim for faces of bookcases.
- Install facing trim.
- Prime bookcases.
- Paint bookcases.
- Install lights. (You can see the lights I've chosen based on their look and price of $50 each up above. The only problem is they aren't meant for bookcases so I'm going to have to figure out how to MacGyver them.)
- Do a bunch of other stuff.
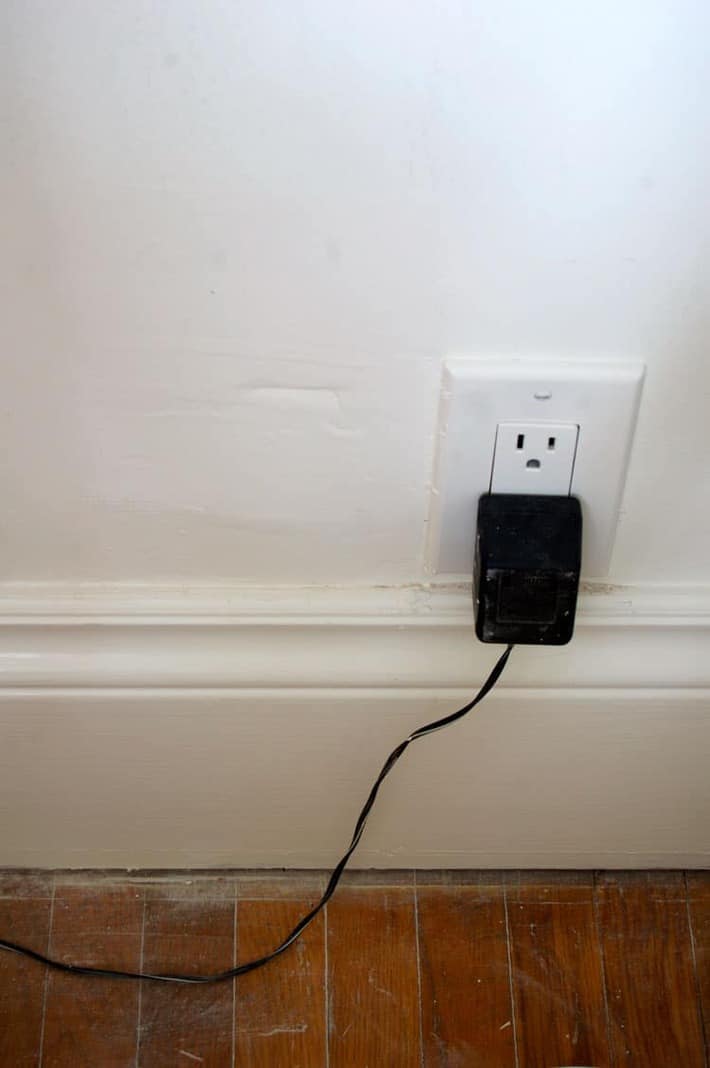
The last step "Do a bunch of other stuff" is referring to things that will have to be done that I either can't predict or don't want to even think about. Like moving an electrical plug 3 inches, which I had to do earlier on in the installation. Yes. I had to move an electrical plug by 3 inches to make it work for my bookcase configuration. Which wouldn't have been too huge a job if it weren't for the fact that in the middle of those 3 inches there was a support beam. That meant I had to cut a big hole out of the drywall and the plaster and lathe behind it so I could access the beam with a drill, so I could drill a hole through it to run the electrical wire to the other side of it. So, yeah. Total bathing suit situation.
The patch job to the left of the plug is almost done, it just needs one more coat of drywall compound.
Right now, at this very moment I'm feeling very much like this is a disaster. Partly because I just haven't had time to devote to this project, partly because my December 1st deadline is quickly closing in and partly because well, have you SEEN the pictures. The whole job looks like a total disaster. But most jobs do when you're in the middle of them.
Hey! Haha! Remember back in September when I wanted it completed by October? No? Well maybe you remember back in April when I wanted it done by the end of spring?
Until just this moment I was feeling weird about that fact that I once made over my entire house in one month. Why am I having such trouble with this? I just realized. I wasn't working during that month. I was a television host in between hosting jobs and I had every minute of every day to devote to getting it finished. Plus I didn't have chickens or 3 large vegetable gardens or a blog. As opposed to now when I'm running a business single-handedly like an idiot, dealing with the gardens and keeping a bunch of chickens alive.
So now I don't feel quite so bad about it. Especially not when you consider I have ... wait ... hold on ... how many days does November have? It's not one of those weird short months is it? Hold on a second while I say the rhyme ... "30 Days have Novem ...." ARGHADLKABHIGHHH. Just a second, maybe if I say it while wearing my bathing suit it'll sound different.
Nope.
Here I sit at my desk wearing my bathing suit and November is still only 30 days. I have 5 days left to finish installing built in bookcases. And I will be working on the blog 3 of those days.
I will need to work later. I will need to work harder. And if these wonky bookcases push me to the point of drinking again, I will need to stop myself from pulling on my bathing suit. Because this just became a birthday suit job.
Neighbours be warned.


I am thrilled I found your blog and am look forward more...
I do want to let you know that there seems to be a glitch in your website...
Or maybe its me?
The scroll bar isn't working and the page keeps jumping around on me...
I am using a new mac on both firefox and google chrome...
I'm about to move into a new house and was considering doing a very similar builtin. Then, when I was there for inspections (a standard part of house buying in the US) I noticed that the wall, being 116 years old, wasn't perfectly flat. Your post now has me questioning my DIY abilities, which are far less than yours. I can do many things, but I have serious incompetency with a level.
Any chance you'd do a post on how to deal with lathe and plaster walls? I've got those too, in the new house, and don't know what I should know about them. Apparently they are hard to drill into? Anything special you have to do to patch them when my shelf or curtain rod inevitably goes up crooked?
I have a couple pro tips that might be helpful for getting the last bookcases installed. First off, find the highest spot in your floor where the bookcase are getting installed and install the one that goes there first! Whole lot easier to shim up then have to start over down the line. Get the first one level in every which way. This will take approximately forever. Once you've accomplished this, figure out what your gap between bookcases and install a heavy duty spacer. You need a 2x4 (or 2x6 etc) ripped to the width of the gap. Be sure it's a straight piece of lumber. I would run a full length along the face edge of the cabinet, maybe blocks along the back edge. Make sure the grain of the blocks runs parallel to the long side of your cabinet. Screw through your first installed cabinet into the spacers. Now get the second cabinet at the same height as the first, and screw into the spacers. You should be close to level with your second cabinet, but will probably have to shim a bit to level out. Then attach to wall. Repeat down the line. You wind up not fighting as much with each bookcase and you'll have a much more solid piece to attach your trim to. Good luck! -a carpenter
birthday suit and a herringbone noose? oh honey that sounds exactly like a cute combination I saw just the other day on the Las Vegas Strip. Only thing you're missing is the rainbow afro wig and a bong you call your boyfriend... I love living here but seriously crazy town has it's limits for us pintrest posse. Well at least your bushes smell nice. ROFL.
Ha! This sounds like my kitchen spruce up that's bled into the remainder of the first floor! Cheers!
Go Karen, Go! You can do it and still look good in your bathing suit. Or birthday suit . We all believe in you. I do believe I see white trim and its looking fantastic.
I am confused, Karen. I thought you already had the foyer all bookcased up floor to ceiling. Are these new or are you moving them to the DR from the foyer?
But, I know the feeling. Reminds me of the time when I installed my Ikea kitchen, extending the feet as high as they would go so the base cabinets are bit higher (the problem is eliminated with the new Sektion system where, I understand, you hang the base cabinets off of a rail just like the uppers). And then I found out that Ikea-provided kickplates will not fit as they won't be high enough. So I set to make my own which presented a new set of problem because the floor was far from being level. (I am hoping to be smarter when I am installing my next kitchen).
Yesterday, I found rather nice curtains at HomeSense (that was NOT planning to buy - but don't you always find the best stuff when you are not looking for it?). So not only I have to decide which colour to keep (I bought them in 2 different colours) and after I decide, I have to move the curtain rod an INCH AND A HALF higher. That, in itself, would not be such a big deal IF I had not torn my rotator cuff (on my right arm, and I am right-handed, of course).
Oh yes, I've been talking about this business of turning my dining room into a library/dining room combo for a few months now. I have indeed moved the foyer bookcases into the dining room, added many more and am turning them into built ins. ~ k!
I'm right handed and I tore my right rotator cuff too!
Oooowwwww!
I think we, and anyone else with this injury, should just sit back on the couch and supervise this year, while other people deliver drinks to us to anaesthetize our injuries.
Lary (who needs someone to put curtains up on every window and door now).
sorry to hear, Larry, I know how you feel (literally).
Your idea is great but it will not work for me since I live alone. I hope it's working well for you (if you have family).
I am glad to know that others start stripping off clothes when a project gets intense. The problem for me is that it usually happens when I am at work.
Yeah. It's totally natural. And if your coworkers don't understand they're just a bunch of under-evolved morons. ~ karen!
Oh, Karen, you poor thing, RELAX! Don't traumatize your neighbors. Please give yourself a break. If your blog consists of a post of pictures of wonky bookcases and screaming, we'll get the idea and commiserate and hang in there until, weeks later, you show us your show-stopping dining room/library reveal with holiday decorations to die for. No pressure from us!
Look, look! I got my gravatar up! I feel so accomplished! I know; small potatoes compared to a dining room/library makeover but this is the kind of stuff that I do!
LOL
I know you will get it done and it will look fabulous! But I do feel your pain so I am just going to sit here, sip my coffee and wait patiently for the BIG reveal. And just think, decorating for Christmas will be a breeze after tackling this project.
Oh my plum and level and mostly not wonky will be yours. I think moving that wall plug deserves applause.
Not sure my gravitar worked. Giving it a try.
Your Gravatar did indeed work! Good job. ~ karen!
I LOVE that you are honest about how these things aren't all smooth sailing! I was using my piano bench and my mohair sofa as sawhorses when I did this (on a whim) about a year ago in the fake dining room (small + far from kitchen) to attempt to make it into 'something' besides the room the dog likes to pee in. It took me two days to put on the bottom, top and side trim on and shim + screw them together with counter-sunk black screws, but the funniest (now) part is that I color-matched the new trim pieces with black bookcases from IKEA and it looked purple-black when it was wet, and dang it, it still does now that it is dry. I give no &^%$s about that. I put them up anyway, pretended I couldn't see the purple/brown/black tone that separates my floor-to-ceiling bookcases. I tell myself that it gives the project depth. And I LOVE that room now. Overall.... cheapest cost, highest impact change in our house. I spent <$100 on trim pieces and paint and screws and most of that was an especially 'fancy' board for the top. LOVE this project, love your writing! Happy Thanksgiving!
Dear Karen,
This post seems to be a cry for help. I think you should leave the books on the table, start drinking and only answer telephone calls that are invitations to other peoples parties. Let everyone else do the heavy lifting this year! Cheers to you! Kt
At the moment, I will be happy if I can get my bookcases refilled now that the floor has been refinished. It's so lovely to see you as an icon of energy and tenacity.
Love the post. I'm with you there sister regarding, "plumb, level, sit down, wine, plumb, level, squirrel,... etc." Old homes,...uhm, I have one as well, and would love to build in some bookcases as well. Love your tenacity and perseverence. Can I coax to visit my Prince Edward County home, and we can sit and stare at my walls (for fitting in 'built-ins'), and then we can have a glass of wine?... and may eventually 'build in' the bookcases?... just kidding.
Hang in there girl. I have faith in your perseverence. Go to it!!