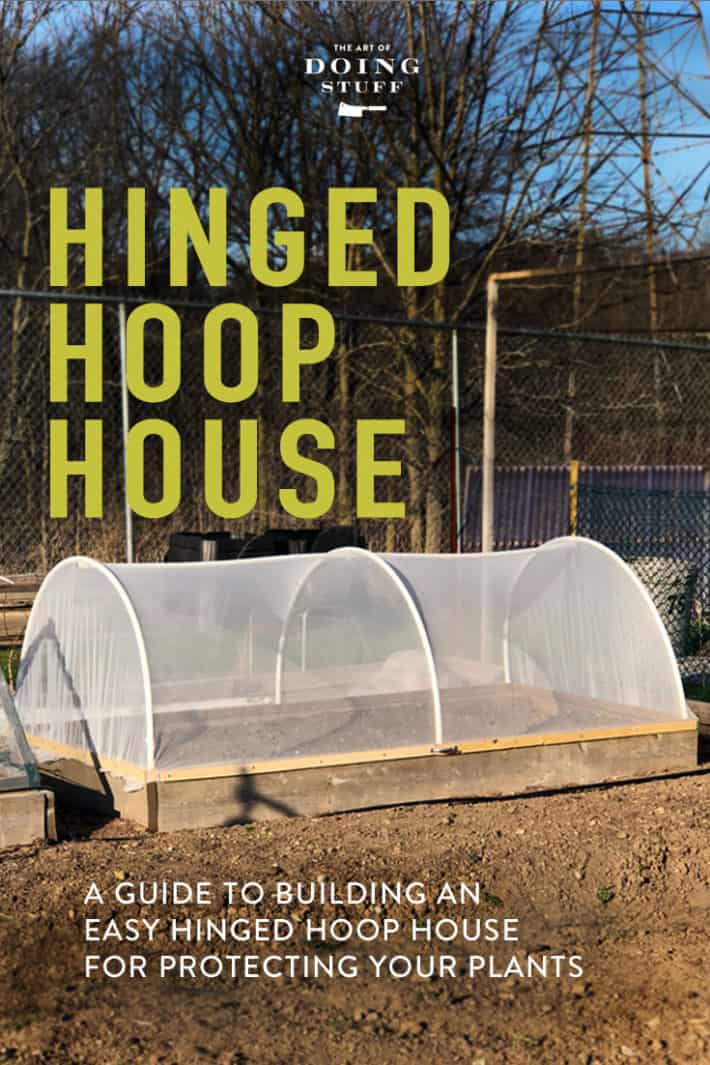
Broccoli, kale, cauliflower, rapini, cabbage, may I have your attention! You can all relax and enjoy your summer. There's no need to worry about Cabbage moths this year! I've got you covered. ~ The easy, hinged hoop house.
I was a little late getting my cool weather plants out this spring, because spring was a little late. It was really late. It was Mariah Carey late. Technically I could have put the plants out even though it was cold and miserable but this year ... THIS YEAR ... I was going to be smart. I wasn't risking putting any plants out until I could protect them 100% from cabbage moths. True, cabbage moths haven't even started flying around yet but I'm not one to be bound by the restraints of logic.
I've been planning on building these relatively simple hoop houses for almost a year now. I first saw a version of them in this Youtube video from Christopher Brandsdal in Norway. The method marries two methods that I already used - a hinged hoop house, and row covers with PVC pipe. He built his hoop house as a green house to keep peppers warm in his cold climate. I wanted to build one to keep Cabbage Moths and other pests out.
Here's are my wood hinged houses for keeping voles and birds out of my strawberries. They're made from brackets, 1x2s and ¼" hardware cloth.
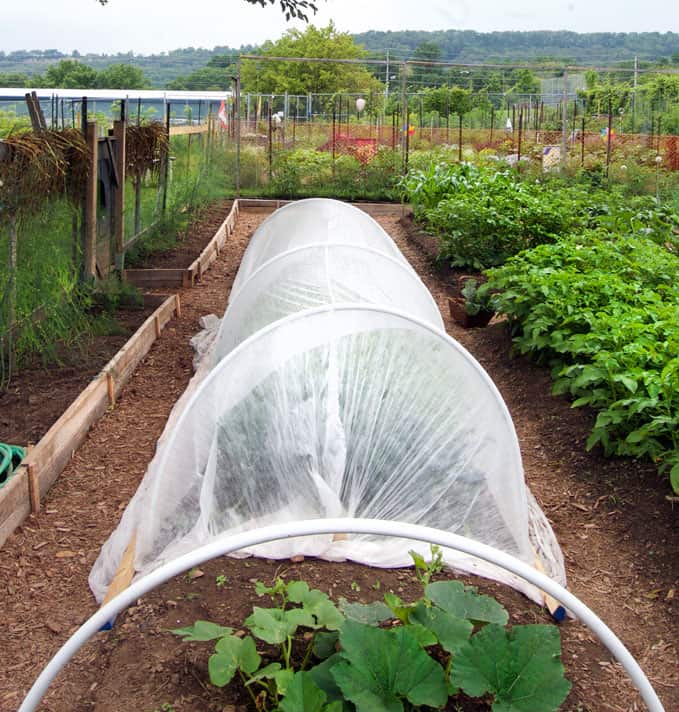
And here are the hoops with row cover (low tunnels) that I've been using for the past several years.
Put the two together and you get this little piece of genius.
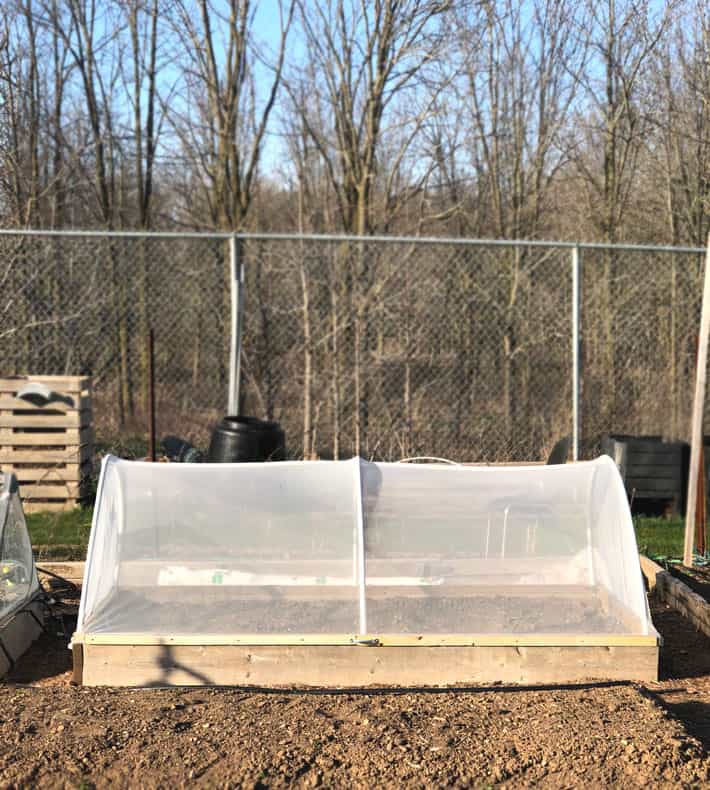
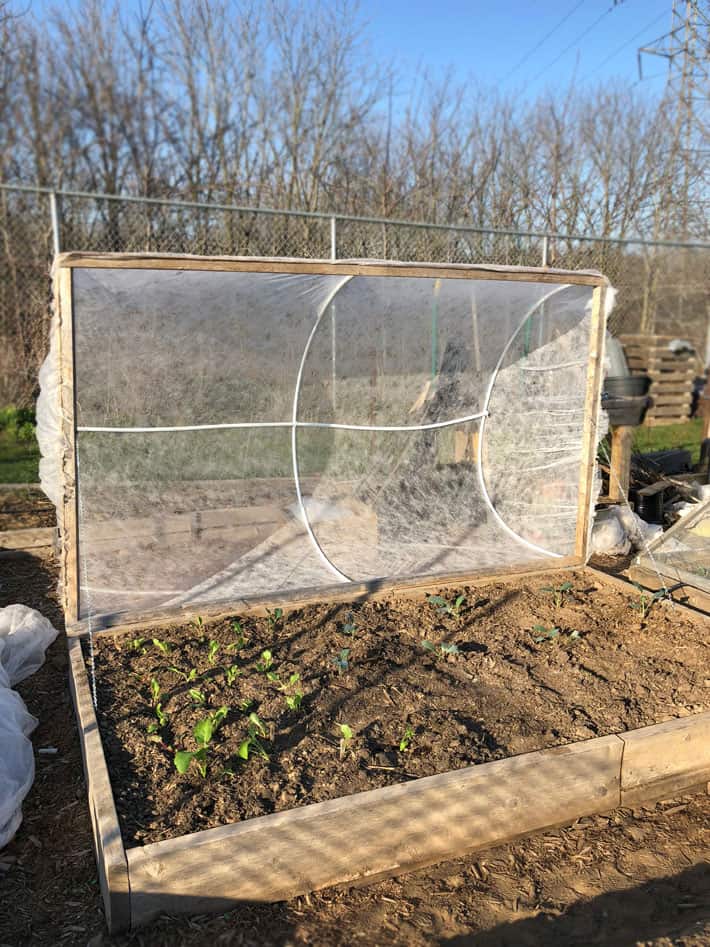
A hinged hoop house that you can lift and close with one hand covered in netting. Throw your hands in the air and scream an AMEN.
Here's how you can make one too.
Make a Hinged Hoop House
Materials (for 1, 8'x4' raised bed)
3, 8' lengths of 2x2s
Hand saw or circular saw
Drill
1 ¼" wood screws
2, 2" hinges
2, 3' lengths of lightweight chain
4 corner brackets
1 cupboard handle or knob
20' of plastic plumbing tubing (Pex Tubing)
Drill
Drill bit that's the same size as the outside measurement of the plastic pipe you're using
Insect netting
Zip ties
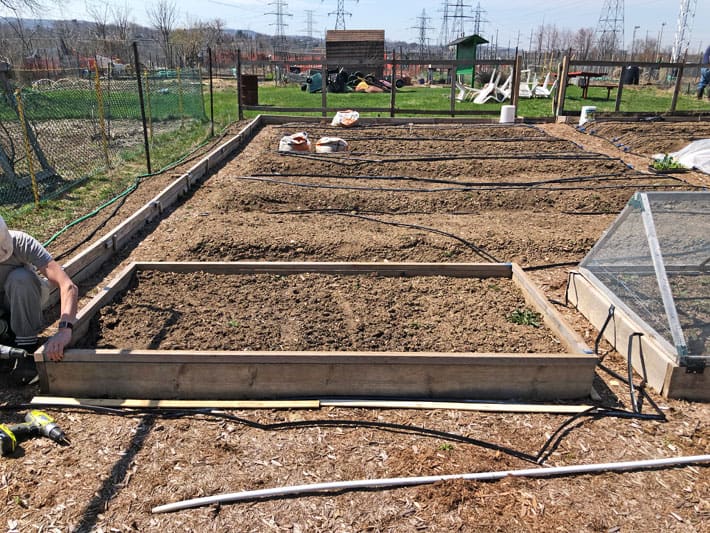
Step 1: Lay 2x2's on top of your raised bed. Mark and cut them to length if needed.
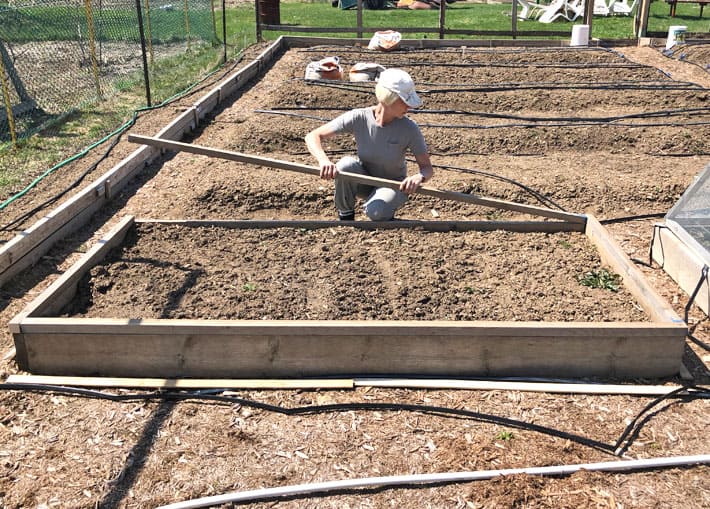
Step 2: Screw the 2x2's to each other, end to end. (don't attach them to the raised bed) The 2x2 frame will just rest on the raised bed.
Step 3: Brace the corners with either triangular cuts of wood or L Brackets.
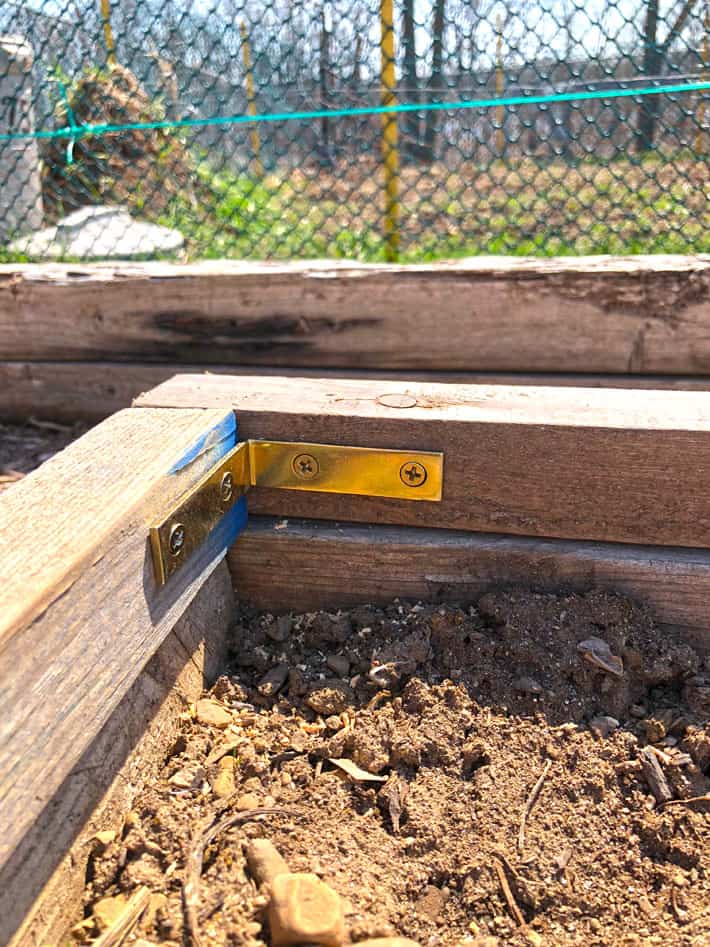
TIP: Use Zinc or galvanized brackets if you can find them. When I went to the store all they had in stock was brass, so that's what I ended up with.
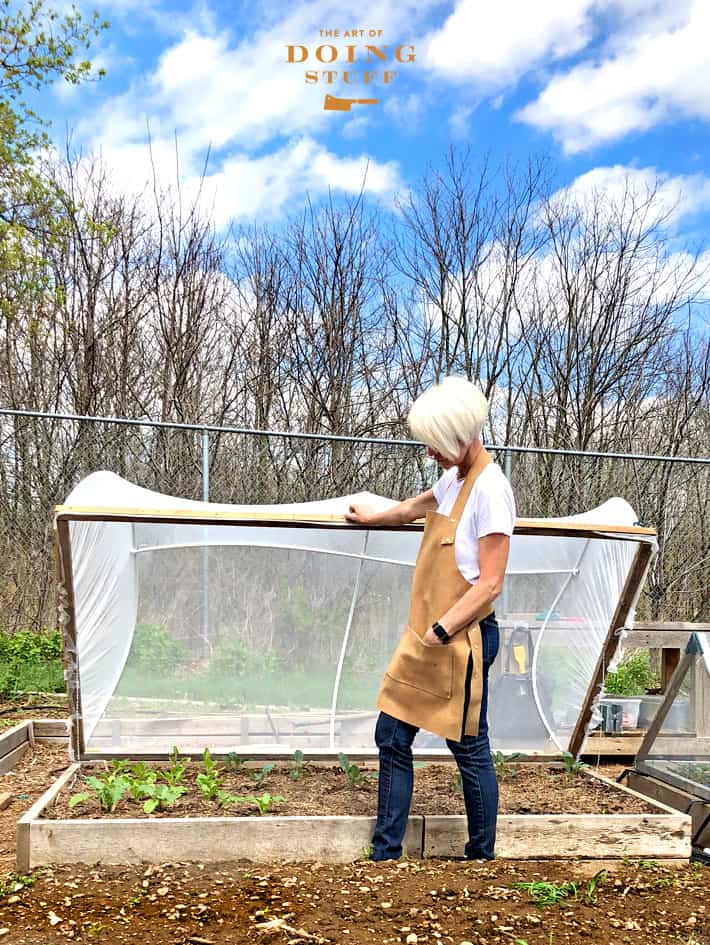
Step 4: Attach the 2x2 frame to the raised bed with hinges on one side.
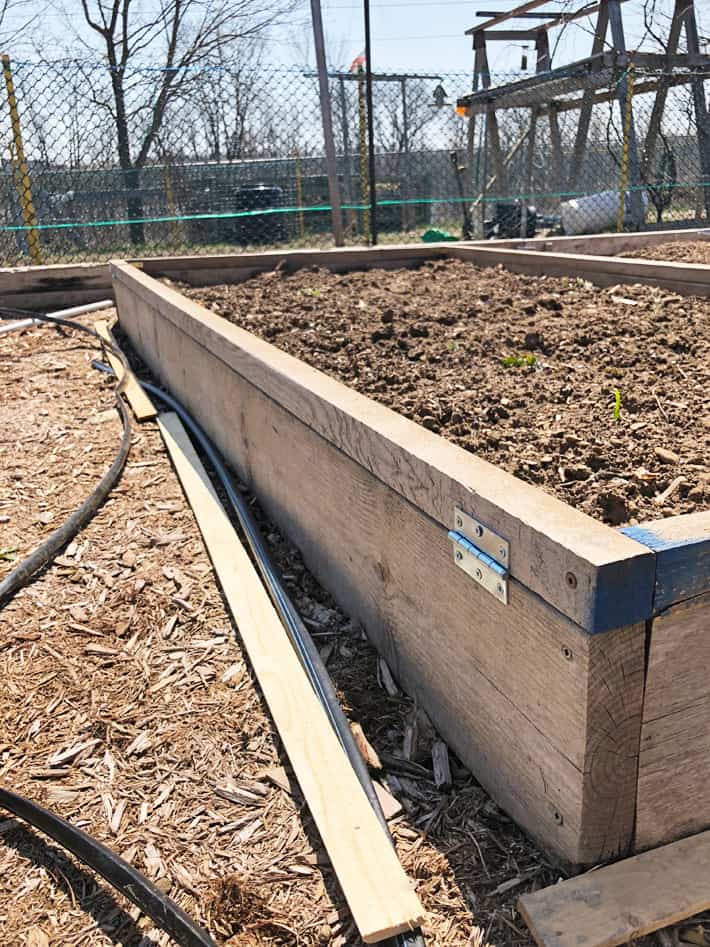
TIP: Make sure there's enough room behind the hinged side to open the hoop house.
Step 5: Drill holes along the long edges of your 2x2s. For an 8' bed, 3 on each side holes should do it.
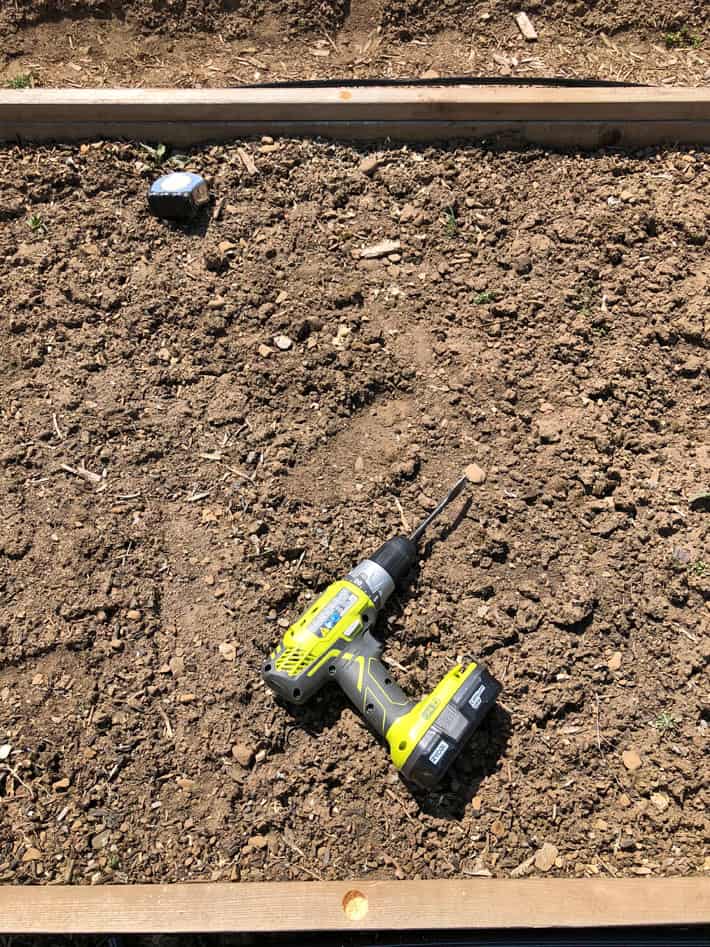
TIP: Do a few test holes with different drill bits on a scrap piece of wood. You want to make sure the tubing fits in the hole as tightly as possible to prevent it from wiggling. Drill the holes ¾s of the way through the 2X2. The deeper they are the more stable the hoop will be.
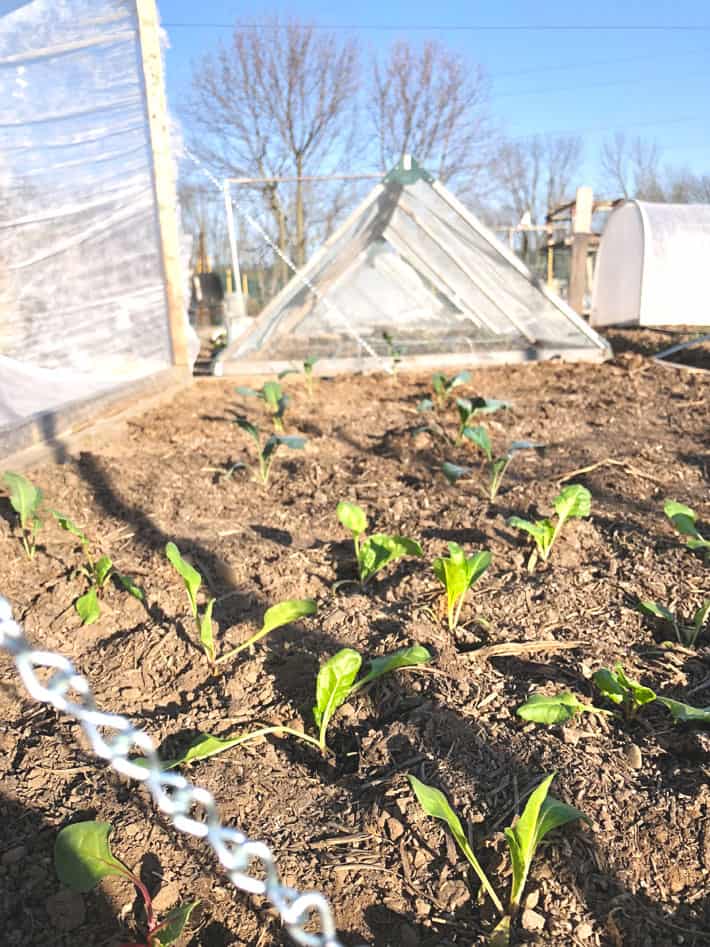
Step 6: Set your hoops inside the holes. My hoops measure 28" at the centre. They're quite high because they needed to accommodate my kale which gets tall as do my ... brussels sprouts. If you're growing lower plants you can have lower hoops.
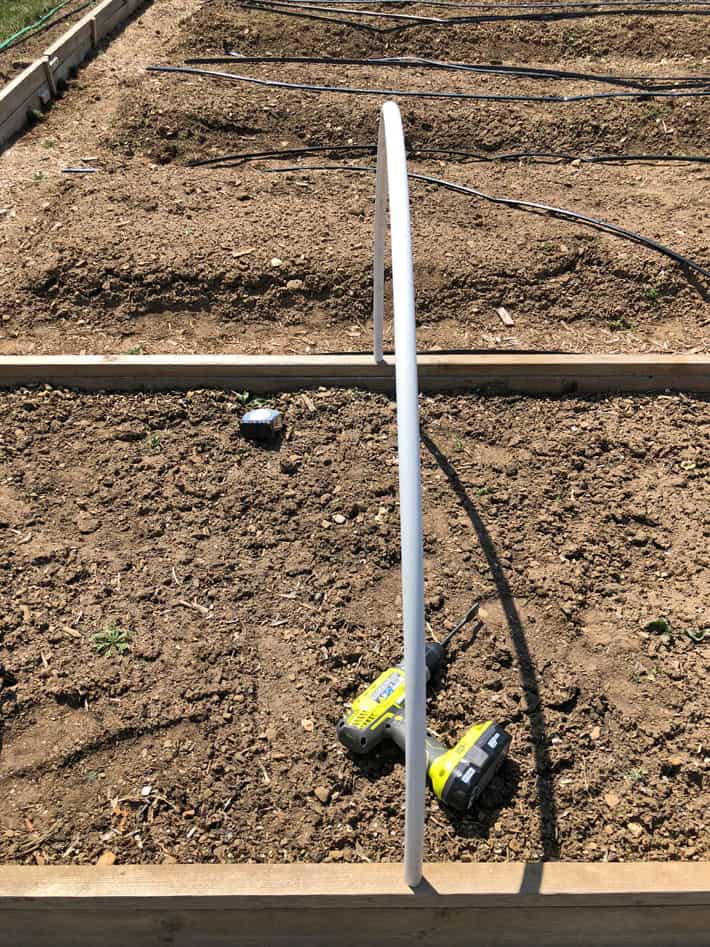
TIP: Remember that your row cover or netting needs to big wide enough to fit over the hoops so choose your netting width or hoop heights accordingly.
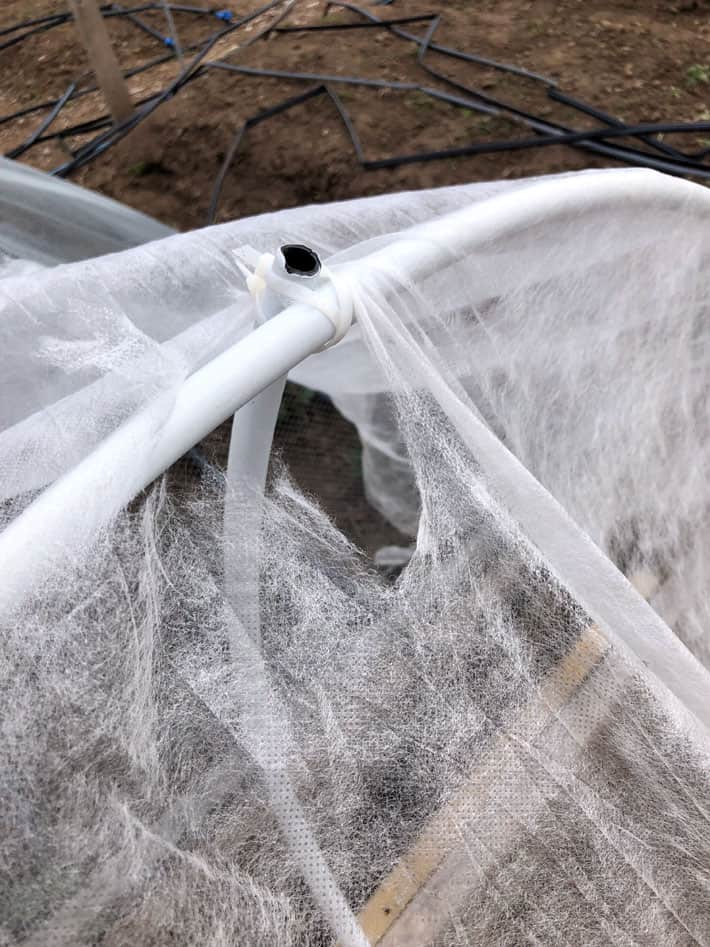
Step 7: Zip tie a length of tubing (if you can find a straight piece of tubing instead of one of the bent ones your life will be a LOT easier) across all hoops.
Step 8: Cover the entire thing with row cover or - even better - netting. If you're working on your own, hold it in place with clips.
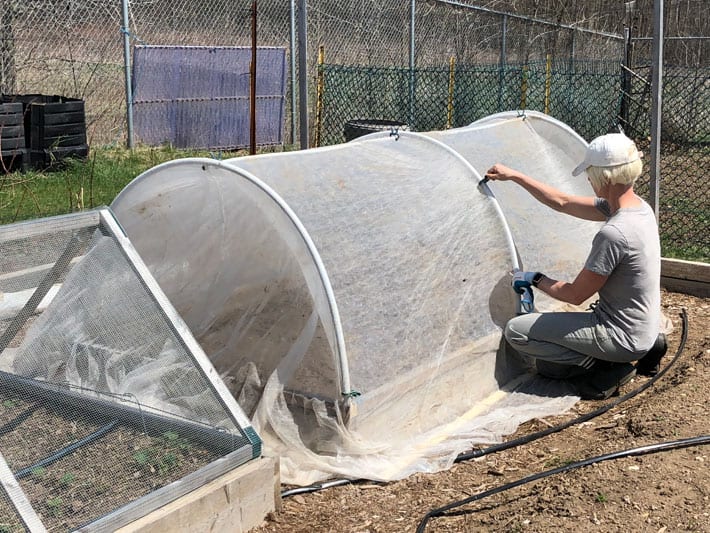
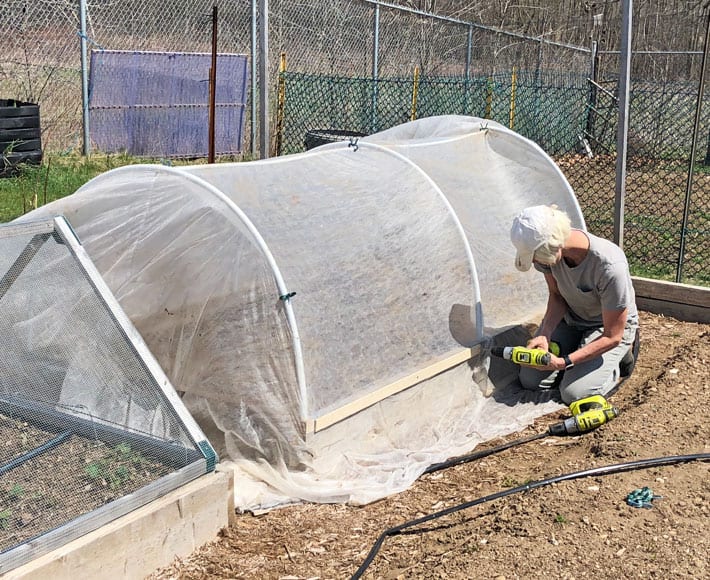
Step 9: Screw flat strapping over the netting to hold it in place. I got scraps of strapping from the lumberyard for free.
FUNNY STORY: I got this far in the building of my hinged hoop house before realizing that I'd rather use netting. So I ran up to my local seed store and bought a swath of netting. I came back, removed the floating row cover and replaced it with net.
Step 10: Trim the fabric.
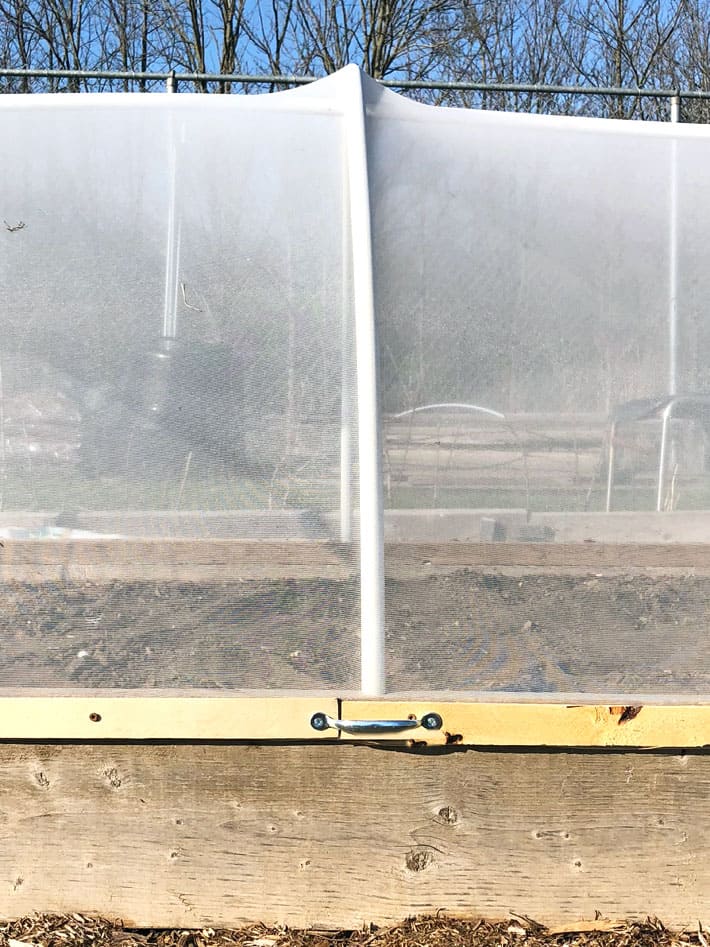
See? Now it's netting.
Step 11: Install a handle.
Step 12: Screw chain into the sides of the raised bed and the 2x2 frame to hold it open.
The chain really makes using the hinged cover a lot easier to work with. If you didn't have it, the cover would flop all the way to the ground
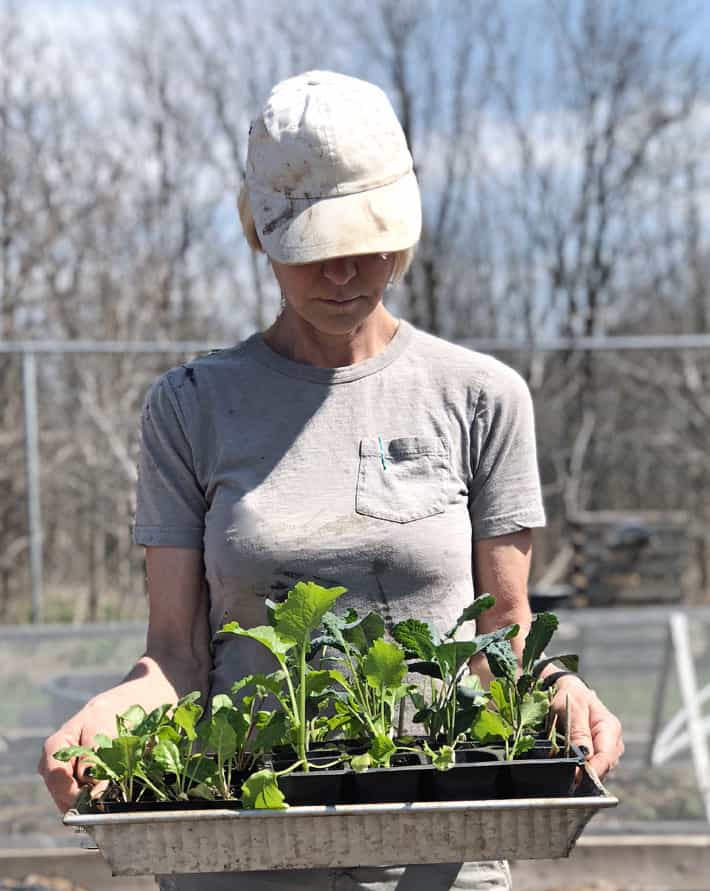
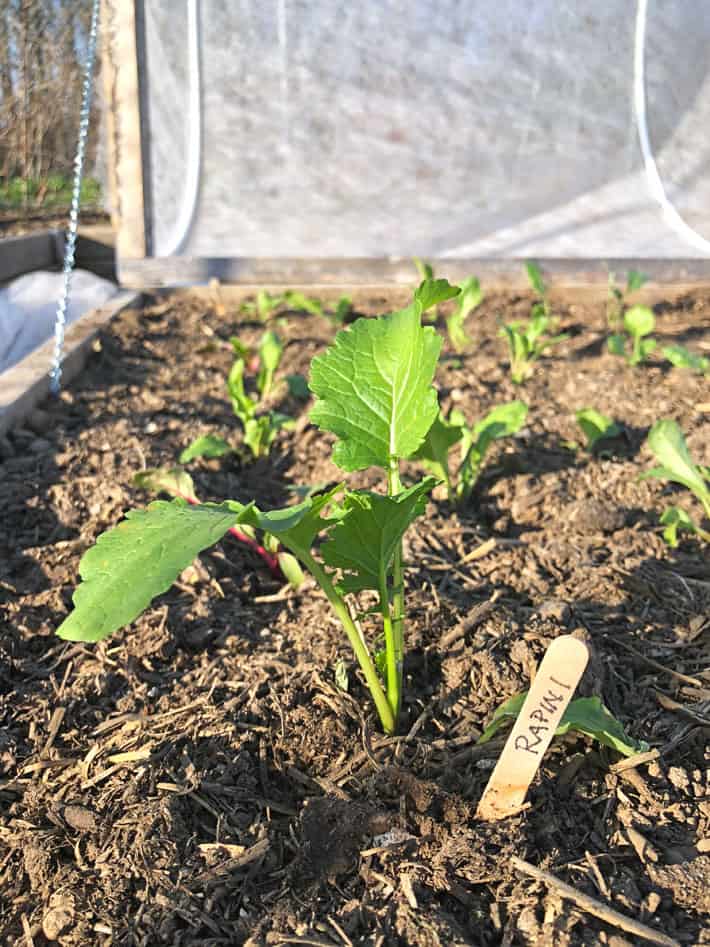
Now that you have protection you can plant your plants. I put in some kale, swiss chard and rapini. Later I'll be adding cabbage, cauliflower and leeks.
I built two of these hinged hoop houses. One with floating row cover and one with netting. I was hoping I could see the difference and whether it was worth it to use the more expensive netting.
The very day after building these hoop houses I had my answer. On that day, my area had a windstorm the likes of which we have possibly never seen. Wind gusts were 126 km per hour, which in Imperial is almost 80 mile an hour winds. Which, by the way, is hurricane force.
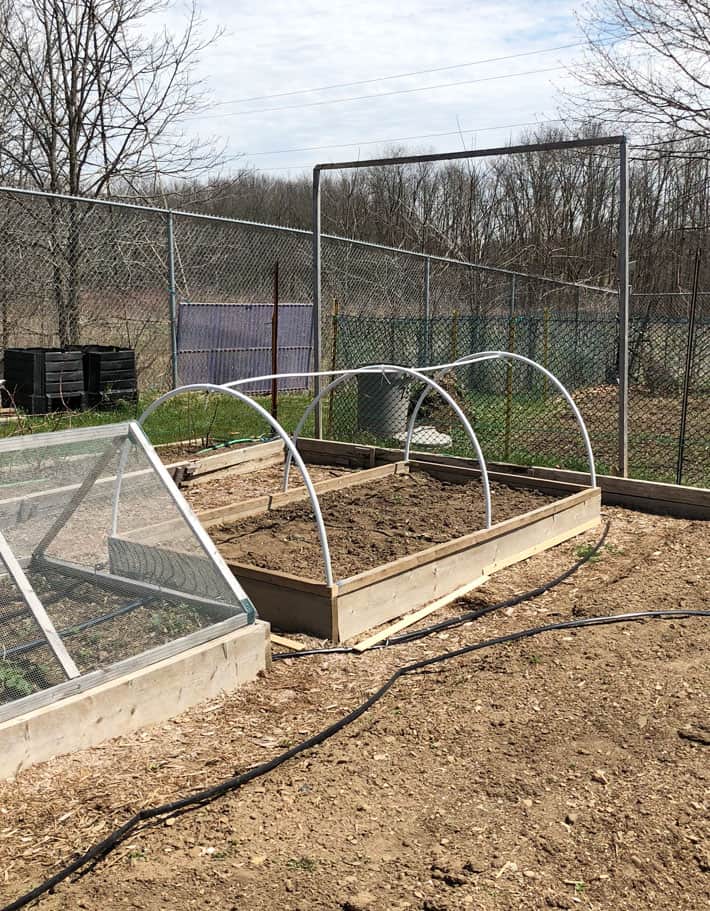
This is what I was met with the day after the storm.
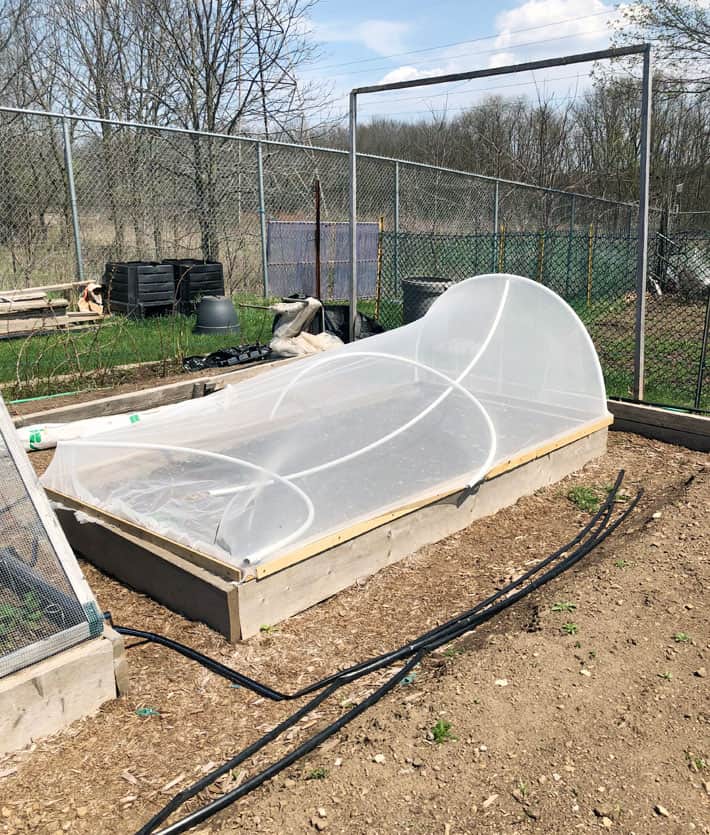
The hoop house with netting was deflated but still in tact. I just needed to reinsert the tubes into their holes on the 2x2s and everything was fine.
This is what the row cover hoop house looked like.

Similar - but the row cover was completely damaged beyond repair.
Experiment concluded, I removed the row cover and replaced it with netting. The netting is more durable plus it allows winds to pass through with less resistance.
I can see having had these for a couple of weeks now that there is some room for improvement. I'm going to brace each end somehow so the hoops don't have a tendency to lean in the wind. I'll let you know when I figure it out. I also stretched the netting too tightly on one of the hoops which ends up pulling the hoop tubes towards the centre. I'll get it figured out one day.
Better late than never. Says Mariah Carey, always.
** I've updated these hoop houses a little bit - see the newer version here**
→Follow me on Instagram where I often make a fool of myself←
My cat likes to catch and then eat the cabbage moths. Every little bit helps.
Hahah! ~ karen
It's a thing of beauty but I don't understand how you attached the netting or the row cover to the skeleton. I hoped for a pic of the strapping.
Hi Alena. There are several pics of the strapping. :) See Step 9. ~ karen!
You make this little project look so doable. Great instructions. Thanks.
It is totally doable Marilyn. :) I'll continue to perfect it over time. ~ karen!
Ummmm... where did you get your apron?
I made it! I had scraps of leather from a project I did for Lee Valley tools. :) ~ karen!
So how do you keep squirrels away from tomatoes?
Just a quick note: For the ridge pole, the zip ties will deteriorate in the sunlight. I have found hose clamps to be a good solution for situations when I might need to remove things, and I actually just drive a screw through the pvc pipes for somewhat more permanent fix.
Karen, please, where did you get the Honey Nut squash seeds?
I got them from Stokes. http://www.stokeseeds.com/product.aspx?ProductID=58344 ~ karen!
thanks!
Just awesome.
I'm sure it would cost more, but using a section of heavier gauge galvanized fencing would provide more support. I use it to keep deer out of my rock gardens. I drape it with deer netting in the winter to keep rabbits out as well. It forms a natural arch and could be stapled to the wooden frame. If you were in the planning stages of the raised beds, make each slightly smaller, so they could nest inside each other for storage. Just an idea.
Hi Susan! Part of the reason I don't use hog panels is because if you don't own a truck, you can't transport them from store to garden or home. Also, the hog paneling would rip right through the row cover and netting because of the sharp edges you'd have on the end. You even have to be careful the cover doesn't rip just from the zip ties and cut plastic on these houses. Row cover is VERY unforgiving, lol. Hog panelling is great in the garden, I just don't think it would work well for this particular application. ~ karen!
Wow, you just keep getting bigger and bigger! I am curious to discover what are you planning in the future with all your harvest? Do you pay rent for your plot and if so may I ask how much?
I do pay rent. I forget how much it is, lol. I think it's around $45 per plot and what you see here is 2 plots. So $90 for the season? I eat all my food. I mainly grow things that store throughout the winter like potatoes, sweet potatoes, carrots, beets, squash etc. The rest I give away to food banks or family and friends. And neighbours. And strangers. ~ karen!
I don’t understand how 1 1/4 inch screws can hold 2x2 boards together. Please enlighten me. I am in great need of enlightenment. Love — Kay
Oops, you're right! I forgot to include the screws for holding the frame together in the materials. Thanks for pointing it out. The 1 1/4" screws are for holding the strapping to the 2x2s. ~ karen!
Cool, what I like about your writing is you actually do the things you write about, works in progress, and keep improving on your ideas. It saves us time.
Thanks Rose! From Day 1 my pet peeve has been people who write and talk about things they've never done themselves. Things they've only "heard work" or "read about". ~ karen!
Hey Karen, love the site and all the shenanigans! First time commenter, long time lurker. Great idea, I'm going to build some of these for my broccoli this year, last years crop got eaten alive!
You could try cutting the loops in half (right at the top/center point) and attach a PVC-T and/or PVC-elbow. The top PVC pipe could run through the Ts (instead of the zip ties). The end hoops could have an elbow which ties into a vertical support pipe. Just an idea... I don't know if all the additional cuts and joins might actually end up making it weaker.
Hi Christina. Yes that's definitely another way to do it! If you glued the connections it would be very strong. Now that I see how well this works, I'll continue to look at ways to make the design sturdier and stronger. As you know I'll keep you all updated. :) ~ karen! (and welcome to the world of commenting!)
Speaking of better late than never, I've been wanting to compliment you on your writing. You're really very good at it, as in you can make anything interesting. I guess that's where the art is - not so much what you do, but the way you do it... and of course, actually doing it.
Great magazine.
Thanks Garnet. That's the goal. If you aren't interested in the topic, you should at least be entertained by it. ~ karen!
Karen,
At the end of the season, would you be so kind as to post an update on how they worked out? And how well (or not) they store over the winter? I'm at the starting to harvest tomatoes stage down here in texas, but it looks like an interesting next year project. Thanks!
I'll do my best to remember! I already think I'm going to look for some way to make the hoops sturdier and more stable. ~ karen!
omg - I kinda have just resorted to shoving seeds in soil these days and watering them ... don't tell anyone - I think I'm more about the mud these days - it's been a rough year so far (loved the dirty white cap your were wearing ;)
What the what?!?!?!? You're growing Brussel sprouts?!?!? Did I miss a posting about this?!?!
Right back to reading rest of article... As you were 😋
I know. They're fun to grow because they look like trees, lol. Plus when I was in Vancouver a restaurant gave me their recipe for deep fried brussels sprouts, which (as most deep fried things are) were delicious. ~ karen!
Thank you. I really like Vesey’s too. I haven’t heard of Dubois before; I assumed it was American.
This would have made an awesome tent/fort/play area/reading hideout for my daughter 20 years ago - with opaque fabric, of course. Looked fun to engineer. Sorry about the unfortunate hurricane winds!
Could you post a link to the netting that you purchased in Canada? These 'lids' are great, I use them, too. I use the 10' grey pvc pipes and I attach them to the inside of the 2x2 using galvanised plumber's tape (the one with all of the holes in it) and they withstood the windstorm. I would prefer to use netting instead of row cover, though.
This is one of the nettings from Dubois .... They offer different sizes though. You can also get it at William Dam http://www.damseeds.ca/productcart/pc/viewPrd.asp?idproduct=6585&idcategory=3066 They also have different lengths and widths. ~ karen!