Remember my Glowing Outdoor Orbs? Of course you do. They're orbs and they glow. Like alien testicles. Who could forget something like that.
Well I've come up with the Glowing Outdoor Orbs Part II. Only the don't glow. So they're the Outdoor Orbs Part II. Only people tend not to know what an Outdoor Orb is (since I made the phrase up), so I've decided to change the name to White Glass Shades that Every House Used to Have But Now Doesn't Because We all Threw Them Out Like Idiots. And Now We Have to Buy Them From Secondhand Stores. How's that?
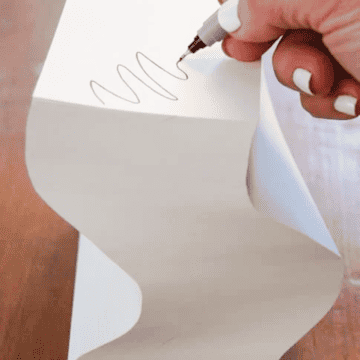
Anyhooooo back to the issue at hand. I'm a genius and as soon as you copy what I have to show you below, you'll feel like a genius too. Please note, with regard to my geniusyness, it doesn't apply to math or mathematical related problems, or numbers or decimals or anything that requires the adding or subtracting of fractions. Or math.
The ingredients for this craft are similar to but different from those in the original Glowing Outdoor Orbs. You still only need 2 things and it's still incredibly easy. I have come to understand that people LOVE the bigger projects I do, but tend to only duplicate the ones that take 10 minutes or so. Don't blame ya.
Here for your pleasure and limited time frame, is the 10 minute birdfeeder.
A old glass lampshade


A squiggle of rope ...


A $3 contemporary hanging birdfeeder.

How to make a super-fantastic hanging birdfeeder
Gather your rope. I happened to use ⅛th inch nylon rope. I bought a 50' package and it cost around $4. There's enough rope in that package to hang 3 or 4 birdfeeders from really high branches.
Using really thick rope would also look great. Probably even better than the thin stuff. I'm not sure why I bought the thinner stuff. I'm sensing a crack in my geniusyness.
#1. Measure twice the amount of rope as you need it to hang. Go look at your tree branch and just guess. When all else fails, just measure out a lot. You can always make the rope shorter, but you can't make it longer. Find the middle of the rope.

#2. Wrap the doubled up rope around the middle of your glass shade. The looped area of the rope is the centre of it.

#3. Pinch where the loop (centre) meets.

#4. Tie a knot where your pinch mark is.

#5. You now have a knot and a loop and a whole whack of excess rope.

#6. Wrap the rope around the shade again.

#7. Slip the excess rope through the loop, allowing the loop to rest over and lock on the knot. You'll probably have to undo and redo your knot to get it right. You want it quite tight but not so tight you'll break the shade. Good and tight is how I would describe it.

#8. Place a soft towel or pillow under the shade, then lift it by the rope to make sure it's hanging straight. Fiddle with centreing the rope until it hangs right. The towel's there in case the shades slips out and falls. It shouldn't but it might. Hell, what do I know about your knot tying abilities?

#9. Using Waterproof Silicone, glue your rope to the shade.

#10. To make sure your rope stays centred on the shade, just run the tip of the silicone down the centre of the 2 pieces of rope. As you run the tip down, it'll push the two pieces aside keeping everything centred. Go allll the way around the shade.

#11. Pinch the rope closed again, along the glue line.

If you want to be extra diligent (I was) you can also run a bead of silicone on the outside edges of the rope.
Hey! Wanna know why I was extra diligent?? Because the first time I did this I wasn't and 2 of my feeders crashed to the ground and shattered into pieces. See? Like this.

I oringally only used "Weldbond" glue, which is supposed to adhere to glass. Guess what? It didn't. So don't go thinking you can do this with whatever glue you have around the house. You can't. You must use a silicone based product like I've used. Marine silicone, tub silicone ... anything like that. Something that's meant for use on glass and is meant to come into contact with water. Weldbond says it does these things. But in my experience ....

... it doesn't.
#13. Let the birdfeeder rest for 24 hours to dry. Unless you're me. In which case, run outside and hang it from the tree immediately. Do as I say, not as I do. You want the glue to cure before subjecting it to the elements.
Hang them & fill them with bird/chipmunk/squirrel food!


You may have noticed that there are no pictures of birds at my birdfeeders. That's because I didn't have an extra 742 hours to sit around waiting for a bird to come. Besides it's been raining since I hung these feeders and I haven't seen a bird at them yet. I'm sure they'll come. They always do.
Also a bit of a warning here! I have no idea if one day the silicone will suddenly decide it's had enough of this and give up. It shouldn't. But it might. But it really, really shouldn't. However, I'm warning you that I cannot take responsibility if these glass shades come crashing down onto your Golden Retriever or French Bulldog's head. I don't think they will but I thought it'd be rude not to mention it's a possibility.
Although, on account of my mathematical abilities, I wouldn't want to put a percentage on it. Or a fraction..


Who would have thought. Great ideas and I am pinnig them to do later. I am new to your blog but I like it so far...you are funny and creative!
Thanks Ana! Pin away. :) ~ karen
Karen..from my experience with these glass shades..when they break...they shatter into a gazillion pieces just like your picture shows...If one would try to drill these they should be extremely careful..I really doubt that they would react well to being drilled..this is a great idea and they do look very cool hanging from your tree!!! Oh..one more thing...just how long is a squiggle of rope???
I am so thrilled that I caught these posts! I'm a fairly new follower, but the previous owners left about a dozen of these shades in our basement. You are a savior!
True enough. :) That's why you are the genious!
2+2= 4. Clearly. A genius.
I LOVE IT! I just went to Habitat for Humanity and bought my shades for the glow orbs(I commented on that post a day or so ago). To prevent the smashing, why not go to Home Depot and buy a glass drill bit, and drill two holes - and string the cord through?
Sarah - I've used glass drill bits before and they don't *always* ensure the glass doesn't break while drilling. Found that out the hard way. Besides. Glass drill bits aren't cheap, and it makes the project less accessible for most people. Most people want to do things with the least amount of purchasing possible, LOL. Some of my projects require special tools, etc., but I was trying to make this one as easy and cheap as possible. :) The marine silicone should work fine though. Fingers crossed. ~ karen
I think I'm going to start stock-piling these for outdoor votive holders. I have 3 daughters of the marrying age & one who's thinking about a backyard wedding. Wouldn't these be fab?! Great post!
Donna O. - Congrats on the wedding! Well ... the possible wedding. :) Everyone keeps talking about using these as votive holders, so I'll do a little test to see if it works. You see, the problem is I'm afraid the glass will get too hot. The flame will be too close to the top of the glass if they're hanging sideways the way the birdfeeders are. I'll let you know how the experiment goes. ~ karen
I think you could use those little battery operated flickering lights on the orbs, they do not generate heat!
PS loved your posts, and great ideas
There are small 'votive candles' that are electric and use bateriess. Slightly less light than true candles, but as a group set in the yard they might do the job. Dollar stores, hardware stores, department stores and drug stores seem to carry them.
And after snacking out, the birds can skip over to the bath to wash off the crumbs! I'm going to try these feeders this weekend. Thanks!
Another Karen - The birds use my Ikea birdbath alllll the time now! It takes a bit for the birds to get used to the play things you put in the yard for them, but once they find them, they depend on them. It's ufn! Ooops, I mean, it's fun! ~ karen
You are funny. I love this idea. I know what you mean about the fingernails. I never wear gloves and am a source of embarrassment for my finely manicured friends and family, but it seems like such a stupid thing to worry about when I use my hands all the time. It shows. So what?!
I can hardly wait for your tutorial on the chicken coop fence. My son gets out of school today so I am going to recruit him to help me build it. Hopefully, it isn't too difficult. My husband doesn't seem to have much faith in our abilities, but I know that if I see how you do it, I can follow along. Unless, of course, there is a saw involved. Then I'm screwed. My chickens have had free access to the backyard until their numbers suddenly started diminishing from either a coyote, fox or other assailant. Therefore, they have been in their house for 3 days and are anxious to get outside once again.
Thanks for making me laugh.
Elaine
Elaine - I hate to be the bearer of bad news but ... you need to use a saw to build a coop. Unless you have a REALLY big set of Lincoln logs. ~ karen
Well, that is bad news because I don't have a big set of Lincoln Logs and I am afraid of saws. However, the saw will be my fear that I face that day. So be it. Thanks.
Elaine
great idea!! thanks. now a question for ya, can you figure out how to wrap the white roundie thing more than once.?? that way you would not have to worry about the "glue" holding.?? yes???
just a thought.
thanks for all the great ideas!!!
Lori - I tried to do this several ways over several evenings sitting on the couch. I knew the basic look I wanted. I didn't want a rope cradle, or nest. I wanted the rope to be subtle so what you noticed was the birdfeeder. I tried macrame and knots and that sort of thing and it just didn't look the same as the feeder hanging from the single long strand of rope. Anyhow .. the silicone will hold. :) ~ karen
Can you tell what kind of tree that is? It is very cool looking, with the bark and the weeping evergreen branches.
Thanks.
Catherine
Catherine - So many people are commenting on the tree that I'll do a post on it next week or the week after and tell you alllll about it! ~ karen
The orb construction looks easy enough, but how did you hang them ...so high? Just wonderin'.
Bobbi - Ladder. Step ladder or regular. ~ karen
i love your hands...I recognize those hands....they are the hands of someone who is an artist (like me)....over time my hands went from slim and small-knuckled to stumpy and well...kinda manly looking.
I'm ok with it. I love what I do. How do you feel about your hands???
Brenda - They are square, workman hands. I've always had them. They have veins and muscles and a few callouses. When I do my nails and moisturize and such they look significantly less manly. But they'll never be pretty. Ever. ~ karen
Your posts always make me laugh! I hope that everyone you know contactntly comments on your geniusyness! It is truly remarkable!
What a cute way to feed the "critters," as my grandparents would say.
I love this! And I really really would like to put them in my garden. However, I am engaged in an ongoing war with several giant, fat red squirrels - fat from eating all my birdseed - who destroy everything I put in my garden to feed the birds. They are relentless and will destroy anything in search of food. These beautiful orbs might last but 10 minutes, I'm afraid.
They are very lovely, though.
Near the top of the rope you could try a large round slick object. The squirrels have a hard time getting around em, and fall off
Love this!! I will be making this soon! I have one of the orb lights in my garage right now. Woo hoo! Thanks for the idea!
Mr. Pickles says, "Brava!" Plus, the more birds I can lure the garden, the better! This the home-improvement project equivalent of the Gary Larson cartoon with the dog pointing to an open clothes dryer that reads, in crazy-person scrawl, "Cat Fud" as the cat looks at the dog suspiciously.
Even more geniusy than I expected (and i have come to expect a lot from you). I think it literally took my breath away when I scrolled down to the picture. Can't wait to do this.
Karen: Absolutely brilliant! Another winner.
(what is happening with the C.Coop?) hummmmm
Diversion, procrastination, just plain wore out?
LOL
No, I'm still working on the coop, but I can't do it 14 hours a day anymore. The rest of the house was falling apart. You should see the laundry that needs to be done. And I still hadn't "spring cleaned" my front yard and porch. So I'm trying to work a few other things in and slow down on the coop for a few days. It should still be done in a week or so! ~ karen
Those are so cute! My only worry is that the wind will come along and blow them into something... or each other!
Hailey - As long as you space them at different heights they shouldn't blow into each other. And if they're far enough away from the trunk, same thing. Also, they're fairly heavy once you get the seed in them. In fact, with the larger feeders don't fill the feeder up, just enough so the birds can reach it from the lip. Otherwise it'll be really heavy. ~ karen