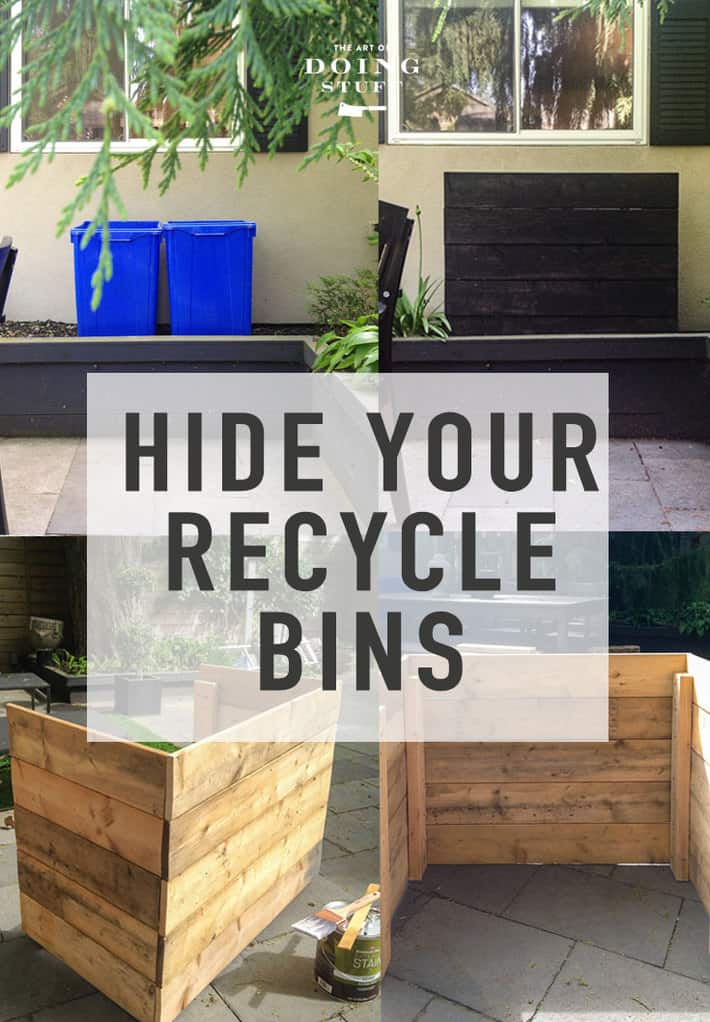
How to quickly DIY a wood cover for your recycle bins to hide them. Because the only boxes that should be blue come from Tiffany.
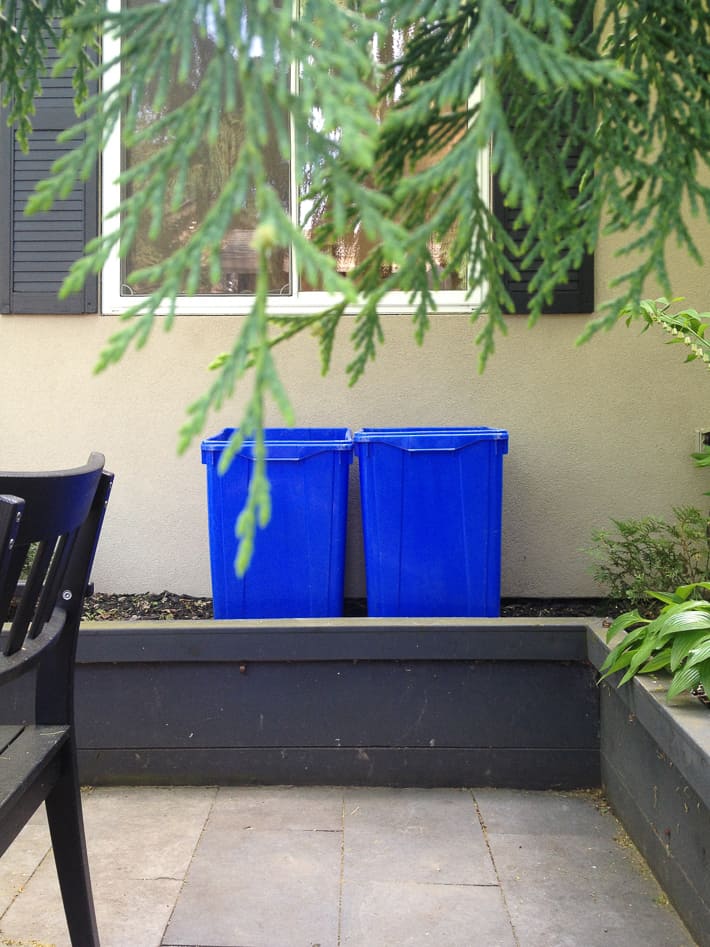
About a decade ago I started to put my recycle bins right outside my kitchen window. I did this because a) I am smart and b) I am lazy.
All winter long I can just open up my kitchen window and throw my recyclables into their appropriate bin without having to trudge through the backyard in the middle of an ice storm. This was fine in the winter because I was never hanging out in the backyard to see the ugly blue bins.
Come summertime I'd have to drag the recycle bins away from the window to a less visible, less convenient part of the yard because I didn't want big ugly blue recycle bins right out there in the open looking like their ugly selves.
So I created a bin cozy. An easy wood cover that just slips around my blue bins.
DIY Recycle Bin Cover
I'm not giving you measurements or anything for this project because chances are your recycle bins are a different size. For instance I have the super-tall, generally massive recycle bins. Standard ones are smaller.
I built this bin cover one morning while I was waiting for a friend to come over. I didn't even plan on building it. I was walking around the backyard and realized I probably had everything I needed to build the bin cover using the leftover materials from my chicken coop.
Again, you don't need to use the same materials I've used. Use whatever you have or whatever you can steal. From a neighbour. That you don't like. Under cover of darkness and drink.
Materials
4 lengths of 2x4s
several lengths of 1x6's or any other flat, fencing type wood.
Wood screws
Drill
Instructions
- Measure the width and height of your recycle bin. If you have 2, measure them side by side.
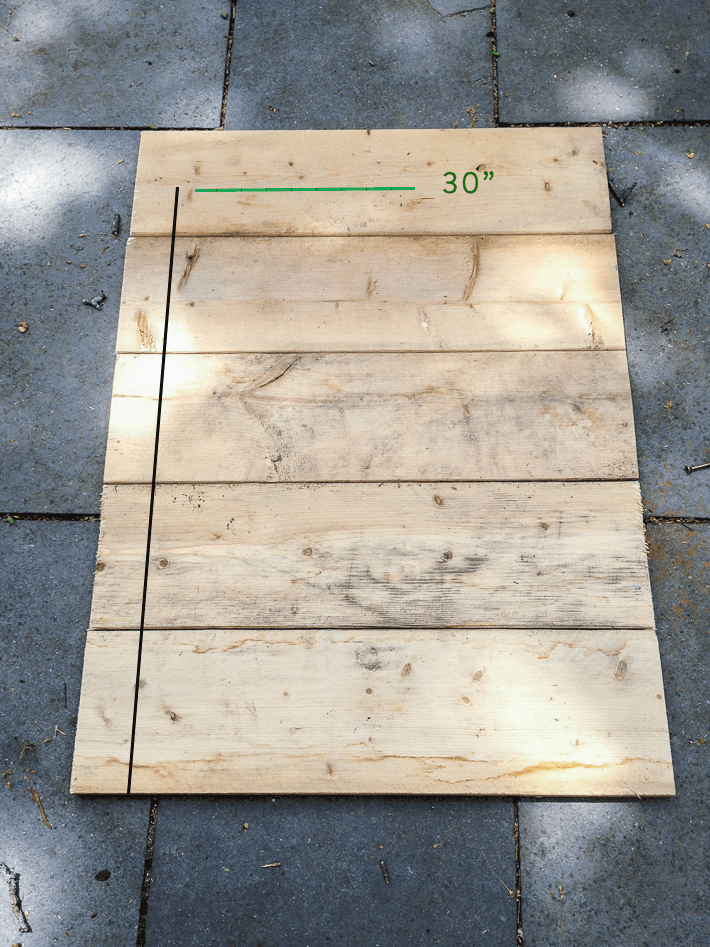
- FOR THE FRONT OF THE COVER: Cut the length of your fence boards so they are at least 6" wider than the width of your bins. (If your recycle bin(s) measure 30" wide, cut your fence boards to 36" wide. FOR THE SIDES OF THE COVER: Cut the length of your fence boards so they are at least 4" longer than the depth of your bins. (If your recycle bin measures 15" deep, cut your boards to 18" long. ) ** always measure the widest part of the bin (the top) **
3. Lay the fencing for the sides of the cover on the ground. Measure from the bottom board to the middle of the top board. Cut 4, 2x4's to this length.
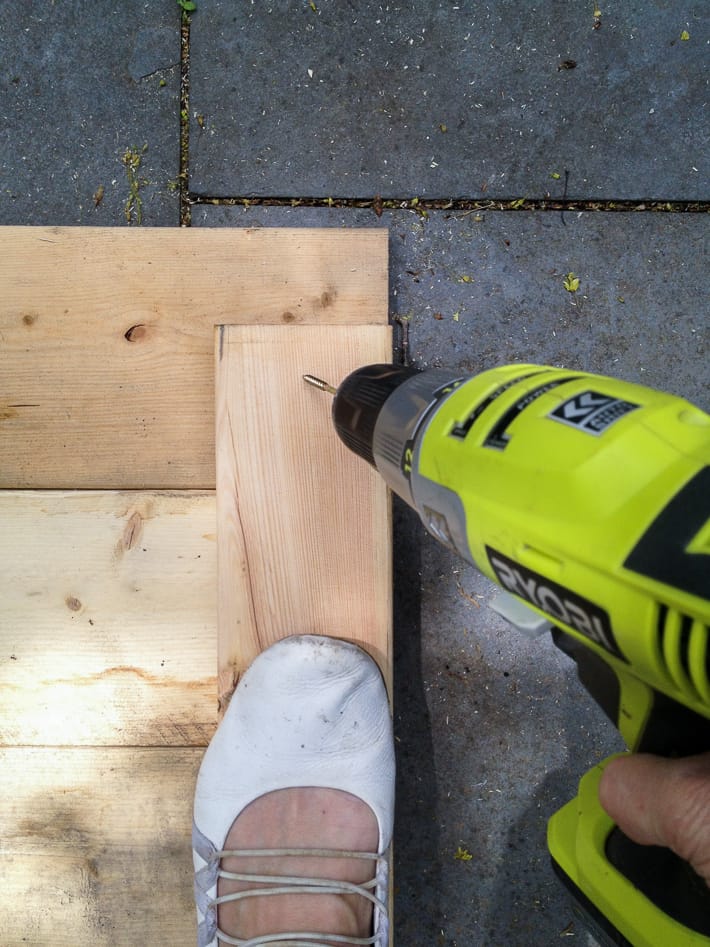
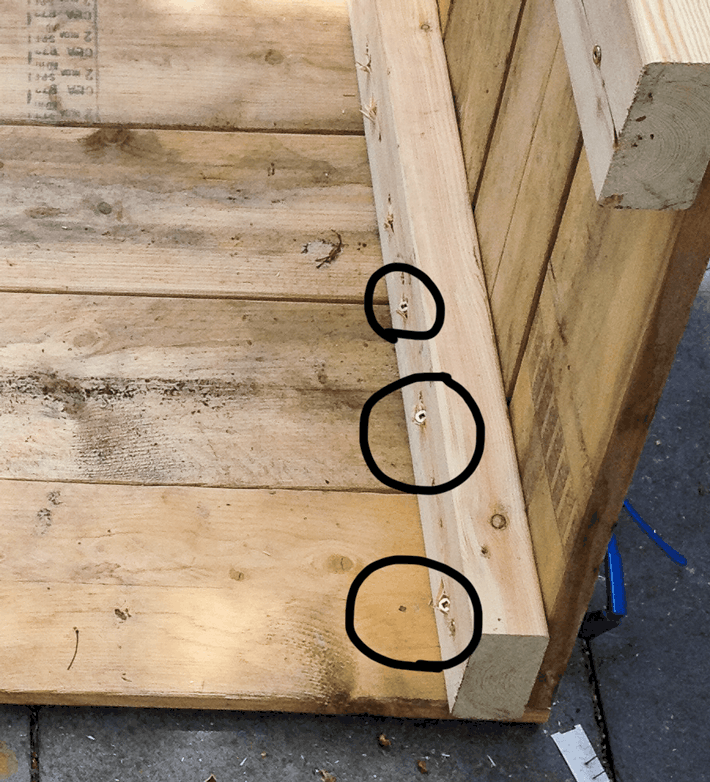
4. Lay your cut 2x4s on top of your fencing and screw into place. Always pre-drill your screw holes.

Drill into every board.
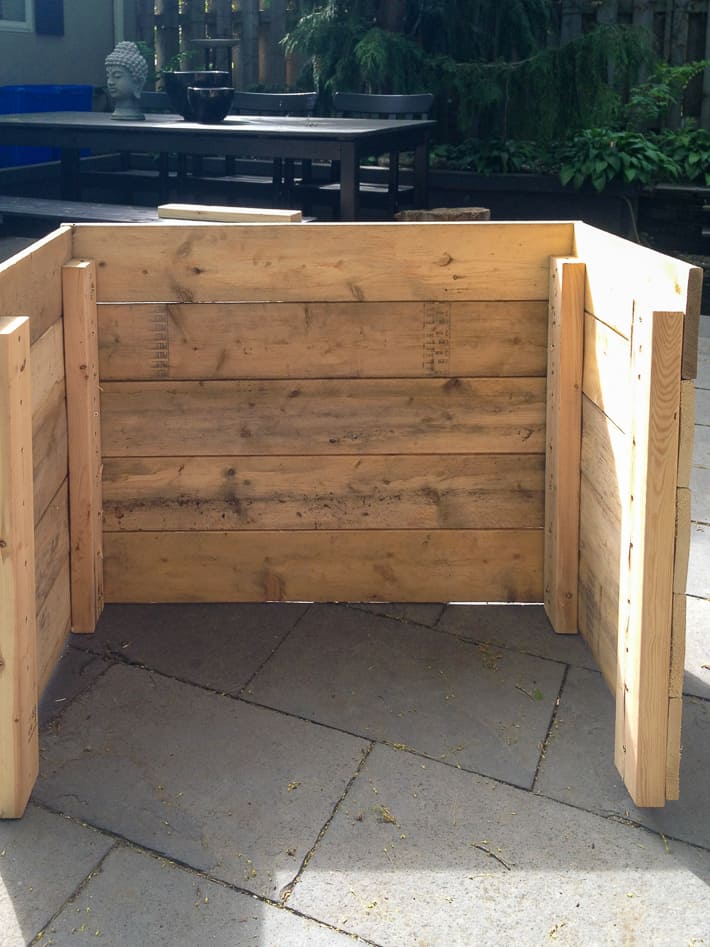
5. Repeat these steps for the other side of the cover. Once you have assembled and screwed together your two side pieces you need to attach them to the front fencing pieces.
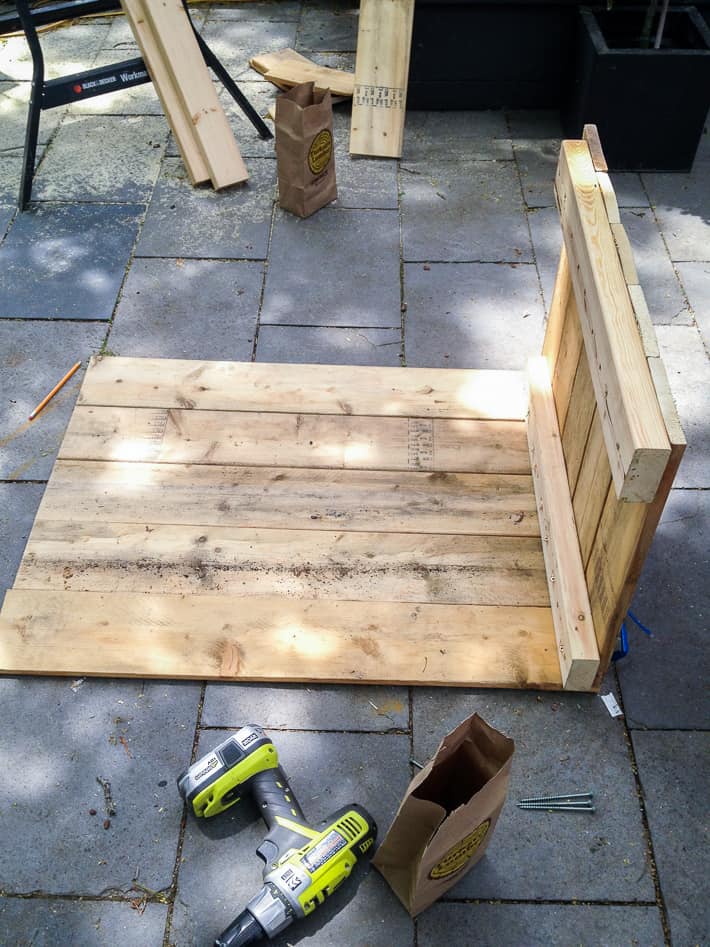
6. Like with the side pieces, just lay your front fencing pieces on the ground. Place one of your completed sides on the front fencing pieces and screw them together by drilling through the 2x4 on the side, into each of the front boards. Do the same on the other side. Pre-drill through the 2x4s at an angle into the front boards like you see in the photo below.
7. Stand everything up because you're done. You now have a slightly wobbly box. If you really want to you can brace the corners and run a 2x4 along the bottom and top of the open end. I didn't want to, so I didn't.
I knew that once the bin cover was in place I wouldn't be moving it so I didn't need to worry about it wiggling apart over the years. If the unstained wood suits your backyard then by all means, leave it as is. If not, then now's the time to stain.
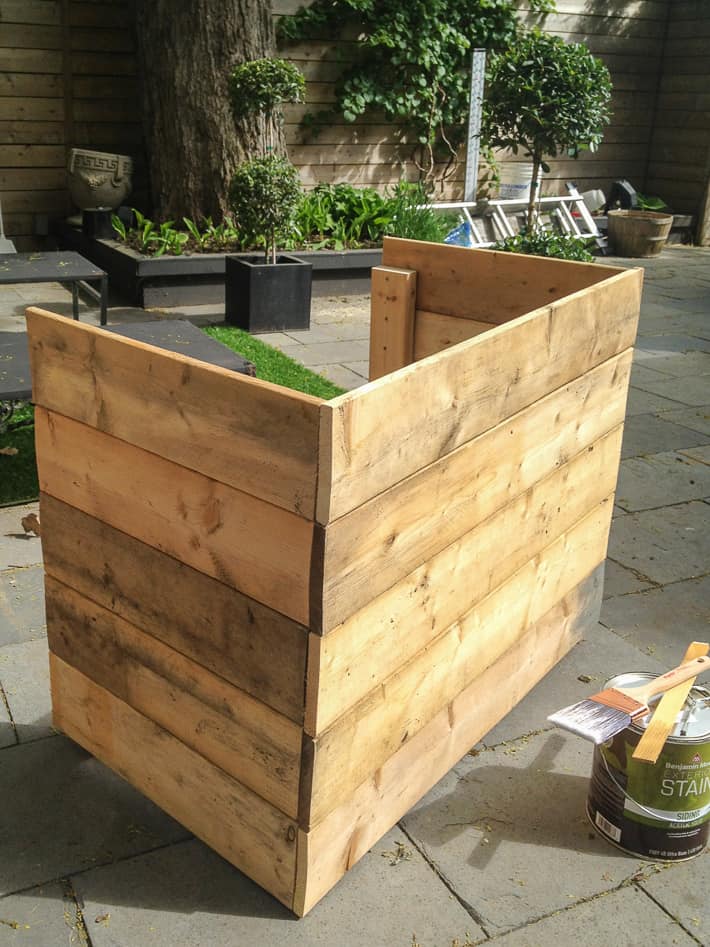
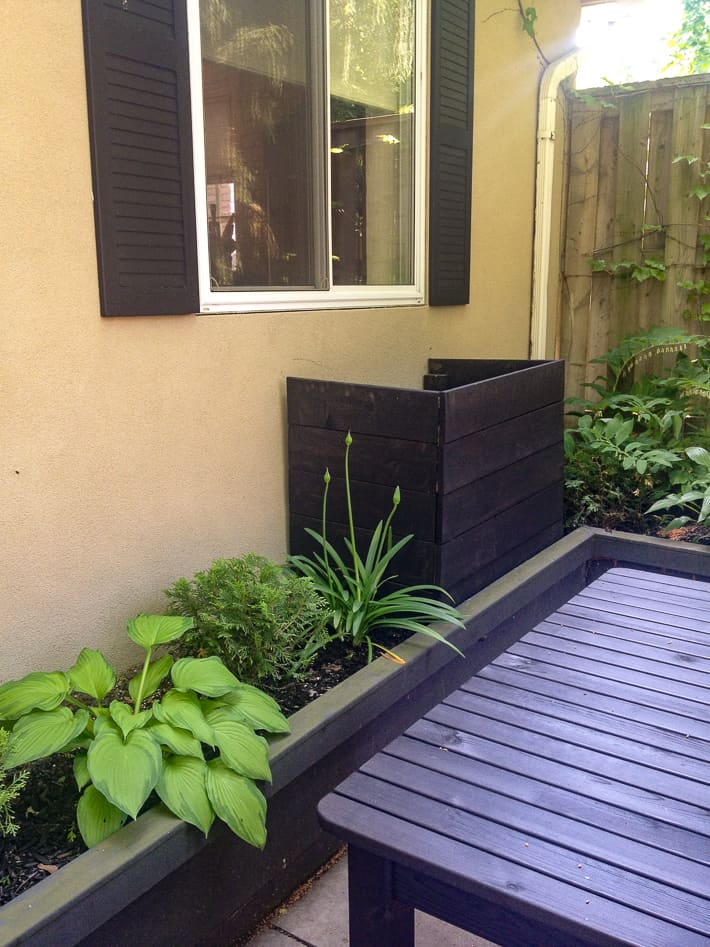
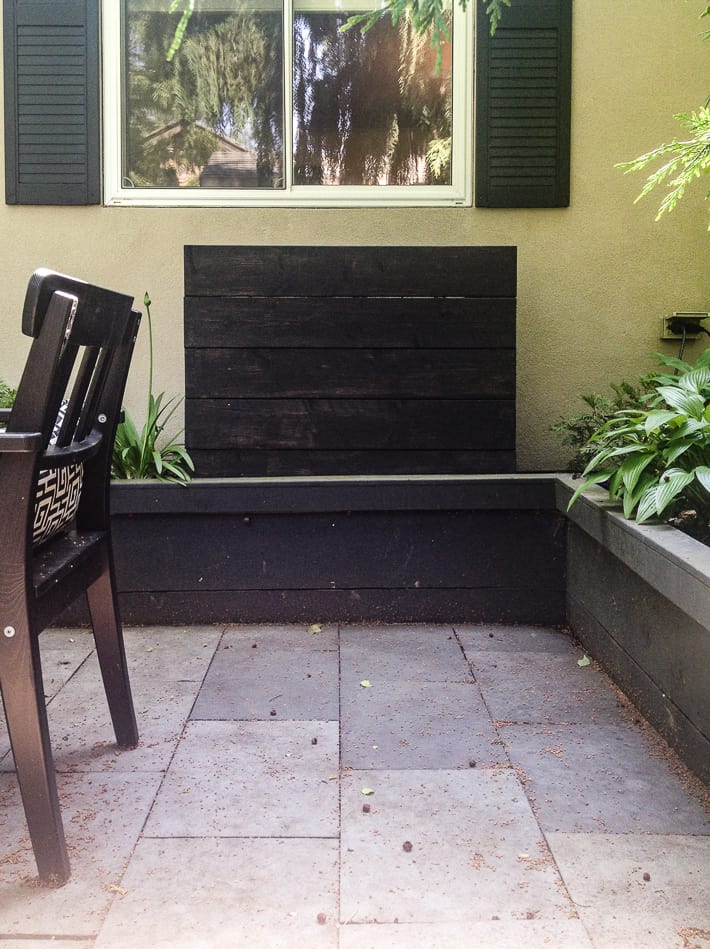
Now that your bin cover is stained you just need to slip it into place. (I realize it looks like I splashed paint all over my recycle bin, but I didn't. Well, I did, but that was during a long ago project, not this one)
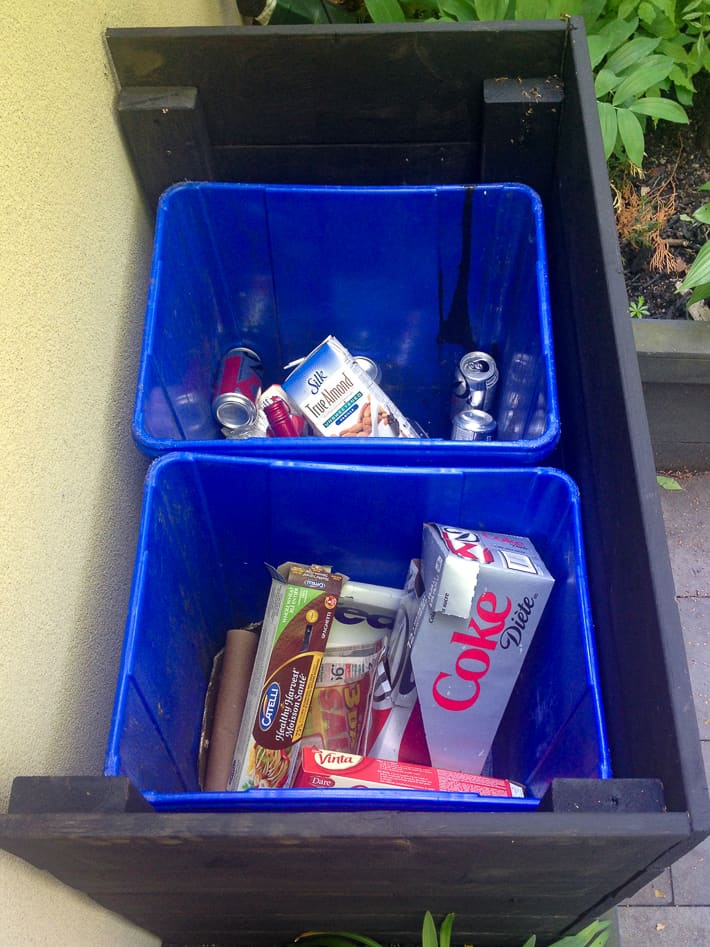
The bin cover blends in well with the planter boxes I built and is the exact same look as the chicken coop.
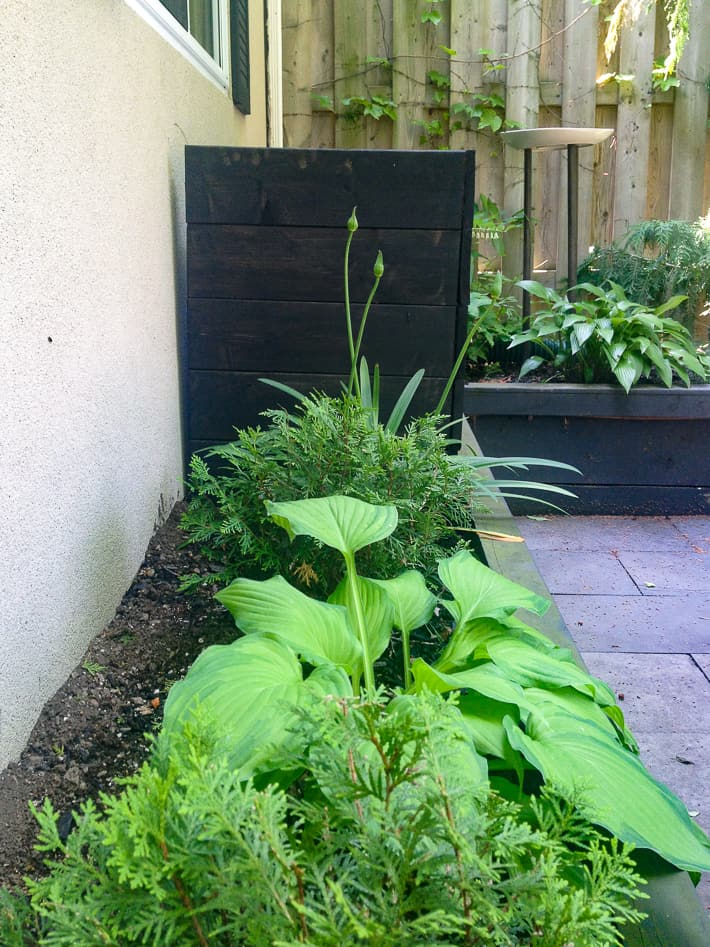
The dark colour is also a really good backdrop for the greenery all around it.
I am on year 8 with these DIY bin covers and so far there's been a bit of rot on the bottom (because mine are laying on dirt). If I had been even SMARTER I would have thought to put some stone or wood underneath the cover to help slow down the chance of rot.
Still. It's a pretty smart solution.

DIY Recycle Bin Covers
Because recyle bins are ugly.
Materials
- 4 lengths of 2x4s
- several lengths of 1×6’s or any other flat, fencing type wood.
- Wood screws
- Wood stain and paint brush (optional)
Tools
- Drill
Instructions
- Measure the width and height of your recycle bin. If you have 2, measure them side by side.
- FOR THE FRONT OF THE COVER: Cut the length of your fence boards so they are at least 6″ wider than the width of your bins. (If your recycle bin(s) measure 30″ wide, cut your fence boards to 36″ wide. FOR THE SIDES OF THE COVER: Cut the length of your fence boards so they are at least 4″ longer than the depth of your bins. (If your recycle bin measures 15″ deep, cut your boards to 18″ long. ) ** always measure the widest part of the bin (the top) **
- Lay the fencing for the sides of the cover on the ground. Measure from the bottom board to the middle of the top board. Cut 4, 2×4’s to this length.
- Lay your cut 2x4s on top of your fencing and screw into place. Always pre-drill your screw holes. Drill into every board.
- Repeat these steps for the other side of the cover. Once you have assembled and screwed together your two side pieces you need to attach them to the front fencing pieces.
- Like with the side pieces, just lay your front fencing pieces on the ground. Place one of your completed sides on the front fencing pieces and screw them together by drilling through the 2×4 on the side, into each of the front boards. Do the same on the other side. Pre-drill through the 2x4s at an angle into the front boards like you see in the photo below.
- Stand everything up because you’re done. You now have a slightly wobbly box. If you really want to you can brace the corners and run a 2×4 along the bottom and top of the open end. I didn’t want to, so I didn’t.
- If the unstained wood suits your backyard then by all means, leave it as is. If not, then now’s the time to stain.
- Set the cover in place. If it's going onto soil, lay wood or stones beneath the cover to help prevent rot.
Notes
* always pre-drill your holes first
I can now chuck things out the kitchen window to my heart's content all spring, summer, fall and winter long. My name's Karen and I am smart and lazy. Otherwise known as slazy.
Here's to all of you who are the same.
→Follow me on Instagram where I often make a fool of myself←


I love your "slazyness" So clever.
Your an amazing woman Karen! Every time we build our homes we always plan for recycling ideas, I am so amazed at how many people don't.
Slazy is, way better, than Sleezy! jus sayin'
I have come to realize black is a very difficult color for the paint people to mix, I had a very difficult time trying to get black that was not premixed when I went to redo my table. Good job on the bin cover Karen! I think I might have tried to figure out how to put hinges on mine and create a door just cause I am lazy and a door seems easier than reaching in to pull the bins out.
Looks slick! I'm all for reducing - reusing - recycling, but hiding the ugly aspect of this do-gooding. Like my adaptive reuse of a vintage ice bucket into a compost pail...
That's a good idea! I've been on the lookout for an enamel container with a lid for the same thing. (well ... for scraps for the chickens actually) ~ karen!
My bread box is enamel with a lid. White. I love it. Says Bread. You could paste a picture of a cute chicken over the bread sign. I ordered it on line somewhere, maybe Amazon (don't go to stores; hermit). Just noticed you posted in 2013; you probably have a box by now.
I LOVE slazy! I really feel for Advicist- I too have windows that I absolutely despise! Whoever heard of a window 36" tall & 96" wide?!
Maybe our favorite blogger can teach us how to replace a window? I've watched it done, but that's not the same as getting the scoop on what NOT to do & tips to make it easier.
Can you share the paint colour of the raised beds/clever recycling camo?
Hi Illoana - I'm afraid I can't. :( I worked together with the experts at my local Benjamin Moore store to come up with the colour. So it's a custom mixture we've dubbed "Bertelsen Black". However, I'm pretty sure it isn't in their database or anything. I don't think. ~ karen!
Looks fantastic and highly versatile- recycling/compost/rain barrel etc. cover! Pinned! Thank you.
Why don't you have to move the bin cover - don't you have to move it every week when you want to take out your recycling?
E
Erica - The recycle bins just get lifted out of their box. ~ karen!
I love your "work shoes"!
What about the smell? When I open my window I want to have fresh air, not stinkiebinky smell from trash. But I really like you slazy mind!
Diana - There isn't any smell. It's just a plastic box with cardboard and paper and then the other one holds pop cans and stuff like that. All cans are rinsed before being chucked into the recycle bin. ~ karen!
I think recycling is so important for our environment....however...I was so disappointed when I saw a city trash truck pick up the recycling bin and toss the contents into the back of the truck, followed immediately by the regular trash bags. It all went into the same mix! It does no good to take the time and effort to sort the recycleables if they're not being recycled! BUT! your bin cover is awesome!
I used to think the same when I saw this on my street but they used these special, side loading trucks- they have two compartments within the opening. They dump the recycle on one side of the opening and a plunger pushes it back and the garbage goes on the other side. If you watch closer, perhaps that's what they do with your curb-side waste, also.
Our county (not country) recently used a great deal of our tax money to purchase a huge, brand new fleet of trucks and they now pick up of garbage and recycle separately. Not yet sure how that investment serves us better, yet.
great and simple idea!
My kitchen windows are above the front and back decks so this clever system is out for me but I do like to have the bins conveniently located just beyond the deck and they're still ugly. I'm gonna do this, too. That takes care of the smart.
Because I have children, we deposit recyclables into a small bin in the kitchen and I make the kids take it out to the bins- that's where the lazy comes in.
Slazy! I love it. And I love the recycling bin / window idea. Unfortunately our kitchen window only has a small pane that opens at the top. It's always annoyed me that I can't pass ketchup out through it, but now I have a whole new reason to be mad with the previous owners!
Nice job!! I am wanting to make something for my A.C. Unit. But I am not sure what to do , now I know! Thanks
Do you find that the cardboard/paper gets too mushy etc because of rain/snow or blows around in windy weather? Where we are, our paper recycling has to be bundled up or in bags, so we wouldn't just put the bin out...
Hi kiwikat. Many weeks the papers and cardboard get soaked but it doesn't matter. Everyone here just throws all paper and cardboard into their bin and the recycle guys chuck it in the truck. No bundling or worrying about mushy paper necessary. The only thing we are supposed to bundle are twigs and tree branches. ~ karen!
That's not lazy, it's called "Working smarter, not harder." Wish I could do this with my bins, but they are huge and on wheels. The only thing in my yard as big as my bins are the spiders and mosquitos waiting for us to open the back door so they can slink in. So enjoy for all of us who can't.
That is an awesome idea - chucking it right out the window! Fantastic!
You slazy genius!
BRILLIANT - Truly brilliant.
Can I ask you a question about your raised garden beds around your house.... I am in the planning stages of designing our dream backyard and incorporating a lot of your ideas...
Do you have any basement window wells in the back of your house? How did you do it with the raised beds?
I think I am going to start chucking out my window as well - so much easier....
You inspire me.
Hi Debbie - I do not have a basement window well along the back of my house because for one thing ... there is no basement back there, LOL. Only the original (1840) part of the house, which is the front half has basement. ~ karen!
Thanks so much!!!
Jealous to be honest with you....
This is crazy, I was going to ask you a question about your raised beds around the house, and in the first comment someone already asked something about it...however, I was wondering if you put any kind of moisture barrier between your house and the dirt part?
Hi Olga. I did indeed. I ended up using some leftover pond liner that I had. You have to be careful with vapor barriers and that sort of thing though because oftentimes all they do is trap moisture in between the barrier and what you're trying to keep moisture away from! (the house) ~ karen!
Thanks for the quick reply Karen. For a moment there I felt like we were connected, sitting across the room from each other discussing my next project...That is a good point, it might be a good idea just to use a barrier inside the bed only on the side where the house is and roll it half way on the bottom, so in worst case the water can escape in the front of the bed.