I've been blogging for a year and a half now. So I'm kind of a veteran. I have learned a couple of things as a blogging old timer.
1. Use the word tinkle a lot. Tinkle is a funny word that always gets a laugh.
2. People do not want to tackle any project that takes more than 15 minutes unless the end result is covered in icing.
So ... because of this, I've decided to offer you an alternative to one of my more time consuming tutorials. The Tree Stump table has proven to be one of my most popular and passed along posts.
It's a truly simple project, but it does take time. There's waiting for the stump to dry and the finish to dry and the finish to dry and the finish to dry. There are several coats of finish. Plus there's some power tools involved and you have to go out and buy legs, and ... well ... it just takes a lot longer than 15 minutes. Tinkle.
So, it occurred to me, that if you reallyyyyyy wanted, you could get the same basic look as my tree stump table, without all the fuss or muss.
And here's how you do it.
Table of Contents
Instructions for ...
The Tree Stump Table
The lazybones version
1. Get stump, let it dry out, bring it inside.
2. That is all.
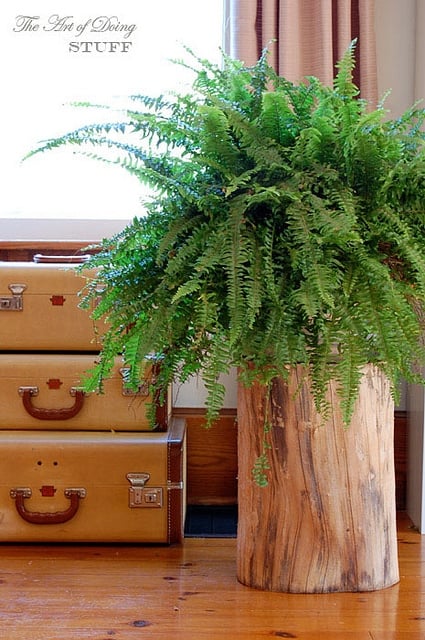
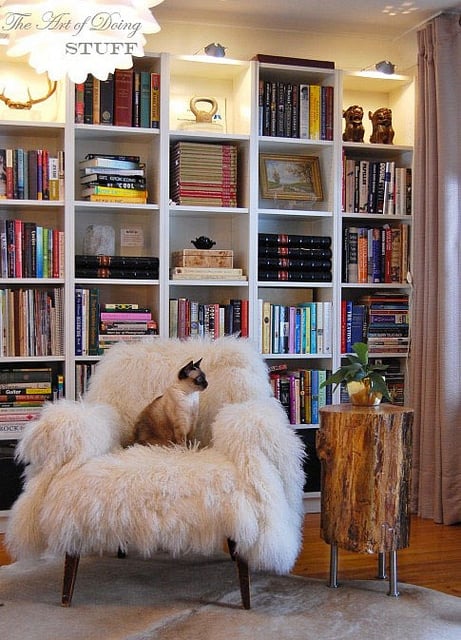
This is a stump the fella and I found while walking home earlier this summer. Originally we were going to make a stump table to bring up to the cottage, but realized there probably wasn't room for it. So ... it sat in the backyard with a fern on it looking quite beautiful. One day whilst looking at the beautiful, natural stump with the beautiful fern, I thought to myself. "Hmm, myself ... I bet that would look beautiful inside, just as it is."
So before frost had a chance to get at my fern I dragged the whole lot inside. And guess what? It does look great inside. Myself was right. Other than taking the bark off, which basically just fell off ages ago, this stump table took no effort at all. I like the dull finish of the natural wood and it's perfect for a plant. If your plan is to use this as an actual table, be warned that if you spill anything on it like wine or salsa or whatever, it will stain.
That's what's great about the original stump table. The finish on it makes it close to indestructible. The drawback to it of course, is that it's not covered in icing.


Karen! i loved your table so much that i saved' , um I mean, I asked the arborist to leave a couple of stumps from this maple tree that we had to get cut down because it was dying. Any who, I had hoped to use them as patio tables or stools. They're quite heavy so i just left them weathering out and now its been a year and a half, and they're gray? is there any hope for finishing/staining them at this point? thanks!
I am late to this party but found this posting through your industrial strength Tree Stump Table blog. Hubby and I just finished a new cabin and we bought the large pieces of furniture (all vintage, handcrafted or antique) over the last couple of years, which made furnishing it a bit less heart-attack inducing (except for the new mattresses -- argghhh.) I am very unwilling to spend any more money on this labor of love but we have about a number of 15 foot logs from trees that were cleared for the home. Surely, they can be of some use for the two sets of night stands I need, right? (The ones I love on line are $900 a piece! Really??) So thank you. I will incorporate your first technique with your second suggestion -- in other words, The Tree Stump Table without the legs but with a piece of felt glued to the bottom so it does scratch my floors. Thanks
Hi KA J - If one stump isn't big enough across for an night table, and you're looking for a bit of design, you could also get several smaller stumps or straight, thick branches and put them all together standing upright. Either glue, screw or use metal strapping around them to hold them together. ~ karen!
I just found your site yesterday while looking for chicken ideas! I made a stump table this past summer from an old discarded one the previous home owners abandoned and never repurposed.... Rude. Anyways...I actually "pickled" mine so it has a nice white stained look. I put a potted tree on it and call it the tree table for my tree to sit on. My family thinks I am insane. Love your blog!
Thanks Brie! ~ karen
Hi Karen,,,LOVE you!!!Currently figuring how to convert my awful backyard into yours..I will consider it over the long winter, and have a game plan for spring.
I was wondering where you got the fabulous sheepskin on the chair...I have been looking everywhere for one like that (even Scotland!) but cannot find one reasonably priced with long hair like yours...Help!
Hi Janet - The throw is from Homesense (which is the Canadian equivalent to Homegoods in the States). It was in with the blankets and such. It cost around ... oh crud ... I can't remember. I believe around $190 ... on sale. Good luck! ~ karen
Janet-I know you posted your question in 20 11, but I just read it! I got one in Iceland and they have/had an airport duty free shop,,,,
Love the table, but I have another question for you: How do you keep your fern alive? I'm currently in the process of killing one right now and I don't know what I'm doing wrong! I live on the Gulf Coast of Florida, so it's not cold yet....HELP!!!
Traci - Tell me where your fern is (inside/outside, sun/shade etc.) and what it looks like (yellow leaves/crispy leaves etc.) and I'll see if I can diagnose! ~ karen
I LOVE your tree stump table! In fact, I love it so much, I've made 3 of them since first seeing your tutorial :)
I recently started a blog, and posted about making the tables here (I linked it back to you, of course):
http://ksarahdesigns.typepad.com/my-blog/2011/08/diy-tree-stump-table.html
Anyway, this lazybones version looks pretty fantastic, too... I would LOVE finding a stump where the bark fell off an it's own, because that was definitely not the case with the 3 I made ;)