Welcome to my most mediocre of DIYs to date! The temporary magnetic letter board.
And this is why my blog isn't more successful. I should tell you this is my favourite DIY of all time and it's really cute and it will probably change your life (at least your pretend Instagram life).
But the truth is I only kind of like this DIY.
It isn't really the DIY that's bad although it is kind of clunky, it's more the whole idea of words on walls and letter boards. I'm not really a fan of either. They're just so ... something. I'm not sure what. I could say they're overdone, but I have lots of things in my house that are overdone. Helloooo Eames chair, tulip table, Danish Farmhouse kitchen.
I guess maybe I'm just not a huge fan of letter boards in general.
BUT I saw a letter board in a restaurant lately and it was done with magnetic Scrabble letters (also supremely overdone) on thin metal rails. I liked it. I'm not sure why. I wasn't even drunk or drinking or medicated.
So I set out to do a copy of it and that is what landed us here, at my most mediocre DIY to date. Hurrah!
It's a pretty quick and easy thing to do and I've made it so it's temporary, but you can make it permanent if you like. I'l explain that bit later.
DIY MAGNETIC LETTER BOARD
Materials
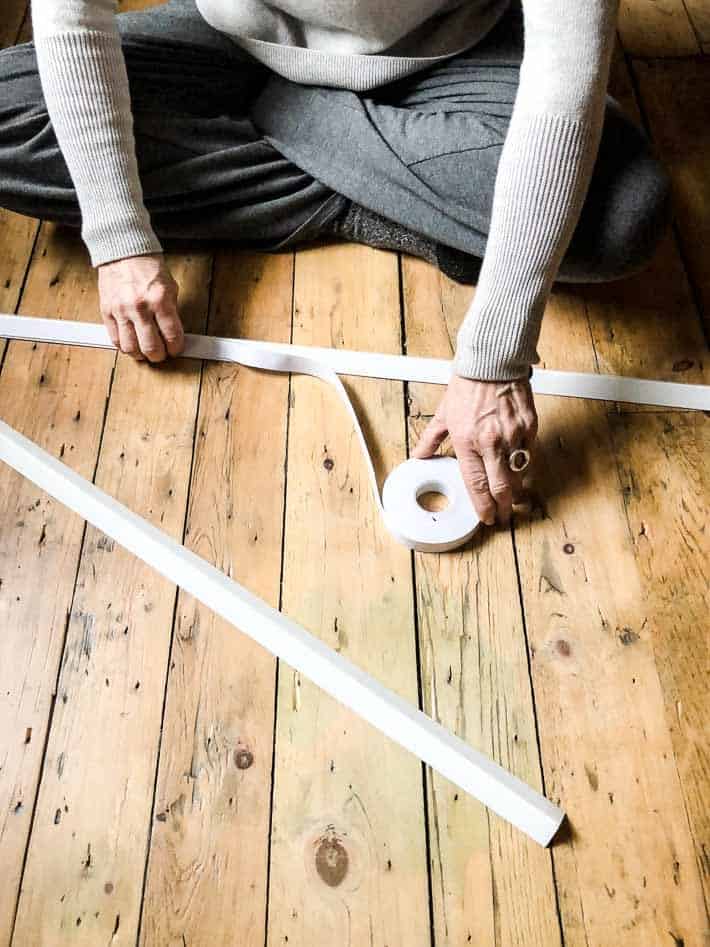
- ½" metal wall moulding used for suspended ceilings. 12' length. (You'll find this in a home improvement store. )
- Stick on magnetic tape.
- Scrabble letters.
- 2 way tape.
Costs (moulding, $10, magnetic tape, $8, Scrabble letters $7) - approximately $25 total.
I knew I only wanted this to be temporary so I'm using 2 way tape to attach the rails to the wall but be warned, 2 way tape will only hold something for so long (it's not a permanent solution) and it can mark your walls when you remove it if you really pressed it on hard. If you're worried, use Command Strips which work great. You'll need 3-4 for each rail.
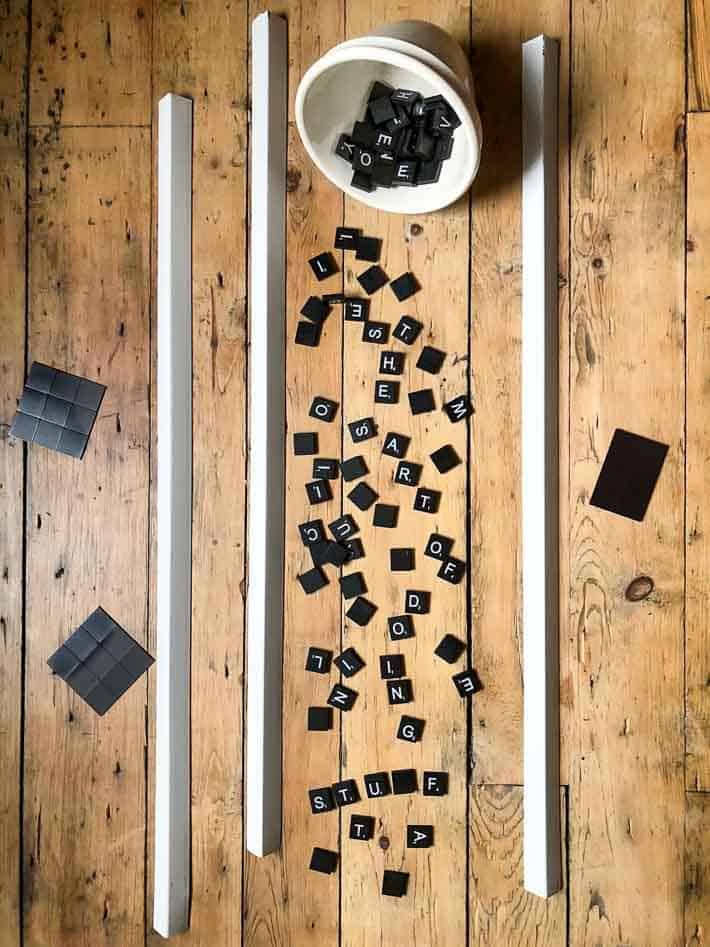
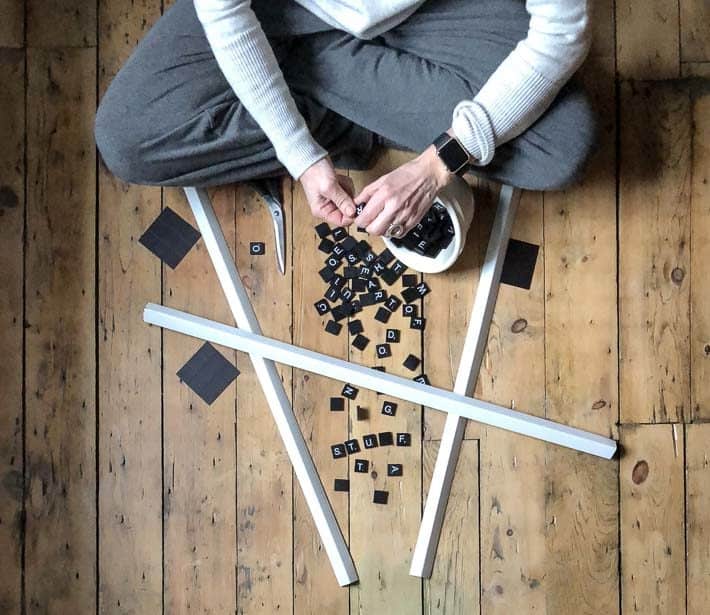
What you'll be doing is cutting L shaped metal rail to the lengths you want, also cutting some of the L shaped metal rail to act as supports or brackets. Then you stick everything on the wall and your rails are ready to use with Scrabble letters (that you've stuck magnets onto the back of)
If you're going to be doing big elaborate phrases or sentences get twice as many Scrabble letters as you think you'll need.
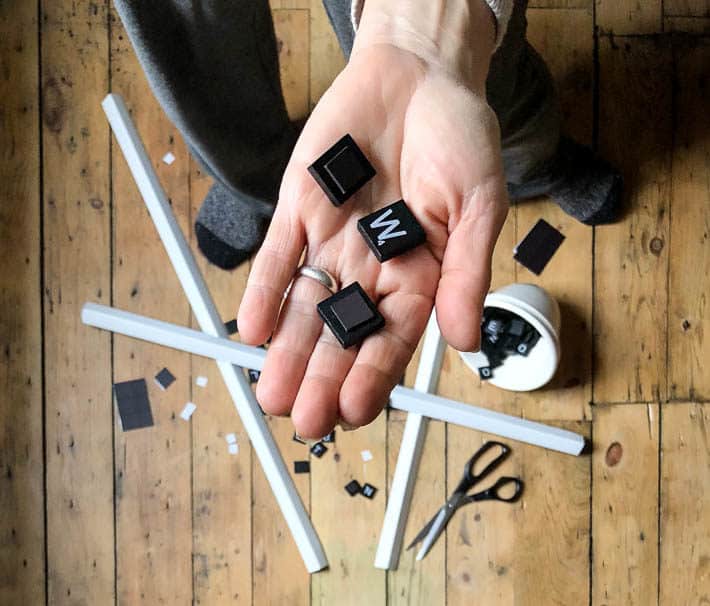
I used stick on magnets which are useless in almost any other situation, but worked great for this. (stick on magnets aren't known for their strength) I just cut them to size and stuck them on.
I used this foam two way tape that I get at Dollarama and I LOVE it. It's hard to believe that I have so many uses for it but I go through at least 2 rolls of it a year.
Would you like to save this stuff?
Like I said earlier, if you want to have a bit more confidence in your rails staying up throughout all of December or you're worried about the paint on your walls then pay the extra money and get some Command Strips.
I honestly just couldn't be bothered to go to the store to buy some.
O.K. now we're entering the portion of photos I took when the sun was going down so the quality is terrible, but you'll get the idea.
They're mainly so you can understand how you're going to hand these L shaped mouldings onto a wall.
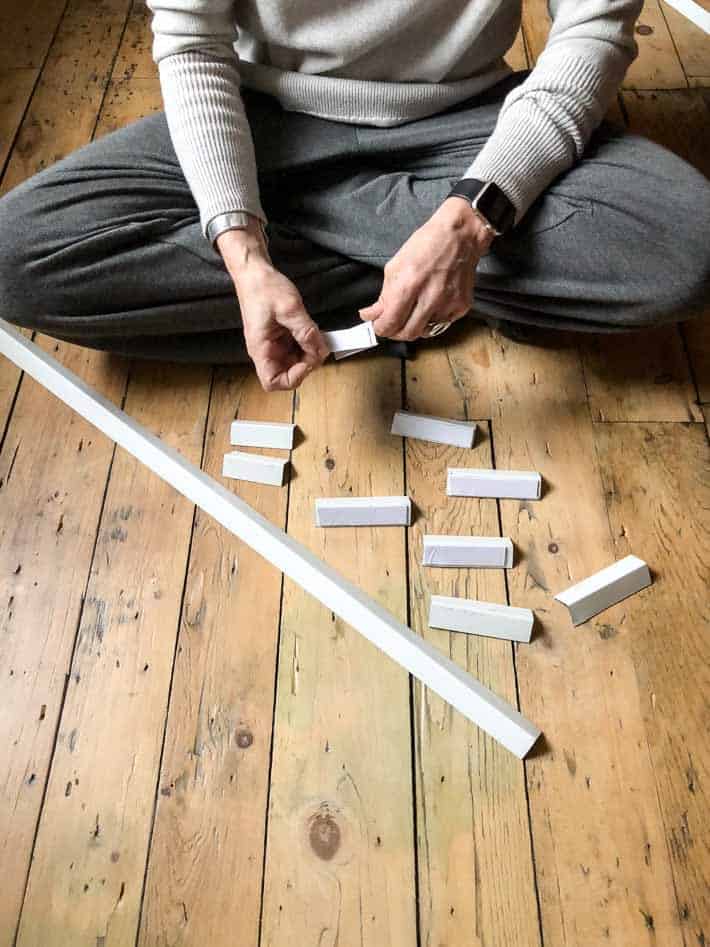
You can see above that I have a bunch of 4" or so lengths of moulding. They will get stuck to the wall to act as a support for your long rails.
Like this ...
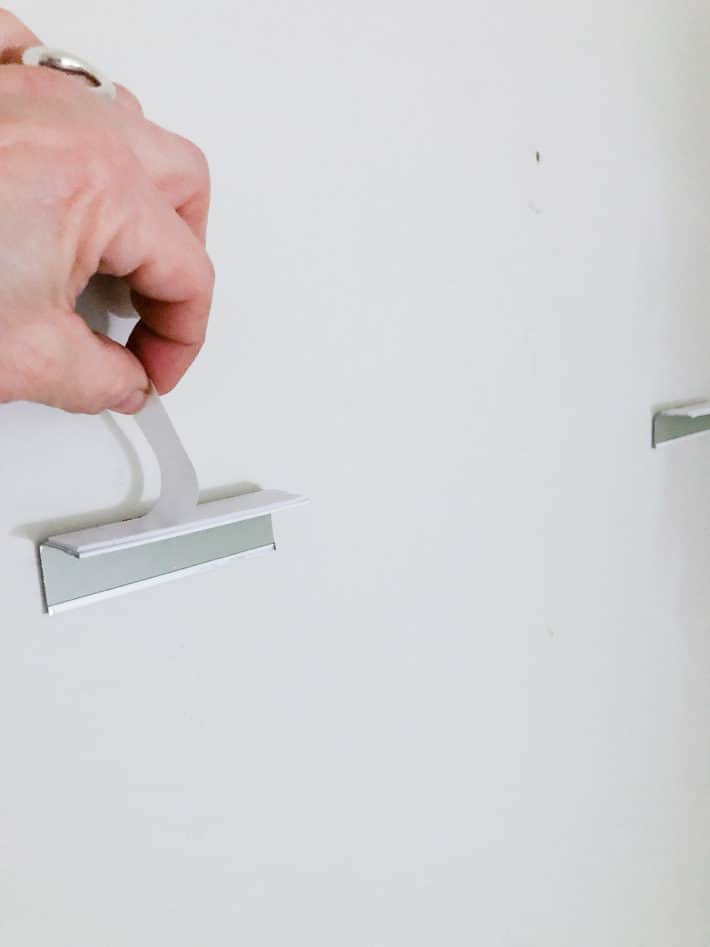
They need sticky stuff to adhere to the wall, and sticky stuff on top to adhere to the rail you're going to set on them.
See? Really bad photo.
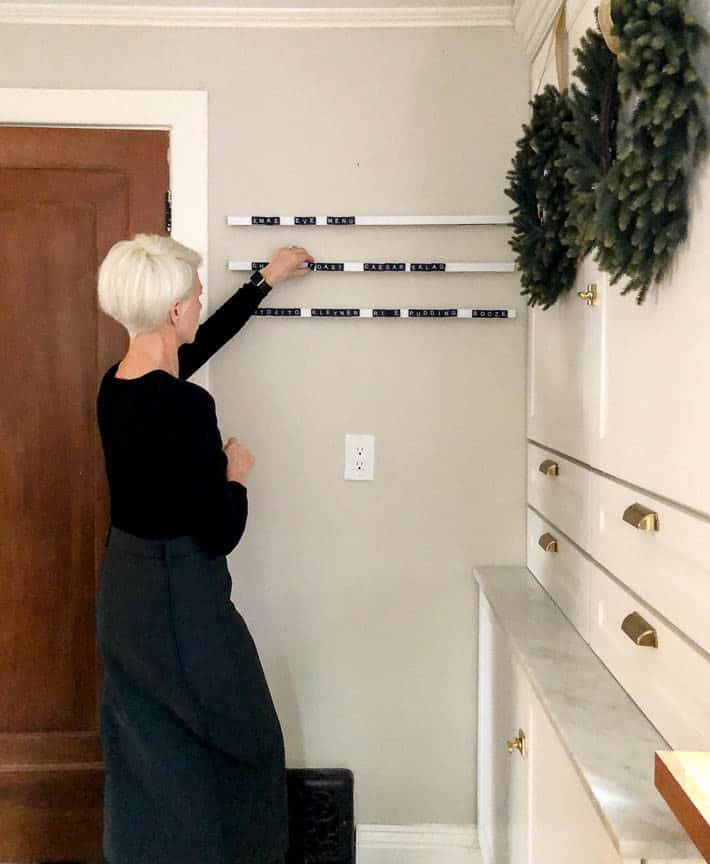
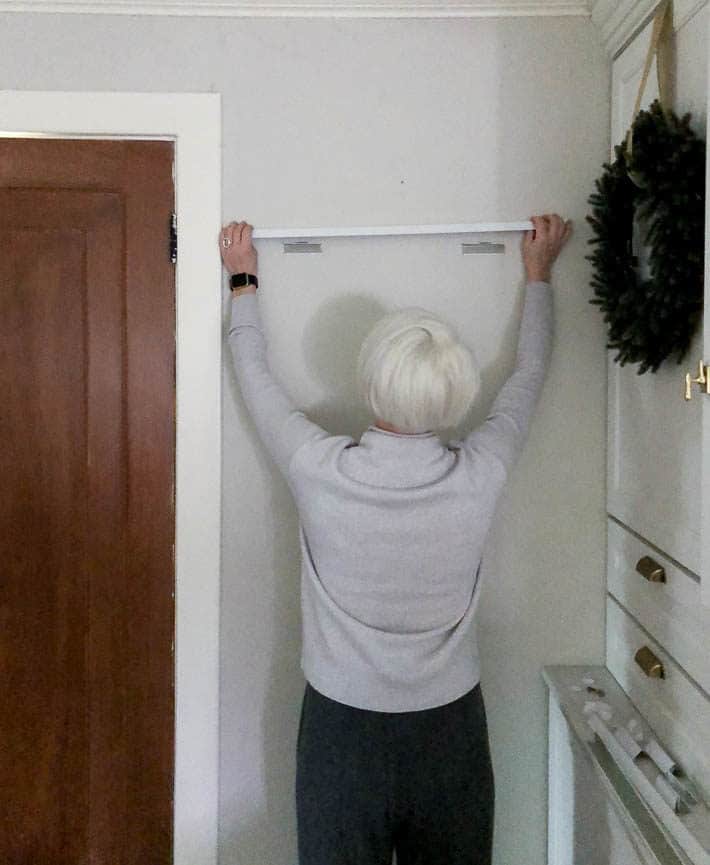
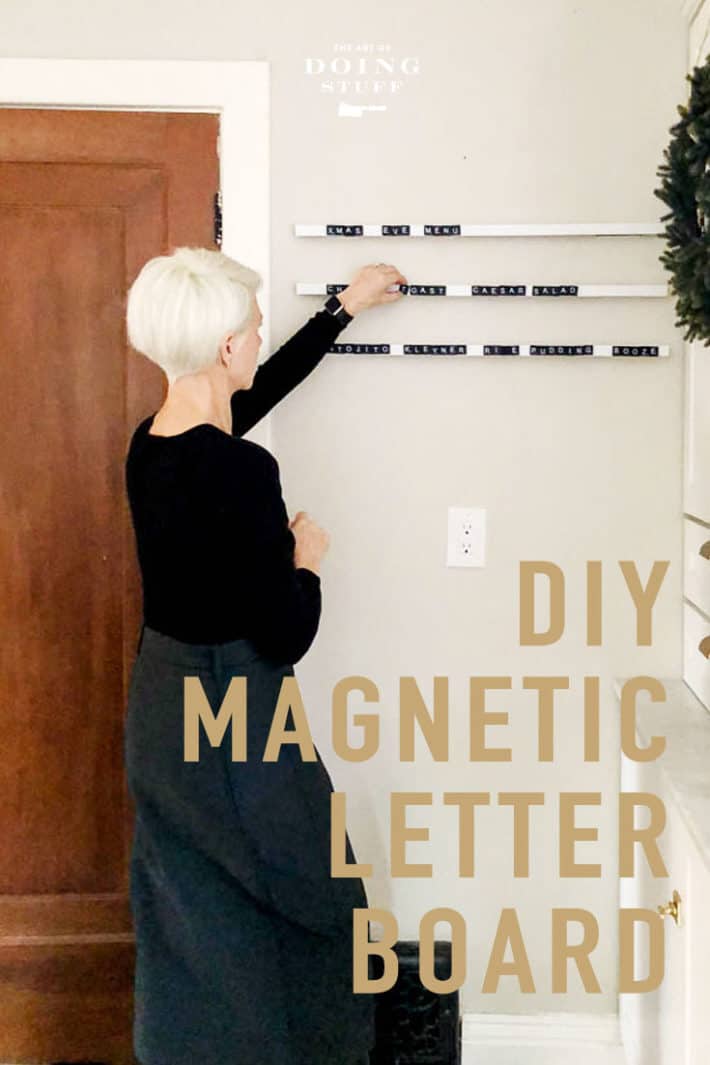
Once you set your rails on the supports, everything is stuck together and it's time to add your Scrabble letters.
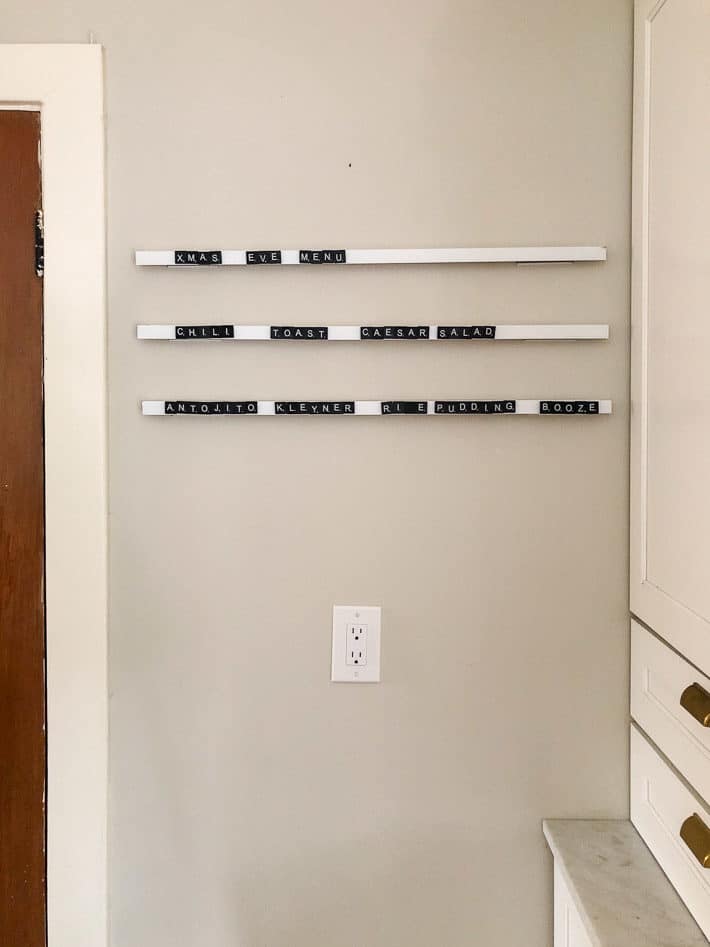
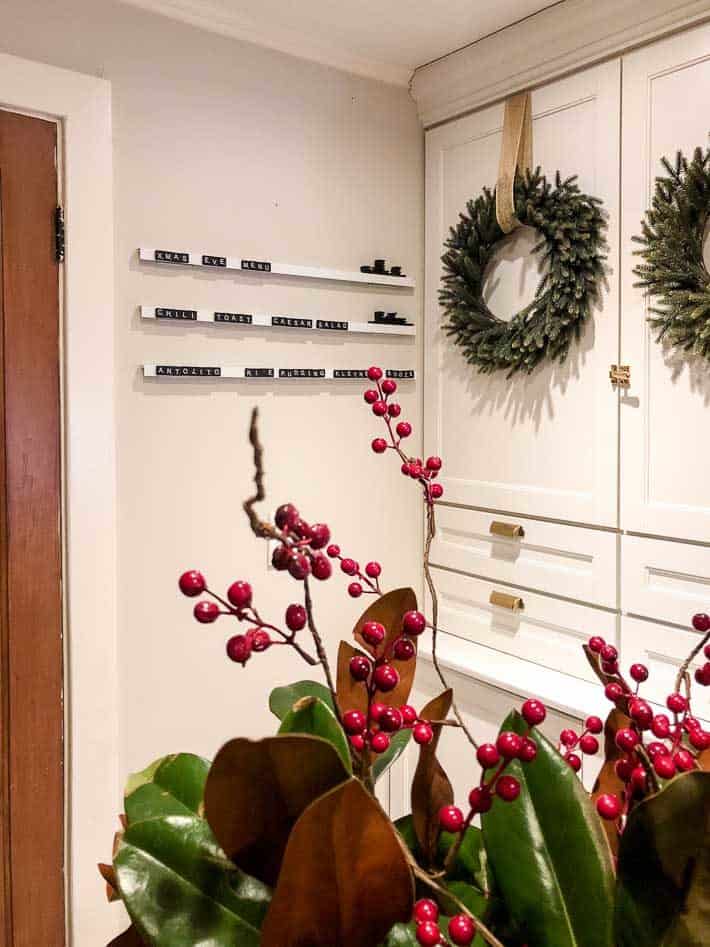
Behold my Christmas Eve Menu which is subject to change at any time. The rice pudding recipe is coming up on Wednesday by the way. It's a Danish tradition to have rice pudding on Christmas Eve. But it's not just regular rice pudding, it's Risalamande, almond rice pudding.
But back to this mediocre DIY ... here are the detailed instructions.
Instructions
- Have someone in the home improvement store cut your metal wall moulding in half. Unless you have a truck, a 12' length of anything is going to be too long for you to fit in your car to get home.
- Cut the magnetic tape into small squares and stick them to the back of the Scrabble letters.
- Cut your wall moulding into the lengths you'd like, making sure you have 8" of extra moulding for each rail. (you need that for attaching the moulding to the wall)
- Cut 2, 4" lengths of moulding for each rail you have to act as supports.
- Run 2 way tape down both sides of your rails and supports.
- Using a level mark where you'd like your rails to go on a wall and stick the supports to the wall by peeling off the tape backing and pressing firmly onto the wall.
- Peel the backing off of the adhesive on top of your supports and place your rail on top.
- Repeat for all the rails you have then start placing your Scrabble letters!
TIPS
- Make sure your metal rail is magnetic! Also make sure it's lightweight, but not aluminium because aluminium doesn't have magnetic properties.
- If you want to make this permanent screw the supports into the wall as opposed to sticking them.
- Don't feel like you have to use the L shaped mouldings. They were just the least expensive option I could find.
- For cutting the metal at home use a hacksaw.
- When you cut the metal moulding FILE THE EDGES. The edges will be extremely sharp after cutting them so file or sand them until they're dull.
My most mediocre DIY - make it or don't. I don't give a care.
(as all the most successful and non-mediocre of bloggers end their posts)
→Follow me on Instagram where I often make a fool of myself←


Myrna Blair
I made this today - and put “Santa! I know him!” (Quote from elf). It now says “Satan! I know him!” This could be fun! I love my teenagers.
Karen
Ha!!!! That's great! Both the original quote (my favourite line from Elf!) and the rewrite. ;) ~ karen!
Sheila
Love it. I love scrabble. I love words and I love DIY. It all works for me!
Is there a scrabble store where you can just buy the letters? I'm not quite handy enough to cut the rails nor do I have a space for them but I could find spots to put scrabble letters around and wait for the ensuing fallout of swear words to appear.
Ok, never mind....I just saw the link! I was too excited about leaving corny messages all over the house!
You rock!
Shelagh
.....and I love how you showcased this floors again by working on the floor instead of a table! Hahaha