To those of you who emailed ... Is it done? To those of you who asked ... Did it work? To those of you who commented ... Will we ever see it?
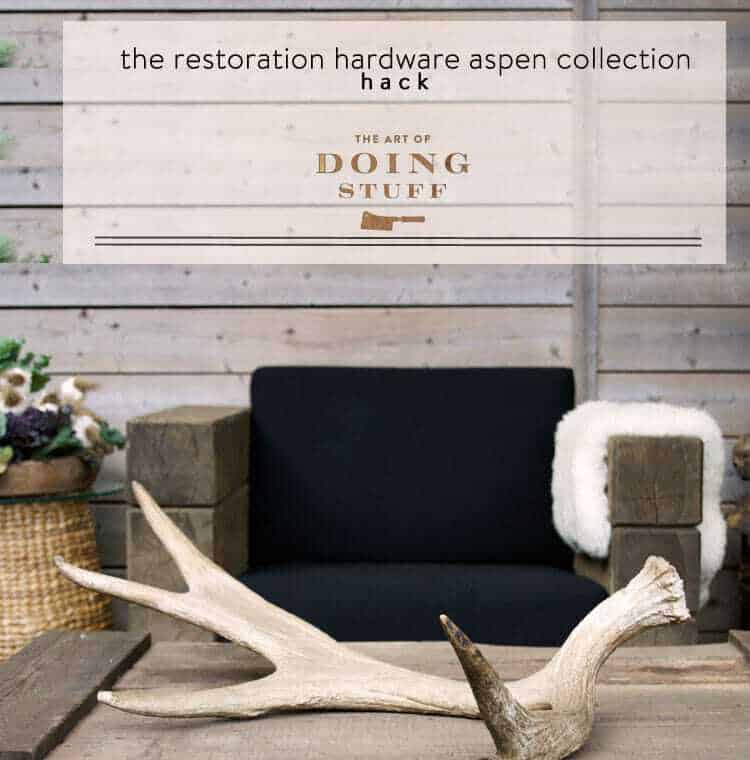
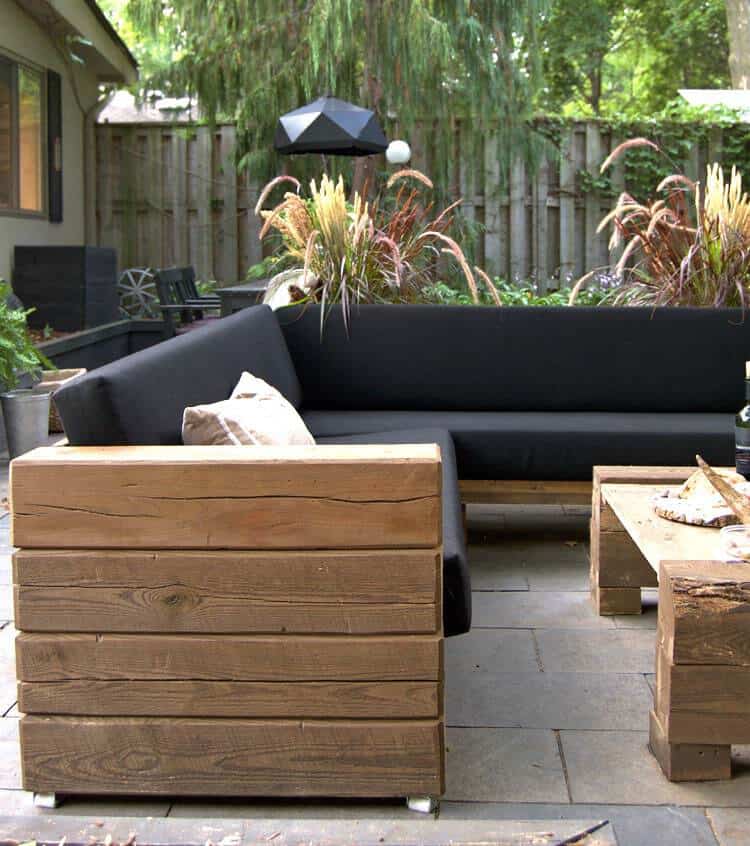
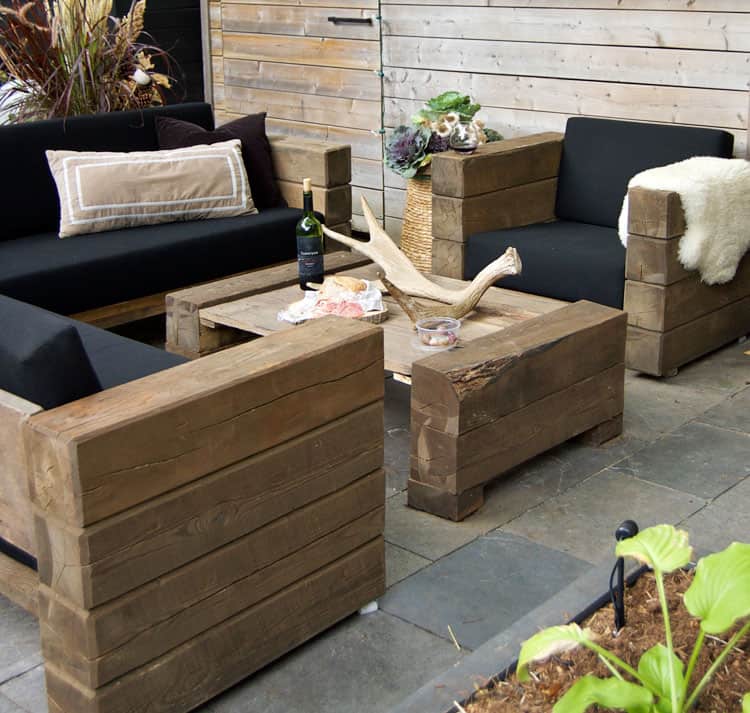
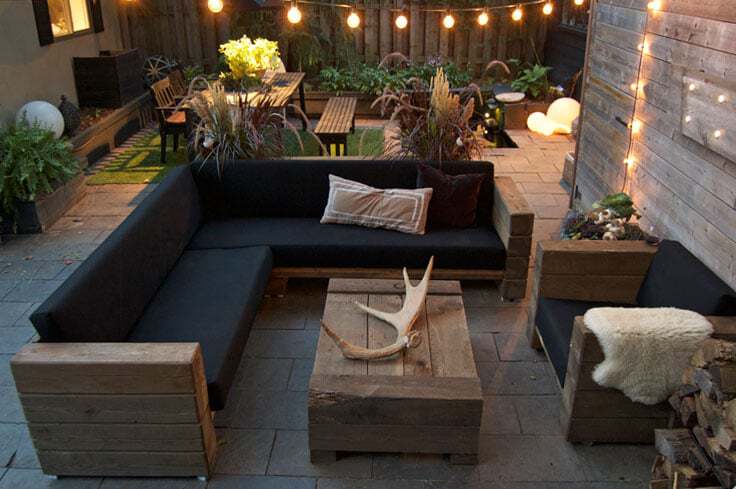
The answer is yes. I got butt implants, they totally worked and maybe a lucky few of you. Also I finished my hack of the Restoration Hardware Aspen Collection. Just in time to pack it away for winter!
I'm not going to interrupt your scrolling with too many words in this post.
Because the clumsiness of my words will only detract from the beauty of my hack.
Although I should mention I haven't actually finished the coffee table yet. I still need to chamfer the edges (I'm holding out until someone decides to give me a router and chamfering bit).
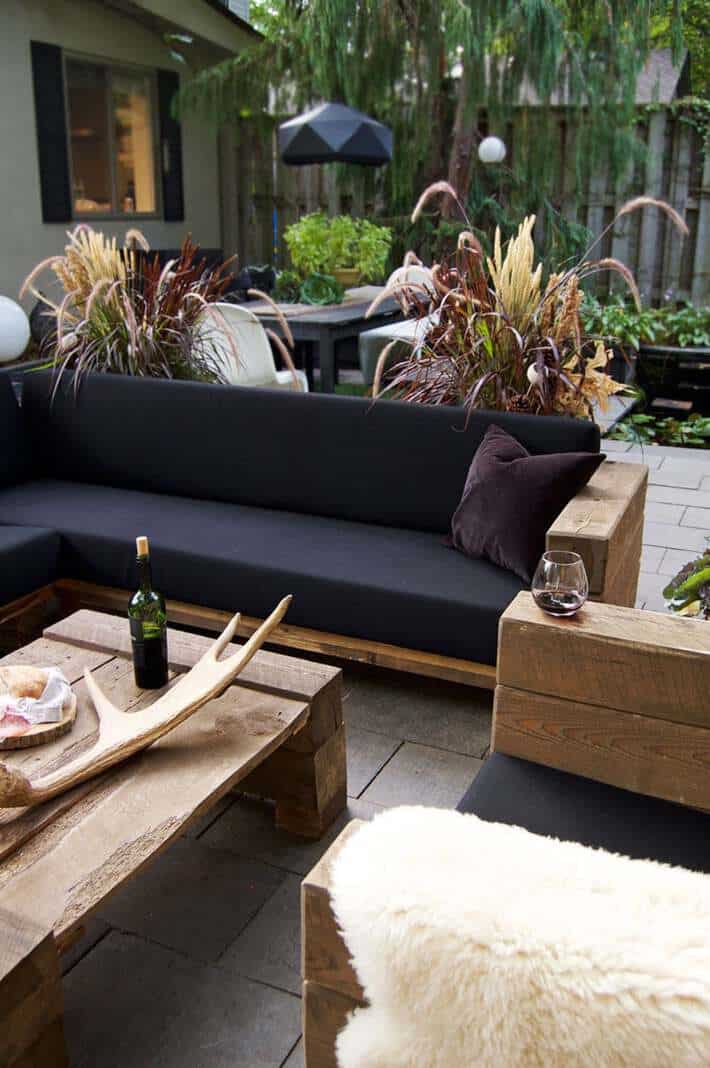
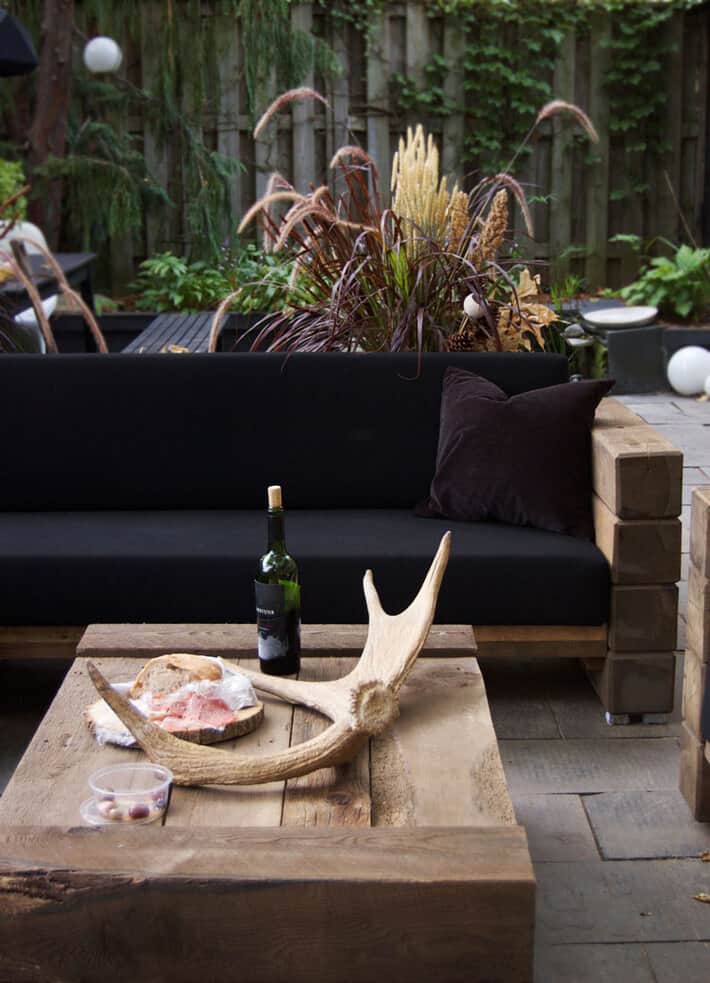
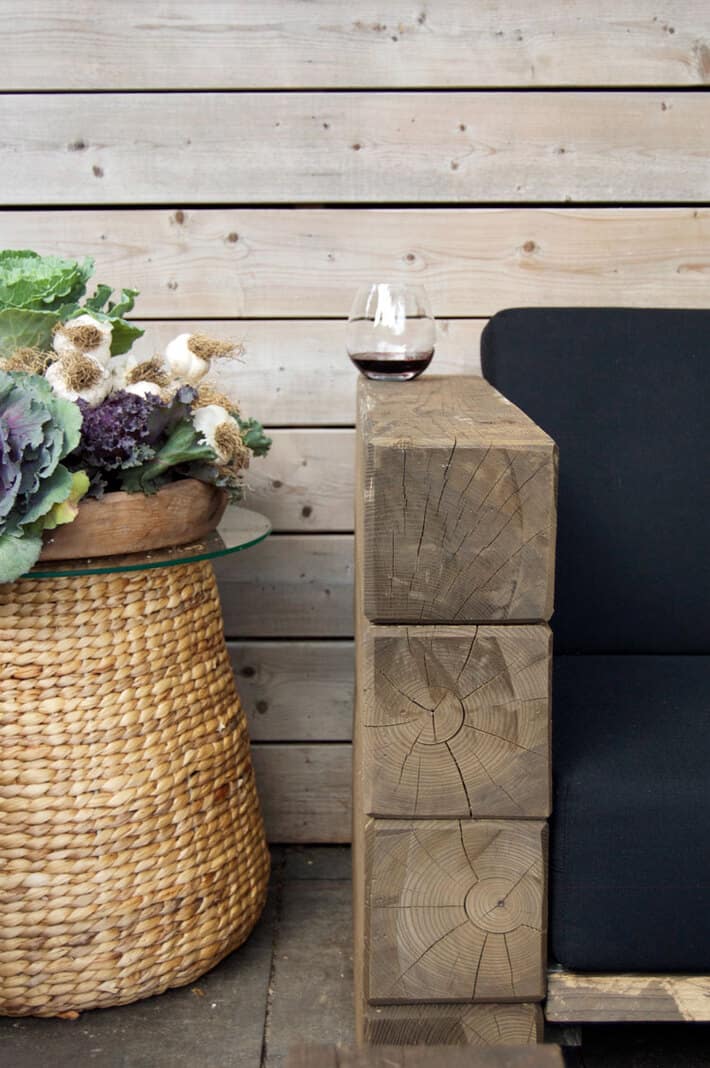
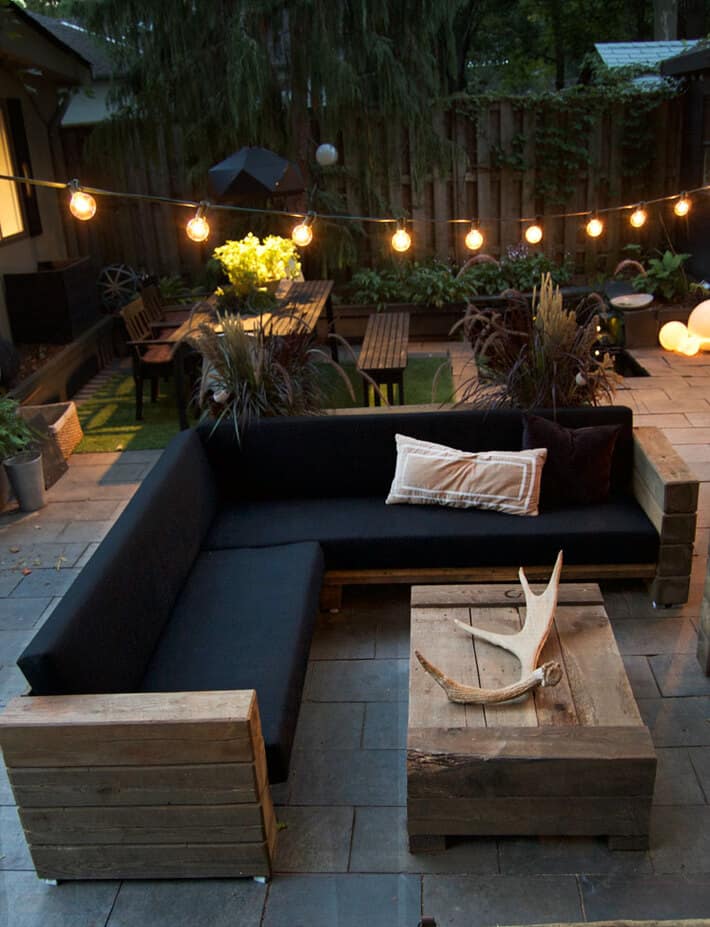
It is not a lightweight collection. Knowing I'd have to move it around eventually I decided to put it on casters. The only casters even remotely strong enough to support it were appliance casters. I wouldn't say it makes the sectional exactly slip across the backyard like a letter carrier on ice, but ... it can be done.
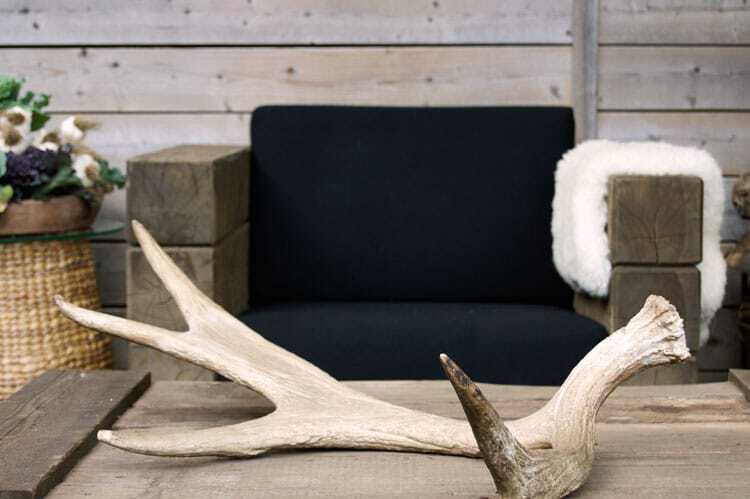
That chair there? I have relaxed in that chair. Not for long, but long enough to be able to claim I've relaxed in that chair.
 There were more than a few hiccups along the way. Which could have been due to the wine now that I'm getting a good look at the whole picture.
Would you like to save this stuff?
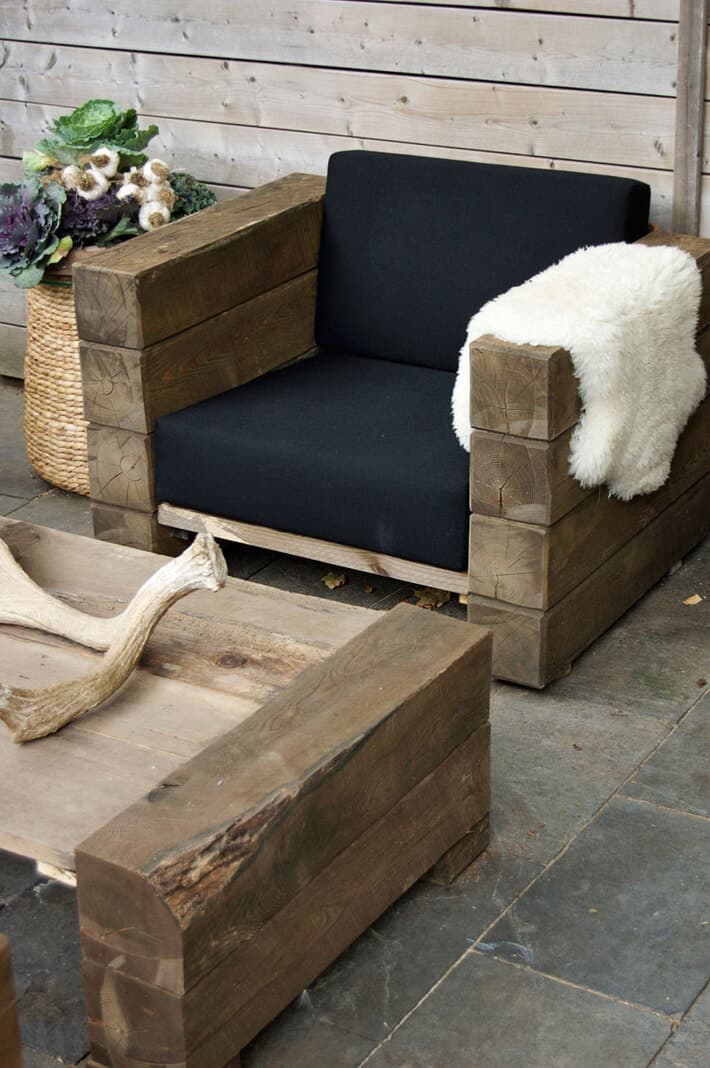
The chair's seat and back are at what is considered the perfect sitting angle, 100 degrees. So the seat of the chair slopes towards the back a bit and the back is at a similar angle, making you feel cradled.
I wanted to have the same angles for the couch and built it that way until I realized that you can't have a sectional couch built like that because once you get to the corner your angles are going all sorts of different directions.
DAMN YOU MATH.
So I built the seat straight on the sectional and fiddled around with it by adding extra bits of lumber here and there to sort of fake an angle. More on that in a later post where I focus on how I actually built this thing.
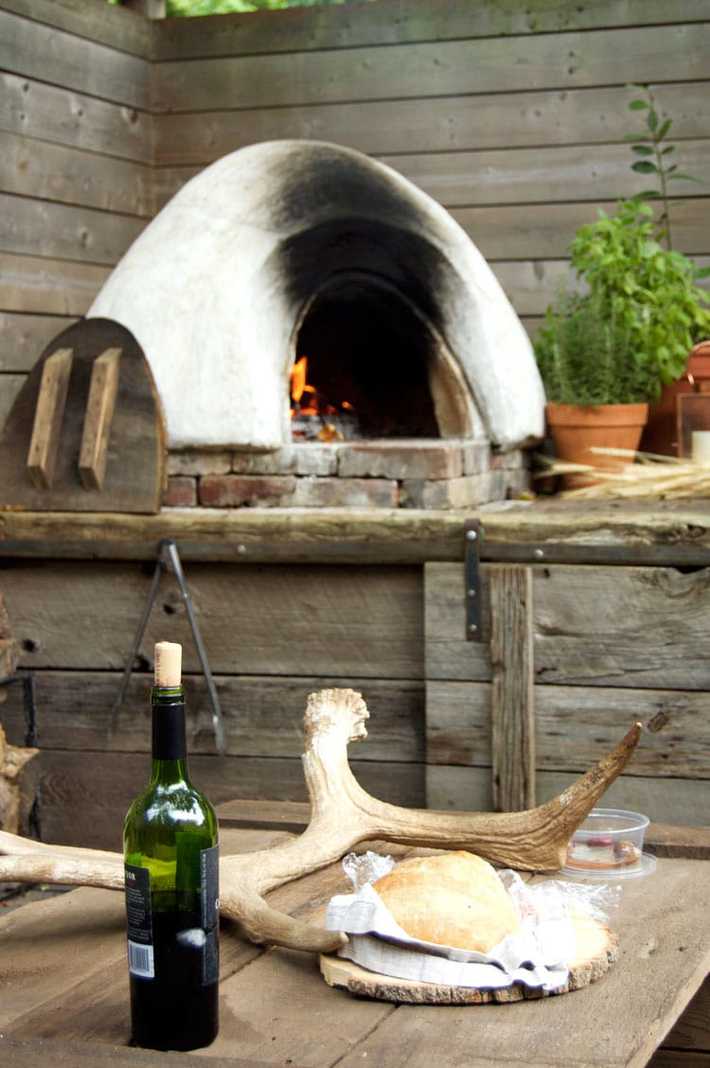
Bread, olives and wine. The PERFECT snack ( if you replace the wine with Diet Coke).
The next step is to make or buy some sort of cover for the whole thing. A pergola is out of the question because that'll be just a bit too much going on in this little backyard of mine. My choices are either a couple of those sail cloths or one of those massive cantilevered umbrellas.
I might get a few weeks of sitting out here if the weather cooperates. And the butt implants.


Melinda Holliday
Hi Karen, did you ever end up having a plan made for this project. I’m dying to try it. Thank you!
Kelly
Gorgeous! Does the black fabric show the normal dust & dirt from being outside? Would you choose it again?
Karen
Hi kelly, thanks! It doesn't really show the regular dirt which is a good thing and a bad thing. I wiped the sectional down yesterday with a white cloth and saw just how dirty it was! It does however show the pollen in the spring. But that's also not a bad thing because at least you can see it to know you need to wipe it down. :) ~ karen!
Salwa
omg this is so gorgeous. I like it better than the RH version. I cannot find plans. Do you have plans for the furniture?
Also what size timber is that? And what type of wood? I assume 8 x 8?
salwa
nevermind! Reading through older posts!
Karen
:) ~ karen!
Stephanie
I have restoration hardware cushions for this project
Sand color so nice if anyone doing this in Pittsburgh
Nicholas Meyer
Hi I really love the look of this outdoor furniture and would really like to make some for my house as well. Do you have a list of what sizes and cuts you did to make these? What size were the large pieces of wood? I would love to hear from you about them! Thank you
Laurie
It’s beautiful. How did she connect the sectional? The corner piece. Are there plans?
Madonna Witte
Karen,
I am now prepared to take on this project...chair, love seat, couch and coffee table. Are you interested in sharing your tool list and or your design plans and materials list? I am sure I could eventually figure it out, but I would be happy to pay for your most awesome work!
Thanks for your excellent work and your consideration!
Madonna
Karen
Hi Madonna! My dream is to have the time to get someone to do up plans for me for this furniture because so many people love it. I tend to just build things without plans. I just start building. So I never, ever have them for anything I do. Getting plans or a better post on the building of this furniture is my top priority for this summer. However, it's still FREEZING cold here for some reason and I haven't even uncovered it yet. ~ karen!
Natalie
Hi there your pieces look great, I'd love to build the sectional do you have pics of the back of the sectional? Im trying to figure out how you joined the 2 pieces and what the back support looks like? Or, do you have a video on the complete build?
chris vanden heuvel
These look awesome! I'm going to try it myself, but building to suit some quality cushions we found on sale.
Do you have a post where you show the detail on the corner where the sectional comes together? Wondering how you built that - especially the back supports? Is it two pieces or one?
Also, did you just space 2x4 pieces every 20" or so under the seat planks for extra support?
Thanks!
Karen
HI Chris. I hope to do a full tutorial this summer, including what I did on the back (which is a little inelegant but works). It's a 6x6 cut to the height of the back supports, which are then attached to the 6x6 with L brackets. ~ karen!
Aaron
I’m really curious about the back of the sectional. How is that constructed? Specifically, how is the actual backboard supported in the corner section? It seems to me that there has to be a support to prevent flexing. How did you go about doing that?
Christian
Hey Karen! Phenomenal job ! Can you help me get an idea on how to connect the back Corner as well as the dimensions, please and thank you!
Karen
Hi Christian! Thanks. I'm so sorry, I keep promising I'll get a picture of the back and then I don't. It's in a corner against a planter bed you see so getting the photo involves pulling it all out. I absolutely promise to get out there as soon as the snow is gone. In the meantime, the corner is basically one of the 6x6's upright to the height of the backs of the sofa supports. Right at the corner. Then the backs supports are attached to it (at a slight angle) with L brackets. It's a bit of an inelegant solution but it works and didn't require super-weird angles that I just knew I was going to get wrong, lol. ~ karen!
Thomas
Hi Karen, nice work. Did you use pressure treated lumber? And how did you achieve that finish? Thanks!
Thomas
Actually, I see you posted an answer to the staining to Jason.
Karen
:) ~ karen!
Karen
Hi Thomas! Thanks! There are a series of posts with the answers you're looking for from how I stained them to how I distressed them. NOT pressure treated wood. Solid Ash. ` karen!