This week I replaced a broken tool handle with... the same broken tool handle. It was for my stirrup hoe, and I would now like to know why this has never occurred to me before. Garden tool handle repair is surprisingly simple—especially when you skip the math and let desperation take over.
I have no fewer than four tools that slice weeds off at soil level, because I take personal satisfaction in dandelion decapitation. My stirrup hoe (Hula Hoe, scuffle hoe ... all the same thing) was one of my 4 favourites—until it snapped in half and became slightly less useful.
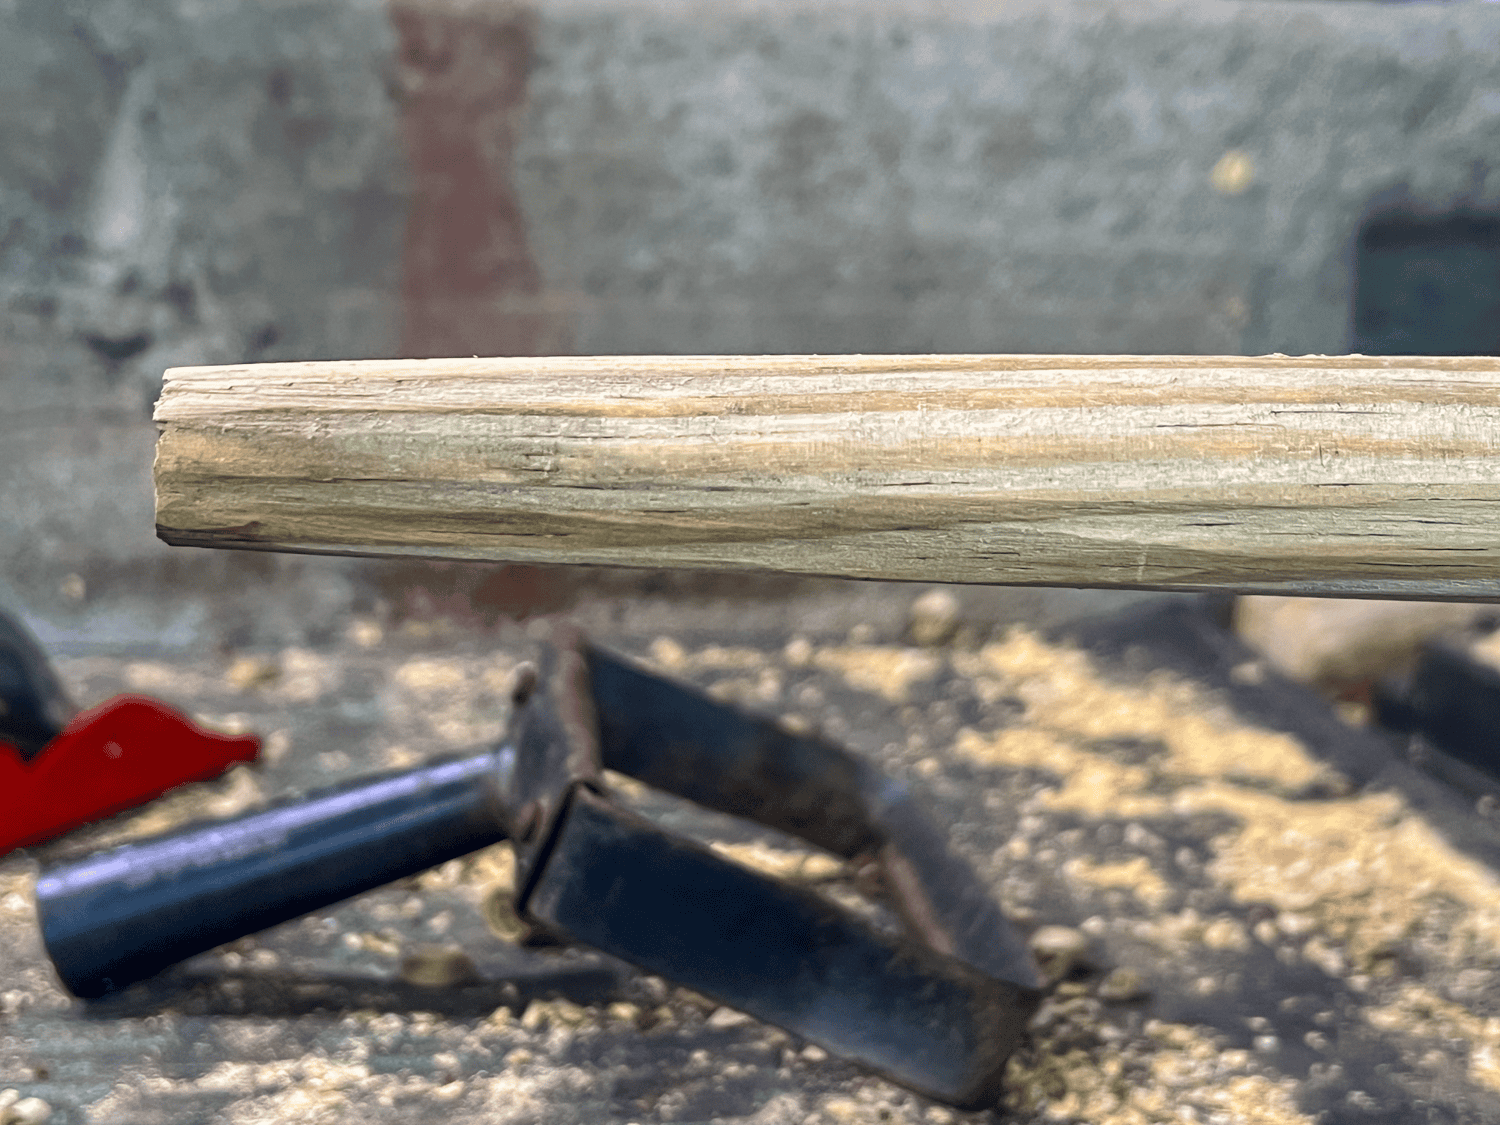
The handle wasn’t rotted. That’s the key detail here. It was solid. A pretty clean break. The kind of thing you look at and think, Oh. You still have potential. You just failed spectacularly.
Basement Descent & Other Risks
I ran down to the basement with the broken hoe.
And by ran I mean descended carefully down my 1840s death stairs into a space built by someone who believed in the structural integrity of loosely stacked rocks. If I'm being honest, they're less stairs than ladder. A sladder.
The only thing that truly runs down them are centipedes.
I’ve replaced wood handles before, but for whatever reason, it never occurred to me to reuse one until now. Here’s the full shovel handle replacement process if you're doing that instead.
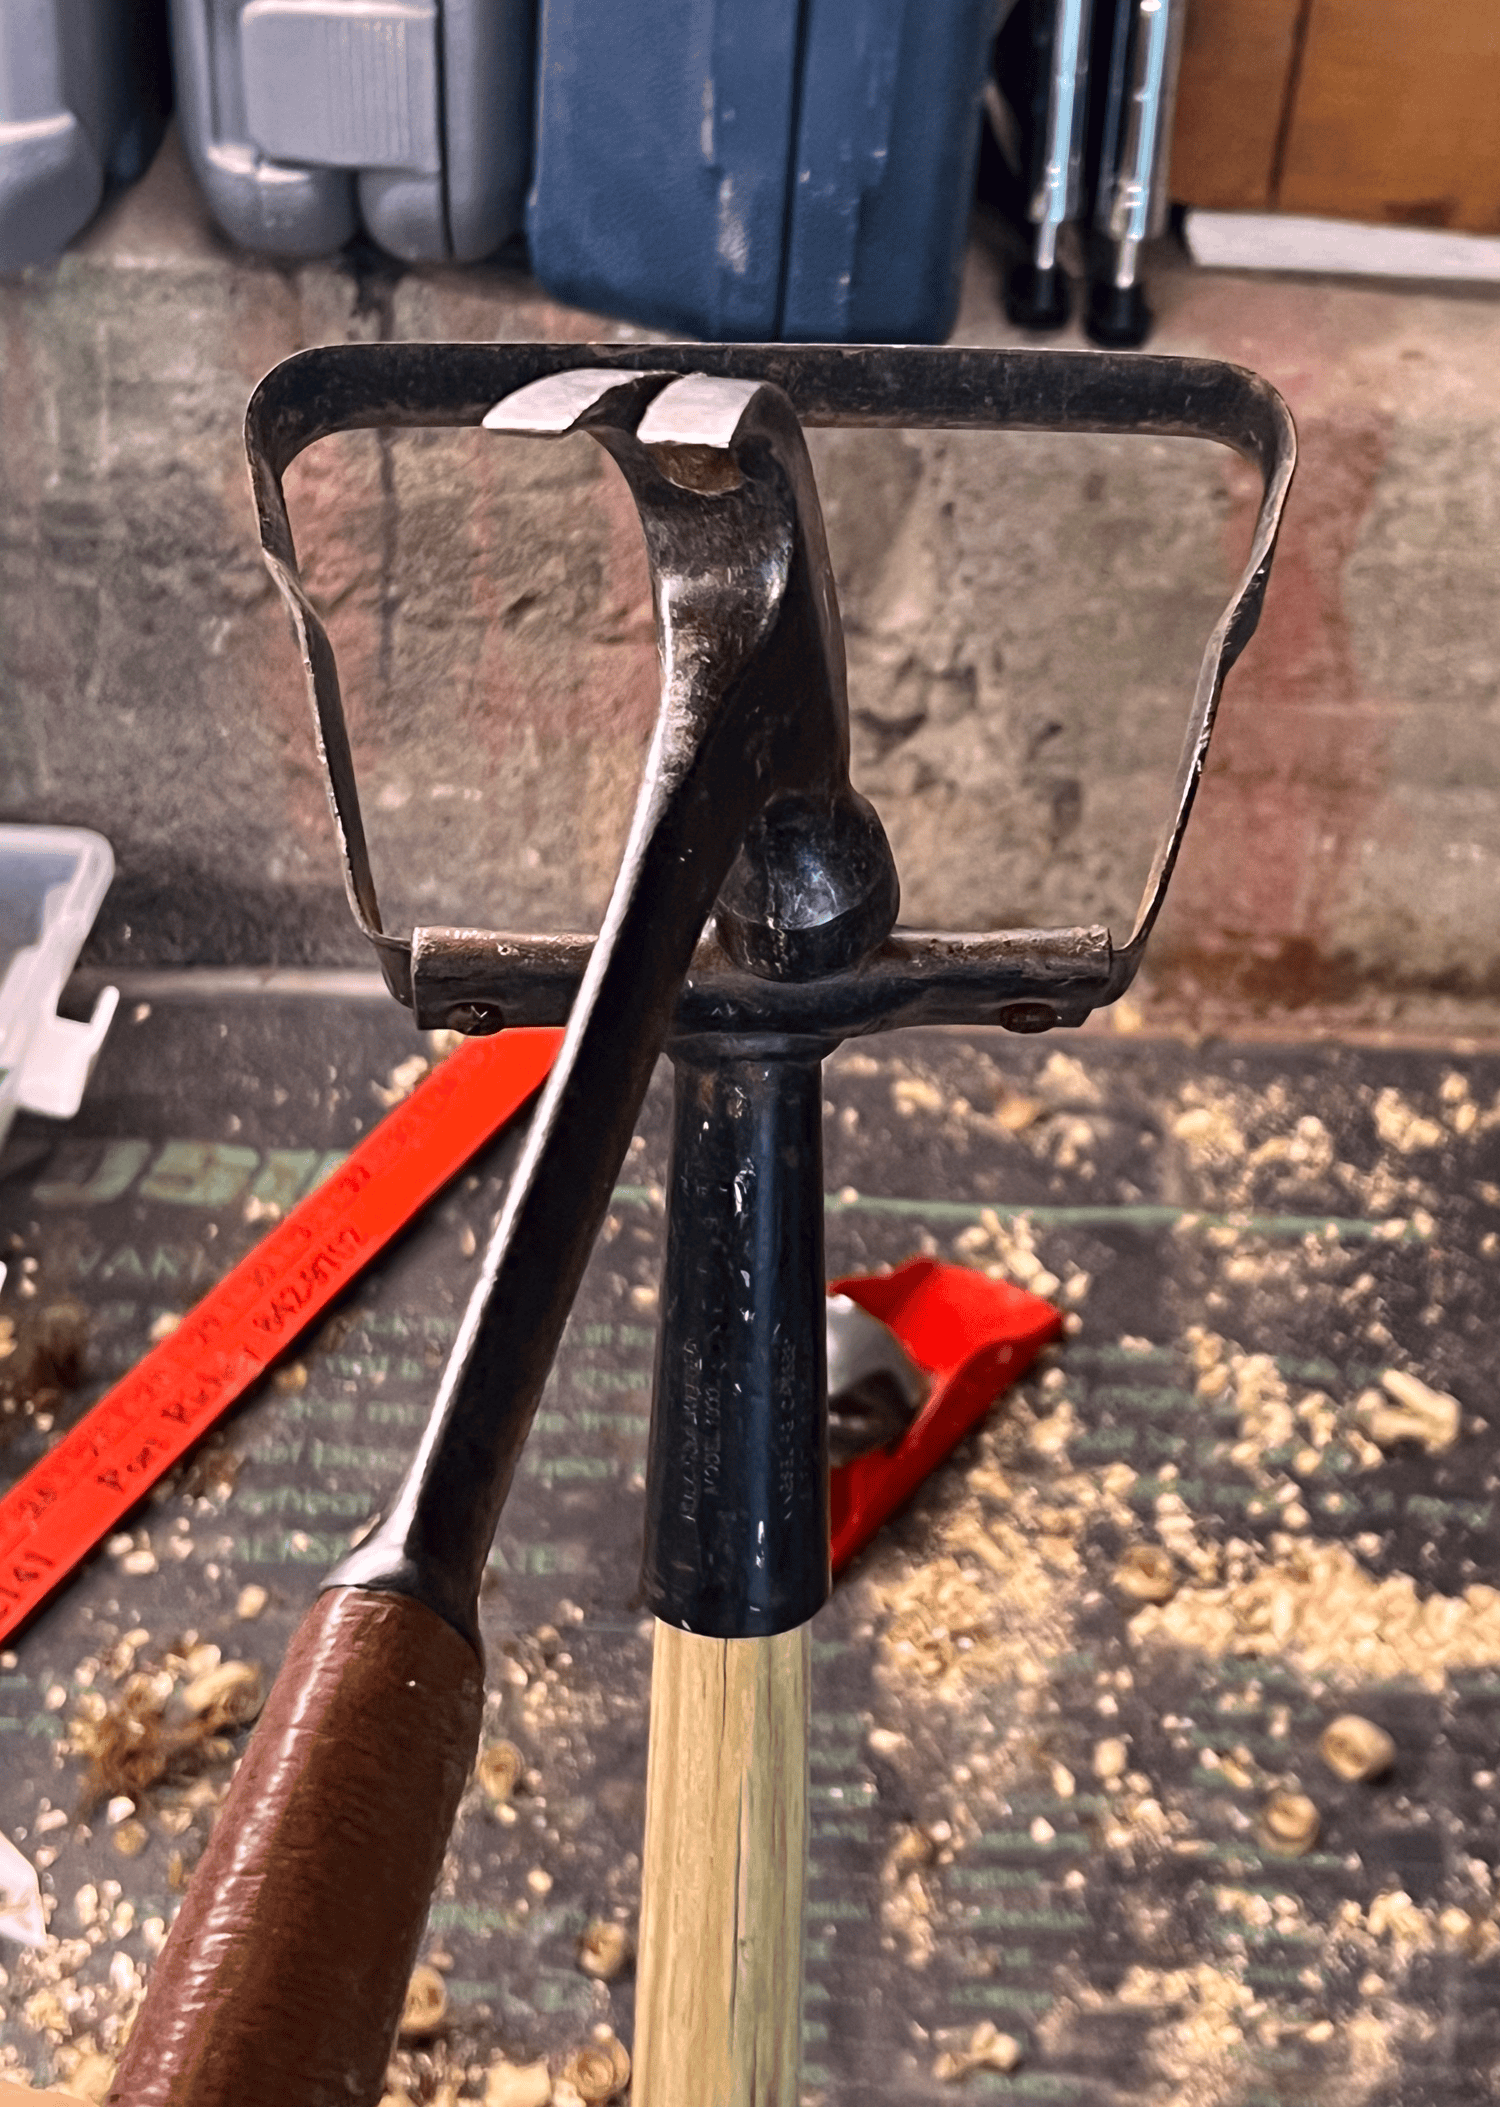
Once down in the basement, I realized I couldn’t just saw the broken end flat and call it a day. The Hula Hoe head needed a tapered fit. Like a wedge. Something with shape. Precision. Possibly geometry.
I couldn't be bothered to dig out my belt sander so I grabbed my little 6" handheld planer.
How to Reuse a Garden Tool Handle (Step-by-Step)
It's surprisingly fast and easy. This isn’t a restoration. It’s a strategic act of impatience.
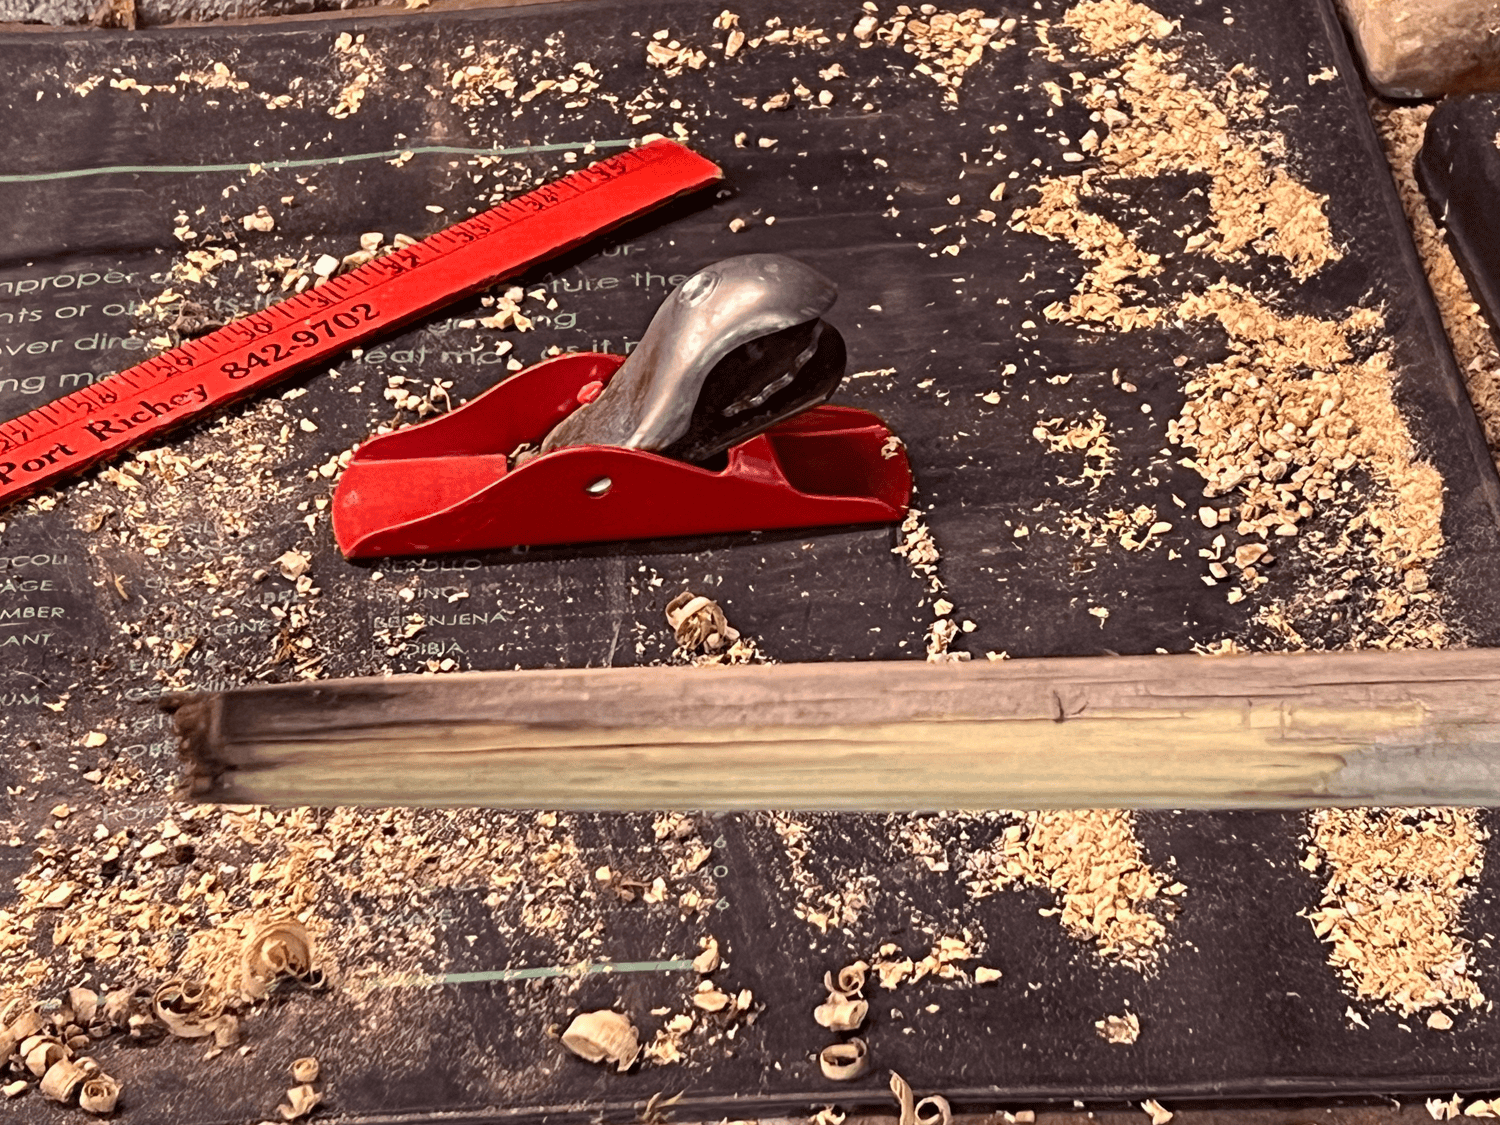
Step 1: Cut the broken tool handle down to solid wood.
Step 2: Use a hand planer to slowly shave it into a tapered shape.
Step 3: Check the fit often. If it’s tight, you’re doing it right.
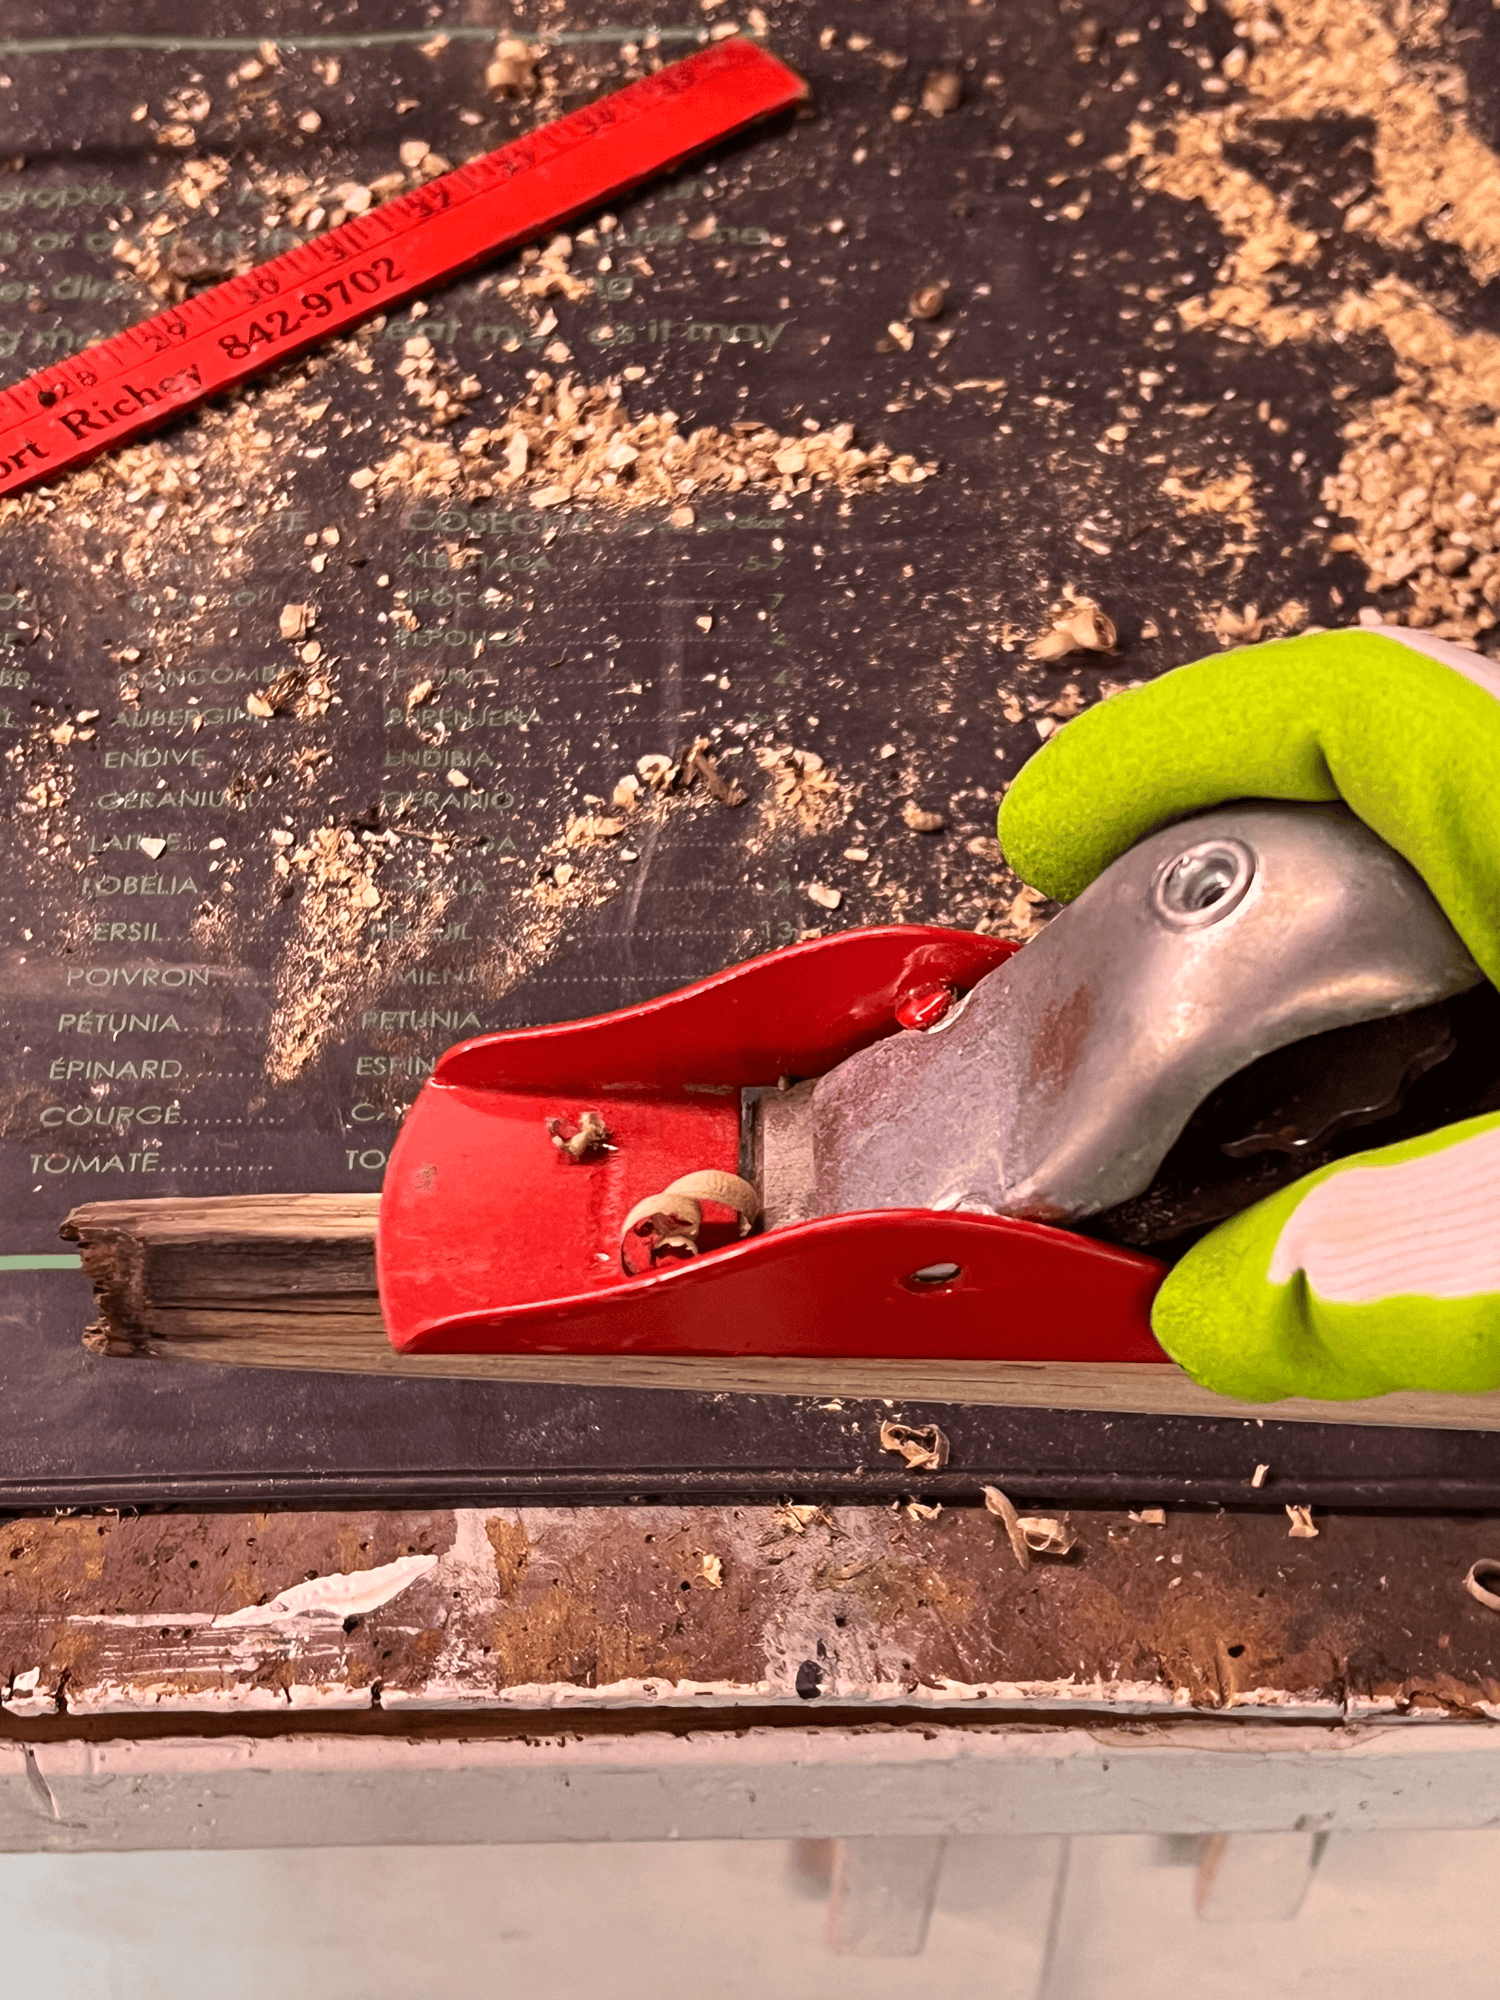
TIP: Use a rubber palmed glove to hold the planer so you have a really good grip. It makes the job easier.
Would you like to save this stuff?
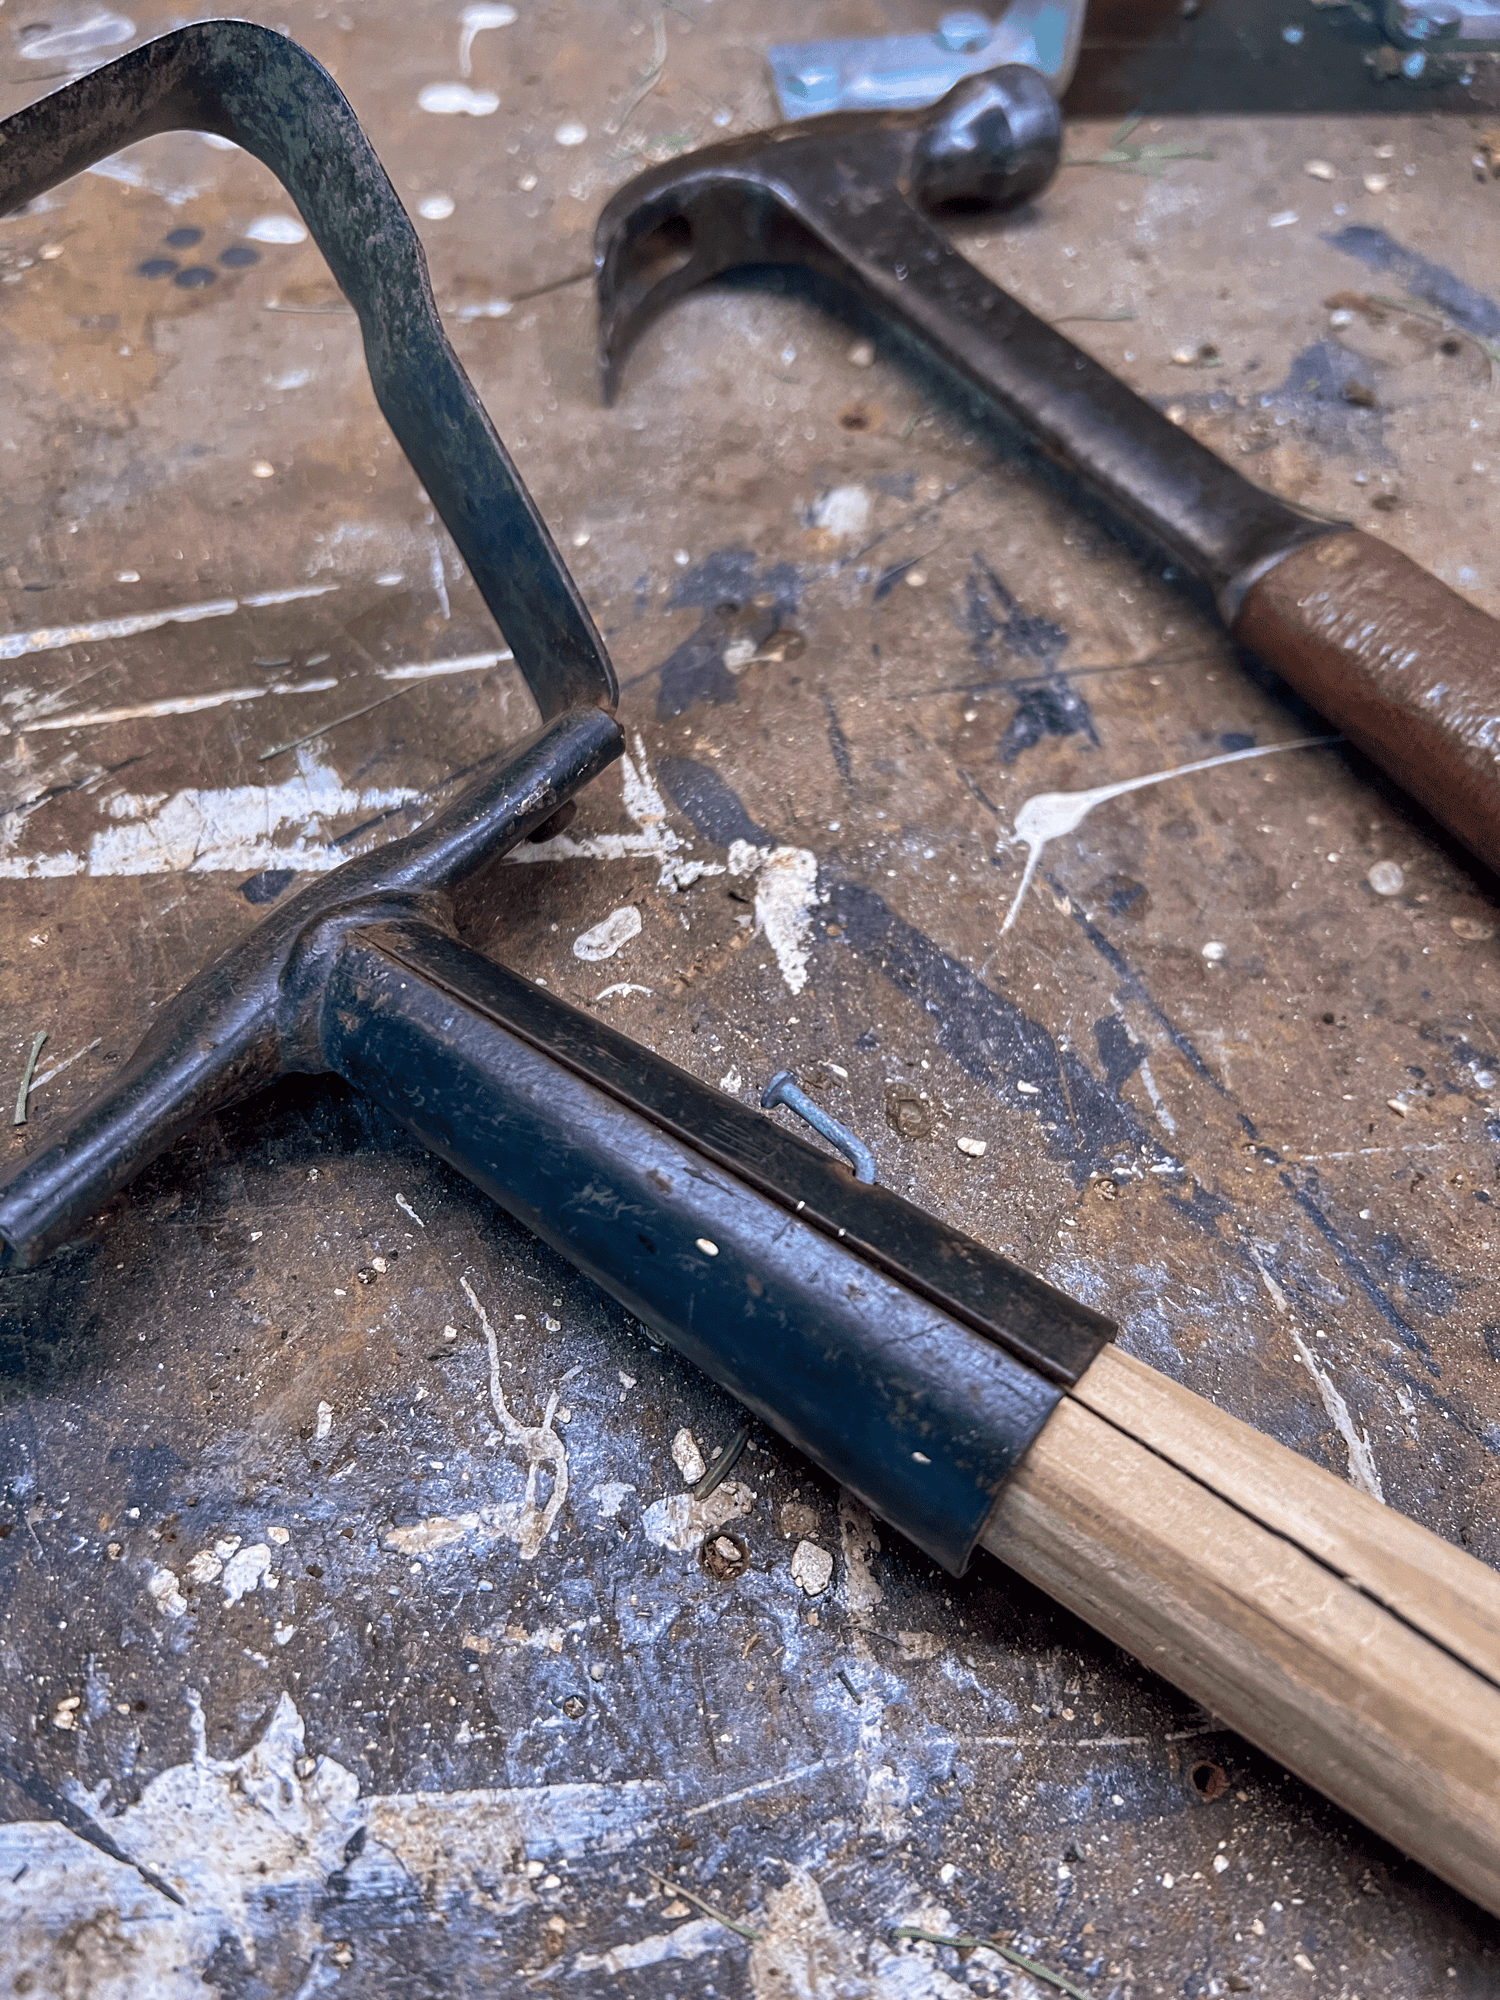
Step 4: Once shaped, test it in the socket. It should be tight.
Step 5: Tap it into place with a mallet or hammer to set the handle.
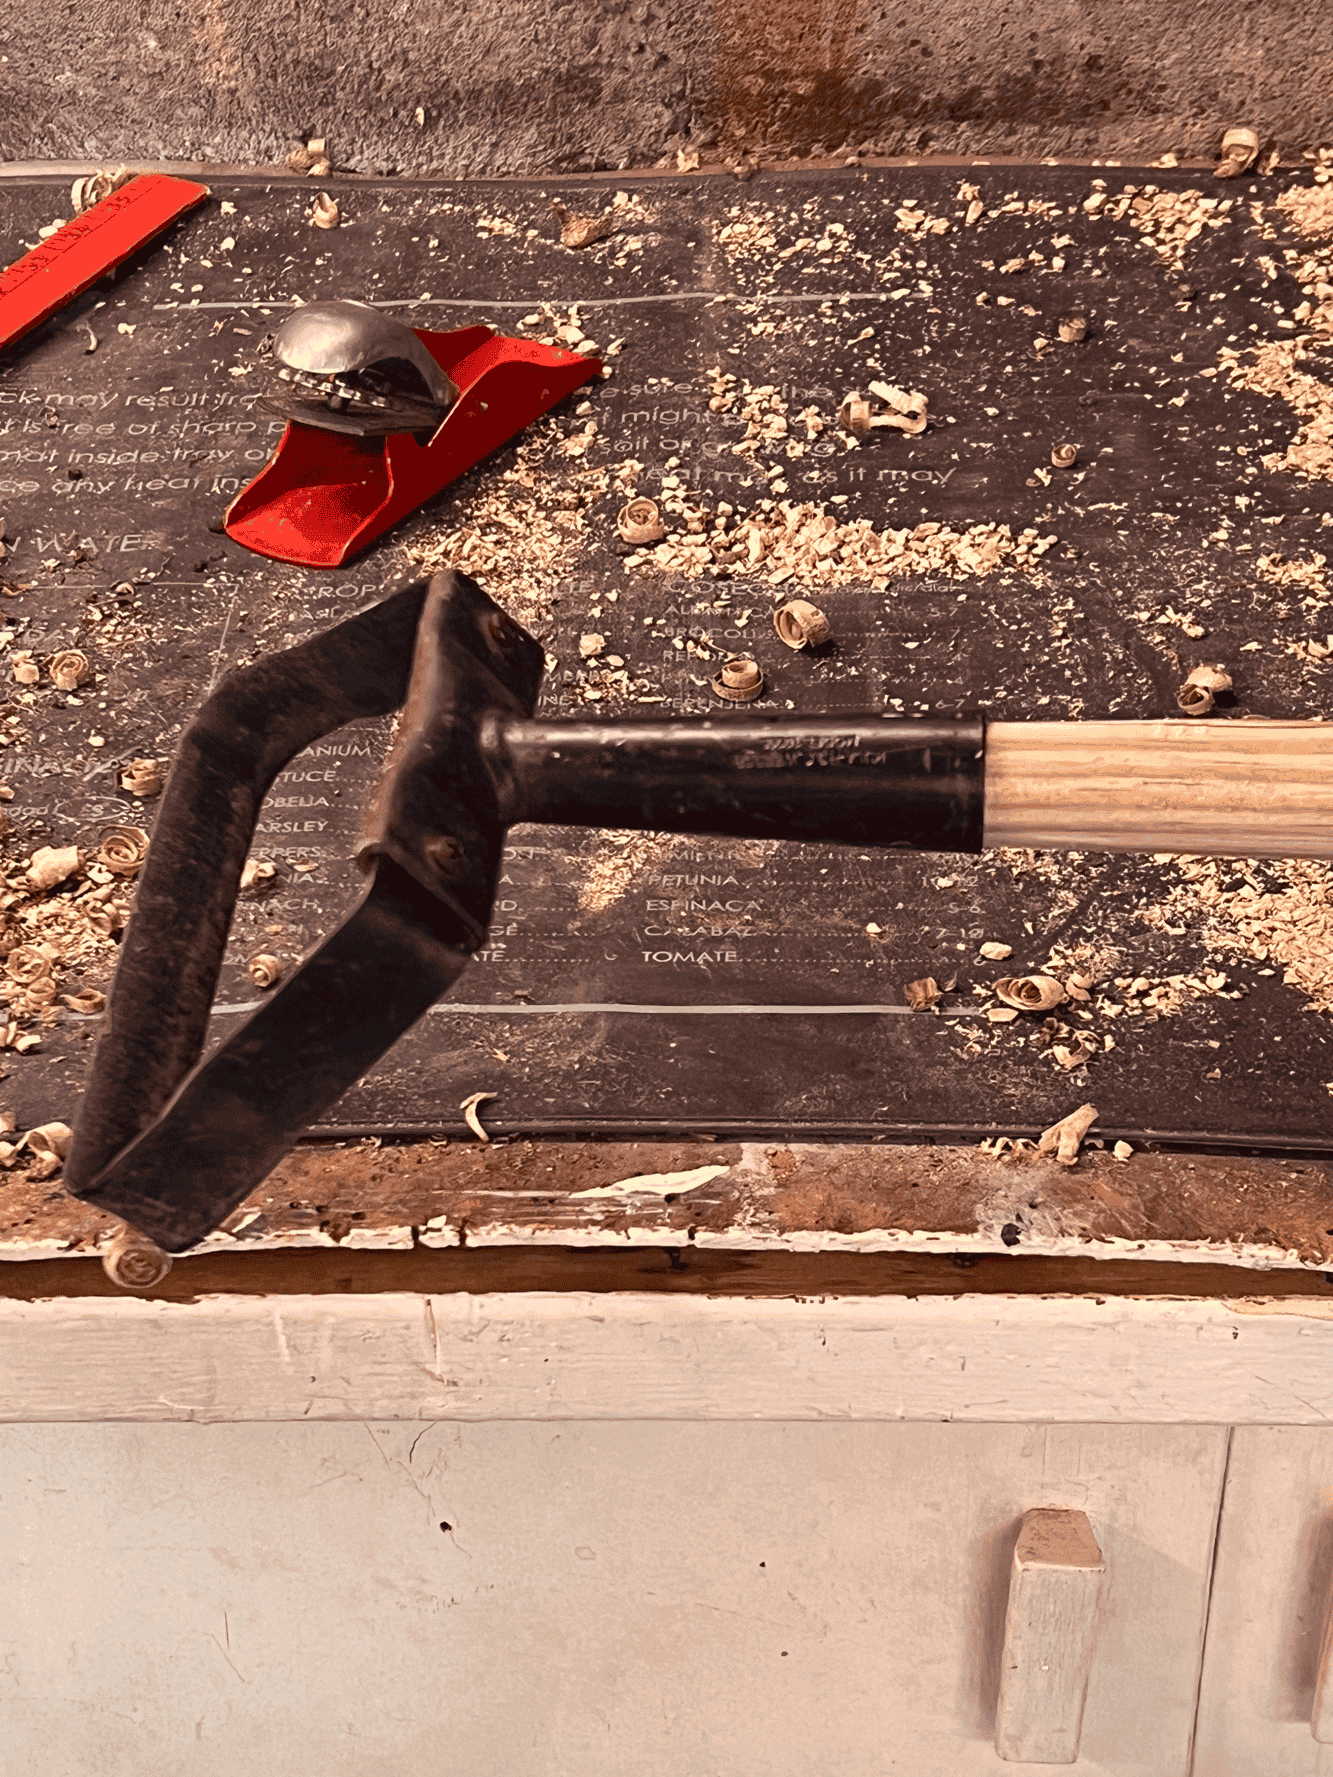
Step 6: If you don’t have a bolt, use a nail and hammer it through the hole(s) to secure the head. I had an especially long nail so I just hammered the head over for now so I don't impale myself while using the hoe. I'll get a proper bolt eventually to replace it with.
HAHAHAHAHA.
I will never do that.
That’s it. Handle restored. Tool functional. Brain satisfied.
The Planing
I didn’t measure anything. There was no radius. No circumference. No math. Just a hand tool and a desperate need to weed before dark.
I shaved one side, spun it, shaved another. Stopped to test the fit. Shaved again. The whole thing took maybe ten minutes and required exactly zero brainpower.
Which is probably why it felt so meditative.
And that’s it. The stirrup hoe is back in action. While I was looking up how much new stirrup hoes go for I found something that looks brilliant, but might be garbage. I don't know. I may have to buy one.
It's a shuffle hoe like mine, but it has a steel handle. A STEEL HANDLE THAT WILL NEVER ROT. But maybe it'll rust?
Anyhow, here's the link to the steel handled hoe if you want to have a look and then please report back to me. It's only $19.
This is a fast fix. An I can't be bothered to do a single thing more than this fix. An I want to weed immediately and I'm gonna do what I have to do to make that happen fix.
This isn't a retired person fix. This isn't a craftsman, precision shave, I subscribe to Popular Woodworking fix.
Because if it was that kind of a fix, it still wouldn't be done.
Linda in Illinois
I do love my stirrup hoe. Very easy for me to use and I’m short. The stainless steel one is interesting that you showed in your link because it’s adjustable in height. Not sure the handles attached would be thick enough or firm enough to last. Especially for only $20. Could be something to try though.
Sioban Mccoy
We had a sladder (best word ever) in our house in Maine AND our laundry was in the basement. I got pretty good at skipping down with a full basket of laundry until I didn't.
Soon after they cut back on the header and we had fairly normal steps installed. Love your blog!
Mary W
That's how everything in my old home was repaired. My husband was a builder/repairer/remodeler/handy man. He used tools that had metal handles all the time BUT that came with the ability to fix things by destroying others. I asked him to put a shelf in our closet and when I came home, it was done. Except he took the only other shelf out (which was being used) and used the wood to make the new shelf. My stored stuff from the old shelf was now laid out neatly on the floor. He passed away when only 48 and people came to work around my house to help before the funeral and tons of visitors. That was so kind and I was totally thankful but one of them removed the stack of old cans wedged under our kitchen sink to 'neaten' the area under the sink. Yeah it looked neat but that night when I did dishes, the whole plumbing pipe to the sink fell out - without it's support system of old cans. I then had to find more support to be able to use my sink. My system of weeding in hot, rainy Florida is to let the weeds grow tall enough to pull easily after a rain. That way the roots come out,also. Not as neat but my husbands habits are hard to break and it gets the job done. I pulled forty feet of weeds around my rabbit fenced garden yesterday and was looking for a hula hoe last night after my shower. How did you know? You have the best timing and I may need to stop stooping and pulling at 80 yo. But this a.m. I'm still feeling fine as frog hair so maybe when I get older.
Karen
Fine as frog hair???! LOL! ~ karen!
Sharon
I really enjoy reading your stuff. Thanks.
Karen
Thank you Sharon! ~ karen
Randy P
Clever AND functional... you and the hoe that is. Kudos on the quick fix.
KimS
Necessity is the mother of invention (sorry I couldn’t resist) haha!
Great job!
Karen
It's true! ~ karen