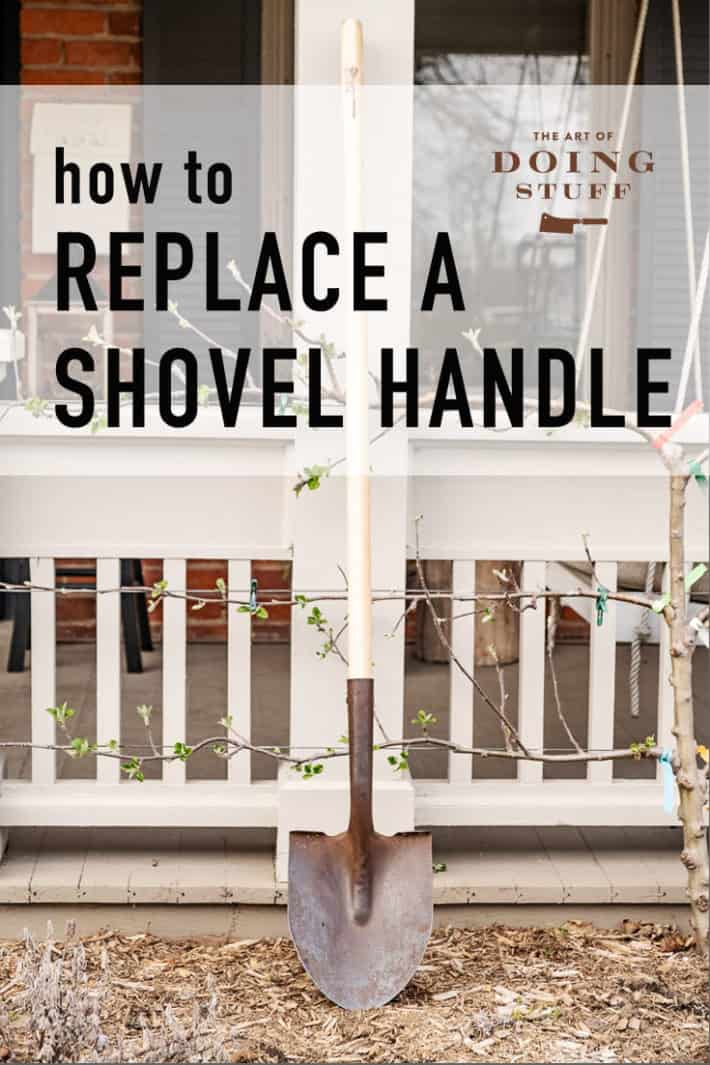
I know. You have superhuman strength and you broke your shovel handle. Way to go Wonder Woman or Strongman. Here's how to replace that shovel handle.

In 2019 I dug a hole and broke my shovel. Last season I broke a shovel handle and a fork handle. I'm a gardening beast with the strength of 12 oxen who just watched the movie Rocky. There's no other explanation for all the handles I break.
Either that or I don't take care of my shovel handles and leave them out in the sun and rain every garden season since always.
If it's a good one, instead of buying a new shovel, I clean up my old shovels and replace the handle.
If you too are super human and have broken shovel handles, here's how you can replace them.
How to Replace a Broken Shovel Handle
like I'll be doing this weekend
Materials
new shovel handle
rivets (often come with shovel handle)
chisel (an old one that's past its prime)
hacksaw
hammer
drill & bits
Steps
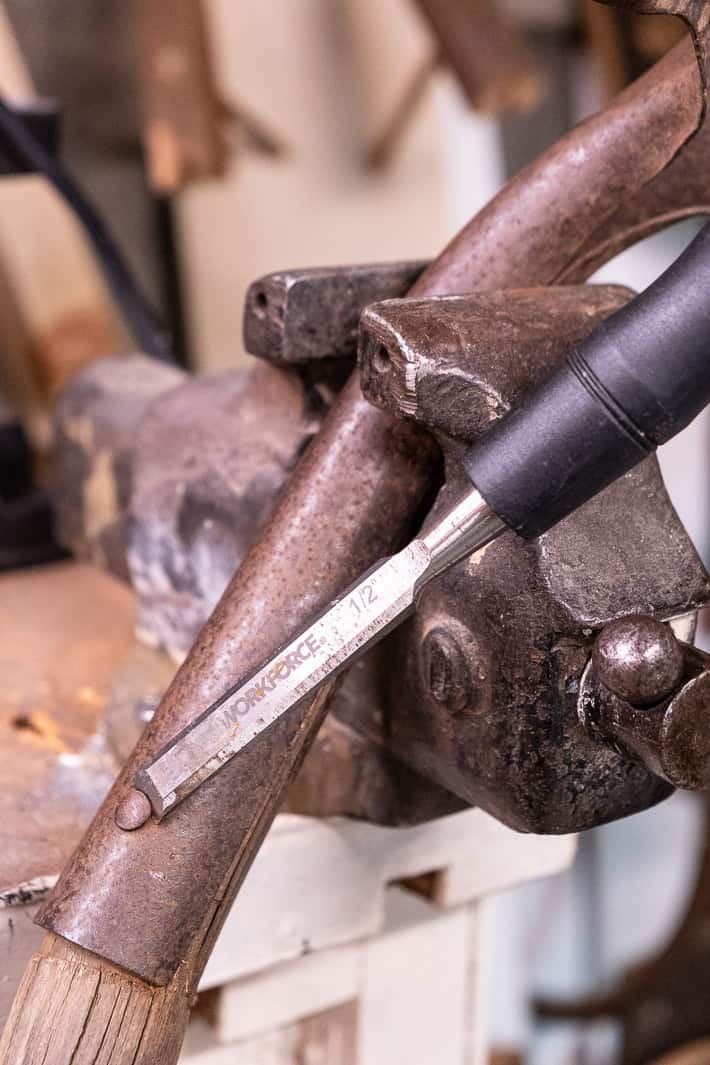
- Clamp your shovel tightly into a vice. Using a chisel, angle grinder or hacksaw remove the rivet holding your broken handle on to the shovel head shaft. If the rivet is very tight use a chisel to pry it up just enough to maneuver a hacksaw blade into the space.
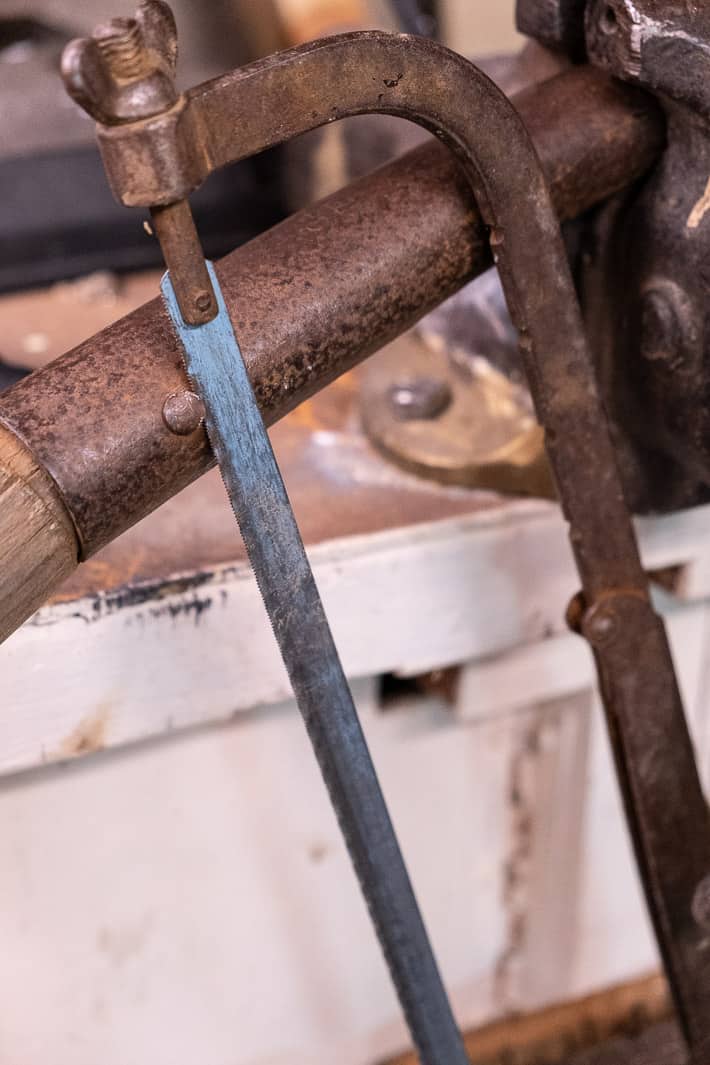
- Once you have enough room for your hacksaw blade, use it to cut the head of the rivet off.
Rivet head cut off.
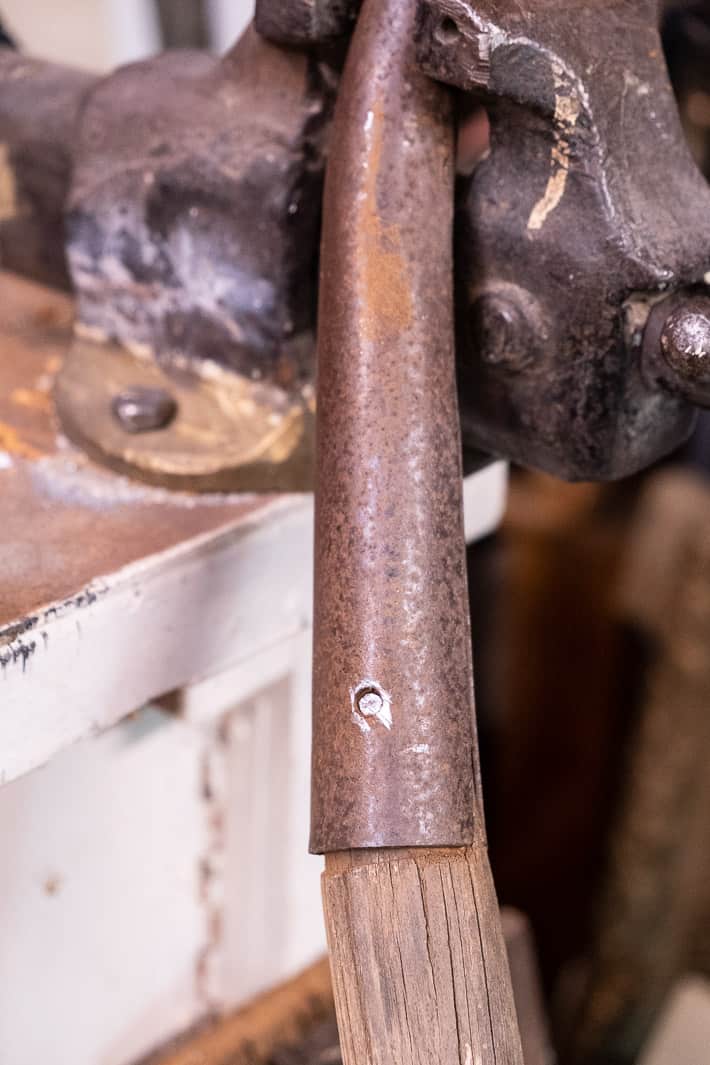
- Using a punch or a narrow screwdriver, pop out the rivet.
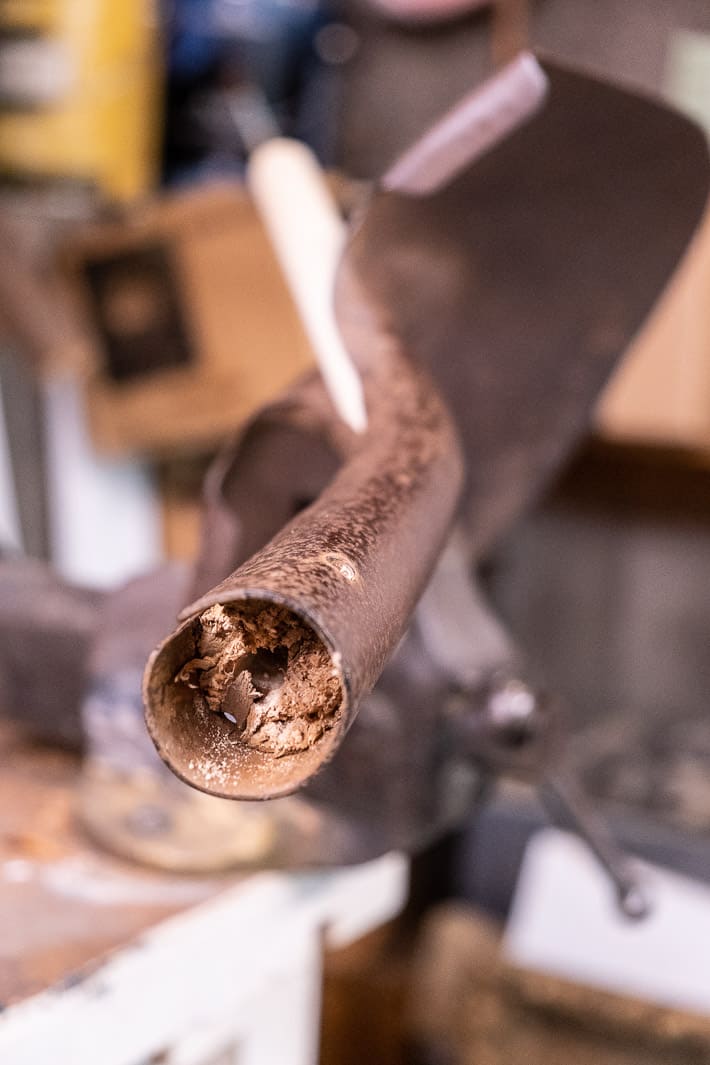
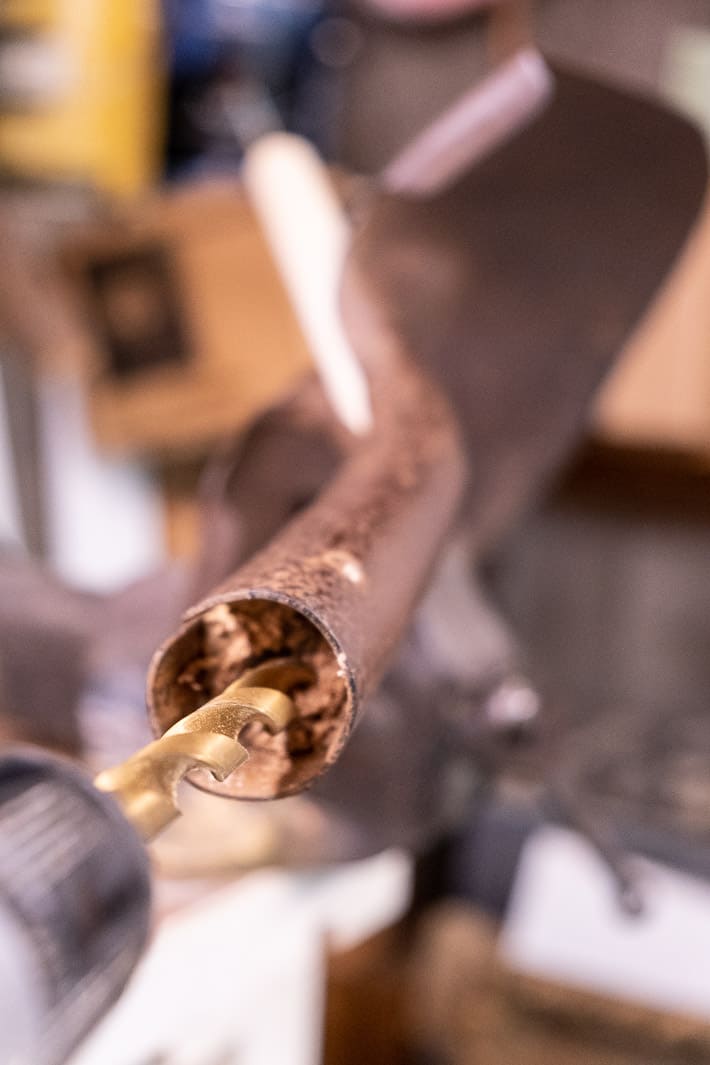
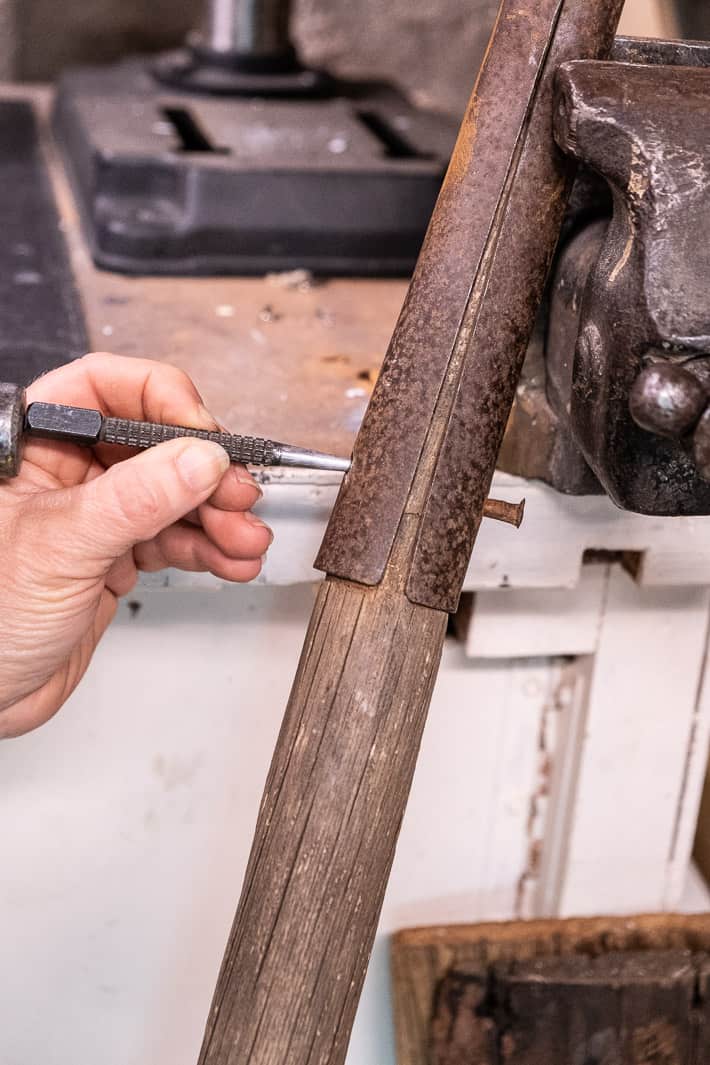
- Once the rivet is out you have the mess of a handle left inside the shaft to deal with. All the wood needs to come out.
- Removing the wood is the biggest pain in this whole process. You have to chisel and hammer and drill until all the wood comes out.
- Get it good and cleaned out.
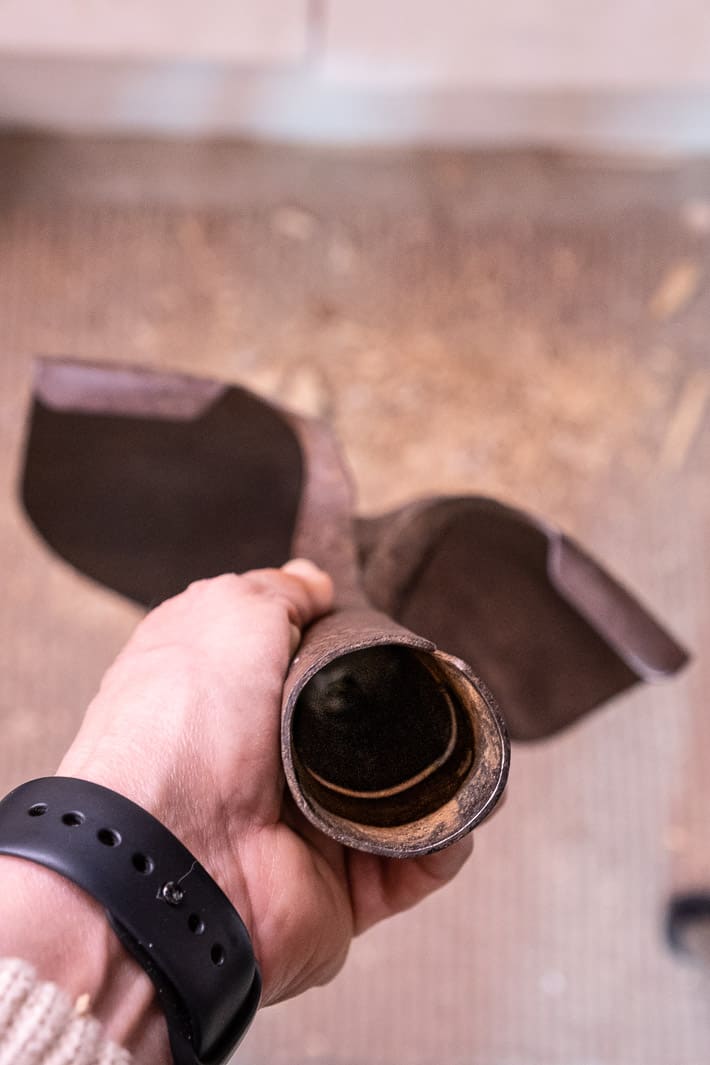
- Grab yourself a new shovel handle.
for everyone in the comment section having a heart attack over using a chisel, please note you should use an old chisel. Anything with a very thin, flat, beveled edge could work.
Would you like to save this stuff?
TOP TIP
If you know your shovel handle is on its last legs, replace it BEFORE it breaks. That way when you remove the rivet holding the handle to the shaft, you can just pull the shovel handle out with a couple of whacks to the shovel head. This is a lot easier than chiseling out the broken wood.
TIPS
- Shovel handles are different than broom handles. They're thicker and longer.
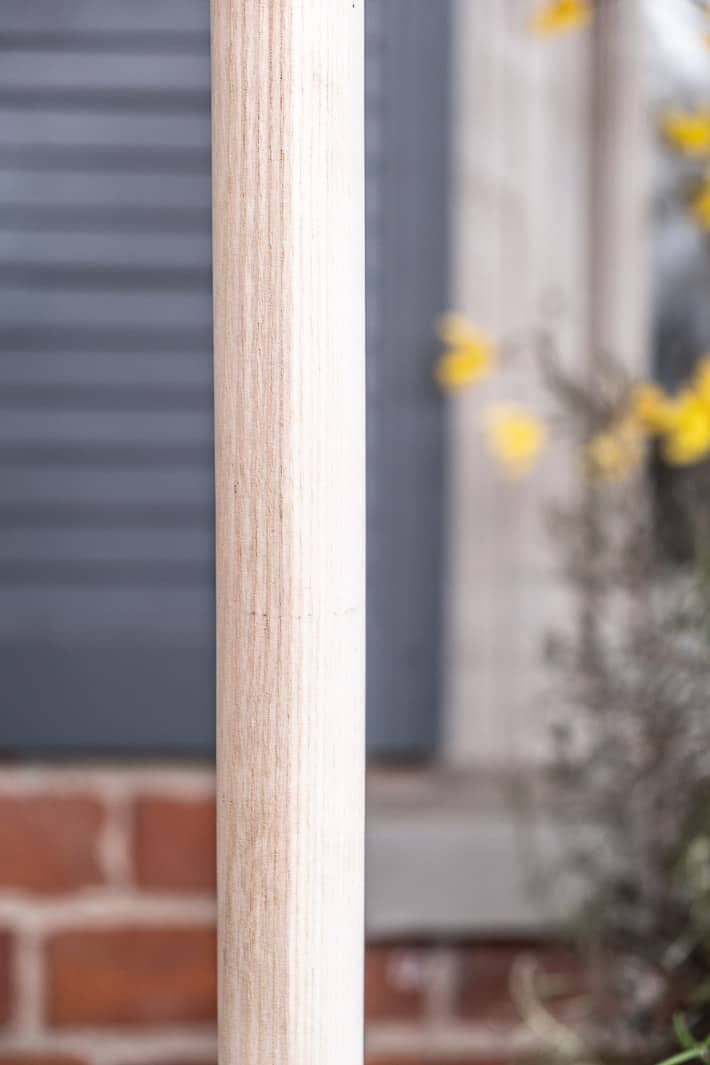
- When you're picking a shovel handle, pick one that has obvious straight lines and obvious grain. This is important when you're positioning your new handle into the shovel head.
- Some shovels come with rivets. Others don't. If yours doesn't, make sure you buy a couple of rivets.
** MAKE SURE THE STRAIGHT GRAIN IS AT THE FRONT AND BACK OF THE SHOVEL HEAD. The curvy grain should be at the sides.**
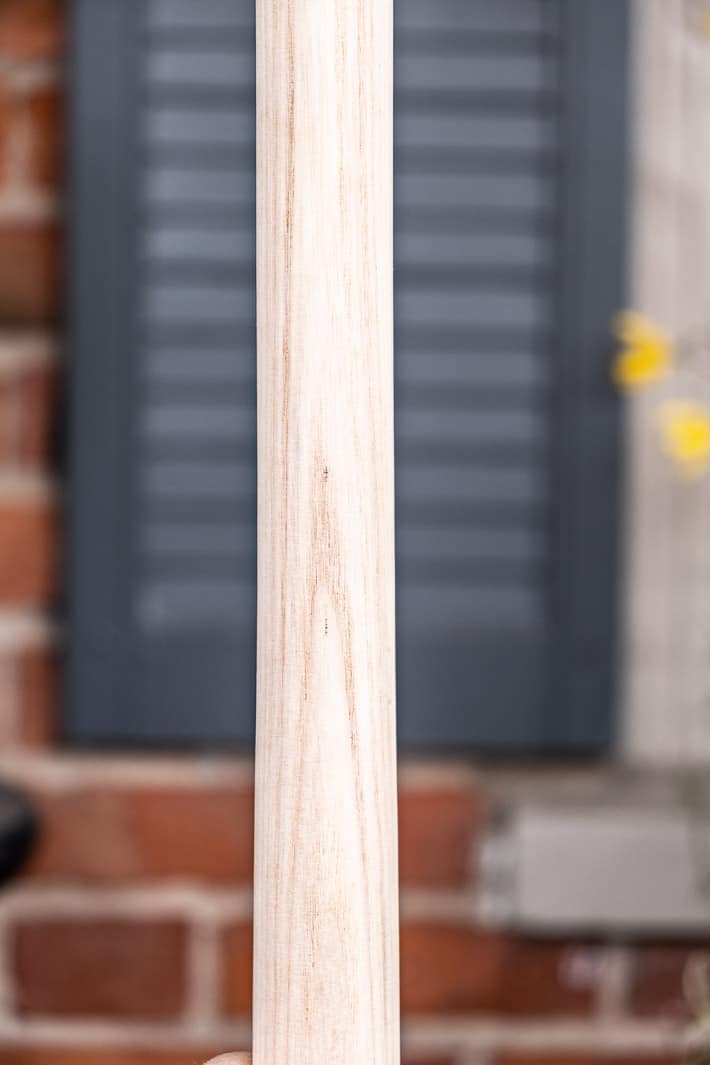
This is a good example of seeing the face grain of the wood. It's the stuff that looks wiggly.
This is a good example of the edge grain of the wood. It looks like straight lines.
Your handle should have visible straight lines and visible wiggly lines. Pay attention to these.
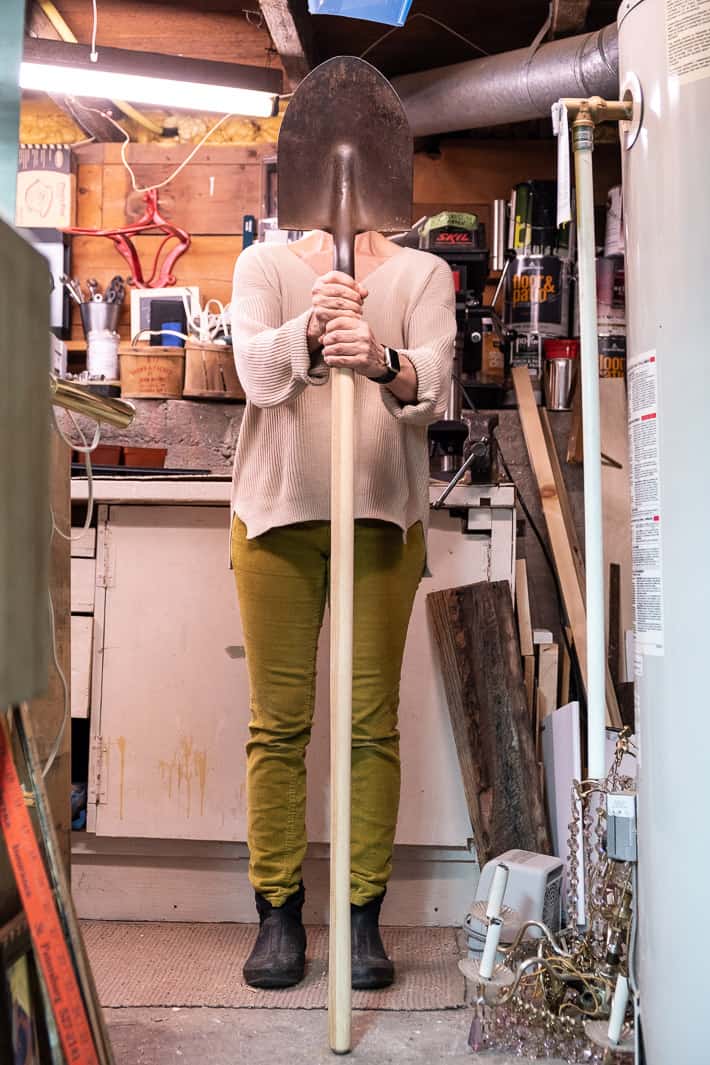
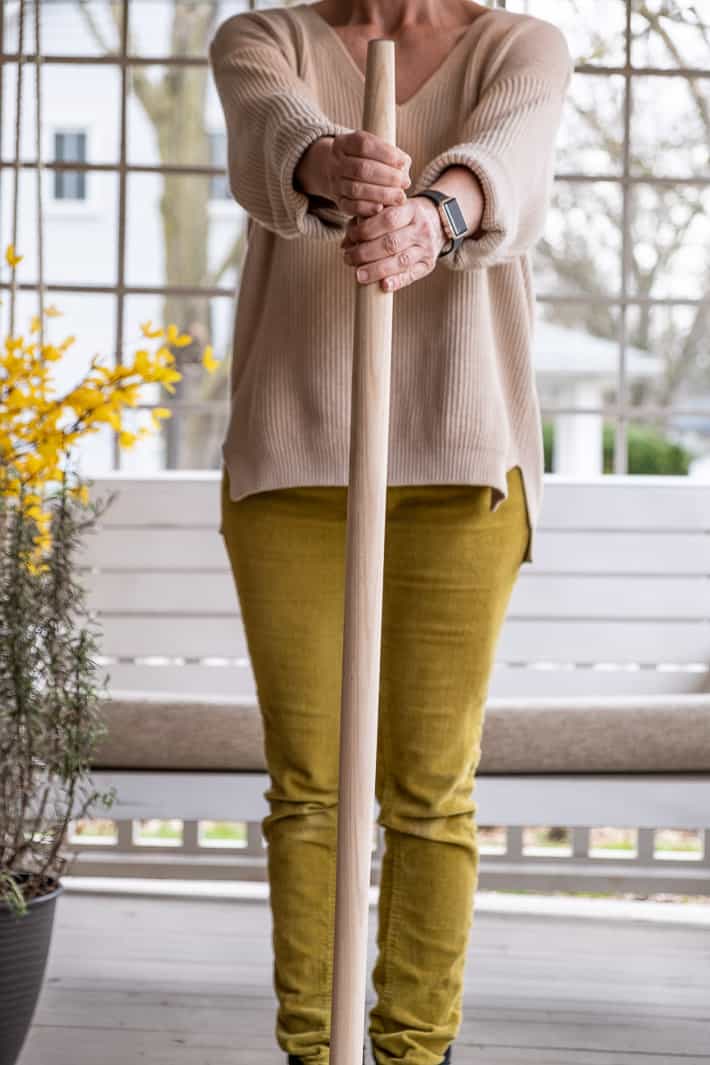
- Seat your new handle into the shovel head by holding it like you see in the picture giving it a few whacks against a cement floor or sidewalk. REMEMBER: The wavy grain at the sides and the straight grain at the front and back.
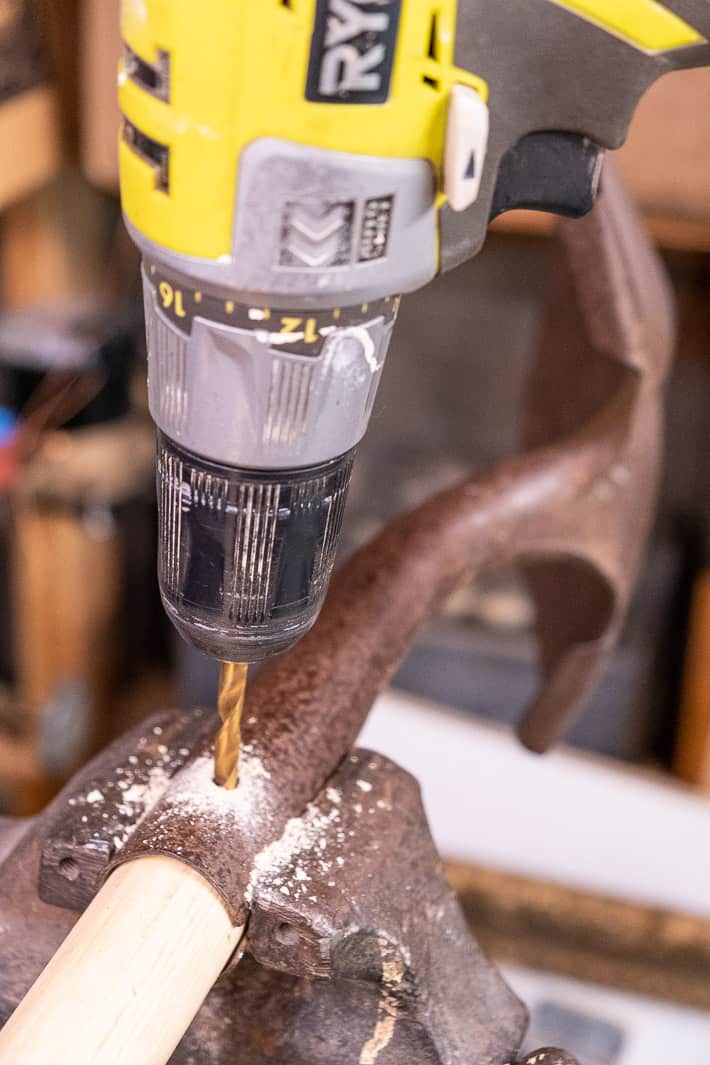
- Once the handle is seated you can drill a hole through the handle where the new rivet(s) will go.
My handle came with a plug in the end. Inside were two rivets. Shovel rivets have a head only on one end. They hold in place when you hammer the other end which flattens it out.

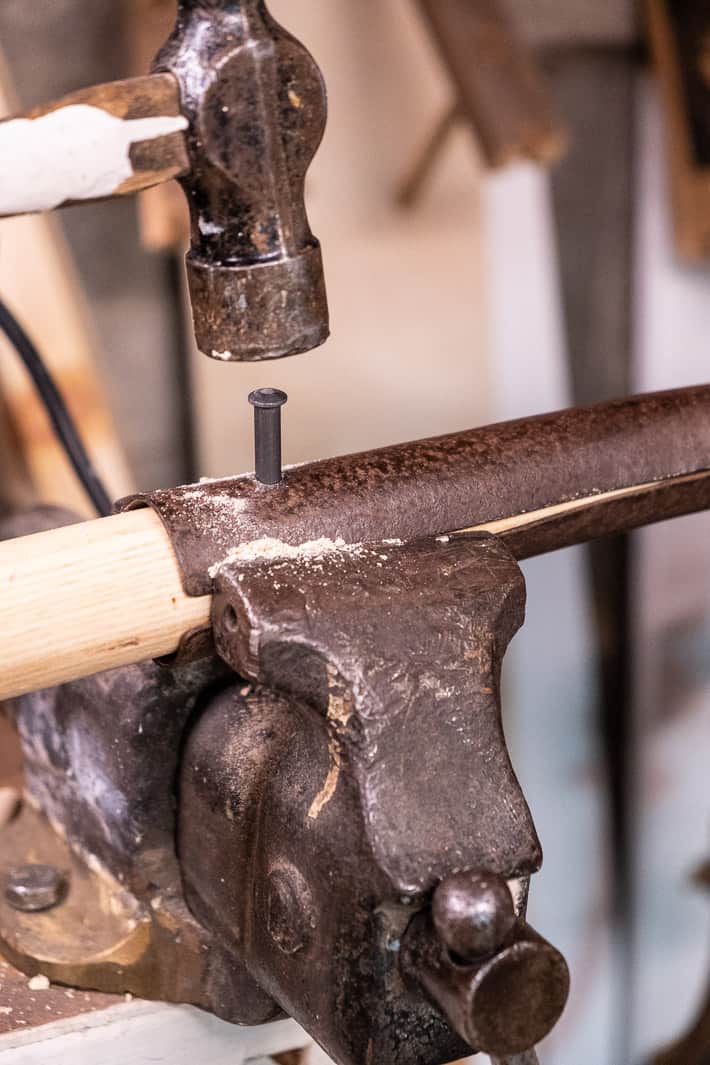

- When the hole is drilled into your handle, knock a rivet through it. It should slide in fairly easily.
- Flip the shovel over so the end of the rivet without a head is facing up. Place your handle on a strong solid surface and whack the end of the rivet several times with a hammer to flatten it out.
Flattened out, now the rivet has two heads and can't fall out.

Add a coat of beeswax and mineral oil (like my Beeswax Board Butter) to your shovel handle to protect it from the elements. You can also use something like Thompson's Water Seal.

You're done! Unless of course you want to add your maker's mark.
Why do all this? Why not just get a new shovel? Reduce, reuse, recycle, revamp. You can do it, you're Wonder Woman, only better.
You're Wonder Woman with a shovel.


Babs
Is there anything you can't do?
Karen
Tons of things that I can't do, but very few things I won't try to do. ~ karen!
Mary
You might want to specify a COLD chisel NOT a woodworking chisel. Cold chisels are meant for work like this (cutting and shaping metal) and are easily resharpened.
Laura Bee
I have a few of my grandparents' garden tools...so worn and wonderful.
I replaced the plastic handle end on my edger a few years ago, so if one of my others with a rivet goes I'll know what to do. Thanks Karen!
Karen
I don't know why this particular job is so satisfying but it is. ` karen!
TucsonPatty
YT he ex who took the compost pile also took all the shovels. (Young man who helped him move said there were 6 or 7 shovels. So, while I was cleaning up the huge mess he left for me, I found a shovel!! Just the head, extremely rusty, and with a broken handle. I went to the hardware store to buy a new handle, and they were so reluctant to sell one to me. The guy kept telling me that a new shovel was just as cheap. Nope - I’ll reuse and recycle all the day long. I still don’t have a rivet or anything to hold the handle in, but it stays for me. I’ll get around to it one day. I choose the bear. (Threads is amazing, people!)
Thanks for the lesson, Karen. ❤️
Karen
Hey Patty! Did you check to see if those parts are in one end of the shovel handle? ~ karen!
TucsonPatty
Well good grief, even after the great lessons that I t a, it didn’t occur to me! 😂 I just went out and checked - nope. I saw that I totally by accident put the grain of the wood correctly, and perfectly (How?!) The new handle is also very tapered at the end and so doesn’t quite fit correctly, and Thais probably why kit is wedged in so tightly that it won’t move! I very recently used it to dig two holes to bury two 5-gallon buckets with many drain holes drilled out on bottom and sides. These are my new compost buckets. I don’t know if it is working - I looked in one of the buckets and found mushrooms growing. 😬 I feel like I’ve just told someone all this, and I hope it wasn’t you. 😂 I’m going to tell Ace Hardware they’d better step it up - Canada has better and more convenient shovel handles. ❤️❤️
Serah Blackstone-Fredericks
Such a great read and looks like a fun project, thank you!
Karen
Thanks Serah! I'm happy to meet another shovel handle replacing enthusiast. There are surprisingly few of us. ~ karen
Deb from Maryland
Excellent tutorial! Thank you for the pictures with the words - I'm all for seeing what it's supposed to look like.
Hettie
Well done! I love learning new things here. Thanks, Karen!
Dan Stoudt
And don't forget to clean, sharpen, and oil the blade.
Donna R
I can not thank you enough for this tutorial. Broke the handle on my vintage (father in laws) shovel last year & someone said just throw it out. That was a big NO from me. So this spring as I was readying all the gardening implements I was wondering how to replace said handle. Bada bing bada boom there was your post. Many thanks once again.
Karen
You're welcome Donna! My two are waiting in the basement for Saturday which is supposed to be a rainy day. Perfect shovel handle replacing weather. ~ karen!
Nicholas
no wonder leaving this stuff unprotected the wood rots and break very easily.Take the time and put them in a shed and it will happen less frequently
Karen
They're garden shovels at a garden where there is no shed. ~ karen
Randy P
Excellent tutorial, thanks for sharing. Have you ever used a shovel with a fiberglass handle? They're pretty impervious to weather.
Terry Canning
I noted that you suggested using an old end-of-life chisel to help remove the rivet from the shovel shank. While that's okay, a much better and safer alternative is to use the proper cold chisel - which is meant to cut cold (IE.not heated) metals - rather than that nice wood chisel that is only intended to cut wood. The cold chisel is thicker, stronger and less tapered and intended to be hammered on to form (cut or slice) metals like steel, brass or copper. I would have a hemorrhage if I caught you using my wood chisel on anything except wood - or plastic.
Jody
Absolutely love the instructions and pictures but being bombarded with so many ads is very distracting and I almost clicked out a few times. If you could just cut back on the frequency of ads through the instructions, I would call it perfect. Nobody looks at ads when there are so many. I couldn't even tell you one of them, and I know they repeated.
Karen
I know. I agree! But honestly I'm just trying to make a living and every year Google makes that more difficult. I'll see if I can look at getting rid of one of them. ~ karen!
Terry Rutherford
It’s fine, never you mind. You offer fantastic advice free of charge. The sun is shining on your efforts today! One petite nit, no easy way to say the your step one has the shovel put in porn (vice) rather than a clamping device (vise.) although now that I think of clamps … Enjoy your garden. I went out on a limb and planted tomatoes this early. Stay away frost!
Jenn
You can also use a nail puller or thick screwdriver or what have you to remove the broken handle from the shovel end. Where the bottom of the shovel handle will go, there's a hole that you can use to knock the wood out from the other side. Thanks for your tutorial:)
Samuel McCuskey
The best article I have read on replacing a Shovel handle. Excellent.
Barb
I loved this article. Thanks so much, I have the handle that I just bought and didn't know about the rivet under the plastic. For some of us that don't have all of the fancy tools, I like the simple way you showed us how to do it. I have the items needed and don't need to go borrow or buy a grinder or gas torch.
Btw, yes, I am in Ontario as well and never had seen it Not spelled vice, in fact my computer won't allow me to put in the other spelling, lol. We have many, many different British words that I love. Zed is my favourite difference, hehe. Thanks again, and keep up the great work.
Karen
Good luck with the shovel Barb! ~ karen