My father taught me a lot of things growing up. Things like always turn your outside water off before the first freeze. When you're cutting something, let the saw do the work. And always eat *around* the hair on a ham hock. I must admit, some things I use in my every day life more than others.
But one of the most useful things my father taught me was how to build a fire. My father was an arsonist. No he wasn't. He did eat hairy ham hocks though. And many other disgusting things.
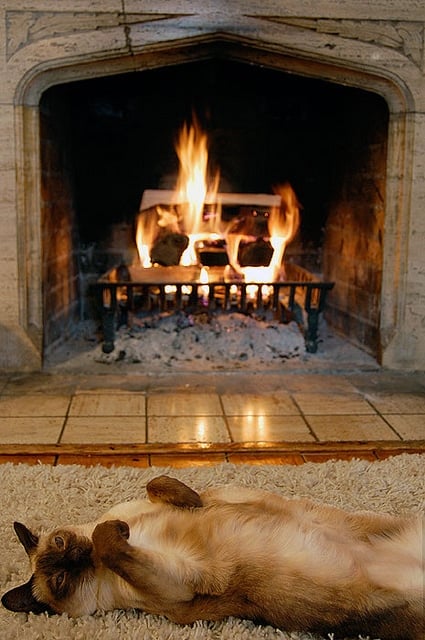
We had a wood burning fireplace installed in our home when I was about 9 or 10 and that fireplace had a profound effect on me. I became an arsonist. No I didn't. I did however, develop an obsession with wood burning fireplaces. If someone were to do a study comparing the effects of 3 months on Prozac to one night in front of a wood burning fireplace, the drug companies would go out of business.
Many years ago when I was looking for a house the only thing it required was a wood burning fireplace. Not a kitchen, not a bathroom ... a fireplace. I'd pee in a bucket before I went without a fire. Hell, sometimes I pee in a bucket just for fun.
So when a reader sent me an email asking me if I knew how to build a fire I responded with a great big YES and told her I'd do a post on it immediately. That was a year ago. Good thing she wasn't asking me what to do in case of a gas leak.
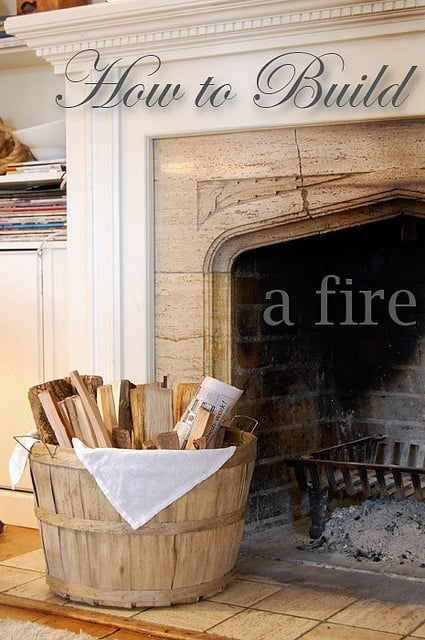
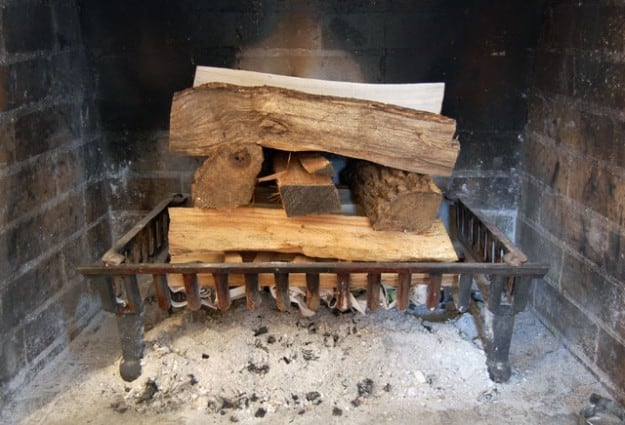
You need just a few things to build a fire, but they are very important. You need newspaper (or cardboard carrying trays from Tim Hortons work GREAT), kindling and smallish pieces of wood.
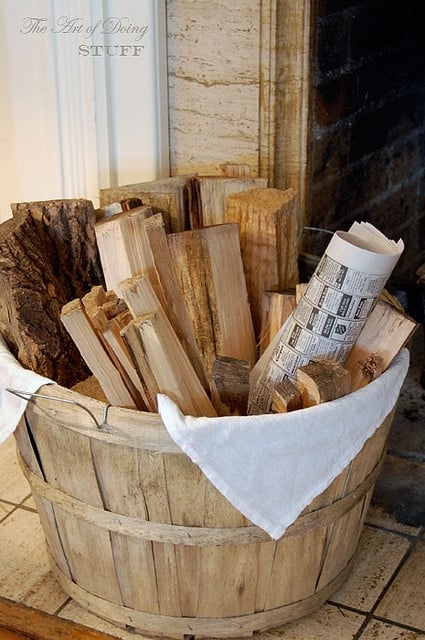
Roll your newspaper up medium tight. If it's too loose it'll burn too quickly and go out before the kindling can catch on fire. If you roll it too tight there won't be enough oxygen inside it to keep it burning and it'll go out before the kindling can catch on fire. 1 full sheet of regular sized newspaper per roll. Double up if you're using smaller newspaper like that from a flyer. The paper rolling is the most important part of the whole process. If you get it wrong, you're doomed. It might take a few tries to get the feel of how the paper should be rolled.
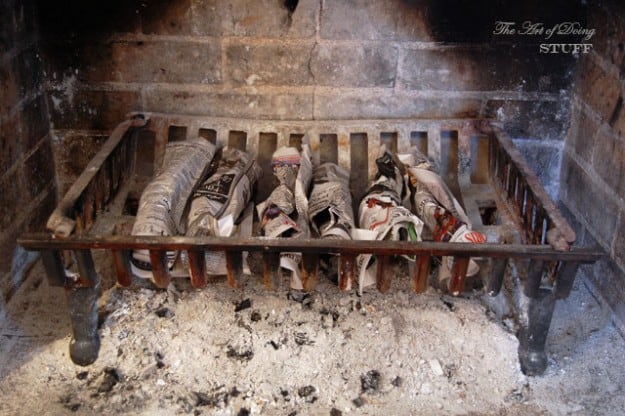
Lay a row of 4 or 5 piecees of long kindling across the paper. Keep the pieces of kindling close enough to each other that when they start to burn the flames will touch the adjacent piece of kindling. Don't put the kindling so close that it's touching the other piece of kindling. Again, the wood needs oxygen around it to burn and if it doesn't have that it won't ignite.
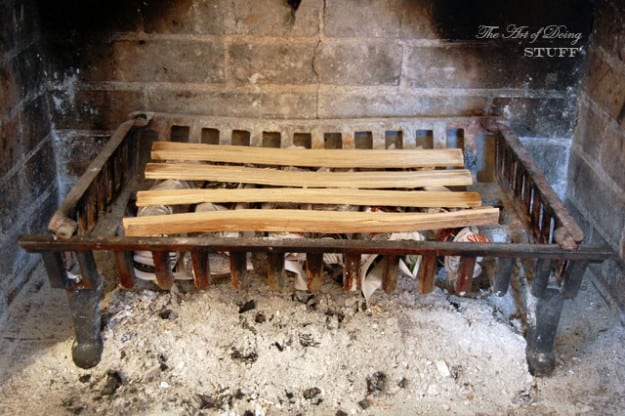
Lay another row of shorter kindling across the longer kindling. The only reason some kindling is longer and some is shorter is because fireplaces are normally much wider than they are deep.
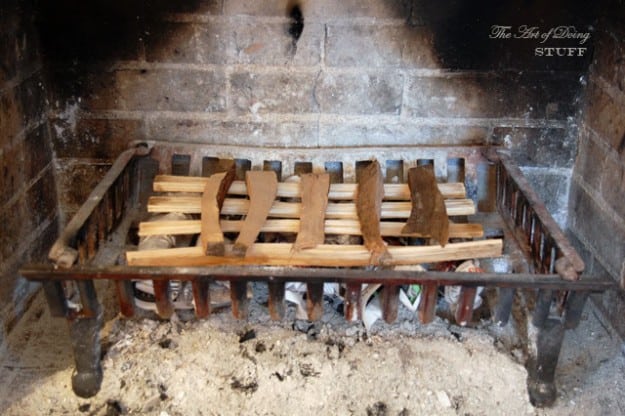
Lay two long pieces of wood (not HUGE pieces) across the kindling.
Lay 2 or 3 shorter pieces of wood on top.
Would you like to save this stuff?
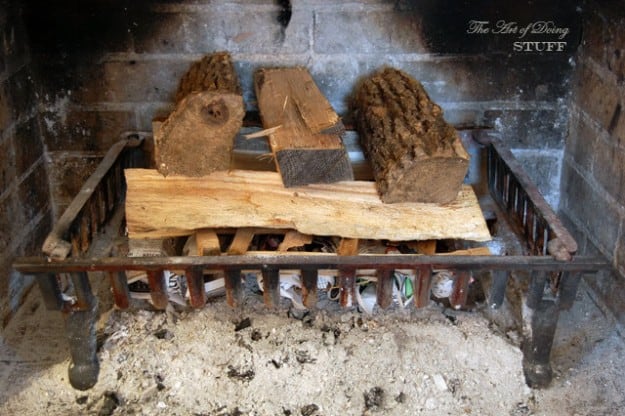
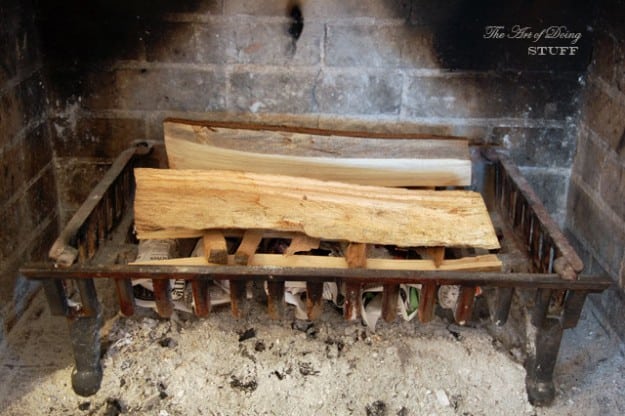
Top your fire with 1 or 2 larger pieces of wood.
Light a roll of paper ...
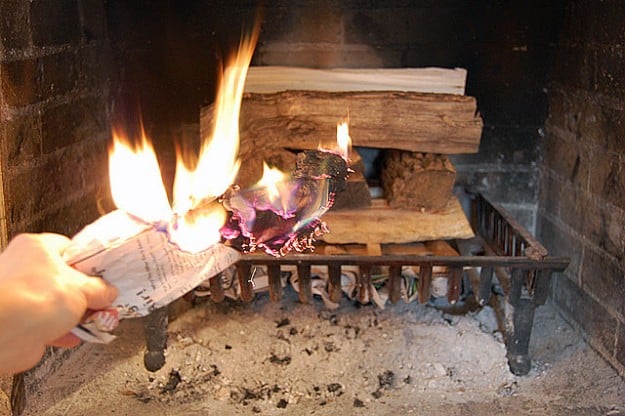
And quickly shove it under the grate. The lit roll will ignite the other paper rolls.
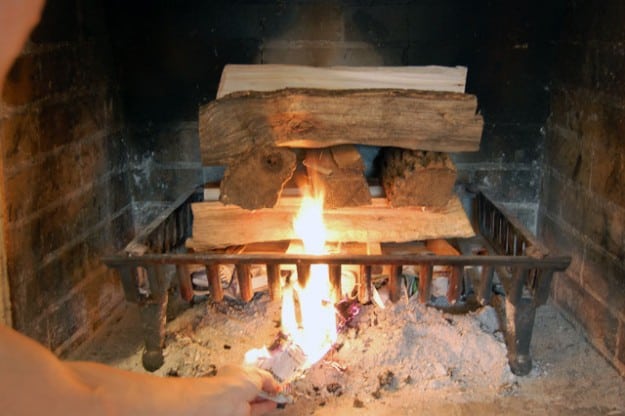
30 seconds later ...
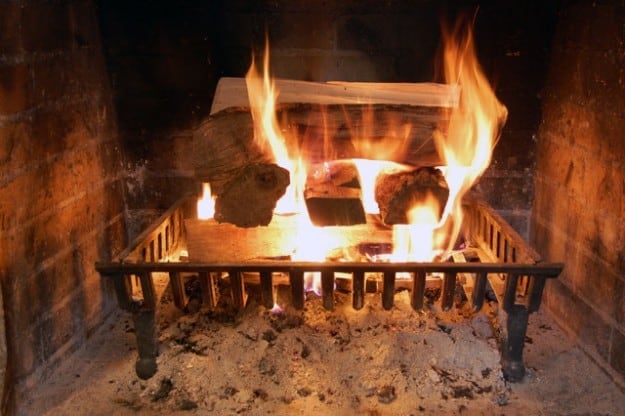
3 minutes later ...
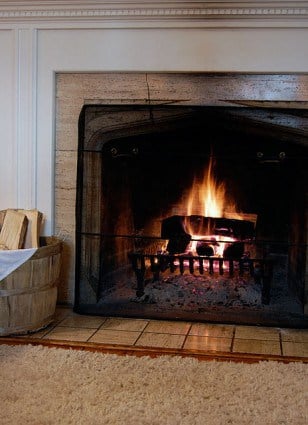
And no ... I don't normally leave the fireplace roaring without a screen in front of it. I was just doing so for artistic and instructional purposes. Normally the big ole screen is shoved in front of the fire.
A couple other tips about fireplaces I have for you are ...
1. Make sure you get your chimney swept once a year. Creosote and buildup can lead to chimney fires which can lead to house fires which can lead to homelessness which can lead to peeing in a bucket.
2. Use a small hatchet to chop your own kindling from your bigger pieces of wood. Cut a large piece of wood in half with a regular axe and then use the hatchet to cut your kindling.
3. When you clean out your fire place don't clean out all of the ashes. Leave a pile of ashes under your grate. It's helps make lighting your next fire easier, because the ashes act as a bed for the coals that fall down, keeping them up higher, and closer to the fire.
4. Wood is sold in cords, but there are different types of cords. The two most popular terms are bush cords and face cords. A bush cord is a stacked pile of wood that measures 4' high, by 4' deep by 8' long. What that amounts to is 3 rows of wood that are 4' high by 8' long. Each piece of wood should be 16" long. Each single row, is called a Face cord. Most places I've encountered, sell by the face cord. We bought 6 face cords this year for our winter fires, which is the equivalent of 2 bush cords. In technical terms, that's a crap load of wood.
5. When buying wood, look for hardwood. It burns longer, hotter and cleaner.
6. And finally, always eat around the hair on a ham hock.


Julene
Hey Karen... thanks! I just built my first indoor fire using your instructions... PERFECT! Our firebox is very small so the wood isn’t placed exactly like yours, but almost! I was out of newspaper so I had to improvise with a paper grocery bag and tissue paper, but it worked perfectly!
Karen
Good job! It's beautiful. I have to say I first saw your picture when it was tiny and it looked like your entire house was on fire. I was terrified for you, lol! ~ karen
Julene
Haha, yeah I don't know why the picture loaded in sideways, that makes it look even worse! I assure you, all is well. ;) I've even built another since, and showed my kids and hubby how! Thanks again!
Stevie
Great resource... thank you! We recently moved into a new-to-us house with a great fireplace (that we had cleaned and inspected) and our recent cold-snap has me excited for many, many fires!
Carolyn Geddes
Hi Karen! I realize this post is old but I hope this comment finds you nonetheless. I have lived in my home two years and have never lit a fire in either of my excellent fireplaces because I'm scared of what's up my chimney. (Insert crude joke here.) You seem to know everything about everything so I wanted to know what you do to you maintain yours? (Chimney that is.)
Karen
HI Carolyn! You need to get a chimney sweep in to inspect your chimney. If yo use a reputable company that cleans chimneys for a living they'll be able to clean your chimney, inspect the interior of your firebox and check that everything is good to go. If you do have fires you have to HAVE to have your chimney swept at least once a year. Some people require it to be swept twice a year if they have a lot of fires. That's all there is to it! Leave it to someone who knows what they're doing. Having your chimney swept and inspected costs around $150. ~ karen!
Michelle
Hi Karen,
I've been at my wood burning stove/fireplace for nearly two hours, going back and forth from "Yes! Finally it's alive!" to "WHY AREN'T YOU STAYING LIT?!" The result? Me burrowing myself under layers of blankets and cranking the baseboards (which, for the record, are not doing a very good job of warming this place up.)
I want to give your method a try, however I'm not sure it will be the same with a wood burning stove? Mostly because there is no grate therefore no airflow from underneath. Any suggestions?
Thanks!
Bre
I think you're smart. Why do I think you're smart? Because you have ideas that I should have thought of but didn't. Like cooking hotdogs in the fireplace!!! I usually use the firelog thingys (not good for cooking over) but recently got some wood and it did not cross my mind to have a weiner roast. With marshmallows for dessert! How fun would that be on a snow day when we're all housebound?!
janice
Love your humor,my kind of chick.love your anything and everything that make life easier. I too love a good fire warms my bones. Thank you