Hello Spring! It's nice of you to join me inside my house. Maybe you wanna think about venturing outside. Finally. You stupid, stupid spring.
It's a good thing Easter is particularly late this year, because there's nothing more depressing than finding the Easter Bunny starving and frozen solid on your front porch. It's hard enough for kids to maintain their wide eyed innocence when you had to explain why Santa smelled like whiskey and Drakkar Noir last year, let alone having to explain a dead bunny.
There's a few more weeks until Easter so we may still have a shot at a live, romping Easter Bunny.
Two days ago I showed you a simple trick to use a Waxed Paper Transfer to print any photo on wood. This planter box is just one of the bazillion things you can do with that little trick.
The great thing about a simple box like this is anyone can do it. There are no mitre cuts, it isn't particularly straight, and the worse it looks the better. I used a circular saw to cut my boards to length but you could easily use a hand saw.
The other great thing is, once you've finished using as a planter box, you can use it to store garden tools, oils and vinegars on your countertop or seed packets throughout the year.
You can make your box any size you want. Think of where you might want to put it and then build a box that will fit in that space. Or, if you're really nervous about measuring and math and hammering things, just make your box the same as mine, following the measurements I've given.
I've made my box large enough to fit a 6" pot of tulips (although you have to squish the top of the plastic pot a bit to smush it in)
If you want your box to have a rustic look, and I think you should, you don't need to have actual old barn board. Any dirty old looking wood will do. Scrounge around your house, basement, garage looking for the most beat up looking boards you can find. If you can't find any go to your local lumber store and they're sure to have some old grungy wood hidden somewhere that they may even be willing to part with for free.
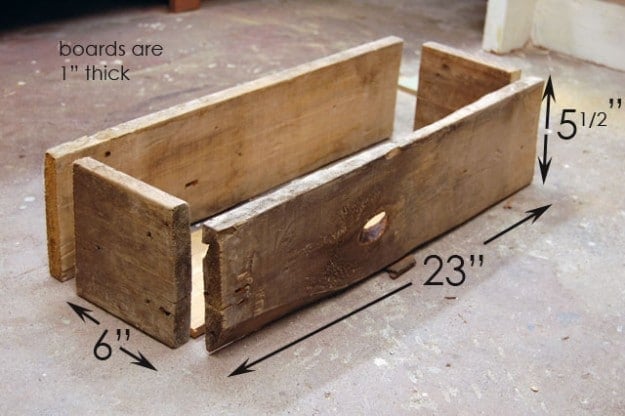
Your box is going to be made up of 4 sides and a bottom.
What I'm showing you is the easiest way to make a planter box, not necessarily the right way to make a planter box. I wanted to make it as easy as possible so that absolutely anyone could make it.
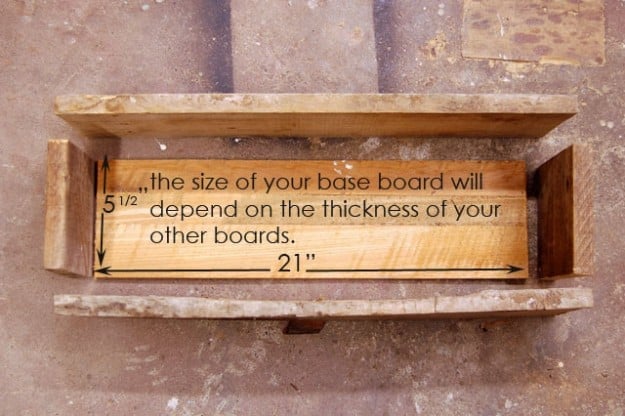
For the base of my box, I've used a thin piece of wood, because that's what I had that would fit. I really just made this out of pieces I could scrounge. Your base can be any thickness you want.
If you're copying my box, the measurements for your base will depend on how thick of boards you use for the sides. If you also use 1" thick boards, then you can do the base the same as mine. 21" x 5 ½". If you don't happen to have boards the exact same size as mine just put your box together, measure the size of the space in the bottom and cut a board to fit.
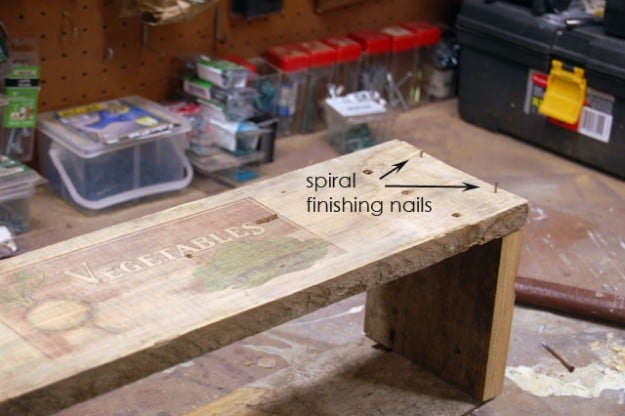
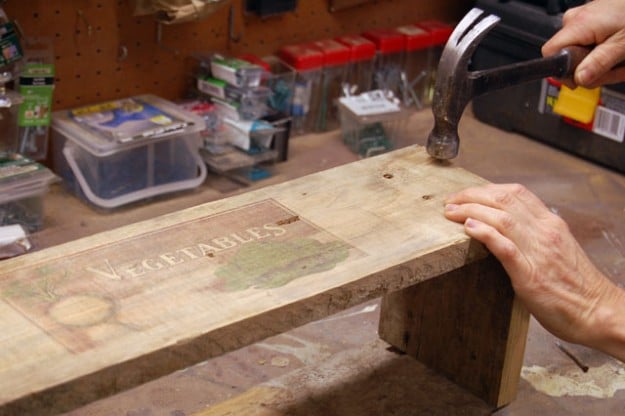
Putting the box together only involves hammering a few nails in. You can use finishing nails but make sure they're the spiral type because they grip better and your box is less likely to fall apart. Not that it's likely to at all, but you know what I mean.
The beauty of making a rustic looking box like this is that if things don't line up perfectly it doesn't look like a mistake, it looks authentic. So if you've never made anything before don't be intimidated. You can't make a mistake.
Would you like to save this stuff?
Hammer all your sides together with 2 or 3 nails on each end.
Now you have a box. You're a genius! I'll give you a second to scream and dance a little. Maybe call your 9th grade teacher who said you'd never amount to anything.
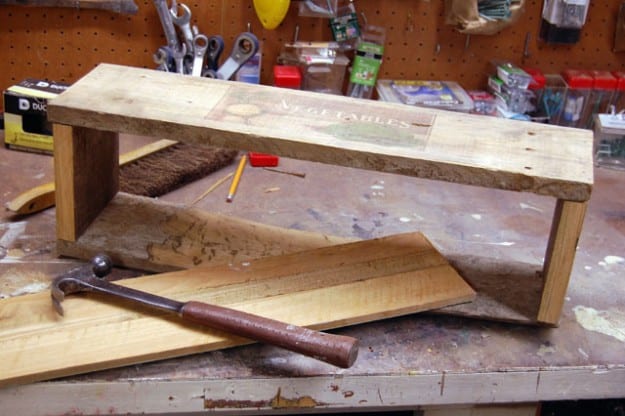
The only problem with your box thus far, is it doesn't have a bottom. And like most things in life, it's much sexier with a nice bottom.
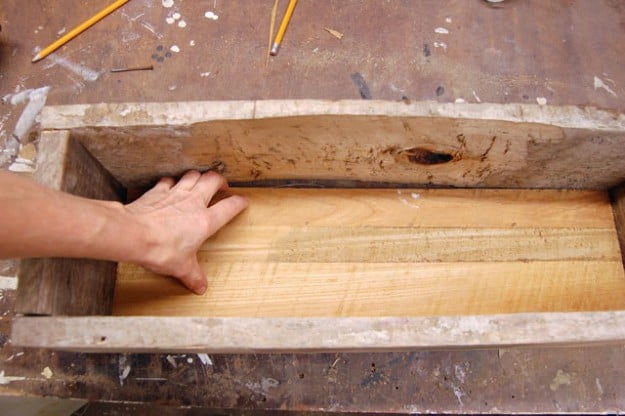
This is when you can either measure the space you need to fill and cut your bottom board, or put your pre-cut board into place.
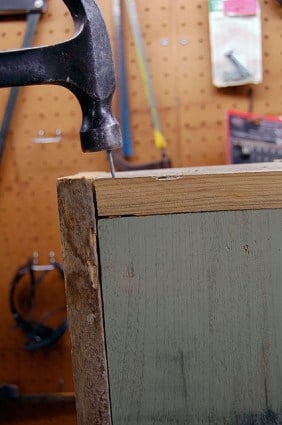
To attach the bottom to the rest of the box, flip everything upside down and hammer through the sides into the bottom. This is the one point where you really have to pay attention to make sure your nail is going in straight. If it doesn't go in straight it will come shooting out either the inside of the box or the bottom of it.
Then you'll have to call your 9th grade teacher again to let them know you are indeed a failure.
Hammer in enough nails along each side to secure the bottom well. I'd say 3 nails on the short ends and 5 on the long.
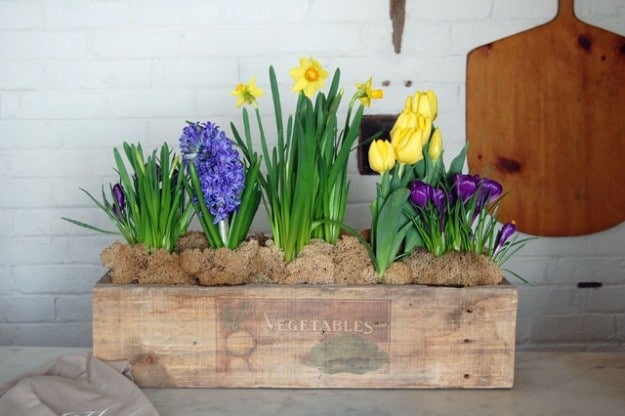
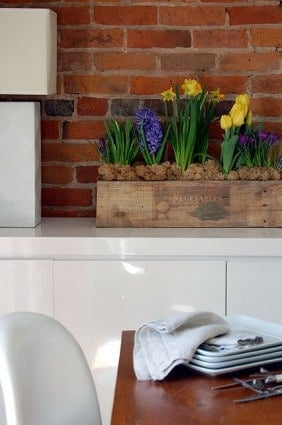
Now all you have to do is fill it with spring potted bulbs and put it in a spot where the most amount of people will see it and compliment you on it. That part is really quite important.

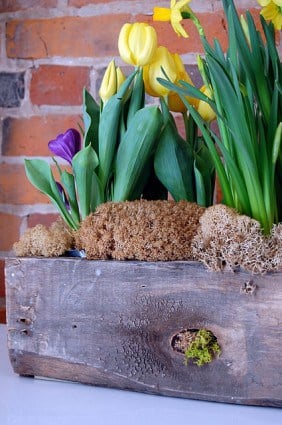
Sick of looking at your printed transfer? Flip the box around. If it has a knothole, all the better. Just fill it with some moss.

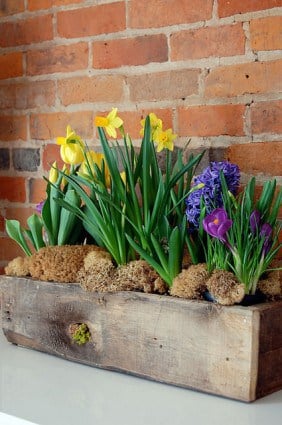
This sized box cost exactly $20 to fill with 4" potted flowers.
In return they will fill your heart to bursting. Holy shit. I can't believe I just said that. Apparently spring is in the air.
Want more STUFF like this?
Get my posts emailed to you daily.
[shareaholic app="share_buttons" id="5342563"]


Linda
I guffawed at the Holy shit in the first article about the picture transfer...the link led me to this one...just as entertaining as your "Holy shit." And I agree about reading the comments...they are well worth the time it takes to read...all...these...comments, LOL! Awesome project which I can't wait to get to...once I find some wood and once all this snow melts from the storm we just got (1/26-1/27 Nor' Easter blizzard!) so I can put it outside! Thanks for the projects and the entertainment!!
Karen
Thanks Linda. My cat just had a bit of a Nor' Easter. Actually a cat fart. Which I didn't hear but did indeed smell. Welcome to The Art of Doing Stuff. ;) ~ karen!
Liz
Great project! Can you use the same wax paper technique on light colored painted wood?
Karen
Probably not Liz. This technique works because the ink soaks into the open grain of the wood. With paint it would just sit on top and easily wipe away. However, if the paint is old, old, old, it's possible it's porous enough to work. ~ karen!
BGrigg
Just received the latest Lee Valley Gardening Newsletter, which features the above article on printing on wood. Nice!
Karen
I know! I wrote it for them, lol. Glad to hear you're reading the newsletter and keeping me in a job that actually pays. ;) ~ karen
Joe_McK
I have two questions about the printing process.
Have you ever had a problem with your printer feeding the waxed paper through?
Since the wet side of the waxed paper is placed next to the wood, would it be necessary to reverse the image to make any text easier to read?
Thanks for the great ideas.
Karen
Hi Joe - Yes, you definitely need to reverse the image. I think show that 2 or three pictures down in the post. My particular printer hasn't had any trouble feeding through wax paper but that doesn't necessarily mean it will go as smoothly for you, lol. But it should. :) ~ karen
Joe_McK
Thank you for the reply. Later I found the answer about reversing the image in the first article about printing on wood, but never saw a picture showing that. Maybe didn't look in the right place.
My printer has problems feeding many kinds of paper, especially if the paper is the least bit uneven or wrinkled. Not sure if it is not too stiff. I think it's worth a try some time.
Celia
I was very interested to see a post about a flower box, as I made one in Woodshop lo these many years ago. More interested to see you only nailed the box because: the parts of my box that *only* had nails fell apart, while the parts of the box that were glued together held. Would you say then that this box shouldn't go outside? Won't watering the plants warp the wood? Thank you for any advice!
Karen
Celia - That's why I specify you need to use spiral finishing nails. They grip in a way that regular straight nails don't. You can use wood glue as well if you like but it really isn't necessary because this isn't a real planter box that will go through a lot of wear and tear. I wanted to keep the project as simple as possible for people who have never done anything like this before. In terms of watering, you won't actually be planting the plants in the box, just resting the pots in it. So just if you plan on using the planter box a lot, always keeping it full of plants, remove your pots, water them, and place them back in the planter. Or, if you're only going to use it occassionally for plants, do as I did which was to put your planter into the bathtub/utility sink, water, let drain and dry, then put it out again. You won't have a problem with warping when you're just doing this occasionally and if you allow the wood to dry out. ~ karen!
Laura Bee
I have been wanting planters along the driveway for years. It's really not that hard, is it? I have to remember to water more this year! What would be good do you think? Peppers, tomatoes. Will cucumbers & zuchinni climb or would I have to tie them up to avoid them getting run over?