Twice. That is exactly how many times my house has looked perfect both inside and outside at the very same time. Twice.
Once when Style at Home came to shoot both the inside and outside of my house for their magazine. And once when Canadian Living came to shoot the inside and outside of my house for a magazine. And both times when they came, I was a mess. I may have even had bugs in my hair, who knows. That's one thing I've never achieved. The trifecta of accomplishment and attractiveness, where the inside of my house, outside of my house and I all look good at the same time.
Other than those two days, every other day of its existence while in my care, this house has had some portion of it that's a disaster. I'm either fixing something, painting something, or working on something. And even if I'm not, the house gets into a pretty good wreck just writing a simple post.
Most days if you were to walk into my house you'd either find a random mound of dirt in the kitchen, or the tripod and a ladder set up in the front hall with all the furniture moved into one corner or every lamp I own bunched into a pile in the living room. Sometimes I do that just for fun to see how many lamps I own. And chances are I'm wearing jeans, my "humorist" t-shirt and a pair of white socks that are never white on the bottom because no matter how many times I wash the floor it never stays clean more than 30 seconds.
Last week my house and the outside of my house were lookin' pretty snappy. I got the last of the Christmas decorations down, swept the porch, shovelled out a nice path to the wood pile, put down some straw outside for the chickens to romp around in and picked up all the random crap laying around the house. You know the stuff. The receipts you don't know what to do with, the random screw you found in the carpet and don't really want to throw out but don't want to walk down to the basement with either.
Everything was as it should be. Which was a great feeling. Which lasted approximately 3 hours.
All that perfection and yet my dining room ceiling fixture was imperfect. By about 8".
When I moved into this house I couldn't figure out why they put the dining room light where they did. Was it an artistic expression to have it not centred in the room? Or maybe their table was a weird shape. After living here for 15 years I realize the dining room light wasn't centred because the people who put it up were idiots. They were probably the same people who laid the ceramic tile it the kitchen with ½" wide grout and cemented in the broken dishwasher at the same time so to remove it I had to smash out a row of tile.
They weren't the type of people to be bothered with things like measuring tapes or even a good attempt at eyeballing things into place. They were more the fling a piece of booger on the ceiling and wherever it lands is where the light goes kindda folk.
So for more than 15 years I've been driven crazy by the light over my dining room table that's off centre by just enough to make it obviously off centre.
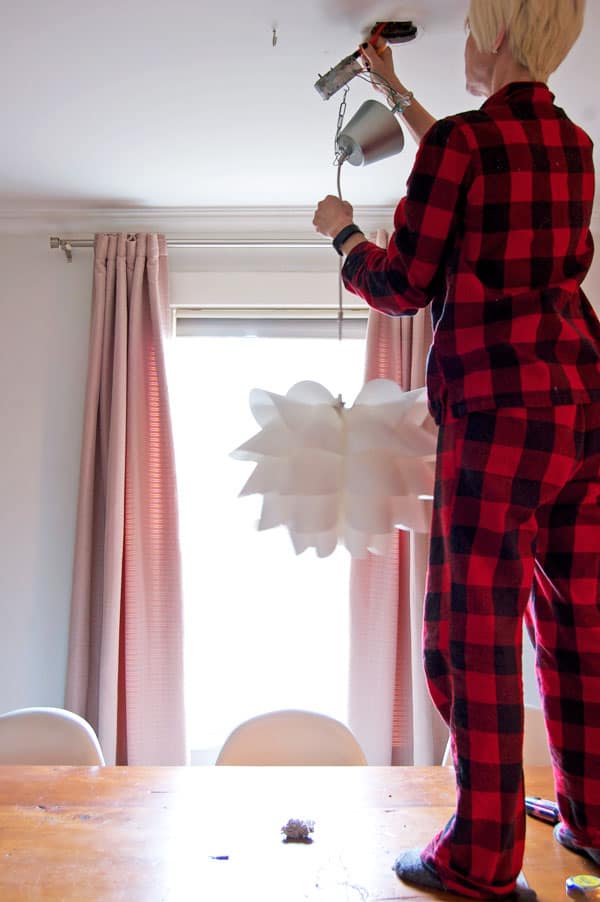
So just when my house was cleaned up ... I ripped out my ceiling fixture and moved it.

I never did it before because I didn't want to have to have an electrician come in and do it because of the cost. Then I realized if there was enough wire in the ceiling that I could stretch it over another 8" I wouldn't even need to add another electrical box and more wiring, . I could just move the one I had over. (If you run an electrical box from another electrical box, you have to leave the first one in place and just cover it with a metal plate which would be ugly) That's according to code anyway.
I'm going to show you how to do this yourself. But I'm not doing extremely detailed instructions because if you need extremely detailed instructions chances are you shouldn't be fooling around with electrical work anyway, so I'm basically doing you a favour. With a U. Because I'm Canadian.
In case you didn't guess by my plaid flannel pajamas.
I do my best work in my pajamas. You'll have to excuse the horrid photography but I honestly wasn't even planning on doing this, let alone a post on it so I just set my camera up on a tripod quickly and as it got later and later the light in the room became less and less until I was basically working in the dark, and therefore taking pictures in the dark too. So. Not exactly worthy of Popular Photography but it'll get my point across.
1. Turn the POWER OFF to the portion of the house you're working on. OFF OFF OFF.
2. Remove your light fixture. Or if it's just lightweight like mine you can leave it and move onto step 3.
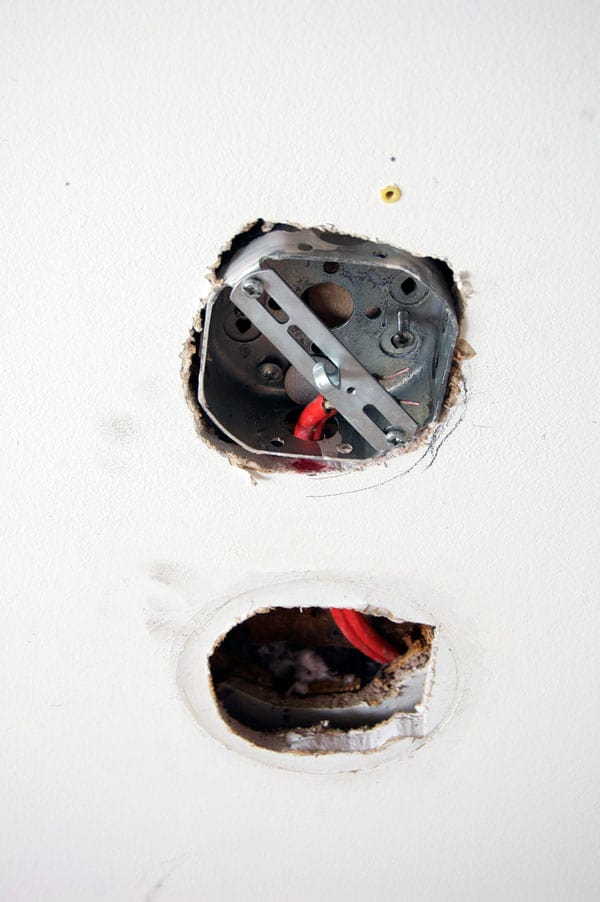
3. Remove the screws holding the box into place in the ceiling.
4. Pull the box down and gently tug on the wires to see how much slack there is in them.
5. Pull out the amount of line that you need (in my case I just pulled it as far as it would go) and mark where the box is on the ceiling with pencil.
Would you like to save this stuff?
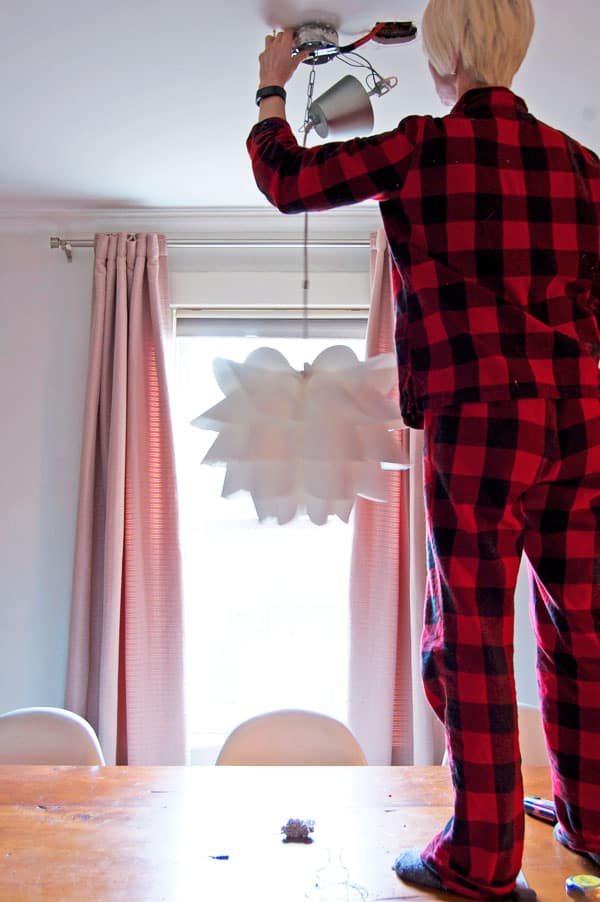
6. Now that you know you have enough wire and you're sure where the box needs to go you can undo your wires and take your light down.
7. Trace around the box on your ceiling.
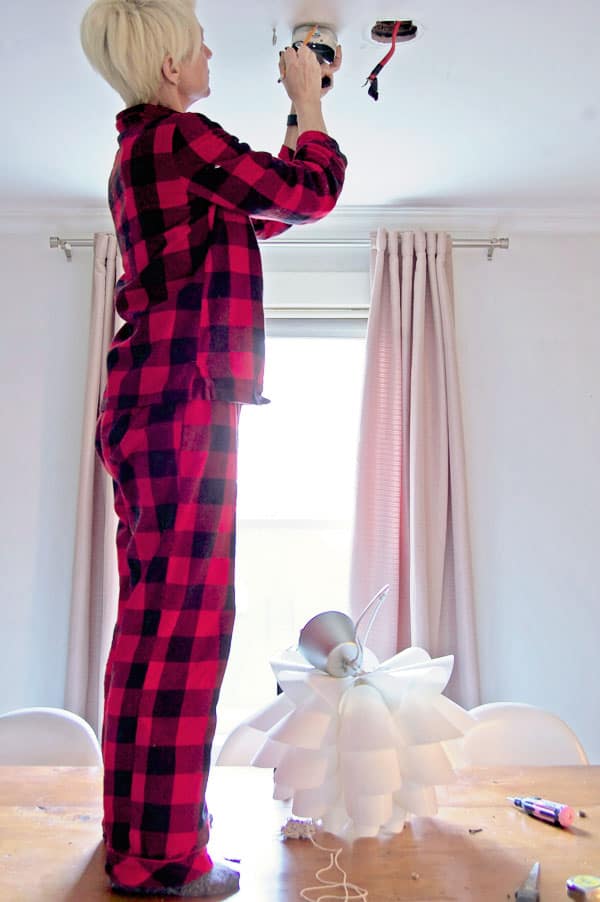
8. Using a hole saw or drywall knife cut around your outline.
(my wire was coming from the right so I didn't need to worry about cutting into electrical wire. Check for that)
9. Cut a length of wood to fit into your hole and secure it into place so you have something to screw the box to. Make sure it's VERY secure because it will be taking the weight of your light fixture and even if the one you have now is lightweight, the next one you put up might not be. You can see a couple of the green decking screws I've used in the right of the hole. The yellow thing is just an old plastic anchor. I'll pull it out later and fill the hole.

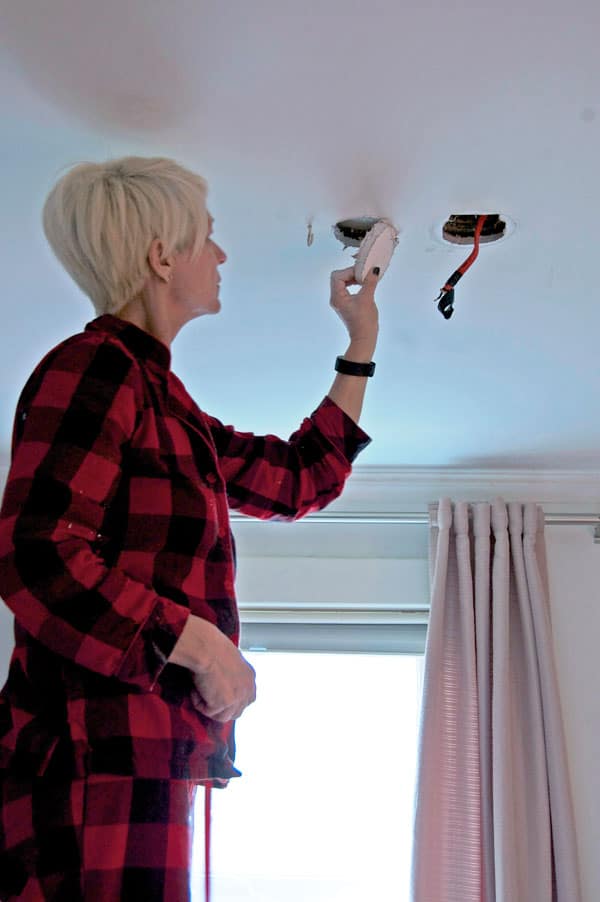
10. Put your box into your new hole and screw it into place. Make sure you run the wire through the hole in the side of the box first.
In the photo below you can see the original hole for the box and the wire running from it to the boxes new placement.
11. Wire up your lamp again and stand back and admire. The big hole in your ceiling.
12. Turn your power back on to test the light.
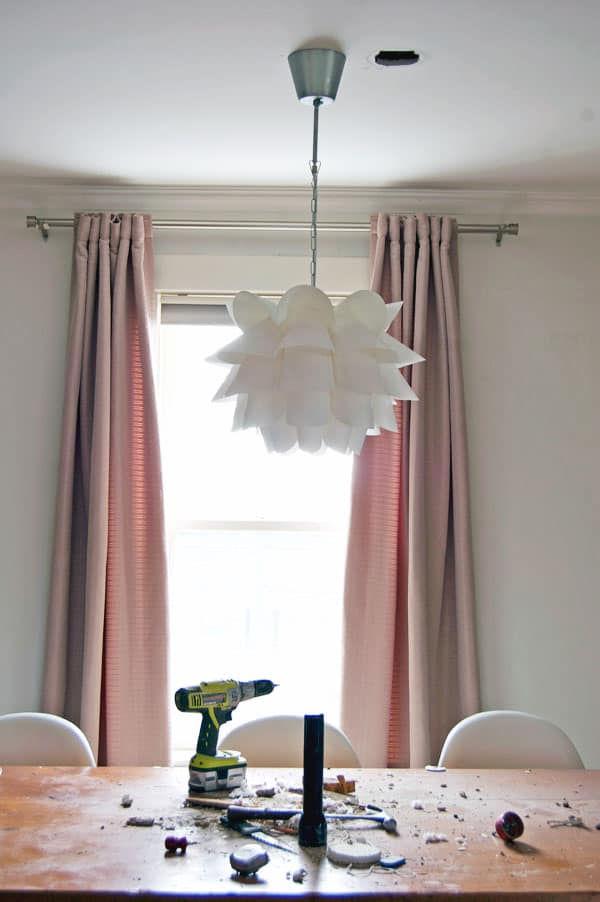
13. Now you just have to patch the hole in your drywall. I did this by inserting the circle of drywall I cut out for the new box placement. Just screw it in with drywall screws and apply drywall compound like you normally would. Here's a post on how to patch drywall in detail if you need it.
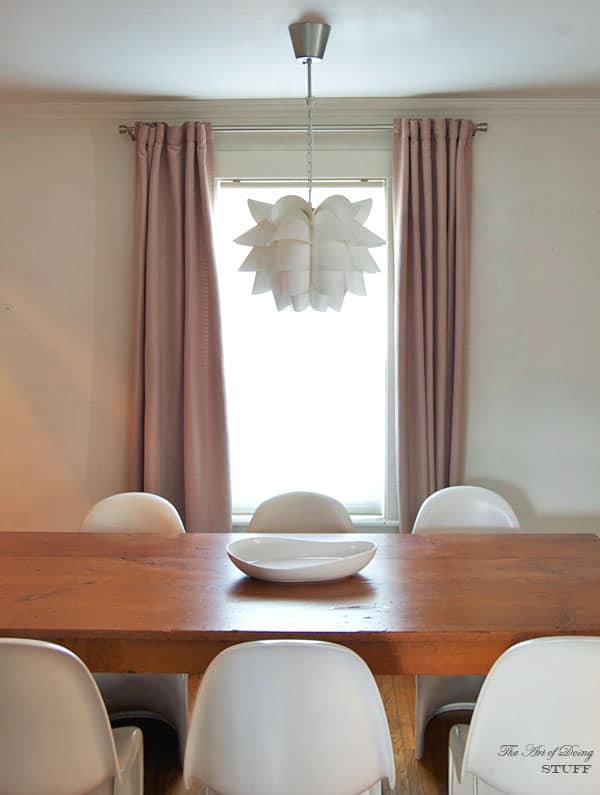
It still isn't perfectly centred but it's way better than it was. It's close enough that it looks centred which is all I care about. If I wanted to make it perfect I would have had to extend the wiring and add a second box and blah, blah, blah. It just wasn't worth it for a matter of 2 inches. With some things 2" make all the difference in the world. This is not one of those things.
I'm proud to say I not only repaired the drywall but have even returned all of my tools to the basement. At which point I lugged up a giant bag of dirt for the kitchen.
It's officially seed starting season. Bring on the mess.
[shareaholic app="share_buttons" id="5342563"]


Emily
Aww I wanted to learn how to patch a hole in the ceiling. There was a water leak that was fixed but left water damage in the basement ceiling. Then my dad did a horrible job at patching and painting it over. Now there's a very noticeable lump there so I want to fix it.
I think all I need to do is sand it down and paint with a popcorn texture.
I'm gonna use your method to patch an open hole in the boiler room tho. Thanks
Karen
Hi Emily! Did you see my drywall patching post? It's an old with but still hits all the points you need. ~ karen!
Shannon
Thank you, thank you, thank you!!!! I am currently staring at a hole in my ceiling where I removed my light fixture because it is 4" off center! It was driving me BATTY!!! I googled & this came up! You have saved me from my perfectionist nightmare!! :) :) :)
Kelsey
Nice Work, You are one of the brave lady I have seen.
Karen
Thanks Kelsey. This wasn't nearly as brave as the time I trapped a raccoon though. ~ karen!