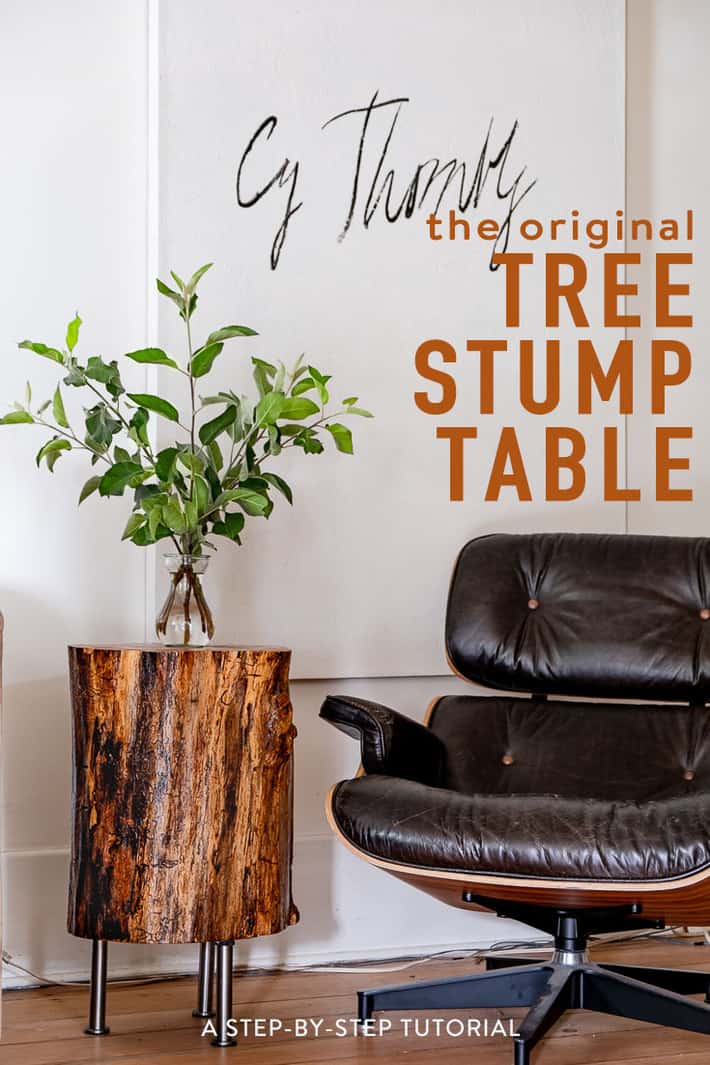
The tree stump table that endured the test of time and my own design whims. Not everything you DIY will be a part of your home forever, but this is one of the few things that might.
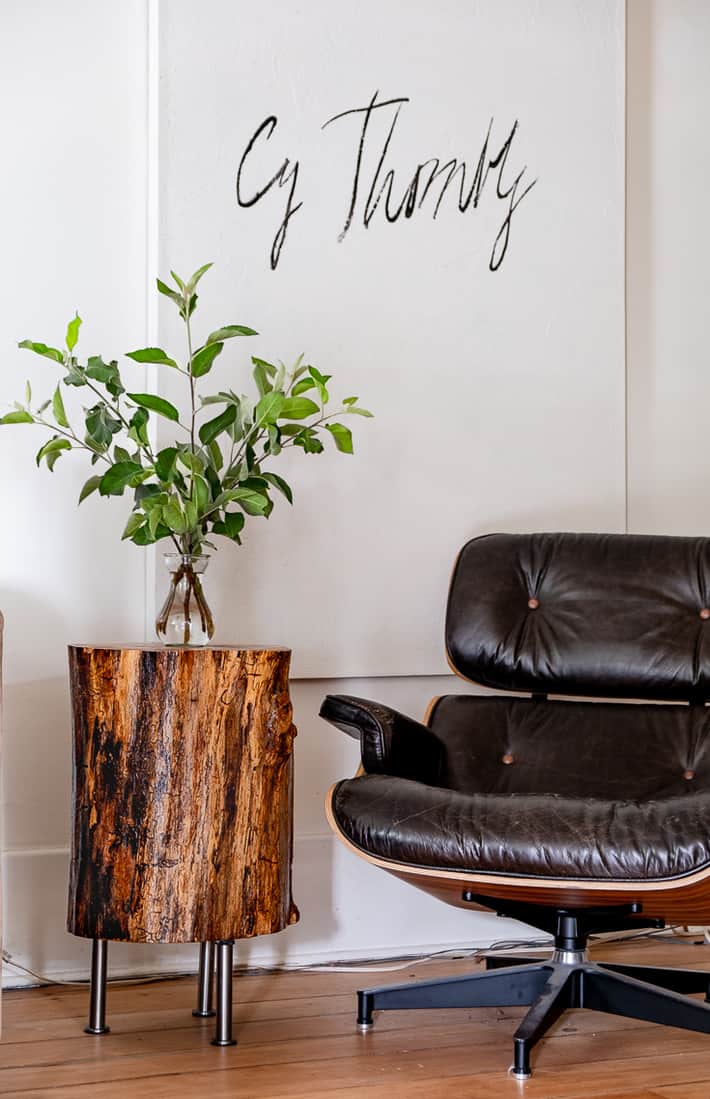
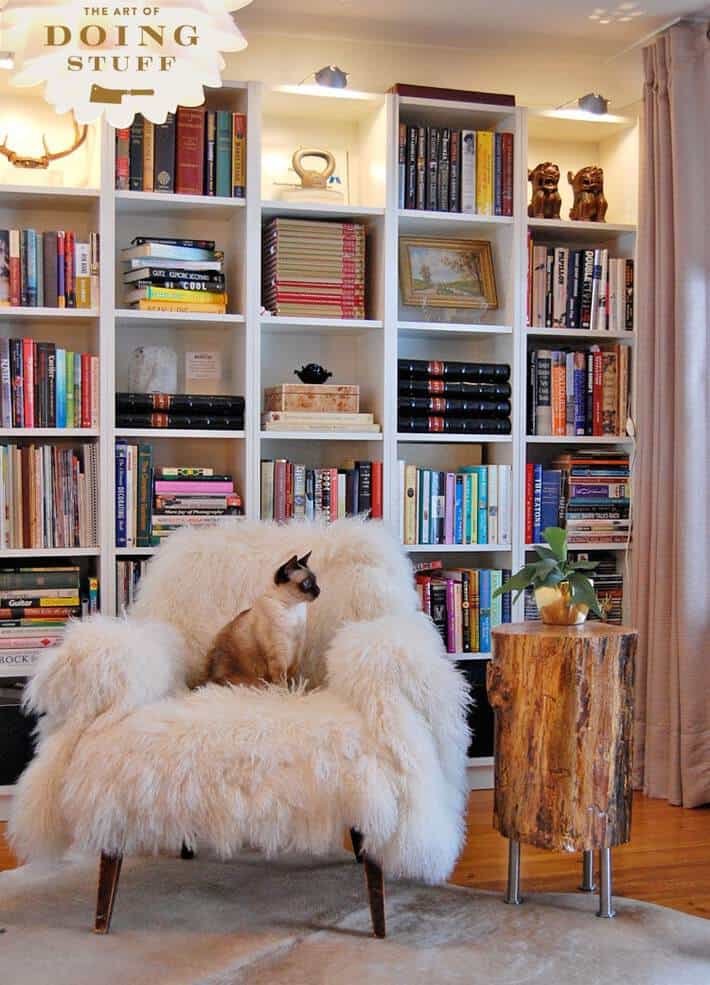
10 years ago I made a tree stump table. It got shared, copied and posted about so much it's one of 3 posts that I consider to have kickstarted my blogging career (thanks in part to Design*Sponge loving it too.) That table still sits in my living room looking as good as the day I made it.
Stump tables, made out of tree trunks, are one part architectural piece, one part table, one part bugs. Don't worry. We'll get rid of the bugs.
The point is they aren't just a place to put your coffee, a stump table brings the outside in giving your room a cozy organic feel.
They can feel modern or completely hygge and organic. It depends on how you finish them.

FYI! You can also use these as bases for a stump table with a glass top.
These two tree stump ideas are for using them indoors and no chain saws are involved.
I'll show you how to make an unfinished table that's similar to the famous Crate and Barrel tree stump table that is STILL for sale over a decade later (proof that this little end table is on its way to being a classic) and a finished one that sits on tall legs.
This table costs over $1,000 on Crate and Barrel by the way.
First the finished stump table that's on legs.
Table of Contents
Materials
- Tree stump
- Sandpaper (medium and fine grit)
- Polyurethane (high gloss, semi-gloss, satin … whichever you want) I used satin which has just a nice sheen
- Paint brush
- 1 package of 4, 6" Capita legs from Ikea (these legs aren't available at Ikea anymore but they ARE available on Amazon.)
- Drill and appropriate bits
First things first. You have to get yourself a tree stump.
Where to find a tree stump?
Keep your eye out for city workers or private tree companies taking down trees. Pull over, ask them if you an have a section of a branch if they're big or the stump. Simple as that.
Call up places near you that sell firewood. They advertise a lot during this time of year so they'll be easy to find. That's what makes fall tree stump season!
I got my stump delivered with my yearly wood order.
How big should it be?
It depends if you want your table to be on legs or sit directly on the floor. I like the look of legs.
Your legs will be 6 inches high, so figure out how tall your stump needs to be for where you want to put it.
Generally you're going to want a tall tree stump for this.
If your sofa has arms at 25" and you want it to be around level with the arms, then you need a stump that's 18" tall.
My stump is 15" across by 18" high, with the 6" legs it's a total of 24" high. This brings it to just below the arm of my sofa.
Steps
Step 1 DRY IT
Allow your stump to dry out for at least a month. It’ll lose several pounds and the bark will loosen, making step 2 easier.
Coincidentally if you allow yourself to dry out for a month you’ll lose several pounds too.
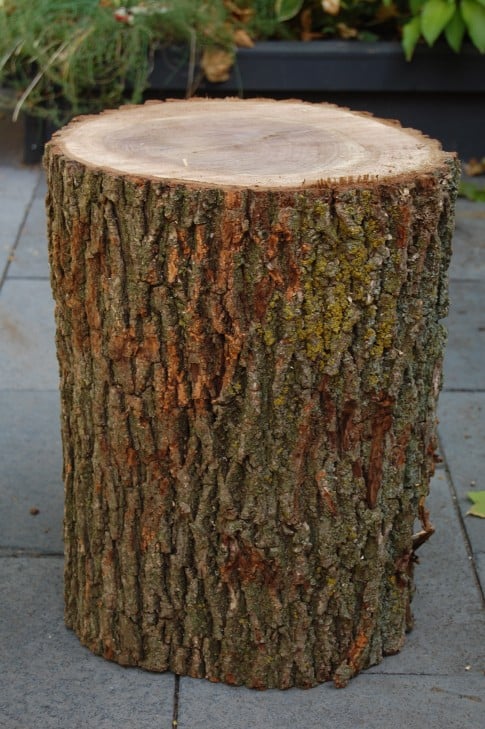
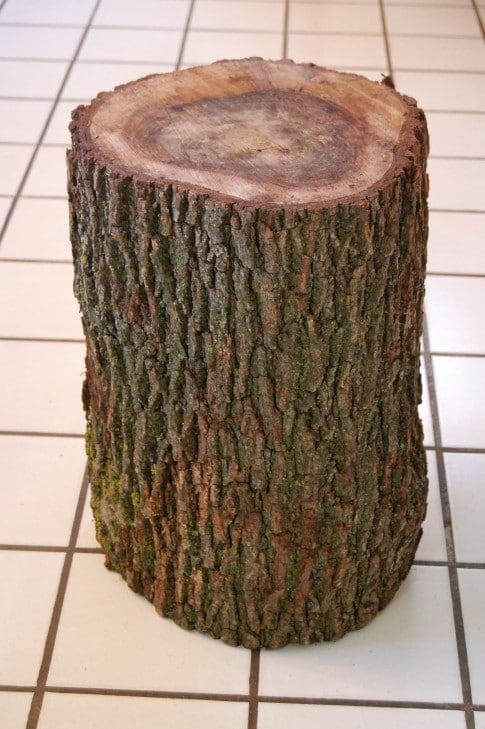
You can dry the stump outside for a couple of months, then bring it inside for a couple of weeks.
If your stump was already cut and dried from wherever you got it, you can just bring it inside for a couple of weeks.
Step 2 REMOVE THE BARK
Now the work begins. You have to remove the bark. Sometimes this is easy, sometimes it isn't.
The first stump table I made was from Oak. The bark just pulled off with my hands.
The second stump table I made was from Walnut. The bark was a nightmare to remove. I needed an array of tools and a 14' length of prayer beads.
To remove the stump's bark, you'll need these tools to do it:
A Hammer
A Prybar
After your stump has dried inside for a couple of weeks insert the prybar between the bark and the stump. Hammer it enough to loosen the wood then either keep hammering or pull the bark loose with your fingers. Keep doing this all the way around the stump until all the bark is off.
And yes, you do need to remove the bark. If you don't, over time it'll loosen and fall off on its own leaving you with a cruddy looking piece of crud as a table.
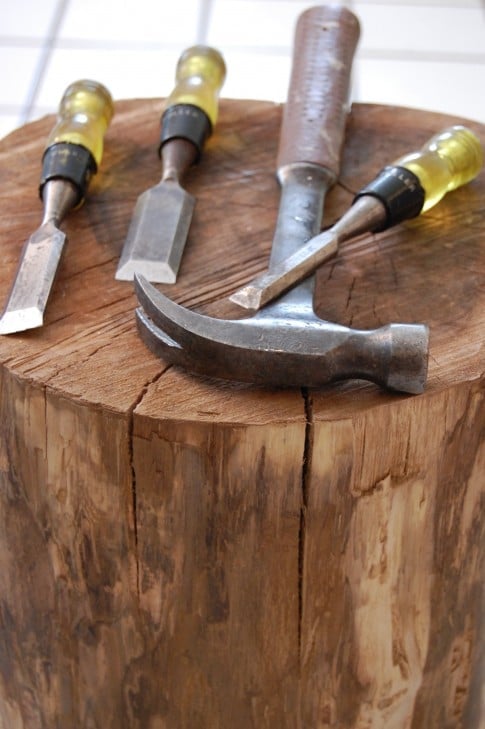

If the bark is particularly stubborn, like this stupid thing was ... do the same thing but with wood chisels. They're sharper and will cut through the fibres between the bark and the stump better than a prybar. Be careful not to hack into the wood with the chisel though.
Do not hack into yourself either. Wood chisels are sharp on all sides, not just the tips, so be careful.
Now your stump is cleaned of its bark.
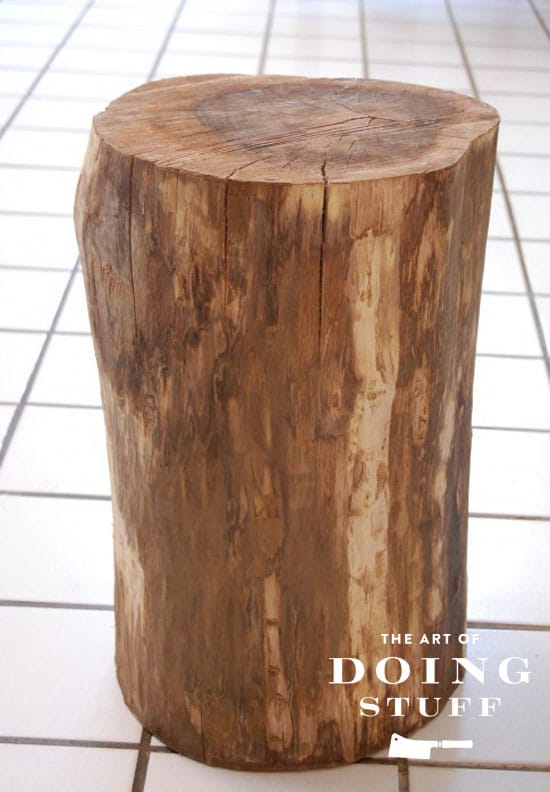
When it's dried out the stump might split a bit like this. That's O.K. It adds character.
Step 3 - SAND IT
The stump now needs to be sanded to get all the little hairs and slivers off it.
You need a smooth stump. Use a variety of sandpaper grits to sand it smooth.
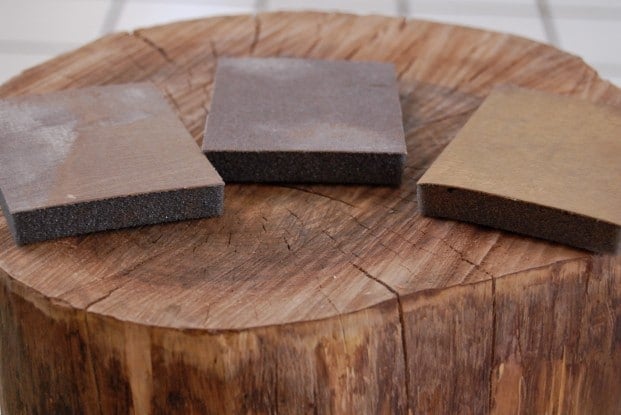
Start with the coarsest grit, gradually working your way to sanding the stump with the smoothest grit.
Get rid of all the hairs.
Sand until you can run your hand over the stump and it feels smooth.
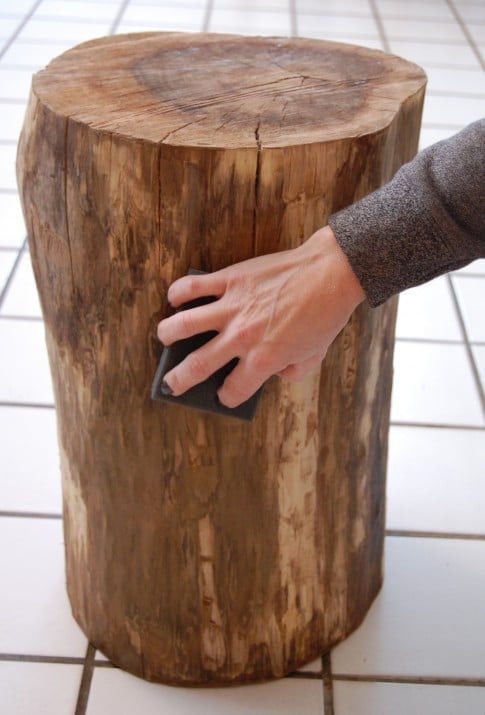
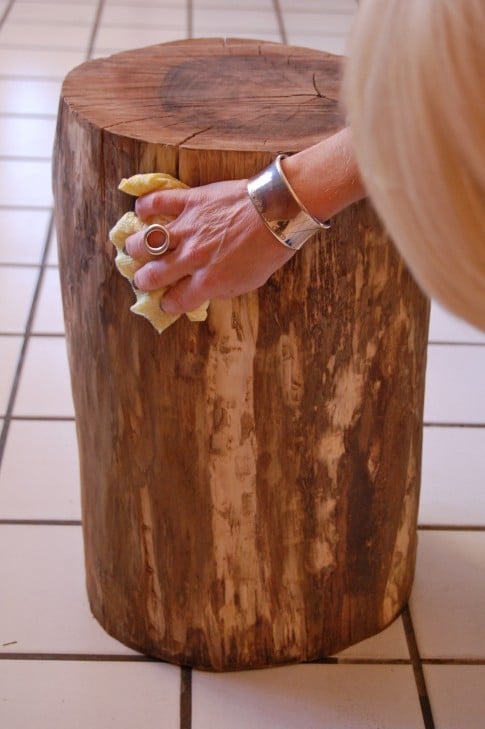
Once your stump is smooth wipe over it with a damp, lint free cloth or a tack cloth.
A lot of wood dust will come off. Keep wiping until your cloth comes away clean.
Would you like to save this stuff?
Now flip your stump over and get ready for the fun part.
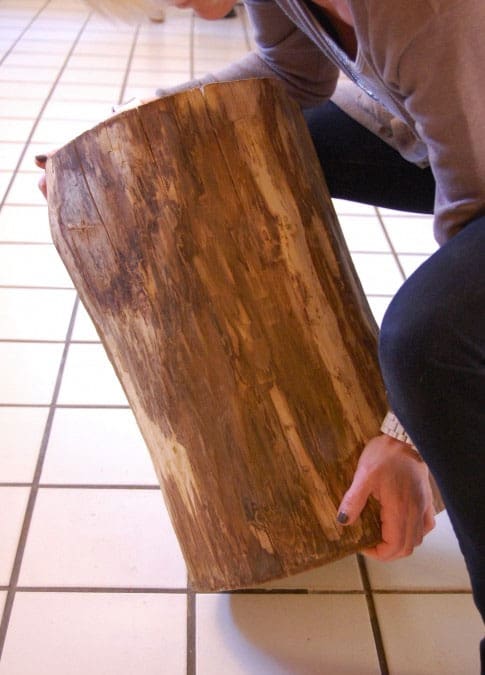
Step 4 - ATTACH THE LEGS
Get your pre-purchased legs. Like I said, mine are the Capita legs from Ikea which are soon to be discontinued. You can buy the exact Ikea Capita legs on Amazon though.
To make the end table more like the $900 Crate and Barrel one, ditch the long legs and use little bun feet like these instead. You'll also need a wider, more squat stump.
Each leg comes with a bracket that you screw into the base of your table.
Whatever kind of legs you get make sure the height is adjustable like these are. Adjustable legs on the table means you can make sure it's level without having to squish up a folded up piece of paper. Or if you're a certain age and type - a book of matches.
Don't forget. Adjustable legs are the way to make sure your stump table is level.
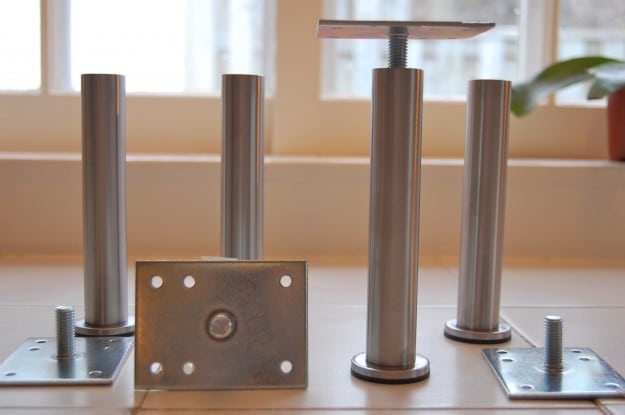
Place your legs on the underside of your stump. You can use all 4 legs or just 3. I'm partial to 3, but 4 is definitely more stable.
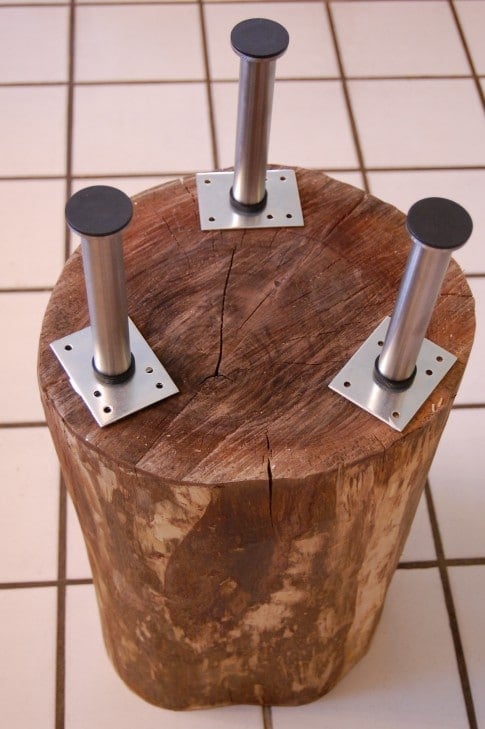
Use a measuring tape to make sure they're an equal distance apart.
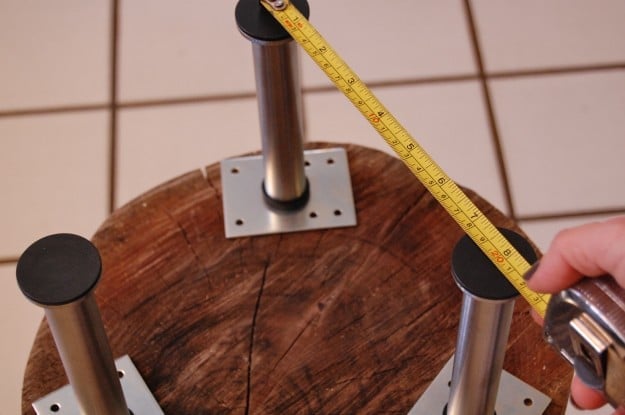
Once you have the legs positioned, mark the holes in the plates with either a pencil or a marker.
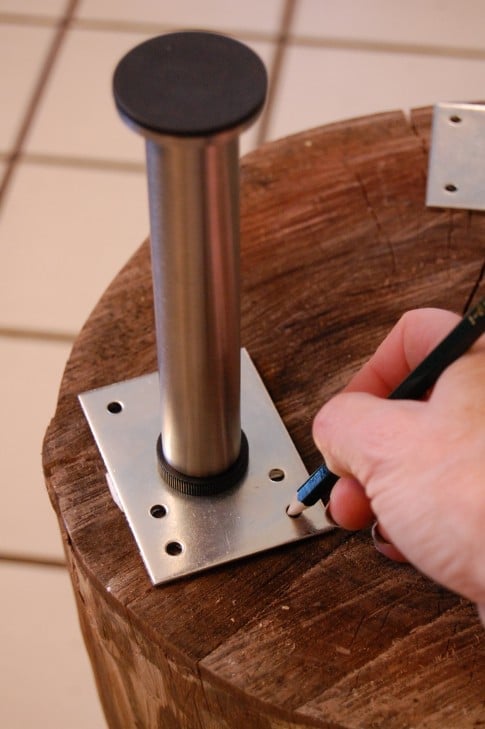
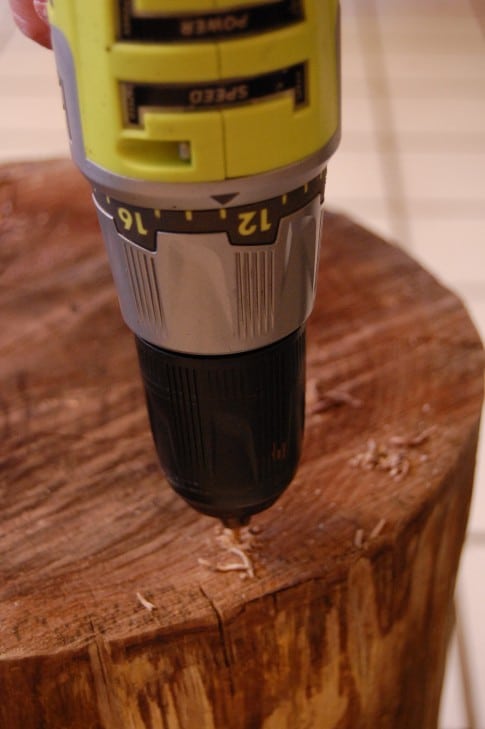
Remove the legs and fit your drill with the appropriate sized drill bit.
Pre-drill holes at the spots you marked for the screws.
Once all your holes are predrilled, place your legs and brackets back on and screw them into place.
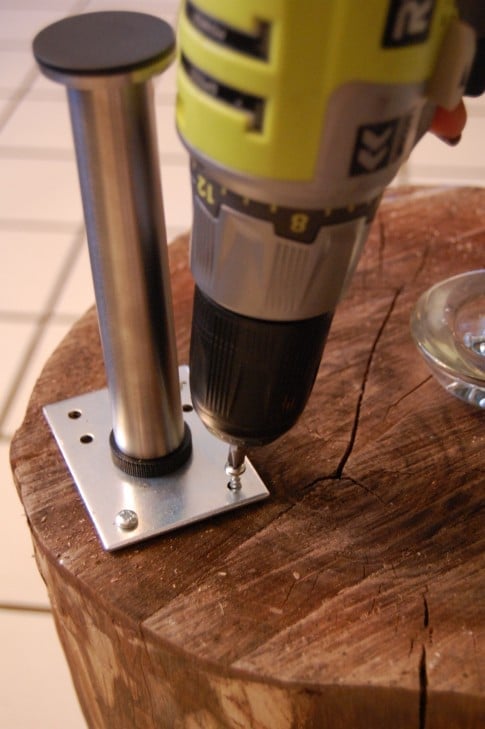
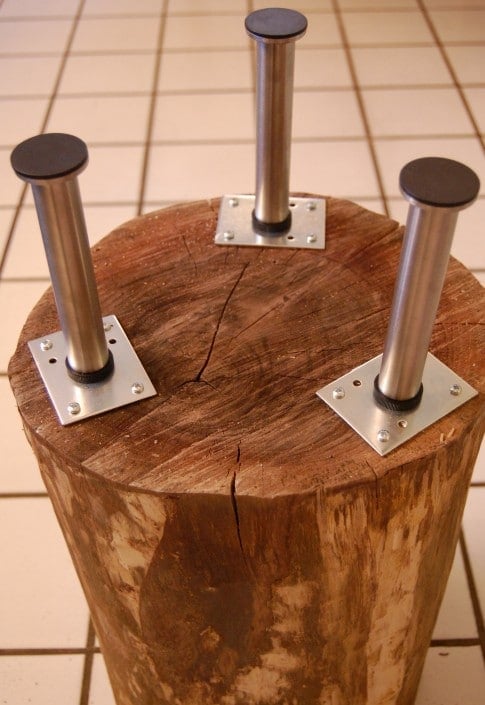
To make my life easier, I put all my screws into a little dish. Don't question it. Just do it.
Now all your legs are on!
Step 5 - STAIN & SEAL IT (OPTIONAL)
If there are any sections where you accidentally took too much of the wood off (it's lighter underneath) you can skim over it with some stain. I have a whack of different cans of stain so I picked the one I thought would match the best.
Appropriately, it was "Walnut" stain for this walnut stump.
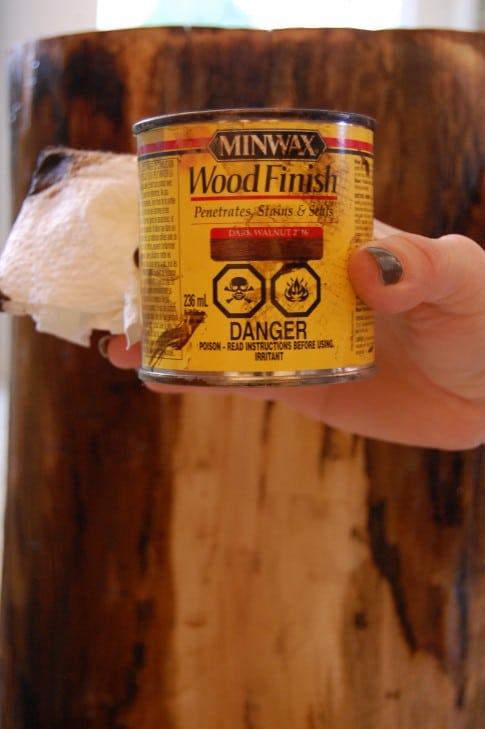
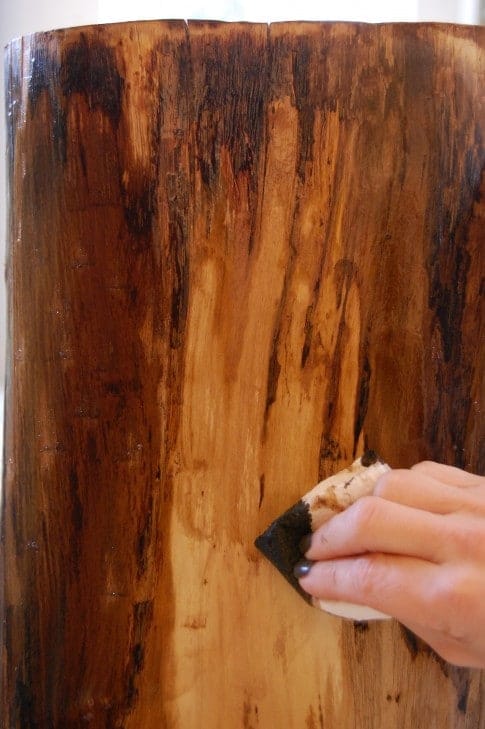
Just wipe it onto the light portion of your wood with some paper towel. It just darkens it up enough to make it blend in a little better. There will still be a colour variation, just not quite as distinct. Again, the look and colour and grain will be different depending on what type of wood stump you're working with.
The staining is a matter of choice. On my first stump table I didn't do it ... on this one I did.
Let your stain soak in and dry.
SEAL IT
Now you have to seal all that hard work in.
To stop your stump from drying out even more and to keep it from getting marked on top when you put things down on it you should seal your tree stump.
You can use any wood sealer. If you want a completely natural look I'd recommend sealing it with Thompsons Water Seal which will give the look of having no finish on it at all. Just remember that Thompsons Water Seal is water based which means it can only go on natural wood or wood that has been stained with a water based stain.
I used an oil based Polyurethane to make my stump top as durable as possible. I tend to be a bit spilly and bangy.
If you're using an oil based finish use a natural bristle brush.
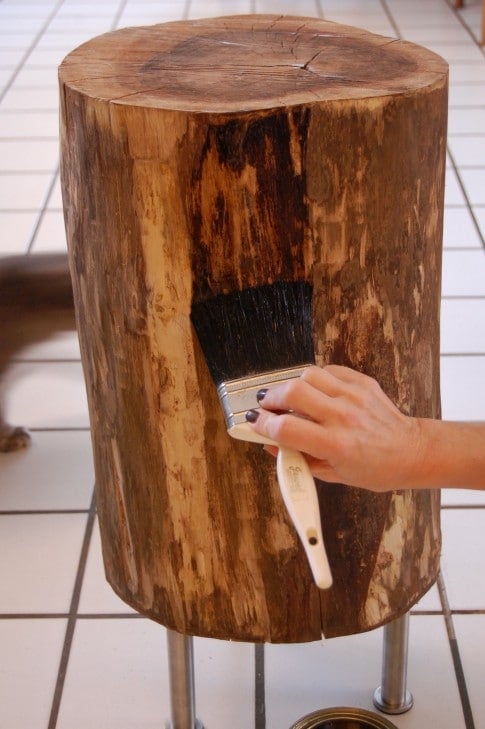
Seal the whole stump.
Seal the top, sides and bottom of the stump with 2-3 coats.
The top of the stump will get really dark, but it'll lighten up once the finish sinks in and dries.
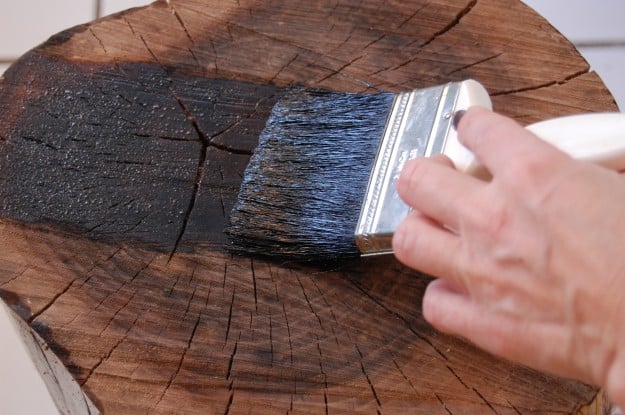
After your first coat dries, gently sand off any burrs and bumps.
The sanding will leave the finish with a white haze. Don't worry about it. It'll go away once you apply another coat of finish. Seal the sides and underside again 1-2 more times according to the manufacturer's directions.
Your stump may need up to 6 coats on the top. Because of the open grain, the finish soaks into the top a lot more and requires more coats. Always let your finish dry the recommended amount of time in between coats.
Once you've completed all coats of finish you're done.
Want to paint it?
If you're rather have a painted stump table, after sanding and wiping it apply a coat of primer. Once the primer has dried you can paint it with either water based or oil based paint.

Tree Trunk Table
How to make a tree stump table.
Materials
- Tree stump (your choice for size)
- Sandpaper (medium and fine grit)
- Polyurethane (high gloss, semi-gloss, satin … whichever you want) I used satin which has just a nice sheen
- Paint brush
- 1 package of 4, 6" Capita legs from Ikea (or similar)
Tools
- Drill
Instructions
Get your stump and allow it to dry out for at least a month. It will lose weight over this period and the bark will shrink away from the wood.
If you let your stump dry outside, as opposed to inside you'll still need to let it dry out inside for another couple of weeks to acclimatize it.
Once the stump has dried out remove the bark from it using a prybar and a hammer to chisel it away. Be careful not to gouge the wood stump.
If the bark is difficult to get off let it dry longer or carefully use a chisel with a hammer to remove it.
Sand your stump to get it smooth and then run over it with a tack cloth or damp cloth to remove any sawdust.
Flip the stump over so you're working on the underside of it and screw in the legs. Pre-drill your screw holes and make sure to measure so your legs are equal distances apart.
Stain and seal the table if desired.
Notes
If you want a very natural look to your stump, use a water based stain followed by Thompson's Water seal.
For optimal protection and a bit of a sheen on your stump use an oil based stain and a Polyurethane finish in satin.
Recommended Products
I'm an Amazon affiliate some I get a few cents when you buy something I've linked to.
Unfinished stump table
This is pretty obvious, but if you'd rather make a more natural looking log side table, just skip adding stain and any finish to it.
For an even more organic look, leave the legs off of it.
To make one just find a log, let it dry out, then sand it smooth.
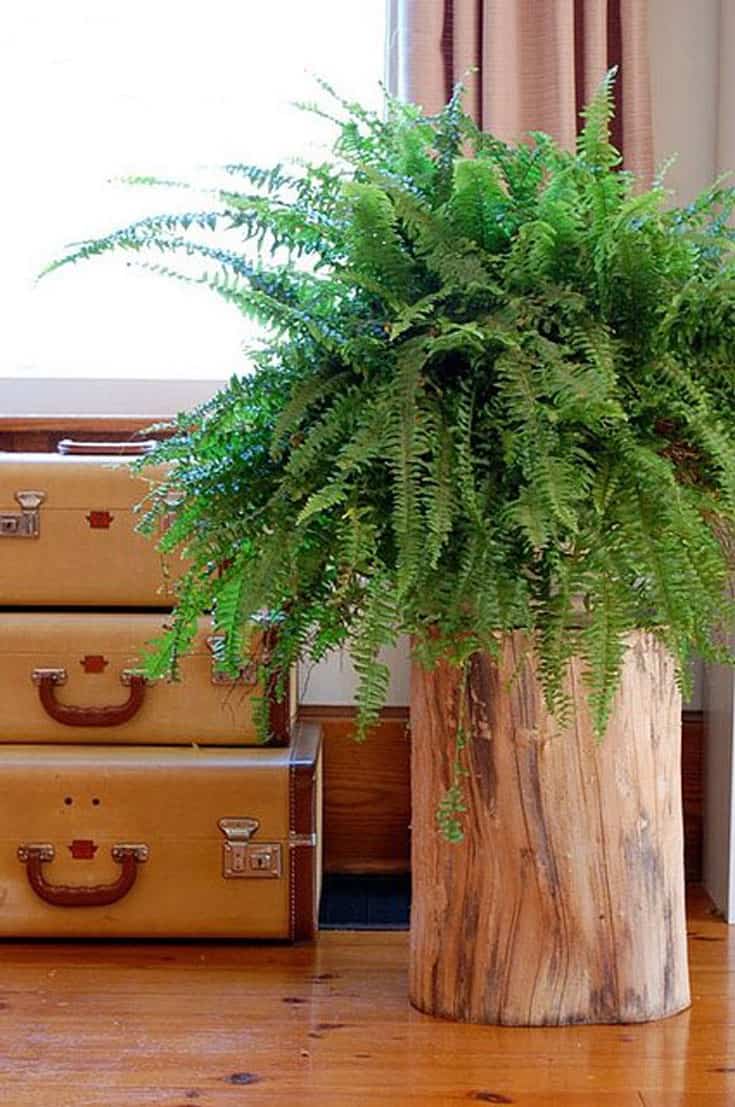
Wood from deciduous trees: Ash, black walnut, birch, cypress, cherry, elm, maple and oak are all good choices.
You should AVOID conifers. Those trees that have resin that are a sticky mess. Trees like cedar, fir, juniper, pine, redwood, spruce, yew, larch should not be used. (think of how sticky the bottom of a Christmas tree is after cutting it)
The only drawback to these tables? Everyone is going to want you to make them one. So you can either start a blog, get a following, contemplate quitting, keep at it, and then one day write a post about how to build a stump table that you can tell them about.
Or you can just skip all that and direct them to this post instead.
→Follow me on Instagram where I often make a fool of myself←


sandrine
hi it is very beautiful your table
Vik
Very informative post. Thanks for putting it up.
I've never done this before. Heck, I am the kinda person who thinks it's a big achievement if I change the light bulbs in the house :)
Quick questions for you:
- I was planning to make a table and put it outside on my deck. Any recommendations on steps to do that? Do I need to seal the wood? Does it prevent the wood from rotting?
I suspect sanding is still an important step as it'll probably get rid of any splinters etc that could cause issues.
Any other tips for setting up a table outside?
Thanks
Karen
Hi Vik! Sealing is important if you want the stump to last outside, otherwise it'll just eventually rot. You can seal it with any outdoor wood sealer. If you want it to look more natural use Thompson's Water Seal because it doesn't add any shine and does a great job of sealing the wood. :) ~ karen!
Vik
Thanks, Karen.
I hope to do it sometime this month :)
krish
hi I like the way you describe everything. I have so many logs but I don't know how to use them Can you please explain how to make a center table with the logs and floating study table for my kids.What tools do I need to buy
thanks alot
Amy
Hi Karen -- I have completed the stump work but would like to add a piece of glass as the table top so that I have more surface area. Do you have any suggestions for how to do this and also where to find a piece of glass for something like that? Thanks!
Nancy
Love love love it.
Going to make at least one. I was at West Elm and saw theirs but must admit I like your table more, especially with the feet.
Now I'm on the hunt for a tree stump.
Beautiful job, love your tutorial.
Karen
Thanks Nancy, I appreciate you saying so. :) I made that table YEARS ago for the blog and I still absolutely love it. Good luck! ~ karen!
Chrissy
I just came across this post, and it has given me the confidence to tackle the stump that's been sitting on my porch for a year and a half! I kept as a memento from our wedding decor with the pipe dream that I'd eventually turn it into a table, but I've been too scared that I'd ruin it. Thank you for the confidence boost. It's been shedding bark for a quite while now, so I'm thinking this isn't going to be so bad after all!!
Guy H.
Maybe I missed it somewhere in your comments but one simple but extremely important question. How did you insure that your table was level? The log needs to be perfectly level in order to make it work.
JP
p.s. it is quite clear you are superior, just like a cat. it also helps that you are a canuck (meant in warm way). i'm in vermont and we really want you to adopt us!! ;-). i'm so glad i tripped on your site!! good luck with your endeavors and please keep posting. :-).
Karen
We expect to see many of our American friends crossing the border some time around November. ;) ~ karen!
JP
beautiful work and talent. i am not going to lie. my favs...the cat walking by in haste and getting a chuckle at the challenge of your neice trying to "toss" this peice out. i highly doubt she will. thank you for your help and tips!! good luck with your art and work.
Karen
Thanks JP. It's been several years since I wrote this post and so far so good. My niece STILL has the stump table! ~ karen
Mercy Jacob
Thanks for the reply. Mercy
Mercy Jacob
H Karen, The stump is pretty good. Can I pour wood glue through the cracks so that all the cracks stick together and does not move. Just asking for suggestions.
Mercy
Karen
No ma'am. That won't work. ~ karen!
Mercy Jacob
Hi Karen, Thanks for the prompt reply. I appreciate it because I was working on it and did not know whether to continue. It is more than three months old so I don't know whether it will crack further. If I go ahead will the crack get covered with the wax. Mercy
Karen
Hi Mercy. Wood can crack for years. I can't see the stump so I'm not sure how big it is. Just polyurethane it as far as you can get your brush in. The polyurethane is just to protect the table from spills and stains so it doesn't really matter if it makes it right into the centre of the crack. ~ karen!
Mercy Jacob
I have a tree stump for the purpose of making a small side table but as I was taking the bark out I found it has a crack all the way through. Can I use it.
Thanks
Mercy
Karen
Hi Mercy! Well if the split runs the entire way through the stump so that it'll fall apart the no. Can't use it. But if it's just a crack that runs from the outside towards the centre it's fine. Basically it's fine as long as it isn't going to fall apart. A crack usually looks nice, it adds interest. Also depending on how dry the log is, it may crack even more so keep that in mind. ~ karen!
Mercy Jacob
Hi Karen I have a tree stump but as I was taking the bark out I found it has a split all the way through. Can I still use it.
Mercy
Diana S
Hey Karen,
Nice Post and thanks for the advice on the tree stump table. I absolutely love your idea. Thanks
Harry Hs
Subject : Are you loosing your business?
Hello,
Looking for online visibility and business from your website??
We can increase your online presence by providing you right platform through various digital marketing tools like SEO, SMO, PPC, mobile application, EMAIL campaign, website designing and development etc. These tools help to increase your business exponentially.
Your company can hit in the top 10 position in Google by doing digital marketing tools in very short time.
If you are interested please feel free to revert through mail or can call on my hand set.
We would happy to provide you best online service.
Waiting for your reply.
Regards,
Harry
2355 Austin Ave Coquitlam
British Columbia, CA V3K 3R9
Call Harry @ (778) 919-9195
Call Abhi @ (604) 657-7427
E-mail: harry@ariswebtech.ca
abhi@ariswebtech.ca
Amber
Karen, I found this amazing project on pinterest. It led me to the joyboo site place that stole your project and didnt link it. Just saw that in the comments and wanted to let you know. I am pinning this from your site so I can hopefully try it out soon. Thanks for the tutorial. Have a great day!
Karen
omg THANK YOU Amber. That's incredibly nice of you. My site is fairly large, but it would be twice as big if I didn't have to deal with all the spammy sites stealing my content! Again, thank you, I truly, truly appreciate you taking the time to Pin to my site and let me know. :) ~ karen!
Nano
Thank you Karen for a fast reply and for taking the time to help us! I will definitely try that out and will let you know how it comes out! ?
Nano
Hi Karen,
Thank you for showing us an amazing idea of creating your own table\chair. We had a tree cut-off and I wanted to make some stools. I followed every instruction that you showed us, but when I took the bark and continue to sand them, little worms continue to come out from tiny holes. I managed to get most of them off, but is there a product that kills them before I put the stain? I am going crazy and don't know what to do and would love an advice.
Thank you so much!
Karen
Hi Nano! Yuck. Wormy wood! If you have that big an infestation I'm kind of worried that the wood will be all rotten inside. If you'd still like to use the wood what I would do is put the stump in a plastic garbage bag and spray it with bug spray that has pyrethrin in it. Taking one of the worms into a garden centre and asking them what spray to use on it is a good idea too. Once you've sprayed the stump close the plastic bag up tight for a few days. Then remove the stump, bang it on the ground several times to knock out any dead worms that you can and leave it to air out for another few days. HOPEFULLY it should be ready for stain then. Hope that helps. ~ karen!
roma
i found your website for making a stump table, I cann't tell you how much I appreciated it. We had a oak tree cut down and I asked the man who did it that I wanted some pieces so I could make a table for my son. Im sure it will turn out beautiful. Im thinking about putting coasters on the bottom so you can move it easier. Once again, thank you for the easy steps to make it.
Karen
Hi Roma! That's great. If you go to The Nester's website, I think she has one of hers that she made on rollers. ~ karen!