Today I'm going to show you how to install a simple gate latch. I wasn't even going to post this tutorial. I mean, installing a latch is definitely a low bar to clear in terms of home improvement. But then I remembered many of you didn't know which way toilet paper should go on a holder so ... let's learn how to install a gate latch!
I'm going to WOW you with my in depth knowledge of installing gate hardware. I know you don't think you can be wowed by gate latch particulars - that it isn't worthy of making space for in your brain. To that I scoff and say, That is EXACTLY what I thought you'd say.
You are honestly so predictable.
I agree it's a simple task, but if you don't do it right, installing a simple latch that should take 10 minutes of your time could end up taking over an hour of your time.
I know this. Because I heard about it on the dark web.
There's a lot more chatter about diy installation timelines for small outdoor projects on the dark web than you'd imagine.
O.K. It was me. I'm the one who spent over an hour installing a gate latch that should have taken 10 minutes and I am proud of that because unlike some other websites, my posts are 100% based on my own personal stupidity. NO other website can make that claim. I guarantee it.
Why did installing this latch take me an hour? Because I tried to do it quickly. Trying to do things quickly guarantees the job will take you 10x as long as if you did it slowly. One of many laws of nature.
The 4 Tips You Need to Know Before Installing a Gate Latch.
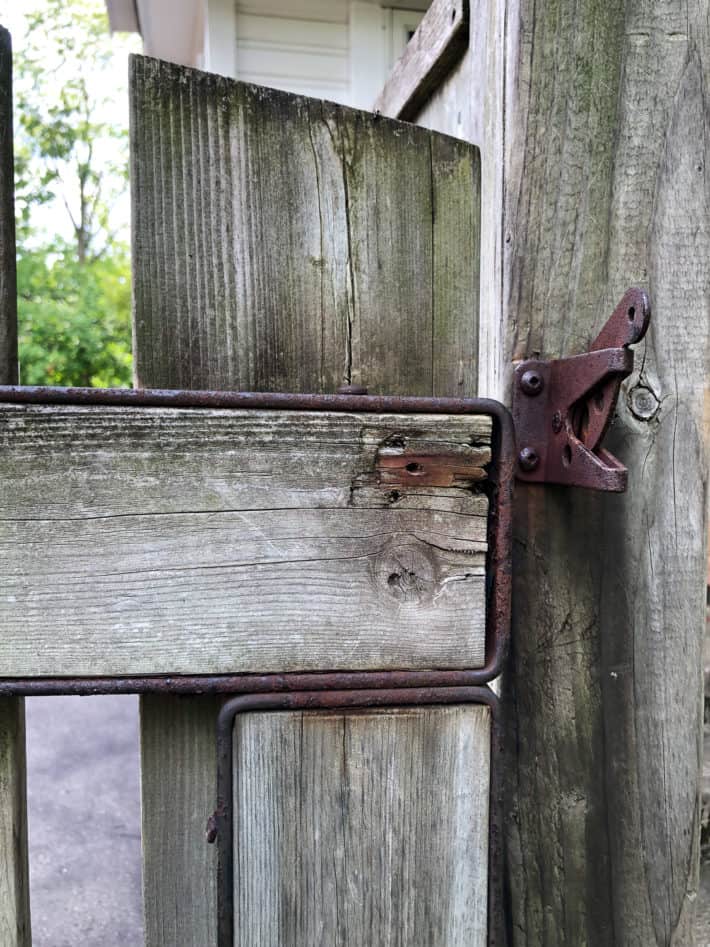
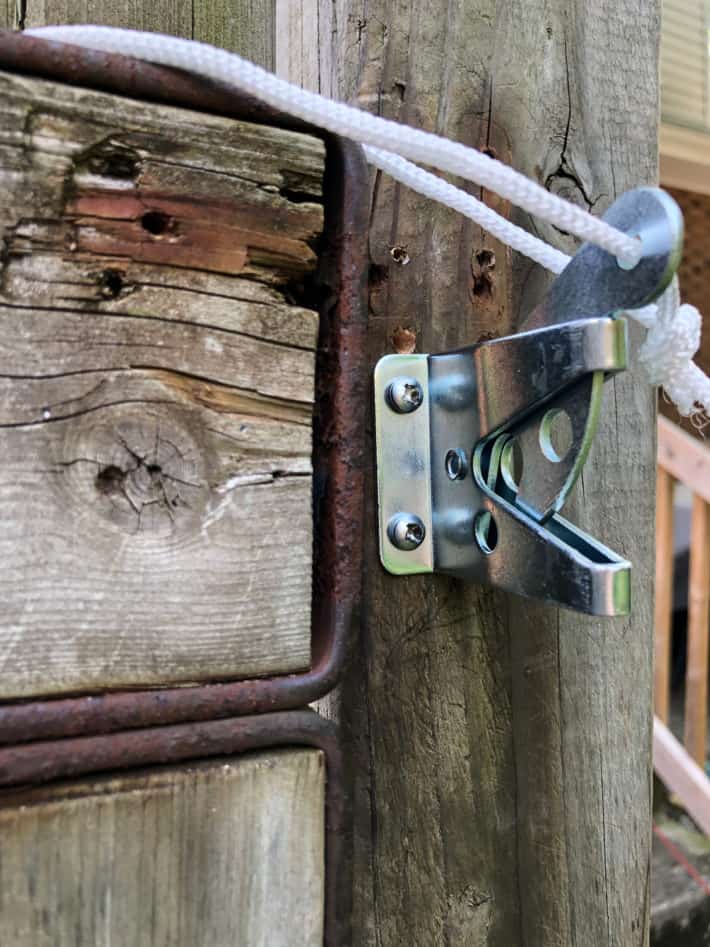
There's no such thing as a world class, top of the line, crappy gate latch. These self-locking latches are universally bottom shelf hardware that run about $5 - $15. That's not a problem except when it comes to the screws that come with them.
- USE YOUR OWN SCREWS. Most screws that come with cheap latches are also cheap. That means you'll strip the head off of them. If you have screws the same size, use them. Chances are they'll be better than what come with the latch.
- PREDRILL YOUR HOLES. The screw holes are located in such a way that it's almost impossible to a regular screwdriver to screw straight into the wood beyond the latch. Mark your holes with a pencil, then predrill with a drill bit 1 size smaller than the screws you're using.
- EYEBALL IT. You don't need a level. Screw one half of the latch in place and then place and mark the other half so you have smooth, perfect contact.
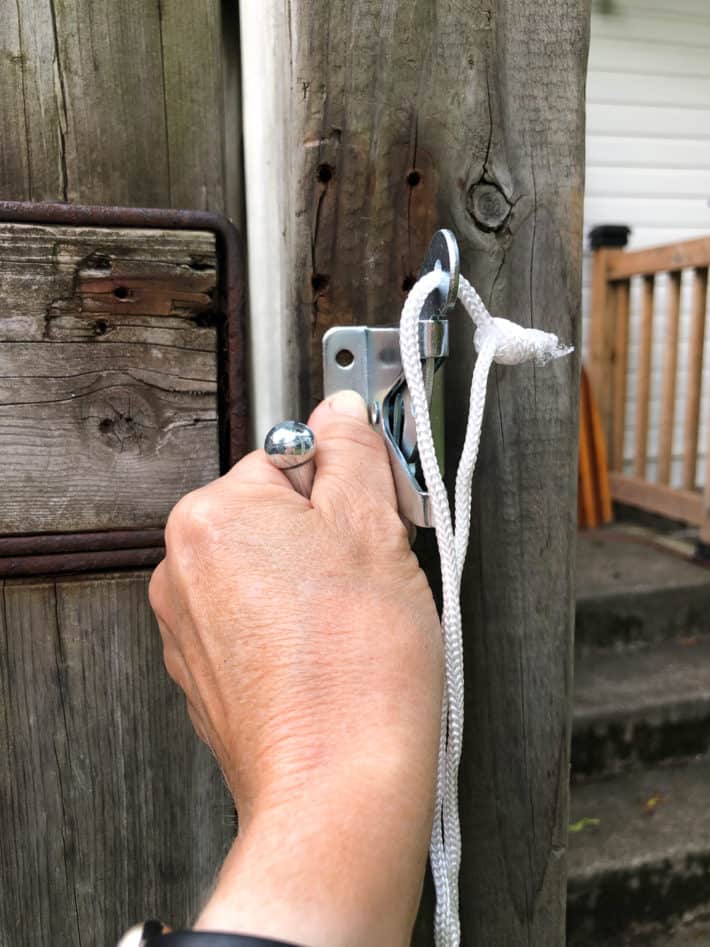
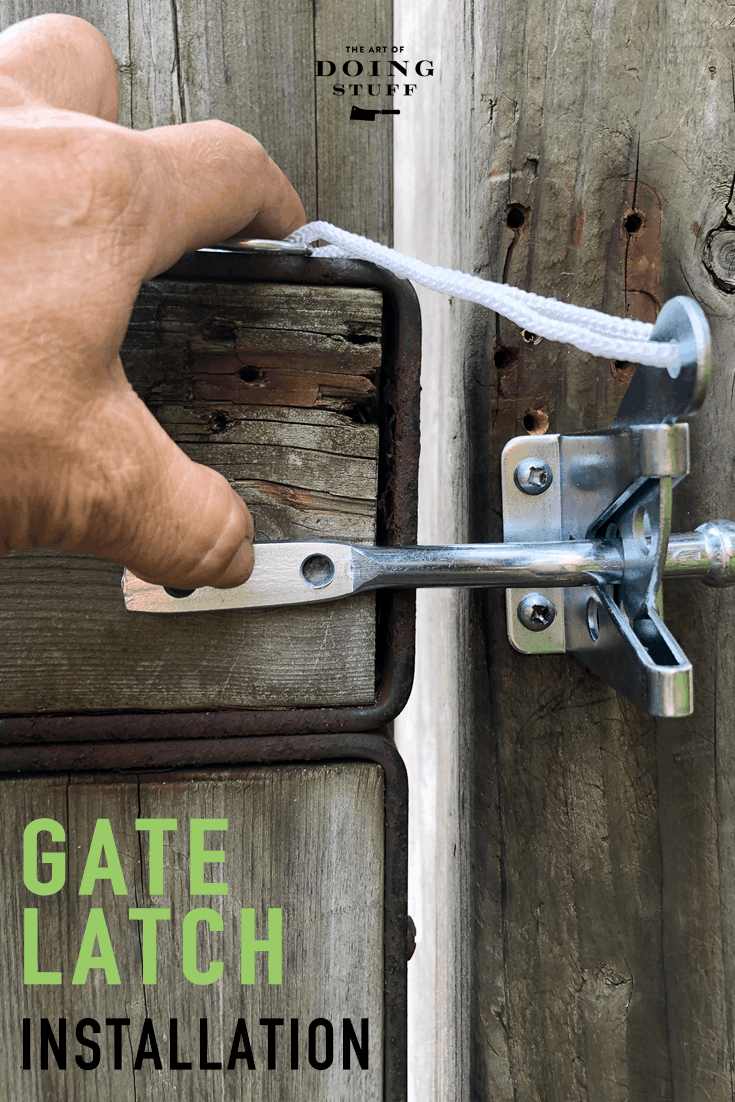
- SCREW EYES. Tie a piece of string to the lever of the latch and guide it to the other side of the fence with screw eyes. Then tie a ring on the end. That way the string will always stay in place and not get lost on the other side or between fence boards.
How to Install a Self-Locking Gate Latch
- Place one half of your latch on the post of your gate.
2. Mark the screw holes with a pencil.
Would you like to save this stuff?
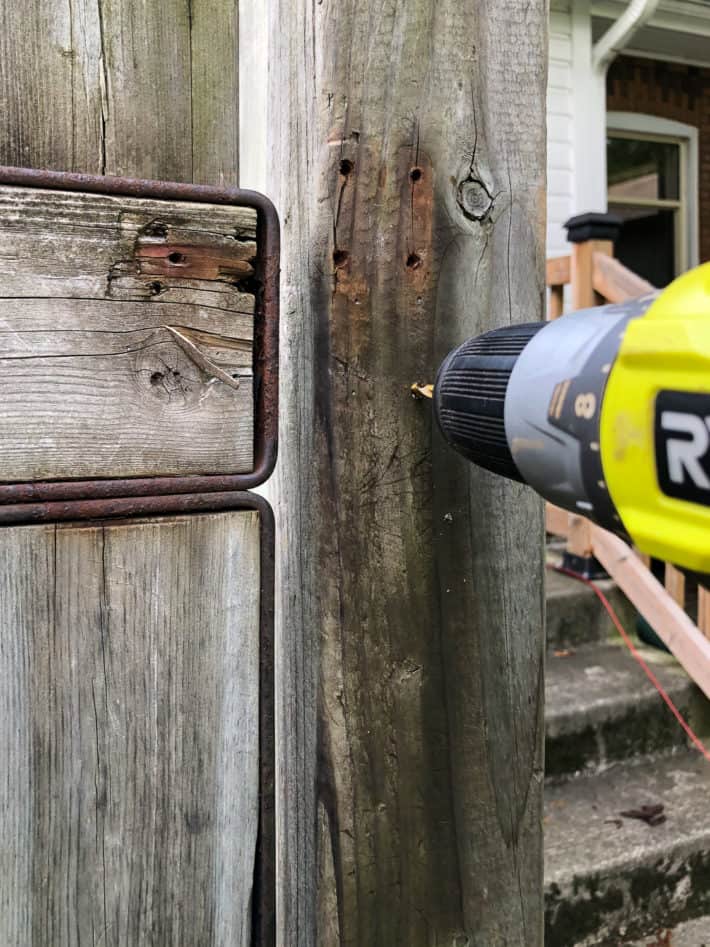
3. Predrill your holes with a drill bit slightly smaller than the screws you're using. Make sure you're drilling straight into the wood and not at any angle.
4. Put the latch back into place and screw the screws in. They should feel snug but generally screw in easily. You can see how my screw heads are stripped from trying to speed things up by not pre-drilling my holes. Insert eye roll, face slapping emoji here folks.
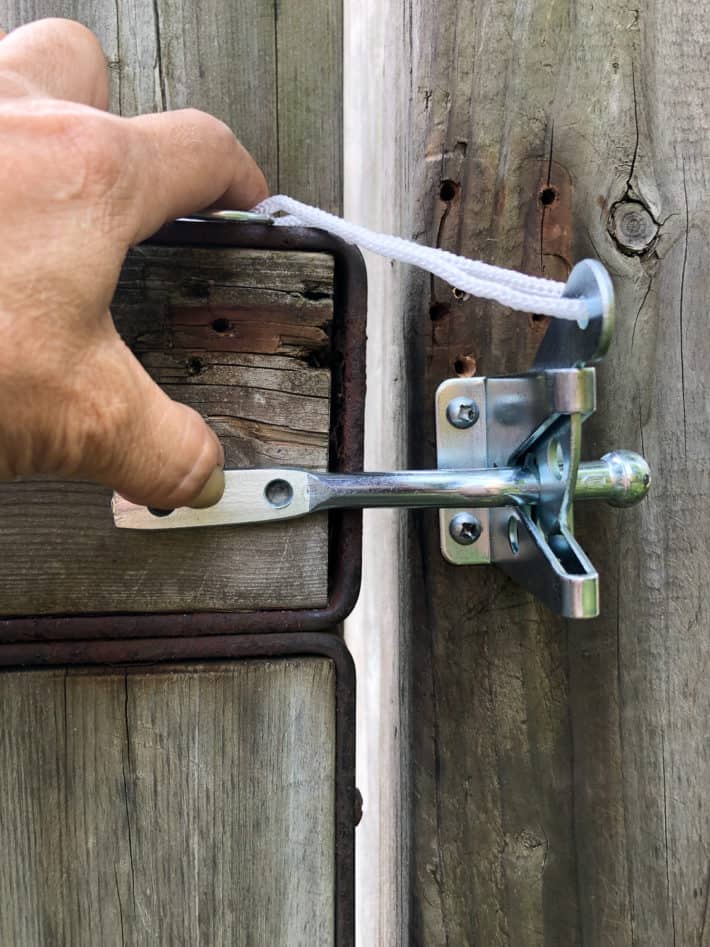
5. Place the other side of your latch and wiggle it around until you can see the latch is operating smoothly. Predrill your holes and screw into place.
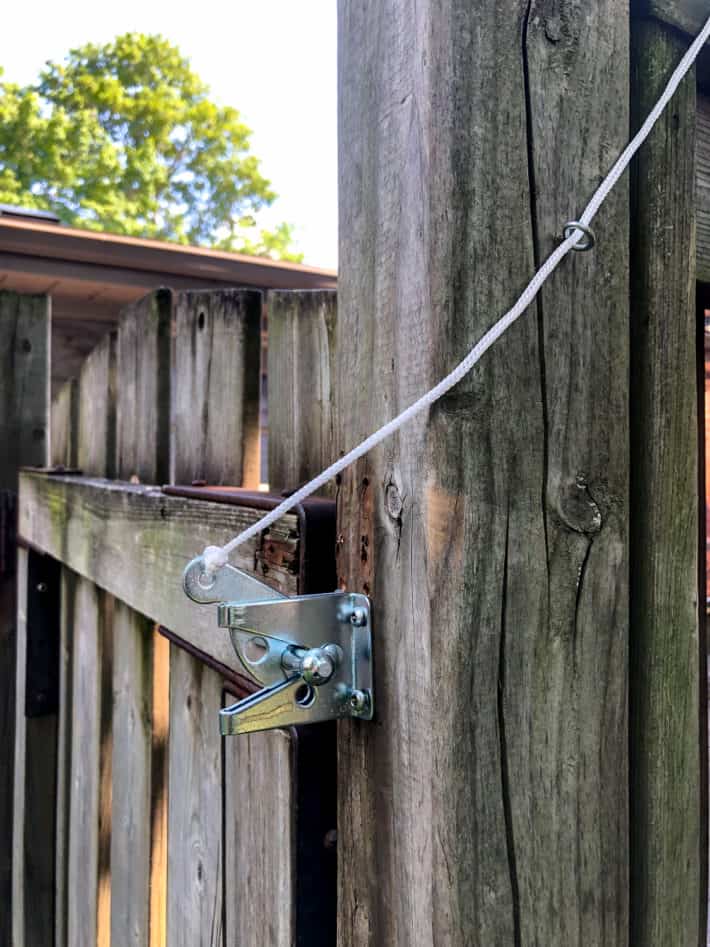
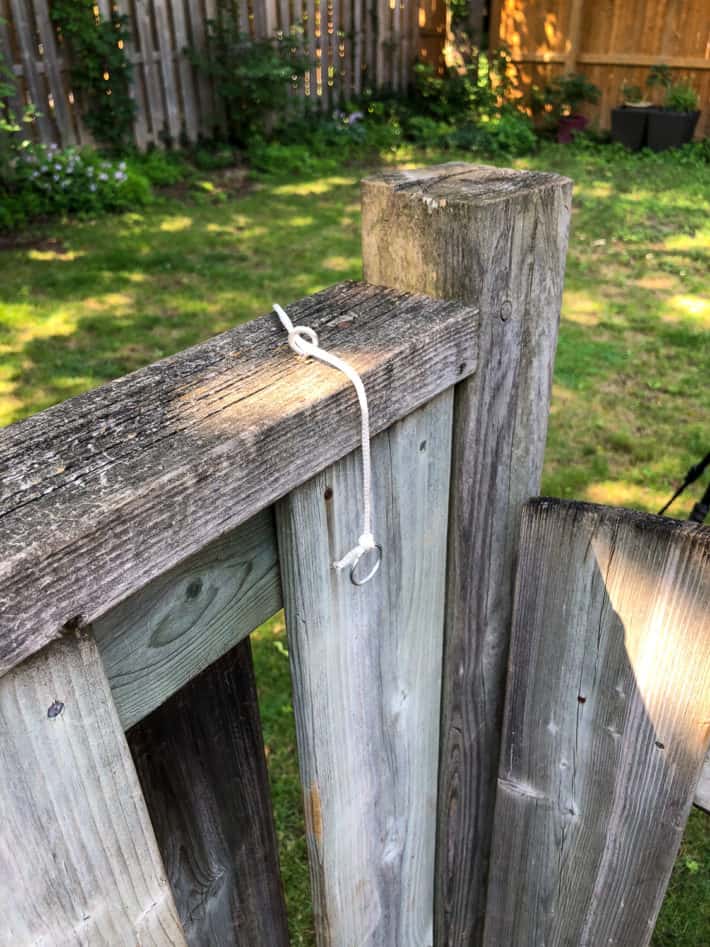
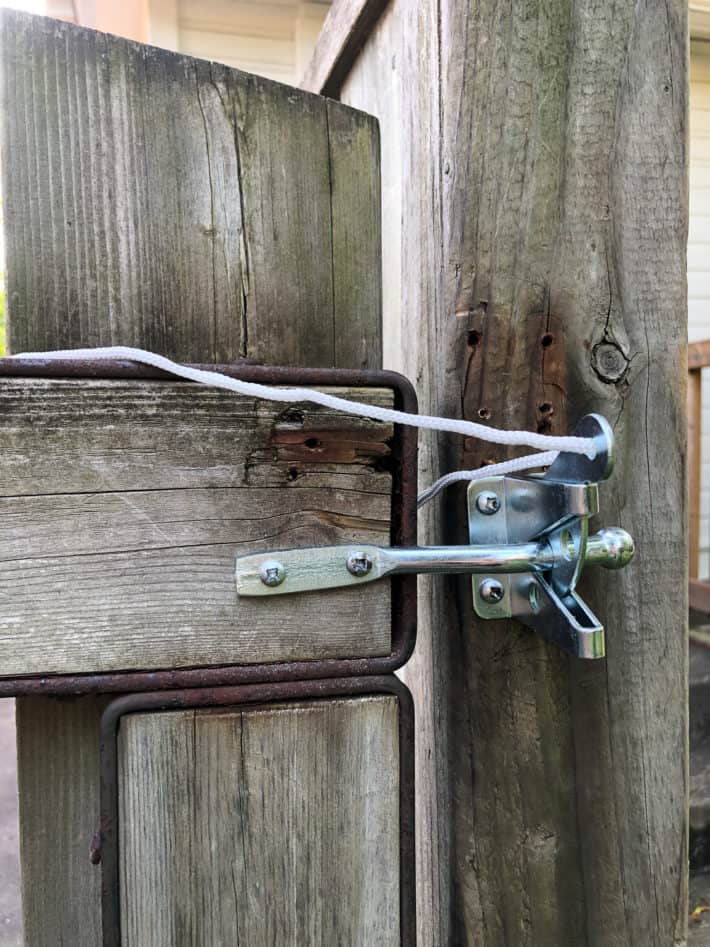
6. Run a pice of string through the top of the latch and through one or two screw eyes to guide it. This keeps your string in place so you never lose it, plus the screw eyes prevent the string from rubbing on the wood and fraying.
TIP
In some cases along a straight fence and fence post you can drill a hole through the post for the string to run. That wouldn't work with the way this fence and post were configured. There just wasn't enough room.
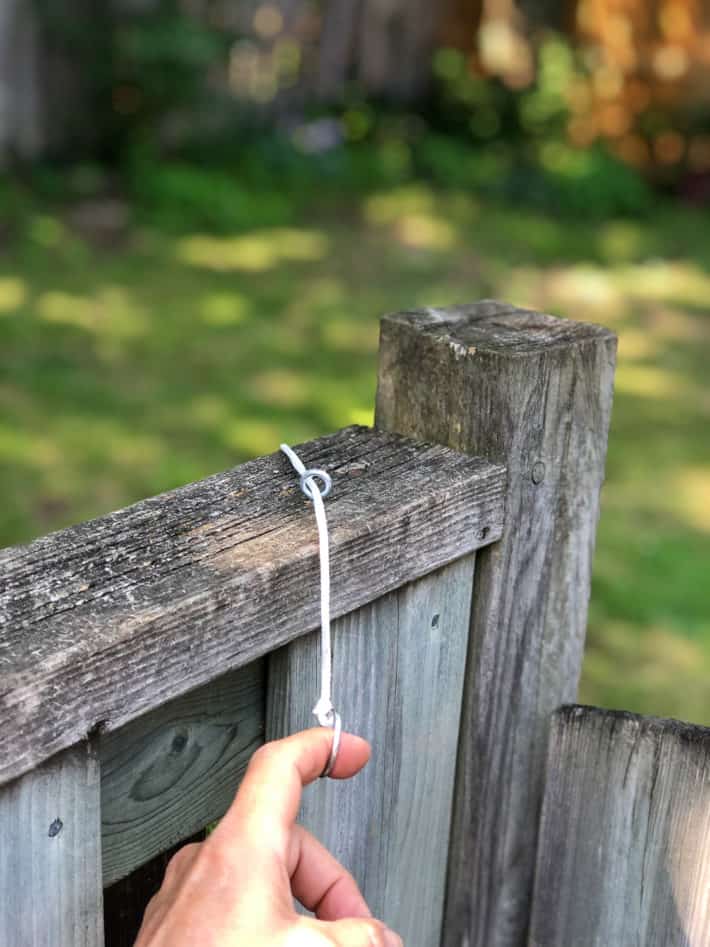
7. In the words of the great and accomplished DIYer Beyonce, put a ring on it. You'll probably never put your finger through it like this but it's easier to grab than string, plus it weighs the string down and makes it impossible to slip accidentally back through the screw eyes.
So with all this knowledge WHY did it take me an hour to install this thing? Like I said. I tried to rush it.
Much like when you try to save time by carrying ALL your laundry downstairs in a huge armful you can barely see over and end up dropping socks and underwear every 2 feet like Hansel and Gretel breadcrumbs.
MY MISTAKES
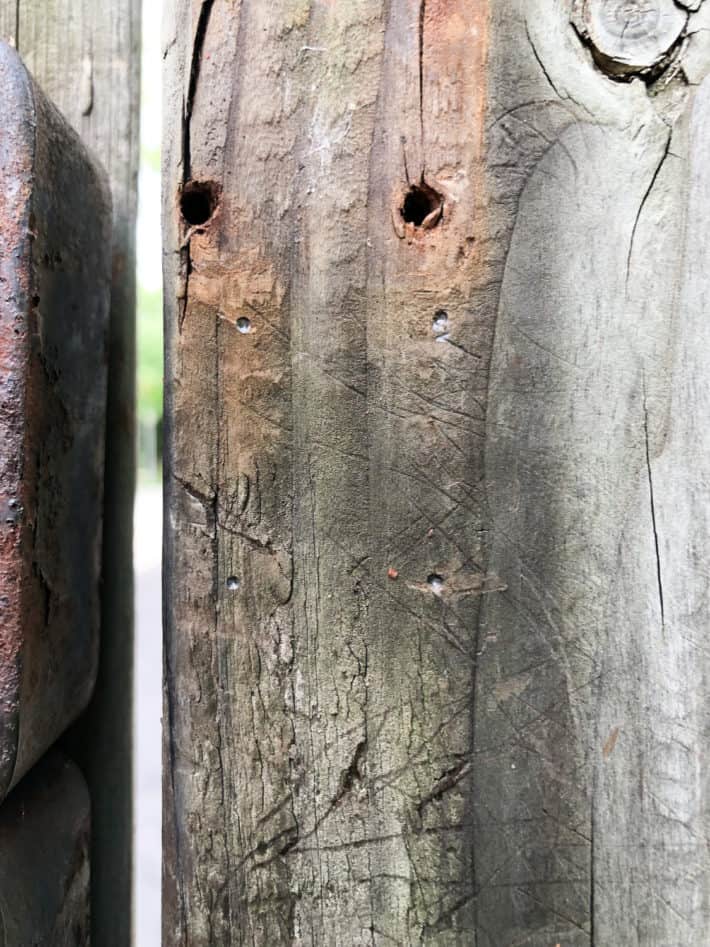
- I predrilled my holes but just guessed at the size of the drill bit and made the holes too big. Instead of getting my drill bits and selecting the right size, I tried over and over again to hand screw the screws into the 4x4 post. Repeatedly. Over and over and over again. All the while thinking to myself - it would be faster to just go home and get my drill bits.
- I didn't swap out the crap screws for better quality screws and therefore while I tried and tried to hand screw them into the wood, I stripped the heads.
- I didn't wear an apron. Seriously. I wear an apron or something with pockets when I do stuff like this so I have somewhere to quickly put drill bits etc. No pockets means dropping things in the grass and then spending the next 45 minutes looking for that last screw.
Alright. You've read it, learned it, committed it to your brain. When the day comes, and it will, you can send me a thank you note for filling a tiny part of your brain with my stupidity.
→Follow me on Instagram where I often make a fool of myself←


Marcie Jones
Oh Karen Karen Karen, you forgot the other 20 steps that can and do go wrong during this seemingly “simple” task. I just got a migraine reliving my last gate latch install. 4 hours later and a broken ankle and it’s still not right. Thanks a lot for that reminder! Hahaha…are we twins separated at birth? No.. your too smart, definitely not twins. Unless… you got the smarts and i got the… hmmm.. oh well.
I just love your writing, thank you for entertaining me with your boo boos as i certainly get tired of entertaining myself with my own! I appreciate you sharing the whole process! Even the wonderful (jealous sneer) successes, of which you have so many! Really though… thank you. I’m so glad i found your site, your awesome!
Cynthia Grogan
The pull string is the best! Doing that today!
Teresa
Slow is steady
And
Steady is fast.
I love the apron suggestion - I want a soft leather one.
stephanie
How about a tutorial on how to install clothesline rope to a pulley, might be a bit challenging.
And tightening an old one?
Kari in Dallas
Thank you. This is actually one of my projects this weekend!
Deb
Karen, had to laugh about the supplied screws. So far this year we have built a greenhouse, swimming pool and a new chicken run. For EVERYTHING, my husband threw out the screws that came with the product, sheet metal worker and will only,use Robertson screws, not those useless Phillips or straight headed screws supplied. Too bad the rest of the world haven’t learned how good Canadian founded screws are. Anyway I digress, I like what you did with the pull rope, I should have read this before I got locked in the chicken run for a hour trying to fish the lost too far from my fingers rope.
Maggie Pitts
This year at 47 I decided to finally embrace predrilling. While feeling proud in my newfound maturity (even *marked* the hole!) I was rewarded with the drill bit breaking in half, first go.
Randy Patka
As a 72yr old DIY rampant geezer, I truly enjoy your near Herculean DIY efforts with modern hand tools, grit and determination. Pre-drilling IS indeed a worst kept secret, and yes those pre-packaged screws are shyte. Thanks for sharing, you are a true gem of a person.
Laura Bee
Ahh, all true..every word of it. Fortunately for me, I now only have one gate. And it's held shut with an old shovel jammed under the handle. The other gate and 10' of fence are gone. But before it was taken out I did replace the latch in about an hour...
Must start pre-drilling more often, like a grown up. Because I am one. Sigh...