There are two fantastic things about this witch's broom. 1. It's easy and free to make. 2. If you don't have a lot of storage space for things like Halloween decorations you can just compost it or burn it at the end of the season then make a new one next year.
Hi. I'm Karen. I long like walks on the beach, scented candles, and sharp things. Sticks, needles, knives sharp enough to cut the piggly off a wiggly ... that sort of thing.
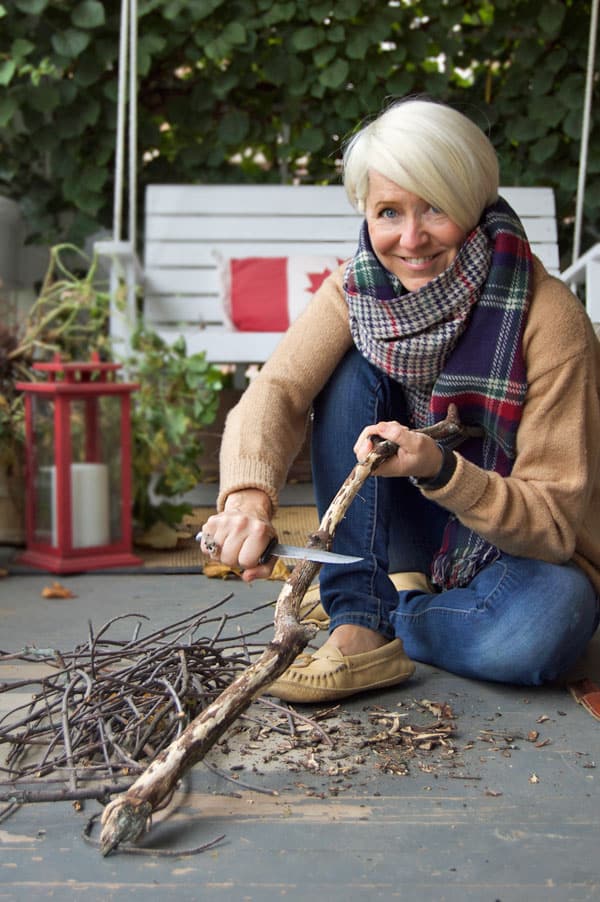
Nothing makes a woman shine that Match.com smile like a cozy front porch, a Buck Knife and a sharp stick. You might wonder what I'm doing with a stick and a buck knife. And to you I say WELCOME because you must be new 'round here.
Everyone else is thinking "Oh, there's Karen with a knife and a stick. I wonder if she's teaching us to make a crossbow for shooting jelly beans."
I am not. Although that would be a reasonable guess.
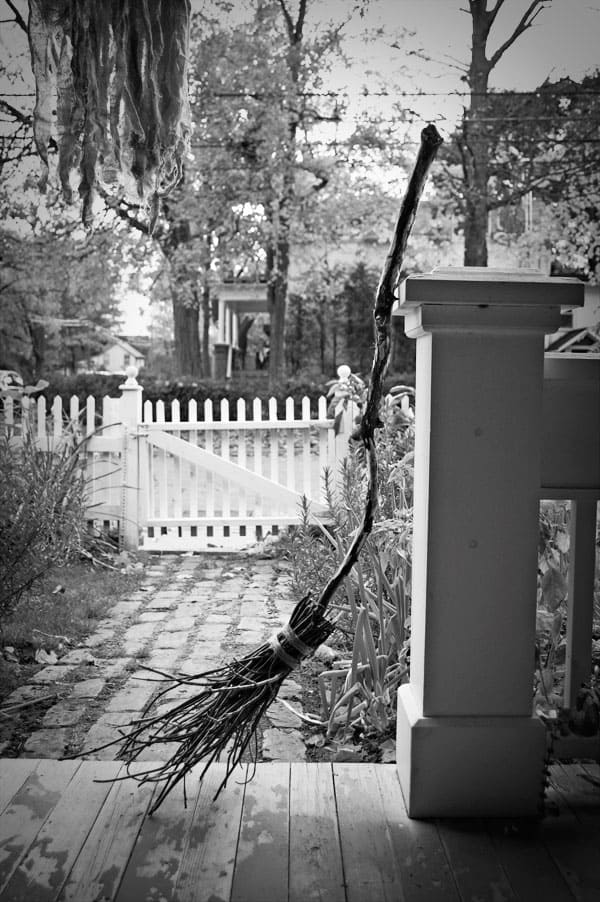
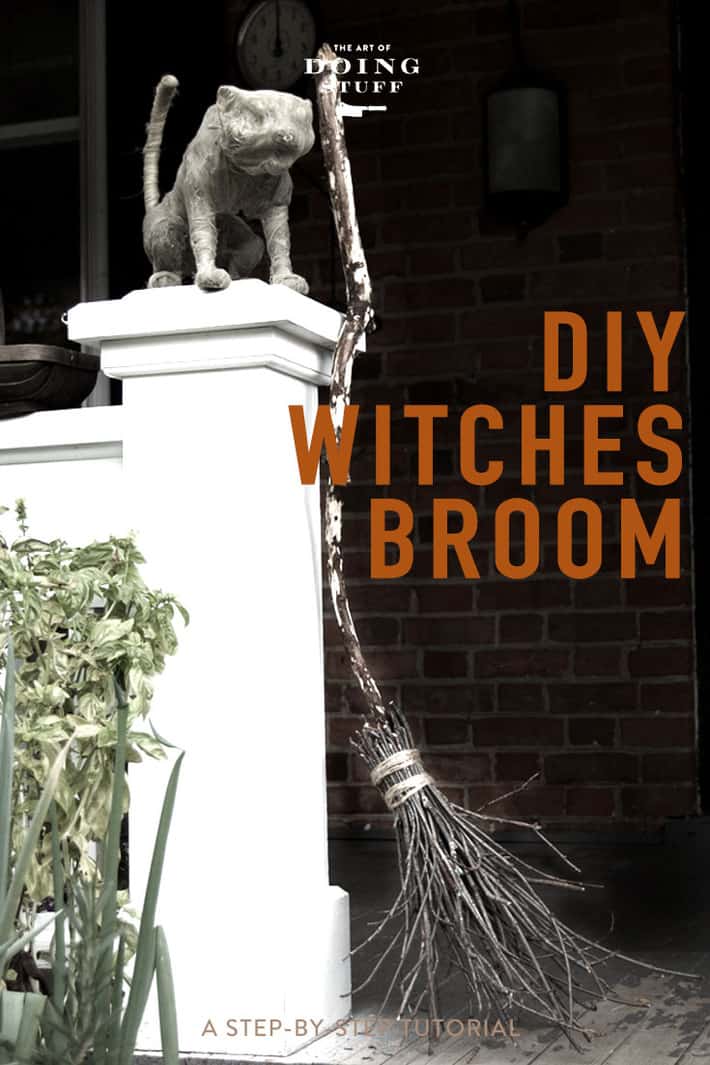
What I am doing is making a witches broomstick for by the front door.
There couldn't possibly be an easier Halloween craft. It's something you can do yourself or something you can pawn off on your kids or grandkids.
I'm not a parent, but I can tell you right now with my hand over my heart I'd be a terrible one. Reason number 1? I'd never let my kids do any crafts because, let's face it, they're kids ... they'll screw it up and it will be ugly.
More than one child on this planet has wasted a whole whack of glue and sparkles on some hideous craft when both things could have been put to better use bedazzling a toaster.
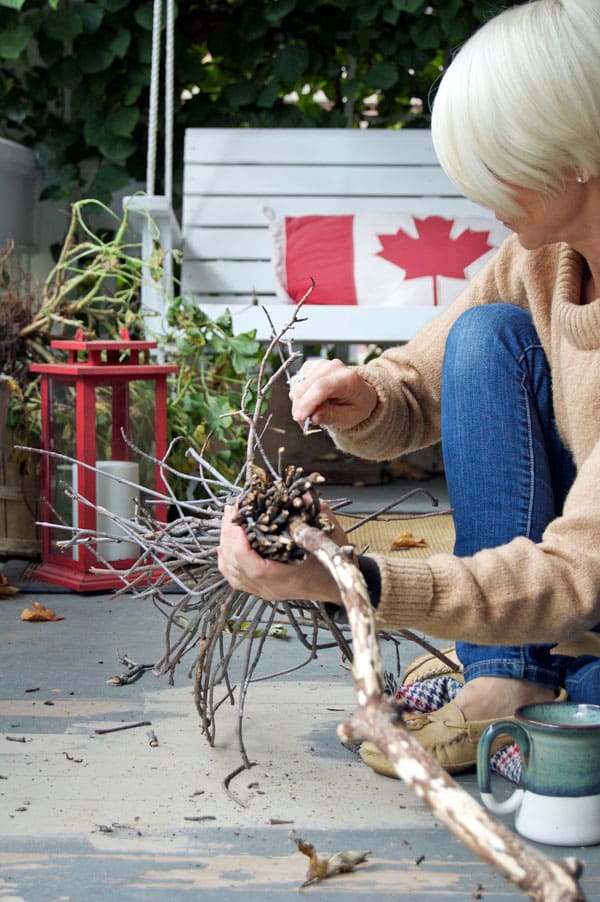
But it's up to you. Maybe make it a two-parter. The kids hunt and gather the sticks and small twigs and then you assemble it. And that's all this is. A dead branch for the broom handle and a bunch of sticks for the bristles.
I gathered all of mine after a big wind storm here in Southern Ontario. I should have put that in my Match profile. I also like big wind storms and gathering twigs.
DIY witch broom
Materials
1 branch apx. 3'ft long
twigs/small branches
rubber band
Would you like to save this stuff?
twine, natural jute or rope
hot glue gun (optional)
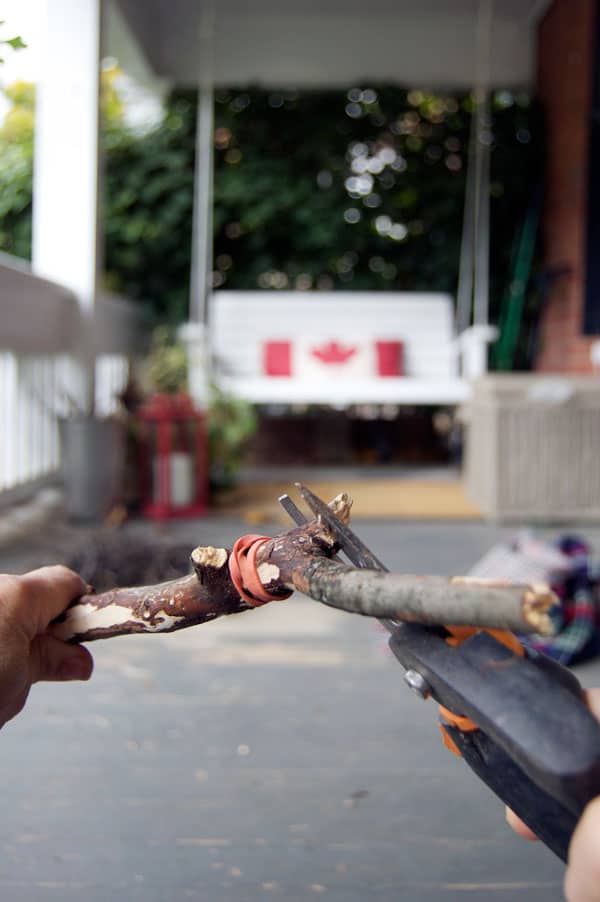
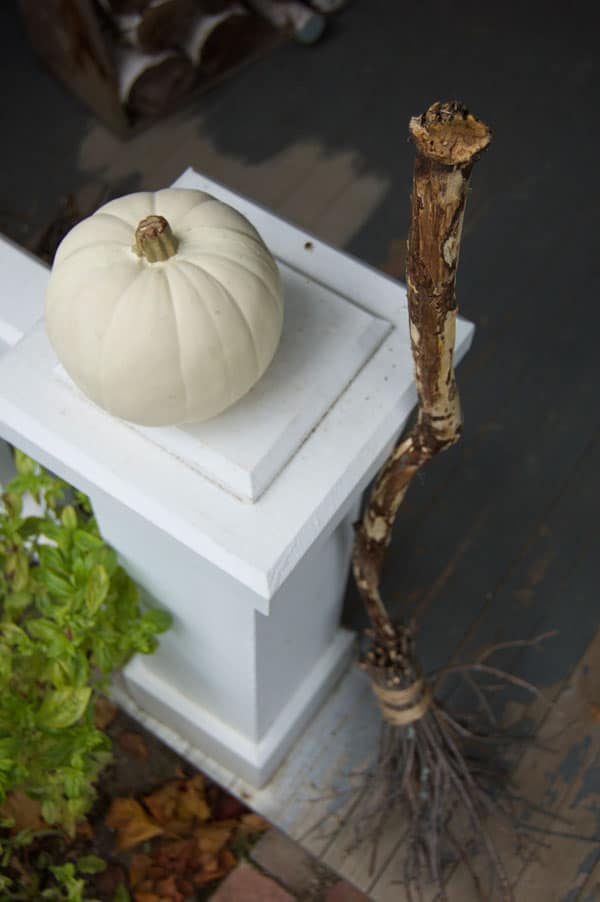
- Remove the bark from your branch/tree limb for an extra creepy look, then snip off any bumps or branches near the bottom that will interfere with attaching the twigs.
- A thick elastic band helps hold the twigs in place before you secure them more with jute twine.
TIP
You can swap out the twigs for other materials for the broom portion. This would also look really good using wheat, rye or roadside dried grass.
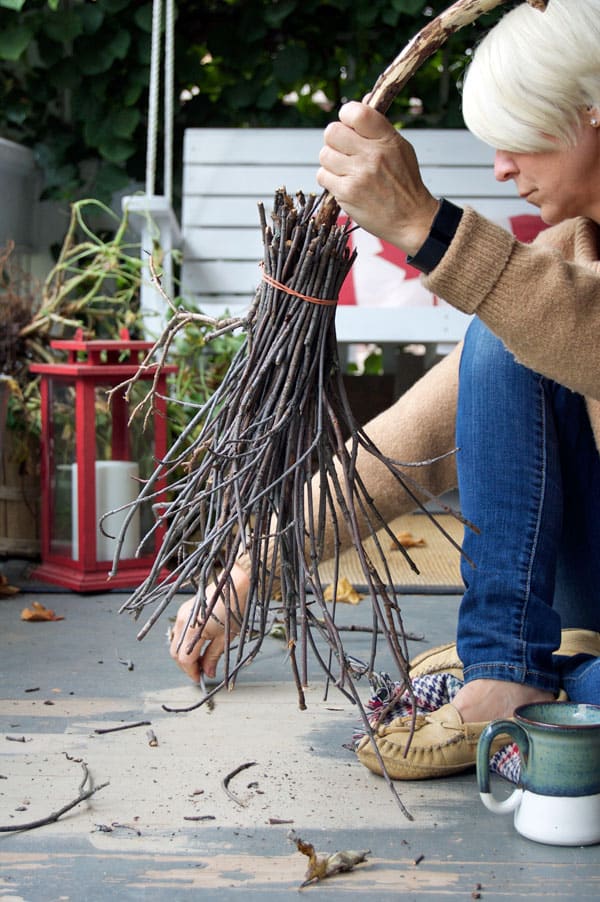
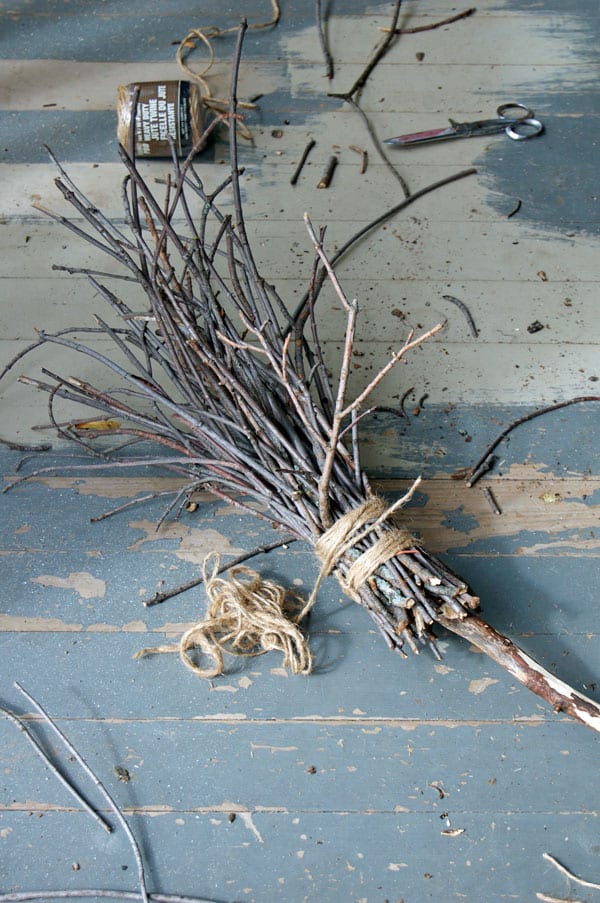
- Keep shoving more and more twigs under the elastic until it's packed tight and then secure it with the twine pulling it as tightly as possible.
And don't forget that you can use different materials, it doesn't have to be what I use here.
Materials
The Handle
Stick, branch, cornstalk, actual broom handle, large vine
The Broom
Twigs, rye, wheat, dried roadside grasses, small vines, straw
TIP
A crooked handle looks better for a witches broom than a perfectly straight one.
Now the rest of the creative process is in your hands. You can paint your broom black, cover it in glitter, leave it as is or hang it from a tree using fishing line so it looks like it's suspended in mid-air.

Make a Witch's Broom
Make a witch's broom Halloween decoration using a branch and twigs.
Materials
- HANDLE
- Stick, branch, cornstalk, actual broom handle or large vine
- BROOM
- Twigs, rye, wheat, dried roadside grasses, small vines, or straw
Instructions
- Strip the bark off of the branch. You don't have to remove the bark, I just think the branch looks more interesting if you do.
- Shave off any bumps and knots, especially around the bottom of the branch where you're going to attach your twigs so you have a smooth surface to attach your twigs to.
- Wrap a thick elastic band around 5" up from the bottom of your branch. You're going to insert your twigs under it.
- Stick your thin twigs under the elastic band at the base of the branch. Just keep shoving them in there until you have a nice, big, whack of twigs.
- Lay the broom (because you now officially have a broom) on the ground and wind your twine around it, covering the elastic band. You need to pull the twine as tightly as possible. If you can't hear a few of the twigs cracking, you aren't doing it hard enough.*
Notes
You can swap out the twigs for other materials for the broom portion. This would also look really good using wheat, rye or roadside dried grass.


jenny
I can't believe no one has mentioned the coffee mug! Wherever did you get that?
MARILYN JOHNSON
PLEASE teach us how to make the ghost/man!!!
Maryanne
Love what you do with your place at Hallowe'en. Can't wait to see the rest of it!
One small, side note - inches, feet? Makes me a little sad that metric isn't mentioned - but I'm a bit of a nut like that.
Thank you for the great posts :)
Maryanne
Karen
Ha! I actually don't know anyone who uses metric for measurements. Young or old. Not with something like this. The odd time I'll use centimetres, and always use km, but never meters in exchange for feet. ~ karen!
judy
Hey! Don't think I didn't notice the 2nd perfect shot of the perfect hair cascading lightly down your perfect jaw line. I have earned my white? hair OK-white,black.brown with some strange yellow strands -why doesn't it just turn white? for crying out loud is it waiting for me to hit the ol dirt hole and the shock to scare it white?
AnyHoo Your pictures are phenomenal and your home is perfect for Halloween-are there many kids with the guts to actually come through the gate? or is that your sneaky way of getting all of the candy for yourself?
Ardith
I was all set to make one of these super duper brooms today. My husband kindly chopped down some bare branches for me use, even selected the perfect broom "handle." It was all so awesome...until he noticed the branches' innards had been pretty much consumed by beetles. So, no witches broom for us this year. Sigh.
Doris Ann Newton
I like the broom just fine, but I really like your moccasins. Did you make them, too?
IRS
Of course she did. She also used her homemade bow to hunt the deer (using jelly beans as ammo), skinned it with that evil looking buck knife she is holding, and then tanned the hide using urine from her many cats. Next week's posts will feature sewing patterns and lessons for the mocs, as well as a recipe for deer stew.
Bob Lawson
Be nice to the sweet lady.
ronda
what a great broom! and the ghoul is it die for ...
Karen
I feel inspired!
Liz
Oh my heavens. Where is that beautiful scarf from?!
Karen
Oddly enough, from my local garden centre. ~ karen!
Mondo | I bake he shoots
dude!!! what's up with that hanging skeleton? did you do a post on that? if not, do a post on that. and if you live on Elm street, how do you keep Freddy at bay? do you beat him off with the witches broom? ok, that last question might insinuate something else.
anyway...love that last pic. please, bless us with a gallery of your Halloween decorations this year.
thanks in advance.
Rondina
Hilter and brussel sprouts aside, I love the Canadian flag pillow and the red lantern. I've been considering making my lanterns instead of handing over a pot 'o gold to Pottery Barn. I suspect you bought yours at the Bargain Store. No?
Kelly
"You might wonder what I’m doing with a stick and a buck knife. And to you I say WELCOME because you’re new ’round here." This may be my favorite thing ever.
Karen
More favourite than ... potato chips? Or dark chocolate cupcakes? Or dill pickles?! ~ karen
Natalie
Ha! My 4 year old daughter made a broom exactly like this at forest kindergarten to celebrate Walpurgis Night! (Which I had never heard of until I moved to Germany.)
Karen
O.K., well I feel far less remarkable at this moment, lol. ~ karen!
Natalie
Sorry, wasn't meant like that! I was impressed that she did something blog worthy. However, after she swept the entire yard and sidewalk and lost most of the twigs along the way, it was looking decidedly less impressive. (The broom as well as the yard . . .)
Rachel
Very beautiful and authentic looking! I did this broom last week making the branch handle exactly this way, but for the bottom piece I used a Cocoyea broom, a tropical broom made from coconut leaf spines and just stuck the branch in and tied with jute twine. Then I lit it with a battery powered string of fairy lights. Looks like I bought it at a PB in Neverland. Will stand it against my DIY mâché cauldron and witch. Very lovely piece Karen, you inspired me to make another using Hibiscus tree twigs instead.
Barbie
Forget everything else! The SCARF....I NEED the scarf!! OMG!~ Great picture of you! Needs to be on the front cover of LL Bean!
Teddee Grace
Love it. Love the black and white photo. Love the portico on the house across the street!
Sarah @ onesuchlife
Loling at the kid craft comment. I feel this so. much. It's hard not to step in to make a craft "prettier" when your kid is at the helm.
Cindy Marlow
I love how the dip in the broom handle looks just like the saddle seat of my daughter's Harley.
Ann Brookens
I'd read the comments, then I'd have to scroll back up to look at the pictures again: first the scarf, then the cadaver, then the floor, then the house/view across the street, then the cat...I'm worn out!
Jane S
I did not like that latest wind storm. It took out half my maple tree and my neighbour's car.