If you’ve ever looked at a birdbath and thought, “Nice - you’d really shine next to a concrete goose in a bonnet”—you’re not alone. A modern birdbath—clean-lined and understated—is strangely hard to find. So I made one. You can too.
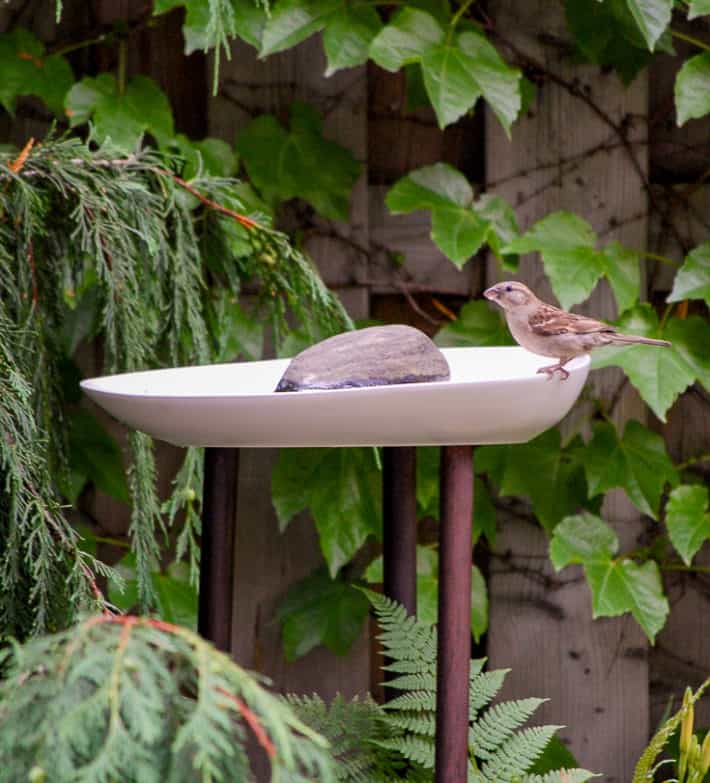
Here’s how to make a modern birdbath using about three things you probably already have and where to put it so birds actually use it.
Just after I rebuilt my modern garden in the backyard, years ago, I made a few versions of free or cheap birdbaths. This one was the winner because it looked the best, worked well and was simple to make. It lasted a few years before I retired it.
On a walk with Philip the other day I was reminded of it when I saw this in a neighbour's yard ...
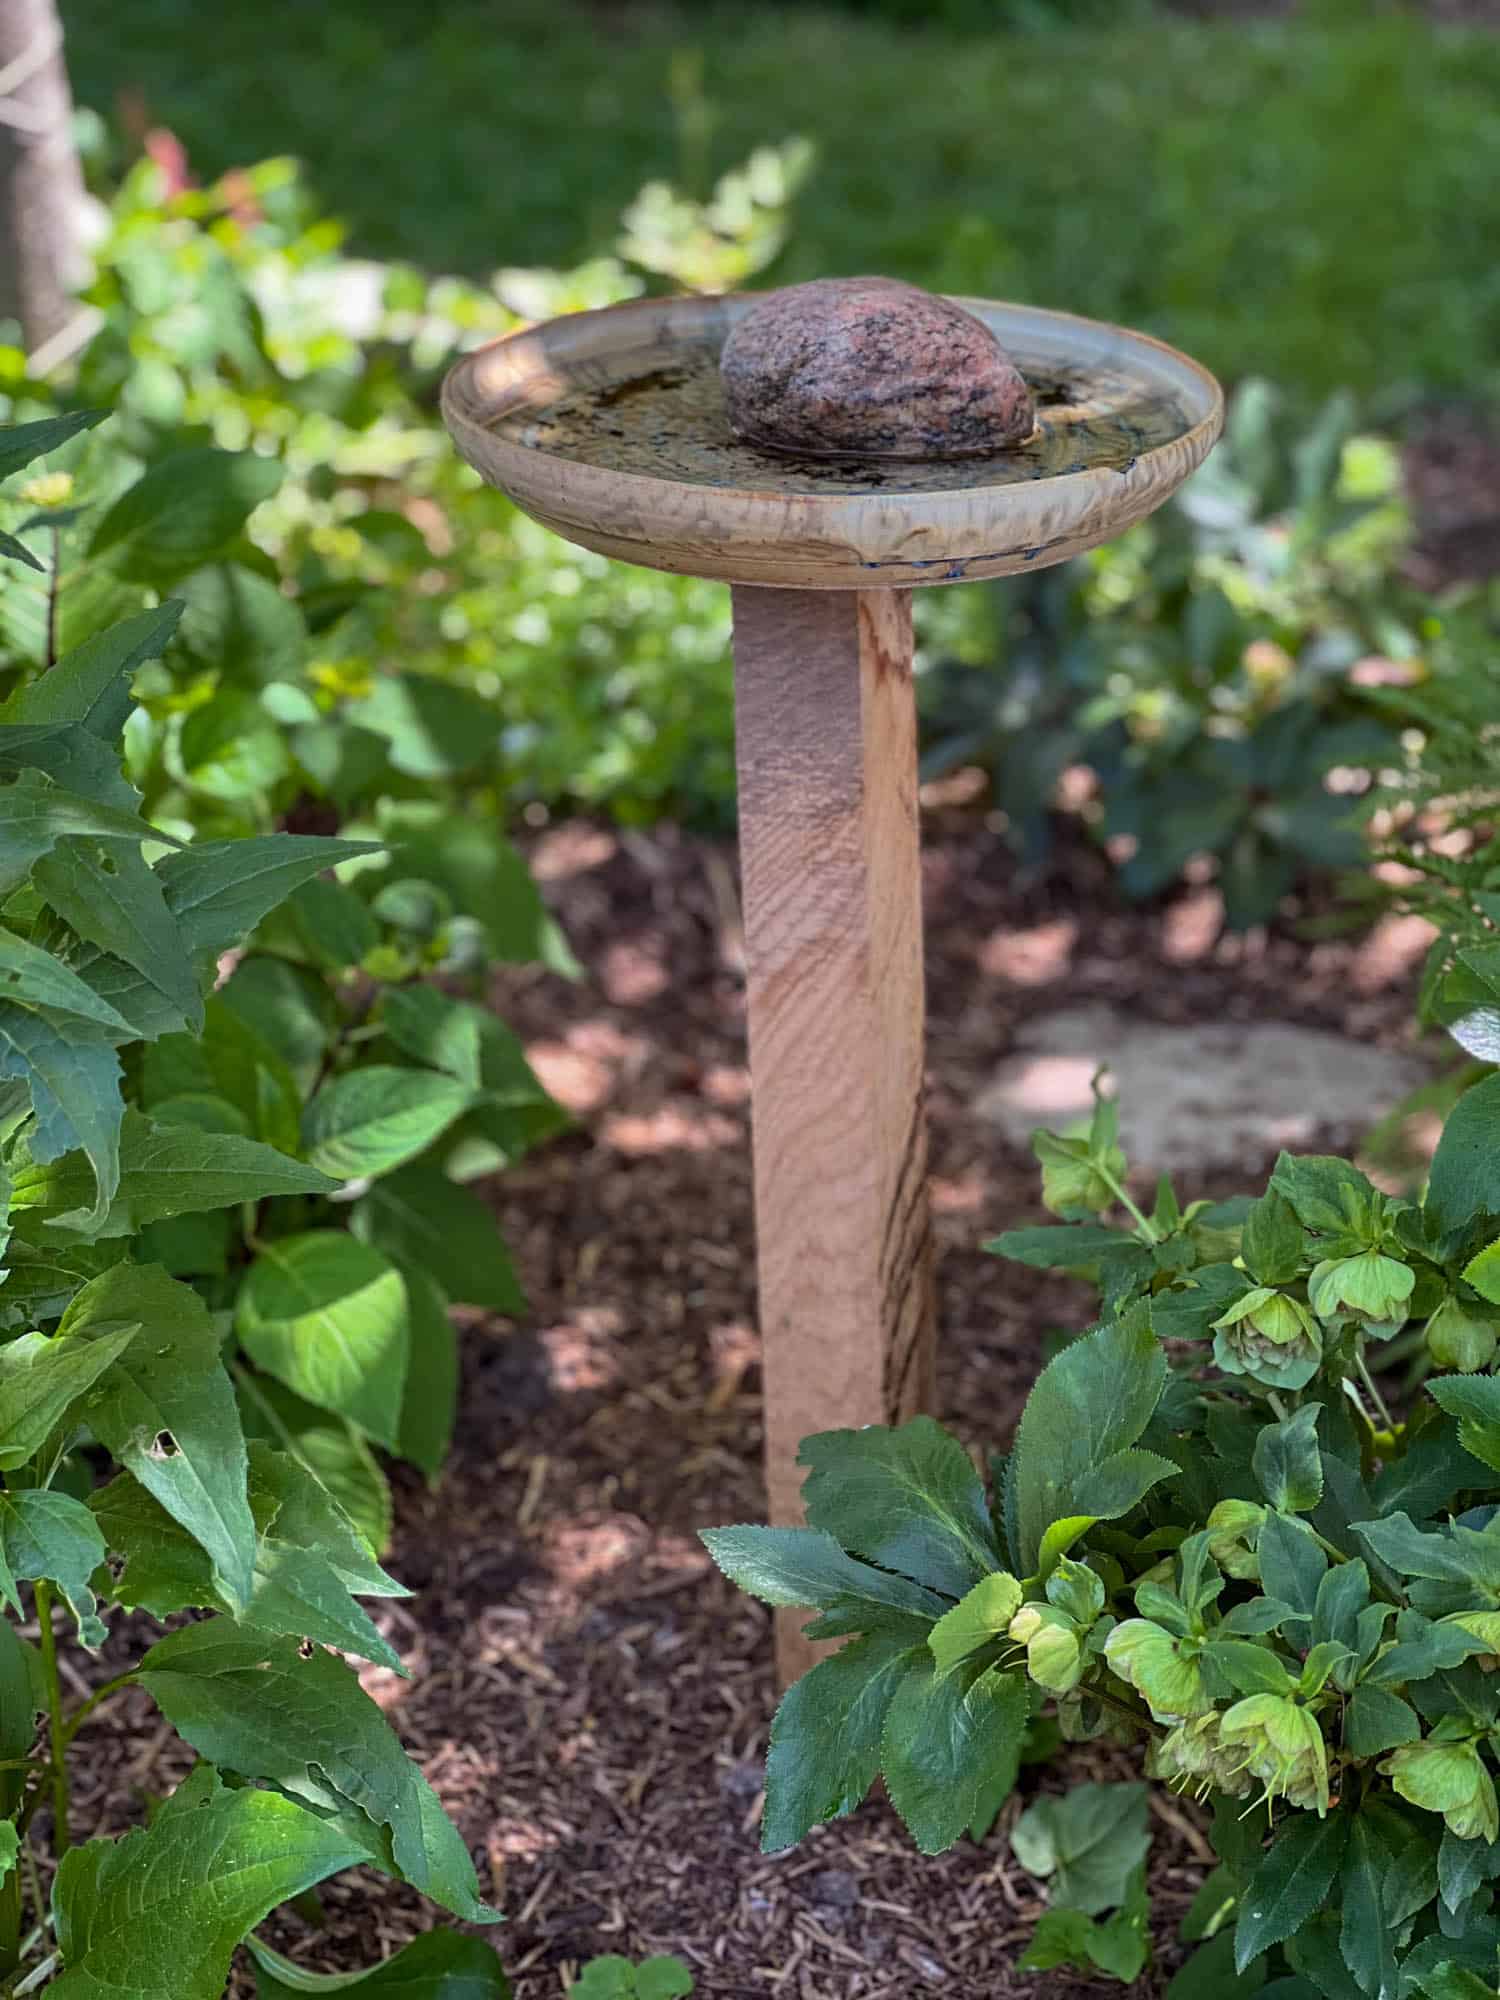
Another homemade birdbath.
Ironic when you consider what prompted me to make the first one.
Table of Contents
The Bird That Made Me Do It
Picture me, walking to the corner store. Just a casual sidewalk stroll. (Mentally picture Christy Turlington if you want accuracy.) Now picture a tangle of (gazelle-like) legs as I tumble, release a toot and almost face plant in a bush.
All because of a bird quietly taking a bath. There he was, hidden behind my neighbour's hedge, fluttering and splashing himself quietly in their birdbath.
And that was it. I needed a birdbath immediately.
FYI if you want to attract birds to your yard a birdbath is a better bet than a bird feeder. The bath will attract only birds, whereas the feeder will attract everything that eats.
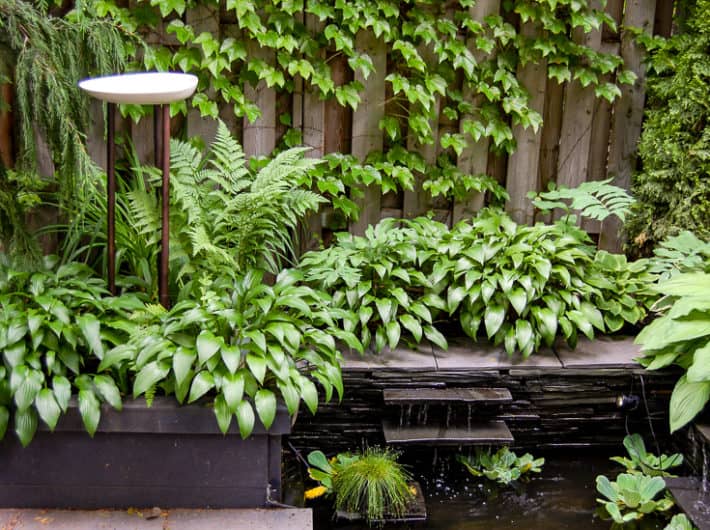
Materials & Tools Needed for a Modern Birdbath
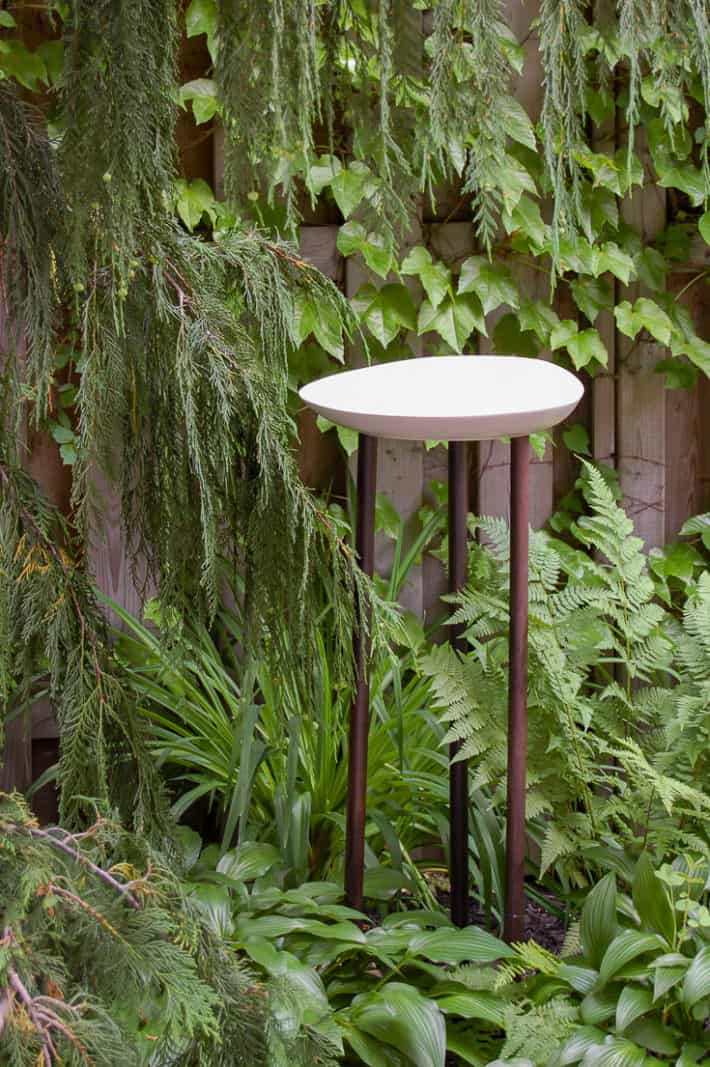
All you need is a shallow dish and three dowels. That’s it. But if you want it to last, look good, and not tip over like a drunk flamingo, here's the breakdown.
What is a modern birdbath?
It’s a birdbath with simple, clean lines—usually shallow, raised, and made from natural or minimalist materials like wood, ceramic, or metal.
🛠️ Materials:
- 3 wooden dowels, or old broom handles (apx. 3' long each)
- Paint or stain (optional)
- Outdoor sealant or Varathane (satin finish)
- Shallow dish or bowl (mine was a candle plate from IKEA)
- Level
- Hammer
Pro Tip: Use metal pipes or hardwood instead of wood dowels if you want this to last longer than a few seasons.
How to Build Your DIY Modern Birdbath
1. Prep Your Dowels
Paint, stain, or leave them natural—just be sure to seal them for weather resistance. Let them dry completely before installing.
2. Install the Stand
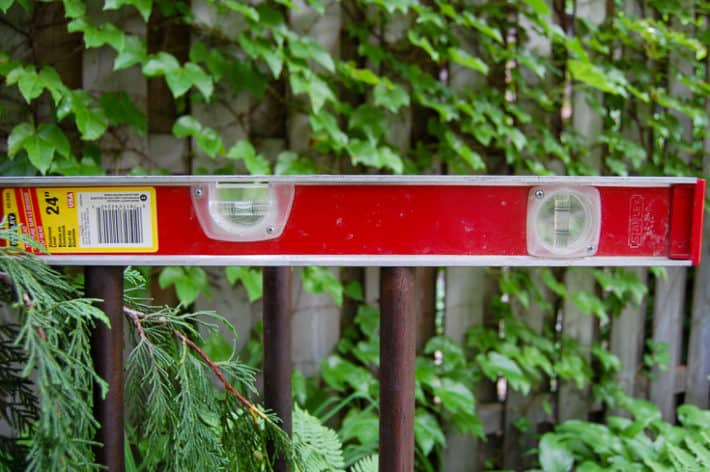
Hammer the dowels into the ground.
Use a level to make sure the tops are even—if not, your dish will wobble and spill.
3. Add the Basin
Place your dish on top. If it has a ridge or footed base, it will sit more securely.
Fill it with ½"–2" of water. Stick a rock in the middle to give birds a perch when they just want a drink and not a full bath-day blowout.
Would you like to save this stuff?
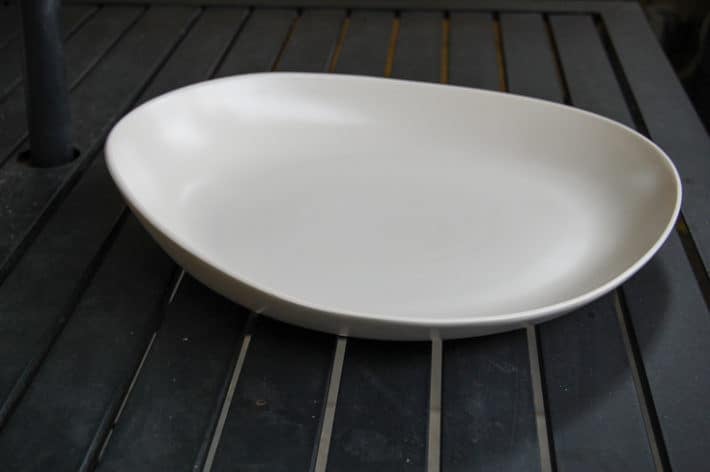
Example: I used an organically shaped candle plate from IKEA. Anything that holds water and can survive the outdoors will work.
Where to Place Your Birdbath
Shade is best—it slows evaporation and keeps the water cooler. But birds also like to feel safe.
🧭 Ideal Birdbath Placement:
- Near trees or fences (so they can perch nearby)
- One clear path to the bath (not buried in shrubs)
- Visible from your patio or kitchen window (for you, not them)
Pro Tip: Place your birdbath near cover—but not too close to where cats can hide.
Seasonal Maintenance & How to Keep It Clean
This is not a fill-it-and-forget-it situation. Birds are not fans of green soup.
🧼 Clean It:
- Rinse and refill every 2–3 days. Birds like clean water.
- Deep clean with vinegar or a drop of bleach weekly.
- Scrub out algae or mosquito larvae (gross, but true).
- If you recently read about adding a copper penny to a birdbath to help stop algae take note: Pennies and pence pieces haven't been made of copper in decades. Use a 1" piece of copper pipe in your birdbath to help reduce algae instead.
❄️ In Winter:
- Bring it inside if it’s not freeze-proof.
- Or install a heated birdbath insert because birds have a really hard time finding water in winter.
Quick Summary: Clean water = more birds. Dirty water = mosquito daycare.
Make It Even More Attractive to Birds
Add a solar-powered fountain with a built in battery. Birds are drawn to the sound and movement of water. Make sure you get one that has a battery to store power so it works even when there's light shade or a cloud.
🇨🇦 - Solar birdbath with battery storage
🇺🇸 - Solar birdbath with battery storage
Pro Tip: Moving water also deters mosquitoes, algae, and the occasional raccoon looking for a splash pad.
Design Variations You Might Try Next
🪵 Wood 4x4 or 6x6
Use a single block of wood for the base like my neighbours did.
🪩 Dish Options
Acacia wood bowls, ceramic dishes, serving dishes, antique shallow bowls, pressed glass bowl, pie plates, large candle plates, glazed terracotta saucers.
FAQ
What’s the cheapest way to make a modern birdbath?
Use a thrift store plate/platter and three broom handles. Done.
Do birds prefer ground-level or elevated birdbaths?
Elevated. It makes them feel safer and keeps cats out of the equation.
How long does it take for birds to use your new birdbath?
Anywhere from a few hours to a few weeks. Birds are cautious. They don’t want to be the first one in the pool.
Keep the water clean, place it near a perch, and don’t hover nearby like a desperate host. Once one bird finds it, word spreads fast. They're the original influencers.
That’s it. Three dowels, one dish, and a backyard full of birds who keep asking you about George Michael.


Michele
Love your blog! I'm a bird fancier and LOVE the idea of being able to simply lift off the bowl to clean out the algae....FABULOUS idea! I like the large 18" clay saucers made to catch potted plant water -- but I never thought of putting them on wood dowels. Thanks for the tip!
Tonya
Your candle plate looks white (which I like, it looks more modern) But, The one I found at ikea is a beige-ish color.
Any suggestions on how to paint it? spray painting it seems to peel.
Karen
Tonya - No, my candle plate is beige. It must look different in the pictures. I like it beige because it's more organic looking for outdoors. Less shocking. If you want yours white you'd have to give it a light sanding and then paint it. If you're already painted it, go ahead and sand it, use a primer and then paint it again. The primer will help stop the peeling. Good luck. ~ karen!
Tonya
Hi Karen
Your candle plate looks white. The one I found at ikea is a beige-ish color.
Tonya
Hi I am interested in making this bird bath. Can you tell me of the name of the candle plate you used from IKEA.
I don't think the IKEA in houston, texas has it in stock. Anyone want to ship me one? :-) I can paypal the money to you before hand?
Karen
Hi Tonya ... this is the dish you're looking for. The Bigarra candle dish from Ikea. (large size) http://www.ikea.com/us/en/catalog/products/70141346 . Good luck! - Karen
Tonya
Thank you! I found the plate at the Houston IKEA!!! Can't wait to get my bird bath setup.
Theresa
Great birdbath....but how about that fountain/pond you've got going on! Did you do that too, cause...I want one!!!!
Karen
Hi Theresa! - Thanks. Yup ... I did make the pond too. :) Here's the story of my backyard. https://www.theartofdoingstuff.com/backyard ~ karen!
soupprincess
Or, if you don't have the dowels and are feeling thrifty, go find one of those round wooden "decorator's tables" that they used to carry at Dollar General and Walmart for $3, and just glue the hell out of whatever large basin, old ashtray, fancy old platter you have lying around...The word is customized...your project are excellent!!! Thank you so much for posting them :)
Fabricio
Very clever solution! I don't know about it in the US, but here in Brazil it's not recommended to create baths like this, because still water would proliferate dengue mosquitos.
Karen
Hi Fabricio. Thanks! There's no problem with Dengue in Canada, but we do have West Nile Virus that is carried by mosquitos. However, if there are enough birds coming to the birdbath the water doesn't stay still for very long. :) Plus I change the water in the bath every day or two to keep it fresh and help deter larvae. - karen.
@my
AND easy to clean! Thanks!! I am so making this when I get home...
Jana @ Weekend Vintage
I want one-it's so fresh and sleek!
jana
Tickled Red
You never cease to amaze me with your endless creativity. Great birdbaths!!
ginger
Fantastic bird bath ! Outstanding idea thank you for sharing it with all of us!
Karen
You're very welcome Ginger! That's my goal. To share every bit of smartness I have! :) - karen
Renee
This is awesome! I was just thinking if people were afraid of the dish blowing off/tipping off, you could glue/epoxy some of those copper )or pvc caps to the dish so it still lifts off and the legs are separate from the dish.
I did something similar a while back with iron pipe, but yours is waaaay more beautiful and graceful!
Karen
Super-fantastic idea about using caps Renee! Smarty pants!
Deborah Wall
Absolutely gorgeous, I love the shape with the Ikea candle plate and the dowels - simple and yet devine...
Karen
Thanks Deborah! Yeah, I'm kindda pleased with the end result too. Takes up a lot of time though. I'm constantly running outside to see if there's any evidence (you know, feathers, poo ...) of a bird having been in it. Nothing yet, but I know it can take a few days to attract the birds. I will wait. And watch. :)
Alissa
Between the bathing options and watching the purdy fish, your yard is definitely going to be the trendy hang out spot for any feathered creature in the know.
Lynne
You do have mad skillz with more than just a camera & it just makes my day to read your posts!
Loving the birdbaths & I got a huge kick out of showing my sweetheart your back yard makeover. He said it was good to know that I wasn't the only girl on the planet capable of such stuff...he gives me way too much credit as I've never attempted any thing on that grand a scale. That being said he told me that none of his friends married a woman who owned her own reciprocating saw.
This summer we are going to be removing and replacing a poorly done retaining wall so I'm pretty excited to be ripping out fencing, cutting cement, digging out the ground and then making it all look better.
Of course it won't look at all fabulous in the end like your yard does but we'll know that the neighbours aren't in danger of having our wall land in their yard.
Hope you have a glorious summer...I miss Ontario but am loving BC so it's all good :)
Karen
Thanks Lynne! Fellow Ont-ari-aree-areeo lady. Good luck with your retaining wall! It'll still be fun to see a finished product. Plus knowing you've potentially saved the lives of all your neighbours is a good thing. Unless ... well you know ... they borrowed some power tools a lonngggggg time ago and never returned them and now pretend they don't know what you're talking about. If you catch my drift. ;)
Tish
In a previous post (I think it was the Easter moss one which I loved. I love all your posts. You already know that. FYI, I also love stating the obvious.) you mentioned having sub-par photog skills. But these pics are awesome so to me it looks like you got mad skillz with the camera. I know that has nothing to do with making a $20 birdbath, but I still thinks it's really important...
Karen
Thanks Tish! I'm definitely getting better and more comfortable with the camera. I'll give you that. But I still mainly suck at it. I only picked up a camera for the first time 3 months ago so I'm sure it'll get easier and easier. The Art of Doing Stuff ... right? Photography included I guess.
Carol
Love it Karen! Looks gorgeous. Do you think you could report back with an update on how the birds like it!? Would love to see it in action. : )
Karen
Thanks Carol! I love it too. This is the birdbath that's going to have a permanent home in the garden. (I had to choose one lest I look like a crazy person) I'll let you know if it attracts the birdies! I have one of those ceramic egg shaped contemporary hanging birdfeeders in the tree next to it and they compliment each other really well.
amy
Hi! OK, I know this might be a silly question, but I've been wondering this since the last bird baths - they all seem to be placed (the plate) directly on broom handles, etc with nothing else (glue, adhesion, etc). Don't they blow off when it gets very windy? Especially the smaller plates Thanks!
Karen
Hi Amy - so far so good with the plates/vessels staying put. They're pretty heavy espcially when they're fulla water. The trickier part is making sure you only take one shot when you're hammering the dowels/broomsticks into the ground. If you fool around too much with hammering them in and pulling them out your hole won't be solid enough to hold the rods up straight. They'll be all wiggly and shifty. That's more a worry than the plates sitting on top. A wiggly rod will end up toppling the plate before wind will.
movita
Have you been using an agglutinate (shout out to thesaurus.com) to keep the bowls on the legs? Or do you just set 'em on the legs and hope the portly birds don't all congregate on one edge?
Wait. Maybe you aren't using an agglutinate to allow for cleaning. This comment is turning into a stream of consciousness type thing...
Please advise.
Karen
Pftt. Agglutinate schmootinate. No, I just set the bowls on top. They're all heavy enough to stay stable. Especially when they're filled with water. This way they are easy to clean and put away for the winter. Unless I get a birdbath heater! Something else to start obsessing on.
Tricia Rose
I thought you were going to cast one! You can do it - and it would certainly support even portly birds... Awww, gowon,
Karen
That's right! I WAS going to cast one. O.K. That's on the list of birdbath to-do's as well. Um ... I ... um ... I'm not sure I want that many birdbaths and that many birds bathing around me. I may have to make them just to see if I can do it and give em away. How much do you think it would cost to mail a solid cement birdbath as a contest giveaway? I can afford $1.27. If it's any more than that the cement birdbath giveaway deal is OFF.
Glenda
Darling idea. I like the simplicity of it. Wondering if some other kind of plate would work just as well.
Thanks for the tutorial.
Karen
HI Glenda - I'm sure you could use any plate that has a rim around underside to keep it from falling off the poles. It also has to be heavy enough not to topple over with a few birds on it of course. :) ~ karen
Karen
I love the idea and look of the bird bath. My only thought is about the occasional stray cat or other small animal that may also want a drink. I've had cats literally topple the basin of heavier store bought bird baths and they cracked. Any idea on how the basin can be permanently secured to the dowels?
Karen
Hi Karen - I would probably use outdoor silicone. I haven't had any trouble with toppling so I keep mine free so it's easier to clean and bring inside for the winter. ~ karen!