In this post I'm going to describe exactly how to lay Radiant Floor Heating and some of the problems you might encounter that aren't addressed elsewhere on the web.

In 2013 I decided to redo my kitchen starting with the VERY chilly floors. In order to install radiant floor heating (aka heated floors) I needed to rip up my ceramic tile, lay the heating pads, pour self leveling concrete, and then glue down my VCT tiles.
If you're buying your radiant heating through the Internet, which I STRONGLY suggest you do, you will get a customer service representative who will have you send them a detailed drawing of the room you want to heat including all cabinets, obstructions, etc. etc. You need to provide all the exact measurements of the room.
In return, they will send you a map of how much radiant heating you need and exactly how to lay it out.
This is why I strongly suggest you buy your heated floor through the Internet as opposed to going to a big box store and trying to buy the coils and figuring it out yourself. Ordering on-line takes out ALL of the guesswork and stress. It's also incredibly fast. You'll have your plans and quote emailed to you within a few hours.
Like this.
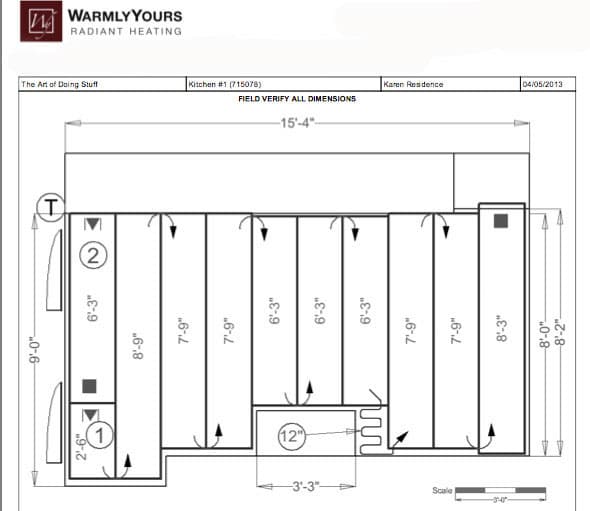
The cost for my 15' x 9' kitchen was $1,200 including the mats, circuit testers and thermostat.
The cost for my small bathroom was only $300.
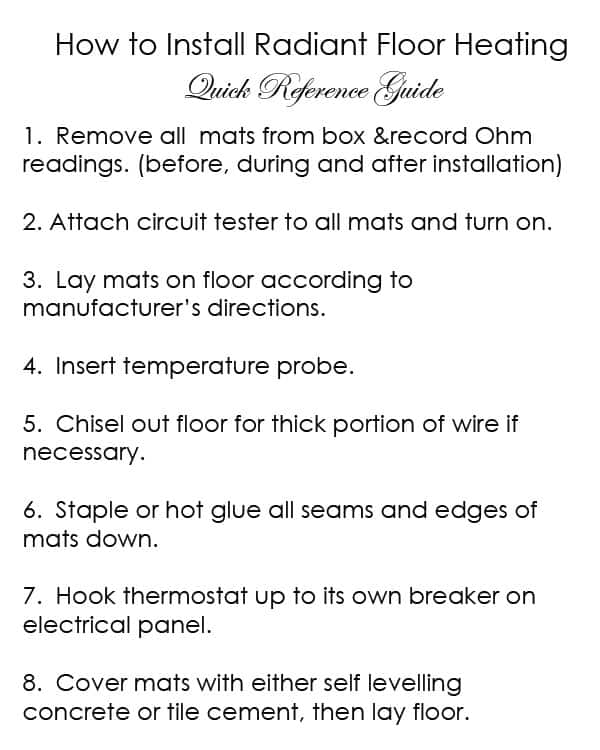
The first few steps, prior to actually laying your floor are as follows.
Receive your box of flooring in the mail and check to make sure everything is in it.
How to lay heated floors
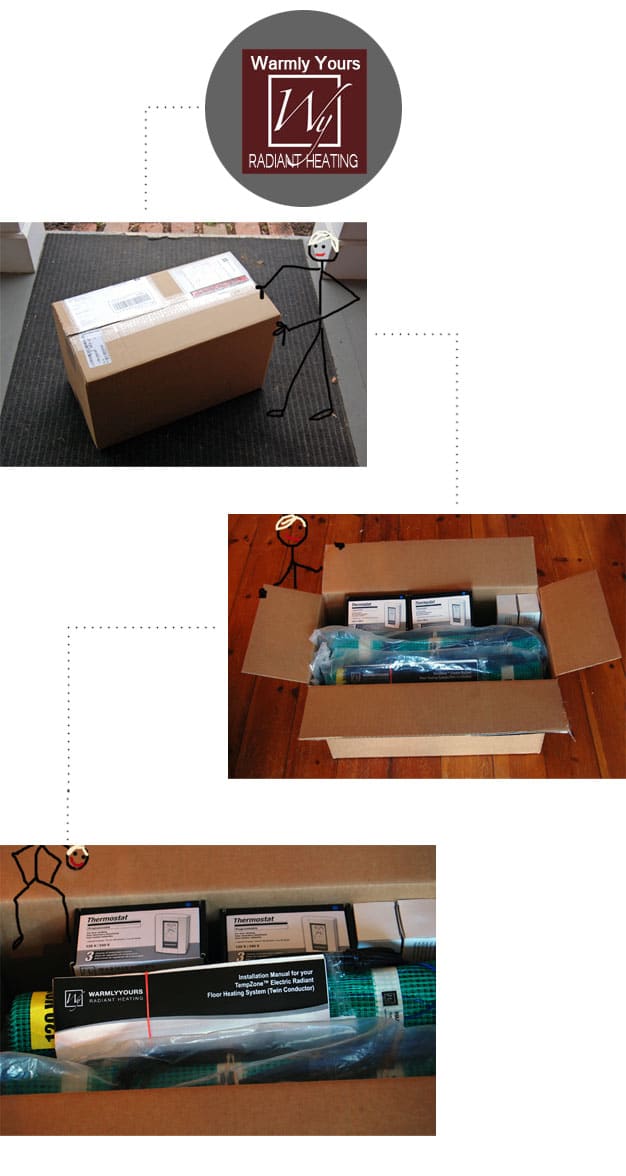
Yup! It's all there.
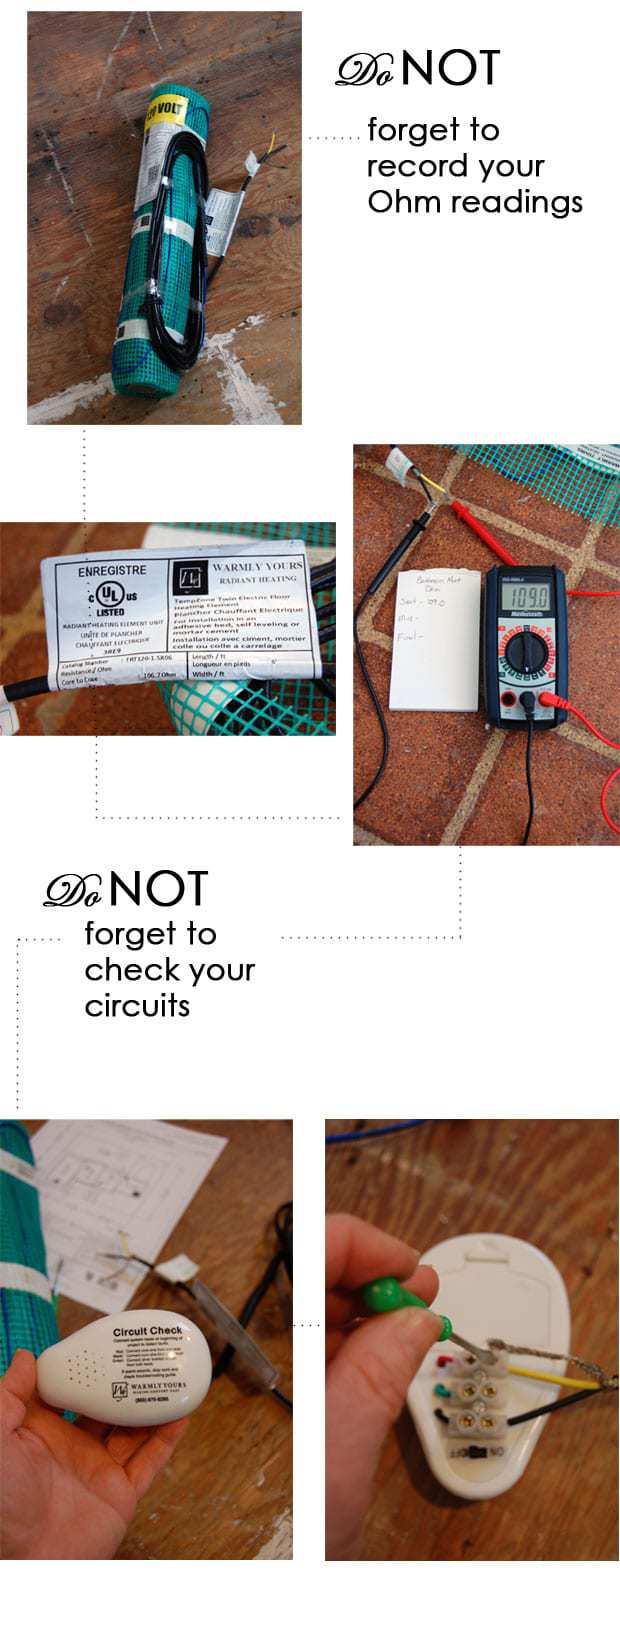
Now, before installing them, you have to check that all your mats are working when you receive them and that nothing has gone wrong. You need to do an Ohm reading and a circuit test. The circuit checker comes with your kit. You must provide your own Ohm reader.
The instructions on how to check everything come in the manual.
For your Ohm reading, you check the sticker on your mat. It will tell you what the Ohm reading was on it when it left the factory. Your Ohm reading should be about the same. To check the Ohm reading, just turn the dial of your Ohm meter to "Ohm" which is the area that's marked with an upside down horseshoe. Set it to "200". Then touch the black wire of your Ohm meter to the black wire of the mat. Touch the red wire of the Ohm meter to the yellow wire of the mat. Leave it and let the Ohm reading register. Done.
Write down the reading. You will also check the Ohm readings during your installation and when you've completed the installation. All of these readings need to be written down.
Once you've attached your circuit checker leave it on the mat. It's set up in such a way that if any of the wires are cut, or damaged an alarm will sound. That way you'll know you've done some horrible, horrible thing and need to fix it or replace your mat. NOT using the circuit checker throughout the installation could very well result in your installing your heated floor, covering it with concrete, then covering it with flooring only to find out ... it doesn't work.
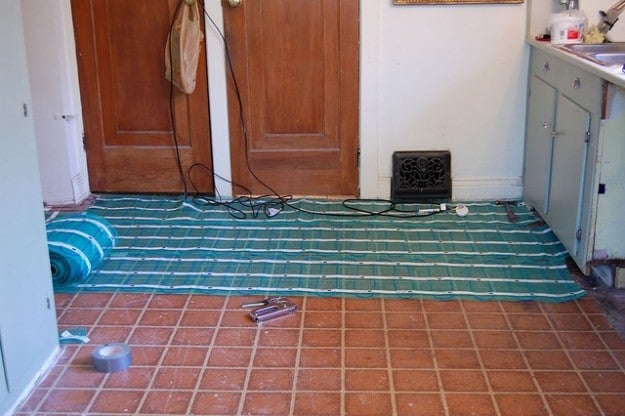
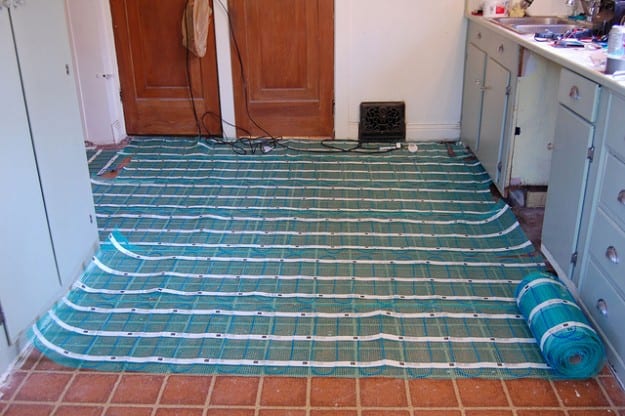
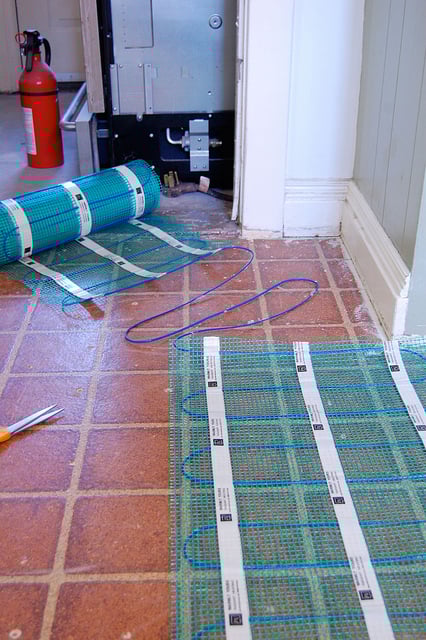
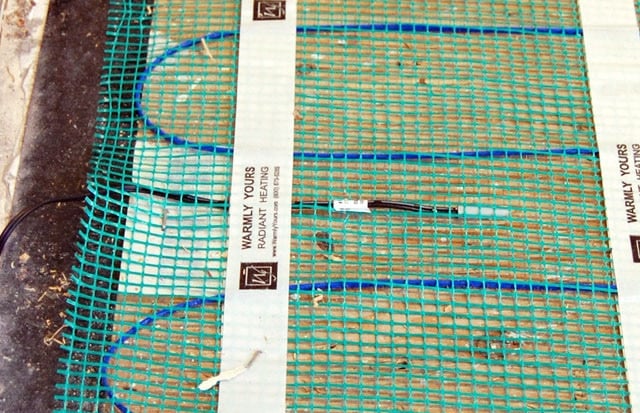
Once you've made sure all your mats are in working order it's time to lay the mats.
They wires are encased in a plastic-like mesh so all you have to do is roll it out according to the measurements Warmly Yours (or whatever company you go with) sent you.
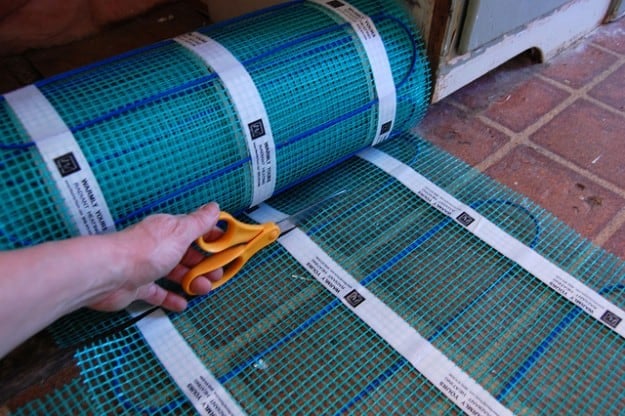
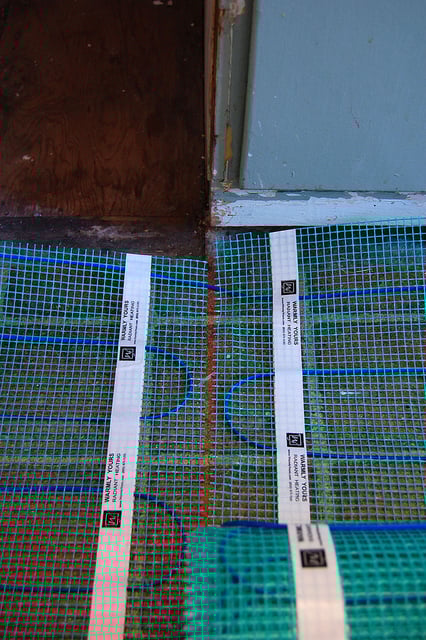
Get your roll, (in my case there were two rolls needed for the kitchen) and follow their directions for cutting through the mesh (NOT THE WIRE) and flipping the mats.
Like this. You can see here I'm cutting the mesh, but not going through the wire.
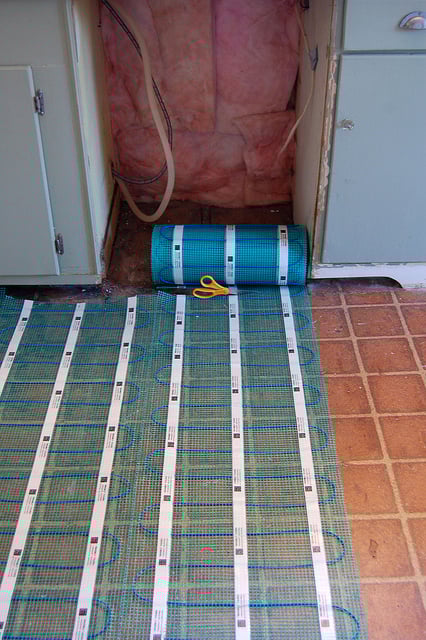
Once you get done cutting to the end of the mesh, just pull the remainder of the mat over and lay it down.
Like this.
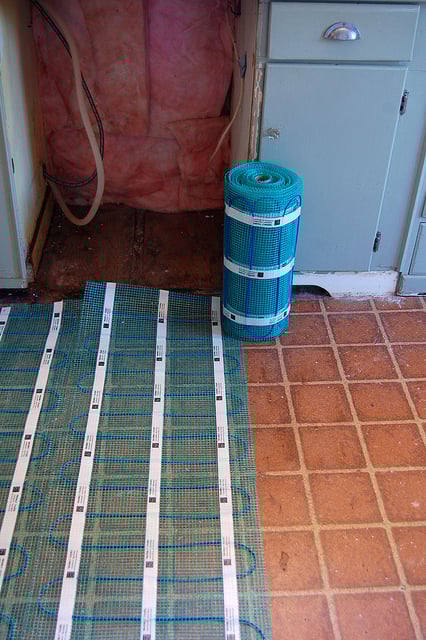
You can see that after you cut and flip the mat a small portion of the wire will be loose. That's fine. That's how it's supposed to be.
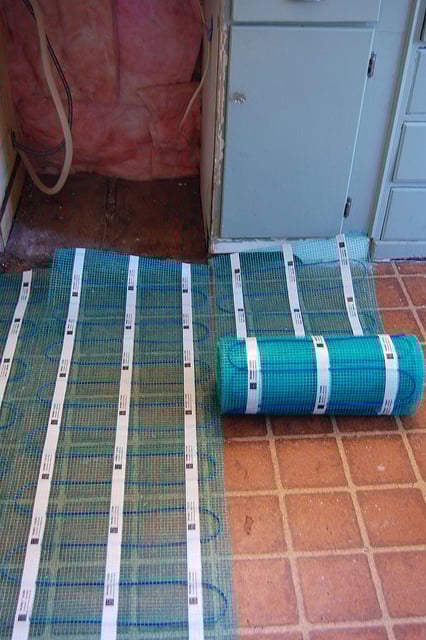
Continue cutting and flipping your way through the mat.
Would you like to save this stuff?
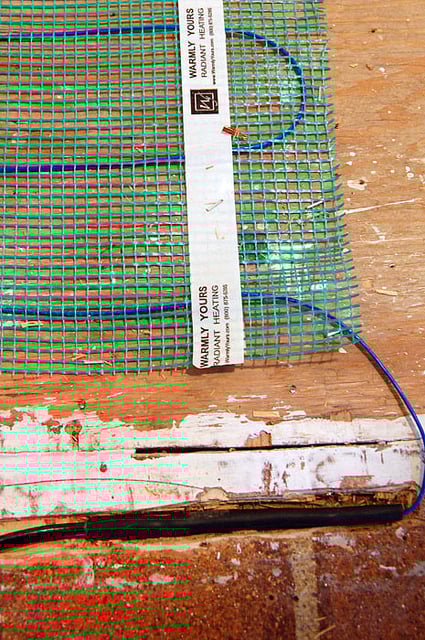
Eventually you may get to a portion of the map that is confusing. Like the squiggly lines. What the hell does that mean? Well if you read your manual you know that it means you need to cut away the mesh
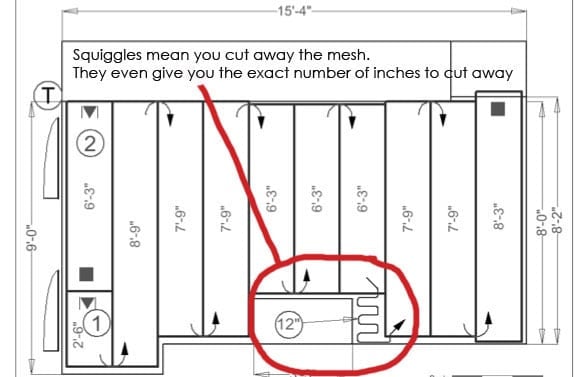
The map shows you that you need to cut away 12" of mesh from the wire.
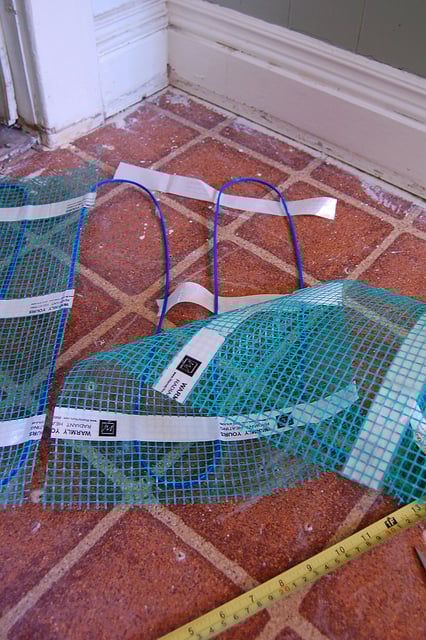
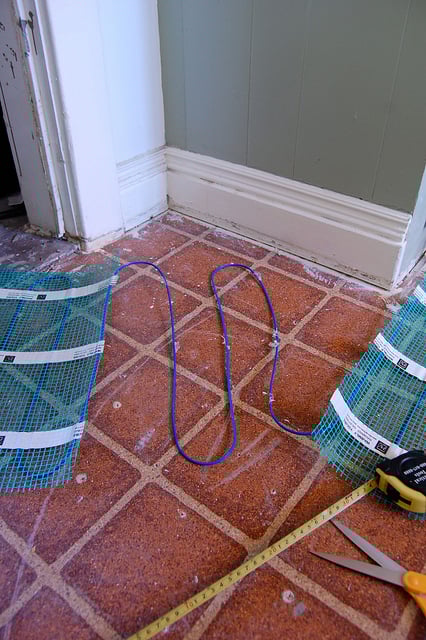
Then just pull the mesh away, leaving the wires bare.
Then continue to lay the wires and mat the way they show you in the instructions. You normally need to do this when there isn't room for the whole mat to lay.
Flip your mat and continue working.
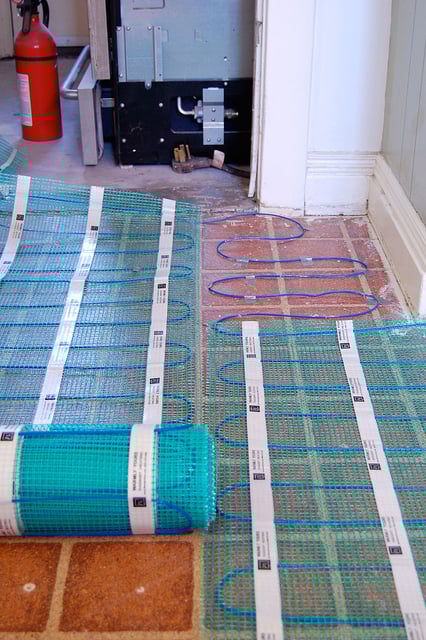
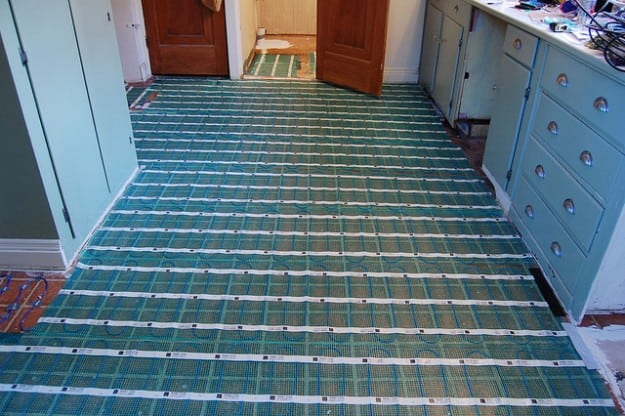
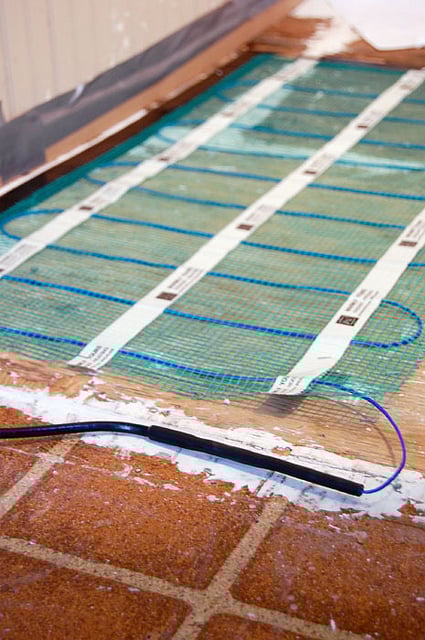
In no time at all your entire floor will be done. Only it isn't done. It just looks done.
Now you have to insert the temperature probe. It will eventually run to the thermostat. I wove mine through the mesh.
Something that isn't mentioned in the manual is the fact that you'll need to dig a little tunnel for the fat ends of the wires. At the end of each mat there's a big bulky wire connection. I knew I wanted to pour as little concrete over my mats as possible to keep my floor level the same as it was before. Trying to pour enough concrete to hide these bulky wires was going to be a problem.
So you may have to chisel out some of your subfloor to shove the wire into.
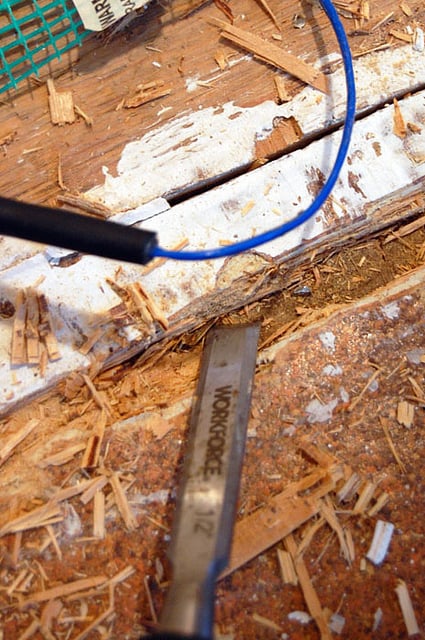
It doesn't have to be neat or pretty, it just needs to accommodate the wire.
Finally you have to go over your entire mats with a staple gun or hot glue gun to secure it to the subfloor.
I CANNOT STRESS ENOUGH HOW IMPORTANT IT IS TO MAKE SURE EVERY BUMP, AND SEAM IS SECURED TO THE FLOOR AND FLAT. YOU CANNOT USE ENOUGH GLUE OR STAPLES. Just be reallyyyy careful not to staple through the actual wires.
What may seem like a small bump will end up looking like and being a huge bump, once you get to the concrete pouring part of this job.
And yes. There is a concrete pouring part. The floor needs to be encased in something and it will either be self levelling concrete if you're doing a commercial vinyl tile like I am, or tile cement if you're having a ceramic floor put down on top.
I'll be doing a post on how to pour self levelling concrete next.
The final step is the electrical work. I had every intention of doing this myself, but realized that I just didn't have enough power in my kitchen. I hired an electrician who came and ran new lines to new breakers in my panel.
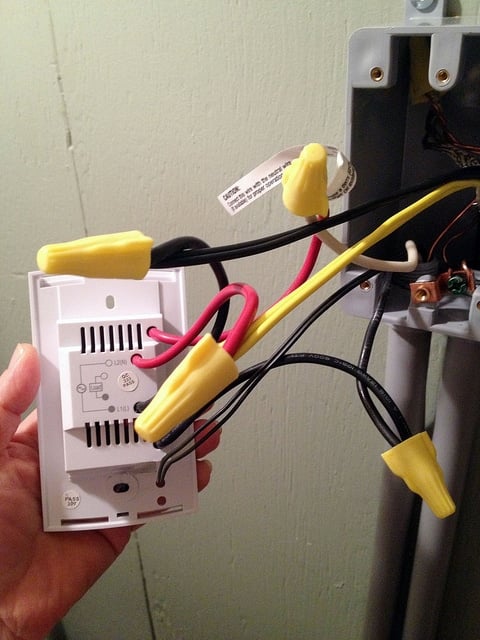
Since he was here doing electrical type stuff, he installed the thermostats for me as well, but really it's just a matter of hooking up the wires.
Another thing the manual doesn't talk about is what to do if you have 2 mats and 1 thermostat. It confused me. I was confused. I emailed their customer support and was told right away that all you have to do is twist the wires of the two mats together, treating them as one wire. So black to black and yellow to yellow. Problem solved.
If you're hiring an electrician one thing that will make your life a little easier is if you have him come first to take a look at how he'll wire the mats. With my house, as with many older homes, the wiring isn't as easy as it seems. There were a variety of routes he looked into but we finally decided on the one and only option, which required I changed how I laid my mats a little bit. Because of this, you're better to have the electrician come first to avoid any surprises later on.
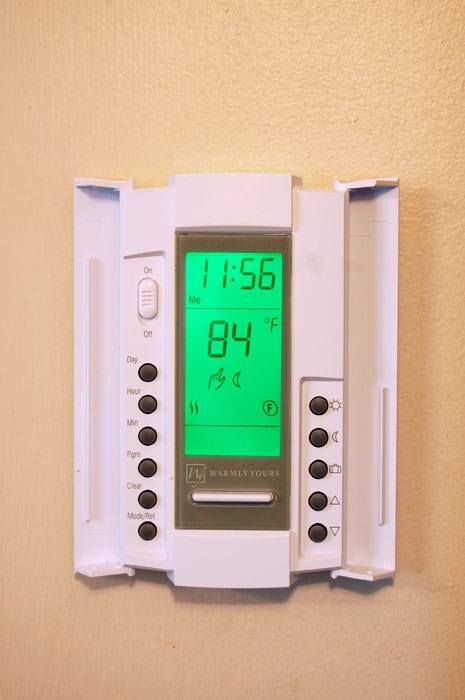
The thermostat itself is FUN. It glows. Which I like. I like anything that glows. Car dashboards, night lights, my face after drinking my mom's 17 year old "holidays only" Creme de Menthe. Even the Creme de Menthe itself glows come to think of it.
I realize this is a long post with a lot of pictures but I laid my flooring in less than one day. In fact it took me longer to write this post than to lay the radiant heating. It then took another 2 days to pour the concrete on top (which I'll post about later).
I've had warm floors for a week or so now and just like magic, the temperature in Southern Ontario has dipped to the point that there's been snow. Kind of unheard of for May. So ... I've been able to turn my heated floors out of necessity, not just curiosity. I look at it as the weather Gods aligning in favour of my feet.
My warm, warm, freshly shaved feet.


Kathryn Lehinger
Thank you so much for this post! I need to do my basement in Minnesota! Question though! Since I’ll be laying all of this over encapsulated asbestos tile, would the manufacturer be able to work the mat placements so that those bigger wires you had to dig out little trenches for would run along my walls? Thank you thank you!
Karen
Hi Kathryn! That's something you'd probably work out with both the manufacturer, yes. Good luck! Mine are still working perfectly over a decade later. ~ karen
joan keating
we did this about 20 yrs ago and it was the best improvement in any house we owned (8 so far) AND radiant heat is the most efficient and cost effective way to heat your home. I am a real estate broker for 30 yrs in 3 states... TRUTH
Karen
It really is a fantastic way to heat. ~ karen!
Marisa
Hi! Thanks for this incredibly helpful how to! Question - I am thinking of doing this in my basement. Is it worth doing in an old home with no insulation under the basement? Do you just lose all of the heat to the earth below?
Random Guy
LOL at the glowing Creme de Menthe! You're a hoot!
Karen
I really am. ;) ~ karen!
Savas Papadopoulos
Thanks for sharing your plans and experiences! We certainly need more website like your online!
I would like to add another option to electric floor heat, which is radiator panel heat:
http://doctorpapadopoulos.com/diy-radiator-heat-buderus/
The concerns I have with electric floor heat is obviously the electricity bill and the fire potential. In Maryland gas is about 4 times cheaper than electricity. But as you say the install is so much easier. If it's only for a small area it's fine
Zoe
Hi! I'm going to try to follow in your footsteps. I'm going to to put this stuff under the tile in my two bathrooms and I'm getting ready to order. Do you think I need insulation under the cables? My house is slab on grade so there's nothing but cement and dirt under the floor surface. My concern is that a layer of cork insulation will raise the level of the floor in comparison to the rest of the house and might not be as sturdy for the grouted tile. Thanks!
Karen
Hi Zoe - My kitchen is the same. Cement and dirt underneath, no insulation or crawlspace. If you're really concerned you can email the people at Warmly Yours, (or whatever product you're going to use and ask them. ~ karen!
Kim
I just want you to know that because of your post, I've decided to go with Warmly Yours. I was completely overwhelmed by all the options for floor heating, and was not getting a lot of support from our local vendors. Knowing that WY will walk me through the process is completely worth the few extra dollars we might spend. They are currently working on two custom quotes for me, and I almost feel like we have a general contractor helping us since I don't have to do any more thinking! Phew!
Karen
Thanks for letting me know Kim! I think you'll really like it. They really do take all the horrible thinking out of it! ~ karen
valentine sayings
Good day! Do you know if they make any plugins to help
with SEO? I'm trying to get my blog to rank for some targeted keywords but I'm not
seeing very good gains. If you know of any please share.
Kudos!
Feel free to surf to my blog - valentine sayings
Feral Turtle
Radiant heating is the best...especially in Canada! Your feet will be singing next winter!
Patti
Dear Karen,
You're the best.
Yesterday, a good friend had the guy and I over for a BBQ. He's been renovating his house and is working on his bathroom.
The conversation became very dudely - they were talking about pipe fittings called 'snakebites', sloping floors, pipes, tools, heat exchanges... I was in over my head.
Then, my friend brought up how he's planning to install radiant heating.
Well, somehow, I remembered like, every word of this blog post, and was the coolest chick ever. I told him about the plans, the warranty, how you remove the mesh for those weird smaller spaces, self levelling concrete... I was seriously the coolest, ever!
Thanks for your informative posts, Karen! I sent my friend this link - I'm sure he'll find it as useful as I did!
Warmly yours,
Patti
Karen
LOL!! "Warmly Yours," Love it! Glad you were able to be a big shot. It's fun isn't it? ~ karen!
Susan
Excellent post, well explained. Looking forward to the next one on the concrete. Also looking forward to hearing what kind of hit your electric bill will take with these additions, since that's a big part of installing something like this. I want a heated bathroom floor like yours, but I need to know first if I can afford the electricity hit on our fixed income.
Karen
Hi Susan - Here's a handy cost calculator that Warmly Yours has on their site ... http://www.warmlyyours.com/en-US/floor-heating/cut-turn-rolls/operating-cost For me it looks like the cost to run my mats in the kitchen and bathroom for 24 hours a day in the winter will be around $40 a month. From October - March that means a total cost of $240 for the entire winter. Which for me is hugely worth it. For one thing the mats don't just warm the floor they warm my ENTIRE kitchen, which is a good 10 degrees colder than the rest of my house. I'm pretty excited. ~ karen!
Janet
We had heated floors installed in our bathroom last spring and I'm so glad we did. You won't believe the difference next winter. It feels great on your tootsies for sure, but it also warms the room significantly.
Cindy@ DesignLove
We love our heated floors! We turn it down and the kids turn it up! Our 8 yr old lays on it with her shirt off, but don't let the fella see you do this, he may get worried! lol....enjoy!
C.
Toronto Boy
Including a floor plan with the heating coils makes the job a little less stressful. After reading the article, I think the hardest part is figuring out the wiring and laying the concrete/flooring on top. Great job as usual! I can't wait to read the followup article!
Karen
The concrete flooring scared the crap out of me but as you'll see in the next part of the series (next week) it wasn't so bad. ~ karen!
Marcy
I told my husband that if he 'accidentally' broke any tiles in our master bath remodel that I wanted radiant heat. He did break tiles and it was an accident, but a deal is a deal.
We laid ceramic tile over ours - his first time tiling - and I wouldn't recommend putting a radiant heat floor under tile on your first try but he managed through and it looks great and I absolutely LOVE the heated floor.
Adrienne
Well, this really rivals how impressed I was by your front yard veggie garden project last year. You are a hell of a woman. ;) (Not the first time you've heard that, I bet.)
Barbie
CRAP....this comes about 7 yrs to late! When we built our house I wanted radiant floor heating and hubs would not do it! This looks pretty easy and risk free!