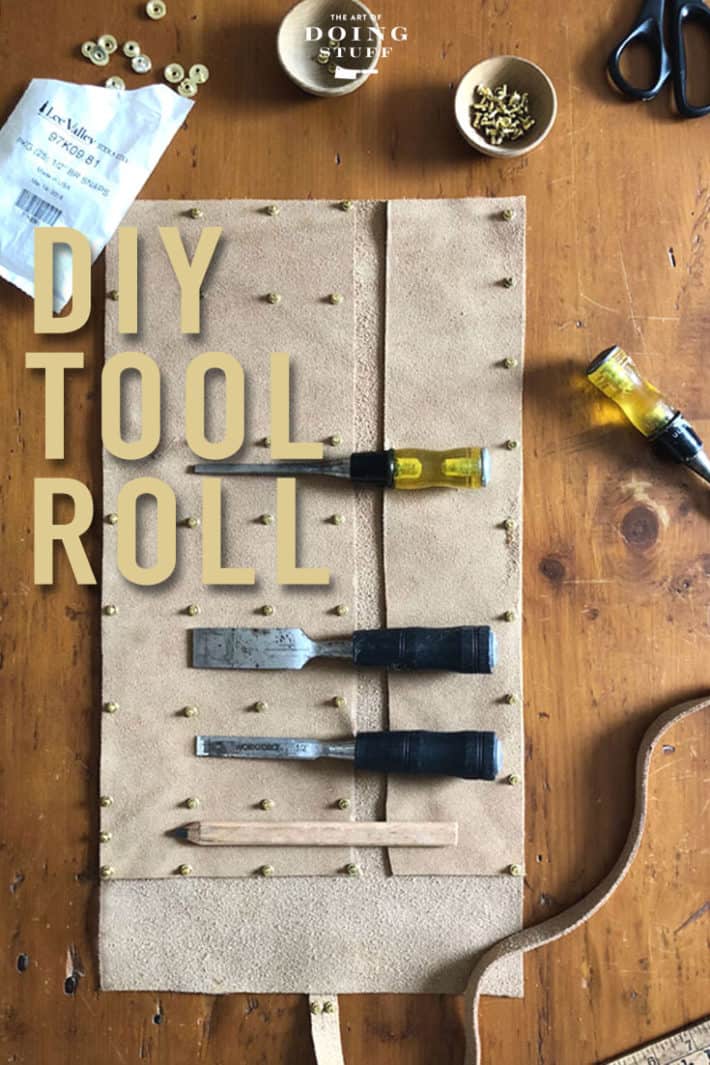
A great first leather working project. This is a beautiful suede chisel holder, but if you don't happen to have any chisels that need holding it would work great for paintbrushes, makeup brushes or colouring pencils too. (just use lighter weight suede or leather)
I have approximately 14 million hobbies - the exact number depends on whether you include eating a hobby. If you do, then I have 14 million and one hobbies. So it goes without saying that, obviously, I desperately need another hobby. What if I lose interest in making maple syrup? Or hammering things? Or cooking things? I'd be dangerously close to running out of hobbies. So, yes, it would appear I needed another hobby. Just to be safe.
Enter leather working. I've worked with leather before making the odd thing but I've never done it with official leather making tools and as I'm sure you know, having the right tools is kind of important. Have you ever tried to router wood without a router? I have. My project ended up looking like it was made by a sloth wearing mittens. So if you plan on making, doing or creating anything, do yourself a favour and invest in the right tools.
I have a tendency to jump right into the most difficult projects instead of easing my way in by starting with something simple. This time I wasn't going to make that mistake. With my new hobby, leather working, I'd do something incredibly easy, build up some confidence and put off stitching together an entire Game of Thrones wardrobe for my second project. It'd give me something to look forward to.
I decided on making a tool roll (a chisel holder) because it was simple, useful and a fast first project.
Even though I sew (hobby #7,425) I didn't want to get into sewing with this first project, so I made something that only involves a bit of gluing and the leather worker's favorite tools - rivets and rivet setters. You can make the tool roll any size you want, with as many pouches you want, customizing it to fit your whatever it is you want to put into it.
I'll admit this would be sturdier and longer lasting if you sewed the one edge I glued, so if you'd like to either lace it up or sew it on a machine I support you 100%.
Don't know where to get leather or suede? I bought a few really ugly leather and suede coats from a thrift store a few years ago and I've used them to make countless things. This leather notebook and keychain are just a couple of the things I've made with the old coats. I just hack off whatever I need and away I go.
How To Make a Leather Tool Roll.
Materials
Leather
7 mm rivets (40 pieces) - buy here
10mm snaps (3-4 snaps) - buy here
7mm rivet setter
Hole punch
10mm snap setter - You can buy a kit with all these things here
Box cutter - the one I use
Rubber Cement - buy here
Rubber mallet or regular mallet padded with rags - this one's really nice
Instructions
This is where I let you know I've already lied to you because this happens to be a suede tool roll. Not leather.
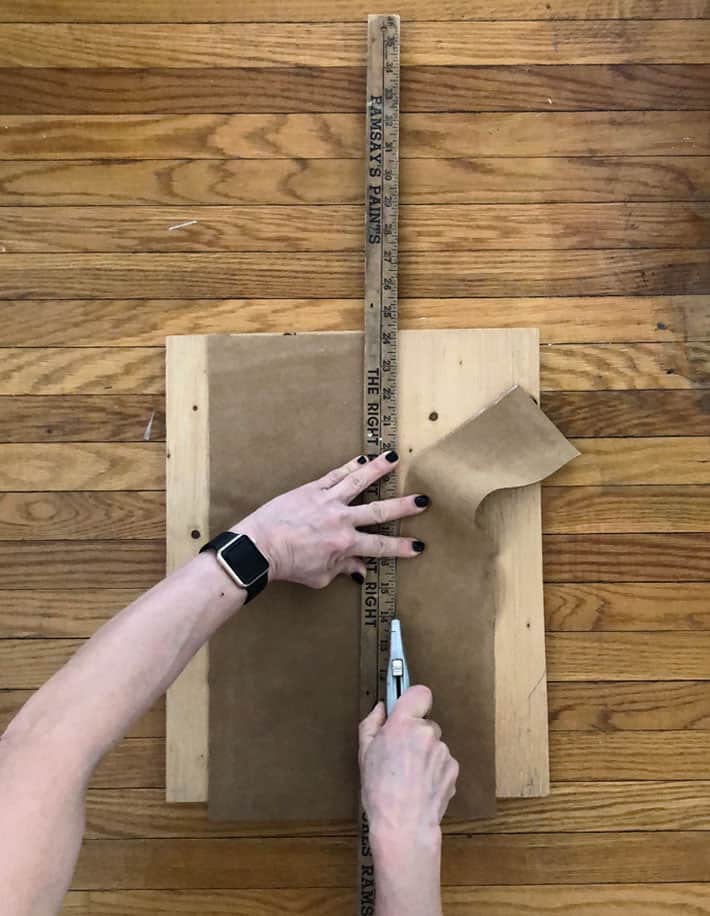
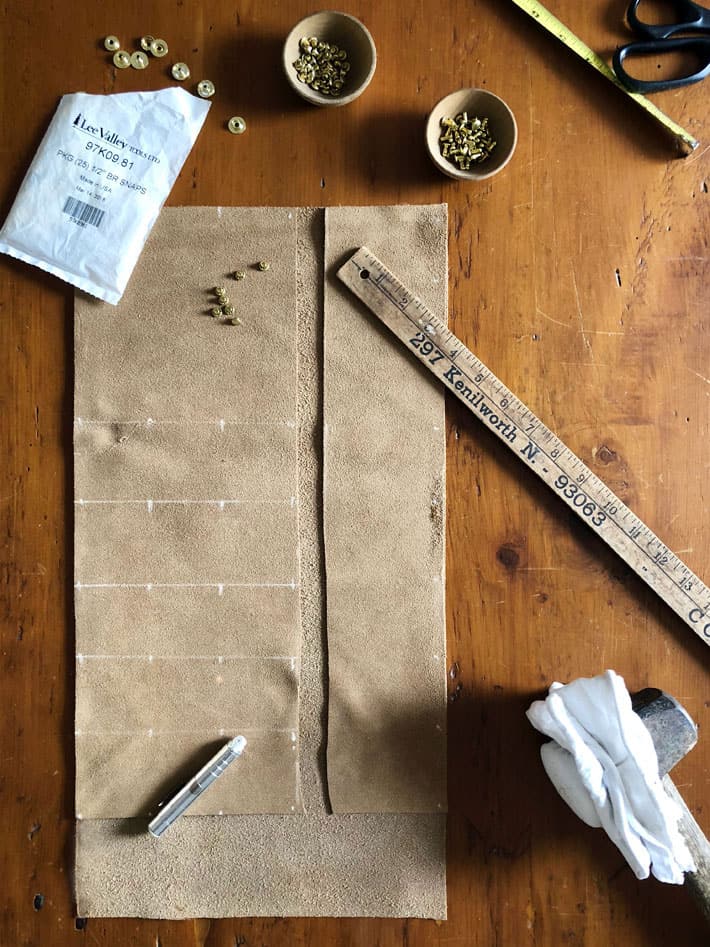
This is your basic pattern.
It's made with 3 pieces of leather cut to the dimensions I've outlined.

- Measure out your pattern on a piece of suede or leather and mark it with chalk. Use a square to make sure your corners are straight. You can also buy grid patterned, self healing mats that make getting your work square easy.
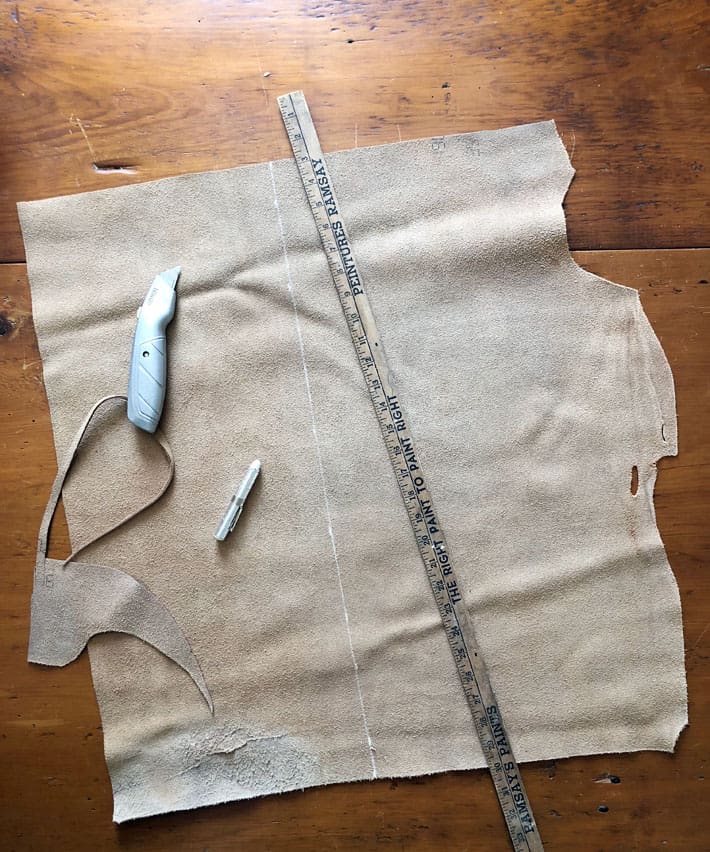
2. Using a straight edge and always, ALWAYS pulling away from your hand, cut the leather with a sharp box cutter.
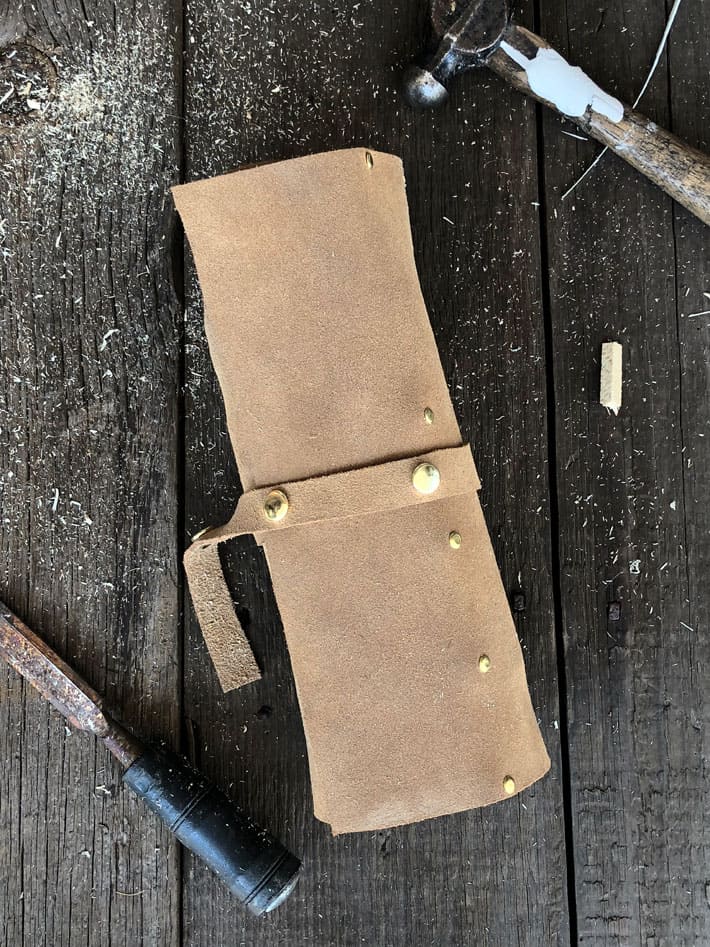
** Cut an extra ½" wide strip of leather. You'll use this as a belt around your tool roll to keep it closed.**
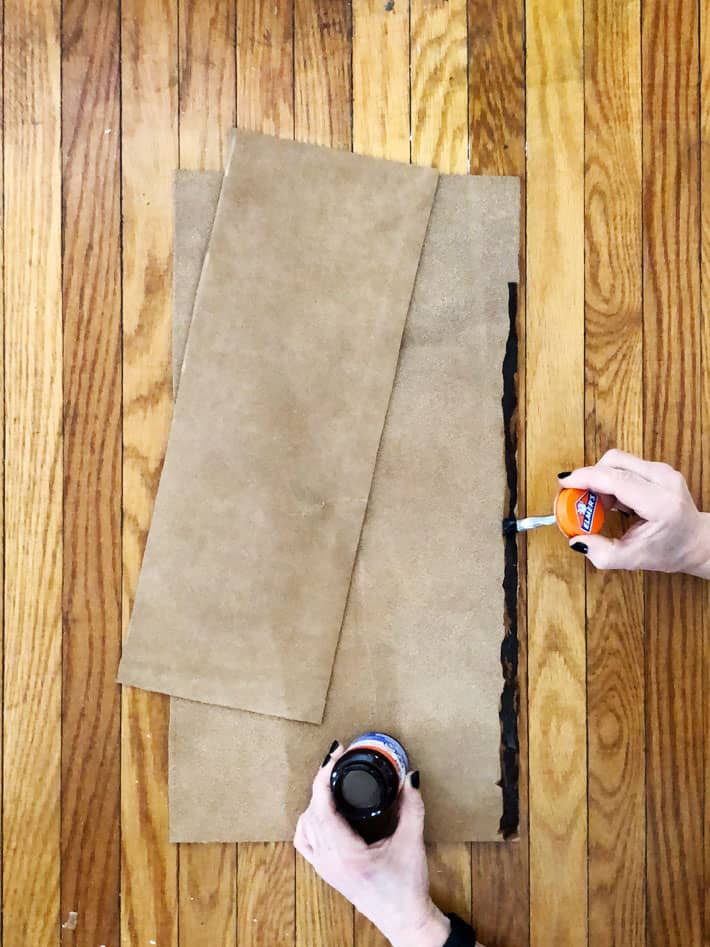
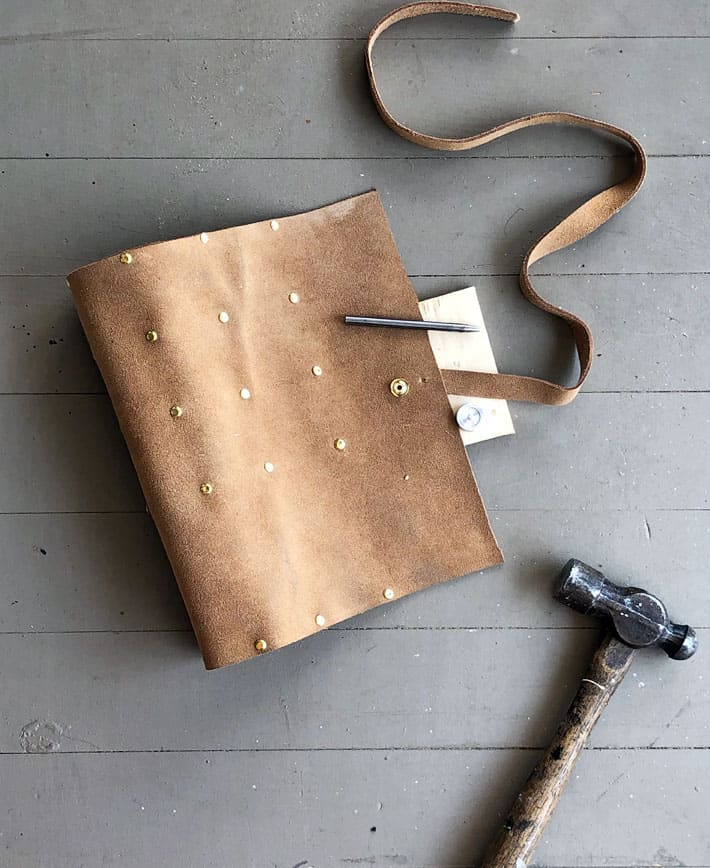
3. Glue the bottom edge of the tool roll, stopping 3" short of the end. Place your bottom piece of leather (the wider one) along the edge and hammer it together with your rubber mallet. Let dry.
4. Mark the lines where you want pockets to be with chalk. These can be any width and anywhere you want them. If you want the roll to hold a bunch of artists brushes or spade bits just do the pouches narrower. With chalk, mark where your rivets will go along the top seam of the tool roll, along the sides and down each pouch divider.
5. Place everything to see if it all looks O.K.

Would you like to save this stuff?
6. Place your hole punch over the rivet marks and punch out your holes. It just takes a short tap if you're going through one layer, a couple of harder taps if you're going through two layers.
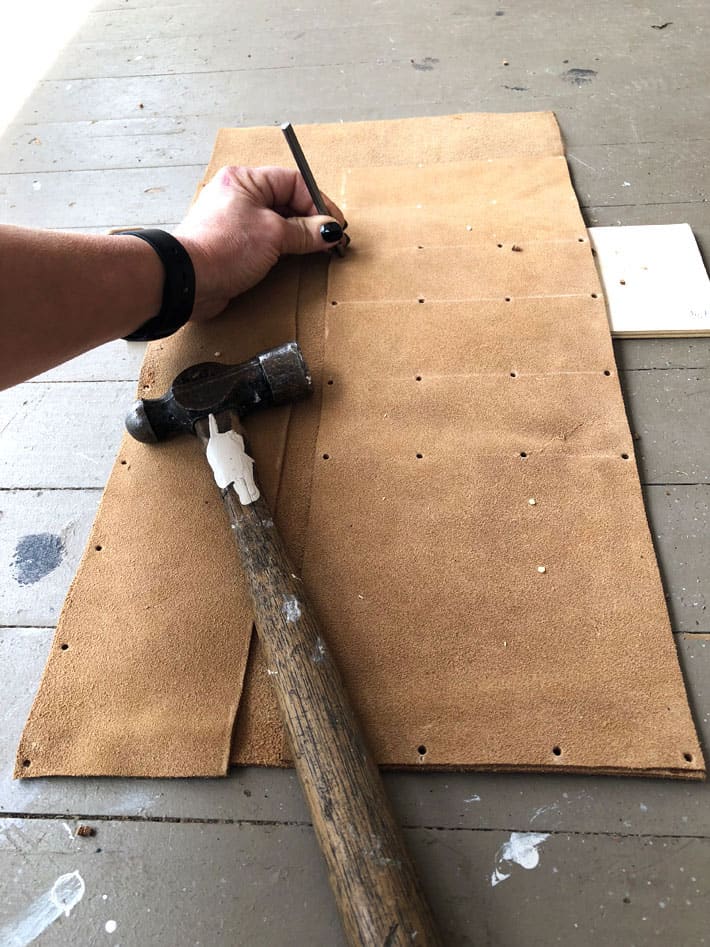
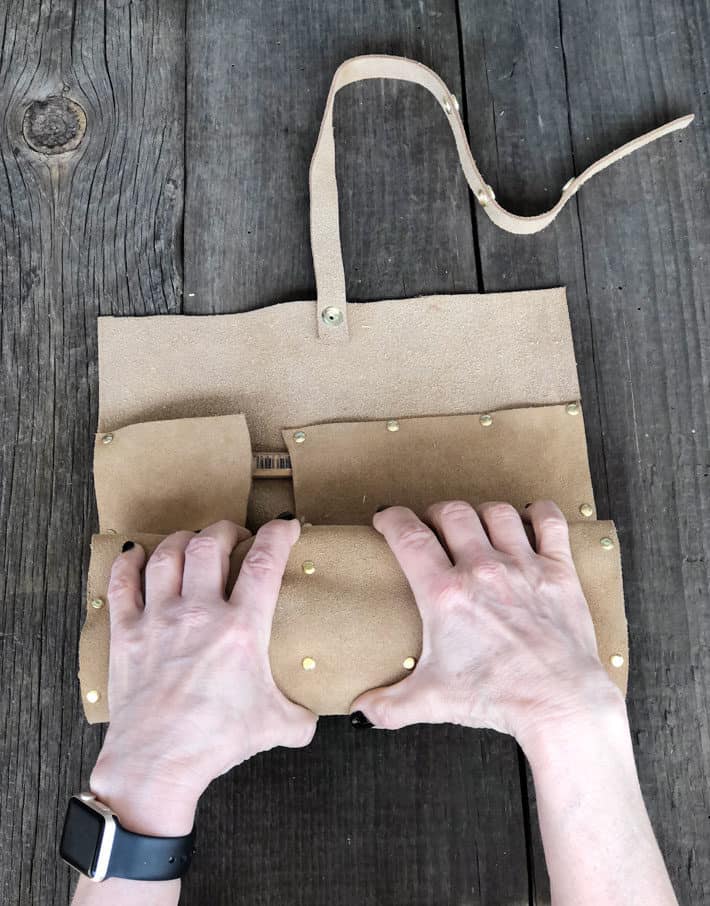
7. Place your rivet fronts and backs through the holes and set them using the rivet setter. One good whack with the hammer is better than several small ones.

8. Attach the long piece of ½" leather you cut to the tool roll with a snap. Run a few closure snaps along the length of leather so you have a few closure options depending on how full the roll is.
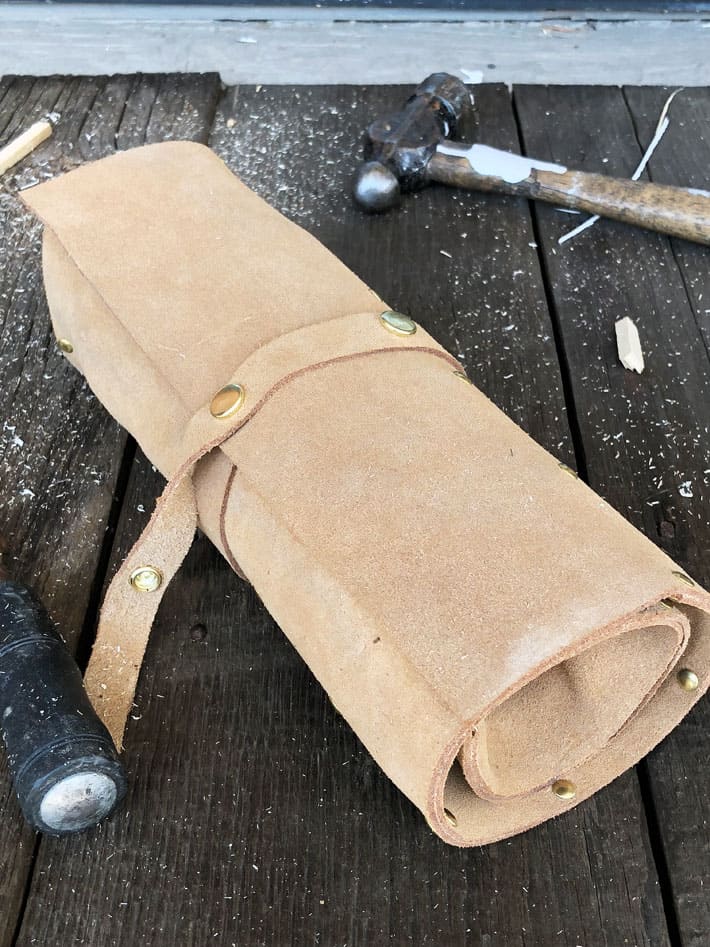
9. You're done! Fill it and roll it.
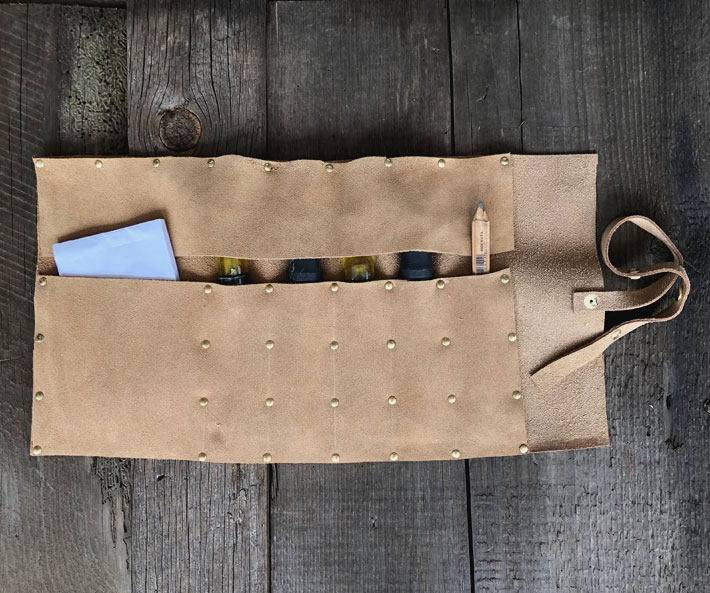
Loaded up with chisels, a notepad and a carpenter's pencil.

It rolls up remarkably straight for being filled with such clunky stuff.
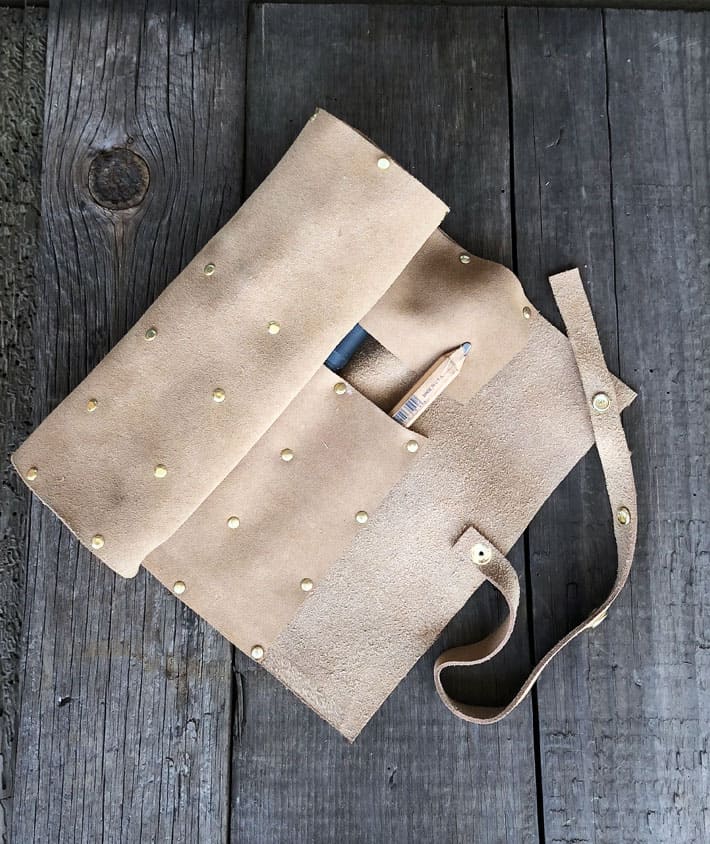
Having several snaps means it'll close properly whether you have a lot of stuff in the roll or a little.
Why make a chisel roll? So when you run your hand into your drawer filled with chisels you don't slice your hands. Not that I've done that.
If you don't like Amazon you can also get all the supplies at your local craft store or Lee Valley. Special thanks to Leather Girl Kelly. She's a leather worker I spoke with who was incredibly generous with her time and knowledge. Plus she makes some cool stuff, if you happen to be a hairdresser check out her scissor belts.
Now if you'll excuse me, I have 14 million and one things to do.
→Follow me on Instagram where I make other stuff and often make a fool of myself←


Benjamin
Let's eat !!
Mary W
Now if you could just explain dying leather so we all could make a pink tool belt like your sister's! I would suspect that little leather Christmas decorations for packages and key chain dangles to find keys in our purse easier, would also be useful and a colorful addition if we knew how to dye properly.
Shawna
You did not lie to us! Suede is just a type of leather with that brushed (vs smooth) texture. Great tutorial!
linda in illinois
when I was in grade school, we made leather wallets, course we didn't get to use rivets, but it was a lot of fun.
Diane
Yep, thrift stores are a great source for leather stock. Also, if you're making a heavier project, you can cut the tops off of tall boots; after all, it's the bottom and soles that wear out first (unless you do a lot of knee slides).
Kate C
Neato!!! Enough said. :-D
Barb
Wonderful project! Leather crafting is awesome, but I agree about using rivets! You can also use the pop-rivets (most guys have a rivet gun in their stash) and even make stylish purses: https://www.madebybarb.com/2016/06/07/no-sew-perfect-little-purse/
Jenny
Great purses, Barb!
Artt Vernon
Great design and flexibility for customizing to specific needs. The suede is a must...... I have used heavier leather, not knowing that the tannins if the leather processing cause the blades of my tools to rust...... sad lesson. Thanks for the idea!
Bev out west
Cool tip, thanks from out west
Sherri
At a recent class sponsored by our library, the teacher was showing some upcycle projects.
One involved leather. She suggested Chicago screws for joining the leather on the bottom of a purse, as being easier than rivets for some people. Throwing it out there. Feel free to throw it back.
Karen
LOL. I'm sure they'd work well. ~ karen!