I know. You probably use your pruning shears, hate them for being dull and sticking closed after you cut with them, at which point you swear, finish the job and put the pruners back wherever you got them. Let's change that.
Pruning season begins in the late winter or early spring before shrubs and bushes have broken their dormancy. I happen to have some boxwoods that I need to cut back a LOT and they need to be cut by hand, not with a hedge trimmer.
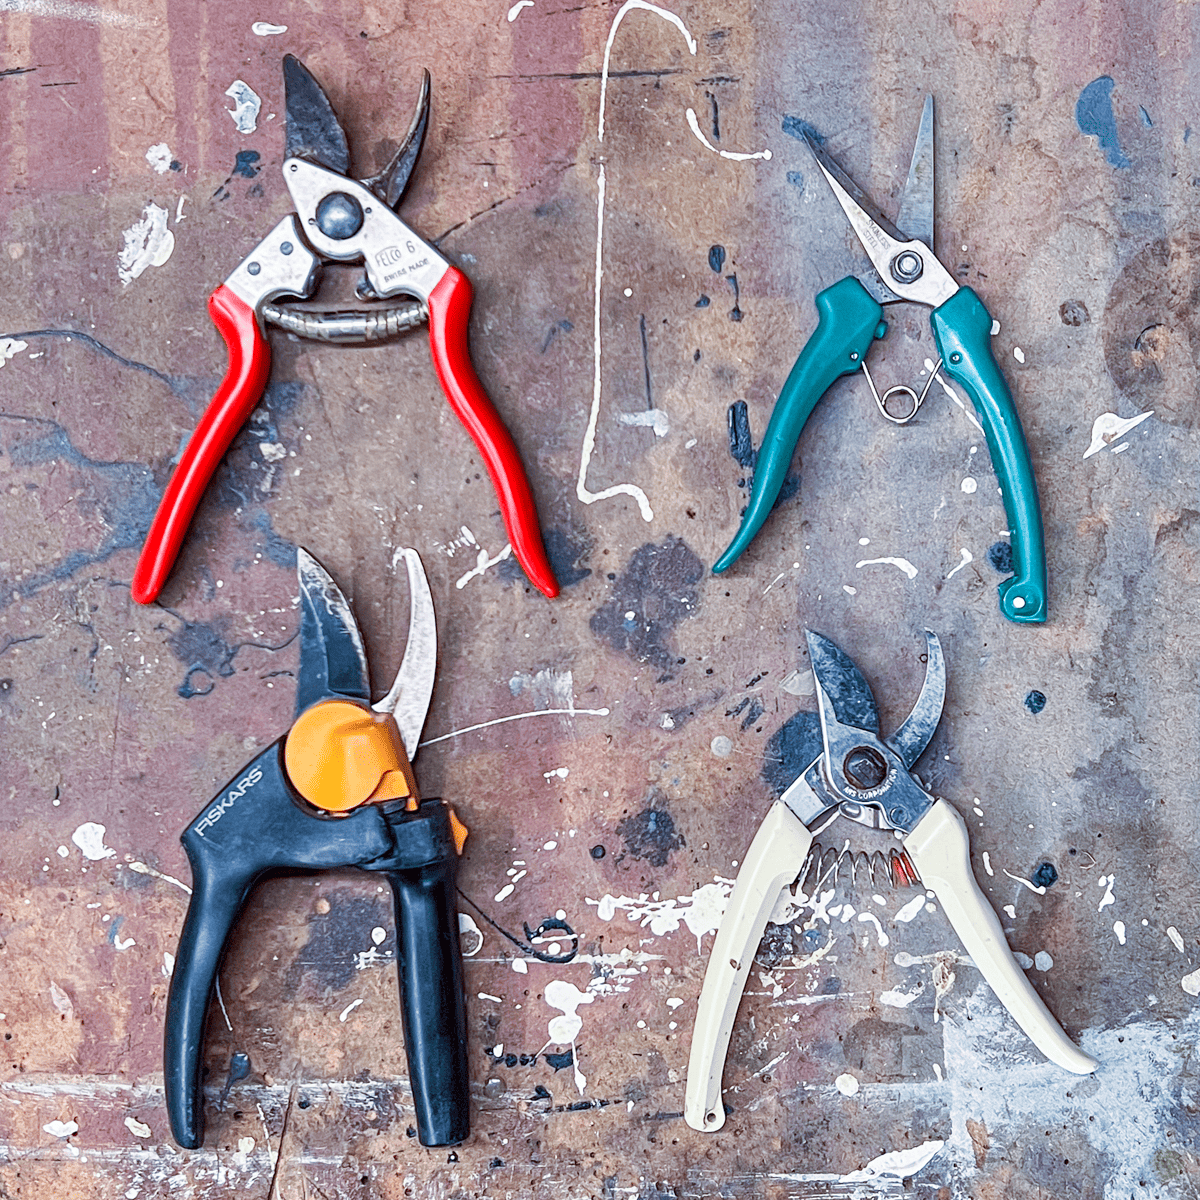
Which brought me to my box of pruners all looking like I found them in Blade Runner. I haven't cleaned, sharpened or oiled them in years but THIS year (because of how organized I am now), this year I have time to do it.
In turn, I'm going to show you. This should be done at least once a year. If you prune a lot, sharpen as needed.
Table of Contents
Sharpening pruners
What you need
- A metal file, Speedy Sharp or diamond files
- 3 in 1 oil (or WD-40 in a pinch if it's all you have)*
- rag
- wire brush
- sandpaper
*Felco advises against using WD40 because of its corrosive properties, so use 3 in 1 oil if you can.
Video
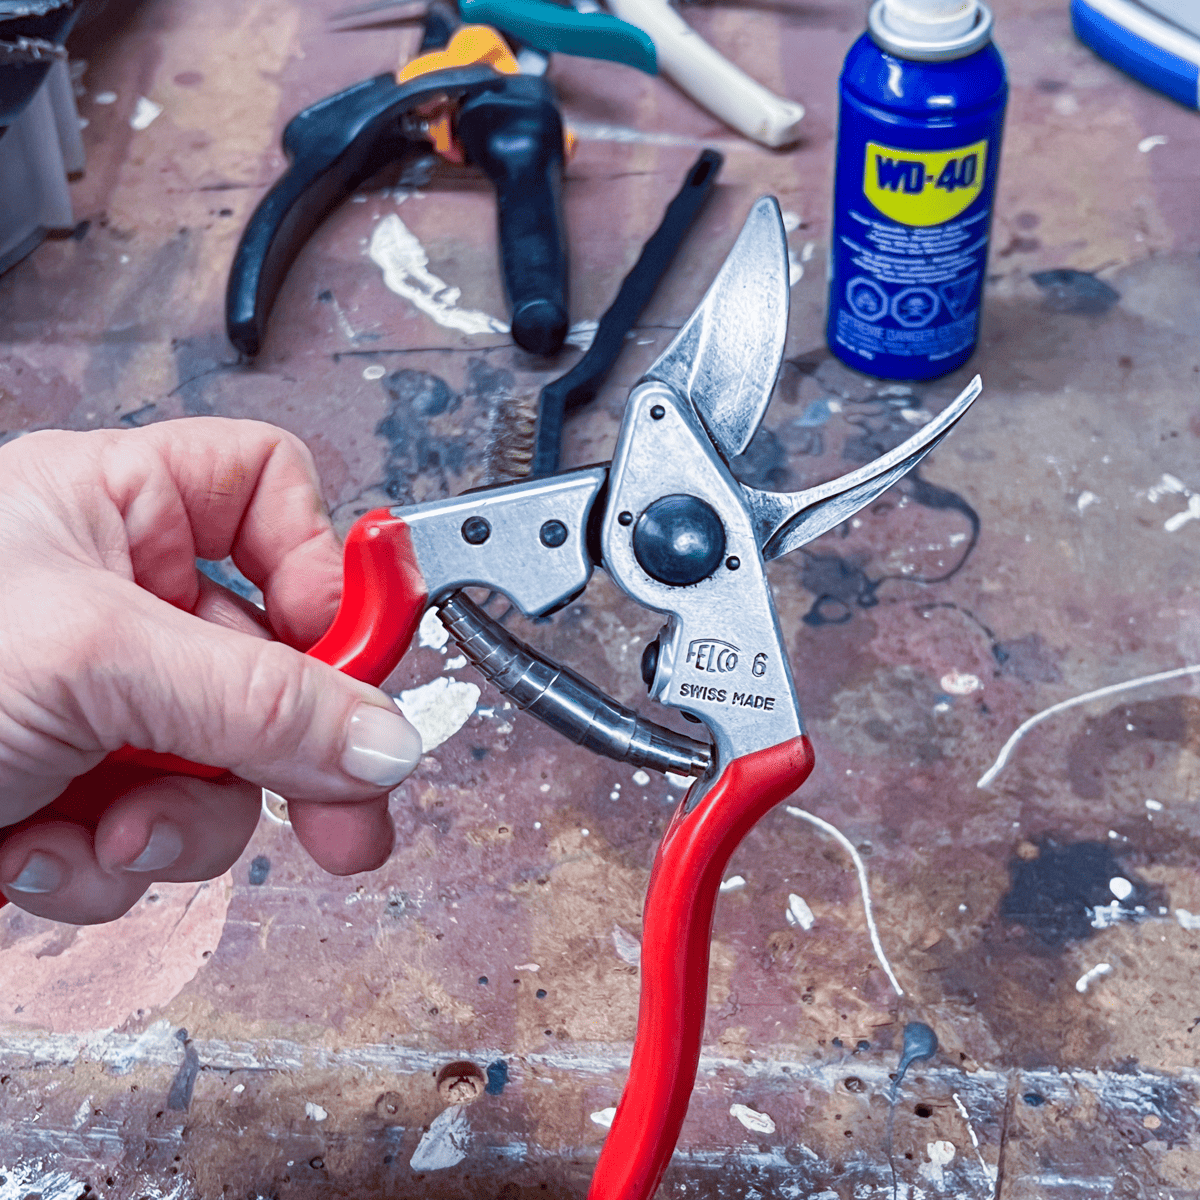
I use a regular metal file because that's what I have (as well as the Speedy Sharp) but you can buy a set of 4 diamond files specifically for sharpening pruners. 3-in-1 oil is better than WD-40, although in the video I'm using the last of my WD-40.
Step by Step
Would you like to save this stuff?
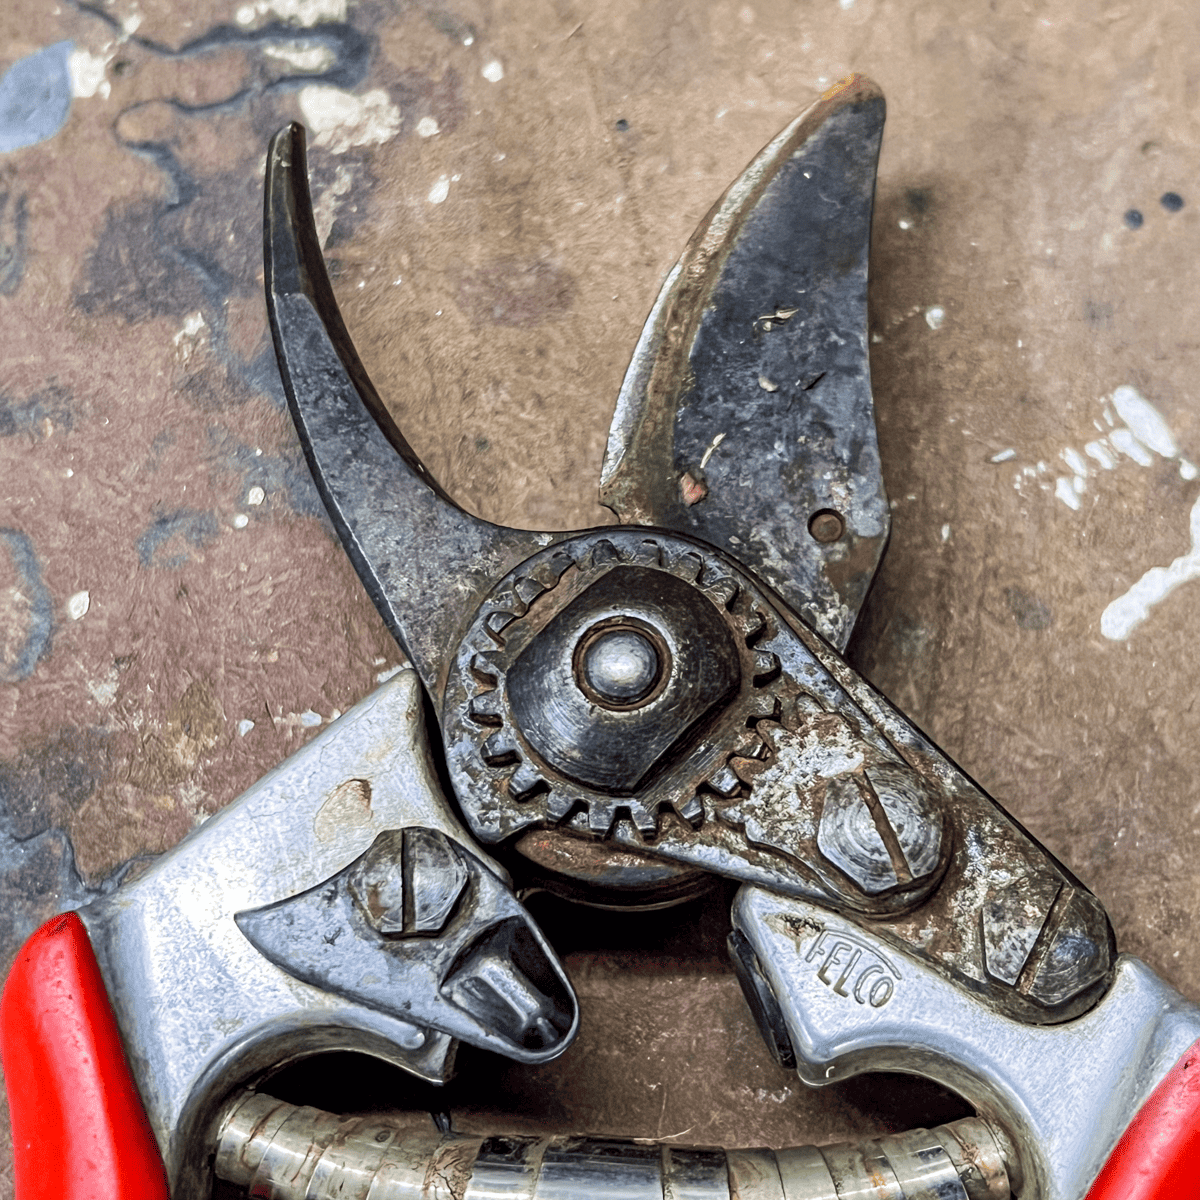
Go from this ...
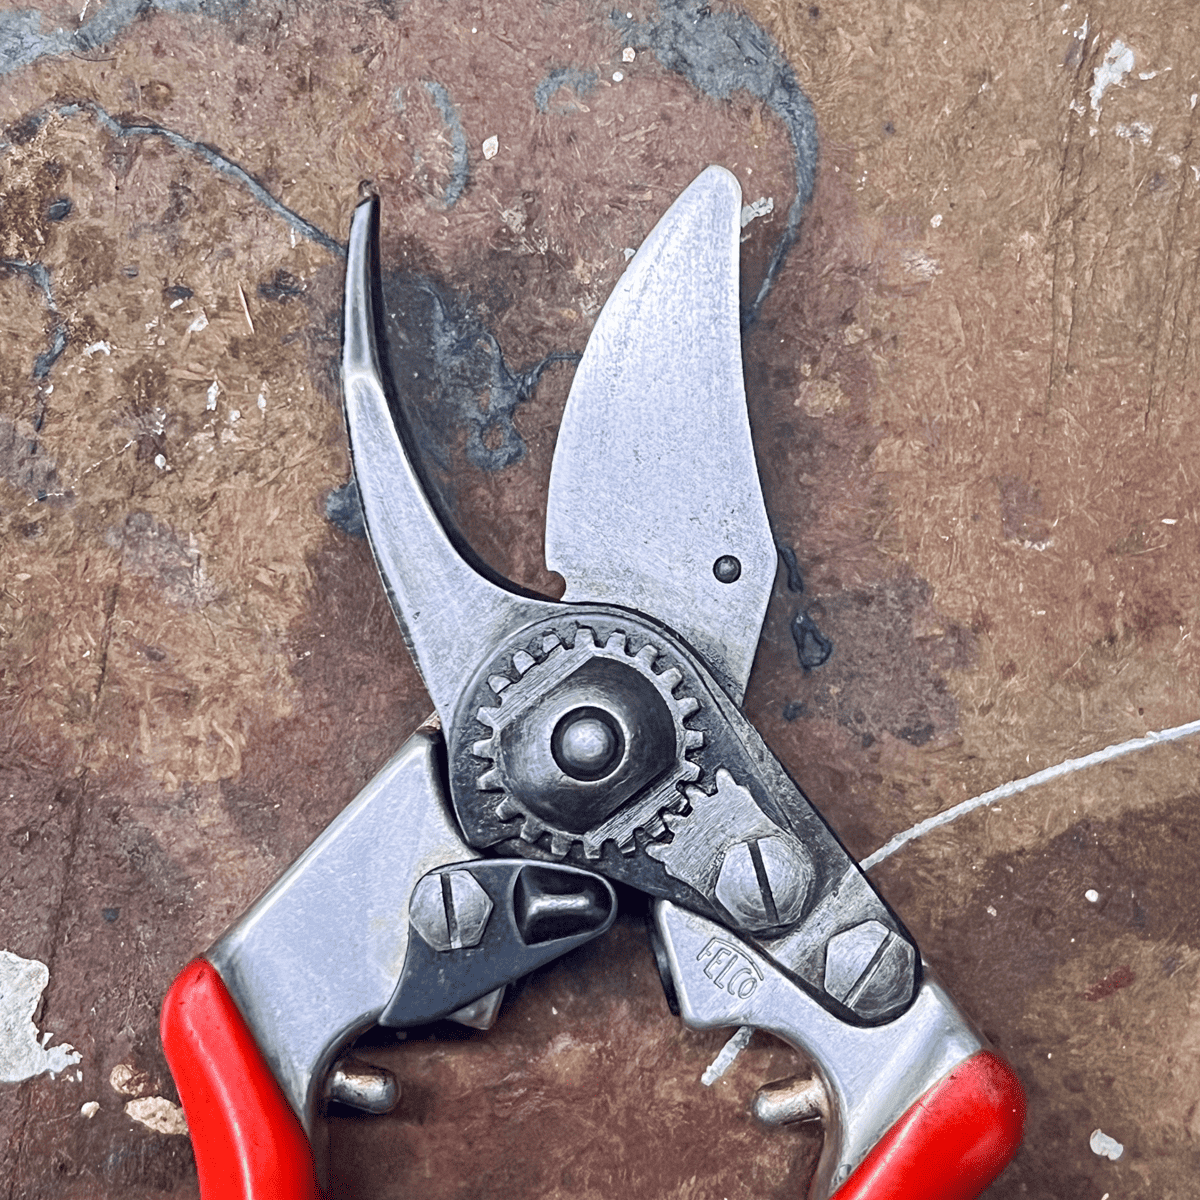
... to this.


- Clean the pruners of dirt and grit with soapy water and wire brush if needed.
- Apply a couple of drops of 3 in 1 oil, or one spray of WD-40.


- Using fine grit (180 or so) sandpaper clean the blades of sap and rust.
- After you've cleaned your pruners up, find the beveled edge of the blade for sharpening.


- File the cutting blade by filing at the same angle as the blade bevel. Run in clean strokes in one direction - always towards the edge of the blade. On the back side of the blade run the file flat along the back to remove any burrs.
- You can also use a Speedy Sharp for sharpening by pushing or pulling the tool along the bevel, shaving off bits of metal with it.
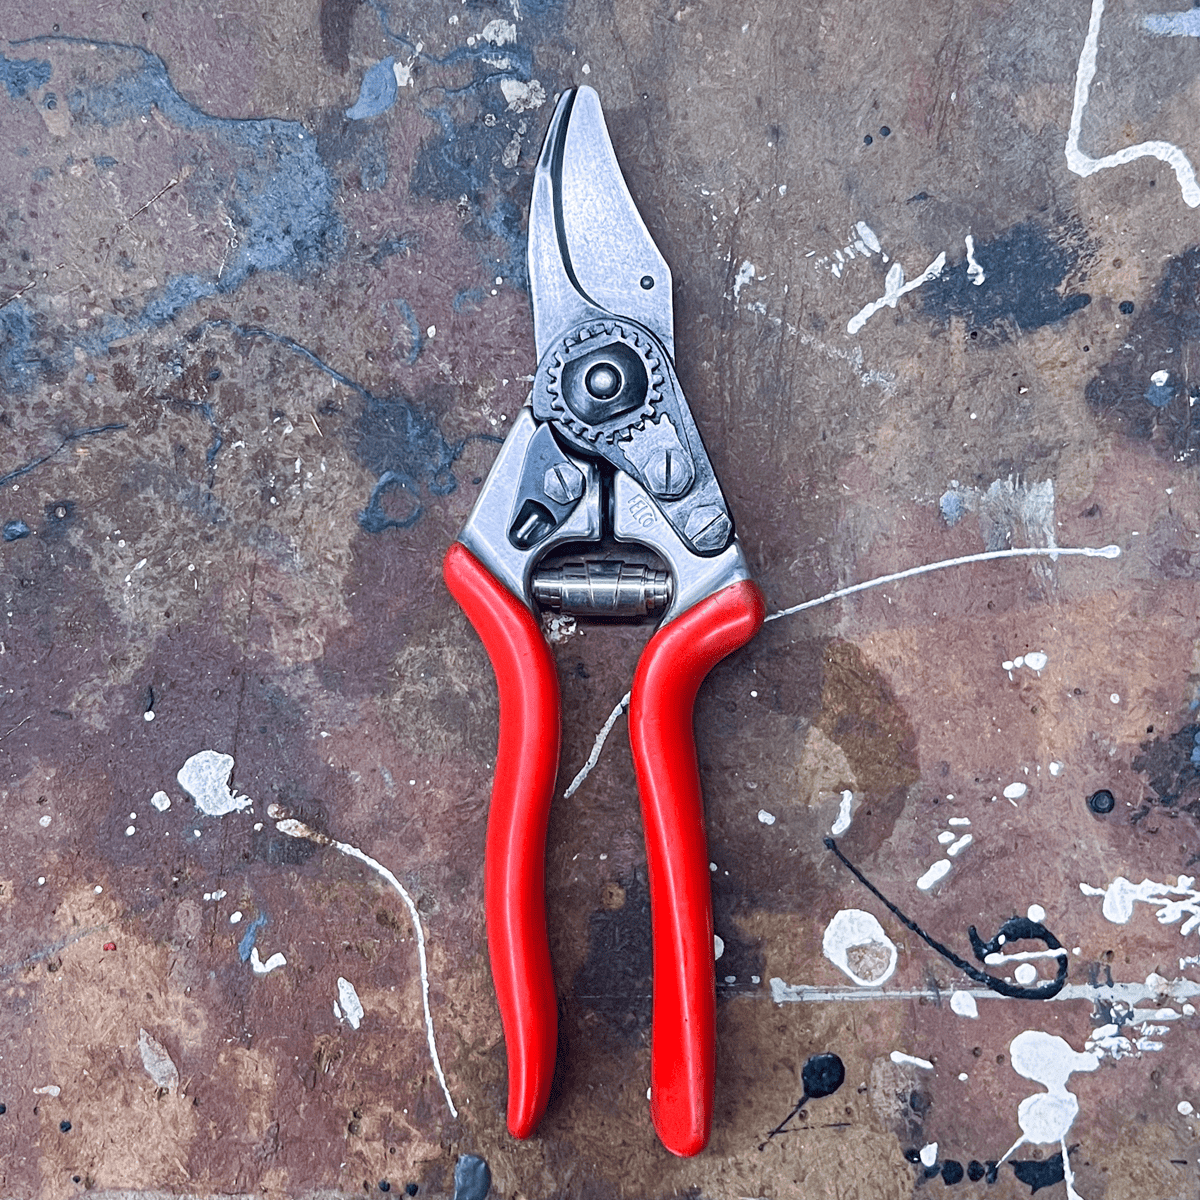
That's it. They're ready to roll.
Pro Tip
When you're using your pruners, especially to cut away diseased stock, spray the blade with a 1:9 mixture of bleach and water after every cut. Bleaching your pruners prevents spreading disease to other branches or plants you use them on afterwards.
**Reader Sabina recommends Lysol spray on the blades in between cuts.**
As with many things in life, the hardest thing about this task is just finally deciding to do it.


Bev Barna
Hi! Ok, but how do we sharpen the electric/battery trimmers?
Thanks!
Bev
Linda
Thank you for inspiring me -and teaching me how- to sharpen my old Felco pruning shears. It was such a satisfying little project with such a great result! I love your approach to practical, creative, hands-on and fun home and garden care. Thank you Karen!
Linda in Illinois
No matter what I do, I never seem to get a sharp blade after I sharpen. I really don’t know why I can’t. I keep trying but never succeed with it. I’ll
Send you all my cutters and have you help me with it. lol. 😛
Elizabeth Chase
You inspired me to clean & sharpen all my pruners! Whi knew I had so many! Lol Thanks for your simple instructions - gave me the confidence to try this 😊
Karen
That's the best thing I've seen. Nice work Elizabeth! I love it when people actually do the stuff! ~ karen
GinaG
I really feel you buried the lead on this one: "As with many things in life, the hardest thing about this task is just finally deciding to do it." Words to live by. You also left out the first step: finding my pruning shears...
Karen
I really tanked this one didn't I? ~ karen!
Wendy Johnson
Do you ever sharpen the smaller blade as well? Or is just doing the one as you show in your video sufficient? Thanks!
jacqueline
Late to the pruner sharpening party…but in case it’s useful to someone… 1 Klingspor Sandflex Hand Block, Fine is what I’ve used to clean the blades of my many pairs of Felcos for 30+ years since Horticulture school. The advantage of the sand block over sandpaper is that it has give and is held in the hand not just with fingers so is easier on the hand. Another tip is never close pruners after use which traps plant moisture. Leaving them open to dry out if I don’t clean or dry right away has prevented rust.
Hettie
Spot on timing - as always. Thanks! I have the little Speedy Sharp tool but I was never sure how to use it. The video helped a lot.
Cindy
Karen, not sure whether to.thank you for this post or not. On one hand, I derived great pleasure from sitting outside in a patch of sunshine, cleaning my tools with childlike anticipation of the gardening to come. On the other hand, I can no longer blame my sadder efforts on my tools ("Why do my roses look like they were trimmed with a hand mixer? My pruners were dull and sticky...").
Vicki DeLeo
Hello - Master Gardener here. Yes on the bleach solution, or isopropyl alcohol (70%) sprayed on and left to dry, but with household cleaners, take a look at this, from Iowa State Extension:
"Household disinfectants like surface wipes, cleaners, and sprays (i.e. Lysol, Pin-Sol, Clorox wipes, Microban, etc) may be used to sanitize pruning blades. They are very effective at killing bacteria and other pathogens on surfaces and equipment in hospitals and schools, but their effectiveness at killing plant pathogens on garden equipment has not been well evaluated. It is likely that these products could be effective at disinfecting pruning equipment, but other sanitizing solutions (such as alcohol) are preferred over these products because the formulations and active ingredients of household cleaners can vary by product and their efficacy on pruning equipment is not well known." https://hortnews.extension.iastate.edu/faq/how-do-i-sanitize-my-pruners-prevent-spread-disease
This one too from University of Missouri IPM: https://ipm.missouri.edu/MEG/2018/1/cleaning_pruning_tools/
They do, however, do a great job of cleaning off sap and other sticky icky stuff. Just follow up with a bleach or alcohol spritz.
Katy K.
What perfect timing! We just bought new pruners last night and *swore* that this year we’re going to clean and sharpen the old ones! Thank you!
Sabina
Horticulture School tip, you can use original Lysol spray or wipes on your pruners in between cuts as well. It really cleans sticky sap well.
Karen
That's a great tip for disinfecting blades! ~ karen
Karin
Have you ever tried the old 'cut the sandpaper' trick? Wondering if that would work with pruners? Works well with scissors.
Judy Jackson
Thank you so much for this.... I've been looking for info on how to clean and sharpen my pruners etc. since forever! Found nothing as straightforward and simple as this.
Kat
Great video. Thanks! I’m now sufficiently motivated to clean and sharpen my pruners … instead of just buying a new pair. The “Thats good enough because I’m not a retired man.” comment had me rolling 🤣🤣🤣!
Alicia
Same technique for loppers?
Randy P
Great tips and techniques. One suggestion, WD-40 is wonderful for dispersing water -its original designed purpose WD stands for Water Displacing - and other chores, but as a lubricant its not that great. I'd suggest plain old 3in1 oil or other machine oils as superb lubricants and rust preventatives.
Karen
Thanks Randy P! Did you tattle on me to Felco? Because I received an email saying the same thing from them this morning, lol. I shall update the post. ~ karen!
Randy P
Hah! Never would I tattle. It is still an amazing product, there are simply better long-term lubricating choices out there.