If you were to walk into my garden any summer you'd see every one of these things at work. These are the tips that usually end up being the answer to any of the gardening questions I get from friends and family.
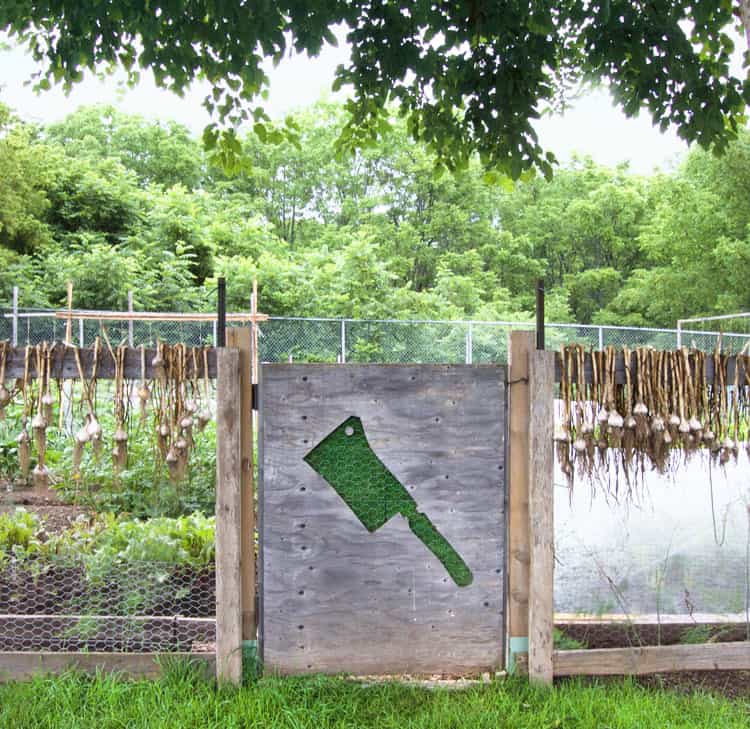
Why is garlic hanging on the fence? To introduce you to your first tip. There are also tips within the tips which of course makes this much more exciting.
This is a big post with a lot of information but it's all easy to remember if you just write it all down 5 times in a row and then memorize it.
OR you can download the quick tip sheet with only the essential information. That free download opportunity is coming up for you about halfway down the post.
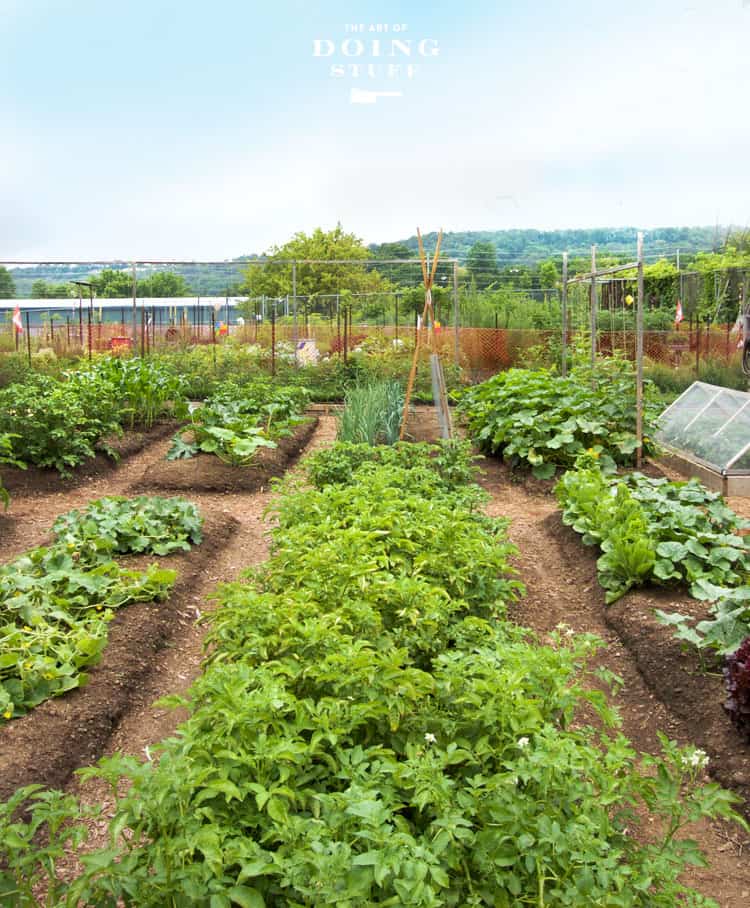
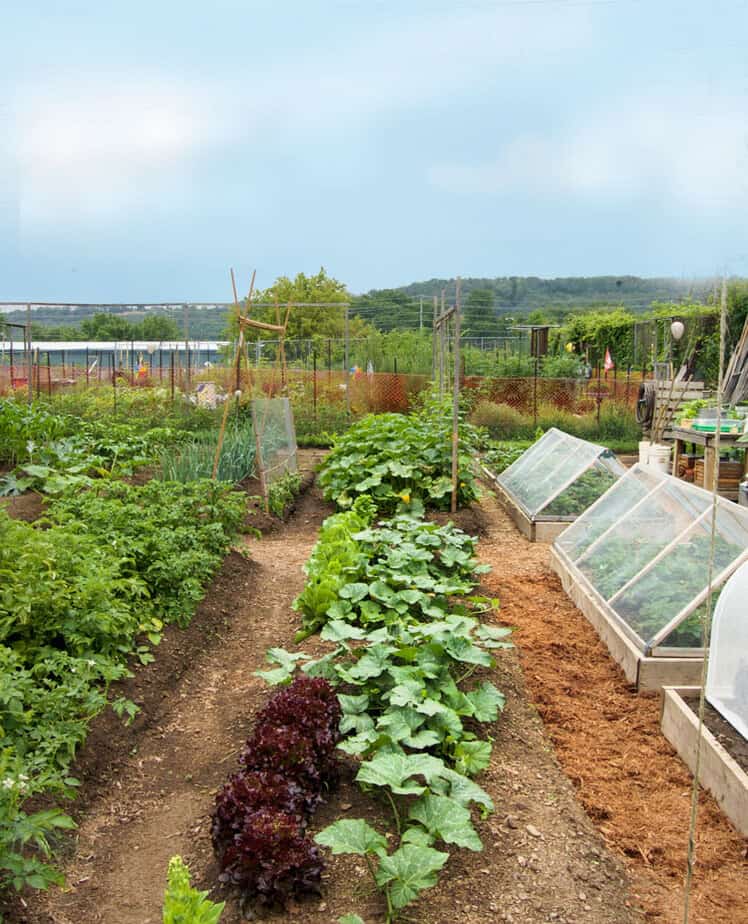
An Overview of My Garden
In case you're new around here.
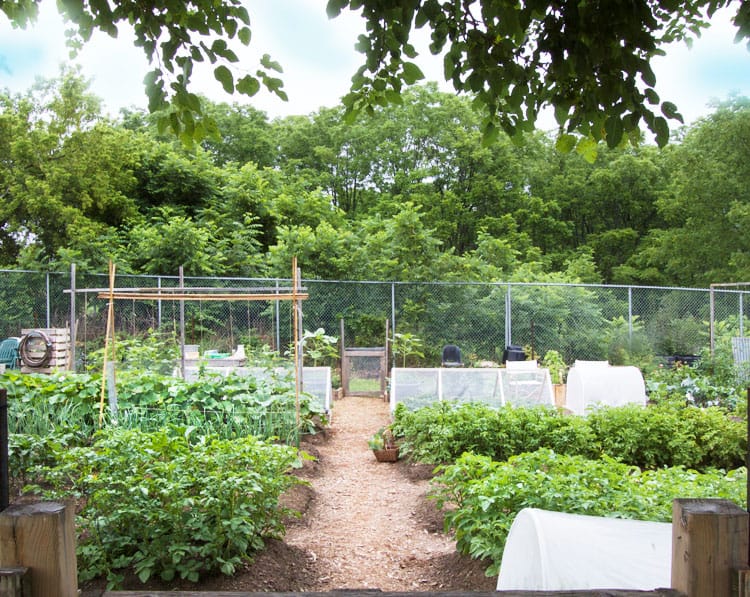
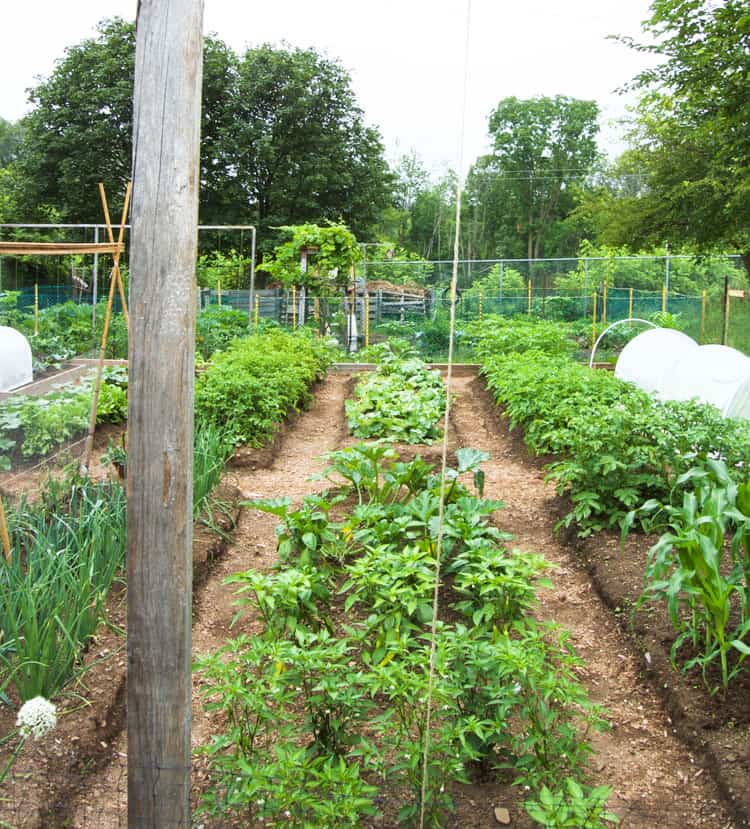
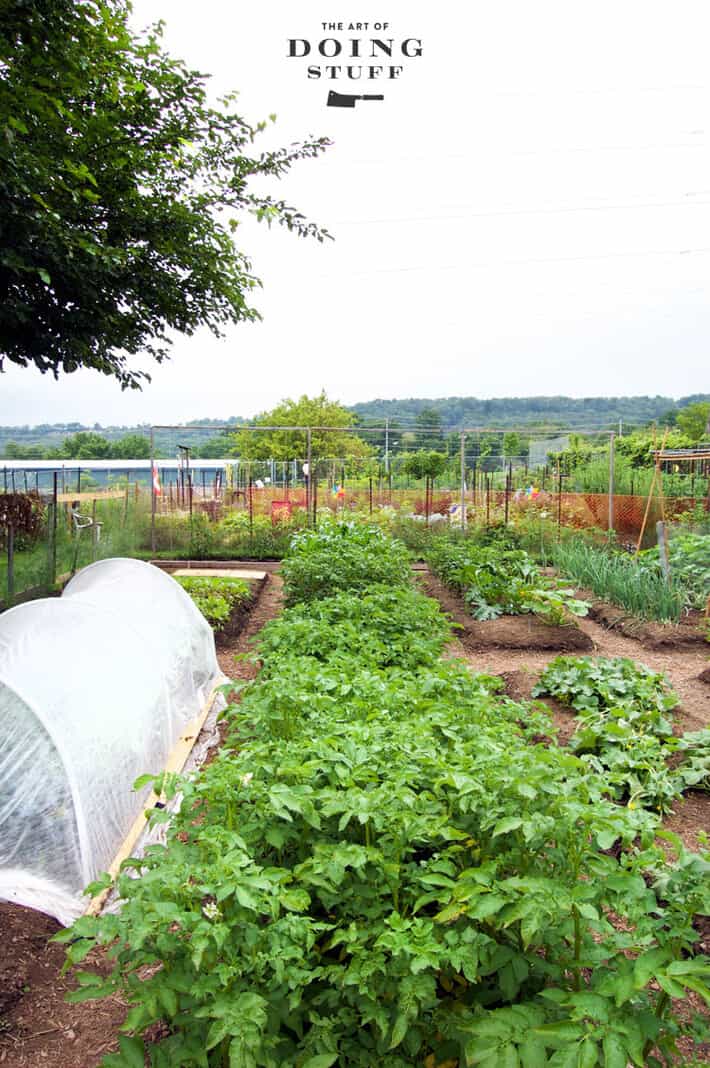
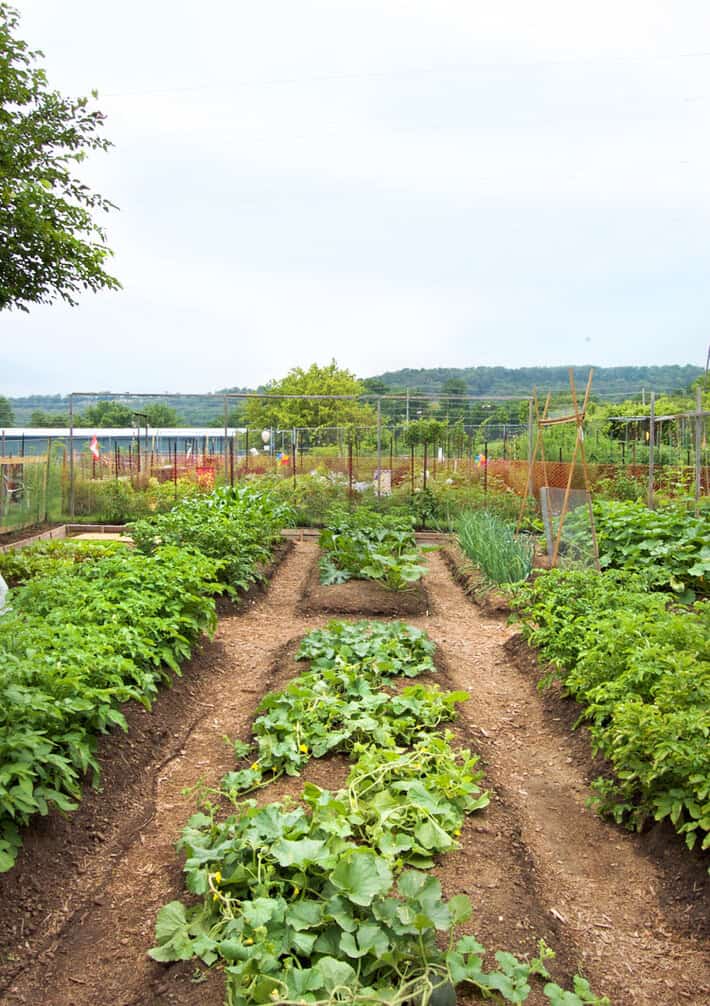
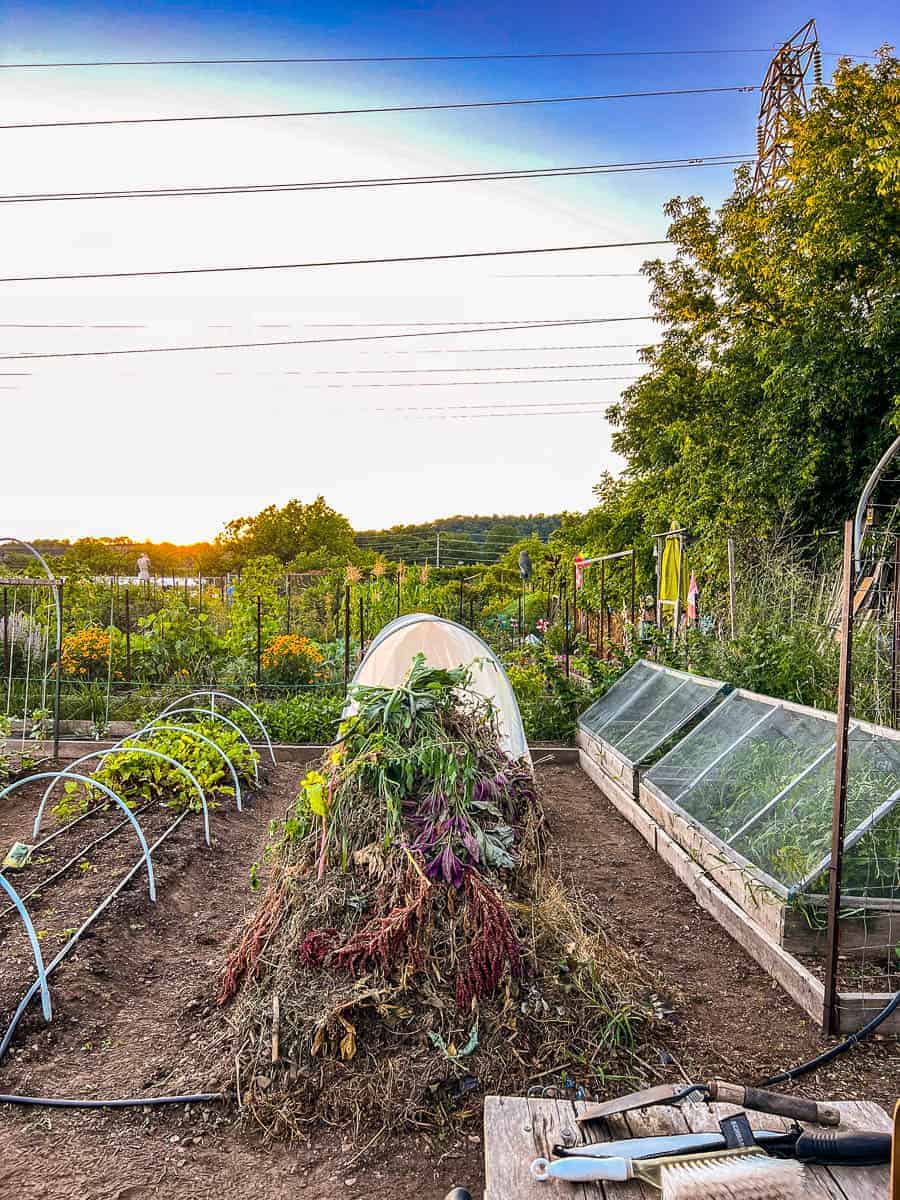
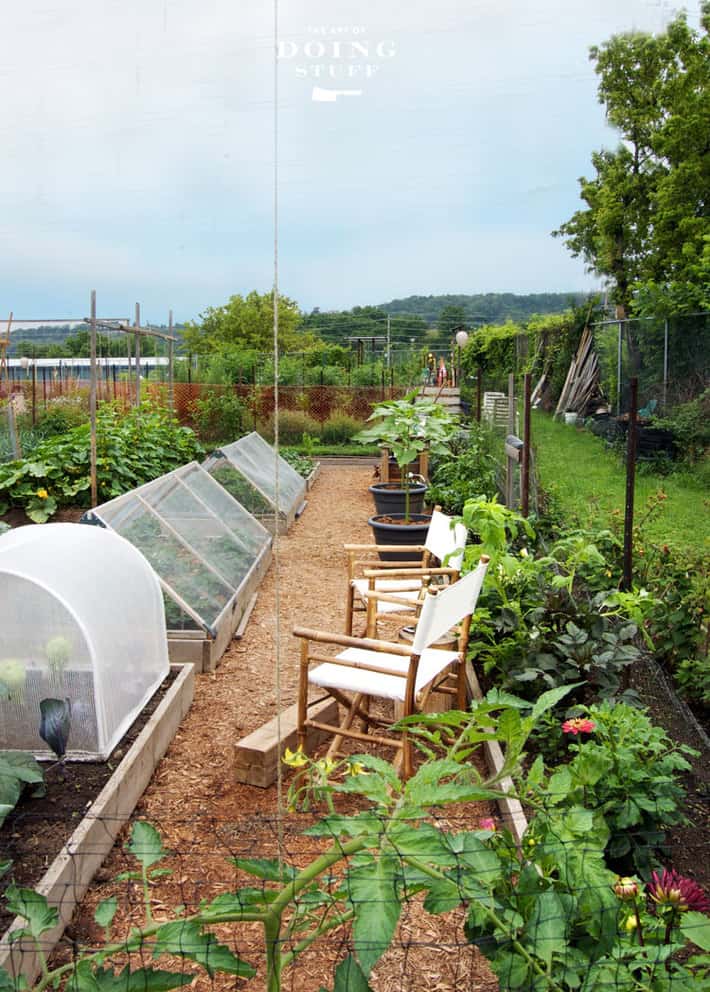
My garden is 40' x 40' and in classic rows mainly because I actually prefer the look and feeling of long rows in a garden. It feels nostalgic to me.
There is a central path that runs from the front gate to the back gate. Off of either side of the path are 16' rows each planted with a variety of things.
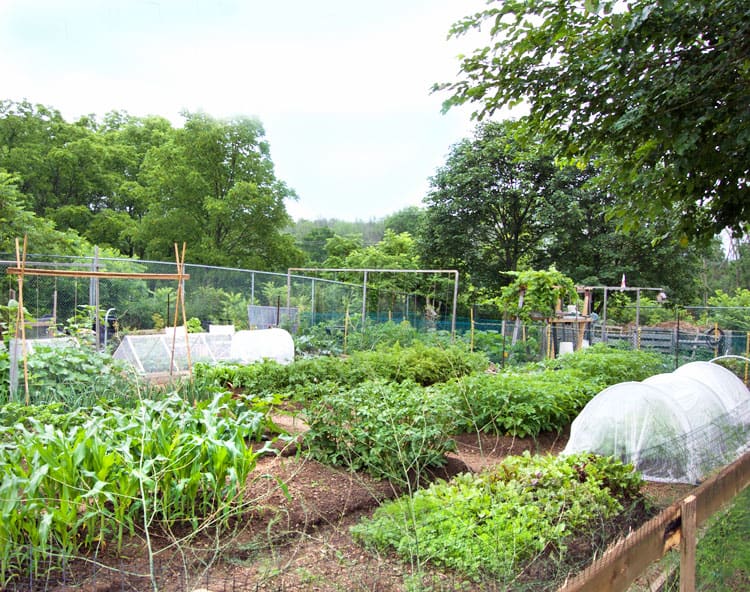
I used raised soil beds without any wood framing. Wood sided raised beds looks nice, holds soil well and prevents weeds on the sides of the beds. But they are expensive and constantly need to be replaced.
Here we go ... the tips I didn't know, but now do and therefore want to share with you.
Table of Contents
Tip #1 - Curing Garlic & Onions
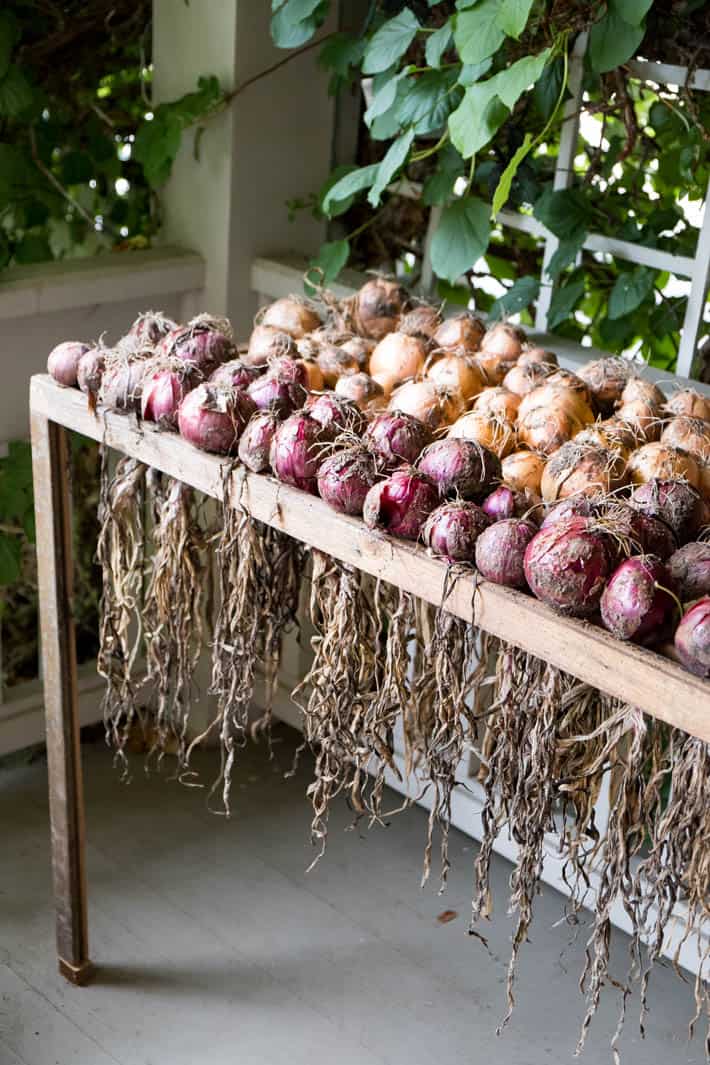
Garlic and onions needs to be cured for 2 weeks outdoors in the shade. Doing this lets the outer skins slowly dry out while the inside retains all of its moisture. Curing extends garlic and onion shelf life so they'll store longer.
Tip #2 - No dig gardening
I've been no dig gardening since 2017. I mean, you know, for the most part. There's only one Charles Dowding.
No dig gardening means you do not till, poke, prod, lift or disturb the soil. This benefits the top layer of soil and all the microbes, worms and other crawlies that are keeping your soil aerated, fed, and healthy.
Each year to feed the soil you add a few inches of compost on top of your beds and plant directly into that.
A word about weeds and no dig
No dig also helps eliminate weeds because if you aren't moving and disturbing the soil, you aren't exposing any of the thousands of weed seeds that are in your soil to sunlight and rain.
Every time you turn over a shovelful of soil, you're exposing all the weed seeds that were deep in the soil to the top of the soil. These weed seeds had no intention of sprouting until you flipped the soil and put them in a front row seat to rain and sun.
ALTERNATIVE - Short on compost? Instead of covering your beds with a 2-3" layer of compost, dig a hole for your seedlings and fill the hole with compost for planting in.
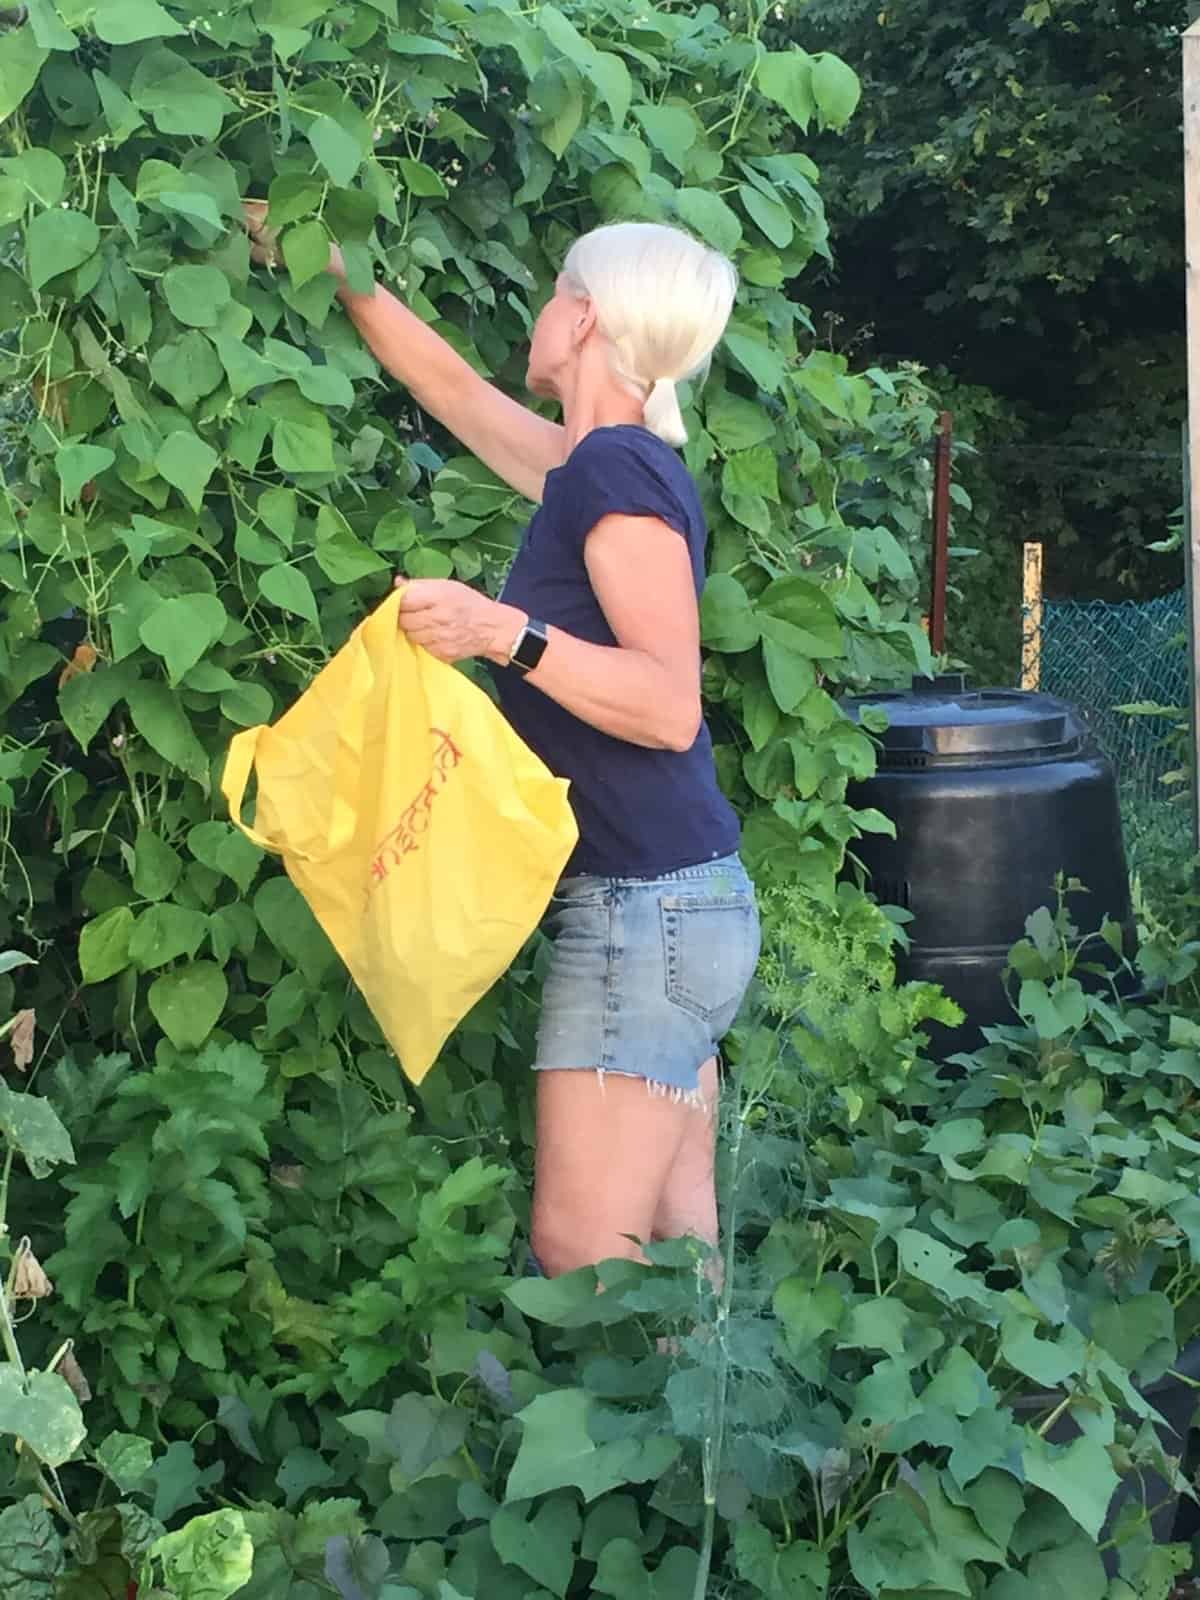
The bean trellis! How do you do it?
Tip #3 - Trellising
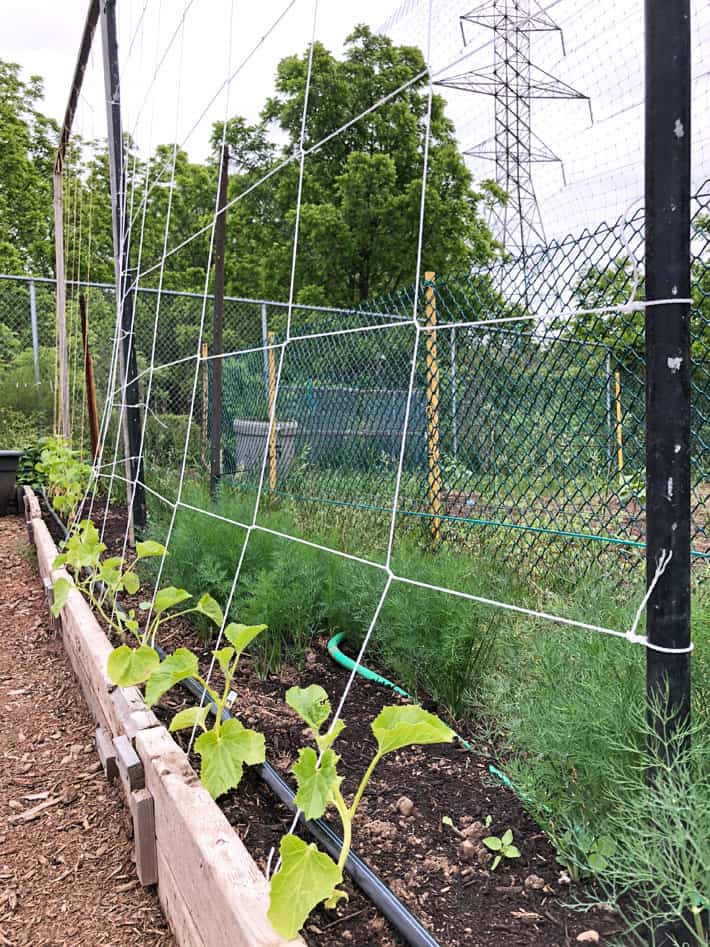
To make a bean (or cucumber) trellis that'll last a year or two buy some wood 1 x 1's. Either hammer them into the soil or dig a 1' deep hole and place a length of wood into each hole.
Add another piece of wood lengthwise across the top of your 2 staked 1x1s and attach it by screwing it in. You can either run string back and forth between the wood to create a trellis or use plastic netting or chicken wire for the plants to grow on.
You can also use metal T Posts which will last for years and years and years and years and years until you don't even like beans anymore.
Tip #4 - Weed suppression
To stop weeds in either beds or paths lay down a layer of newspaper then top it with 2-3" of natural, cedar mulch. The newspaper eventually decomposes at which point you just need to top up your mulch every year.
Alternative - You can use professional grade landscape fabric on paths to control weeds. It works well but is slippery when wet and doesn't look as pretty as mulch. BUT it lasts longer and doesn't need to be replaced for many, many years.
Tip #5 - Corn
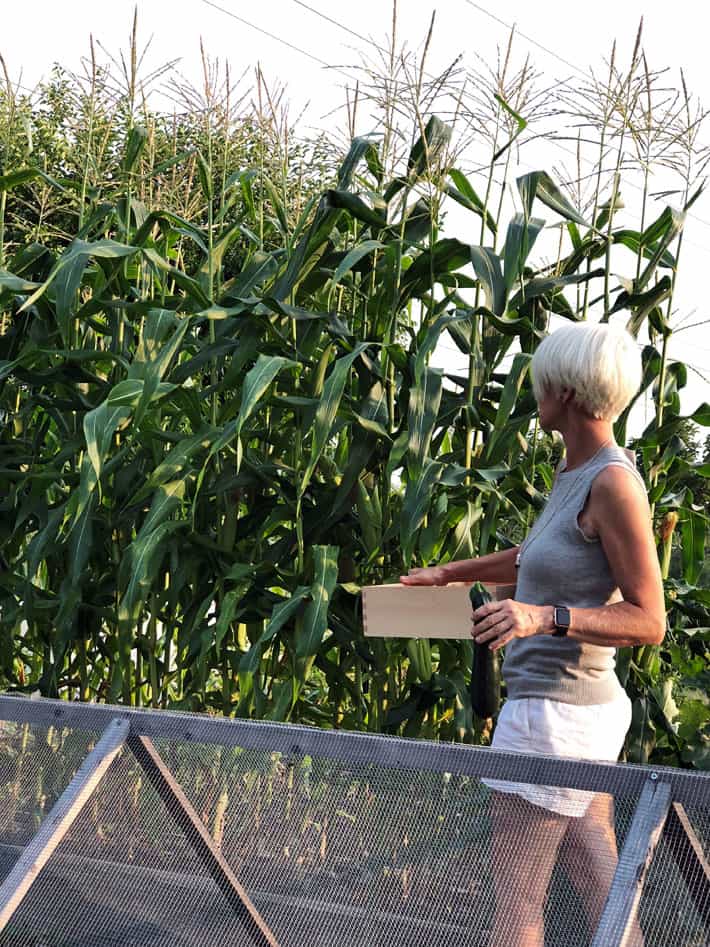
Don't grow corn in a single row. Each corn stalk pollinates those around it and it does a much better job of that if it's grown in a clump.
A square bed of corn will be way more productive than a long row.
Also, don't grow two varieties of corn near each other (especially ornamental and edible) because they'll cross pollinate and you can end up with some weird-ass corn.
Want just the essentials? Download the Quick-Tip Sheet for a glanceable version of all 20+ tips—perfect for printing and stapling to the shed wall.
Tip #6 - Carrot germination
You need plywood or wood boards. A more religious woman would use them to kneel on to pray to the Gods for carrot germination. I use them to *almost* guarantee carrot germination.

To get carrots to germinate, plant the seeds into watered soil and then cover them up for a week. Flat wood is your best option because it presses down and helps the seeds maintain contact with the soil but you can use burlap as well.
The wood or cloth helps keep the seeds damp and in darkness which they like.
Carrot seeds are temperamental.
Tip #7 - My favourite tip
Boxes, bags and baskets.
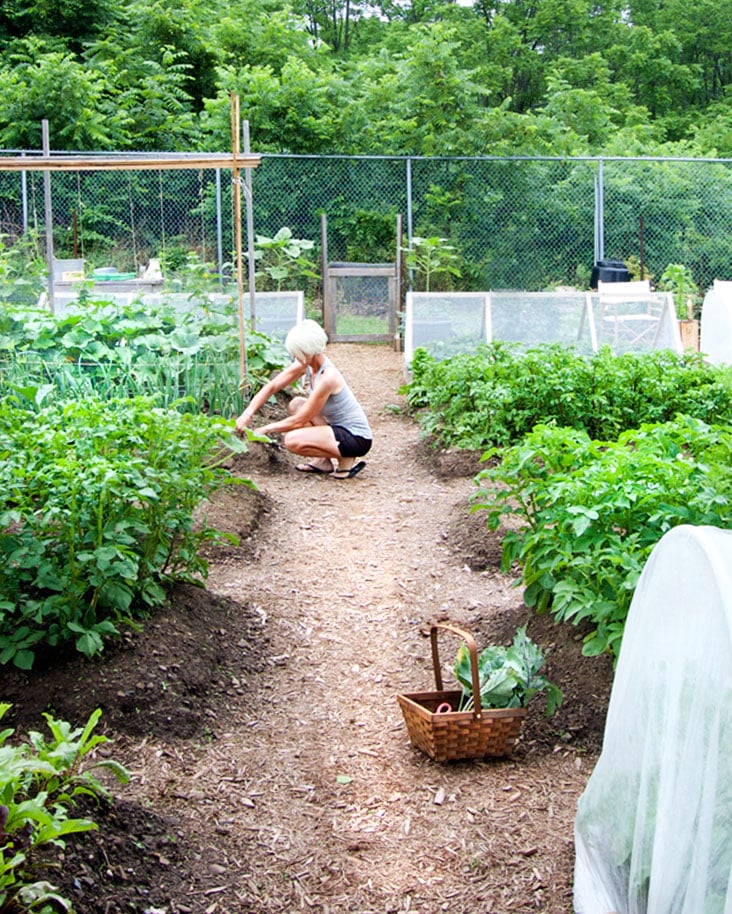
Keep bags or baskets for carrying vegetables RIGHT in your garden at all times.
ALWAYS keep something in your garden for putting vegetables in to take home, whether your home is 20 steps away or a 5 minute drive. How the hell do you think you're going to carry it all? And if you think you'll always remember to bring a bag or basket whenever you go into the garden you're wrong. We're not that smart.
Bonus harvesting tip: Don't wash your vegetables right away if you want them to store well. Brush the extra soil off of them and leave it at that. Wash them just before you're going to prepare them to eat.
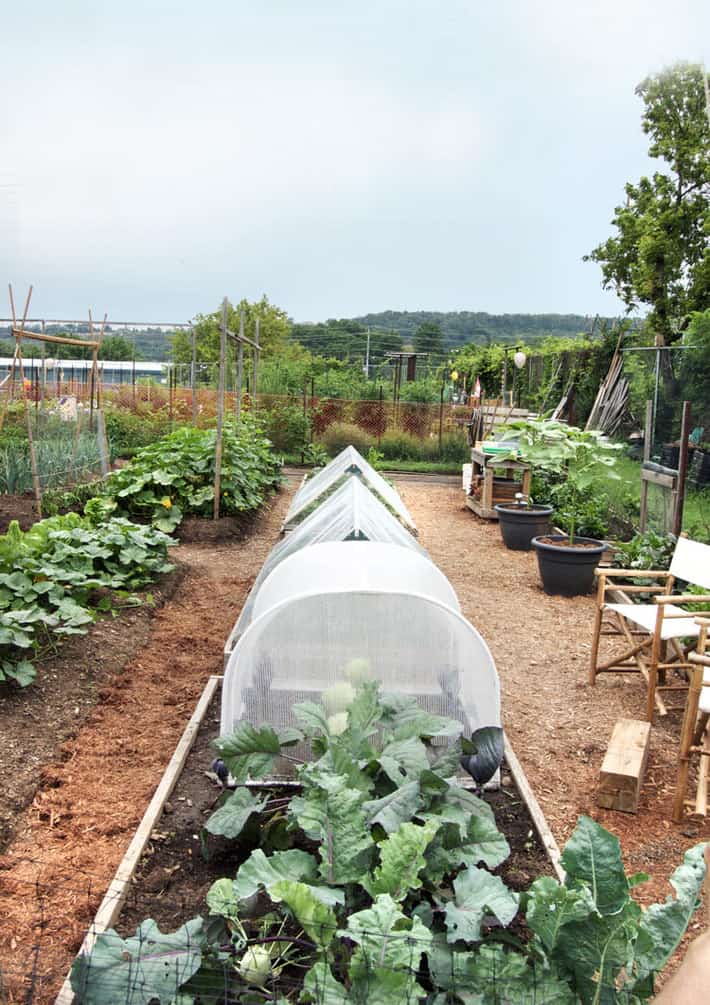
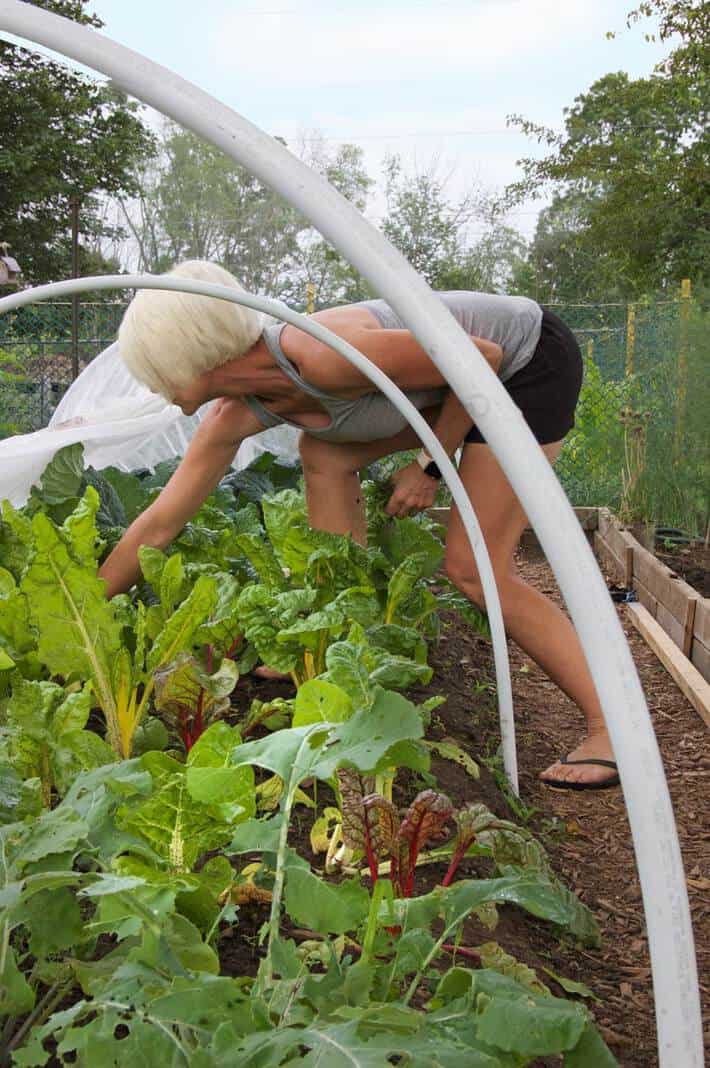
Tip #8 - Row Cover
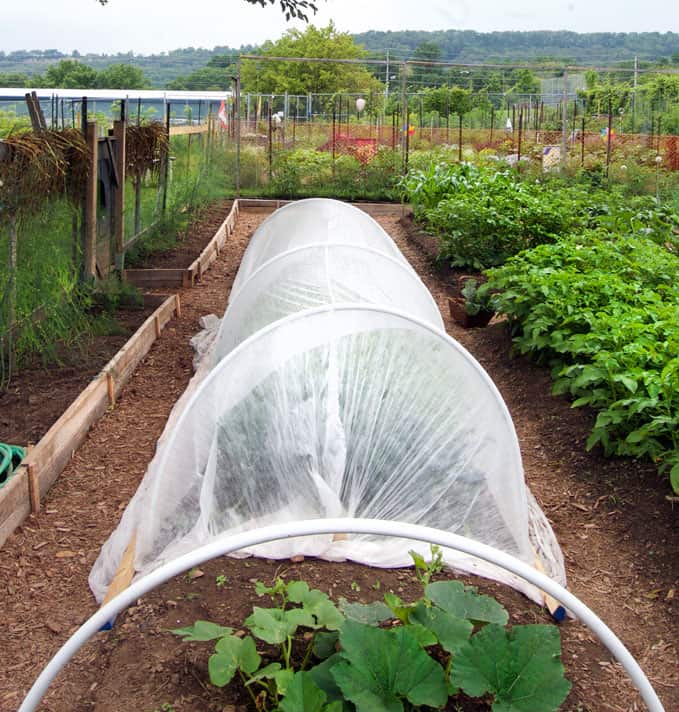
To keep crops clean use row cover.
You can either just "float" it right over the plants, holding the edges down with rocks or wood or you can make hoops out of flexible plumbing pipes.
To build a mini hoop house:
Drape row cover over the hoops and secure it to the ground using rocks, bricks, or strips of wood.
Hammer rods or bamboo sticks into the ground on both sides of the garden bed, spacing them about every 3 feet.
Slip flexible plastic tubing (from the hardware store) over each rod to form an arch. The rods must be slightly thinner than the inside of the tubing so the tubing can slide over and stay in place.
Or you can buy premade garden hoops in a variety of heights and widths.
Types of Row Cover
Generally I work with mesh insect netting or a medium weight row cover. The heavier the row cover, the less light can pass through it. That's good for protection from frost but not good for allowing enough lights to get to the plants to grow well.
Tip #9 - Potato hilling
If you don't have it in you to hill your potatoes ... don't. I have never noticed any huge loss of potato production from not hilling.
Potato hilling is most necessary when you have planted your seed potatoes either on top of the soil or in the first few inches.
If you have planted deep (9-12") there's no huge advantage to hilling.
The other big hit in the garden with kids are the melons. You haven't experienced life if you haven't sat down in a garden and consumed a just picked Honeydew still warm from the sun.
Tip #10 - Sweeter Melons
Don't water your melons as they're getting to the point of ripening. You'll just dilute them. Less water when ripening = sweeter melons.
Would you like to save this stuff?
The more melons ripening on the same vine the less sweet they'll be because they all have to share the sugars the vine leaves have produced.
If you have 2 or 3 melons of around the same size growing on the same plant pinch 2 of them off if you want a really sweet melon.
Tip #11 - Weeding habits
Every time you step foot in your garden pull some weeds. Make it a habit.
The more you weed the less weeds you'll have. Weeds flower and go to seed quicklyyyyy. THIS is the crucial point. If you don't pull the weeds before they go to flower and seed, those seeds will drop all over your soil and start the weed cycle again. It will never end.
If you take the time in the spring and especially for that first year to get rid of all the weeds as they appear and never let them go to seed you'll make every subsequent year more and more weed free.
Whenever I walk into my garden I keep my head down and just weed for 10 minutes. I don't even look around to see what has grown or if there's a giant pyramid of raccoons anywhere - I just weed.
Tip #12 - Pumpkin leaf recipe
Pumpkin leaves are one of the many edible leaves we tend to just ignore. A lot of the weeds we pull are excellent for salad or as sauteed greens.
With pumpkin leaves only pick the smaller, more tender pumpkin leaves, boil them in water with some baking soda (to help soften them) for a couple of minutes, then sauté them with tomatoes and onions. The boiling also helps get rid of the prickles on the squash leaves and stem.
All pumpkin leaves are edible but the ones with the white veining are the ones my fellow gardener from Zimbabwe told me they eat.
I think we need to take a break here so I can let you know I realize this is probably the least hysterical post I've ever written. But there's a lot of information to get through and my brain is focused on teaching. If I can muster up the energy I'll throw in a knock knock joke later on.
Tip #13 - Cabbage harvest
Cabbage will grow 2 or 3 more small heads after you harvest the initial large head. Just cut the cabbage off just above ground level instead of pulling up the whole plant. Within a couple of weeks it'll start growing a couple of new heads off of the base of the stalk which are a FAR more reasonable size for eating. They're perfect for roasting as a side dish.
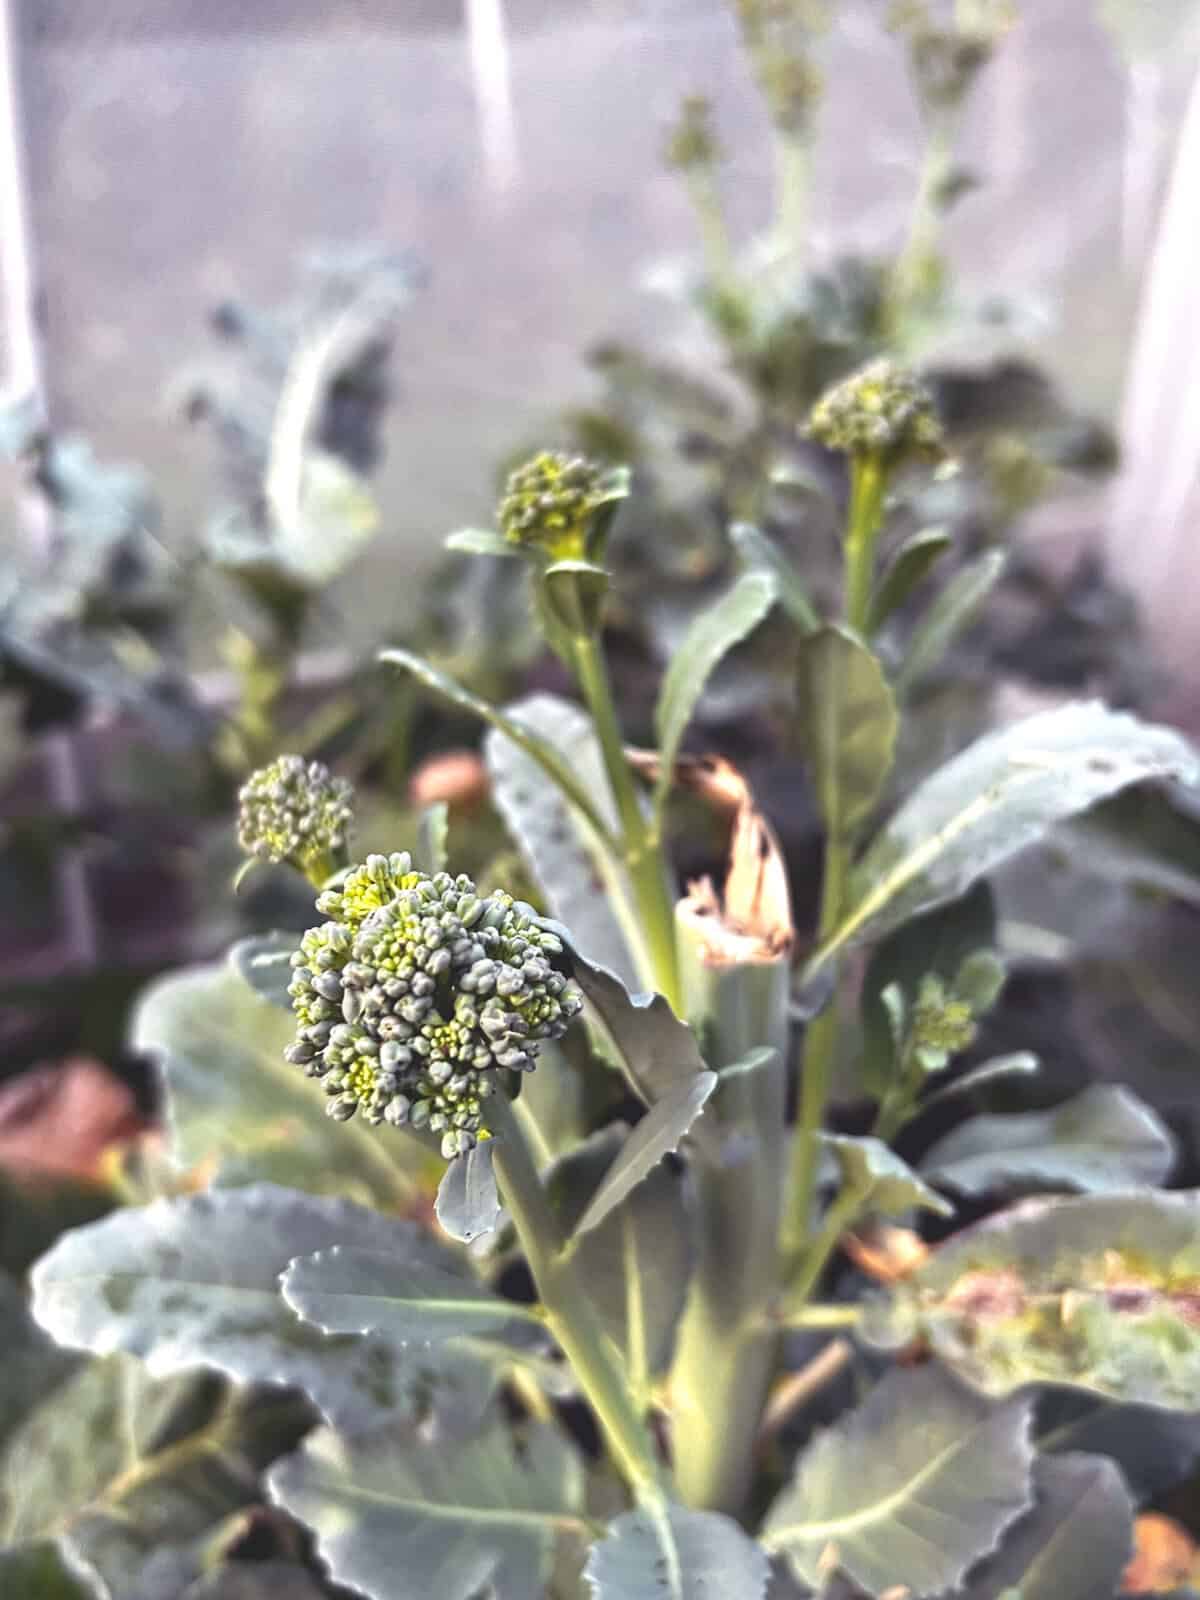
Broccoli TIP - Broccoli will also do the same thing. Just cut the large head on the top of the broccoli stalk when it's ready. Keep the stalk of the plant in tact just removing the head. The broccoli will continue to put out smaller broccoli florets from the leaf nodes along the stem.
Tip #14 - Make things convenient & comfortable
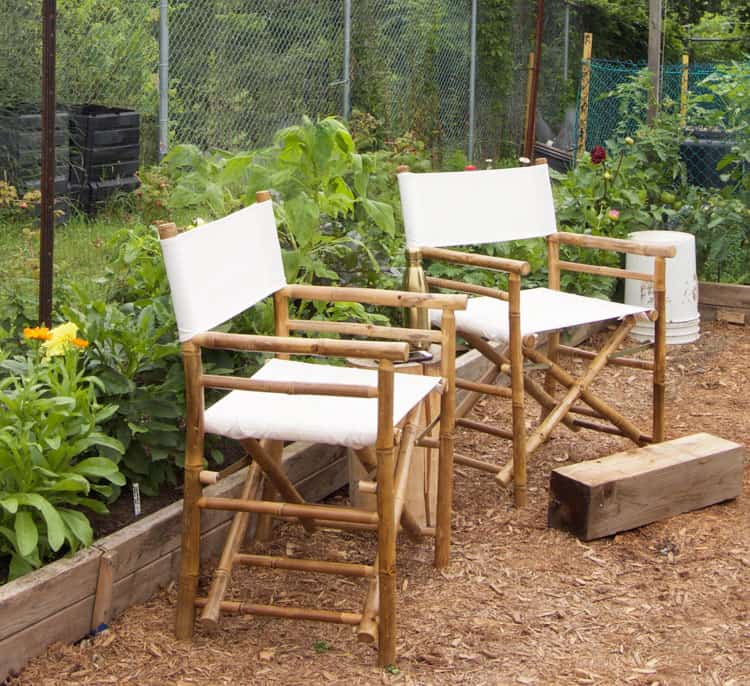
Keep a chair in the garden so you can sit on something civilized as opposed to the dirt. Or a snake. ALSO I keep overturned buckets around the garden so when I'm weeding I'm never far from a bucket to throw the weeds or rocks into. They them get dumped onto the compost pile.

I also eliminated all compost bins in my garden because they aren't convenient. Instead I keep a huge open pile of compost that I can easy add to, remove from and turn.
She's not pretty but she produces beautiful compost.
Tip #15 - Rabbits, Raccoons & Deer
The best way to keep rabbits out of a garden is to dig heavy metal fencing 6" or so into the ground around your garden. Rabbits will dig but generally not that deep. They'll chew but generally not through heavy metal.
The best way to keep raccoons out is with flimsy fencing. Building a sturdy tall fence will do nothing other than give the raccoons something sturdy to climb. Flimsy and lightweight is hard to climb.
So the perfect fence is one that has a base of hardware cloth dug at least 6" into the soil around the bottom, with 6' high loosely hung deer netting or hardware cloth on top.
Note: Deer netting is inexpensive and easy to work with but will rip over time and birds and snakes can get caught in it. Hardware cloth is really expensive to surround a garden with but it will last a long time and nothing will get caught in it.
Tip #16 - Snakes
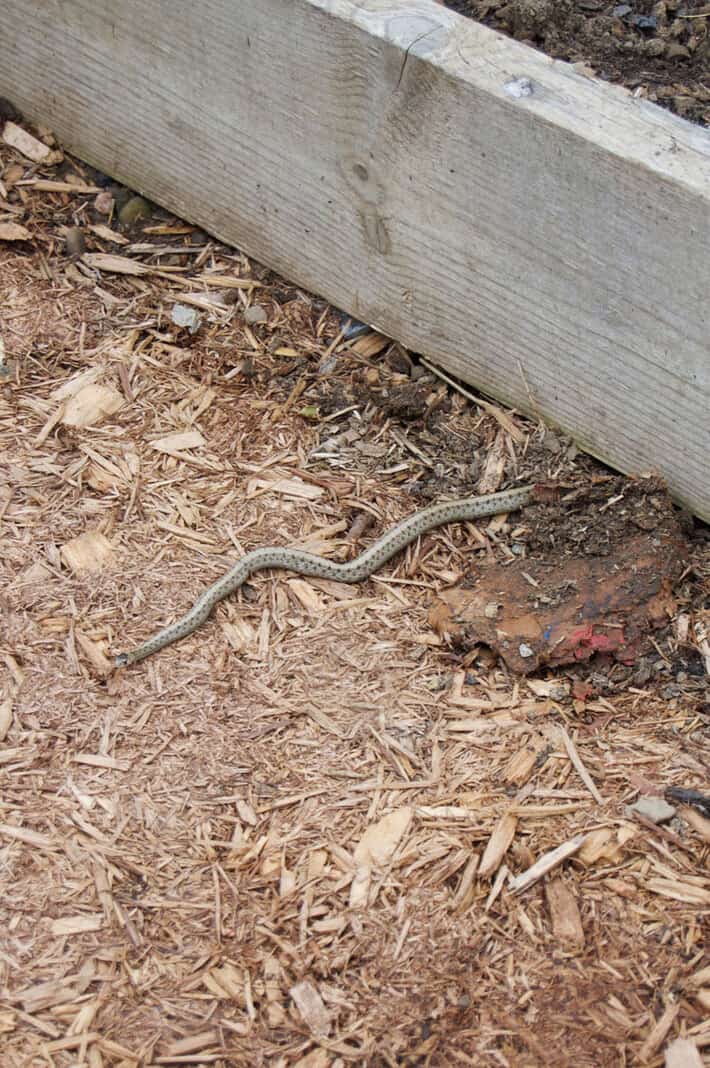
If you aren't terrified of them, you should time-share your garden with snakes. Why?
Snakes will scare mice, voles and other rodents away from your garden plus they eat bugs. Also if there's anyone you don't want visiting you in your garden, having a plot full of snakes is the most discrete way of making sure they never show up.
To attract snakes to your garden leave piles of wood around. You can see this one coming out from underneath the raised bed. They love to hide in the cracks of stacked wood and sun themselves on top. They also love to live in compost piles.
Tip #17 - Work Surface
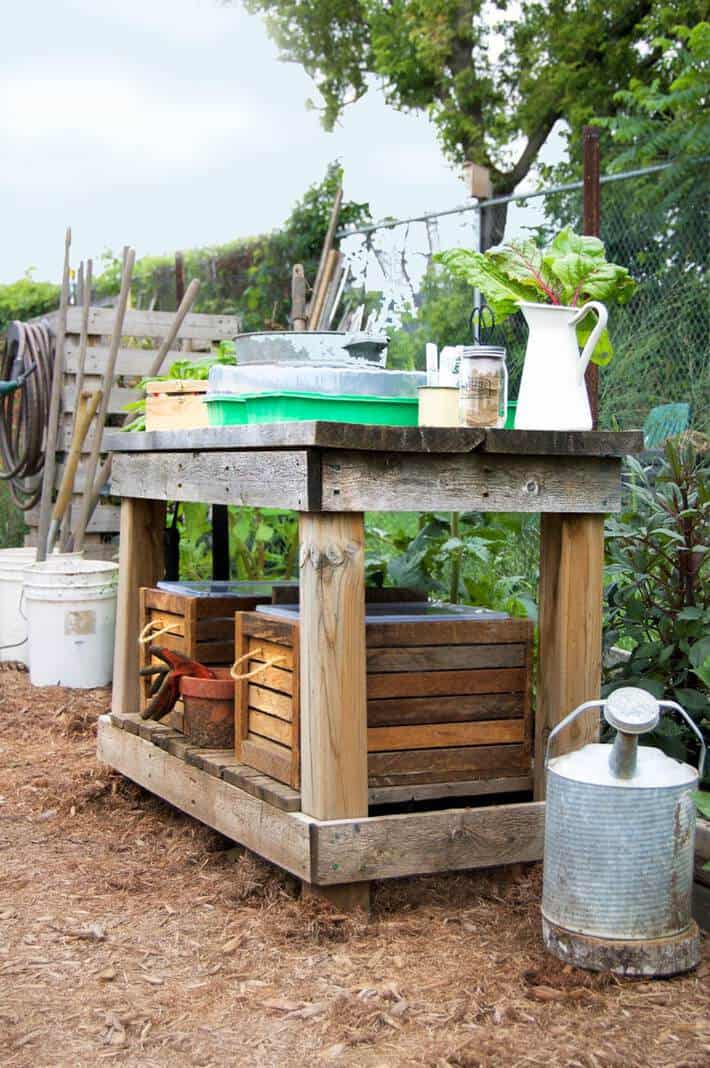
You need somewhere to put stuff. Gardening requires stuff and if your garden isn't a few steps away from your shed then you realllyyyy need somewhere to put stuff. What stuff?
- Seedlings
- Harvested vegetables
- Tools can lean against it
- Water bottle/coffee
I made this garden table out of scraps of wood and donated lumber. AS of 2025 it's in its 9th year and the top is now rotting. Everything else is good so I can just replace the two top boards.
Tip #18 - Keep planting
You can keep planting a lot of seeds throughout the season to make sure you have a continuous crop.
When you pull a crop out because it's done (garlic in mid July for instance) you're left with an empty bed. Plant something in it right away so the bed doesn't go to waste and doesn't become a massive bed of weeds.
Carrots, lettuce, beans, onions, spinach, radishes, zucchini & cucumbers are all things you can reseed if they fail the first time or as a succession planting.
In 2024 I planted out carrots and beets seedlings on August 5th. By the end of September I had a massive harvest of carrots. The beet harvest was so/so.
Tip #19 - STRAWberries
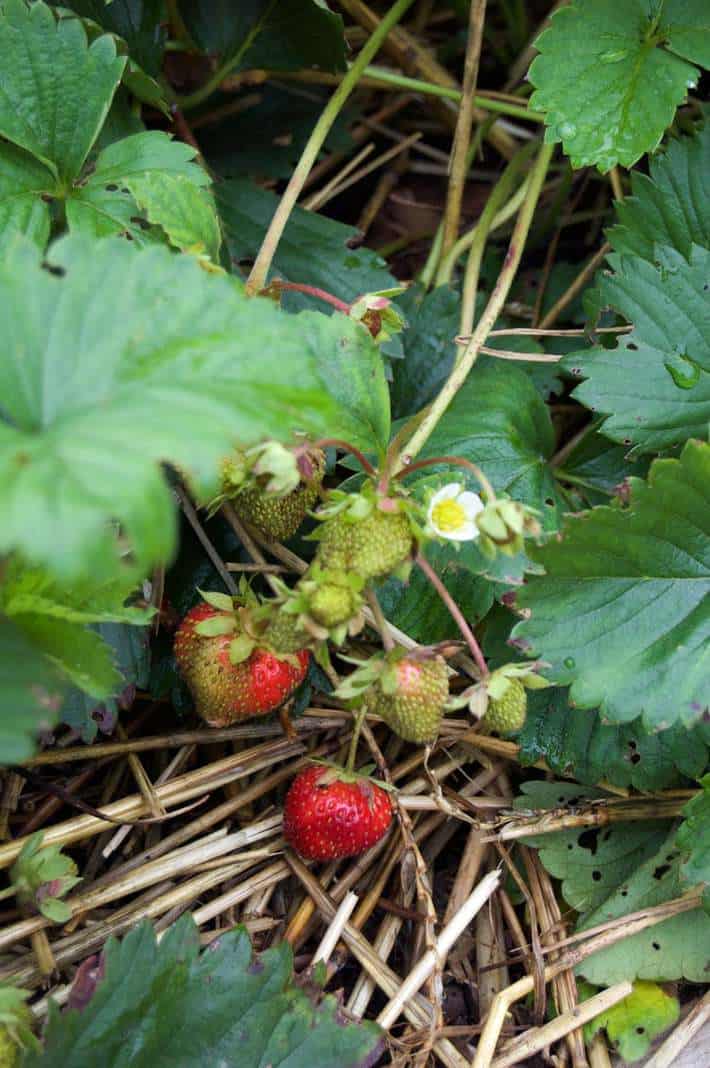
There's a reason they're called "straw" berries. Put a layer of straw underneath your strawberry plants to help keep dirt dwelling insects and moisture off of the berries. Your berries will rot less quickly and never have any dirt or guck on them. You'll be able to pick them clean off of the plant and pop them right in your mouth.
NOTE: Straw can also be a happy haven for slugs, so watch for them and act appropriately with a Slug Chug.
If you're in the US you can use Sluggo which apparently is some fantastic organic slug killer that we can't get in Canada. I haven't looked into it too much.
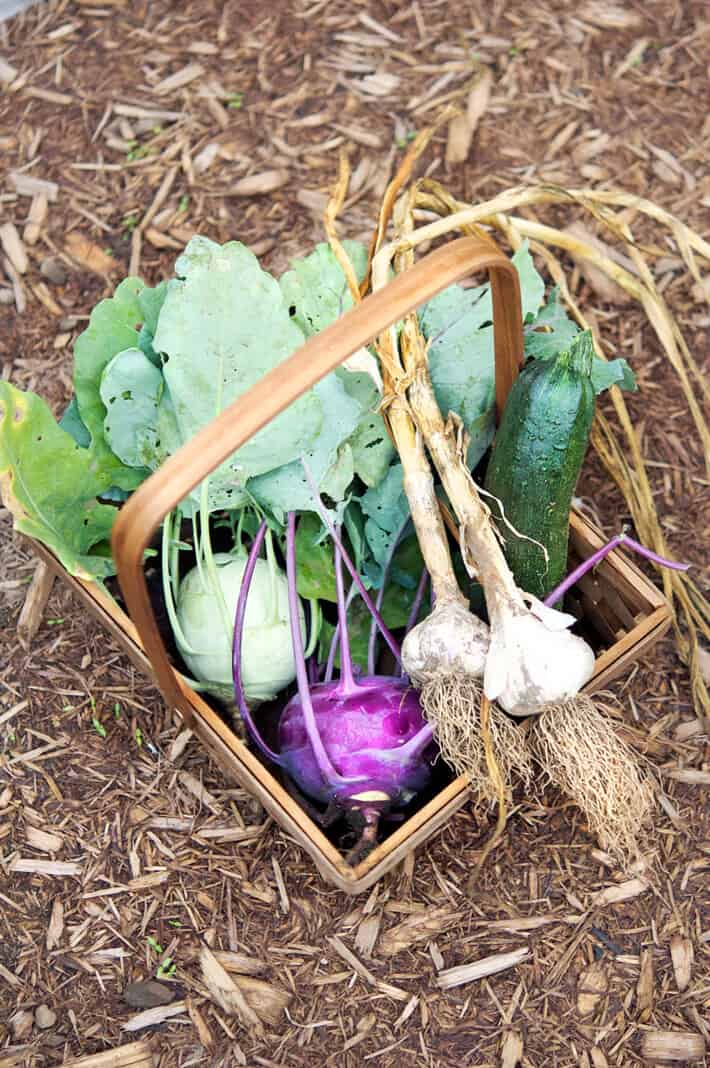
No tip here. Just a pretty picture to entice you into growing your own vegetables if you don't already. Green and purple kohlrabi, fresh pulled garlic and the ubiquitous zucchini.
Tip #20 - Bed Size
Garden beds are typically 4' wide but if that's too wide for you and your short little freak-show arms, then do them 3'6". When designing your garden make sure it fits YOU.
Also, try to have at least one path that's wide enough for a wheelbarrow if you plan to use one and make sure paths between the beds are big enough to walk and kneel in. You don't need much more than that but you do need room to walk, turn around and work.
I keep paths the width of my 18" rake, which means I just need to do one swipe with the rake to clear or clean the path.
If you really love gardening then take the time to make your garden nice and grow what you like. Or what your friends and family like. Make it a place that's fun to be as opposed to a place you resent being it. It may take a few months of gardeners rage and resentment before you get to the "fun" place but as long as you eventually get there you'll be able to work through the rage.
Bonus Tip - Don't forget the pretty
Europeans have understood the beauty of vegetable gardens for centuries. Potager type gardens evolve outside the kitchen doors of homes in England, France and Italy. There's a beauty in growing your own food and your garden can reflect that.
Keep it simple, keep it weeded and keep it alive. Also ... keep the back of it full of flowers. When all else fails you'll have your zinnia to look at.
Let's end today with a knock knock joke.
Knock knock.
Who's there?
Just some old ho.
Perfect. I have a bed right here for you.


Nancy Giese
I like your tip of succession planting, but here in Alberta (just north of Edmonton), I can't plant as late as August. Usually June is too late, too, because the stuff you can plant doesn't usually care for the heat in June. We do succession planting of peas, though, and we always plant as early as possible.
Mary
Thank you, as always, for your many tips, ideas and inspirations! I have a question for you about morning glories - the weeds. We have what I would call an infestation! I spend alllllllll spring, summer, and fall pulling them out, and yet, every. single. year they return in full force! This is compounded by the fact that my neighbors on one side are, how shall I put it, incredibly uninterested in maintaining their yard (or house) and they grow wild over there.
Any tips to eradicate these pests!
Signed,
a gardener at her wits end!
Karen
I've never had to tackle that weed! What is it like? (how does it reproduce? Does it have runner roots? Does it drop seed? Taproot? ~ karen!
Cara
To say I am totally and utterly impressed with all the gardening photos you have included in this post, is to put it mildly! I think the time you must put into these gorgeous gardens that give you veggies and flowers must be very extensive. I can only spectate and take away tips I can use for my modest efforts. I do very much enjoy seeing how you devote yourself to this seasonal work. When you show us mature beds as well as how it looks when you start out, that is the real kicker! Thanks
Karen
Thanks Cara. It IS a huge effort. But also a hobby. And also therapy. It all works out. Except the inside of my house - that doesn't work out in gardening season. It's always a disaster. ~ karen!
Kat - the other 1
If a hose has burst and can't be repaired it can be used around the garden too. Place it over stakes / sticks for hoops to keep the cloth over the veg - instead of pvc. Slice a length down one side and slide over a bucket handle ( tie ends with twine to hold in place.)
I'm going to try covering the thin wires of some tomato cages with hose to sort of pad it so it's gentler on stems, tying in place. I'm sure there are many other uses but those are what I can think of right now. I wish I had realized this when the first hose blew, it was a lot less stiff than the one I'm working with now.
Something else you may want in the garden, bug bite medicine of some kind.
susang
what does one do with kohlrabi? ideas later in the season please
Kat - the other 1
Hand it off to a small child and tell them it's an alien invader. Then make sure they are playing outside. 😆
Karen
Mainly I shave it into salads. My gardening neighbour eats them like apples! They're very hard and crunchy and solid. ~ karen!
Jody
I love that you garden in your thongs. Or jangles. Or flip flops. Thank you for all the great tips and tricks.
Sandra Blackwell
Love all of these tips. I moved to a new and hopefully forever home a year ago. Last summer was full of unpacking and "where is that-oh in a box somewhere". Things are still unfound and still in boxes but I either don't need it now or have found another one. I am late to get much of a garden in this year, but want to work on getting garden beds set up. What I need is advice on starting a garden from scratch. And starting plants without a greenhouse, etc.
Karen
Hi Sandra. I start all my plants indoors starting around February for the earlier ones. You can learn about my seed starting setup here. I've been doing it for years and grow hundreds of plants in quite a small area. Starting a garden from scratch is a good idea for a post! I'll work on it, but for now figure out what direction everything should face and whether you want raised beds so you don't have to get down on the ground or in ground beds like the olden days. ~ karen!
Mary W
Flowers and chairs are the best advice ever!!!! I never had flowers in my garden and it was work - now it is something I want to do every day! Flowers have a magic to them that makes you smile and smell and enjoy. AND sitting to admire what is pretty gives you a bit of time to catch your breath (at 79 yo) and survey what you have accomplished. Then it's a hobby not a chore. I love your advice. I began no-till and still do it today - been 7 years! Love it for all the reasons you discussed. My one question is what predator eats rollypollies? I need a hundred of them in my garden for those *&%$$## nasty things. They are cute when they roll up but NOT when they eat all my seedlings and move onto fruits quickly. This years has been the worst. Someone suggested feed them with narrow slices of raw potato which they love over seedlings and fruit which is my next final solution experiment.
Karen
Hi Mary Even though I have those rolly pollys they aren't a pest that I normally have to worry about. They're gross and ... rolly ... but they haven't yet decimated anything the way the other pests do. All this to say I'm not sure how to get rid of them so I don't have any advice for you. :/ We call them potato bugs so who knows, maybe the sliced potatoes will work as a trap crop. ~ karen!
Judi
I use diatomaceous earth on them and other pests.
Mary W
Thanks for the info - I will try that never seen so many in my life!
LEEANNE BLOYE
Hey Karen,
I'm not a gardener but do putter in the yard. Thanks for taking the time to write this article. I never really understood no-till gardening and you explained it quite clearly.
You also gave me some ideas of how to easily deal with a strip along a row of cedars that is covered in Avens.
Karen
Hi Leeanne! I'm happy to help. Good luck with your Avens control. ~ karen!
Randy P
Doubtless these are all great tips for a happy garden. I WILL share them with my FB family and friends who DO enjoy tilling the soil and all the rewards therefrom.
Karen
Thank you, I enjoy a good sharing with friends. Unless it's french fries in which case, obviously - no. ~ karen!
Randy P
I would gladly share my fries with a lady of whom I was deeply fond. Anybody else? Not a chance, I'd stab their hand with a fork -LOL.
Kathryn Vezerian
Your garden is beautiful! Do you share with family and friends? I always end up with way more than I expect, and it's such a good feeling to share the abundance. Great advice, and I like your research behind it, wether it comes to you through experience or reading, or talking with fellow gardeners. I actually am one of those weird people who likes to weed. It's meditative, and even if it's just for a few minutes every time I walk into the garden, it always produces a good result. Happy gardening season to you.... Can't wait to see the owl pics.
Karen
Thanks Kathryn! I do give it away when I know I won't/can't use it for whatever reason and it is fun. :) I don't mind weeding actually! Just not on the scale it needs to be done in this garden. Ack. I agree it is meditative. ~ karen!
Lisa
Awesome tips and perfect timing because I was just about to refresh my raised beds to get my lettuces and greens planted. I have a pile of perfectly aged compost from chicken manure and straw. I added a step, which was to spend about an hour picking out the big fat juicy grubs and tossing them to the chickens.
Linda in Illinois
i love your garden advise. thank you Karen