Table of Contents
Make an Easy DIY Snow Globe
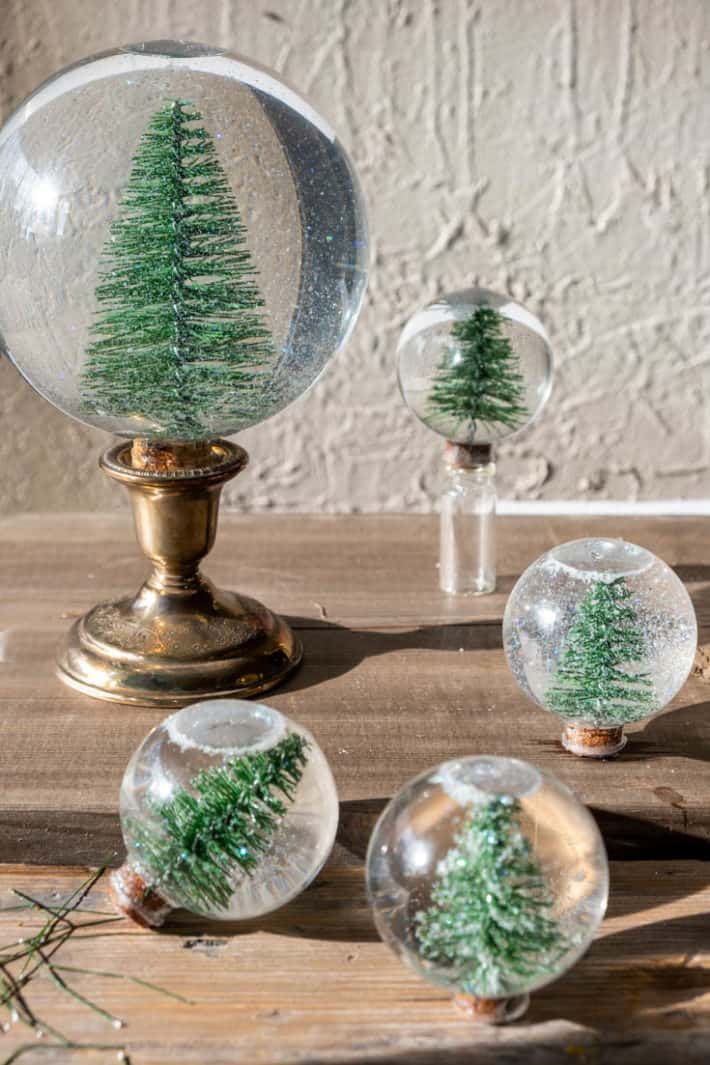
Make a classic, real, round DIY snow globe. Not a tree in a mason jar because a tree in a mason jar isn't a snow globe, it's a snow jar. Bang out these Christmas craft snow globes in about 15 minutes with a few basic materials.
Skip right to the printable tutorial.
Why make your own snow globe? Because you can put anything you want in it. If you want the bare bum from a Ken doll in your snow globe you can do it. Although you shouldn't, because bare bums aren't very much in the spirit of Christmas. Usually.
Pinterest is bursting with mason jar snow globes. I think I was one of the first when I created these mason jar snow globes, in 2012. But to me - that's not a snow globe. It's a snow jar.
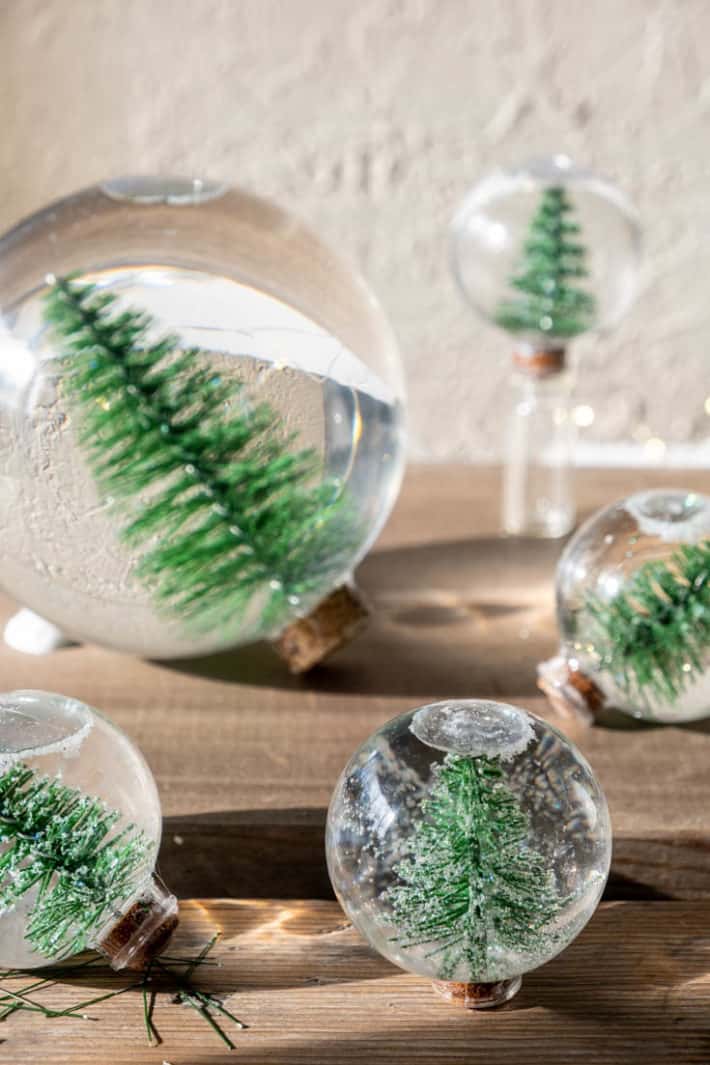
These homemade snow globes use a clear Christmas ornament and a cork. They're simple enough that a kid can make them.
So here we go, you and I are going to make simple Snow Globes. Right here. Right now.
Quick Instructions:
- Pull the neck collar from the Christmas ball.
- Fill with distilled water and 2 drops of liquid glycerin.
- Add sparkles!
- Push tree "trunk" wire into the centre of a cork and shove it into the globe.
- Glue the hell out of it.

The possibilities of what you put in your snow globe are as never-ending as the last children's dance recital you went to.
But there are a few restrictions. It needs to fit into the neck of the Christmas ball and it needs to be something made of - plastic. Yes. I said it. Plastic. Or rubber.
That's because if you use an item that has some metal on it, it will rust and turn the water murky. If the item is bendy, you can put something quite big in the snow globe, like the simple trees I chose.
My simple trees happen to have wire, but I'm crossing my fingers that it's steel wire that's been treated to prevent rust. I'm a risk taker like that. I also run on slippery floors in socks. Risk TAKER.
(update) - the metal wire made the globes cloudy by the next year
How to Make a Glitter Snow Globe
You can get most of the supplies from your local craft store like Michaels, Hobby Lobby or a dollar store. Glycerin can be found at any pharmacy (usually in the upset stomach aisle).
I like the look of them all being the same with bottlebrush trees but you do you. Fill them with whatever you like and whatever will fit.
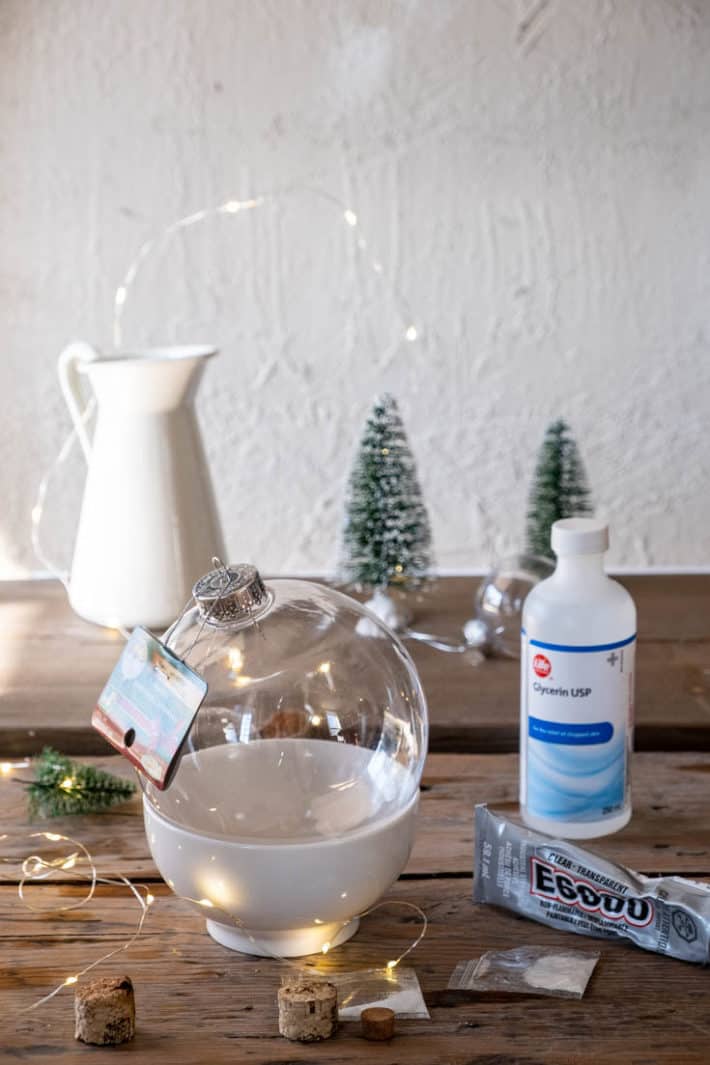
Materials
Clear Plastic Christmas Ball (choose ones with wide necks so you can fit a figurine or tree in it)
Distilled Water (optional)
Glycerine or Glycerol (optional)
Sparkles (glitter), gold foil, or small plastic artificial snow flakes
Mini bottle brush tree or other miniatures
E 6000 glue (this is the go TO glue for crafters in the know)
Small bowl
Would you like to save this stuff?
Detailed Tutorial
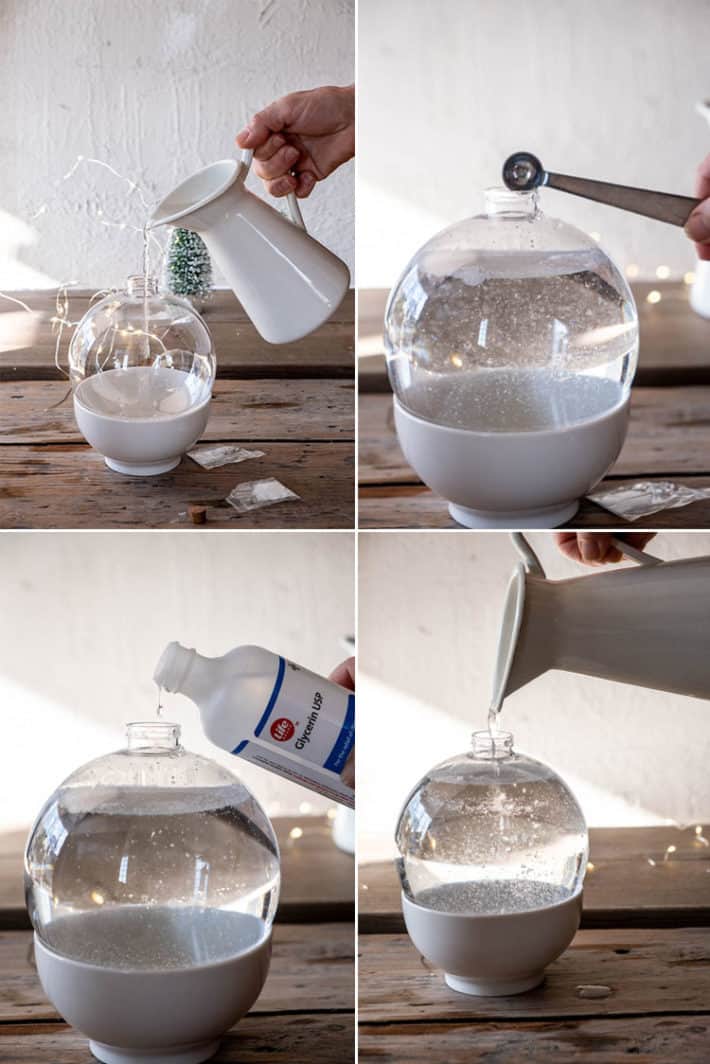
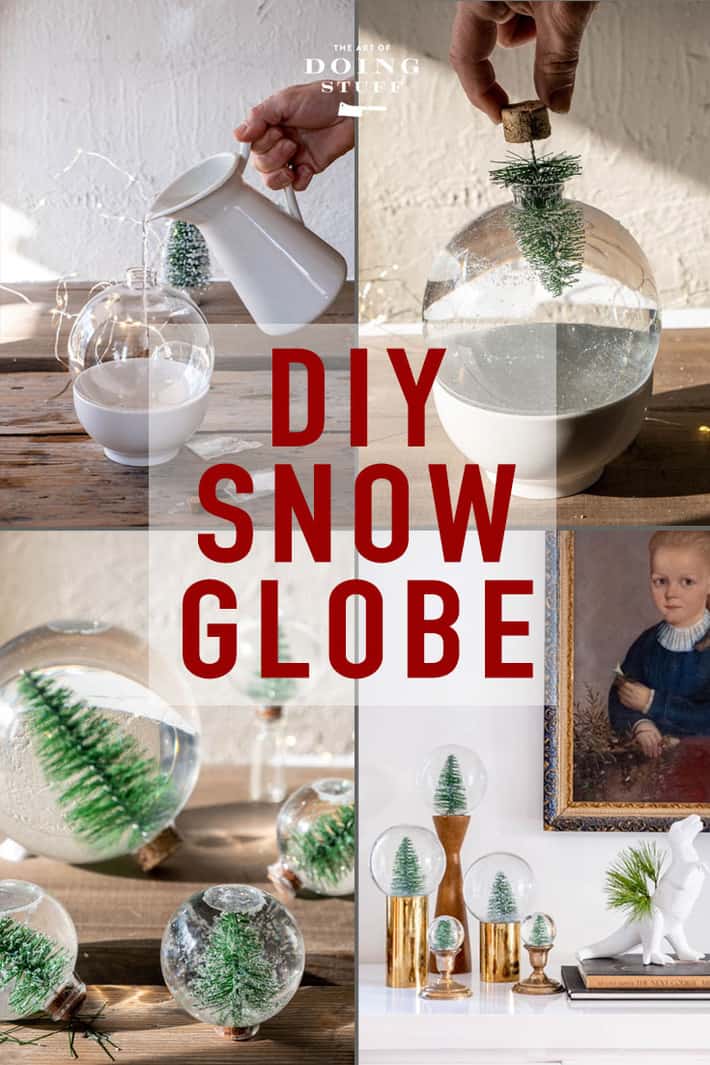
- Pull the plastic top off of the plastic ball and set it in a round bowl so it doesn't go rolling around. You now have a globe! Fill the globe with distilled water until it's ¾ full.
- Pour in some sparkles. A medium sized globe with need around ¼ teaspoon of sparkles. Add 2 drops of glycerin. NO more. Glycerin helps the glitter fall slowly.
- Top the globe up with water until it comes just below where the neck meets the ball.
- Cut your wine bottle corks in half with a serrated knife
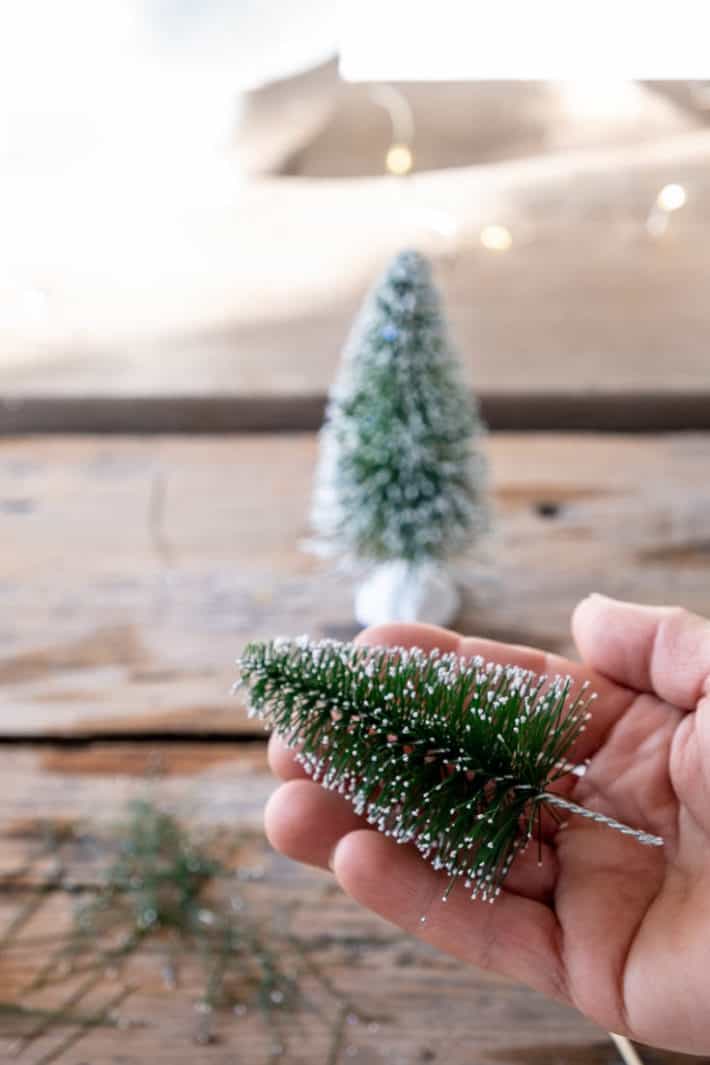
- Pull the bottle brush tree out of its base if it has one. Remove some of the lower "branches" of the tree so you have an inch of bare trunk. Stick the trunk into the centre of a piece of cork. Make sure it's perfectly straight.
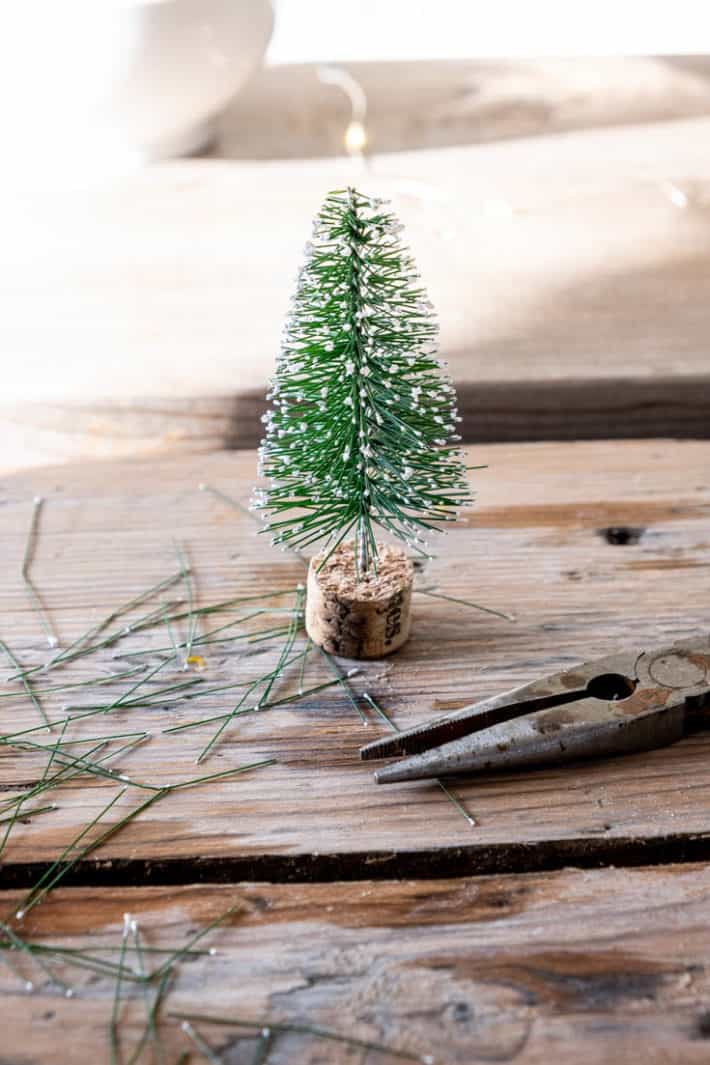
Shoving the trunk into the cork will be easier if you pre-punch a hole in the cork with a toothpick. Also holding the trunk with needle-nose pliers to shove it down into the hole makes the job easier.
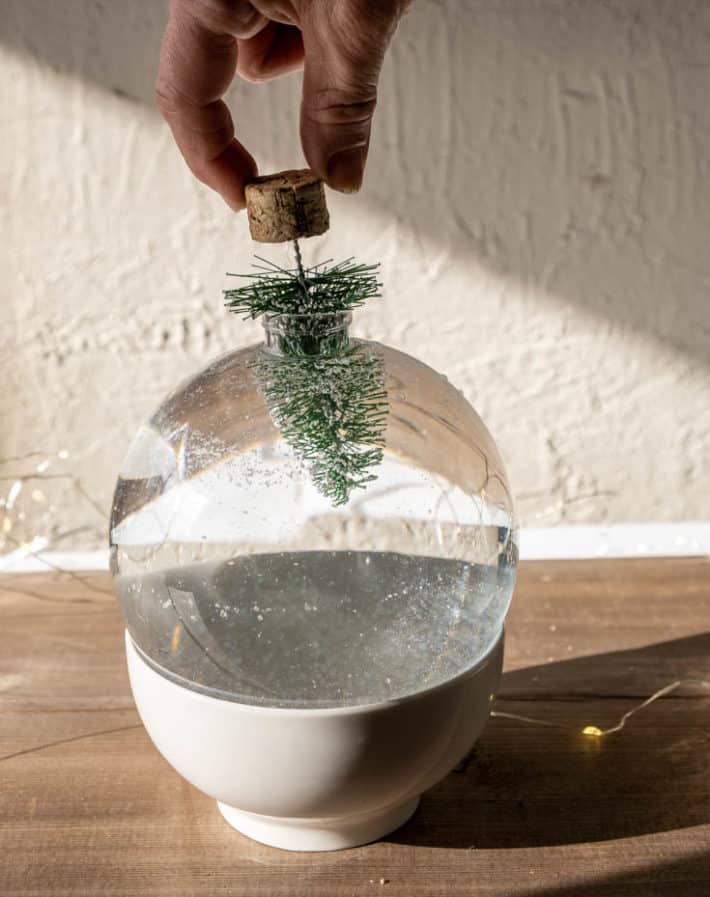
- Push the tree into the globe forcing down any errant branches with a toothpick or something. Force the cork into the neck and push it down until it *almost* touches the water level.
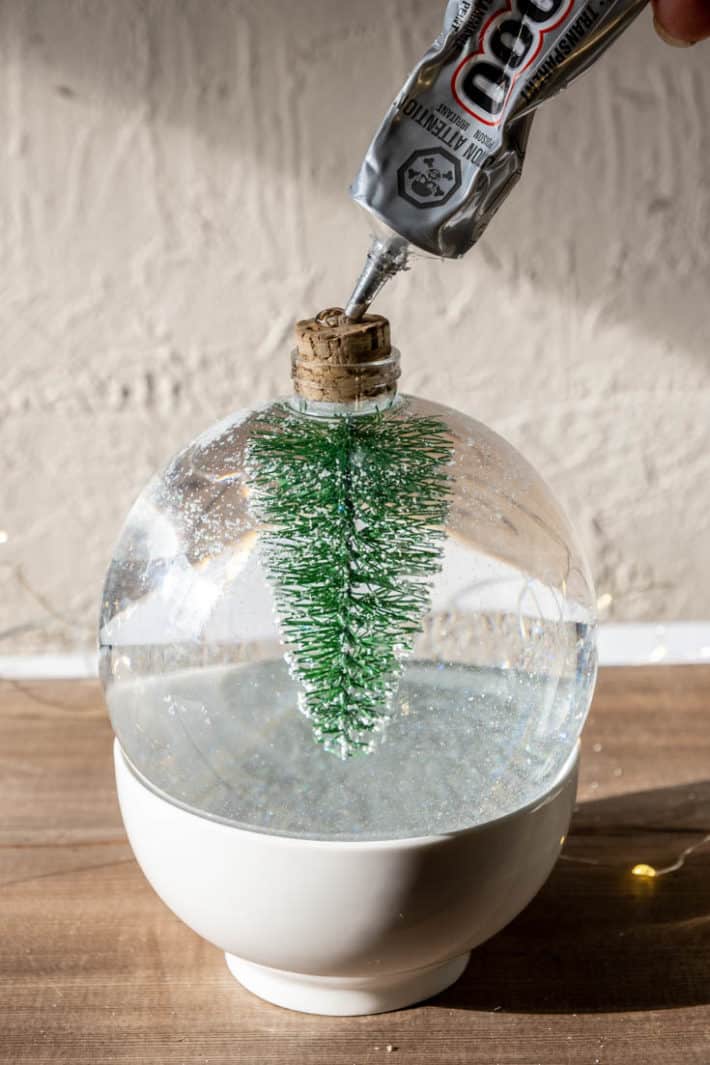
- Keeping the globe in the bowl that's stabilizing it, seal the cork top, sides and where it touches the neck with E6000. Let your snow globes cure overnight undisturbed.
- The next morning turn the globes upside down and give them a good shake or slight squeeze to make sure they're watertight. If they aren't (one of mine wasn't) turn it cork side up again and let it dry then apply more E6000 and let it cure again.
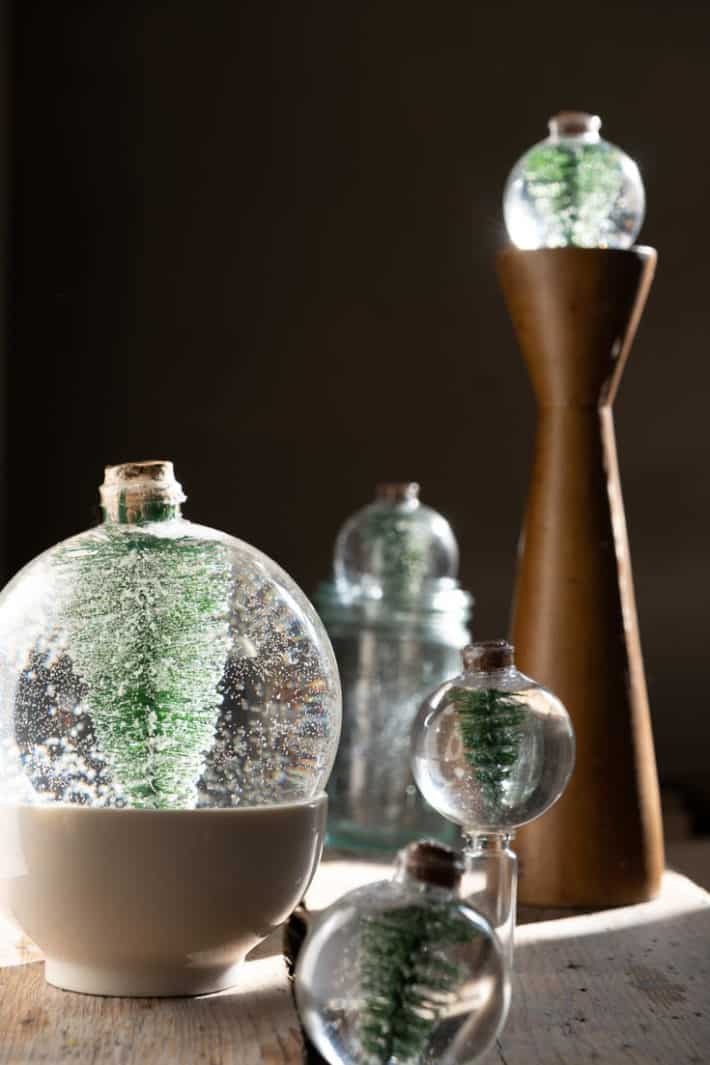
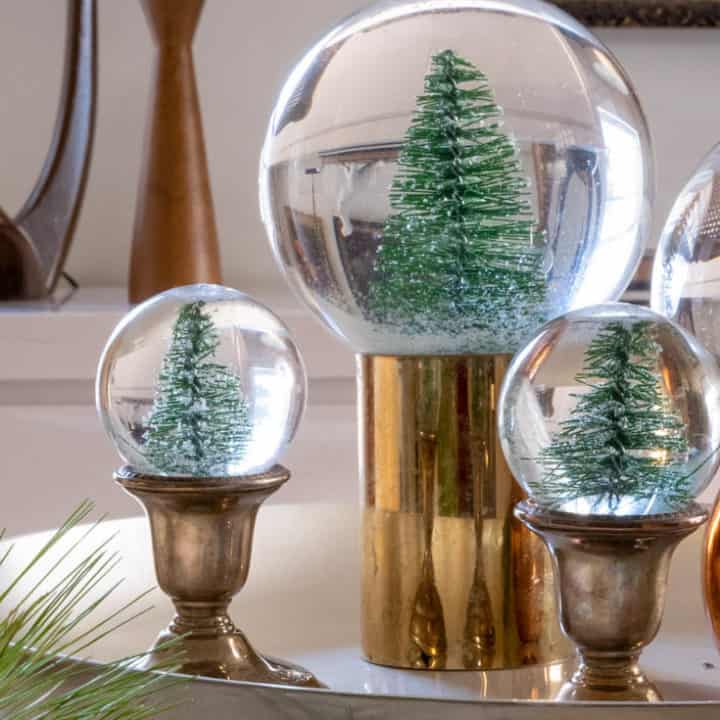
If your globes have all cured and there are no leaks you're done! I have to admit I like them without any base at all, just like this. But I know most people will probably want some sort of base for them. That's where you can get creative because the base you choose will make a big difference in how the snow globes look.
You can go modern, traditional, weird - whatever you want.
I keep mine on a buffet, but obviously a mantel or grouping them on a dining table for a centerpiece are other ways you can go.
IDEAS FOR BASES
You don't *have* to use a base but it'll make the globe look more finished and keep it sturdy. If your plan is to gift one of these, adding a base is the way to go. You can either keep them separate or glue the globe to the base using a hot glue gun.
- salt cellars
- candle holders
- vases
- zinc mason jar lids
- mason jars
- tea cups
Below I'm using 2 short antique silver candleholders, 2 gold metal tubes (that originally had candles inside), and 1 tall, wood, mid century modern tea light holder.
A contemporary take on a little winter wonderland scene.
Easy DIY Snow Globes.
YOU are going to make a snow globe. You are crafty!
Let's do this.
Materials
- Clear Plastic Christmas balls
- Distilled water
- Glycerin
- White sparkles (fine or superfine)
- Wine corks
- E6000 glue
- Tiny bottle brush tree
- Bowl for stabilizing plastic ball while you work on it
Instructions
- Pull the plastic top off of the plastic ball and set it in a round bowl so it doesn't go rolling around. You now have a globe! Fill the globe with distilled water until it's ¾ full.
- Pour in some sparkles. A medium sized globe with need around ¼ teaspoon of sparkles. Add 2 drops of glycerin. NO more. Top the globe up with water until it comes just below where the neck meets the ball.
- Cut your wine bottle corks in half with a serrated knife
- Pull the bottle brush tree out of its base if it has one. Remove some of the lower "branches" of the tree so you have an inch of bare trunk. Stick the trunk into the centre of a piece of cork. Make sure it's perfectly straight.
- Push the tree into the globe forcing down any errant branches with a toothpick or something. Force the cork into the neck and push it down until it *almost* touches the water level.
- Keeping the globe in the bowl that's stabilizing it, seal the cork top, sides and where it touches the neck with E6000. Let it cure overnight.
Notes
If your cork is too small for the neck of your globe, steam the cork! Putting a cork in a steamer basket for several minutes will make it permanently bigger. It's a great trick I used for my own snow globes.
Don't use too much sparkle. Excessive sparkles will just clump together in a blob.
Glycerin is optional. It helps slow down the rate the sparkles fall at, but it isn't imperative. If you don't have it, don't worry about it.
Distilled water should remain clear for longer, but it also isn't mandatory. You can just use tap water.
If your trees are too big, don't fret. You can make a really big fake tree much smaller by just using the top of it.
To make sticking your tree into the cork easier, pre-punch a hole in the cork's centre with a toothpick. Hold the stem of the tree with pliers to make shoving it into the cork easier.
TIP
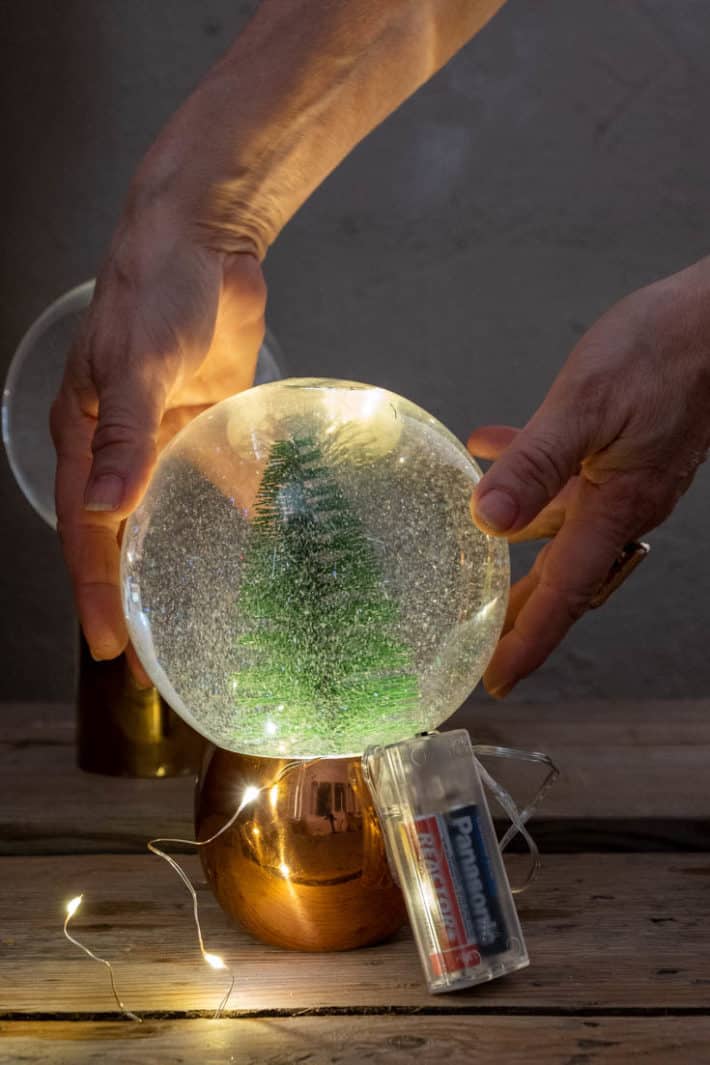
You can light your globe up by sticking a strand of copper wire lights into the base that you're putting the globe in. Just know you'll have a strand of wire hanging down from it and a little battery pack you'll need to tuck away or hide.
REMEMBER to check for leaking every once in a while and when you store them away after the season, store them with the corks facing up so there's no chance of springing a leak while they're tucked away in the basement.
These will NOT last for years. Inevitably the metal, sparkles or fake snow ends up turning the inside of the ball cloudy. But they're fun and easy enough that you can redo them every year. Just keep reusing the same plastic balls and corks, and replace what you have inside.
→Follow me on Instagram where I often make a fool of myself←


Susie
Love this snow globe idea! Do you have a link to where you purchased those large globes?
whitequeen96
These are so pretty and a wonderful project for the kids to make over the weekend. Thanks!
amy
Is your dinosaur musical? My mind went right to ... "I'm feel pretty, oh so pretty". You make me smile. Thanks.
CathyR
I’m not sure why people think you put lights IN the snow globes. Clearly it says to put them into the base not the ornament.
Since you did this years ago, did your wire tree rust?
Do you think it would be a good idea to seal the whole cork first? I’m thinking of something like Krylon spray, letting it cure then assembling things then glue the hell out of it. Nice tutorial kid.
Christie
I don't want to do a snow globe, but I MUST have a dinosaur vase... Nobody but you Karen (except maybe your sledgehammer, wielding Mom, Betty!!!)
Wendy Nathan
Super fun idea. I just might get a little crazy and try other things in the globe. I have a friend who used to collect snow domes. I am sure she would love this for a gift. Thanks for making my day each time you post! You make me smile.
Karen
Thanks Wendy! ~ karen
Tina Gogo
Dinosaurs are just so Christmassy! It just wouldn't be Christmas without a Christmas dinosaur! I'm glad you didn't forget him and leave him out. Is he your family's version of the Christmas Pickle, lol? Have a happy and safe Christmas and New Year Karen! Love the tutorial, thank you!
Karen
You're welcome Tina, lol! Have a good holiday! ~ karen
Gerri
Where do you get sparkles? Is there an actual name for them or are they just called sparkles?
Jackie
It's just glitter - you can buy it anywhere crafts are sold.
Mary W
These are so pretty! I agree that snow globes should be globes! But for fun with the kids, any old baby food jar will be ok. Yours are classy!
Amy
Thanks again for another great idea and humorously written instructions!
I appreciate what you do!
Amy Campbell
Melissa Leach
You never fail to amaze. Love this!
Randy P
Neato easy craft. Thanks. It must be a very special thing to have you as a personal friend, because you really are rather special...... in an 'ordinary clever person' kind of way. Why if I were only a younger and svelter guy..... well I still wouldn't stand a chance in Hades but I'd be younger and in shape. Like 'they' say, "Don't judge a person till you walk a mile in their shoes... then who cares? You'll be a mile away AND have their shoes."
peggy mckenzie
i did one and the air bubbles are on the globe and making it look cloudy. what can i do?
Karen
Hi Peggy. There has to be some air in there if you've put sparkles because that's what allows them to move around. If there are so many tiny air bubbles that you can't see through then you might have to remove the corn, let some air out and reseal it. ~ karen!