Beeswax food wraps can go limp and useless after a couple of years. Don't throw them out and don't buy more. You don't even need to re-wax them. Here's how to revive a beeswax food wrap by just popping them in the oven.
You sauntered into a store or online shop and bought yourself some beeswax food wraps because you care about the earth, don't want to contribute to the plastic problem and also they smell really good.
That and the fact you don't want to appear like an old fuddy duddy (even if you use phrases like fuddy duddy) prompted you to buy beeswax food wraps like all the hipster kids.
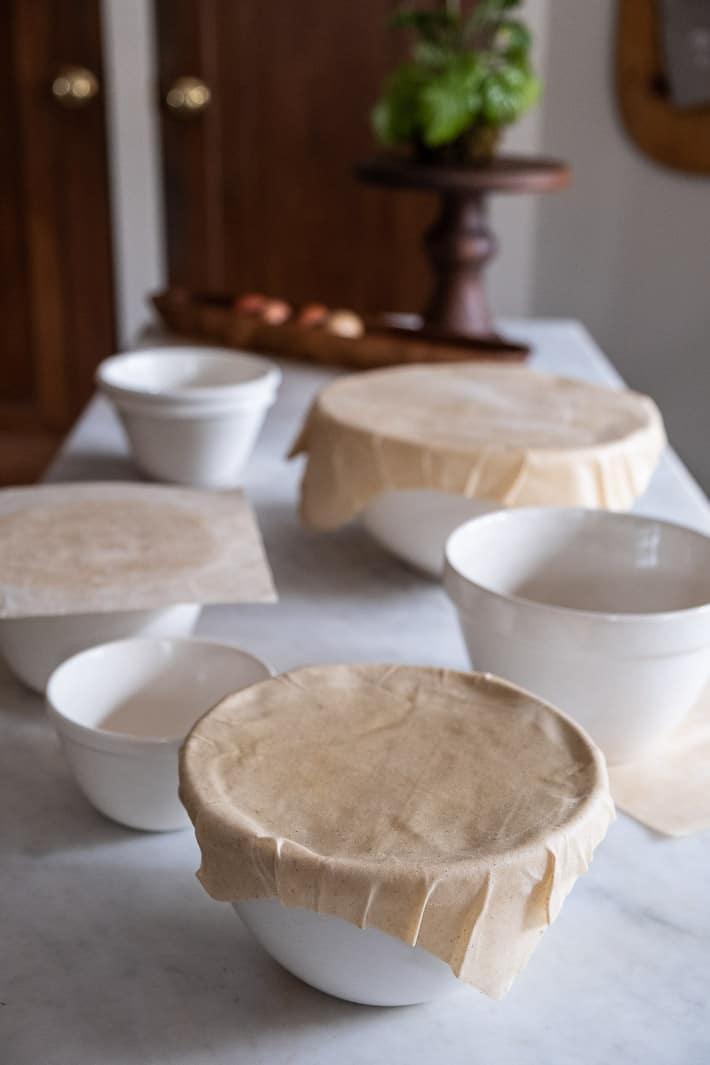
I love my beeswax food wraps. They really do work, they are hygienic, easy to clean and like I said ... they smell really good. BUT, after a while they get worn.
When you first buy or make your beeswax food wraps (yes you can make them EASILY, here's my DIY beeswax wrap tutorial) they're stiff, moldable and perfect for covering or wrapping any food items.
But the first time you use them to seal a bowl is the moment they start to degrade. Bending them over foods, bowls or jars creases them and if you do it enough times in the same area they become limp.
TIP: You don't really need to use cool water to clean beeswax wraps. Warm or even hot water is fine. Just don't use water that's so hot it will melt the wax.
And when they become limp, they won't hold a tight seal like they used to.
No matter how hard you press them and squish them they just won't work.
Would you like to save this stuff?
You'll probably notice this after a year or so of using the wraps. They won't form around bowls or food. What's an adult hipster wanna-be non fuddy duddy to do with these sad squares of organic cotton?
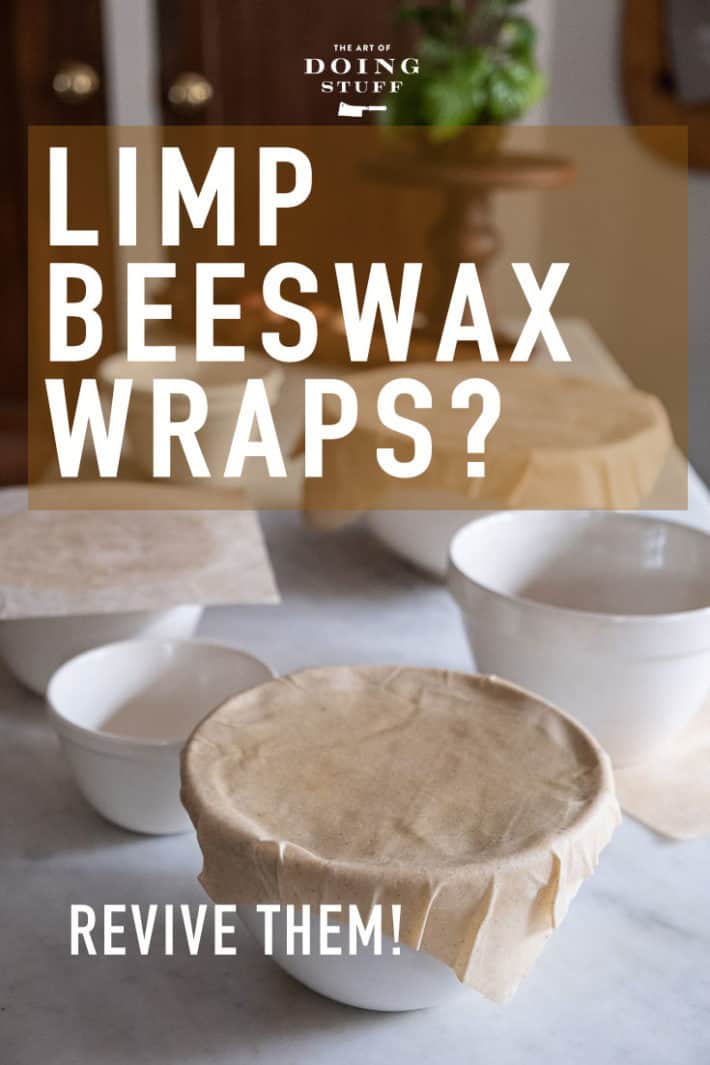
Revive them.
What makes wraps eco friendly is the fact that you can use them over and over again. Reviving them when they don't work anymore extends their already long life even more.
How to Revive Beeswax Food Wraps
(without re-waxing)
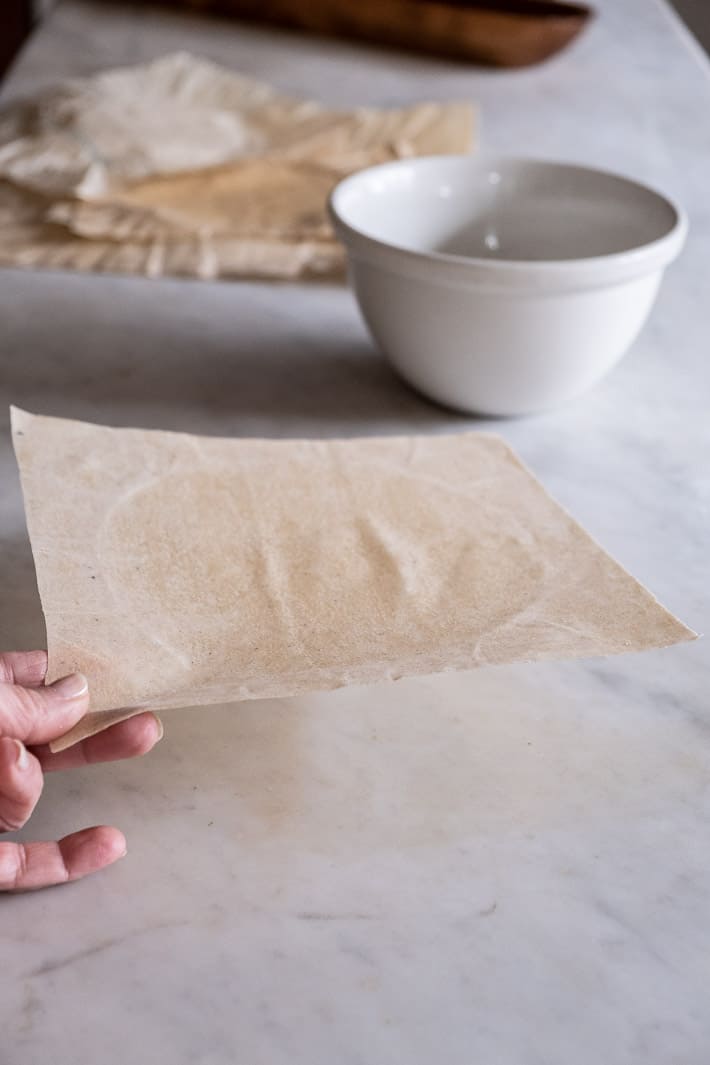
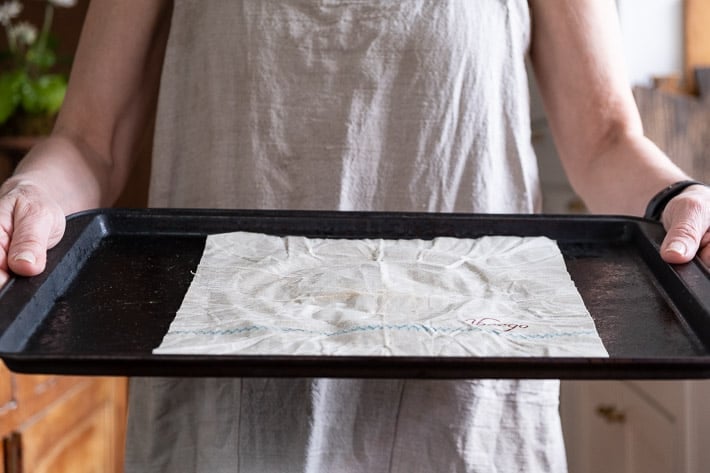
- Place your beeswax food wrap on a baking sheet and stick it in the oven set to the lowest temperature. 150° F or so.
- After a minute or two check to see if the wax on them has started to melt.
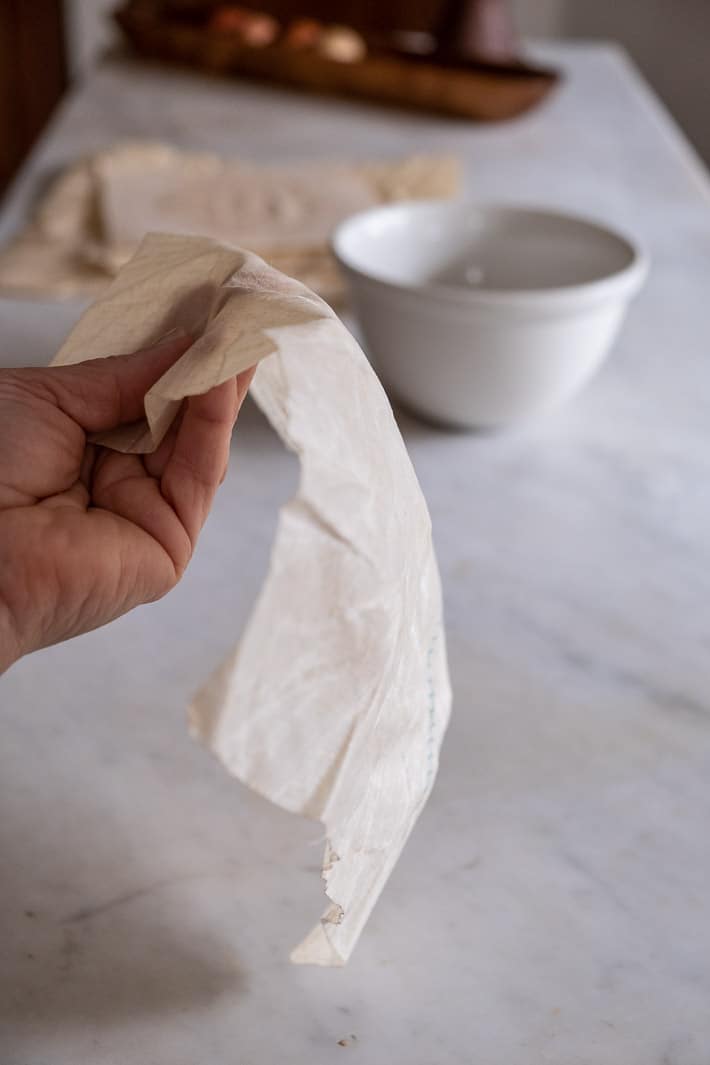
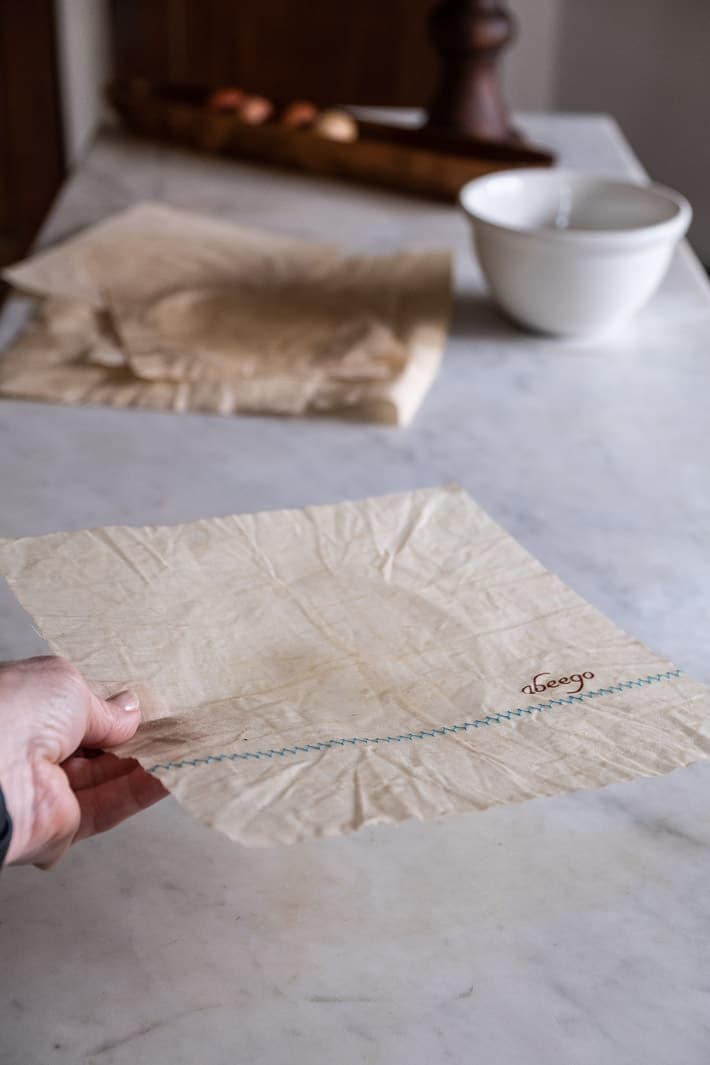
- Once the wax is melted remove the tray from the oven immediately and pick the wrap up holding it by the corners.
- Keep holding the wrap by the corners until it cools enough for the wax to harden by air drying again. This will only take a few seconds.
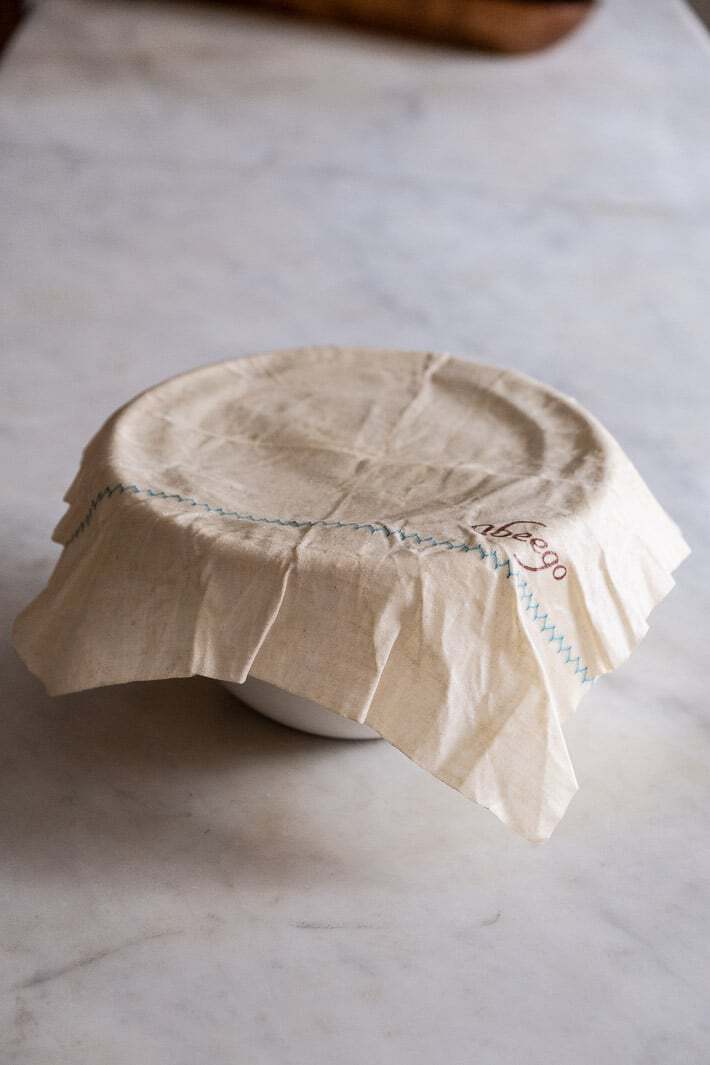
- Place your newly revived beeswax food wrap on a flat surface like your counter or a table. Done!
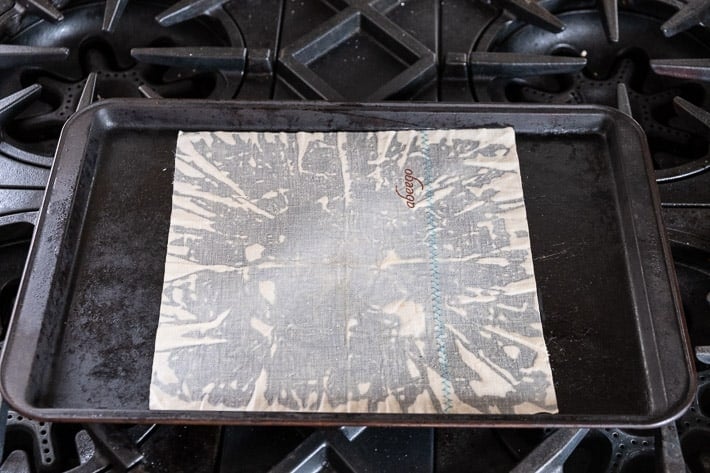
You can do this on either store bought wraps or the ones you make yourself at home. Just pop them in a low temperature oven. The heat will melt the wax again which lets it spread out and pool around the creased areas where it was cracked and limp before.
It's normal to lose a tiny bit of the beeswax to the bottom of your baking sheet.
When it firms up again, the beeswax is spread out evenly again and it's like new. Stiff and ready to form around whatever you want. (except raw meat - don't use them for that)
Reduce your use of single use plastics for food storage by bringing your hipster, hippie, beeswax wraps back to life.
→Follow me on Instagram where I often make a fool of myself←


Jacquie Gariano
My daughter got some for Christmas last year and loves them. She takes her lunch to work in them. My granddaughter is using them to wrap her kid's lunch inand except for the time he threw them in the garbage (with the paper) they are working fine
I love the hints on how to make them and renew them. What a great money saver.
Thanks for all your help, ideas and laughs.
Steven
You have a block of cheese like that too, huh? 🙂
Emily Cox
I love that I’ve found your blog! It’s so cool to see the growing season differences (Alabama Deep South = like, a week of winter). Gonna try growing loofa sponges now! I had no clue!!! Keep on writing, girl! We are listening!
Karen
Oh yes, I imagine there are BIG differences, lol. ~ karen!
Cottontail Farm
I'm so happy to see this. My family extracted honey this weekend and I am going to make some of these with the comb cappings. yay!
Cottontail Farm
Just one flaw in this post; the lack of "limp to stiff" jokes. You had a goldmine there. Ha! A big, massive penis-punned goldmine.
Did you know boy bees basically explode when they mate?
Susan Baker
OK so I love the idea of not using Saran Wrap for covering leftovers. I recently bought beeswax wraps. They don’t bend to my containers or I should say they don’t stick to the bowl to keep air out. Do they need to be reinvigorated in the oven? Maybe they sat on the grocery shelf too long before I bought them?
Shelley
The wraps don’t actually stick to bowls, only to itself.
Crease the wrap over itself to stick to itself.
Jen
Hi Karen,
I just read your tutorial on how to DIY these. Could I use linen? I’m just hoping to get your opinion. I’ve used these before and love them, but they are pricey. And you know what? I LOVE THE SMELL TOO!!!
Thank you, Jen
Nancy J
What fabric weight would you recommend? Do you think a broadcloth or something like a muslin would work better. Yours look pretty substantial.
Katherine L Varnum
I worked at a Portland,OR DELI. Called Ron Paul's. All the ugly romaine lettuce leaves were washed and saved and we used those leaves as covers to macro wave everything. Just toss into compost bin when done. Used that method since then. Early 1990's.
Mary W
Using waxed cloth for lettuce and other produce is a great idea. Not only for leftovers. The very best idea is for bread. I've been making my own for a while now and hate to wrap it so it gets soggy so don't want it to be 'sealed' under plastic. I wrapped mine in the flour cloth from rough linen, also. That worked nice.
Idaho Girl
This post reminded me that this is something I've wanted to try, so I did go back and reread your tutorial. I have a group of friends that like to get together for a Girls' Night, and this looks like a fun project to do together. I just pulled all of my older flour sack tea towels out of the drawer, so I can trim the frayed edges off and use those. Plus, I have a friend who's a beekeeper, so I'll hit him up for some local beeswax. I call myself a rabid recycler, and this looks like a good way to spread the infection. Thanks for the inspiration!
Peter Oster
Hope you are feeling better. Had me worried.
Karen
How so? I was just took Friday and Monday off for the Easter weekend. Since I work alone I take all statutory holidays off. I need them to recharge. :) ~ karen!
Robyn
I don’t have these but now I want some. I used your rough linen cloth for my rolls on Easter and was grateful that I did not need to use plastic wrap to cover my dough. Love that!
Thanks!
Karen
Yay! ~ karen
Teresa
I line my baking sheet with parchment paper which makes it easy to recover and reuse any beeswax.
Karen
Good thinkin'. ~ karen!
Becky
I have home-made ones that, when they're looking worn, rub with a big block of beeswax (like colouring with a crayon) and blast with a hot hairdryer. I've heard this works for waterproofing canvas shoes too, but haven't tried it out yet!
Amanda
Karen. I just. 👏🏼👏🏼👏🏼
Karen
:) ~ karen!
Rose
Couldn't you just iron them between parchment paper with a low temp. iron? There wouldn't be any loss of wax and you wouldn't have to scrape wax off your baking pan.
Karen
I don't know. Maybe. I'm not sure the beeswax would melt out the same way as in the oven. But if you have some give it a shot and let me know! ~ karen
Debra
What about ironing them between two sheets of waxed paper, wax side toward the fabric?
Deborah Wright
Yes you can. I have done this when I accidentally washed it in too hot water. No beeswax loss. Just makes it a little shiny.
Julie
Ugh! I just tossed 3 last month!! Dumb. Thanks for the tips!
Sherrill
I honestly never knew such a thing existed. I thought you were talking about wax paper at first,lol! What a wonderful idea! Might just follow up and use your idea to make myself some. How hip am I now?
Karen
Exceedingly hip now!! LOL. ~ karen!
Tina
I don’t use them but would like to. But often I’ll cover a plate with my lunch to have the following day and heat it with the plastic still on top (to hold moisture in and keep from making a mess). I guess you can’t do that with the bee’s wax covers, right? So what do you cover with? Thanks!
Teresa
In the microwave, use waxed paper or a damp paper towel or get a microwave splatter cover. You can also cover a plate with another plate. It takes a minute but there are ways to stop using one-use plastic. I got creative by not buying plastic baggies. I love waxed paper - it is compostible.
Karen
I don't ever heat food with plastic wrap on it, I just leave it open unless it's something that's going to spatter like refried beans or chili. Then I either inverse a bowl over a bowl or just use a paper towel. :) ~ karen!