You're gonna bake bread. Old fashioned, full of gluten, honest to goodness WHITE bread. You rebel.
And in fact today I'm going to make more bread in it. Partly because the bread is really good and partly because it's just fun. Also I'm out of bread, and like any good mini-Martha instead of going to the store to buy bread, well of course I'm going to bake some myself in the cob oven I built.
I'm not sure when this happened to me but I have a hunch it's only going to get worse, culminating with me growing my own heart valve when I'm 80.
Table of Contents
Baking Bread in a Cob oven
Baking bread in a cob oven is FUN.
This was just a basic, white bread recipe that you can use in any oven, not just a cob oven.
It's originally from the book Artisan Bread in Five Minutes a Day: The Discovery That Revolutionizes Home Baking. I don't own the book yet but it's only a matter of time because if this recipe is a representation of how good this book is ... I need it. Actually ... hold on a second while I go order it.
I'm back. Book has been ordered.
Would you like to save this stuff?
update: I've since ordered the book and use it every week. Always. I am never not making bread.
It's a no knead bread, but not the kind that's been making the rounds on the Internet over the past few years. That no knead bread is a very, very wet dough that has to be baked in some sort of pot or crock. I love that bread by the way and make a lot of it ... this just isn't that sort of no knead recipe. It's a wet dough, but manageable unlike the other no knead recipes.
No Knead White Bread
Ingredients
- 3 cups water luke warm
- 1 tablespoon yeast 1 packet
- 1.5 tablespoon coarse kosher salt
- 6.5 cups white flour unbleached, all-purpose white flour
- Cornmeal for pizza peel
Instructions
- Add 1 Tbsp. yeast to bowl along with 1-2 Tbsps kosher salt.. Add 3 cups warm water. Stir.
- Gradually add 6 1⁄2 cups flour.
- Stir the mixture until it's thickened and well combined. I use this Danish Whisk which is GREAT. Cover bowl with tea towel. Allow to rise for 2 hours.
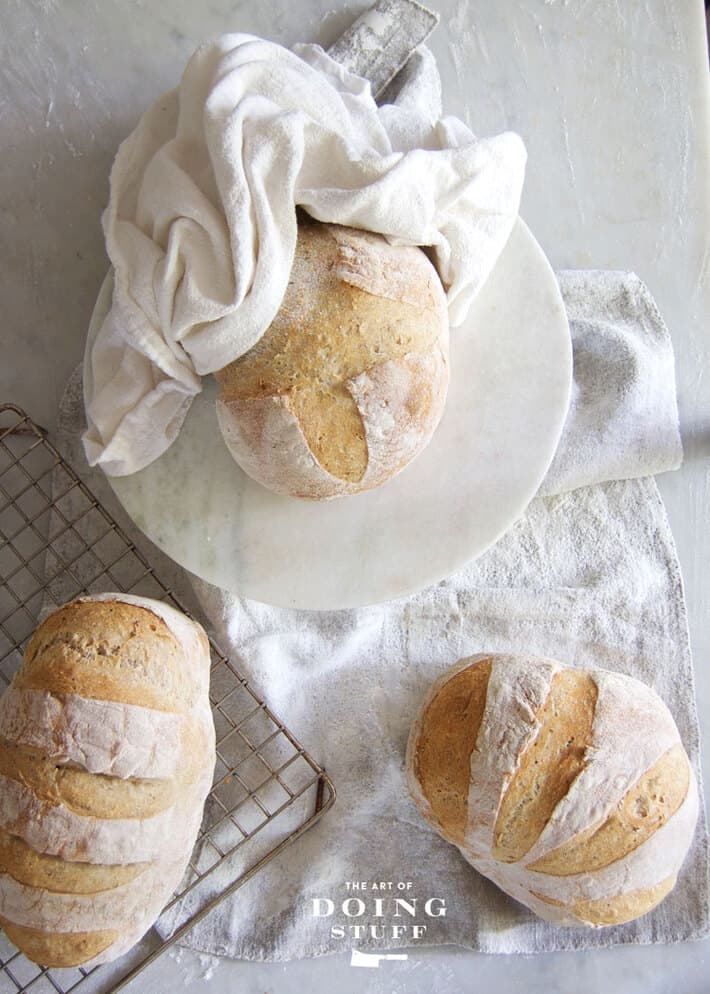
- Once the dough has risen divide it into 3. Form each section into a ball and pull the 4 sides of the dough to the underneath. This is stretching out the gluten and aligning it. It gives you a nice tight top to the bread.
- Preheat oven to 450 f. You want it to heat for an hour prior to baking your bread.
- Leave the dough for its final proof on a very well floured proofing cloth (the floured, linen mat you see in my video) or tea towel for 45 minutes.
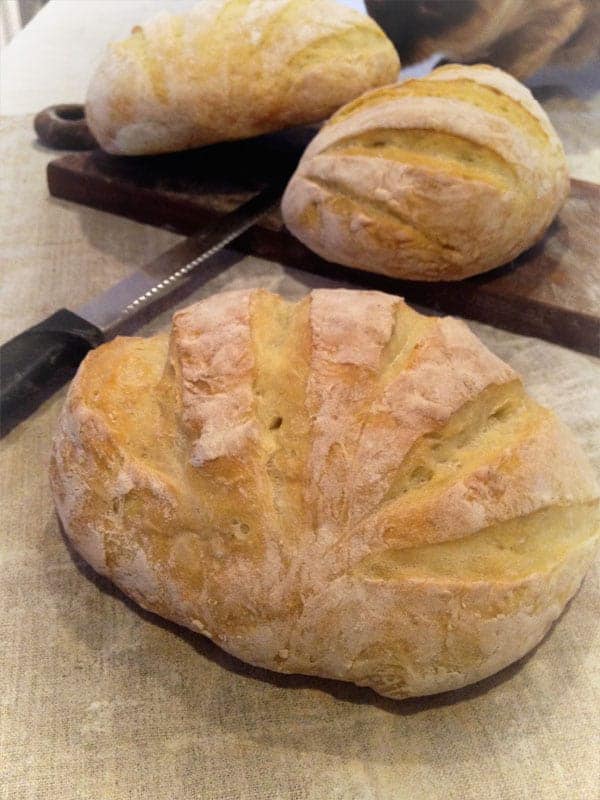
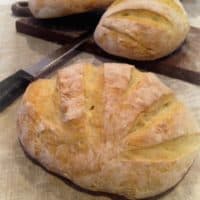
- After it's proofed, gently transfer to your peel or baking tray/stone. Cut several slashes across the top. This allows the bread to move upwards as opposed to sideways when it bakes.
- Bake until the interior temperature of the bread is 210 f. (around 25 minutes).
Notes
*You can also just use ⅓rd of the dough, and put the remaining dough in the fridge for up to 2 weeks.
*For an extra nice crust, bake the bread in a preheated dutch oven. Leave the lid on for the first 15 minutes of the bake and then remove it.
*Try removing 1 cup of the white flour and replacing it with Red Fife, Rye or another flour for a different flavour.
Nutrition
Consider this next fact a warning. If you make 3 loaves of bread, you will eat 3 loaves of bread. I did. No joke. I ate 3 loaves of bread in 3 days. By myself. I now have back fat. This is a serious warning and not even a joke. YOU WILL GET FAT if you make homemade bread. There's no way around it.
If you can deal with that, then bake away. If you can't you'd best stick to other baking. Like baked broccoli. Which taste especially good with a nice cheese sauce and a big ... slice ... of bread.
→Hey there! GET MY POSTS emailed to you 3 times a week←


Patty Popoff-Serwotki
We Doukhobors in the Saskatoon, Sk area have been delighting the exhibition go-ers with our brick oven baked bread for decades! Our Doukhobor bread is famous. People line up for loaves or just a slice slathered in butter and strawberry jam. It's a great fundraiser for our Prayer Home. You just can't get the same kind of bread in the oven! I've enjoyed reading about your adventures building. I'd love to build one as well, using the plans my Uncle used on the old homeplace.
Kori F
All I have to say is... you are amazing!
Nancy Blue Moon
Yes..I do believe that you ate 3 loaves of that bread in 3 days..I also believe that I could do that..warm..with lots of butter..yum..I think I will make some bread this weekend..
Bernard
"Mini-Martha" !!!!!!
Gasp!!!! Ack!!!!
a) You're genuine;
b) You have exceptional wit and humour;
c) You're much easier on the eyes;
d) Repeat as needed in the order warranted by occasion.
I would there fore submit You are "Maxi-Martha" except it sounds too, too much like a feminine hygiene product.
How 'bout "Uber-Marta" ... a bit Germanic, but hey, that's pretty much where many of us can trace our roots.
Cheers.
Laura
I love this bread - it's the base recipe from the book Artisan Bread in 5 minutes a day. I too can eat 3 loaves at one time, but you can also put any amount of dough in a loosely covered bowl in the fridge and it will keep up to 2 weeks. You just grab some, pull it for a minute or two to form the ball/loaf and let it rise on the counter for a few minutes and then bake. Yum. Now I need to eat some bread!
Karen
It is, lol?! I can't remember where I found it (somewhere on the big Internet a while ago). Do they have a website too? I'll credit them. I'll go Google it now. ~ karen!
Ev Wilcox
I have been making the wet no-knead artisan bread all summer. My family and friends think it is the best thing since sliced bread, (sorry, couldn't stop myself!). I think it is OK, but not as flavorful as other knead breads I've made. But they eat it like it's magical, and I will soon have to make two loaves at a time just to keep up! Will be trying your recipe this weekend-thanks for inspiring us Karen! Your oven is a thing of beauty!
Tigersmom
I appreciate the caveat because I looooooove bread and would eat way too much of it.
Last night I made tortillas that I bought pre-made but uncooked at the grocery store. Its easy to trick yourself into thinking it's no big deal because they cook in one minute (30 seconds per side) in a dry non-stick skillet over med to med-high heat. Which wasn't so bad except for the fact that I ate the first three fresh from the skillet each with a lovely slather of butter. : /
Ruth
Hubby and I have been researching outdoor pizza ovens ever since your 'pizza parade' got rained on... We're trying to figure out a portable version since we're renters right now.
Last time, I forgot to ask.... can regular aluminum bread pans and Pyrex dishes be used in one of these? Far too many insects in the tropics, so our loaves have to fit in a normal 10x20 bread bag. I'm taking no chances with bread baskets.
Karen
Hi Ruth - Sure, you can use a regular Pyrex or aluminum bread pan in the oven. I wouldn't put the Pyrex in while the oven is 900 degrees, but when it's 450 or 500 for baking bread it would be fine. I've used Pyrex dishes in my oven a few times! Also if you haven't ordered the book I suggested yet, he has something in there about making a portable oven. It's not as easy as you think because even a small pizza oven weighs around 800 lbs! I think they made it in sections that fit together and came apart like a jigsaw puzzle or something? ~ karen
Ruth
I guarantee you... if it can be conquered at all, I have just the man for the job. Not sure about 'straw acquisition' over here so we're examining other options in the interim.
I haven't bought the book yet, because I intend to do that closer to the time when I have someone travelling in from the US. That's how I get stuff from Amazon... purchase, send to a friend's address, await their next flight, rejoice... :-)
This will have to be a 2015 project because the book will get here right on the cusp of the rainy season. (Side Note: I am sooo ready to say goodbye to this stupid drought and 98F heat... I have never experienced anything higher than 82 in my almost 41 years. This is madness, I tell you!)
Teresa
I mill my own flour, so I often have difficulty replicating recipes that use store-bought flour because my flour is not as 'fine-ground'. Do you have any suggestions on how to use whole-wheat, home-milled flour in this recipe or have you ever used that method? The bread looks amazing!
Karen
Sorry Teresa, I have no idea. :( But I know a lot of bakers AND home flour millers read this site, so they may have an answer for you! ~ karen
Suanne
Planning on getting our cob oven started next week! My Sweetie and I have a week off work at the same time and this will be our vacation project. We have watched your cob oven posts over and over and over, (plus the ones you suggested on the internet) have our book, with pages marked, have our site picked out and will be scoping out a couple places we can dig our clay. Question... you mentuioned having to let the lime plaster sit for a few weeks. Is there any way to expidite that process? I don't want to run into frosty weather..... And do you add the sand to the plaster/water mixture right before you apply it or while its slaking? How does it feel to be such an inspiration to so many people???? :) If it wasn't for you, we would NEVER have tried this on our own. You ROCK, Karen.
Karen
Hi Suanne - Good luck with your oven! You'll love it! I'm afraid you're really supposed to let the lime sit for a few weeks minimum. The reason for this is that's how long it takes to actually hydrate. The longer you leave it, but better the consistency and the less chance of having problems like cracking, flaking, chipping, etc. Plus the texture is easier to work with the longer it slakes (sits and hydrates). However, if you don't get it coated with the lime plaster this year, you can always just put a tarp over it for the winter and do the plaster in the spring. You can still use the oven, you just have to be careful about it getting rained on. You add your sand to the lime, just before you apply it to the oven. Have fun and keep me updated! ~ karen
Su
I can smell the bread too! Hot baked bread and butter - YUM!
And a heart valve at 80 would probably be a good thing (says Martha).... :)
Danni
I can't wait to make pita bread in my oven, which by the way I took a vacation day and will hopefully FINISH making today!
Hint to those of you too lazy, like me, to go hunting and shoveling clay... Bags of clay kitty litter. Wish I could say that was my idea, but doing research and watching hours of YouTube gleaned that gem. Of course the grocery checkout person now thinks I'm an insane cat lady....
mimiindublin
Hahaha! I LOVE the warning, you with back fat! No way!
Karen
OHhhhhhhhh trust me, lol. I was kindda surprised too, lol. ~ karen!
jainegayer
I'm drooling!
Grammy
I can smell the bread in your video. It's that good.
That's my secret trick for enjoying fresh-baked bread without getting back fat: watch bread being baked in a cob oven on a video on the Internet and convince yourself you had some of it. I'm going to have sweet dreams now. Thank you.
Debbie ruiz
Wow, looks wonderful. You make it look easy!
Pat
My husband just learned a new technique from you for his same bread...the slashes. He does his in a cast iron dutch oven. When I read to him how the slashes will make the bread grow up rather than sideways, he was thrilled. Yes, you made his day. And we thoroughly relate to the bake and eat thing. We can easily polish off a loaf with friends as part of an appy, if we put the whole loaf out. We are learning not to do that as then we don't have room for our supper or have some left for breakfast toast! If he makes 2, yes, then we eat 2 rather quickly.
Jamieson
Bread is my favourite food (and stuffing is my favourite dish). Back in high school I used to bring back a loaf of crusty bread from Main Street after lunch time and eat the entire thing in class. This did not pass without comment. And frankly sometimes it did not pass at all, at least for a couple of days.
Amber
Good Punk! Punk is best for baking, I've always found.
caryl hodgdon
I like that big holey bread-plain-slathered with butter-covered with honey-homemade jam-homemade peanut butter-garden veggies etc. I just need to knead it before I need it!!