Get ready for takeoff. You're going to build a tiny rocket stove in under 10 minutes.
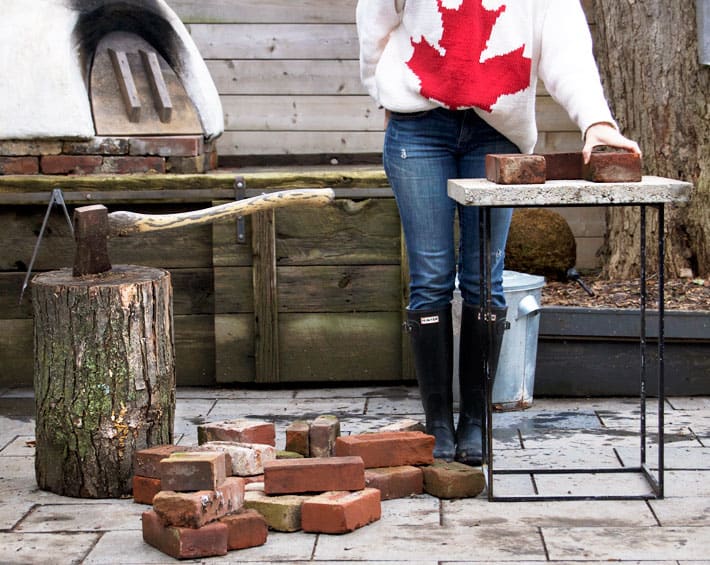
Every once in a while I think, That's it. I've done it all. That there's isn't anything new or fun or exciting for me to learn. And then a chicken of mine will get maggots in its bum or I'll suddenly need to learn how to pour self levelling cement and the world is shiny and new again.
Last week I was in the whole ... that's it - I've done it all phase (which is ridiculous because I've never even castrated a bull or panhandled or a bunch of other fun stuff). But alas, that's what I was thinking.
As always, I was proven wrong. As I was getting everything ready to collect my first buckets of sap from my tapped maple trees I got to thinking that I'd love a different option for boiling the sap down.
If you've always wanted to turn sap into syrup (which I fully support) you're going to want to read my post about how to make maple syrup right in your own backyard. It has everything you need to know about doing it.
The first year I boiled it in the house which resulted in every surface in the house being so sticky I could just lie on the floor and wiggle around if I needed to lint roll my sweater.
The following years I've used a heavy duty outdoor burner that runs off of propane. Propane that's around $25 a tank. And I'd go through 2-3 tanks each season boiling my sap down. That makes for some expensive maple syrup.
Looking around the backyard at all my fireplace and pizza oven wood (I really do seem to have a thing for fire) I realized there had to be some sort of little fire pit I could make. I didn't want something that was HUGE, it needed to be a temporary, fast, easy and strong.
Enter the 10 minute portable rocket stove. An incredibly powerful wood burning oven you can make with 20 bricks and a piece of wire mesh.
10 Minute DIY Rocket Stove
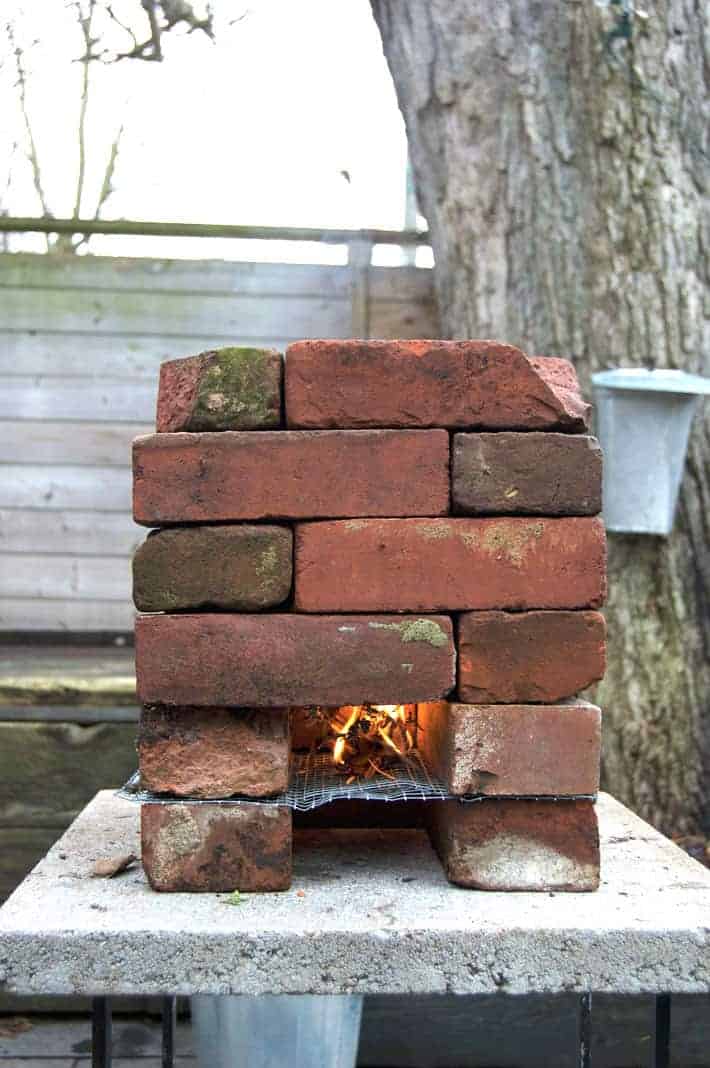
Materials
24 clay bricks
1 piece of metal screen
Steps
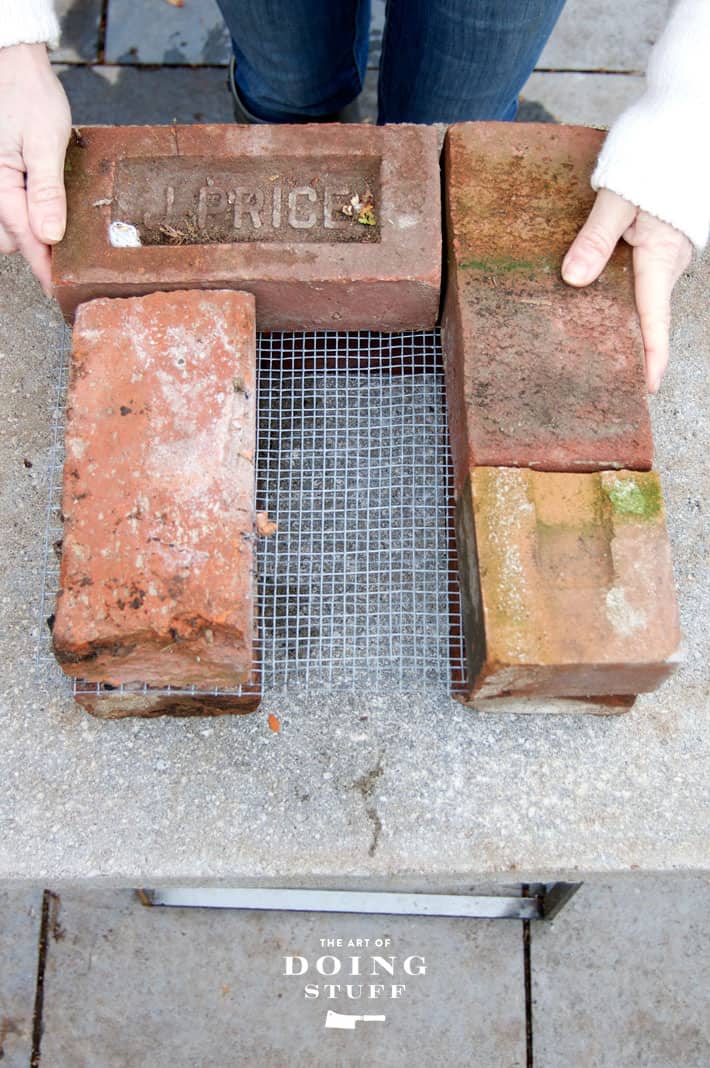
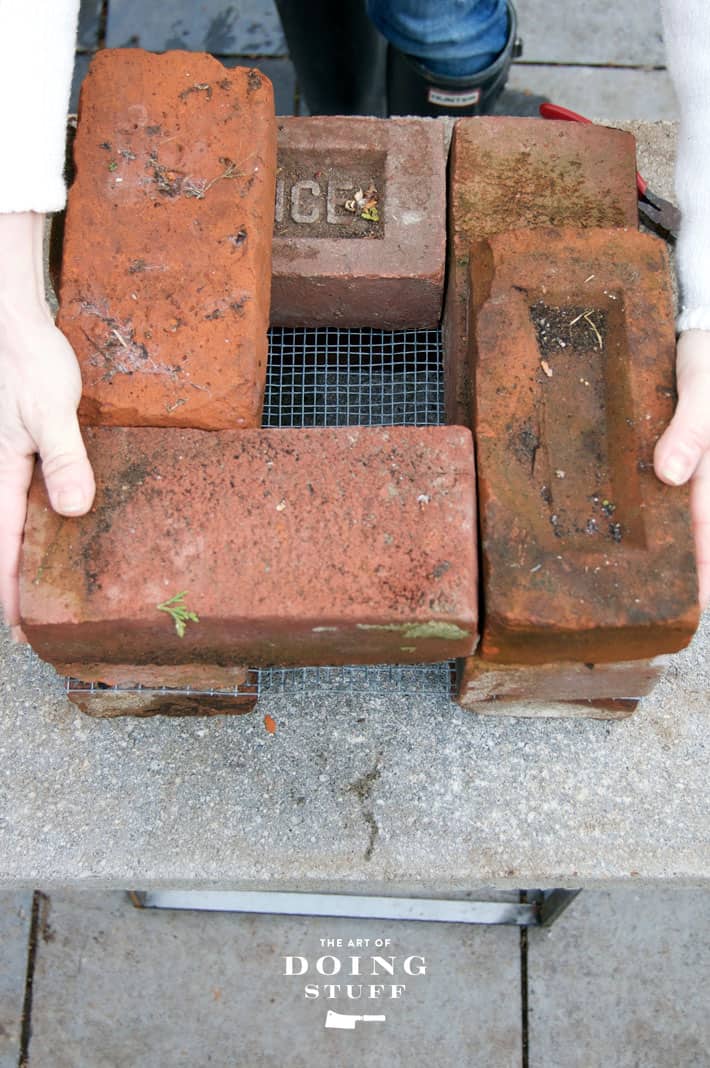
- Lay 4 bricks in the pattern you see below. Just make a square with a hole in the centre. I've used a half brick where it's needed, but you can just use a full brick. It'll just stick out the side or front a bit. Not a big deal.

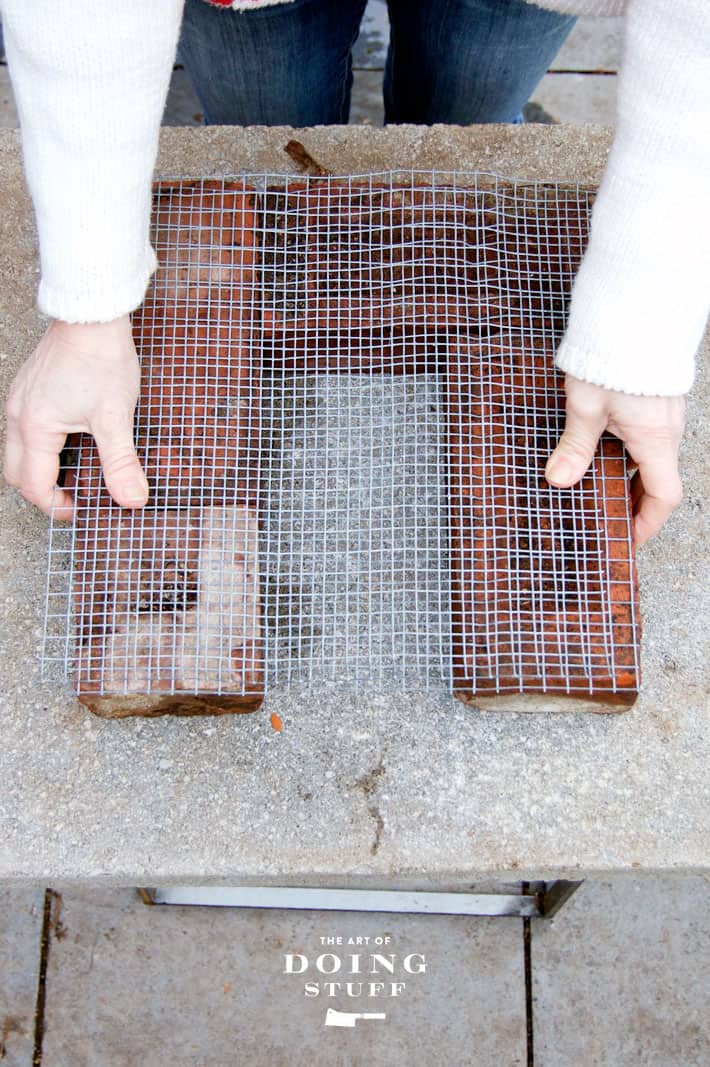
- Lay fine wire mesh on top of the first layer of bricks. If you don't have fine mesh, do what I did, which was to lay 2 layers of hardware cloth down. The reason I did this was so I could lay it in a way that the holes would be smaller. You need the mesh to be fine enough that small twigs and charcoal can't fall through. You can see on the left edge the size my hardware cloth actually is, and in the centre you can see how much finer it is by staggering 2 layers, one on top of the other.
3. Add another layer of bricks on top in a "brick" pattern. That means you want your bricks staggered from the previous later covering any edges.
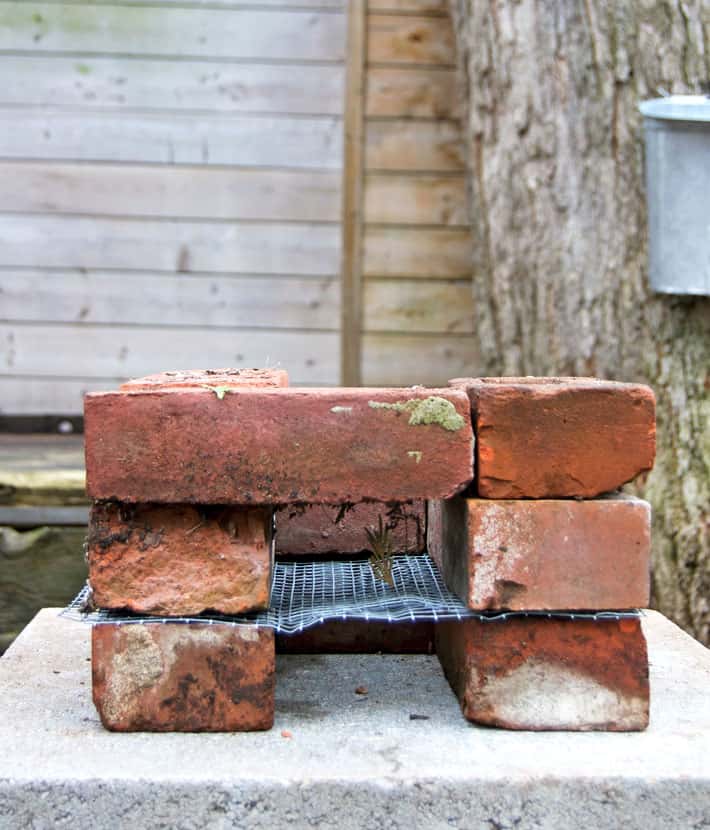
4. Lay your 3rd layer the way seen in the picture above. Now you're only working with whole bricks and are basically building a chimney. The full brick in the foreground is just barely resting on the brick underneath, to the right.
5. Now just continue laying in a brick pattern until you have a total of 6 layers.
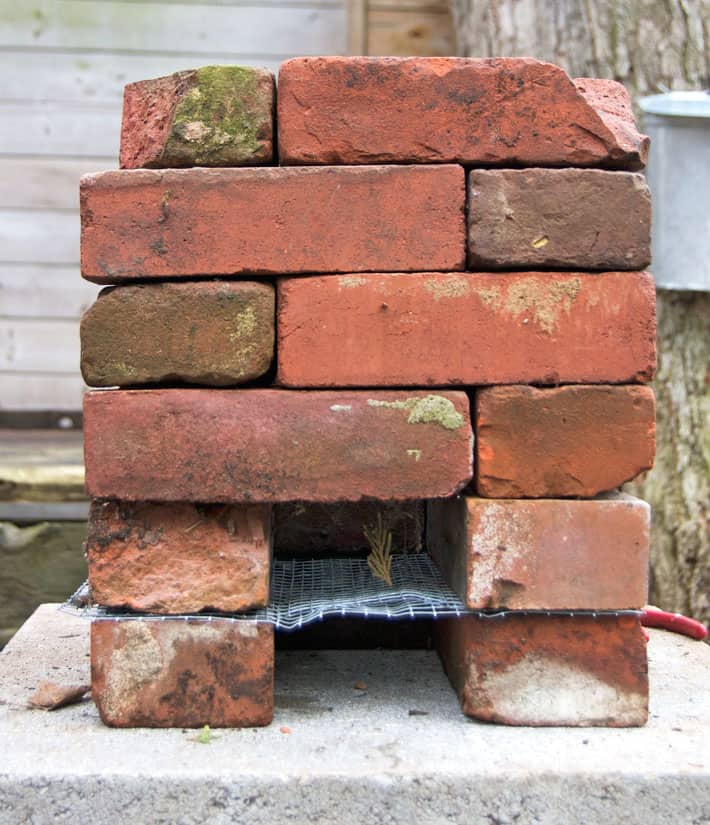
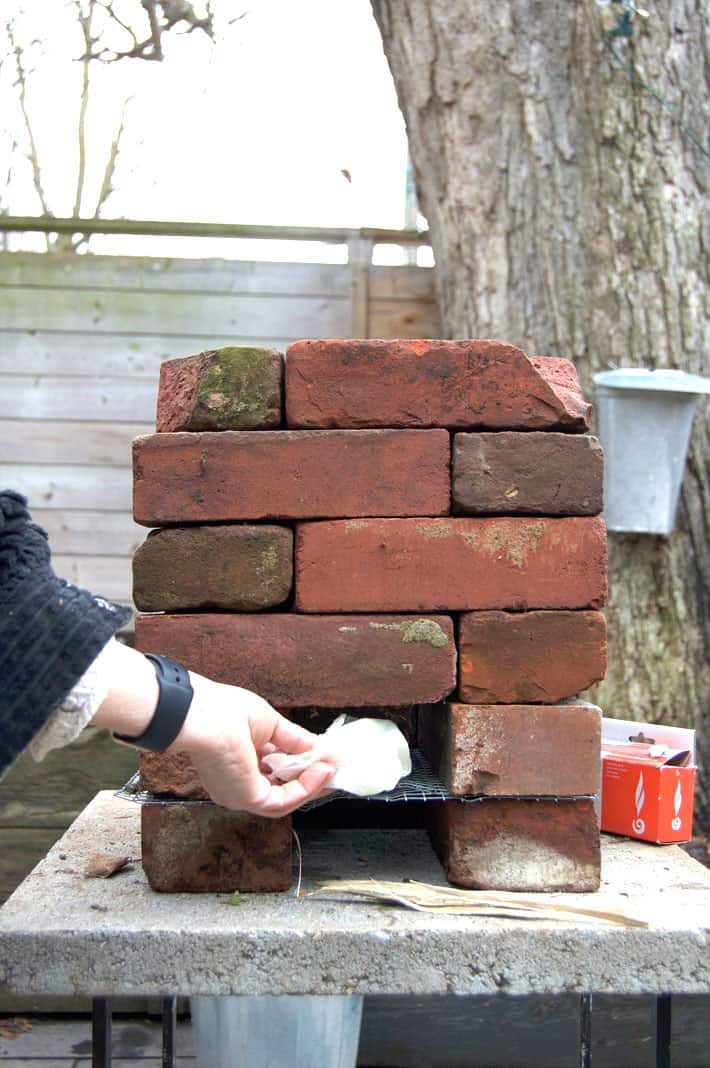
6. You're done. That's it. Your rocket oven is built. Seriously. It's done.
Would you like to save this stuff?
I built my stove on paver set on a stand but you don't need to do that. I did it so the stove would be a bit easier to feed and it was better for taking pictures.
If you have dirt, you can build the rocket stove on dirt, but if you have an area you don't want wrecked or burned up set it on a paver like I have.
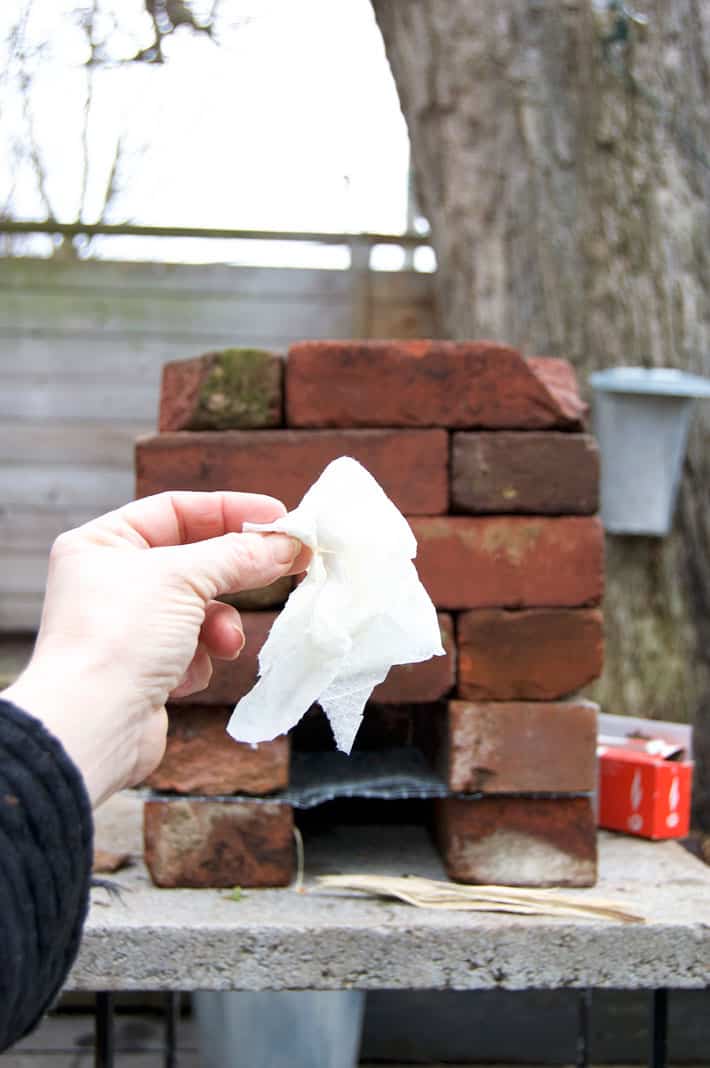
The fastest way to start the oven (or anything you want to light on fire really) is with a paper towel that's been soaked with some vegetable oil. It'll catch easily and burn longer than a plain paper towel or piece of paper would.

Add a few very dry, very small twigs to the combustion chamber and once it's going (if the fire is crackling, then it's going ... no crackling generally means it's only pretending to go) add bigger pieces.
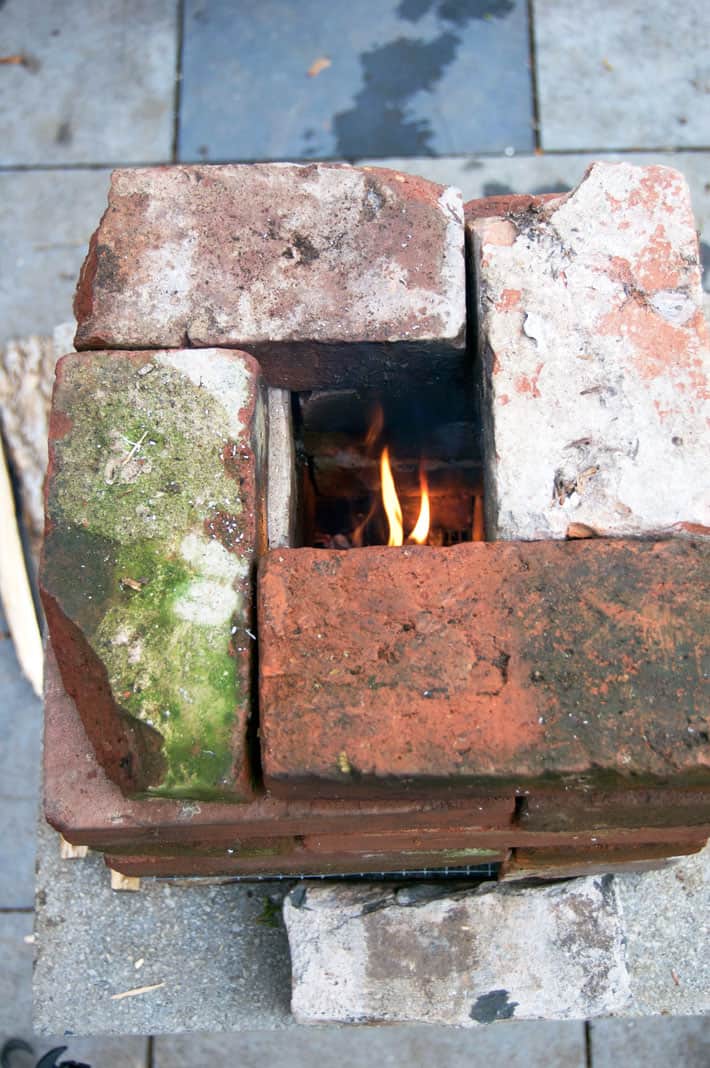
You will soon have fire roaring up the chimney.
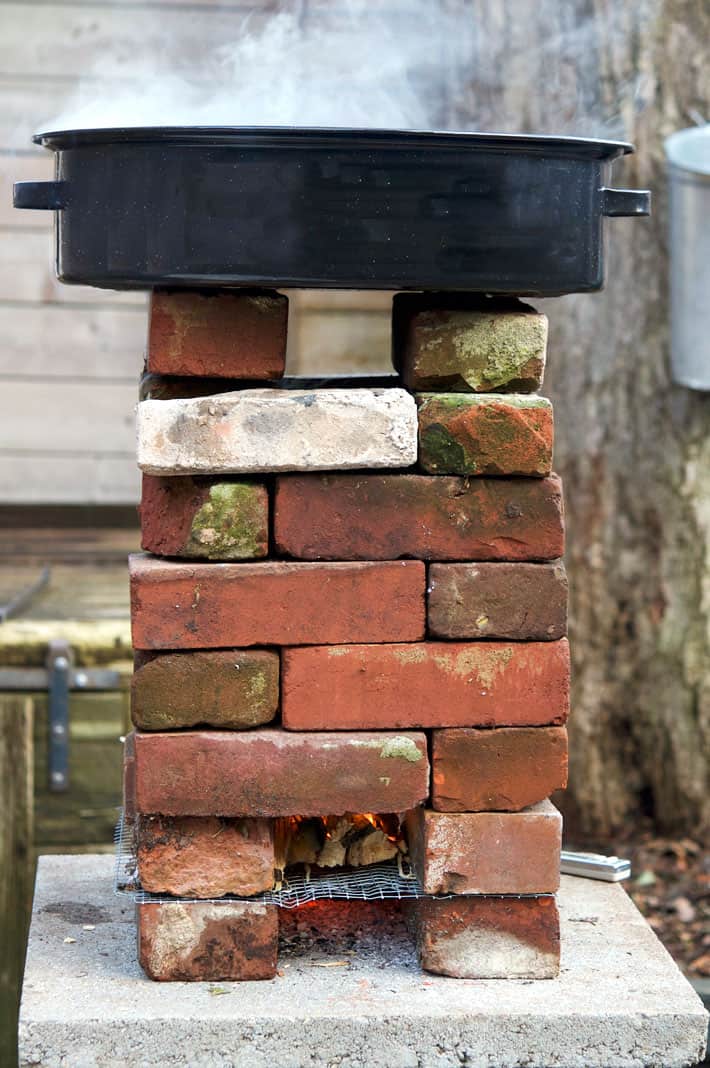
There are other FAR more efficient rocket stoves but if you're just looking for something that works and is temporary this is great. Mine would be even more efficient if I had bricks that weren't hand formed and were all the same size. That way I wouldn't have any cracks and gaps in the chimney.
Another rocket design has you build an additional base at the front of the rocket stove where you have the fire. The fire then creates a draft, and burns sideways, up the chimney. It's also stronger and more efficient, but ... honestly. This little setup is fine. It works. In fact it's hilarious how well it works.
Reconfiguring and using cinder blocks is next on my list because I think it will be more efficient and burn hotter but for now this brick rocket stove is perfect. .
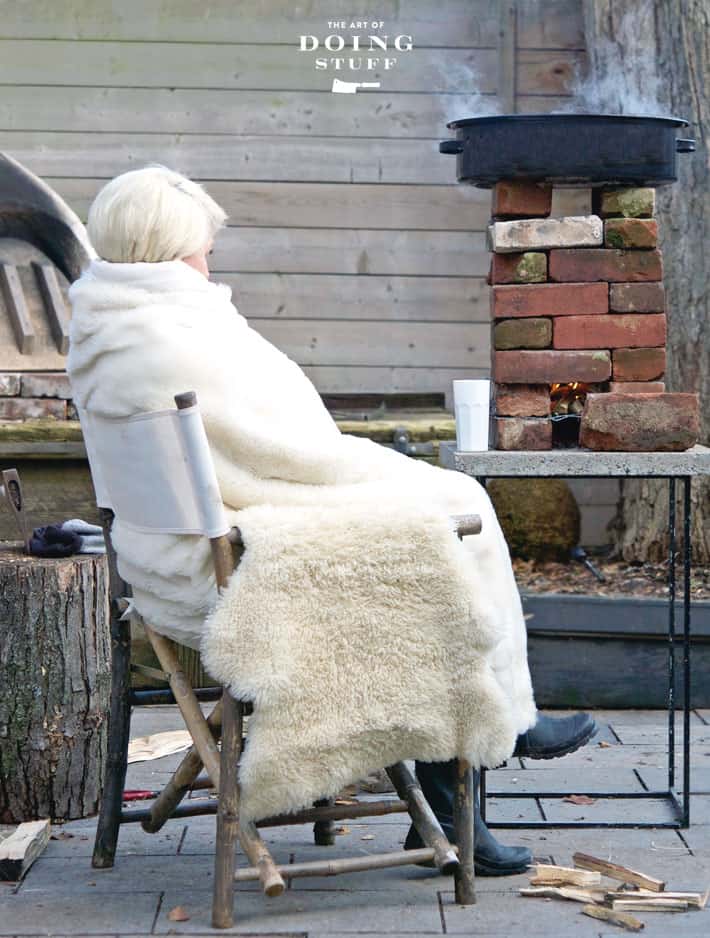
Yup. Just when I thought this old dog wasn't going to learn any new tricks, I'm given a stick to play with. The one thing that you have to keep in mind is because the area you're feeding is so small you have to use fairly small pieces of wood which means they burn quickly which also means you are constantly feeding the fire. You can't leave it alone for 10 minutes or it'll go out.
So just keep that in mind.
Other than that, there really isn't anything bad I can say about this cute little Rocket Stove. It's fast, easy, cheap, portable and there is zero chance it's ever going to get maggots.
→Follow me on Instagram where I often make a fool of myself←



Allen
Inexpensive and effective. Swap anything galvanized out for an old barbie rack (can we say zinc poisoning? Even low exposure to the vapours will make one veeeery ill; and it'll get in the food being cooked! NO fun!) Old racks should be easy to come by.
Love your blog; my Missus and I have decided you're our kinda crazy. Have fun...
Mary W
LOVE this idea for a small fire for marshmallows or hot dogs on a cool night with hot chocolate and movies on the garage door. Brilliant!
Marsha
Oh, and I have castrated a few bulls.😉
Marsha
I just need your sweatshirt 😊
Heather Sykora
Love this idea!!
Lisa
One more thing that is totally unrelated to this post, but I saw on one of your instastories - Bog Boots - I just busted through my second pair. So sad. But decided to go out on a limb and try a different neoprene rubber boot. Went with the Alaskan Xtratuf - wore them all weekend and let me tell you, they are the most comfortable boots I have owned. Check them out - there are many different ways to wear them too, which is an added plus!
Lisa
Cute sweater, by the way :-)
Lisa
Fantastic - if you love fire so much, you should look into Swedish Fire Logs! Would love to see you post on that
Nicole
Oooo, those look neat!
David in Oakville
Wait, am I the only one who noticed that the first thing she lists when she realizes she has not done it all and there is still lots to do, is CASTRATING A BULL! (insert YIKES emoji here!)
You and Dr. Freud could have a long long talk sitting around your hot stove. And you won't be talking hockey, hockey sticks maybe.
Jan in Waterdown
Puck, yeah!
Kat
I have panhandled! Way back when I was 16. Toronto, Yonge Street was closed off from any traffic. Musicians, artists and other hippie like people were able to wander around all nilly willy and set up shops on the street to sell their artsy stuff. It was a fantastic era. My sister who was one year older than I and myself panhandled the summer away and had the best summer of our lives. Now that I am 60 those memories are some of the best of my youth.
karin
Am I remembering correctly that you have to keep the sap at a certain temperature? Was it easy to regulate? And doesn't it take pretty much all day to boil it down? Although it looks like a pretty idyllic way to spend a day; you're just missing a good book in your hand!
Karen
It does take all day to boil down (depending on how much sap you have). And nope, you don't need to keep it at a certain temperature. You just need to stop boiling when the sap is boiling at 219 degrees because that means it's syrup. :) ~karen!
H.C.
Is that 219 Celsius or Fahrenheit degrees?
Karen
Fahrenheit. ~ karen!
Nancy Sanderson
Just when I think you must be starting to run out of fantastic ideas, you come up with this! Wow. I need to try it.
Also thank you so much for explaining how to change an outlet (a few posts ago). I too do my own electrical and no one has ever explained it so clearly to me before. I'm already more confident with wiring little jobs. Thanks
danni
This may be the answer to getting melted butter and hot clam broth on time during our yearly backyard clambake! The pizza oven is being used for apps (usually pizza, duh!) the grill being used for kid meat (burgers and dogs), the half barrel for steak... yeah!! Thanks again Karen!
Cathy
How do you not get your white clothing stained, ripped, or otherwise trashed?
Who is your mystery photographer ??
Robert
Cut to you finding a maggot in it right before you take it apart
Lois Baron
Chickens can get maggots in their bums???? My fantasy of chicken ownership might be slipping . . .
I love ideas on ways to have fires.
Robert Vellios
Great idea, maybe use some pieces of coal, would give significant heat for some fine but the screen would have to be beefed up. Maybe use expanded steel, much thicker than hardware cloth
Karen
Hi Robert! There's no need for coal in rocket stoves. Because of their shape they produce incredible heat just from small amounts of burning material. ~ karen!
MrsChrisSA
Oooo - as we have no Maple trees in SA, I was wondering if this would work as an outdoor stove type thing (we call them potjiekos here - basically a stew made in a black cast iron pot).
Think I will have to try that but the wood burning area may have to be a little larger!
Karen
Hi Mrs. Chris! The point of the rocket stove is for it to be tiny. :) It uses small sticks and pieces of wood and burns them at an incredibly high heat to the point that even the carbon monixide is burned up. Very little waste and hardly any ash at the end of burning for hours. So you probably don't need a larger wood burning area. (if what you're talking about is the spot you put the wood in the stove) :) ~ karen!
Lavada
Great stove; great tutorial.
LOVE the chair. Did you make that at some point as well?
Karen
:) No. It's one of my garden chairs. ~ karen!
billy sharpstick
Please be aware that burning galvanized metal can give off toxic zinc fumes.
Karen
You mean the hardware cloth? I don't think it should pose a problem based on the small amount and being outside, but good to know. Will not boil sap in galvanized buckets. ~ karen!
billy sharpstick
Yes. Idon't know if they make it without galvanizing. Maybe a charcoal grill grate, old oven shelf, pieces of steel rod laid in and anchored with a layer of sand. (Do not use old refrigerator shelves, either. I think they have toxic metal on them, too.)
Mary W
Didn't know about the galvanized poison - why do we drink out of it? Burning must release the yuk but what about it leaking into water? I fed my hogs from galvanized pails all the time. (They never lived long enough to die from natural causes but I ate their meat.) I cooked spilled corn/grits in water over an outside fire and gave them the cooled off mash the next day. It's been 50 years so imagine it didn't hurt me - no cancer. What about coffee in galvanized cups? I'm going to rethink a lot of metals, now.
Kristina
It's coated in zinc to help keep it from rusting. I don't think that you want to breath zinc fumes, but I don't think ingestion is a problem.