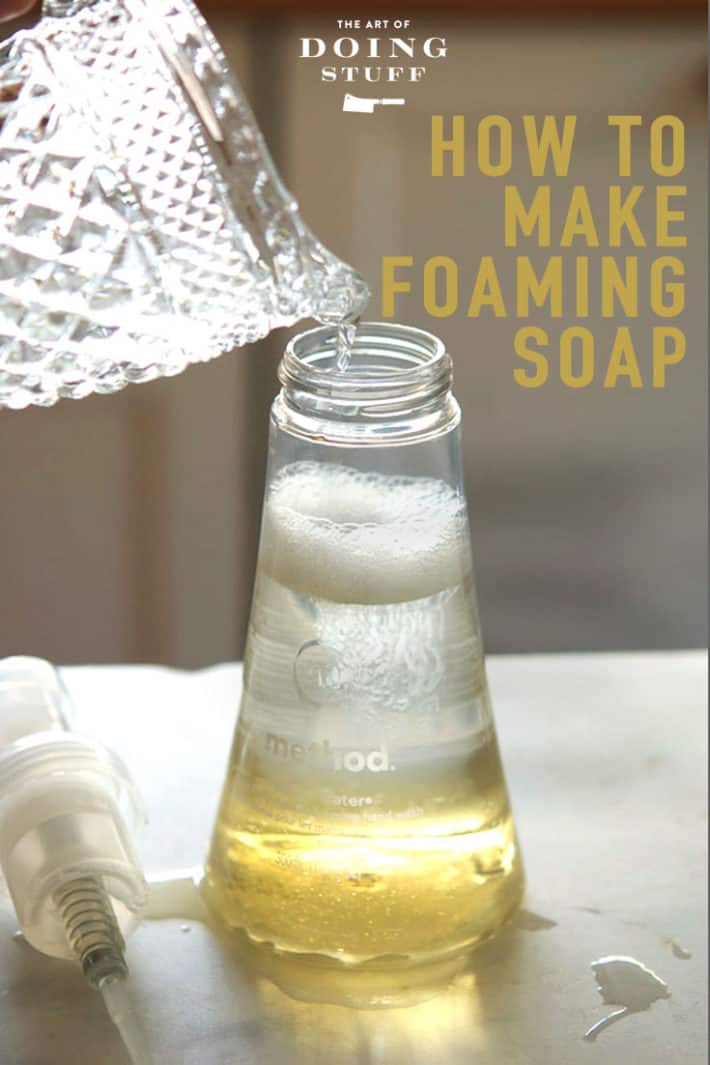
I'm going to go into this assuming you know foaming soap is a rip off. You know that, right? You pay the same or more for foaming soap & for that you get - less soap and more water. Here's how to make your own diy foaming hand soap.
It's the little things in life that get me all riled up and in a good mood. Remembering I have leftover pizza in the fridge, watching squirrels scurrying around trying to find hiding places for their nuts in the fall, finding out Home Depot now carries the 2" galvanized pipe elbows with a double sided, screw in end. You know. The little things.
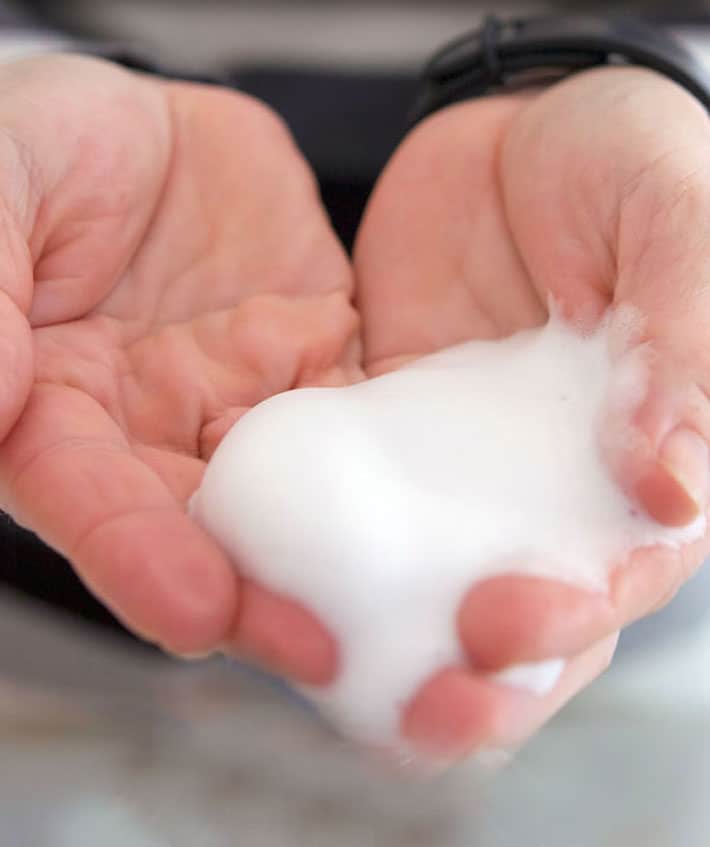
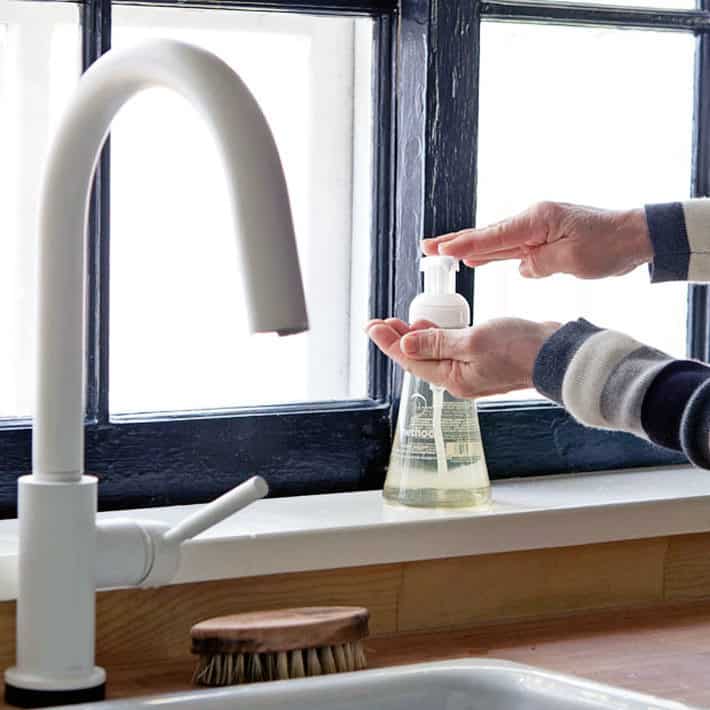
Foaming soap is one of those little things. I love it. It's easy. It comes out puffy and lathery without any work on your part at all.
That's right. I'll spend 12 hours stacking 2 full, bush cords of wood, but I'm too lazy to lather.
What of it?
The one thing I don't like about foaming soap dispensers is refill soap for them is harder to find than regular soap and is usually more expensive. Even though you're getting less soap.
500 ml of regular liquid soap
=
500 ml of regular liquid soap
wheras
500 ml of foaming soap
=
100 ml soap + 400 ml water
That means a 500 ml bottle of foaming soap refill is 20% soap and 80% water.
So I figured out how to turn regular liquid hand soap into the sort of soap that will work in a foaming dispenser. This winter I even made my own Frasier Fir scented foaming handsoap using Frasier Fir essential oil and The Unscented Company soap refill.
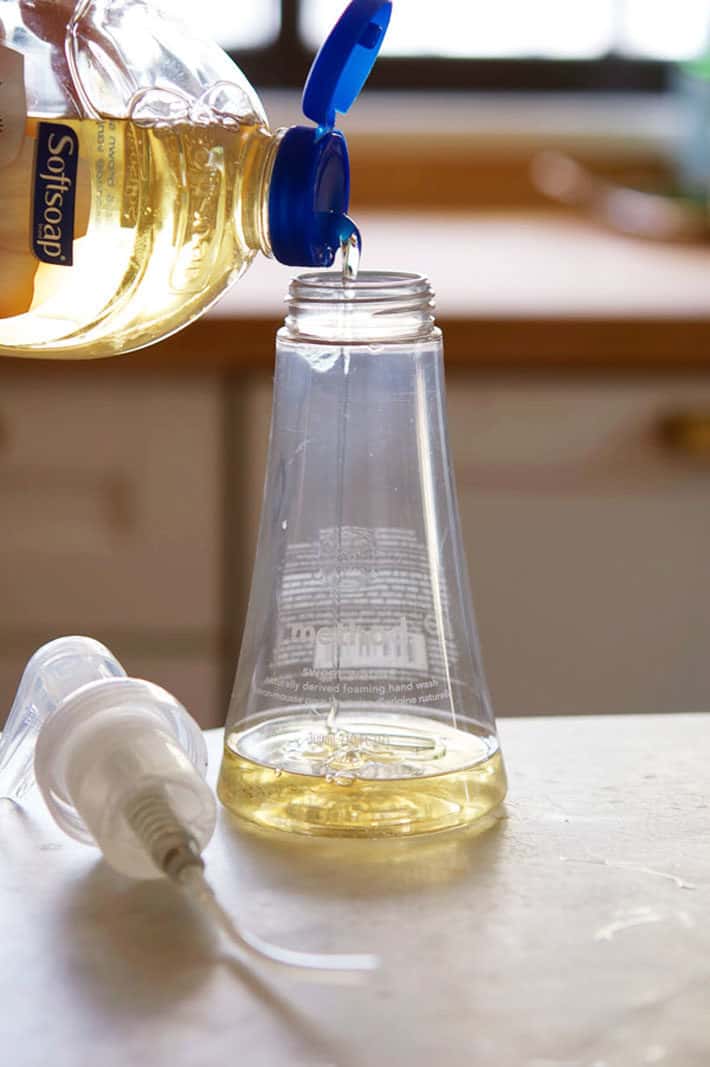
Regular liquid hand soap won't work in a foaming dispenser because it's too thick.
So genius me decided I could probably just add water to it to thin it down.
Genius me was right.
Getting the proportions right isn't even difficult. It's pretty forgiving. It's foaming soap, not an atomic bomb.
Table of Contents
Can You make Your Own Foaming Hand Soap?
You CAN indeed make your own foaming hand soap. But for the soap to foam you need a special foaming soap dispenser. If you've ever bought a foaming soap that's in a dispenser this technique will work in it.
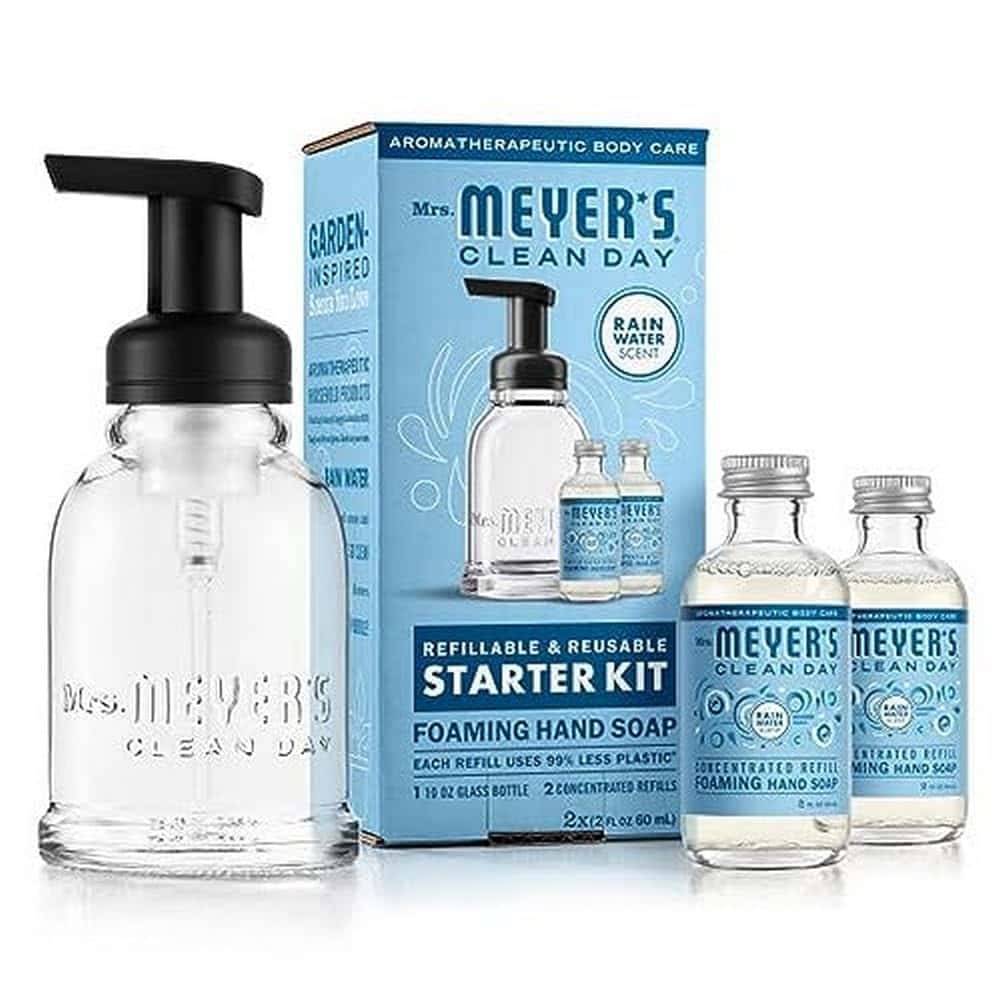
Mrs. Meyers (not a sponsored post) even has a foaming soap kit with a glass foaming dispenser, and 2, 2 ounce bottles of refill soap. Just add water.
What Makes Foaming Soap Foam?
The reason the soap foams has nothing to do with the actual soap. It's the way the soap is dispensed. Foaming dispensers add air to the soap as you push down on the foaming pump. If you take a look at your foaming soap dispenser you'll see the soap is held in the main chamber, and then attached to the pump there's a smaller chamber. It's that chamber that forces air into the soap as you pump it out.
Would you like to save this stuff?
Is it Better Than Regular Soap?
Aside from the fun of having your soap being pre-foamed for you, foaming soap is actually better in many ways than regular liquid soap. Here's how:
- People use less soap when dispensing it from a foaming dispenser. This makes it more economical and means that foaming soap lasts longer.
- People use 15% less water to lather with foaming soap so that's less water use which is environmentally friendly. If you only use water to rinse your hands and don't add water for the initial hand washing, using foaming soap will save 45% of the water used during traditional hand washing.
- Using foaming hand soap reduces the amount of soap you use for each hand washing which in turn means you get more hand washes out of each package. This means you're reducing the amount of packaging used.
How to Make Foaming Soap
- Mix 1 part liquid soap with 4-6 parts water in a foaming soap dispenser.
- Slowly mix by gently turning soap dispenser until incorporated.
The higher ratio of water you use the more cost savings you'll have but the less foamy the soap will be.
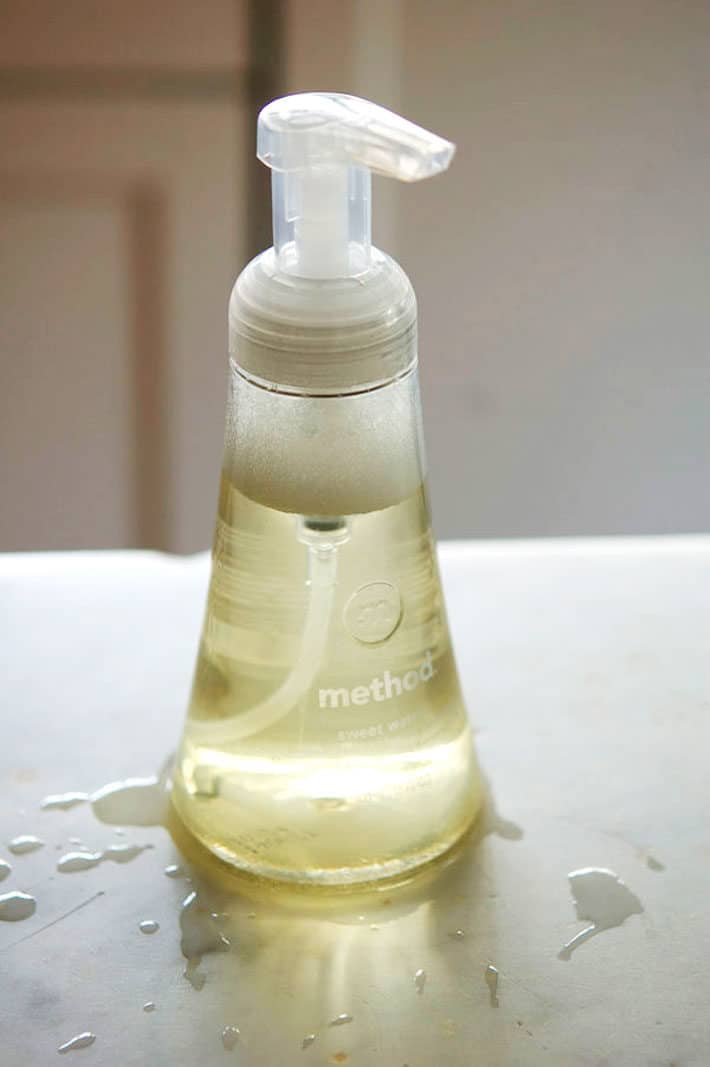
You can use any foaming soap dispenser you have and any liquid soap.
But if you plan on doing this a lot I'd recommend getting a nice, heavy glass foaming soap dispenser.
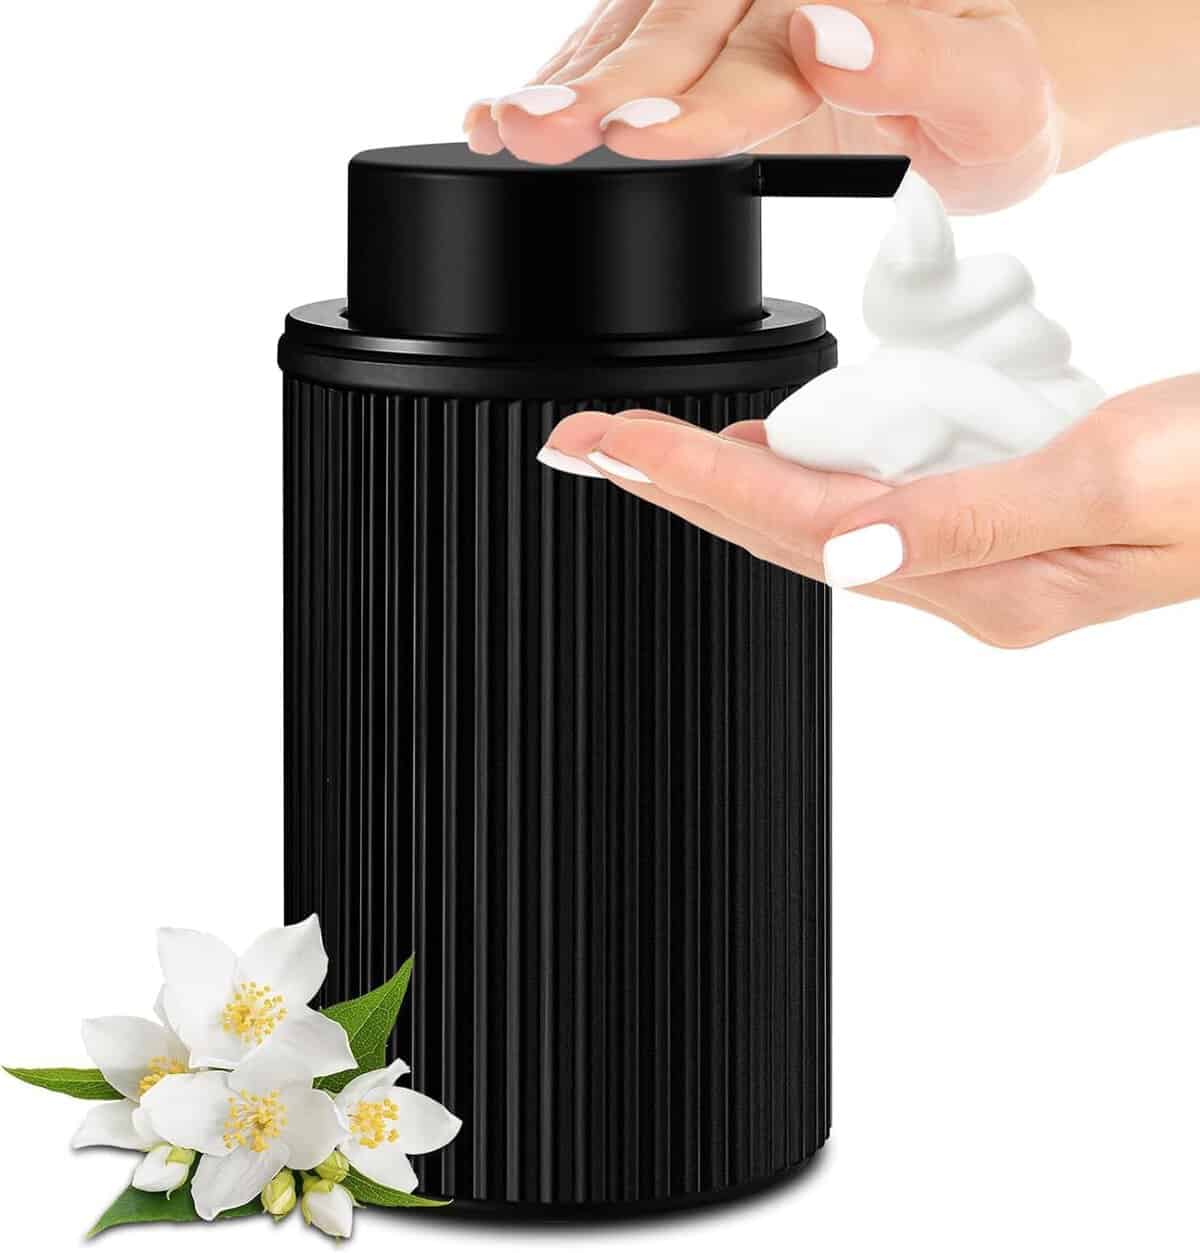
I like this black glass dispenser. It's solid and heavy, so when you're down to the last bit of soap your dispenser won't flip over or tip like the lightweight plastic dispensers sometimes (always) do.
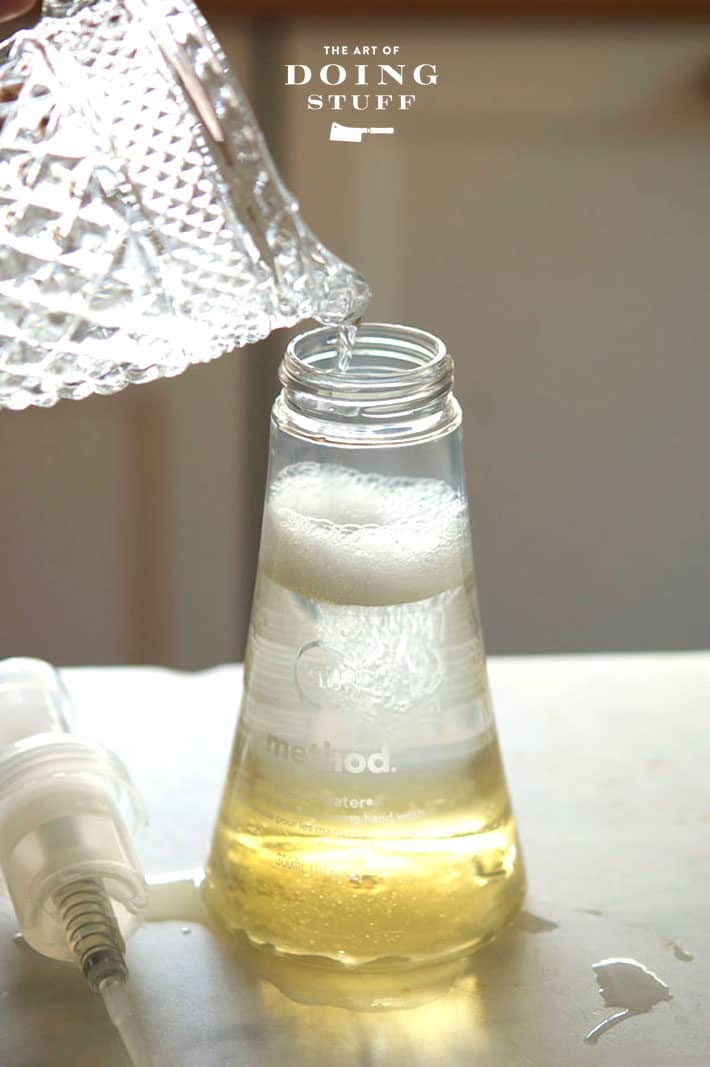
To mix the water into the soap you just have to do it slowly and gently. Just tip the container back and forth slowly until the water is incorporated with the soap.
I wasn't even going to do this tutorial because it's so logical and so easy but I thought the same thing when I did a post on How to Peel a Peach. I figured everyone knew how to do that to and as it turned out … they didn't.

If the screw top of your foaming dispenser fits other jars with a screw on lid that are more attractive, then you could attach it to that the same way I did in this billion year old post Pouring spouts and Bottles.
If your foaming dispenser screw top is an odd size then you can just slip the whole thing into a nicer container so it's hidden. If you can be bothered. My dispenser actually fits into a black ceramic vase perfectly. It would have been great if I'd taken a photo of it. But I didn't. Cause I'm not quite as geniusy as we thought just a few paragraphs ago.
And that's it to DIY foaming hand soap. That is all it takes to make me happy. Soap that self lathers and having a brain large enough to figure out how to make it myself.
Which in terms of brain size puts me right up there with your average nut hiding squirrel.


felicitas loranger
I used your recipe for pint mason jar and my ratio is 1 part soap x 5 parts warm water, premixed it measure cup with warm water and PERFECT FOAM!!! SO far so good! Thank you for the recipe.
Karen
You're welcome Felicitas! karen
Emma Doorish
Could you use Castille soap
Char
I am using an electric foaming soap dispenser and followed the instructions but have too many large air bubbles in with the foam (it does foam). Should I add more soap or water (the dispenser has been sitting for a couple of days waiting for bubbles to dispense but that hasn’t happened yet)
Beth Stanton
I use 3 -4 parts soap to water. I found thad adding the water to the soap after it is warmed works best. The foaming dispenser also makes a difference. I used a special glass container and it didn't work. So, I use a recycled "method" brand dispenser and it works very well. I usually take a liquid soap that I really like and diluted to make foam soap. In my experience, most soaps are fragranced too heavily so turning them into foam soap dilutes the smell.
Jo
I totally agree ! I am very nose sensitive and prefer no fragrance. There are a few I love, like lemon and a few others, but I too make them light scented.
Sanjay Sridharan
Thank you, Karen! In tried it and it’s looking good.
Karen
Excellent! ~ karen
Sandy
What a lovely, lovely site I stumbled upon. I was looking for a recipe to make "foaming hand soap". I love your sensible attitude, with a side of humor. Had to scroll down and then found "gardener's soap" Here's to a new follower from Sunny Florida! Thank you so much!!
Karen
Welcome Sandy! ~ karen
Carolyn
This my second time trying to make the foaming hand soap. Twice I have used Dawn Ultra (original scent) and both times the soap is watery. I use the ratio, 1/4 cup soap to 1 cup water and use a foaming dispenser. It does foam, but is to watery. What am I doing wrong? Please help !!!
Karen
Hi Carolyn. You may need to play around with it a tiny bit. If it does foam (thanks for saying that, it helps) then it's your ratio. If it didn't foam, then I would say it's your dispenser. Just play around to see what ratio works for your Dawn Ultra. It sounds like you probably just need a tiny bit less water. But just in case I'd also try it in another foaming dispenser in case that one isn't working at full capacity. ~ karen!
Carolyn
Thank you so much Karen for the helpful hints. I didn't know if the mixture was to thick(cut back on the Dawn) or to thin(less water)! I will play with it and figure it out. I just didn't know where to start!! Thanks again for your help!!! - Carolyn
Leslie
My dispenser is automatic which is awesome with raw chicken on my hands. My soap was perfect for about 5-6 months then got splattery. I think my ratios were off. I did the clean the tube etc. I found your soap ratio and made it. The first day it was perfect and then it got watery and splattered again. Help
Karen
Hi leslie! I have no idea I'm afraid. :/ If the very same solution works for a while and then doesn't I'd say it's either the liquid soap you're using or the dispenser. The foaming dispensers don't seem to last a lifetime. They get ... weird. ~ karen!
donna
when you diy your foaming soap after you gently mix does it stay combined or does it separate?
Karen
Hi Donna! It stays combined. ~ karen!
Leslie Lehrman
I bought it in December. It’s the touchless type. It just started a month ago with spitting so I did the cleaning routine. Didn’t help. I figured I had my ratio wrong so I found this one and it was perfect (like new) agin but only for a day. The standard foamers don’t seem to last very long either.
M_Birds
I’ve experimented with using a reusable foaming soap dispenser with natural soap berries and water. Turns out that if you leave the soap berries in the bottle they go mouldy; and instead I should have made a detergent with by simmering them in water and using the strained liquid. This post has inspired me to try some other additions like essential oils and perhaps the rubbing alcohol to make it a little more shelf stable. Hmm…
Mary W
The instructions I received years ago say that the motor generates the particles that heat any liquid by making the particles move rapidly and they need about 4 seconds to stop bouncing around the inside. If you open it beforehand, they will fly out the door. So I always wait till 4 seconds have passed (beeping) and the particles don't come shooting out into my head or chest - I would think that is a greater chance of damaging a body inside! My comment was meant to be snarky not mean as I LOVE how you research everything in a down to earth way that I do believe. Still use and really love the frying pan you suggested - a real winner.
Mary W
OK genius - why is it that manufacturers get away with not telling you the dangers of opening the micro wave BEFORE the 4 second beeper goes off? A squirrel may know the answer but operating a microwave may not be in his tool house.
Karen
Hi Mary! From anything I've read there is no danger in opening your microwave before it beeps. Did you read something somewhere that's worried you? ~ karen!
Aly
I don't know how a microwave discussion ended up underneath a post about making foaming soap... BUT... FYI - there's a basic little switch that turns off the microwave when you open the door. Well, fun fact, this can stop working. It happened to my microwave. I *always* just open the door - or used to, till one day I opened the door and it kept running! I panicked, shut the door, and hit cancel. This wasn't an old microwave, either. It was a 2-year old Whirlpool over-the-range model. It sometimes works and sometimes doesn't now, but I'm not taking the chance anymore, so I always turn off the microwave before opening the door now. Anyway - food for thought. Nice blog!
Karen
Thanks for the info! Yet another thing for me to be afraid of in my house. Centipedes will always be #1 though. Much scarier than a microwave. ~ karen!
Marcia
This is such a good idea! I started doing this when you posted the directions the first time and used the empty container from the expensive foaming soap. At first I used a chopstick to blend the water and the soap, but then i realized I could just mix it together in a measuring cup and pour it into my bottle premixed.
I have a couple more hints that took me most of my life to figure out, but when I did it was a true light bulb moment. I use two binder clips to keep the dish towel I put on my stove handle from constantly falling off. I overlap the ends and put a clip on each side. Voila! My second tip is to fold tablecloths with the wrong side out. You don't have to flip them over when you put them on the table this way. Much easier. You probably already do this, but it was a genius moment for me.
Karen
How many drops of essential oils do you add? Does it ruin a plastic container?
Karen
Hi Karen. I use about 12 drops of essential oil. I haven't noticed any ruining of the container. ~ karen!
Louis Eller
Great Info, I started doing the same thing during the pandemic...But I use a mix of; Mix 1 part Dawn liquid soap with 2 parts of 70% Rubbing alcohol and 4 parts water in my glass foaming soap dispenser.
Kipley Herr
Another advantage is that it doesn't drip across the counter from the dispenser to the sink.
Monica
The link to the black glass dispenser takes you to the Mrs Myers dispenser. Boo hoo. :( Halp please!
Karen
Sorry Monica! I've fixed it. Here's the link to the black ceramic dispenser.
Monica
Thanks! My dispenser came with absolutely no instructions, but a plastic vac with another small shaft tube. Gonna have to wing this one and figure out where to store the spare for when I need it. I am guessing it is a spare. 🙄
Karen
I usually just throw those parts out knowing that when I finally find them in a drawer in 2 years I'l have no idea what they are for. That's my method anyway.😆 ~ karen!
Cowa COOK
Thanks for your genius posts! Thought you'd want to know, in your paragraph "How to Peel a Peach" the word "to" is misspelled - it should be "too" as follows: "I figured everyone knew how to do that TOO and as it turned out …