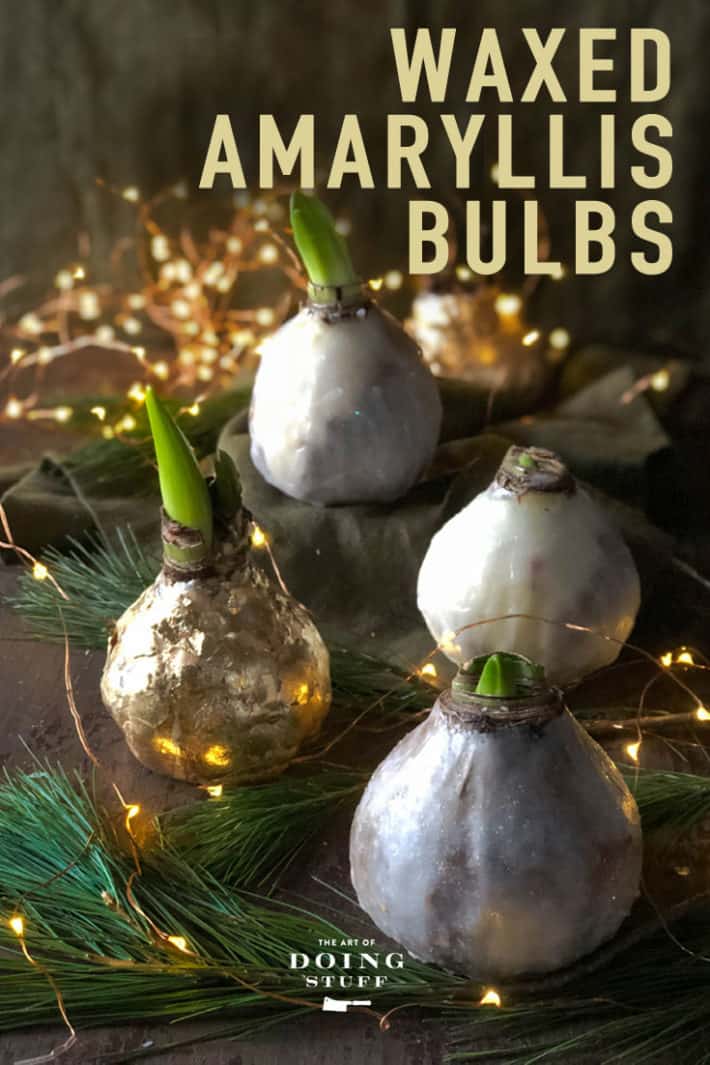
An Amaryllis that grows without any water, a vase or general care. Just stick it on a table and walk away. What is this sorcery? Waxed Amaryllis bulbs. Here's how to make them.

Now is the time to start thinking about getting some Amaryllis bulbs if you'd like to wax some so they're ready to bloom at Christmas.
Table of Contents
What's a waxed amaryllis?
Years ago I saw Amaryllis bulbs that had been dipped in wax at my local garden centre. I didn't know what they were and figured they were just Amaryllis bulbs that had been dipped in wax to look pretty. At around $34 for a bulb I wasn't intrigued enough to read anymore about them on the box.
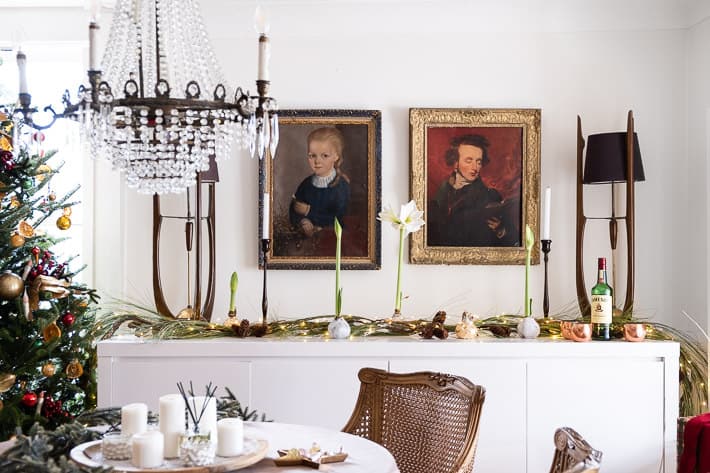
Fast forward to this year when I saw them again and realized the magic of them is the fact that you can just place them anywhere and they'll grow. Along a mantle, down the centre of a dining room table tucked into greenery. They're less expensive this year, around $20, but they're still a lot more than a plain Amaryllis bulb - which is between $8-$15 per bulb depending on the rarity and quality of it.
omgomgomgomgomg. THIS is what my DIY dreams are made of. I got to work immediately figuring this out.
Did I mention this would make a GREAT hostess gift this season?
After some online research and reading on Amaryllis bulbs I got a handle on it. The wax part was fairly obvious. Wax would hold the moisture in the bulb. But according to the makers of these wax bulbs there was some super secret process the bulbs went through to make sure they'd bloom without additional water.
Since it was pretty easy to figure out how they got the Caramilk into the Caramilk bar I was pretty confident I'd crack the secret to the waxed bulbs.
I gave it some thought, did some more research and decided the two things you'd need to do to ensure success was twofold.
1. Soak the Amaryllis bulbs in water so they're fully hydrated before you wax them.
and ...
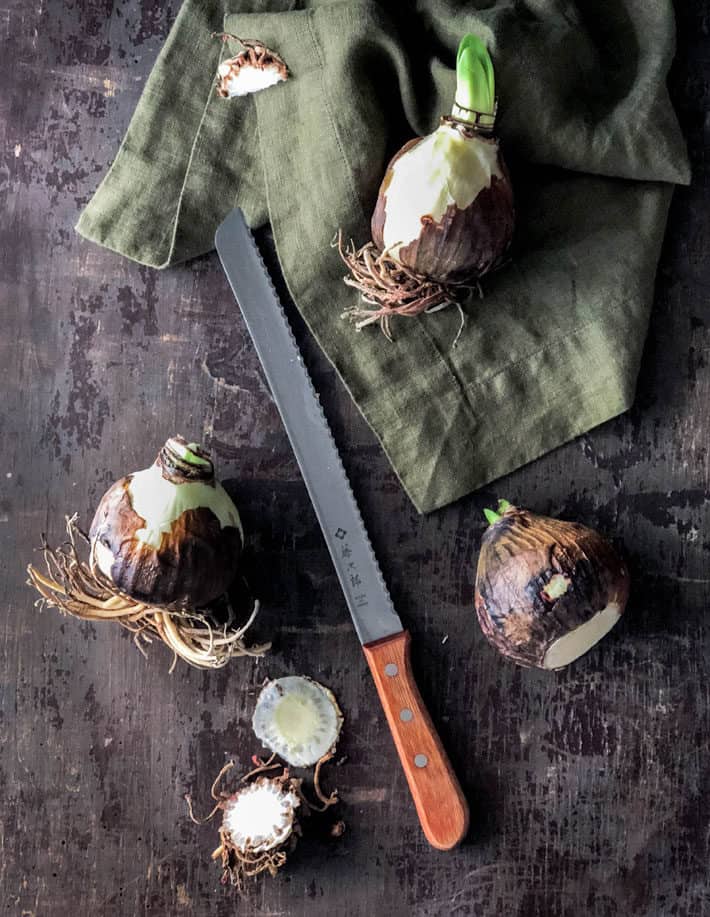
2. Cut off the bulb's basal plate (the flat part the roots grow out of) to shock it into thinking it's dying which forces it into trying desperately to reproduce itself - by flowering.
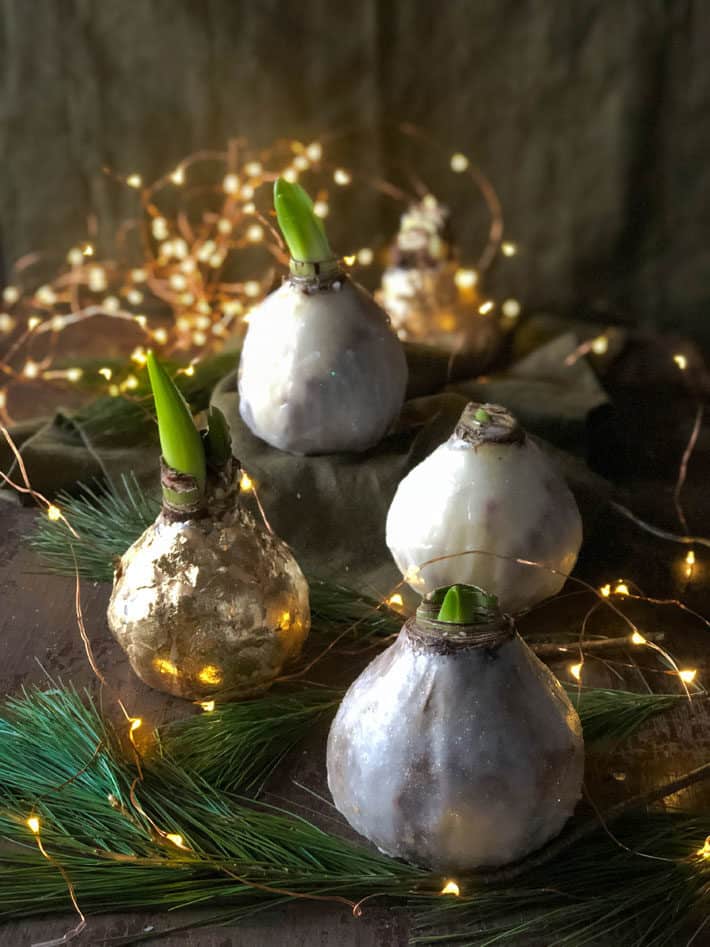
My experiment seems to have worked. And I have to say I like the way these homemade wax Amaryllis bulbs look better than the store bought ones. For one thing, you can customize them.
At first glance I thought the store bought waxed bulbs were made with metallic wax, but it's just regular paraffin wax that's been spray painted.
If you have all the stuff you can also make coloured wax by mixing regular wax with wax dye, but I didn't do that. I just wanted a quick DIY not a whole "thing" that would end up costing more money than just buying one pre-made.
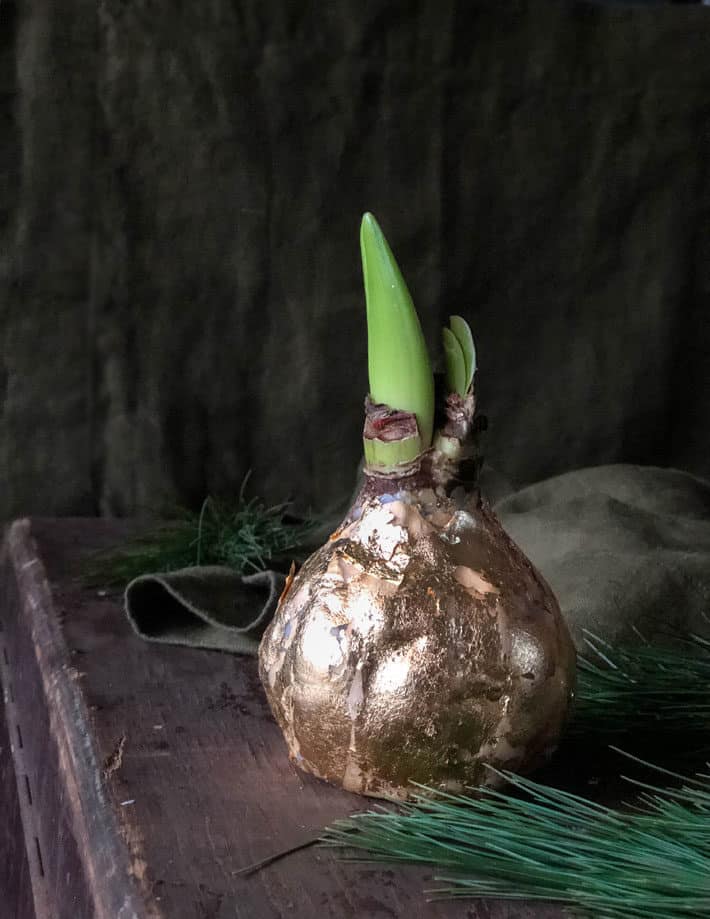
So instead of trying to make metallic wax for instance, I gold leafed the bulb afterwards with gold leaf I found at the Dollar Store. Other bulbs I left natural, with just white wax covering them, part of the darker bulb skin showing through and and most of the bulbs I sprinkled the white wax generously with white dollar store sparkles to make them glitter.
All in all this "I'm cheaping out" experiment has been a complete success and these waxed Amaryllis bulbs are going to be beautiful around the house throughout the holidays.
Here's how to do it:
How to Make Waxed Amaryllis Bulbs
- Soak Amaryllis bulb in lukewarm water for 4-8 hours.
- Cut off the roots, including the basal plate.
- Let the bulb dry for a few hours.
update: Wrap the bulb in plastic wrap before waxing it. - Melt wax (I used old candle stubs but if you don't have those use some paraffin wax) over low heat.
- Paint the wax on the Amaryllis bulbs from the neck down covering the sides and base.
- Gold leaf or cover in sparkles if glitzy is your thing.
- Place the bulbs in a warm area of the house to encourage growth.
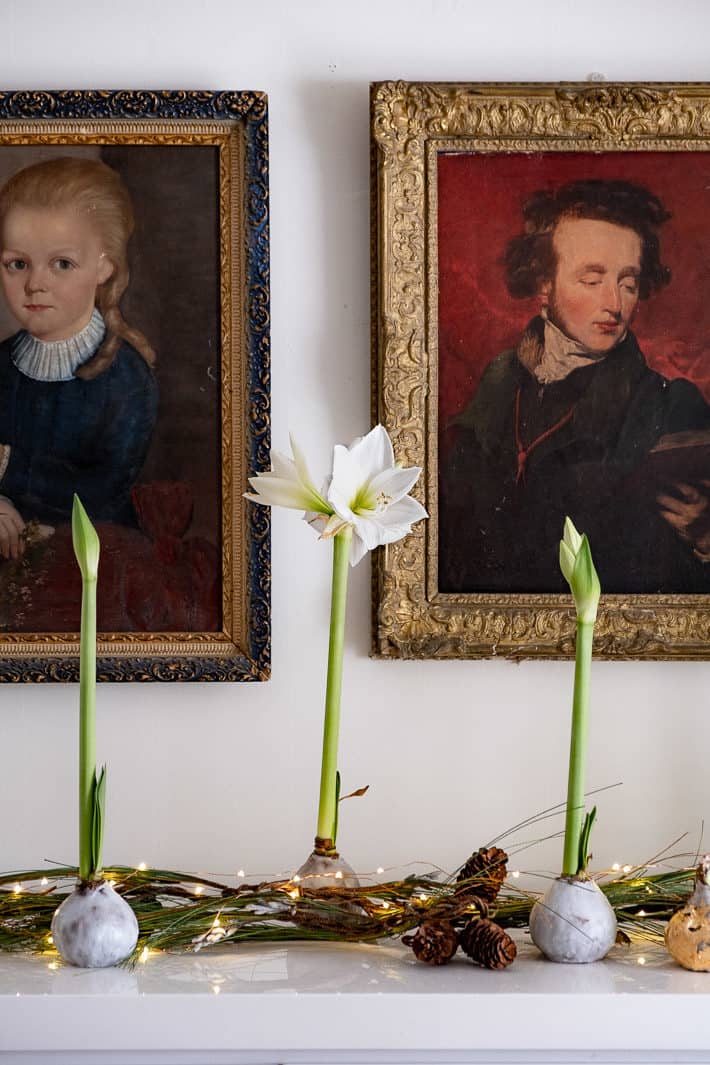
The length of time it takes to flower usually around 6 weeks with store bought Amaryllis bulbs. I can't give you a timeline on this because mine haven't flowered yet, but the flower bud has popped up out of the bulb so I know it's only a matter of time.
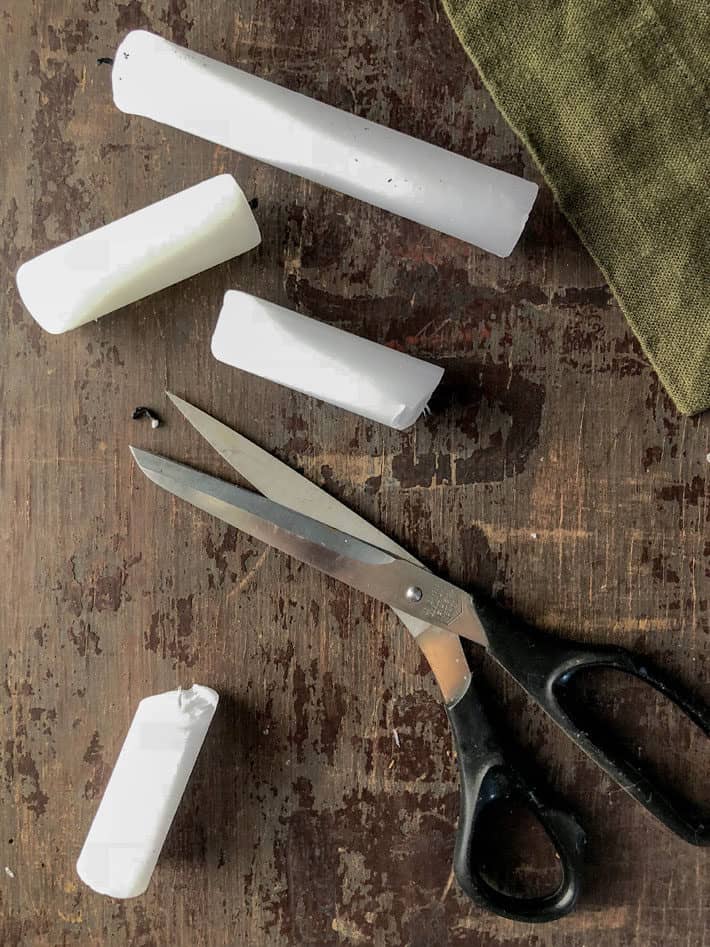
I save my short, burned candles all the time. Half the time I look at them in the cupboard and think WHAT am I saving this crap for. The other half I pull them out and think WELL thank the lord I saved this crap. (I also use spent candles for making homemade fire starters.)
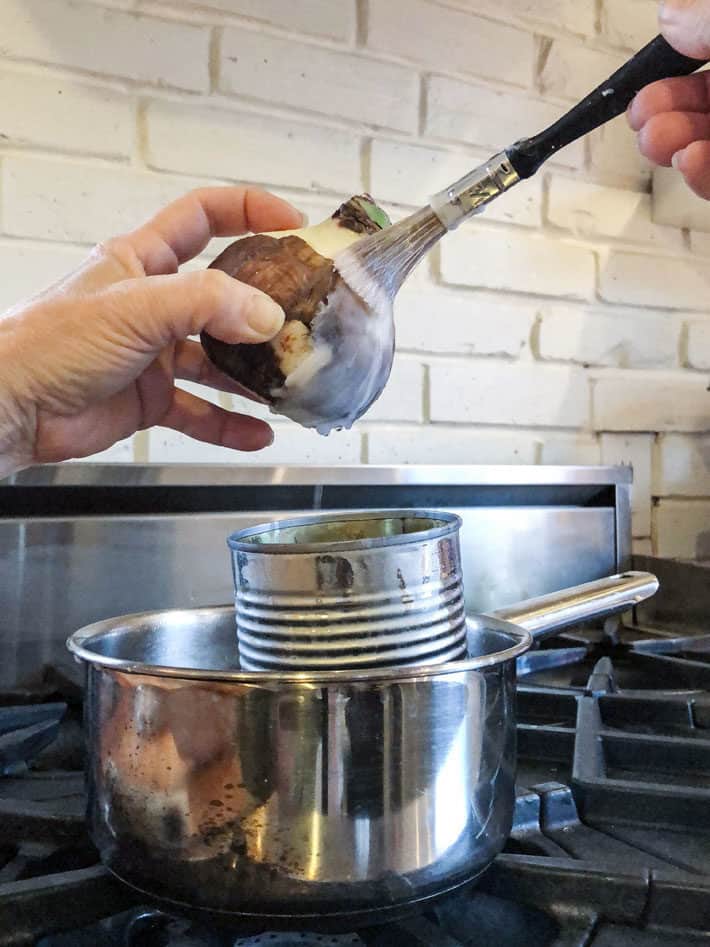
I didn't dip the entire bulb into the hot wax because I felt like it would be too much of a shock to the bulb. Painting it on felt more gentle.
Paint the wax on until there's a good thick coating of wax all over the bulb. It'll take several layers.

The gold foil is VERY fiddly to get on the wax. Make sure your wax is still hot when you apply the gold foil and press it into the wax with your fingers or the palm of your hand until you think it's really stuck. And repeat. Like a million times.
It's a huge pain but the result is kindda breathtaking.
The easier way to fancy up the waxed bulb is to sprinkle it with sparkles as soon as you're done waxing it.
I used white sparkles on white wax but you could do whatever you wanted. Green sparkles on green wax, green sparkles on white wax, gold sparkles on white wax ... how many more examples do you need?
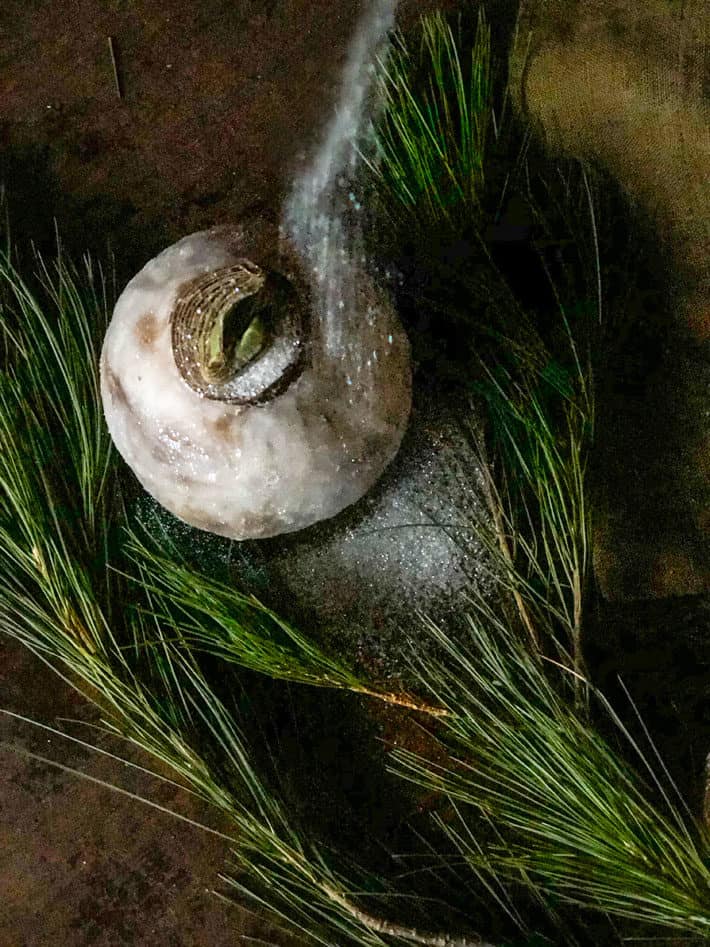
I've also left my wax drippy looking. I did that on purpose. If you want things perfectly smooth just smooth the wax out with your finger or the brush while the wax is warm.
Would you like to save this stuff?
How long do waxed amaryllis bulbs last?
It takes an Amaryllis bulb around 3 weeks to show signs of growth after planting it.
It takes 6-12 weeks for the Amaryllis to *bloom* from the day it is planted.
You can speed this process up by keeping the bulb in a very warm room of 27 C (80F). Conversely you can slow the blooming time down by putting it in a cool room of around 10 C (50 F).
Each amaryllis blooms will last about 5 days.
When to start them for Christmas blooms
Mid November.
This is a bit of a crapshoot because different varieties of amaryllis take different lengths of time to grow and bloom. But generally speaking, for Christmas blooms, you should plant your bulbs in early to mid November.
Bulbs you buy in a box kit from the grocery store or garden centre may have already sprouted in the box! If they have, you'll get blooms a few weeks earlier - so plant them accordingly.
If a bulb shows NO signs of green growth, it will take a few weeks longer to produce a bloom.
Can you regrow the waxed bulbs
If the entire growth plate at the bottom of the bulb isn't completely cut off, there *is* a possibility that the amaryllis can live another day.
So when your amaryllis is done blooming you can either throw it in the garbage, scrape the wax off and compost the bulb, or scrape the wax off and replant the bulb in soil.
For replanting follow these steps.
- After your waxed amaryllis has bloomed and the blooms have finished, cut the bloom stalks off, but leave the leaves on the plant.
- Scrape the wax off of the bulb.
- Plant it in soil and continue to care for it like any other house plant.
- Once spring weather arrives and frost is no longer a threat you can put the potted amaryllis outside for the summer, taking care of it as necessary. Amaryllis plants need little water so don't overwater them. You can plant them straight in the garden as well.
- Dig it up September 1st, cut off the leaves and a lot of the roots (leave 3-4" of roots)
- Place bulb in a paper bag and store in a cool room to dry out and go dormant.
- On November 1st, replant them in a small pot.
- They'll rebloom in 6-8 weeks.
*you don't have to immediately pot it up after 8 weeks. You can wait another month before potting it up if you like.
Waxed bulb tips
- Don't soak your bulb in water for longer than 8 hours. It can turn to mush.
- When you cut off the basal plate make sure you do it straight so your bulb isn't tippy. Your flat cut is what will keep the bulb stable.
- If you're using spent candles for your wax, like I did, cut the burnt part of the wick off otherwise it'll get your wax dirty looking. Don't worry about getting rid of the wick, the wax will just melt away from it.
- For heating your wax I HIGHLY recommend putting the wax in a tin can and setting that can in a pot with some water in the bottom. It keeps your pots clean. Plus if you have leftover wax you can just put the whole can, wax and all in the cupboard and pull it out when you need to wax something else.
- Don't forget to wax the bottom of the bulb. The whole point of waxing is to help the bulb retain moisture so as much of the bulb needs to be waxed as possible.
- I used Dollar Store gold leaf which was basically a mess of small gold leaf pieces. To make things easier you can buy whole sheets of gold leaf.
Amaryllis Bulb Buying Guide
When you buy your bulbs for waxing pay special attention to the size of the amaryllis. Amaryllis with HUGE flowers are going to be very top heavy and have a tendency to tip over.
Also pay attention to the bloom time. Different bulbs take different lengths of time to bloom. To get your flower to be on full display at the time you want you need to know how long that particular variety takes to flower.
Most grocery stores carry box kits of Amaryllis bulbs and that's where I usually pick mine up. But if you want something other than the standard white or red flowers there are speciality bulbs you can order online.
"Charisma"
This red and white specialty Amaryllis looks paint spattered.

![]()

![]()
"Coral"
Not in love with the traditional red & white? This orangey coral coloured ones would look beautiful.
More subtle, but still a deviation from red or white.

![]()

![]()
Sure it's red ... but look at it! A double amaryllis with double the petals.
Those are just a few. If you go even further into Amaryllis world you can order from specialty places like Brecks but they're already starting to sell out of a lot of bulbs.
Making these waxed bulbs is fun to do. Like, 100%, I should totally have a bulb waxing party. Which of course would be much more fun than any other sort of waxing party. It's easy, the results are great and it's weirdly satisfying to paint wax on a bulb then cover it with gold foil or sparkles.
Happy waxing.
→Follow me on Instagram where I often make a fool of myself←


Paige
What are the steps if you want to rewax the bulb for next Christmas? Would you simply skip repotting it after the dormancy stage, going from the paper bag to soaking the bulb for 4-8hrs? or does it need to go in a pot for a time before waxing the bulb?
Thanks
Karen
Hi Paige. There's no need to repot at that point. As long as they've done their prescribed weeks of cold/dormancy You can wax them. ~ karen!
Lynne
Thank you for all the great information on growing and caring for Amaryllis. I have one every year but never been able to have them rebloom. I now see how easy it is to do it the way you show. Also bought a couple of waxed ones. Thank you again looking forward to having them bloom. 😉
Karen
Hi Lynne. You're welcome! My amaryllis are currently chilling in my fridge. ~ karen!
Alison Wasson
Love your tutorial and going to have some late winter/Valentine gifts to give! I noticed your update about wrapping the bulbs in plastic wrap somewhere between the process of finished soak and dipping in wax. Could you clarify a little more? Do you leave the plastic wrap on as you dip it? That seems like a loose surface that would make the wax less adhering to the bulb. Or was the wrap to retain moisture after dipping? Only one other article suggested letting the bulb out(but not excessively) before dipping in the wax for adherence. I am ready to succeed! Thank you again for the how to’s and further info!
Charlie
Hi, I received a waxed amaryllis and the wax is cracked, broken at the top. Do I need to do anything to ensure its growth? More that half of the bulb is covered in wax still.
Karen
Hi Charlie. There's not much you can do now, but without seeing it I'd say it's probably O.K. You could try to rewarm the broken wax a bit with water or your hands and try to restick it to the top but it probably isn't necessary. I would think it will still bloom for you. ~ karen!
Charlene Brueggeman
Thank you
Susan Murphy
Thank you, Karen. I appreciate the explanation about the smaller bulbs!
Susan Murphy
Can’t wait to try this. Today! However, this post got me thinking . Can other types of bulbs be waxed? (Not electric). I haven’t found anything on the WWW, so I turn to you because you know stuff! Thank you!
Karen
Hi Susan! Most bulbs are too small to hold the amount of moisture needed for the months of growth they have ahead. Things like paperwhite or tulip bulbs. The easiest, cleanest way to grow paperwhites is in rocks. Do a layer of small rocks ont he bottom of a vessel, pack the paper whites on top and then surround with more rocks. When watering only add enough water to hit the top of the lowest layer of rocks. That way the bulb will have water for growth but won't rot from sitting in water. The rocks are heavy and help hold the paperwhite bulbs in place to prevent flopping. ~ karen!
Susan Murphy
Oops. I think I posted my reply in the wrong spot. Anyway, thank you! :)
Karen
That's OK.. :) ~karen!
Jan
Hello Karen, I have purchased these in the past but am having difficulty finding waxed bulbs at a reasonable price this year. I shall try your method. Do you think that I can use any type of paint or is a spray paint best? Thank you
Carol
My first try at waxing an amaryllis. I soaked, wrapped with plastic wrap and and added glitter. I’m not a glittery kinda girl but yours looked spectacular with it.
So far, so good…
Karen
Nice work! Seriously. :) ~ karen!
Karen
Ooo I love that container! ~ karen
Beth
I’m so excited to try this! So do you put the Saran Wrap on the bulb then apply the wax over top of the Saran Wrap?
Karen
Yes Beth! I'm actually debating whether to wax the bulbs I got this year or to plant a bunch of them in a big tub. ~ karen!
Linda Oxford
Hi,
Question about waxing Amaryllis bulbs. You added cover bulb with plastic wrap. Did not see that step in your photos.
Is that necessary?
Thanks,
Linda
Karen
Hi Linda. That's a new tip! It helps keep the bulb from dehydrating. I will be doing it myself for the first time this year and will add a photo when I've done it. :) ~karen!