If you've ever thought about making a tree stump table, fall is a good time to actually do it. That's right. It's tree stump season! Fall sees a lot of firewood deliveries and trees coming down in storms which gives you, the intrepid reclaimer, easy access to tree trunks. Let's get started.
10 years ago I made a tree stump table. It got shared, copied and posted about so much it's one of 3 posts that I consider to have kickstarted my blogging career (thanks in part to Design*Sponge loving it too.) That table still sits in my living room looking as good as the day I made it.
Stump tables, made out of tree trunks, are one part architectural piece, one part table, one part bugs. Don't worry. We'll get rid of the bugs.
The point is they aren't just a place to put your coffee, a stump table brings the outside in giving your room a cozy organic feel.
They can feel modern or completely hygge and organic. It depends on how you finish them.

FYI! You can also use these as bases for a stump table with a glass top.
These two tree stump ideas are for using them indoors and no chain saws are involved.
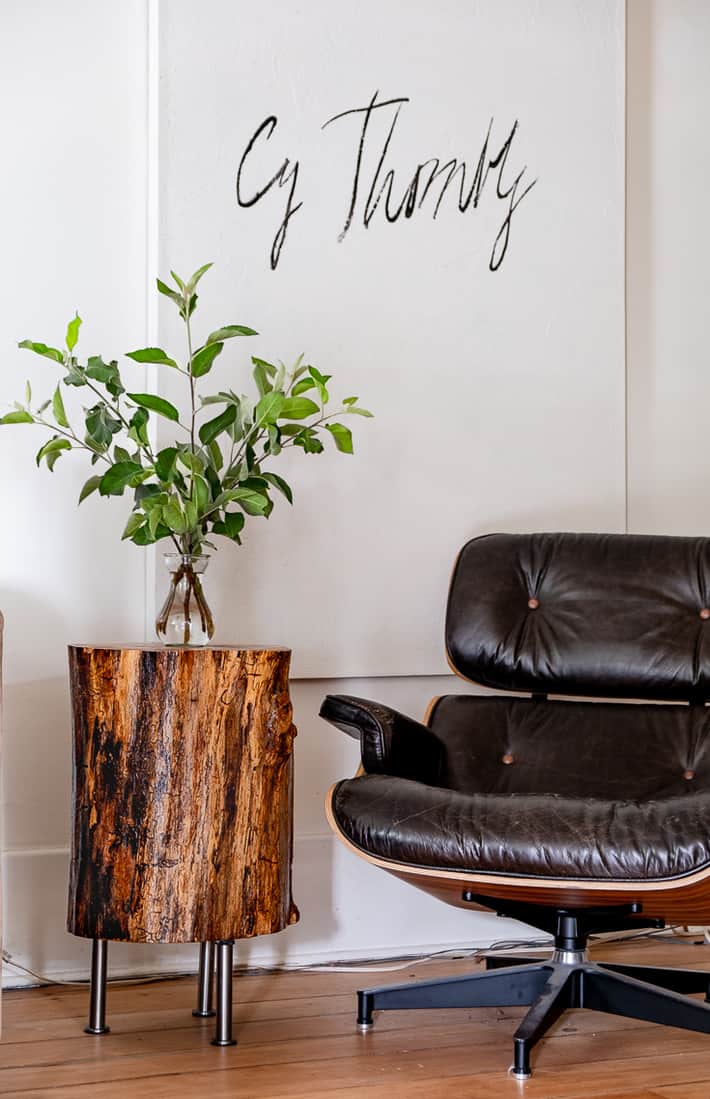
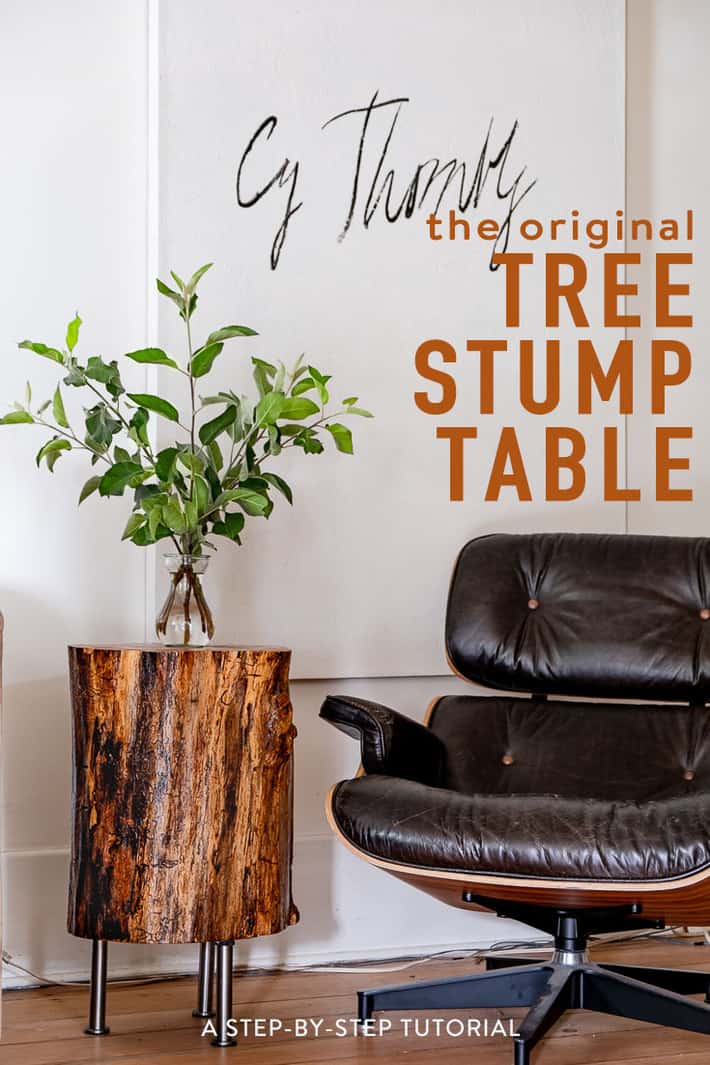
I'll show you how to make an unfinished table that's similar to the famous Crate and Barrel tree stump table and a finished one that sits on tall legs.
First the finished stump table that's on legs.
Table of Contents
Materials
- Tree stump
- Sandpaper (medium and fine grit)
- Polyurethane (high gloss, semi-gloss, satin … whichever you want) I used satin which has just a nice sheen
- Paint brush
- 1 package of 4, 6" Capita legs from Ikea (these legs aren't available at Ikea anymore but they ARE available on Amazon.)
- Drill and appropriate bits
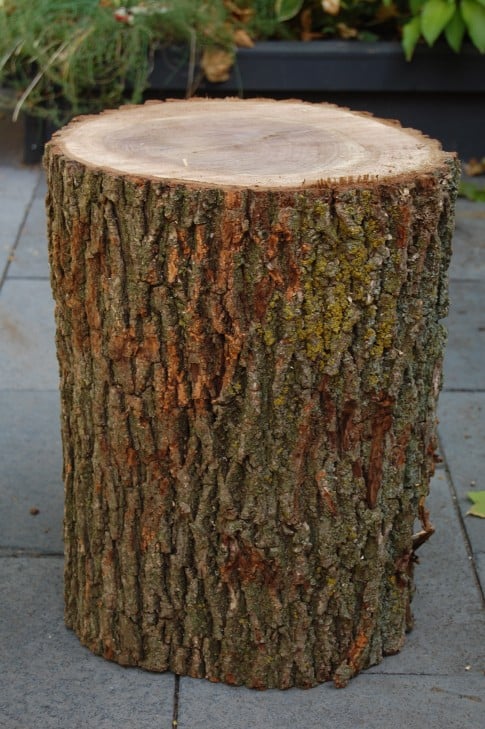
First things first. You have to get yourself a tree stump.
Where to find a tree stump?
Keep your eye out for city workers or private tree companies taking down trees. Pull over, ask them if you an have a section of a branch if they're big or the stump. Simple as that.
Call up places near you that sell firewood. They advertise a lot during this time of year so they'll be easy to find. That's what makes fall tree stump season!
I got my stump delivered with my yearly wood order.
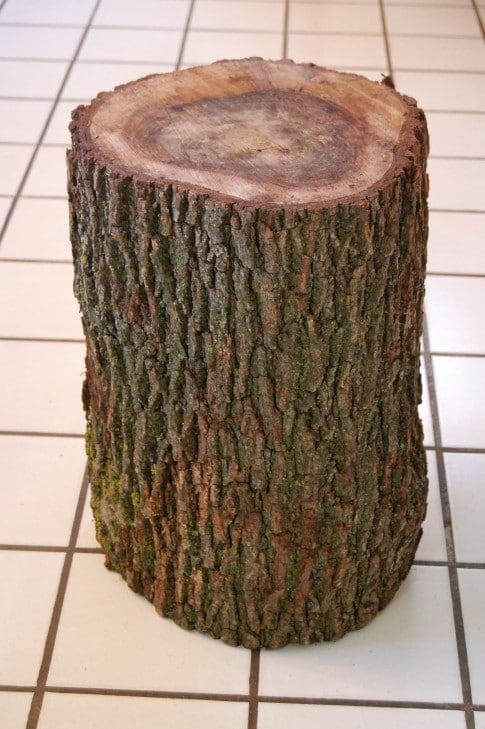
How big should it be?
It depends if you want your table to be on legs or sit directly on the floor. I like the look of legs.
Your legs will be 6 inches high, so figure out how tall your stump needs to be for where you want to put it.
Generally you're going to want a tall tree stump for this.
If your sofa has arms at 25" and you want it to be around level with the arms, then you need a stump that's 18" tall.
My stump is 15" across by 18" high, with the 6" legs it's a total of 24" high. This brings it to just below the arm of my sofa.
Steps
Step 1 DRY IT
Allow your stump to dry out for at least a month. It’ll lose several pounds and the bark will loosen, making step 2 easier.
Coincidentally if you allow yourself to dry out for a month you’ll lose several pounds too.
You can dry the stump outside for a couple of months, then bring it inside for a couple of weeks.
If your stump was already cut and dried from wherever you got it, you can just bring it inside for a couple of weeks.
Step 2 REMOVE THE BARK
Now the work begins. You have to remove the bark. Sometimes this is easy, sometimes it isn't.
The first stump table I made was from Oak. The bark just pulled off with my hands.
The second stump table I made was from Walnut. The bark was a nightmare to remove. I needed an array of tools and a 14' length of prayer beads.
To remove the stump's bark, you'll need these tools to do it:
A Hammer
A Prybar
After your stump has dried inside for a couple of weeks insert the prybar between the bark and the stump. Hammer it enough to loosen the wood then either keep hammering or pull the bark loose with your fingers. Keep doing this all the way around the stump until all the bark is off.
And yes, you do need to remove the bark. If you don't, over time it'll loosen and fall off on its own leaving you with a cruddy looking piece of crud as a table.
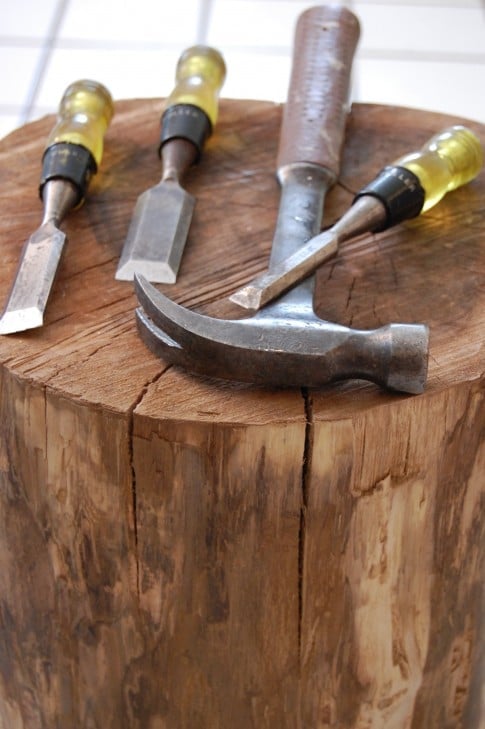

If the bark is particularly stubborn, like this stupid thing was ... do the same thing but with wood chisels. They're sharper and will cut through the fibres between the bark and the stump better than a prybar. Be careful not to hack into the wood with the chisel though.
Do not hack into yourself either. Wood chisels are sharp on all sides, not just the tips, so be careful.
Now your stump is cleaned of its bark.
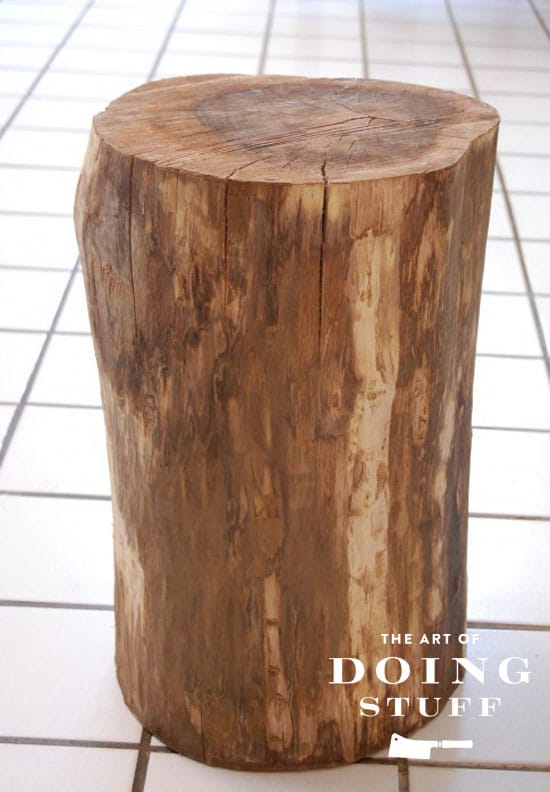
When it's dried out the stump might split a bit like this. That's O.K. It adds character.
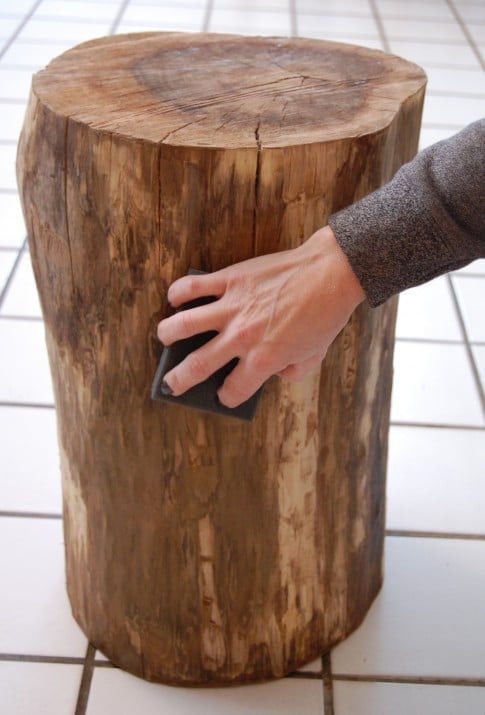
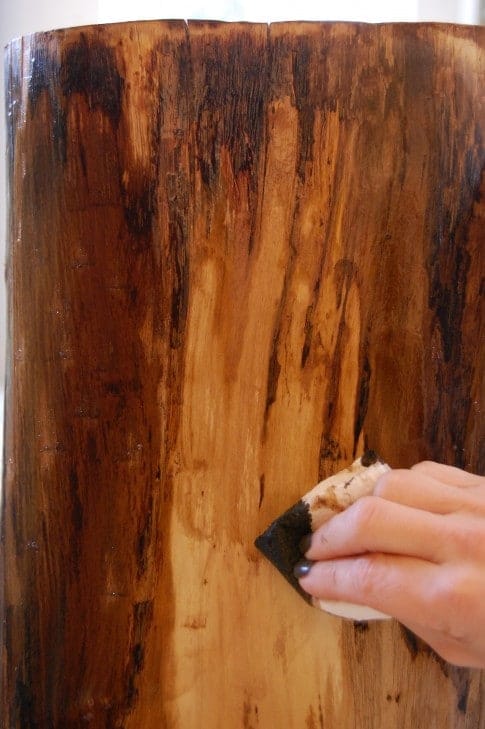
Step 3 - SAND IT
The stump now needs to be sanded to get all the little hairs and slivers off it.
You need a smooth stump. Use a variety of sandpaper grits to sand it smooth.

Start with the coarsest grit, gradually working your way to sanding the stump with the smoothest grit.
Get rid of all the hairs.
Sand until you can run your hand over the stump and it feels smooth.
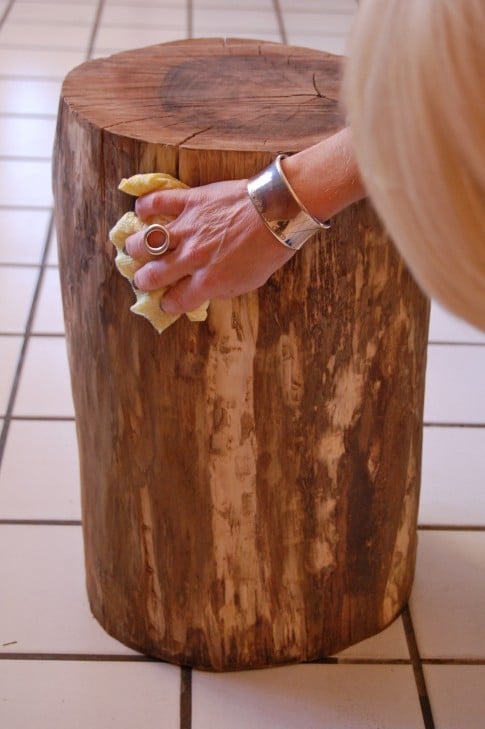
Once your stump is smooth wipe over it with a damp, lint free cloth or a tack cloth.
A lot of wood dust will come off. Keep wiping until your cloth comes away clean.
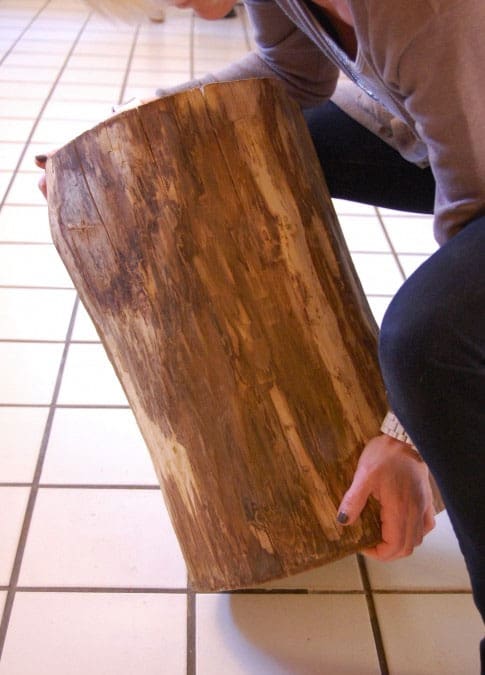
Now flip your stump over and get ready for the fun part.
Step 4 - ATTACH THE LEGS
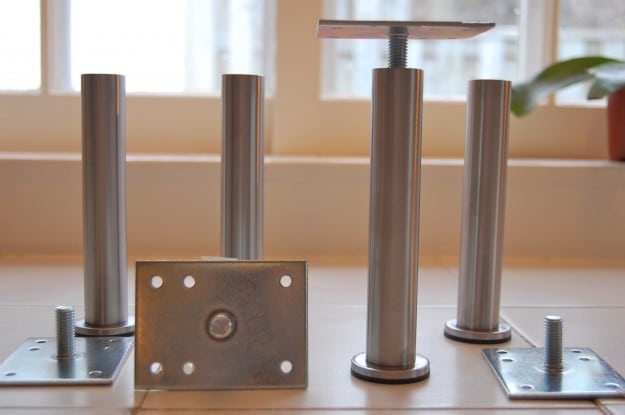
Get your pre-purchased legs. Like I said, mine are the Capita legs from Ikea which are soon to be discontinued. You can buy the exact Ikea Capita legs on Amazon though.
To make the end table more like the $900 Crate and Barrel one, ditch the long legs and use little bun feet like these instead. You'll also need a wider, more squat stump.
Each leg comes with a bracket that you screw into the base of your table.
Whatever kind of legs you get make sure the height is adjustable like these are. Adjustable legs on the table means you can make sure it's level without having to squish up a folded up piece of paper. Or if you're a certain age and type - a book of matches.
Don't forget. Adjustable legs are the way to make sure your stump table is level.
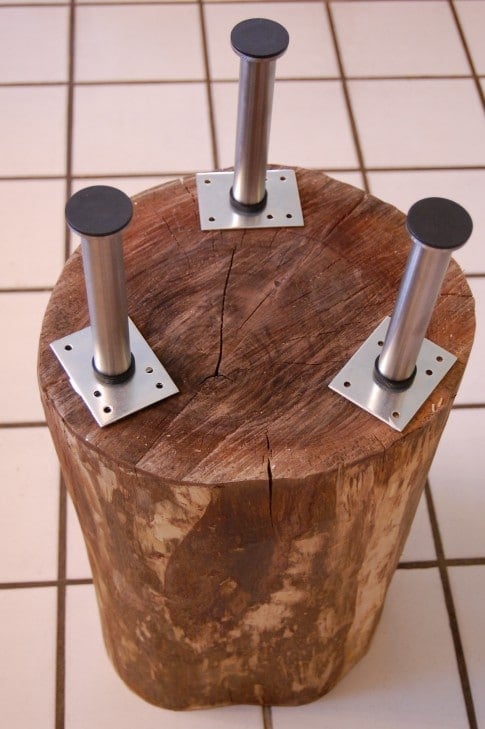
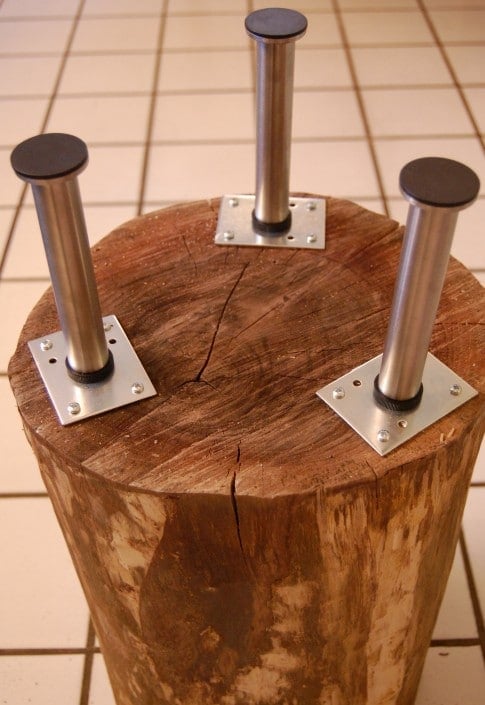
Place your legs on the underside of your stump. You can use all 4 legs or just 3. I'm partial to 3, but 4 is definitely more stable.
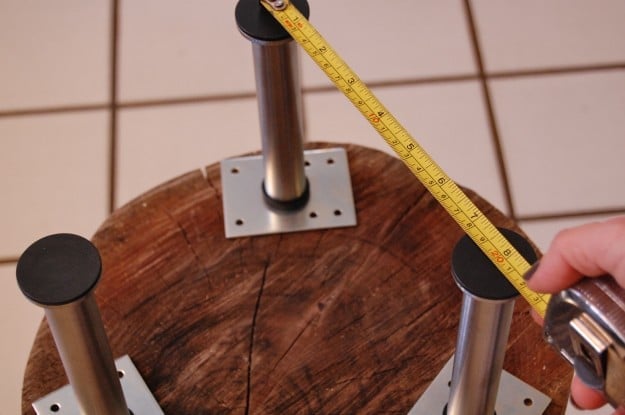
Use a measuring tape to make sure they're an equal distance apart.
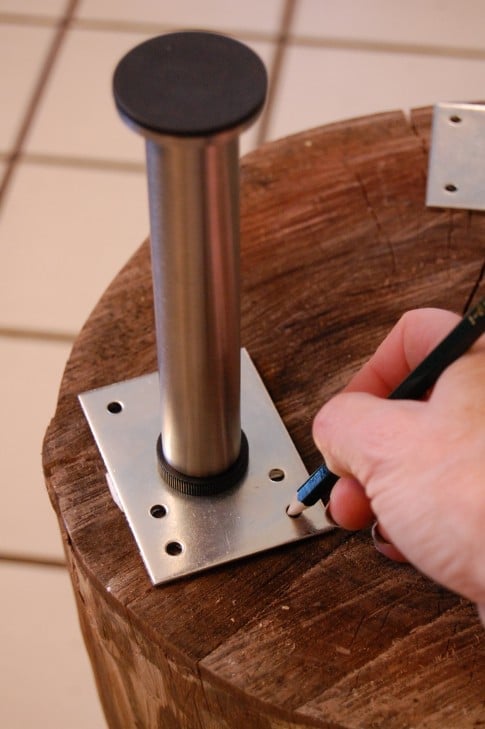
Once you have the legs positioned, mark the holes in the plates with either a pencil or a marker.
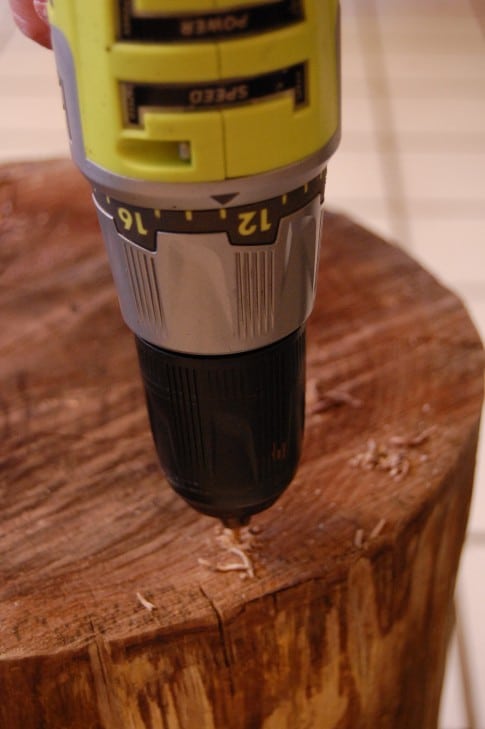
Remove the legs and fit your drill with the appropriate sized drill bit.
Pre-drill holes at the spots you marked for the screws.
Once all your holes are predrilled, place your legs and brackets back on and screw them into place.
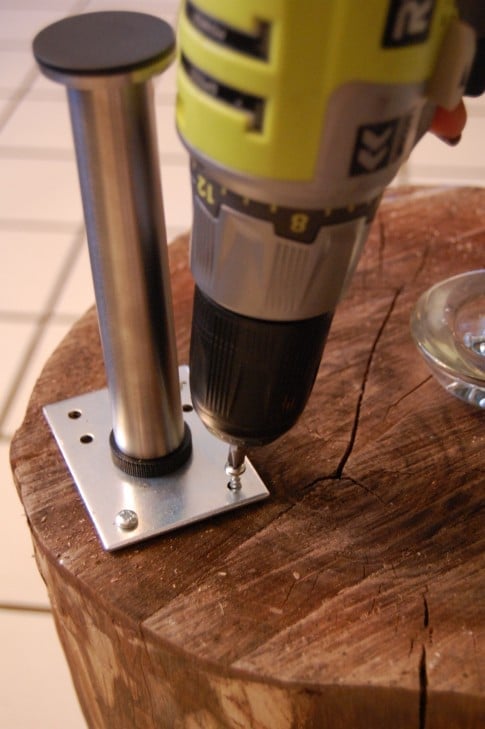
To make my life easier, I put all my screws into a little dish. Don't question it. Just do it.
Now all your legs are on!
Step 5 - STAIN & SEAL IT (OPTIONAL)
If there are any sections where you accidentally took too much of the wood off (it's lighter underneath) you can skim over it with some stain. I have a whack of different cans of stain so I picked the one I thought would match the best.
Appropriately, it was "Walnut" stain for this walnut stump.
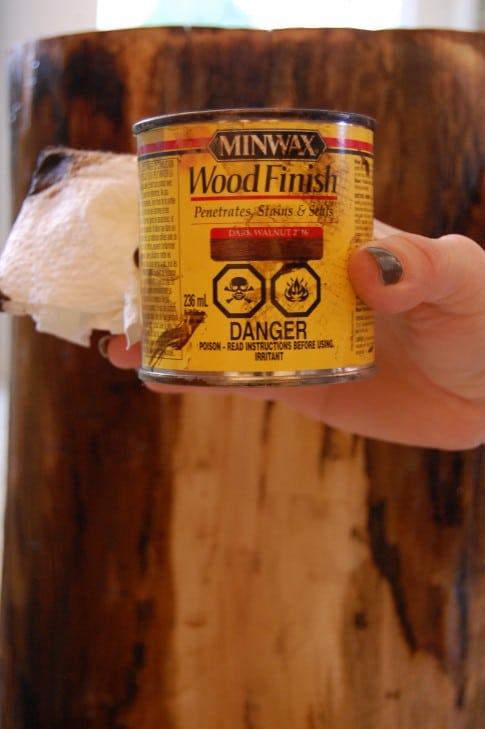
Just wipe it onto the light portion of your wood with some paper towel. It just darkens it up enough to make it blend in a little better. There will still be a colour variation, just not quite as distinct. Again, the look and colour and grain will be different depending on what type of wood stump you're working with.
The staining is a matter of choice. On my first stump table I didn't do it ... on this one I did.
Let your stain soak in and dry.
SEAL IT
Now you have to seal all that hard work in.
To stop your stump from drying out even more and to keep it from getting marked on top when you put things down on it you should seal your tree stump.
You can use any wood sealer. If you want a completely natural look I'd recommend sealing it with Thompsons Water Seal which will give the look of having no finish on it at all. Just remember that Thompsons Water Seal is water based which means it can only go on natural wood or wood that has been stained with a water based stain.
I used an oil based Polyurethane to make my stump top as durable as possible. I tend to be a bit spilly and bangy.
If you're using an oil based finish use a natural bristle brush.
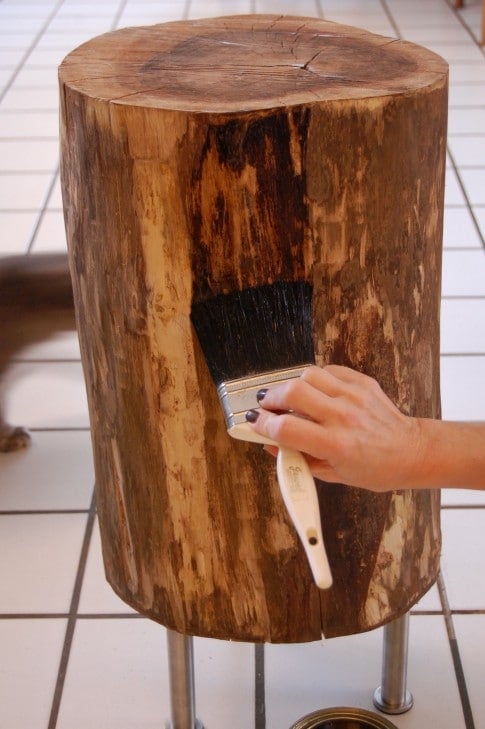
Seal the whole stump.
Seal the top, sides and bottom of the stump with 2-3 coats.
The top of the stump will get really dark, but it'll lighten up once the finish sinks in and dries.
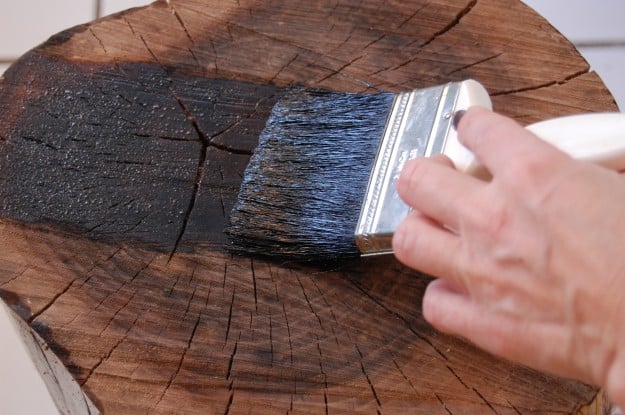
After your first coat dries, gently sand off any burrs and bumps.
The sanding will leave the finish with a white haze. Don't worry about it. It'll go away once you apply another coat of finish. Seal the sides and underside again 1-2 more times according to the manufacturer's directions.
Your stump may need up to 6 coats on the top. Because of the open grain, the finish soaks into the top a lot more and requires more coats. Always let your finish dry the recommended amount of time in between coats.
Once you've completed all coats of finish you're done.
Want to paint it?
If you're rather have a painted stump table, after sanding and wiping it apply a coat of primer. Once the primer has dried you can paint it with either water based or oil based paint.


Tree Trunk Table
How to make a tree stump table.
Materials
- Tree stump (your choice for size)
- Sandpaper (medium and fine grit)
- Polyurethane (high gloss, semi-gloss, satin … whichever you want) I used satin which has just a nice sheen
- Paint brush
- 1 package of 4, 6" Capita legs from Ikea (or similar)
Tools
- Drill
Instructions
Get your stump and allow it to dry out for at least a month. It will lose weight over this period and the bark will shrink away from the wood.
If you let your stump dry outside, as opposed to inside you'll still need to let it dry out inside for another couple of weeks to acclimatize it.
Once the stump has dried out remove the bark from it using a prybar and a hammer to chisel it away. Be careful not to gouge the wood stump.
If the bark is difficult to get off let it dry longer or carefully use a chisel with a hammer to remove it.
Sand your stump to get it smooth and then run over it with a tack cloth or damp cloth to remove any sawdust.
Flip the stump over so you're working on the underside of it and screw in the legs. Pre-drill your screw holes and make sure to measure so your legs are equal distances apart.
Stain and seal the table if desired.
Notes
If you want a very natural look to your stump, use a water based stain followed by Thompson's Water seal.
For optimal protection and a bit of a sheen on your stump use an oil based stain and a Polyurethane finish in satin.
Recommended Products
I'm an Amazon affiliate some I get a few cents when you buy something I've linked to.

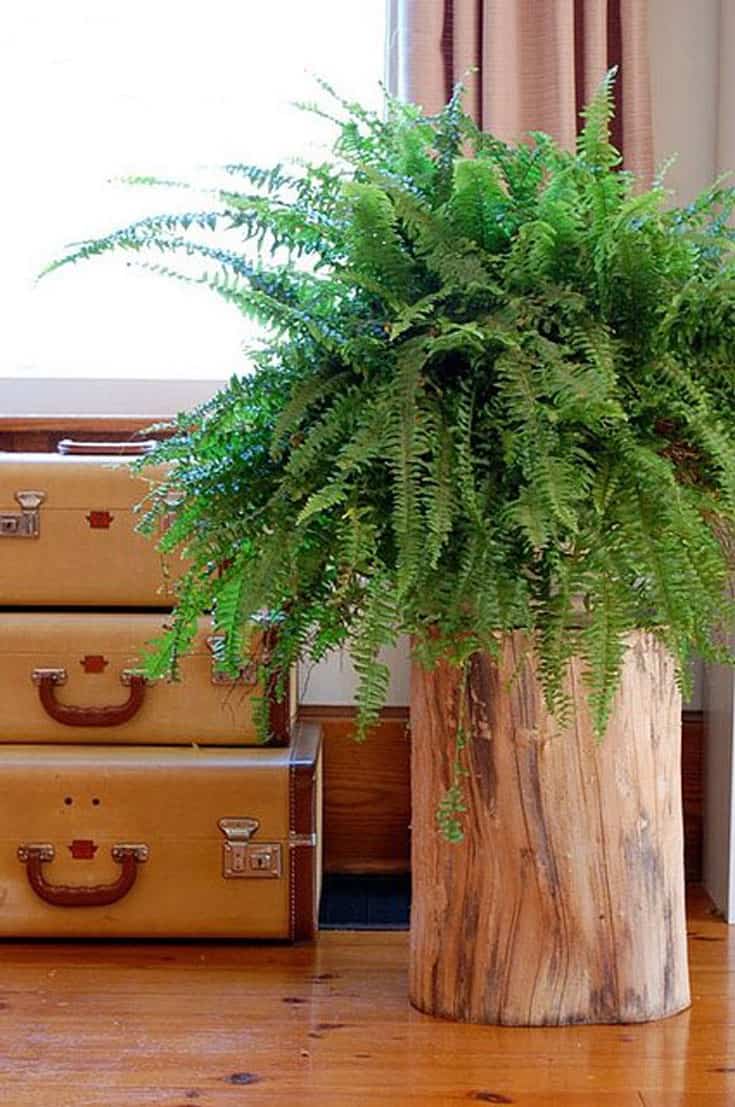
Unfinished stump table
This is pretty obvious, but if you'd rather make a more natural looking log side table, just skip adding stain and any finish to it.
For an even more organic look, leave the legs off of it.
To make one just find a log, let it dry out, then sand it smooth.
Wood from deciduous trees: Ash, black walnut, birch, cypress, cherry, elm, maple and oak are all good choices.
You should AVOID conifers. Those trees that have resin that are a sticky mess. Trees like cedar, fir, juniper, pine, redwood, spruce, yew, larch should not be used. (think of how sticky the bottom of a Christmas tree is after cutting it)
The only drawback to these tables? Everyone is going to want you to make them one. So you can either start a blog, get a following, contemplate quitting, keep at it, and then one day write a post about how to build a stump table that you can tell them about.
Or you can just skip all that and direct them to this post instead.
→Follow me on Instagram where I often make a fool of myself←


I just took down a couple of trees in the yard and have too much wood sitting around, great idea on how to use it up. I think the plant stand is also a tremendous idea. Hot project by a hot woman....lol
It's very nice ! I like it
this is so incredibly cool! i need to find myself a bit of trunk now! :) lisa
Go get it Lisa! :) ~ karen
This is great. I'm going to make one of these bad boys!
I've made another since this post! Actually, didn't really have to do anything. The second one I left unfinished with no legs. Sits in a corner with a fern on it. Good luck! ~ karen
Karen,
Thanks for the quick reply. Yea, I think the soft spots are a little bit of rot but it's definitely only on the surface. These things are SOLID. The big one still weighs an easy 100lbs. I guess I still have a while to wait.
I forgot to ask earlier, one has a very uneven side (I guess where they cut an angle to fell the tree. What tool do you recommend to even that off if not a chainsaw. If a chainsaw, do you have any tips? (I know chainsaw is not your favorite tool).
Ickis - The only way to cut it is with a chainsaw. And cutting perfectly straight is really tough. You're best to get someone skilled w/ a chainsaw to do it for you. ~ karen
Karen,
I've snagged myself two stumps that have been drying in the garage a couple of weeks. They are about 28inch circumference by 16inch high. I have no idea how long they sat out by the side of the road, but the bark all came off with relative ease. How will I know when they're dry enough?
Also they have some soft spots; are those detrimental? Seems like I could just sand through them.
(btw, yes I did have a he'll of a time getting them in/out of the SUV by myself)
Ickis - I'm not sure what you mean by soft spots. It could mean that the tree is rotting, which wouldn't make for the best tree stump table. :( If it doesn't seem throughout and just a bit on the surface you might be O.K. You'll know when the stump is ready to go when you see a bit of cracking. Bring it inside the house and weigh it if you can. Then leave it in the house where it'll dry out faster. Weigh it again in a few days and you'll be surprised at how much lighter it is just from drying out inside. I'd give it a week or so inside and then you can start on it. Good luck! ~ karen
Karen,
I want to thank you for thoroughly entertaining me with your article! I laughed many times and also thanks to you have a new project to try out.
Thanks again,
Jenni
Thanks Jenni! Welcome to the site. ~ karen
These are awesome, and entertaining, instructions. I want to make a floor to ceiling tree in a bedroom and this is perfect! Thanks for the awesome tutorial and pictures with it.
Cori, if you do that, will you please please post it somewhere as a tutorial (like Karen does)? We have lots of wood and are trying to find cool ways to bring them into our decor. I'm a big believer in learning tips from others before embark-ing (get it, haha) on my own ventures. :D
Just made my first first one! It was EASY the way you described it - thanks you so much! I had 5 camphor tree stumps in my back yard all summer, so when I saw this post I was soooooo happy! Many thanks!
Excellent! You're very welcome Beth. ~ karen
hey Karen,
I am a photographer. You should sell these. They would sell. Trust me!
Oh, and a question....forgive me as I know nothing about tree stumps....but are bugs ever an issue?
Blessings to you and thank you for sharing!
Karen
http://www.karensmutzphotography.com
Karen - Bugs haven't been an issue for me but if you're worried about it you can spray the stump with bug spray and put it in a plastic bag for a few days. I just bash the stump on the sidewalk until bugs stop flying out of it, LOL. ~ karen!
I just made 2 of these tables and they turned out amazingly well! I needed help from my husband as they were quite heavy to move, and he helped with the power sanding. Used the Ikea legs...they added that modern touch. These 2 tables are gifts, but am going to make one for myself next. Can you explain the whitewash technique?
Hi Cathy! I'm glad to hear your tables turned out so well. For a good, basic whitewashing tutorial go look at this Centsational Girl post! It's very, very easy. ~ karen!
I loveee how youve done this and i just had a huge tree cut down in the summer, and stumps all over my backyard. Finally i know what im doing with them! I just have one question, How can we make them shiny and smooth like these?
http://roomology.files.wordpress.com/2011/11/ralph-lauren-home-stump-tables.png
Sameera - My stump is smooth like that. You just need to give a bit of a rub with sandpaper if there are any rough bits, but there shouldn't be. To get the shinier, glossy look all you have to do is use a high gloss Polyurethane (or sealant of your choice). ~ karen!
Thanks Karen! Cant wait to get this done!!
I am totally doing this! I have 6 stumps in the backyard that have been drying all summer! I am pulling a few in before it starts raining.
I love castors, I might put this thing on castors then roll it all over my house! wheee!
Thanks for the great tutorial!
Beth! Ooooo! I love castors too! I have a bunch of antique ones in my basement with wooden wheels. If I can find 3 or 4 that match I'm totally doing that! Good thinkin'. ~ karen!
Hello - Love the stump - just wondering if it would be appropriate to hollow out a bit of the inner stump to make it lighter to carry (from the bottom of course). Would this cause any adverse effects?
Anna - I can't see any reason why that wouldn't be possible, but it'd be pretty hard to hollow out part of the inside of the stump and I'm afraid it wouldn't make much of a difference in the weight. Once the stump dries out it weighs less. I'm 5' 3" and 105 pounds and I could manage it just fine. It's not like you're going to be lugging it around the ouse every day. :) If all else fails, just make your stump shorter, as opposed to hollowing it out. ~ karen!
Great idea!
I'm surprised that a handy Canadian like yourself didn't put the damn Philips screws into the metal recycling and pull out some Robertsons.
One of my first tasks with Ikea projects is go to the shop and find Robbie screws that match in width and length and ditch the included fasteners.
Love this
I have seen this series, who was the contestant?
Her name is Shannon. She had a website called Bake n' Bloom, but she's let it go by the wayside now as she gets her new site up and running. She lied to me and said she'd been away from my site for months because she had mono. Turns out she didn't have mono ... she was stuck in the Masterchef house and couldn't tell anyone, LOL! ~ karen
This site was so very helpful Karen! I've just made one using some redwood, has come out a beautiful colour, however when the council was cutting some trees in my area ( melbourne, Australia) one side was not a straight cut, the hours and effort I put in to cut that straight myself was almost not worth the effort!
Fantastic website
Cheers
John
Thanks John! I just finished watching the finale of Masterchef Australia. Not that you watch it simply because you're from Australia, but I felt compelled to tell you anyway. :) (one of my readers was a contestant) ~ karen!
Hi karen - great site! I noticed you mentioned being from Southern Ontario. Where did you get your wood from? That would be my first place to start :)
Inga - All you have to do is go to any place around you that sells firewood and buy a stump off them. 2 of my stumps I actually found at the side of the road after neighbours had a tree cut down. Just keep your eyes peeled and you'll find one! ~ karen
Inga - in Toronto there are a lot of Norway Maple trees being taken down because they're near the end of their useful life. If you live in (or drive through) neighbourhoods that were built in the 40's, eventually you'll see the tree service guys cutting down the old, sick trees. Sad for the city, good for the DIY'ers!
Hi Karen
Loved the tutorial so much I made my wedding cake table with a huge stump from my wood pile. Its about 3ft tall and in the shape of a funky star.It must weigh an easy 300 pounds I love it. Wish I could post pictures!
Laura - I *HAVE* to see pictures!!!! Post em on the Facebook page. If you aren't a fan, just join up here then start posting! :) http://www.facebook.com/pages/The-Art-of-Doing-Stuff/362703487505?ref=nf ~ karen!