It was just about a year ago that I made the announcement I was a hooker. As expected this proclamation was met with several yawns and a very nice handwritten note outlining the specific play time preferences of an older man of Norwegian heritage.
This note was written by the very tired wife of an older man of Norwegian heritage. It was accompanied by the couple's address, payment up front and a Xeroxed copy of all his recent prescriptions. I let her know I was in fact talking about rug hooking and made sure she understood this was a type of craft and didn't mean I only took clients who wore toupees.
I declared my love of rug hooking. I deemed it my new obsession, addiction and hobby last February. And I did love it. I *do* love it.
But ... I have a lot of hobbies and it's hard to fit them all in. So come spring, my rug hooking sat. And it sat and it sat and it sat.
I put away the rug hooking around March because I had to make room for my other hobbies that mostly take place outdoors and involve either dirt or hammers (which interestingly enough would appeal to the adventurous side of a certain older gentleman of Norwegian heritage).
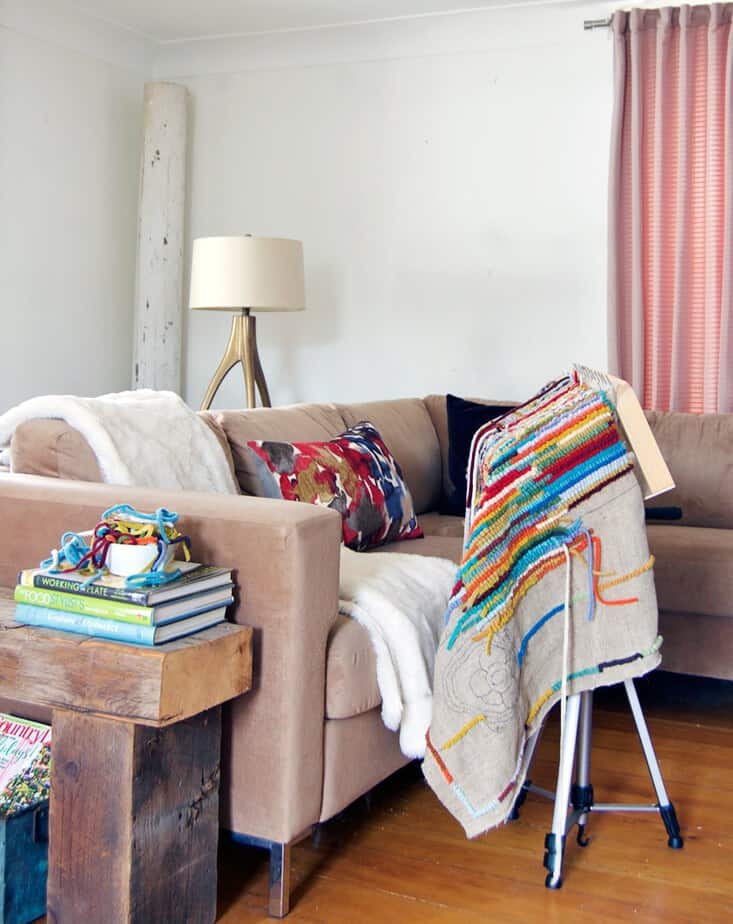
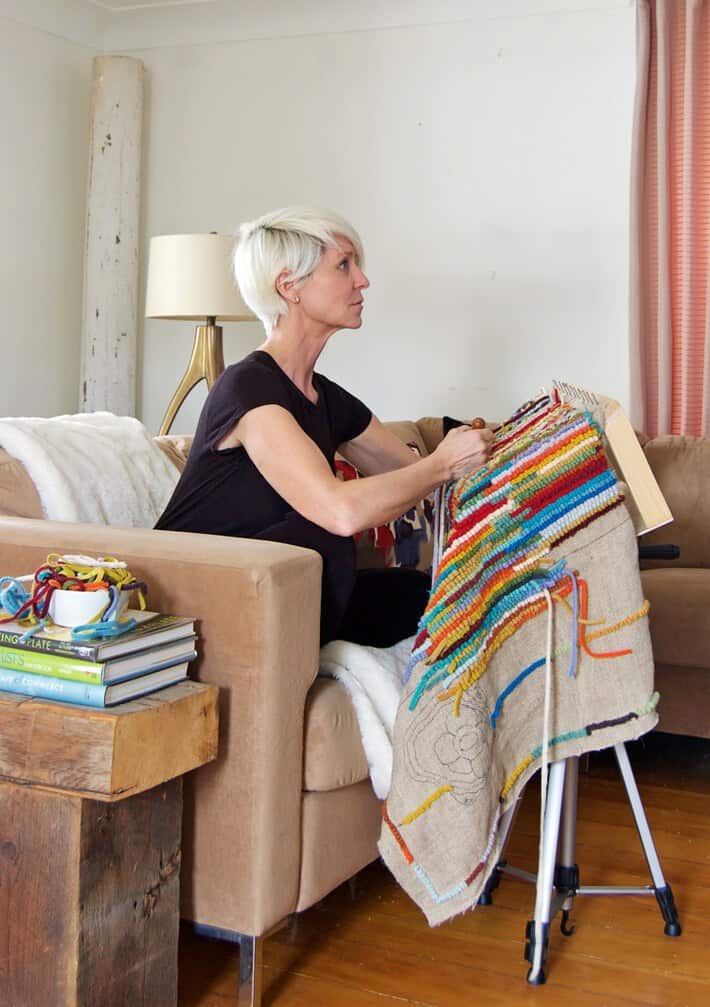
But just after Christmas I picked up my rug hooking again because I've vowed not to do any huge projects between now and spring. No hammering, no welding, no sawing or painting, just relaxing.
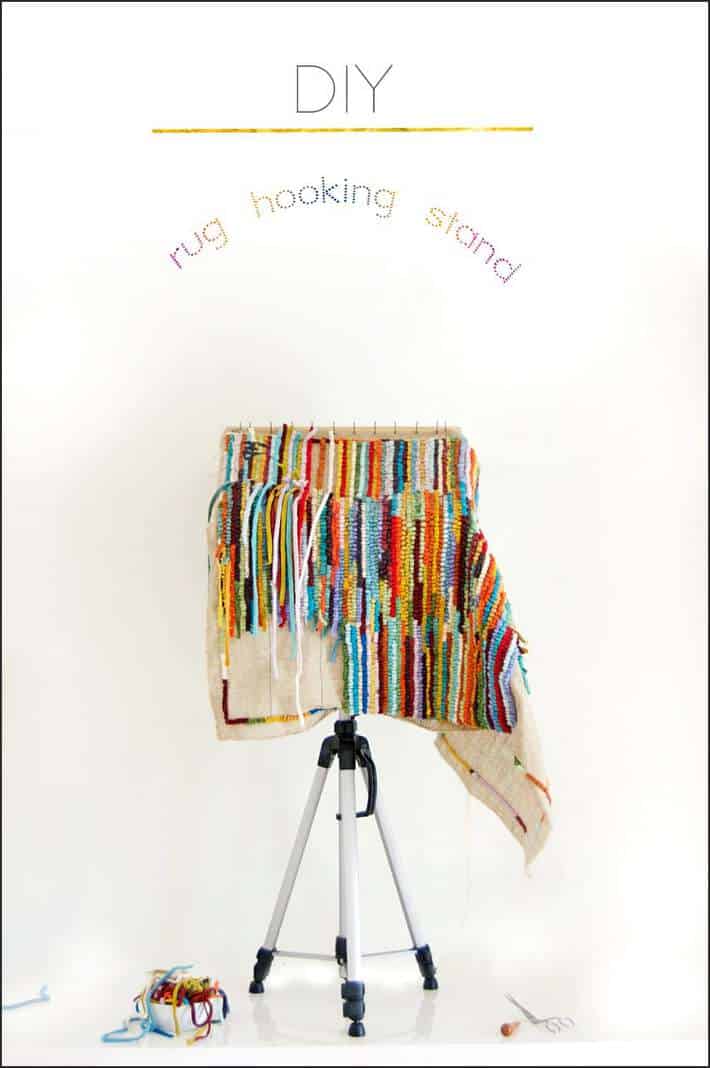
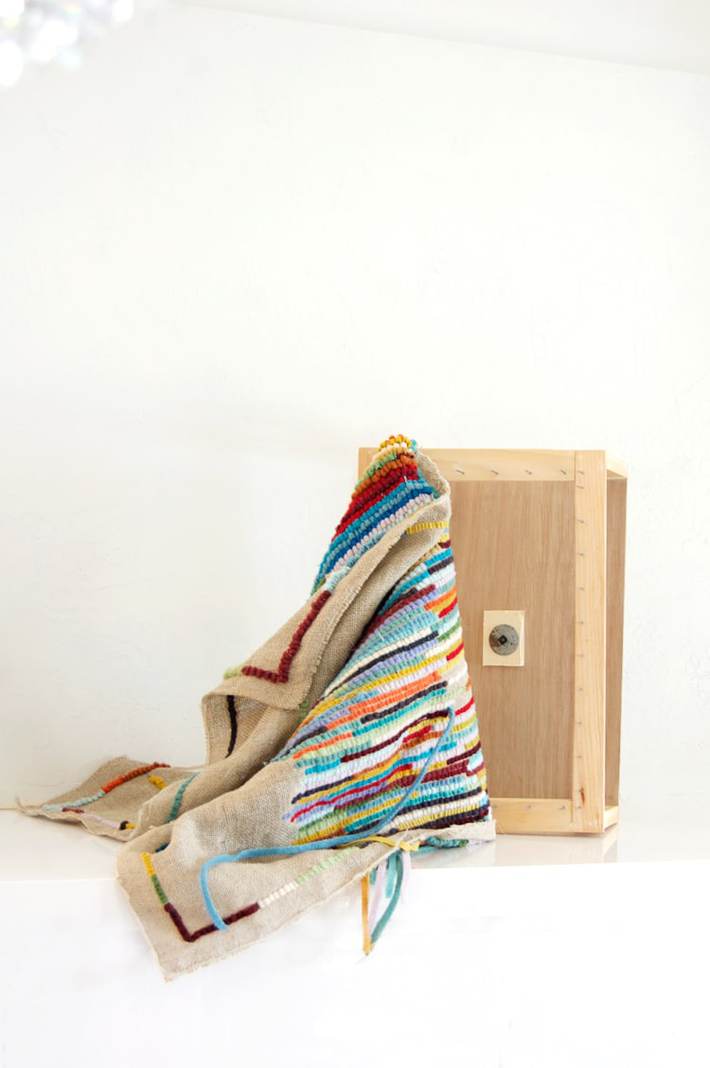
Most rug hookers, and especially beginner ones who aren't ready to shell out a lot of money on a new hobby, work on a little wood frame. My sister actually made my wood frame, which is basically just an open wood box. You sit with it on your lap and hook away.
From there you graduate to a bigger and better frames with stands that you can maneuver, tilt and shift. Since I clearly wasn't going to be a full time hooker and didn't want to spend the $200 - $300 for a floor frame I thought it would be easy enough to make one.
And it was. And SO cheap.
I made this DIY rug hooking stand with a simple camera tripod. It tilts, shifts, swivels and moves up and down so it's always at whatever you think is the perfect height or angle.
It cost $27.
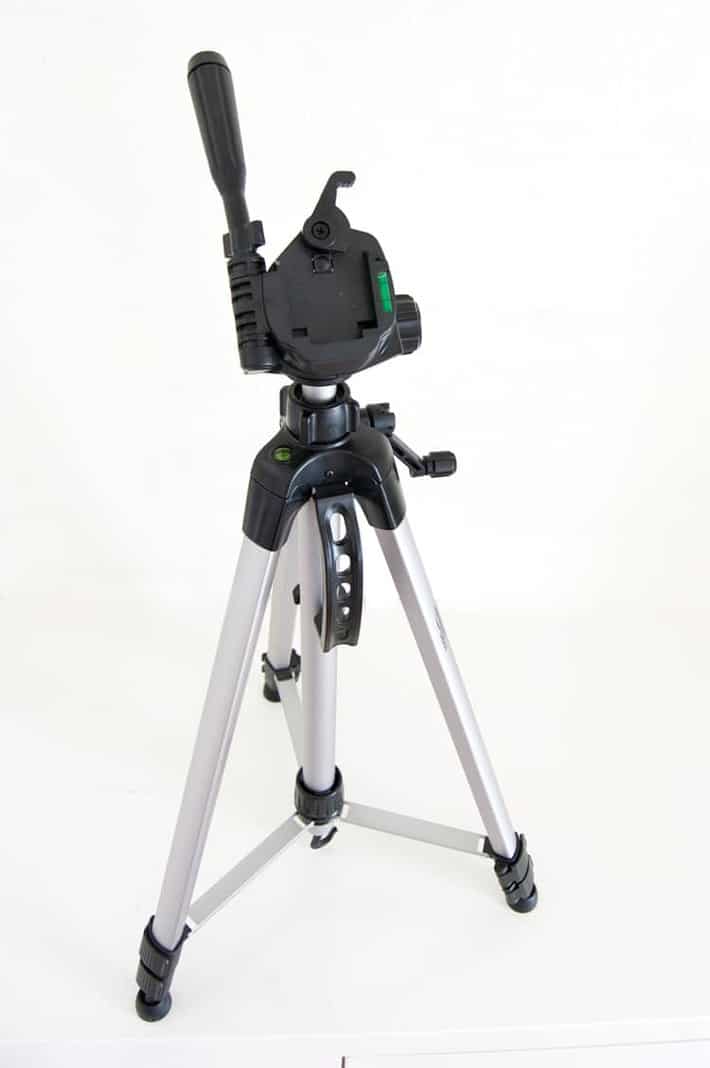
The tripod cost me $27 on Amazon. I took a lot of time to figure out which tripod would be the least expensive but still have the strength to hold a big, weighty rug. And this one was the winner.
If you're in Canada click here to buy the tripod for $27 CA
If you're in The United States click here to buy the tripod for $24 US
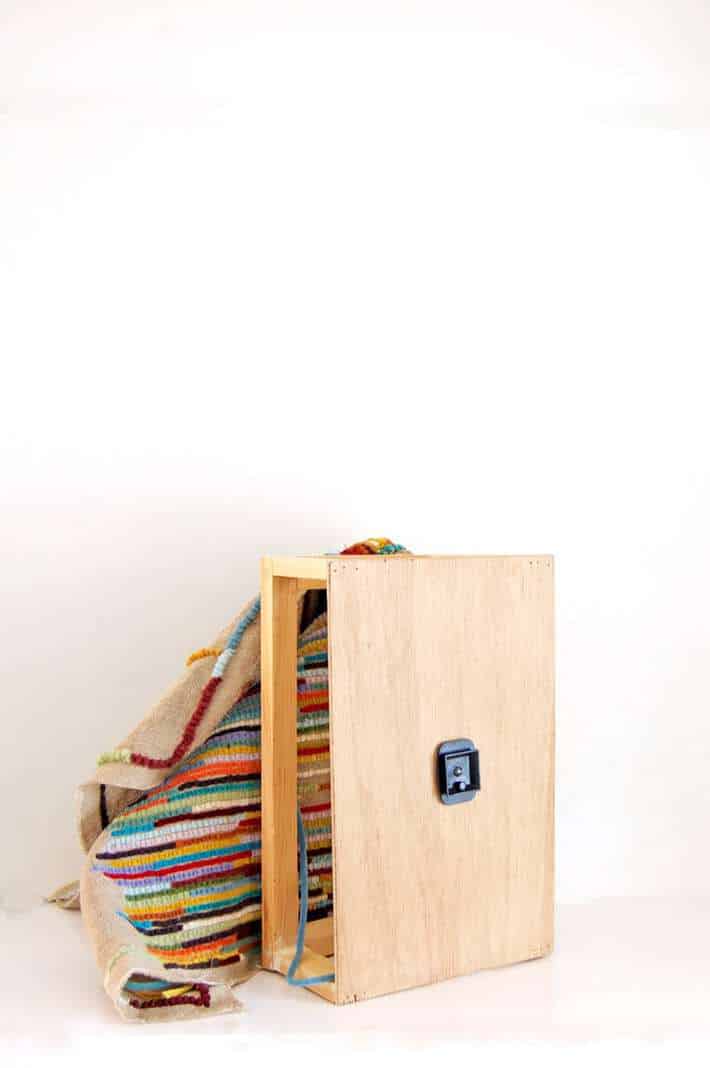
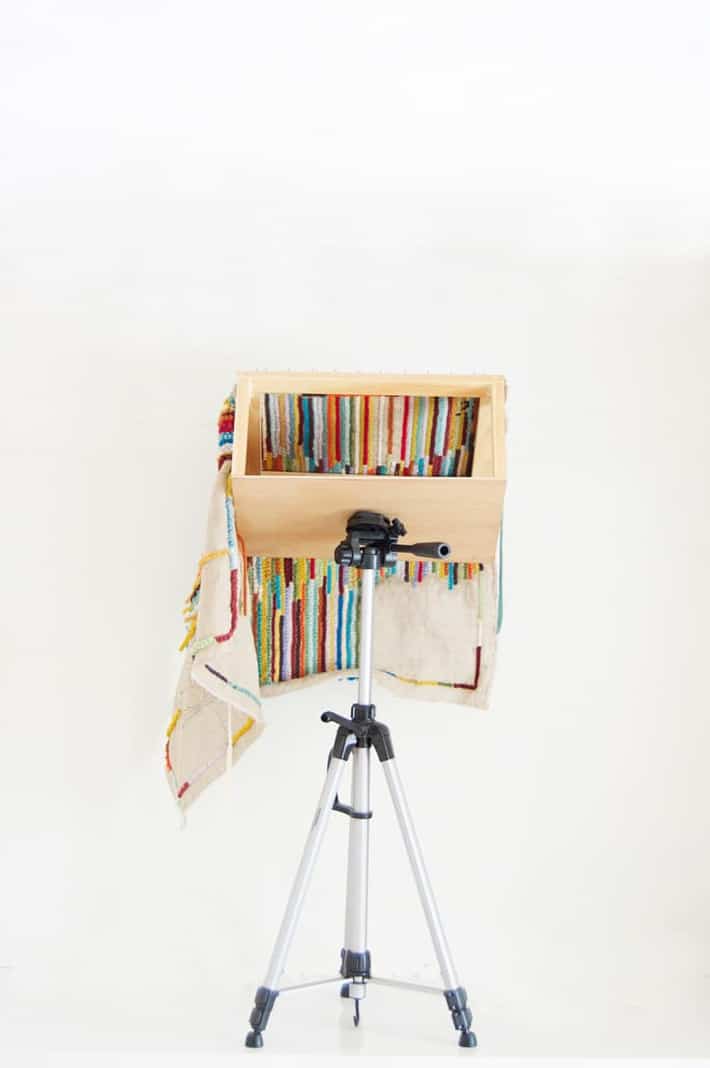
The tripod comes with a head that normally gets screwed into your camera base. Instead of screwing it into a camera base, just screw it into the base of your wood rug hooking stand.
Would you like to save this stuff?
Once you do this you can slip the wood stand on and off the tripod whenever you want. It goes on with one click and comes off with one click.
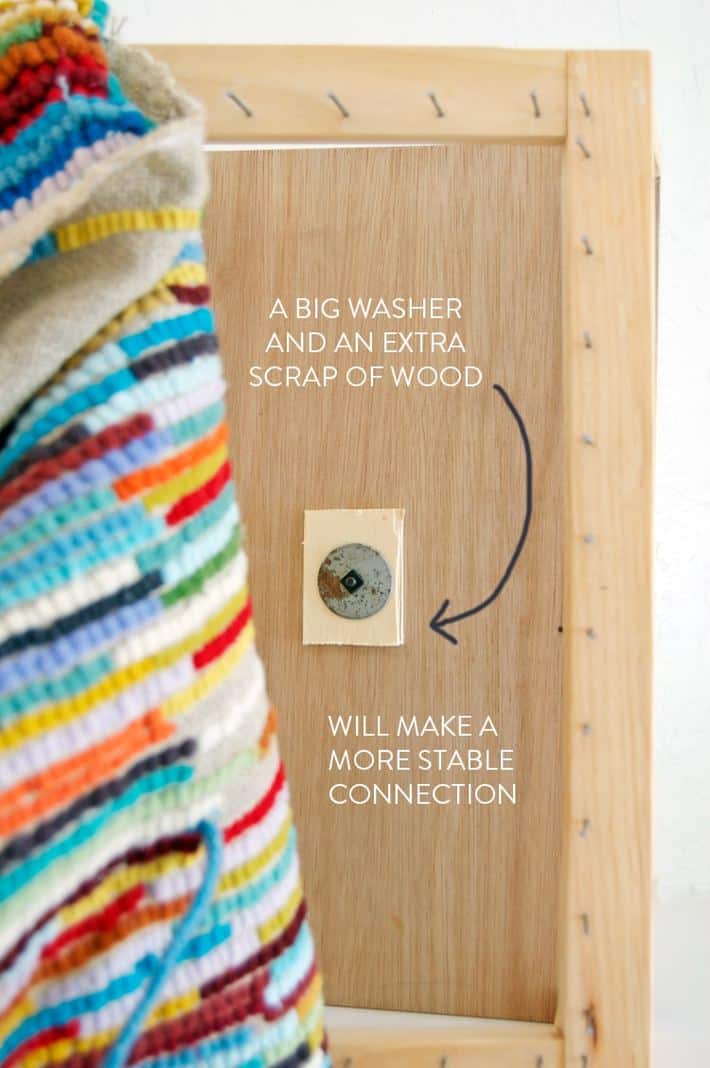
To make it sturdier, stronger and more stable add a little piece of wood and a big washer underneath and secure it with a nut. A lock nut would be great if you have one. I didn't have one so I just used a regular nut that I had.
Masterchef Australia by the way. That's the TV show I'm mesmerized by at this moment.
For those of you who need a more detailed description of how to do this here you go.
DIY RUG HOOKING STAND
MATERIALS
1 wood lap frame
1 tripod (available from Amazon Canada here, and available from Amazon US here.)
1 small, thin piece of wood (apx. 2" x 4")
1 large washer
1 nut (that fits screw that comes with tripod head)
INSTRUCTIONS
Remove tripod from box and open it up.
Remove tripod head base that is supposed to attach to camera.
Screw hole into very centre of wood laptop base. (hole should be same size as the screw you'll be fitting through it)
Attach tripod head base to laptop base by securing it with your piece of wood, then washer, then nut.
Done.
I expect I'll be hooking for the next month or so until my head starts to go to seed and vegetable garden planning begins.
Happy hooking.


Linda
I would like to know size and dimensions of the wood box and what you are using to hold the rug in place.
Karen
Hi Linda. If you look closely at the photos you can see there are finishing nails that have been hammered around the frame. The nails are small enough that you can push the linen over them and it holds it the rug in place. As for the size, you can make the box any size that you want but small enough that it's easy for you to work on and not too heavy or for a small stand to hold it up. ~ karen!
Pat
Did you use a common drill (drill bit) to make the hole in the bottom of the frame? Did you have to use a bigger screw in the tripod and is that possible?
Karen
Hi Pat. Yes, just drill a hole into the wood with a regular drill bit that's the same size as the screw from the screw from the tripod. ~ karen!
Debbie
Brilliant! Sure would like to see a picture of the locker hooking frame without the project on it! Please
Chantal
Hello! Did you replace the little screw in the mounting plate with a larger one?
Marion Findlay
I have just bought this from Amazon UK and have removed the screw as it is so small and will be replacing it with more sturdy one.
Cindi Gay
Welcome to the world of rug hooking. I don't hook as much as I used to because I spend every minute teaching or working on my rug hooking websites.
What a great idea for a stand!
Cheryl Hudson
So, what is the prickly part that you staple to the wood to hold the fabric?
Deborah A McGauley
sooo the thought is that maybe this technique can also be modified for a standing embroidery hoop? not sure how but..if any one has any ideas? thnx! Trying to avoid the beautiful black hole of hooking or punch..lol..w one of THE BEST wool shops nearby..arghhh! lol
Marna
Cool! What more can I say?!!!!! :)
Nancy Blue Moon
Love it!!!
GillyBean
You did a much better job than I did with my diy adjustable peg weaving frame....as soon as I have a day off from my ho hum drum job I'll give it another shot. My biggest issue is the lack of a drill press....
something like this....
Benjamin
Now it becomes more clear why you wanted to know penis nick-names from your readers, so the secret hooker has all the correct terminology for clandestine hooking parties between seasons. Ahh-Ha... you're building quite a reputation also with equipment that tilts, shifts, swivels, and moves up and down at any angle. Oh, my... what's next? (gasp)
Stephbo
So I totally misread the title of this post as "DIY Rug Hooking Stoned." Now the product of THAT would be fun to see! ?
Ellen in Illinois
....now I know why you blogged about danglers ..... You were preparing us for your hooking!!!!
Jan in Waterdown
Looks like you managed to make an old looking new end table outta the outdoor furniture scraps? Gotta love leftovers!
pat
I saw that end table as well. Post to come?
martina
Let's talk more about Masterchef Australia! What season are you on? It is THE BEST. We're totally obsessed with it and we live in California. Somehow the contestants all get along without any manufactured drama, it's really so good.
Karen
I'm watching the most recent season right now. I'm just at the beginning. I skipped the last 2 seasons because I didn't like the format or the contestants. I just wasn't into it. I learned about the show years ago when one of my Australian readers competed on it! :) SUCH a great show exactly because of the reason you state. NO manufactured drama. Manufactured drama was one of the reasons I chose to quit after 15 years or so of being a television host! ~ karen!
martina
Yeah, they messed up the format for a while, but last series was back on track pretty much. Have you seen seasons 1 through 4? They are amazing. Season 3 has the most insane list of guest stars, the flippin' Dalai Lama!!
Karen
Yep! Saw em all. Loveddddd the Dalai Lama episode.
Robyn Belsvik
As a long-time American hooker, I have never seen a frame with nails sticking up like that! We always used big quilting tacks (at least I think they were for quilting!). I have one of the expensive frames that rips the crap out of my inner arms and a larger quilting hoop on a pivot which is what I prefer to use. And I have never seen anyone hook from top to bottom like you appear to be doing! It would seem you have showed this old hooker some new tricks! Will be anxious to see how you finish the rug with binding, etc.
Karen
Hi Robyn! I hold my wool underneath the linen and hook from the top down. I'm not sure how you'd do it any other way, lol. And yes, those are just nails that are hammered into the frame, but a word of warning they too scratch your arms up, lol. There's linen tape that you can buy I'd love to get but it's SO expensive. Basically a version of picky velcro that the linen sticks to. ~ karen!
Karin Sorensen
you and your hook rugging :0B ye got me all riled up. what issit? why issit? how works it? ah, pinterest will tell me. it looks like something I should be able to handle. my friend tried to get me into crocheting. I managed one askew crooked hat for my puppy. he's terrified of it. meh.
gonna give that hooking bidness a try. thanks for the inspiration
Karin