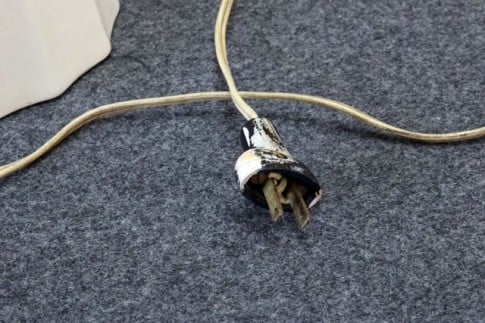
Alright, let’s get started with this little DIY on how to rewire that spectacular lamp you might find with exposed wires, circa 1940.
First and foremost, you don’t have to fear rewiring lamps. The wire kits come with all the instructions you need. You can buy the entire kit, or each of the pieces separately. This lamp worked, so I knew the socket was good.
***Always follow the directions that come in your kit.
You’ll need:
A flat head screwdriver
Needle nose pliers
A new cord/socket kit with instructions
Here’s what you do:
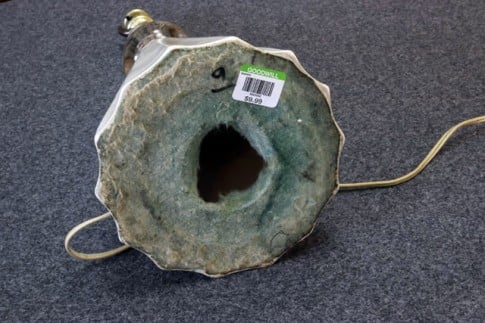
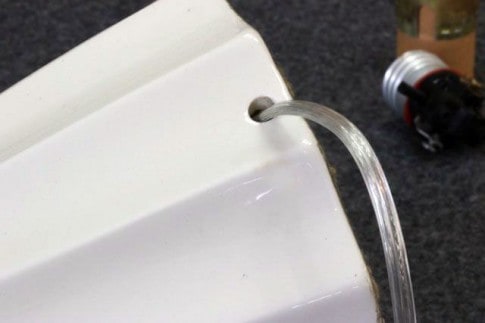
- Poke a hole in the bottom covering so you can access the cord inside the lamp base
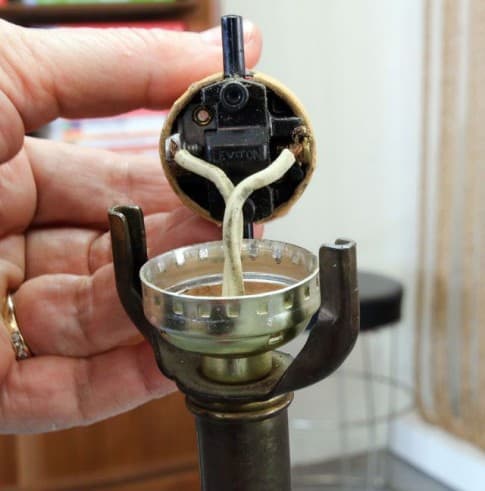

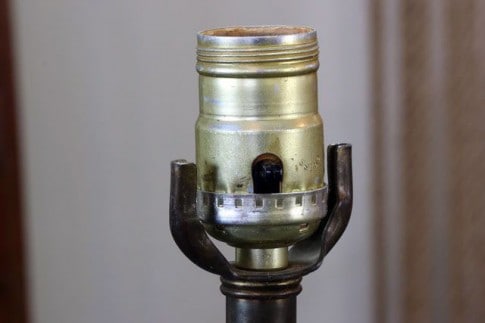
- Remove the top of the light socket and the cardboard sleeve to expose the wires and screws
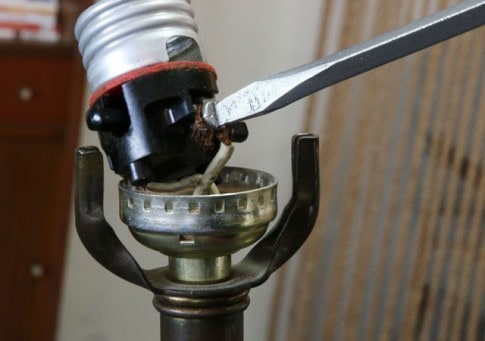
- Unscrew both wires on the light socket. One will be on a silver screw and one on a brass screw
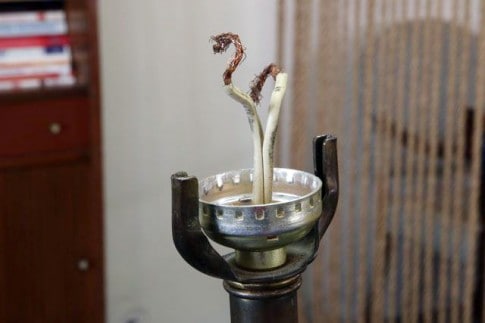
- Remove the old wire from the lamp, pulling it down and out the bottom of the lamp
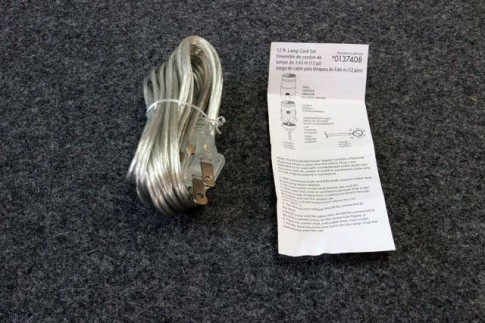
- Review the manufacturer’s instructions with your new lamp cord and/or entire kit
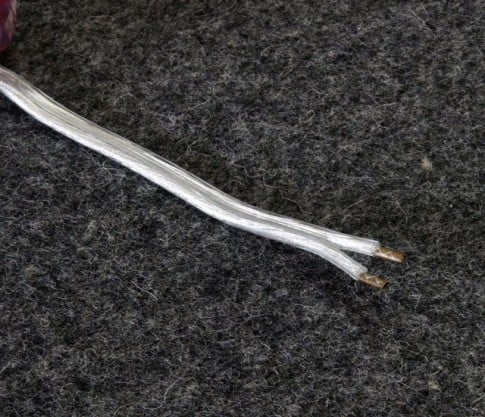
- Determine if your new cord needs some of the plastic to be peeled back to expose the wires, or if it’s ready to attach like this one. Very nice and user friendly.
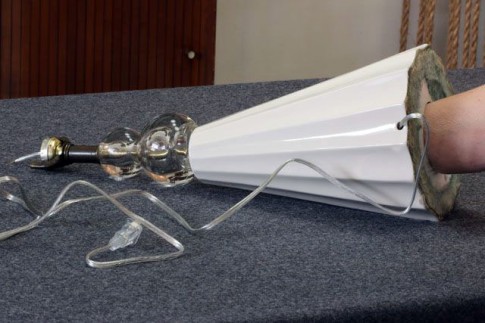
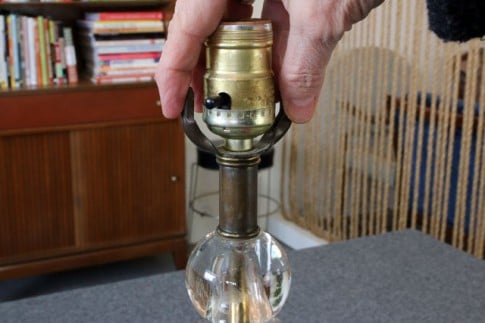
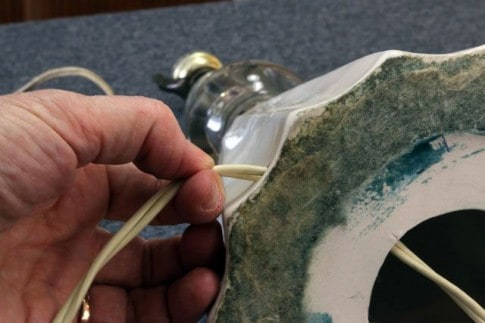
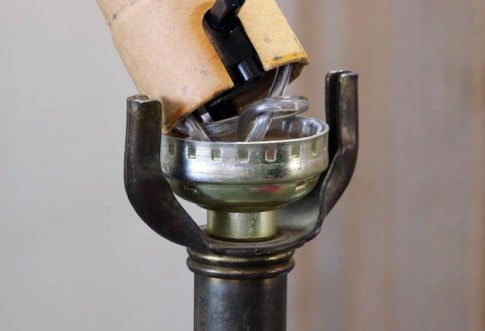
- Insert the new cord through the lamp base and up through the threaded pipe in the top of the lamp. Even though it looks like I’m helping this lamp give birth, it’s just my arm threading the cord through the upper pipe in the neck of the lamp.
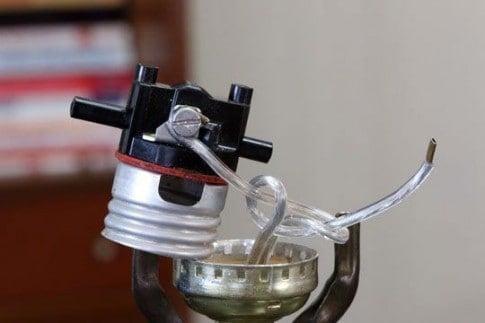
- Now, you need to split the cord about 4” down from the top and tie the Underwriter’s Knot which is included in a diagram on the instructions.
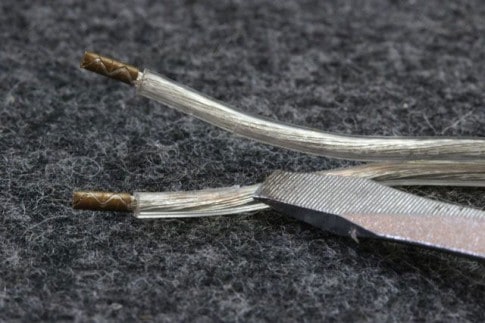
- Here’s the most important part: there is one side of the cord that has grooves all the way around it (flat head screwdriver in the photo is resting on the grooved side). The other side is smooth. The grooved side goes on the silver screw, and the smooth the side goes on the brass screw. MAKE SURE YOU GET THIS RIGHT.
- Replace the cardboard sleeve over the wire and screw piece of the socket
- Replace the metal sleeve onto the socket
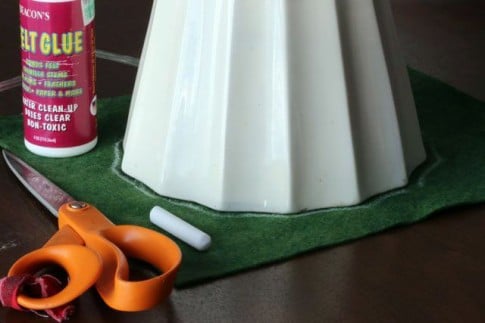
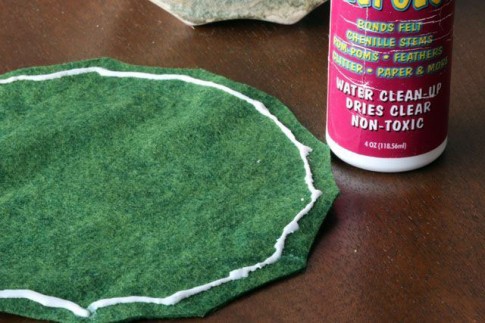
- Trace and cut out a new piece of felt to glue on the bottom of your lamp for furniture protection.
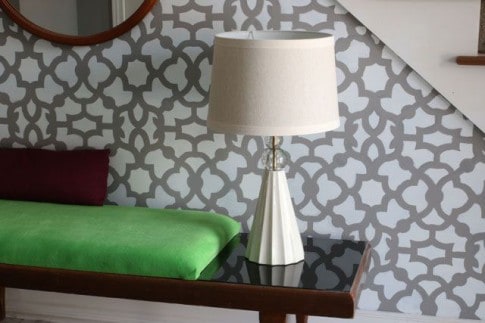
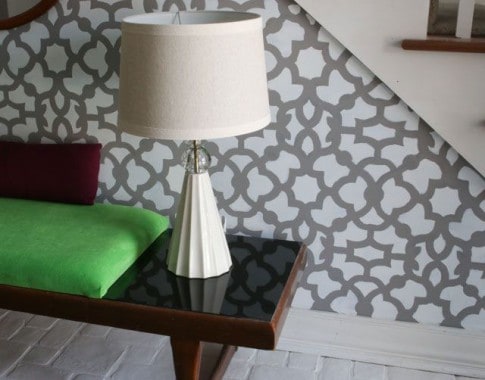
I’m not such a fan of this kind of lampshade, but I had it on hand, it fits the lamp and it only cost $11.99, also at Goodwill.
My studio upholstery classes in Indianapolis have attracted students from all over the US. Our recently added online upholstery courses, Upholstery Knockouts, includes students from the US and Canada who are learning how to upholster through our online ‘classroom’ (private blog) videos, written materials, a private Facebook Group, as well as emails and group calls. If upholstering in your jammies sounds like the way to go, check out ModHomeEc and the Upholstery Knockouts sales page for the class that is now in session.
Thanks to Shelly! I'm back tomorrow everyone so I'll see you then. Wait. No I'm not. I'm not coming back until Friday. See? I'm so tired from working I can't even be trusted to make sense anymore. ~ karen


Thanks for making this so down to earth and not brain surgery...anything electric scares me, even though I did replace my dining room fixture. I have some really frightening 1940s wiring.
Shelly, what a helpful tutorial. Once again, I'm motivated by what you share!! THANKS
This was a great tutorial. LOVE the lamp… it would work great on my Danish modern sideboard. (Need my shipping address?) I worked in a lamp shop several years back and I learned a LOT from this little write-up (particularly about what to do with weekends if I ever move to Indianapolis!) so thanks much Shelly!
Karen, what happened to Lynne? Are you THAT tired?
Tigersmom-I completely get it that those wires are almost indistinguishable, but they really are! Get a magnifying glass, or better yet, close your eyes and feel the two sides with your finger tips. You'll feel the grooves. (Feel the Groove--a good name for some project! haha)
Hello and Welcome, Shelly.
That is a seriously cool lamp. I see why you couldn't pass it up.
I have rewired a lamp before (thanks to Karen convincing me I CAN do stuff) and as is typical, a fifteen minute job took me, an actual living and walking idiot, an hour and a half.
One of my main problems was being able to tell the difference between the all important piece of wire that had the grooves on it and the one that didn't. I saw no difference whatsoever and see no difference in the ones in the above photo. And, yes, I did use my reading glasses.
Do you have any further details to share that may help an idiot such as myself to tell the difference between those wires? Up until now I thought it was just a funny joke the electrically savvy liked to play on those of us not so electrically inclined. Or perhaps I just need some much stronger reading glasses, like a microscope. Any help would be appreciated.
I also am looking forward to checking out the upholstering in my jammies classes as I try to do most things in my jammies. I have reupholstered a few simple dining chairs, headboards and footstools (all in my jammies), but would love to advance to trickier items.
Karen - I read your line at the end as if it were a sarcastic thanks to Shelley and that you were annoyed at having to be back tomorrow. While speed reading does nothing for my comprehension, it does provide me with the occasional laugh, so for that reason, it is still my friend.
Hope all is going well and I echo the request for bunches of pics because I know that's what you want to be doing, stopping work on your kitchen every five minutes to set up and take a picture of every blinkin' step. ; D
Timely post -thank you! Sometimes I don't trust internet DIY's, but if you are a friend of Karen's you can be trusted! And the pictures are great! I have an antique floor lamp I paid someone to rewire about 18 years ago when electrical work scared me. The socket has become loose and comes apart sometimes (the bulb hangs upside down). Guess I should get the replacement socket and just do it! Is there a special one for inverted bulbs? It looks normal.
Guess my step one would be: Unplug the lamp.
Post was well done! Thanks for the info. I would never have tried to rewire a lamp, now I can. Goodwill here I come!
Hi Shelly! After I finished university, about 4 years ago, I was still working my part time job as a secretary at a hospital and I used to read curbly every day on my breaks and that's how I found Karens blog! So I guess I owe you a big thanks :)
(I love curbly and wish I still had time to keep up with all the posts!)
Awesome tute! I've bookmarked it for future use. I too passed up way too many vintage lamps because I was "afraid" of the scary looks of the old wiring. Now I know it's as easy as 1-2-3 to rewire.
Love the lamp and the shade looks great on it. Thanks for the tutorial. I've always wanted to know how to do that. Unfortunately I got rid of the lamp I wanted to fix but it's still a good thing to know. I'm all about becoming the best DIYer that I can be. :)
Sweet lamp and simple instructions - thanks!!
Great info Shelly! Cheers.
Shelly, Your tutorial is perfection. Rewiring CAN be for wimps because it's really a simple process.
Like the refelting the bottom instructions too.
Wish like everything I could find someone like you for reupholstering workshop nearby! I'm in the North Atlanta area if anyone reading has a recommendation.
Rosie, in Sugar Hill, GA
The shade I used is one of those that has the frame that fits down on top of the socket. I love drum shades, but I would rather have the better shades that fit onto a 'harp' (you know, the metal frame that allows a better quality shade to be screwed on top). This shade is a good color and shape, but tends to be looser than the other.
I have a big, Jetson-esque floor lamp that needs a three-way switch. I'm taking it on faith that these, too, can be purchased in toto at the hardware store... ? (Excellent post, btw.)
Awesome! First, I love Thrift Shops! Second, now I won't shy away from lamps that need rewiring. This is perfect timing as we are lamp hunting for my son's first "real" apartment (to go with his first, out-of-college "real" job!) Third, I really think I can do this. I just have to be careful I don't get "screwed" by mixing up the screws! Fourth, thanks for guest writing!
Thanks! You made this sound and look so simple, I'm going to quit being such a baby about rewiring lamps. I'm always afraid there are some extra electricity juices stored up inside there. I know, I know, not possible, but it sounds good!
Thank you Shelly for your post on how to rewire a lamp. I have a couple lamps now that need this in order to be used again. Now that I see how easy this is I will be on it this weekend. I will be looking you up for the upholstery. I have several pieces now I want to work on. For some reason this is very hard to find anyone teaching here in Oregon. You made my day. Thank you
My husband just re-wired a lamp for me a couple weeks ago. Now I will try to do one myself! Thanks!!
Great practical blog Shelly. I have rewired countless lamps using this method. some of those old lamps are too good to pass up. I don't mind spending a little money on lampshades because I figure the money I save on the base, it still ends up being WAY cheaper than buying brand new.