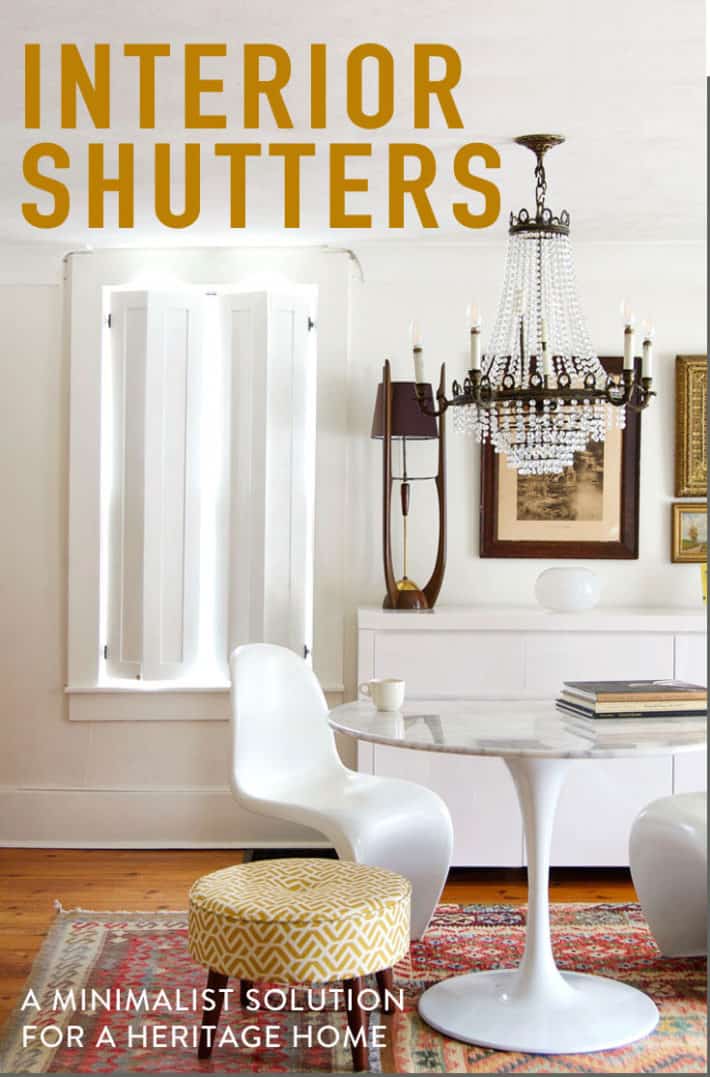
You'd better sit on your hands because after seeing this you're going to want to rip all the curtains off your walls and throw them in a ditch. Interior shutters for the win. The minimalist solution for a heritage home.
If you already know you want to make interior shutters you can go straight to my full step-by-step tutorial on how to make them.
Once upon a time I bought $15 curtain panels from the discount bin at a fabric store. As far as home decor decisions go, it was right up there with buying a shag rug from Costco. When I finally threw the discoloured, flattened rug out, I suspect many pounds of potato chip crumbs, tv remotes and socks went with it.
You can see my old horrendous curtains AND the Costco rug in this post I wrote on how to create a gallery wall. I still miss my gallery wall.
It wasn't my most inspired move to impulse buy curtains for my entire house based solely on the fact that I was out buying buttons, but at the time I needed something fast and cheap. I hung them up and loved them for the first 2 weeks or so. That's the period when I still had the WOW I saved so much money!!! adrenaline rush. Then I noticed in photos my curtains looked kind of ... well dusty rose. I have nothing against dusty rose, it's just that I hate it. Therefore I hated the curtains. Obviously I couldn't keep them so I immediately got rid of them 10 years later.
In that time my love affair with cell shades ran out as well. I had those on my windows in addition to the curtains. But cell shades are nearly impossible to wash, have a tendency to break and need to be custom cut to size.
So I spent a decade thinking about what to use as window coverings and THIS time it was going to be something that would last. Enter the interior shutter.
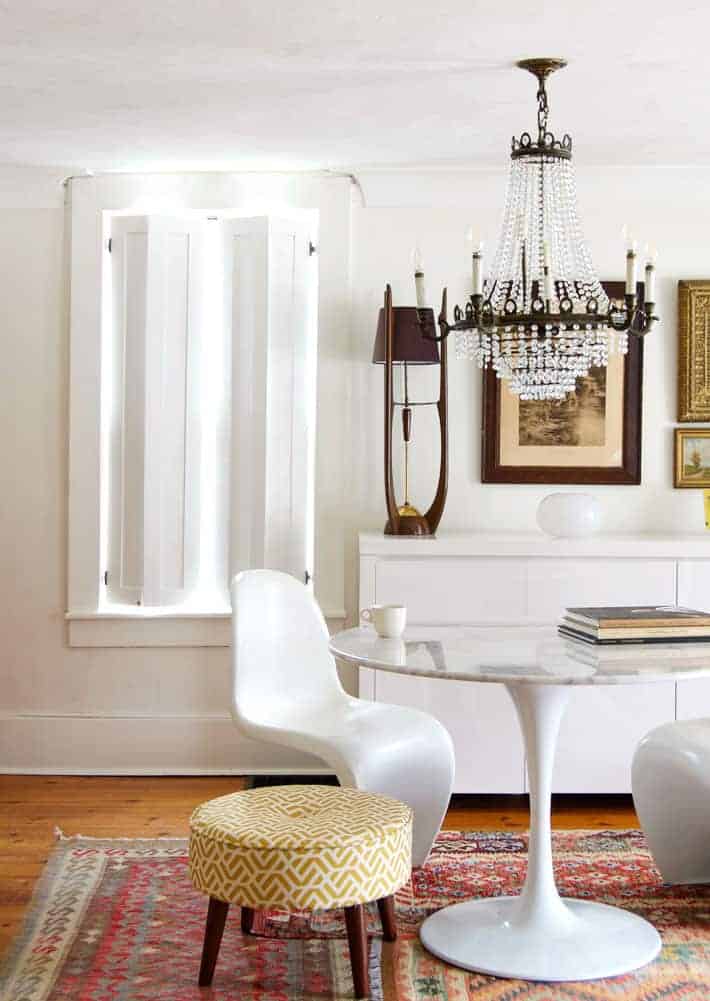
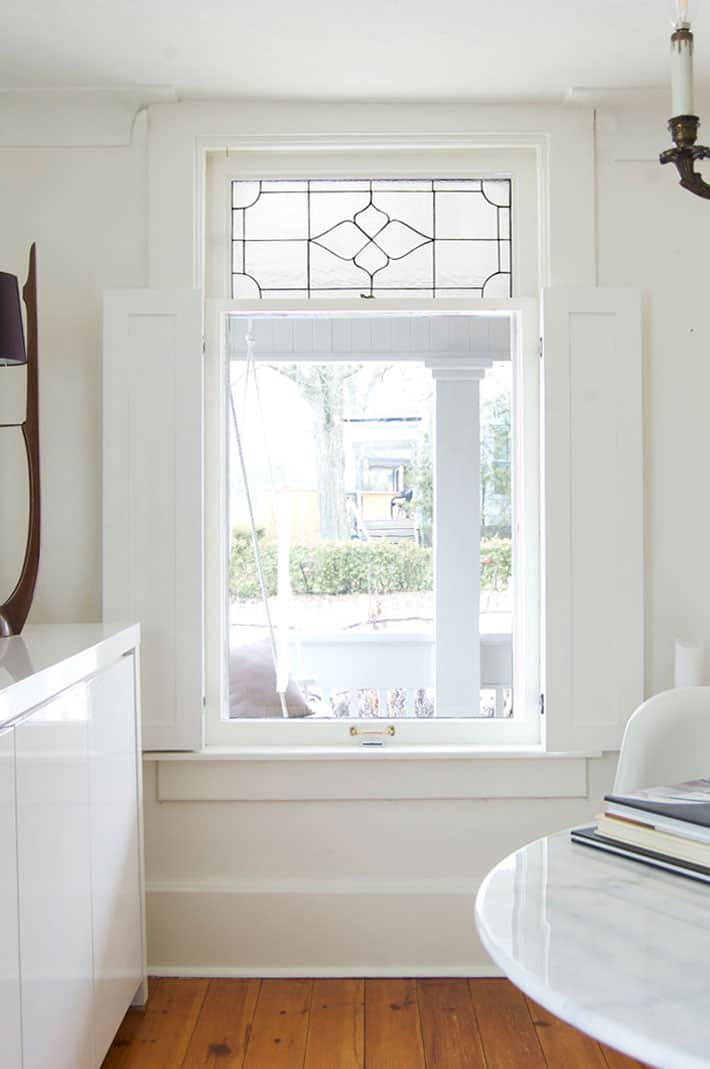
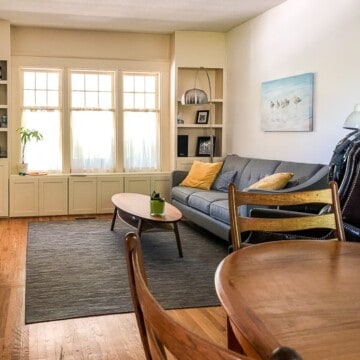
I finally got rid of the horrendous curtains and built these shutters with some birch plywood and trim. If you look at the photo above you might think to yourself ... "But there's no room to actually open them. Stupid Karen." And you'd be right. But I fixed that by designing shutters that ...
... fold in on themselves making them half the size they appear on the windows when they're closed. I've never loved anything so much in my life. I'm certain of it.
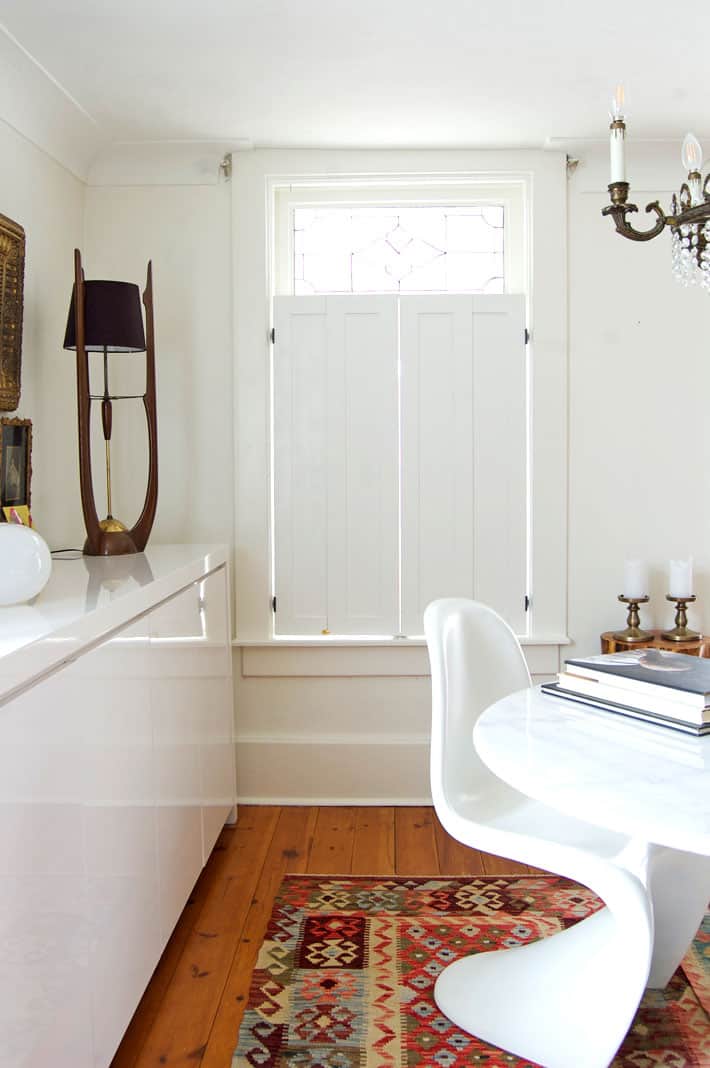
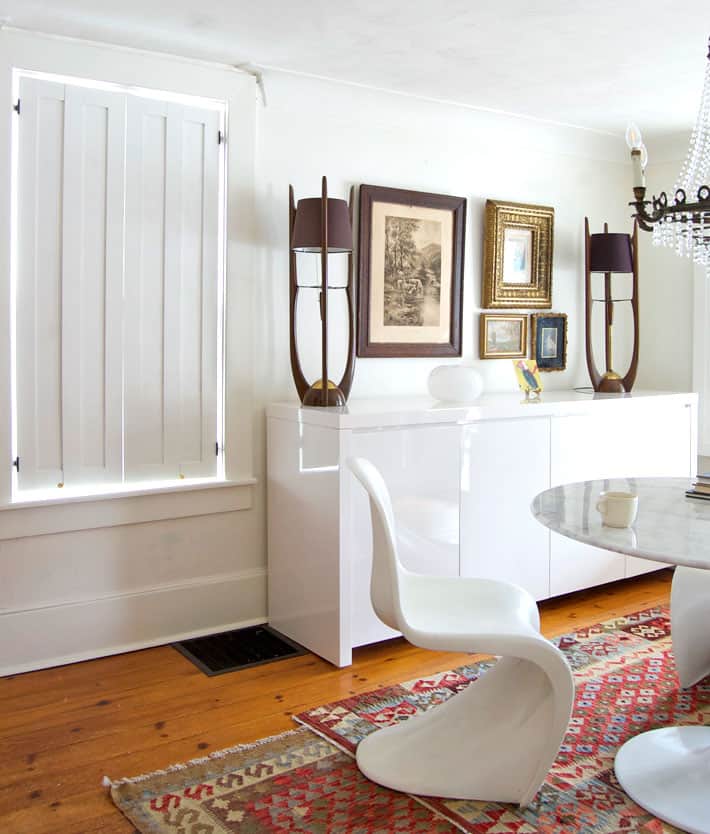
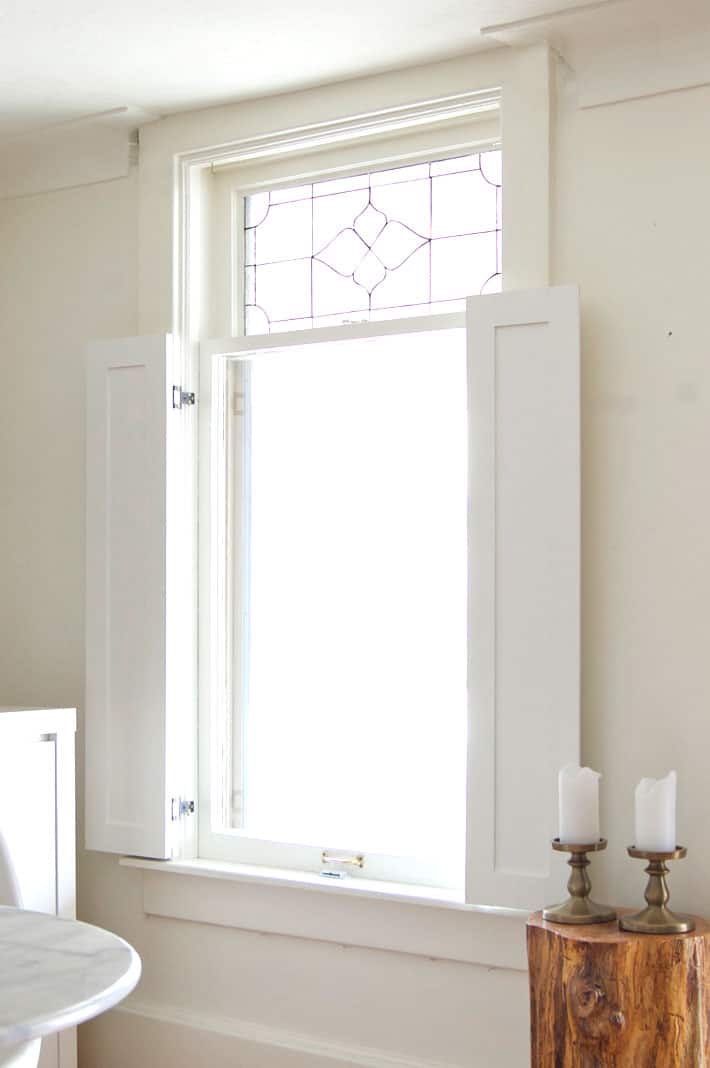
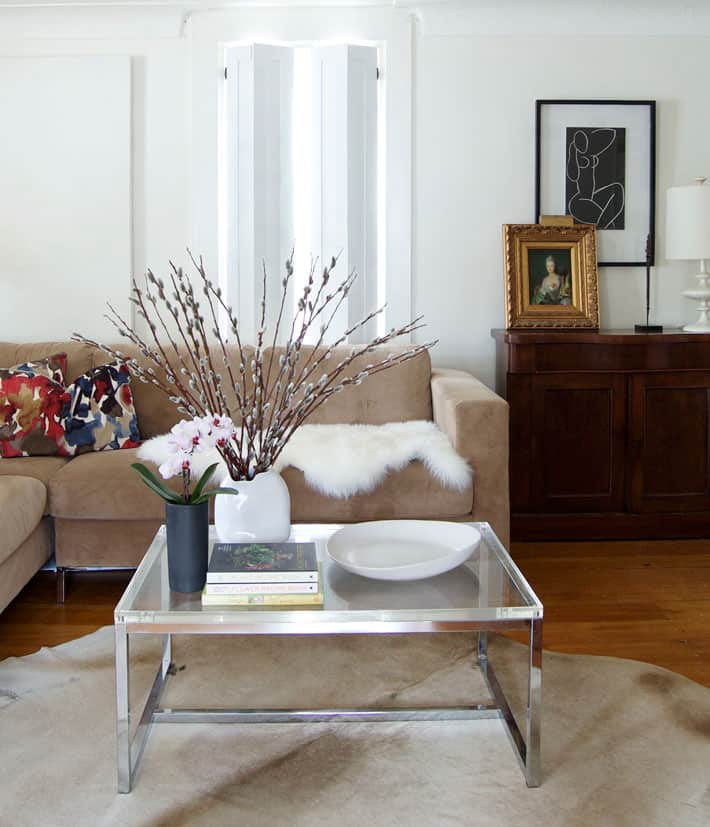
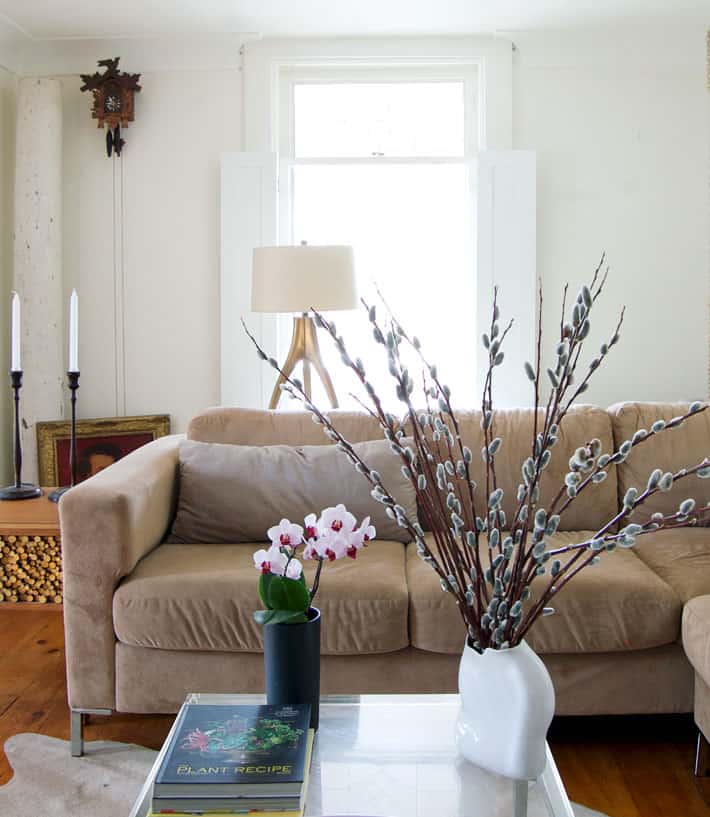
The two windows at the front of my house have a clear stained glass transom over each of them so I did the interior shutters at ¾'s the height of the window for those two windows. That way light still comes in the house during the day even if the shutters are closed, the transoms become a design feature in the rooms whether the shutters are open or closed and they're still high enough to create complete privacy.
Would you like to save this stuff?
I don't have a lot of extra space around my windows. There are buffets and tables and couches everywhere. Like some kind of house or something. So annoying. I had to come up with a solution that would allow me to have full sized shutters that would fit into a tiny space.
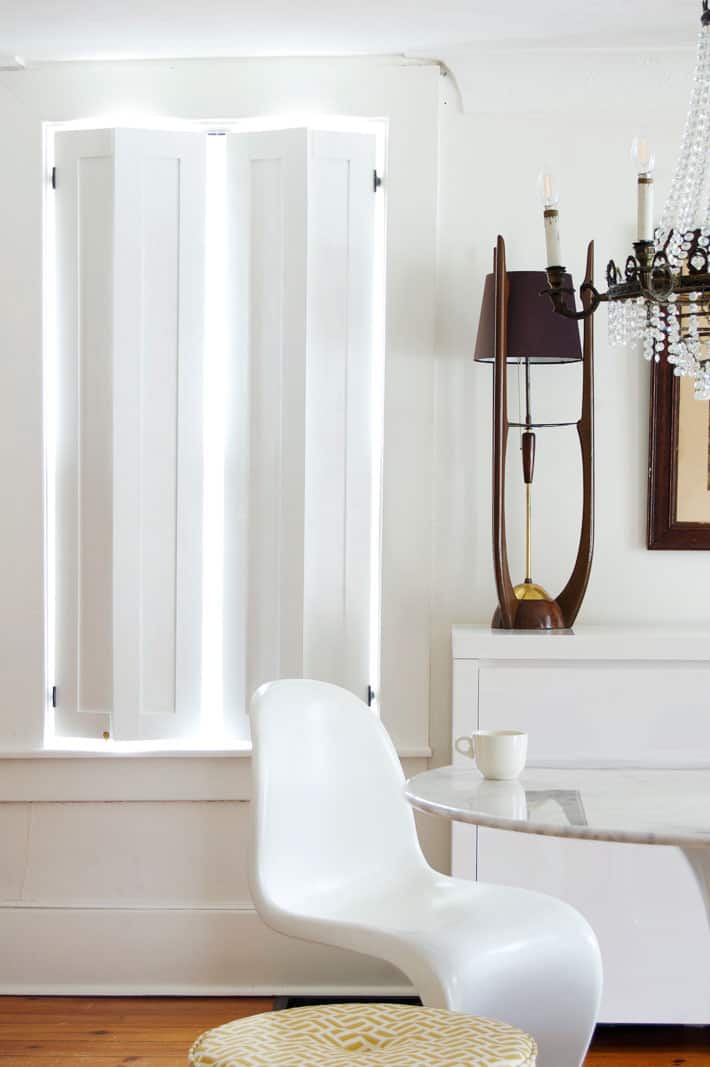
I created a concealed hinge folding shutter. And they work perfectly. The hinges that allow the shutters to fold in on themselves are hidden by a strip of trim down the centre of each shutter.
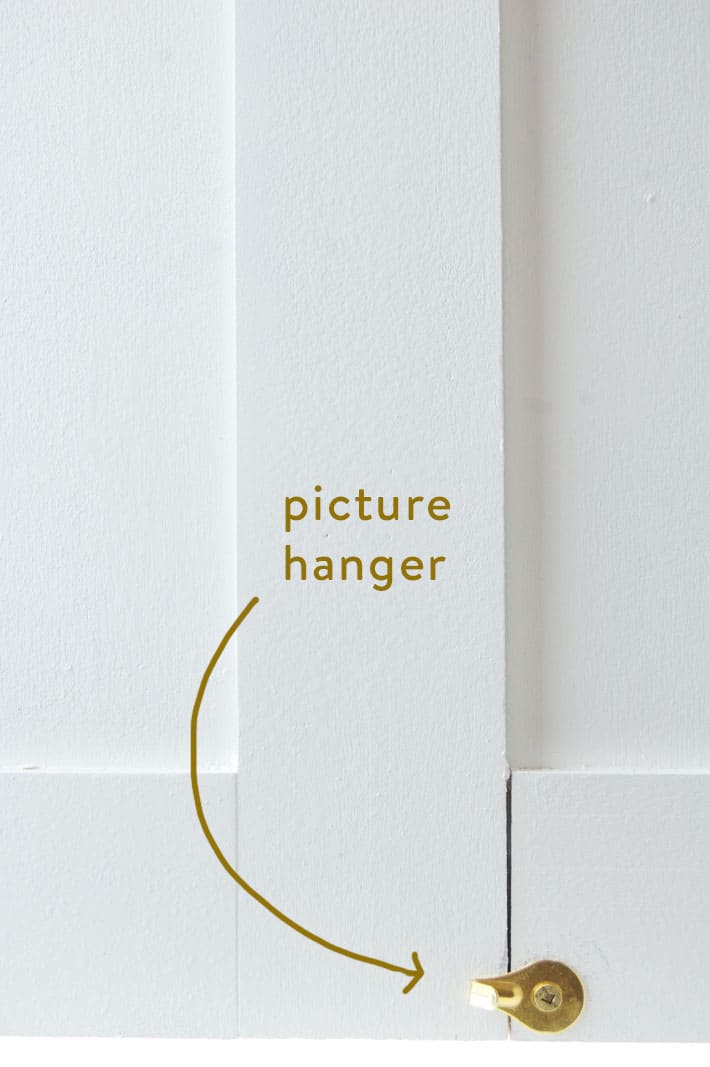
After figuring that whole thing out I realized I had a bit more figuring out to do. Because they're on hinges and made out of very lightweight ¼" plywood the shutters have a tendency to want to pop open. A few magnets here and there and a latch (that is actually a picture hanger) at the bottom and my problems were solved.
I assume you realize I'm only referring to my shutter problems. I still have those Idris Elba, potato chip and always grabbing the grocery cart that pulls to the left problems.
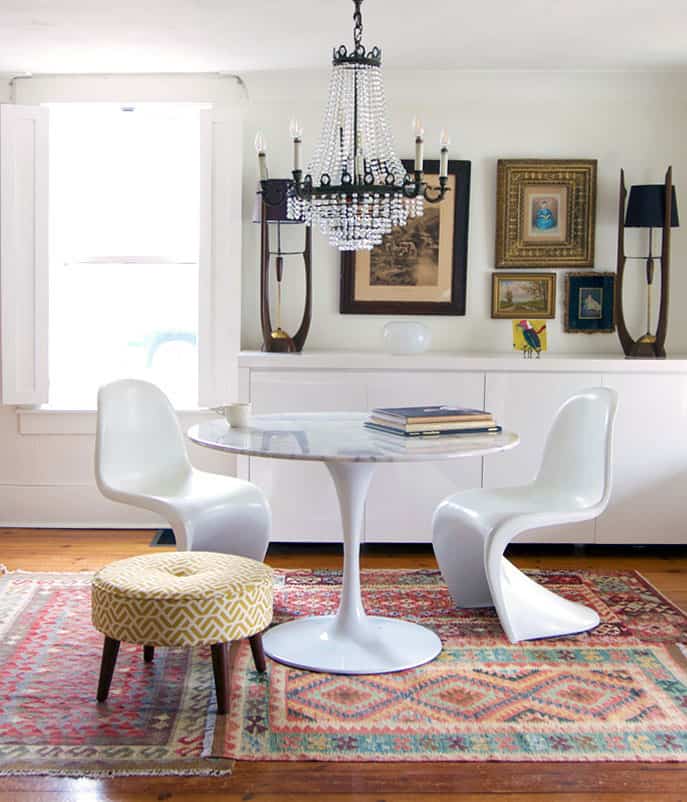
The shutters are a basic shaker style which makes they really easy because the trim joints in the corners are all just straight butts.
These shutters are astonishingly versatile. Because they're on hinges I can maneuver them open many different ways. I can open them so they're folded on themselves like you see below, or just crack them open a bit like you see in the photo above plus a multitude of other ways.
If you feel like your house needs some sort of architectural element, this could be your answer.
So how long did this take? I figured it would take me a full day to make these shutters. Knowing I'm always wrong about this sort of thing, I doubled my timeline and gave myself a weekend. Then I laughed and laughed as I entered day 5 and I was still making shutters. The tears didn't start until day 7. But they were tears of joy because the shutters were finally done. 5 windows of shutters made, painted and hung in 7 days.
I know that probably seems like a long time but these babies are here for good. There's more to making these than you think. It's not hard, there are just a lot of steps, mainly in finishing them. Stuff like sanding and gluing and hanging.
For more, click on over to my tutorial that outlines exactly how to build them.
→Follow me on Instagram where I often make a fool of myself←


Elaine
Is there anything you CAN’T do, Karen??!! 😳😳
Your shutters are the perfect window covering for the style of your house! You did a fabulous job and must be so thrilled; I love them! They remind me of the pretty houses one sees in the various villages on Cape Cod with their shuttered windows and beds of blue hydrangea blooming outside.
Megan
I love your posts, but as a person who got interior shutters with the house I absolutely hated them. Still do to this day, they are awful and annoying and ugly and just the worse. Maybe it was the style or the color or just the fact that they were all only half as tall as the window itself but with the shutters it came with they were nearly impossible to clean and really served no purpose. So now I have a couple of them as a garden gate, and they are much happier out there.
b
They are perfect!!!!
Lorrie Jamieson
I am REALLY looking forward to the tutorial, Karen ... I've got three windows that they'll be perfect for!
Now I'd appreciate you starting to think about my 10 foot picture window ... I'd love to have a solution for that.
Beth
Oops! HOW you made them. Dang Spellcheck.
Barb
I just love the look of these shutters, especially how you adjusted the sizes so those lovely lead glass transoms are allowed to "shine". And I appreciate that you hung in with the dusty rose curtains that you disliked for a full 10 years. Now I don't feel so badly about the 25 years it took before I got around to removing our hallway wallpaper that I despised from day 1...and boy, was that a job! It wasn't going to come down without a fight! You always inspire, thanks.
Beth
Oh Karen! I love those shutters so much. I bet now that you’ve had the practice, you could make some for my house in half the time. I look forward to your reply, or at least to your next post detailing to me joe you made them.
Linda Bohling
Your a genius Karen and these are AWESOME!!
Mary W
I'm so curious, I didn't even stop to read the other comments. The pussy willow vase looks like a white ceramic cat vase with the head broken off (from my view). Is it halloween decor or am I just looking wrong. The shutters are FANTASTIC and solve the space clearance problem. Genius! I love shutters anyway - something so 'little cottage in the woods with a picket fence and fabulous english garden along the walkway' feeling about them. They make me happy just looking. It is PERFECT with your furniture, room and you.
Leona
Brilliant! Now my thinking cap is on, wonder if I could do something like this in our camper. I absolutely hate the mini blinds and those disgusting valence like trim things over all the windows. Should be easier to dust down after a week in the desert. Think, think, think, Thanks for the awesome idea!
Meredith
Awesome! When is the tutorial? My coonhound went partially out a living room window after a squirrel some 6 years ago (neither the squirrel nor the coonhound were injured). We got the window replaced but have a half sheet of plywood to cover the bottom half of the window for when we are not at home. I wanted shutters, but balked at the price and the husband insisted plywood was fine. It looks like shit. This is the solution!! Nicer plywood with trim! Painted! And hinges! Eagerly await your how-to!
Sandi Remedios
Two thumbs up, one from me and one from my co-worker. I can't wait for Wednesday. These will look great in my 1934 cottage.
Love the nice clean Shaker Look!
Sandi Remedios
Two thumbs up, one from me and one from my co-worked. I can't wait for Wednesday. These will look great in my 1934 cottage.
Love the nice clean Shaker Look!
Cussot
Stunning! Now you can stop staring dagger-eyes at those windows and the shutters will recede gracefully into the background gracefully. Perfect solution.
Terri Cantor
This post is everything, including timely! I've been thinking about doing this for my in bathtub windows, but never thought about doing the same for the rest of the house. Kinda harkens back to pioneer days 😊 Thank you for the inspiration! Looking forward to your follow up post.
j
Love, Love, Love! If there was a word for more than perfection I would say that! I want them, NOW! I wanted them years ago, but the louvered ones and they weren't really right, and too dusty, and too bulky. So I forgot about the whole idea. Now I know you and I know I can somehow tackle this. So psyched! Thank you Karen!
Ardith
Brilliant, truly brilliant!
Claire Bickley
Thanks Karen for info about your pretty sectional.
I would love to take that off your hands when you're tired of it but the truth is, Im looking for it for a house in Pennsylvania so that's not gonna work.
:)
Lynn
Fantastic job Karen love the shutters. Always loved shutters just never knew how to make them now I get to find out thank you.
ElenG
Those shutters are perfection, Karen. And your lamps in between them just sing now. Kudos.