Have you always lusted over antique plate racks? Yeah. Me too. But I always seemed to be too cheap or too late to buy one. So I made one instead and you can too. I think. I mean I don't really know your skills all that well, but if you can drill and glue you'll do fine.
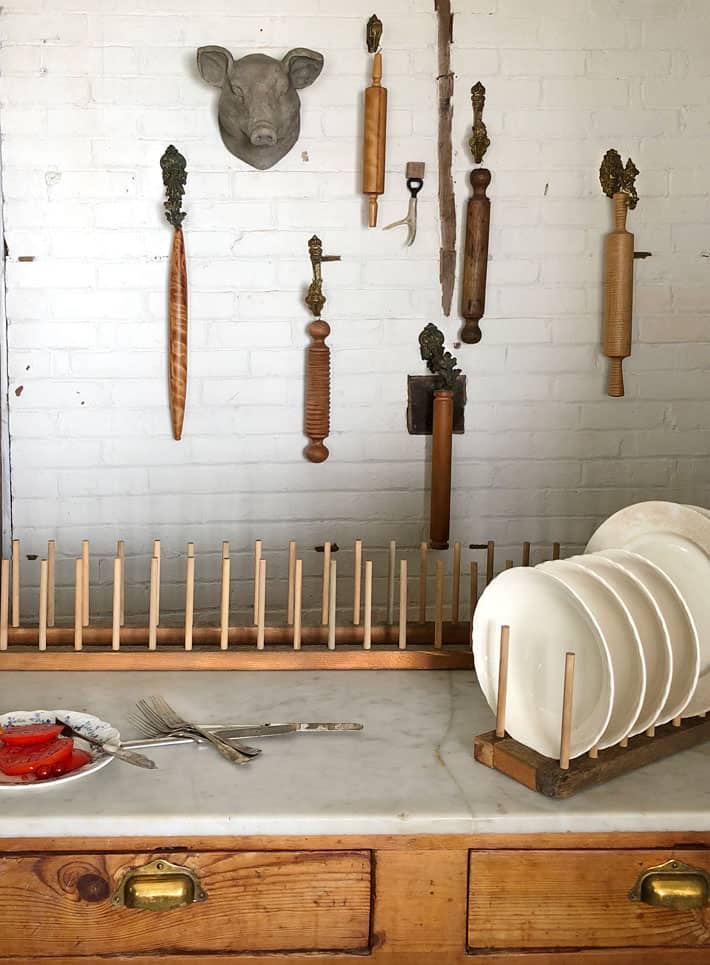
O.K. If you're interested but scared let me calm you down. This is a reproduction antique plate rack. That means it's supposed to look rustic. That means, you can make mistakes, cut your angles wrong, break off a dowel by accident - and it'll only add to the charm of it.
So don't worry about it. We're not building a walk in closet for J Lo here people, we're making a clunky wood plate rack.
But it'll be pretty. Don't worry. Calm down.
You might think that flattering overalls are the rarest thing in the world but the rarest thing in the world is actually a half decent looking plate rack.
For the past 3 years I've spotted a multitude of plate and platter racks at antique shows but they either aren't for sale or they've already been sold. Either way the vendor goes home with a black eye and an unfortunate memory of me. I go home without a plate rack.
Please understand I don't curl up my fist and punch the vendors, I mean we're all civilized here. I'm at an antique show, not a cage match. I hit them with a wood rolling pin.
A few years ago I finally decided to just make an "antique" plate rack. It's a couple of pieces of wood and some dowels. How hard can it be?
Turns out, not very hard at all.
And now that I've figured out the measurements and everything, it'll be even easier for you.
Put your unflattering but you feel cute in them anyways overalls on, it's plate rack making time.
Table of Contents
DIY Plate Rack
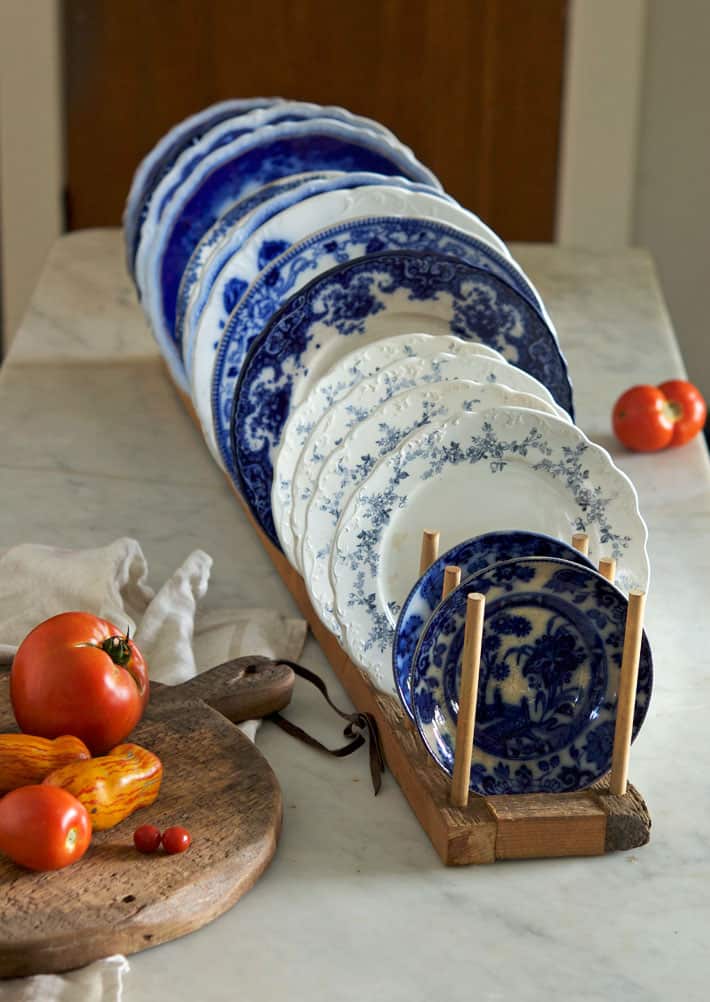
You can make this antique plate rack to be any size you want. It can be wider for platters or shorter if you just want it to hold a few dishes.
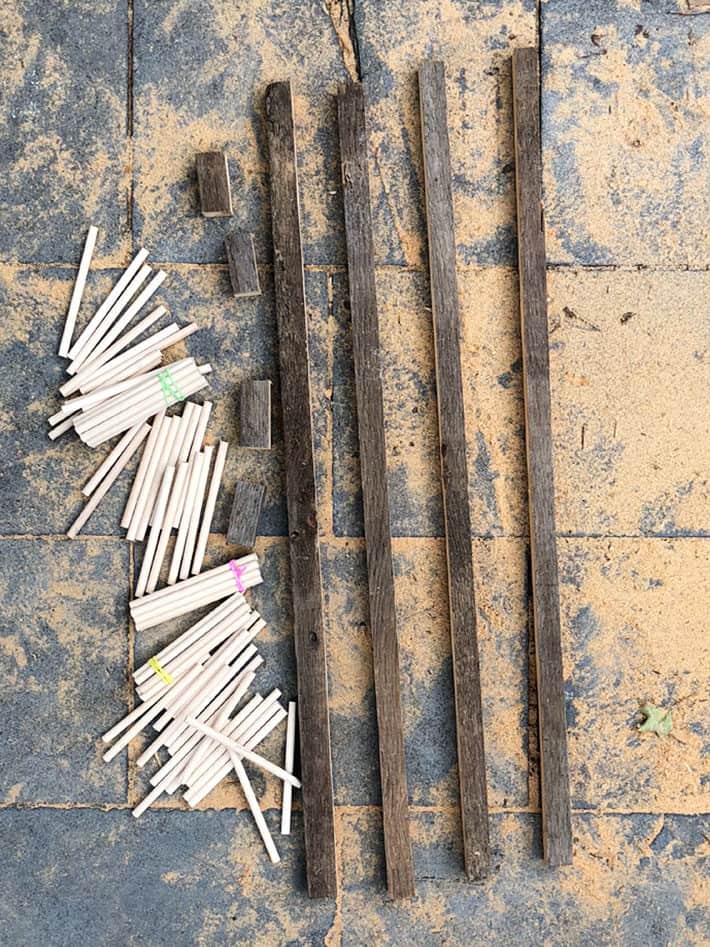
MATERIALS 🪜
- Wood dowels ( cut to 6" lengths, each approximately ⅜" in diameter )
- 2, 24" lengths of 1" x 1" wood
- 2, 3" lengths of 1" x 1" wood
- Wood glue
- ¼" dowel pins (¼" refers to the diameter)
TOOLS 🪚
- Saw
- Drill
- Drill bits
→ QUICK REFERENCE ←
- Cut dowels to 6"
- Cut 1x1s to length (2@24" and 2@3")
- Drill holes every 2" down the centre of your long pieces of 1x1
- Lay drilled long pieces down and attach short pieces to inside to create a box shape
- You can attach the short ends by using wood dowel pins or just glue, screw and clamp.
- To finish the rack, using wood glue, insert 6" dowels into all of the holes.
STEPS
If you already understand how this is made really all you need to know is that your dowel holes need to be 2" apart to properly support a plate or display a platter. For everyone else ... these are the steps.
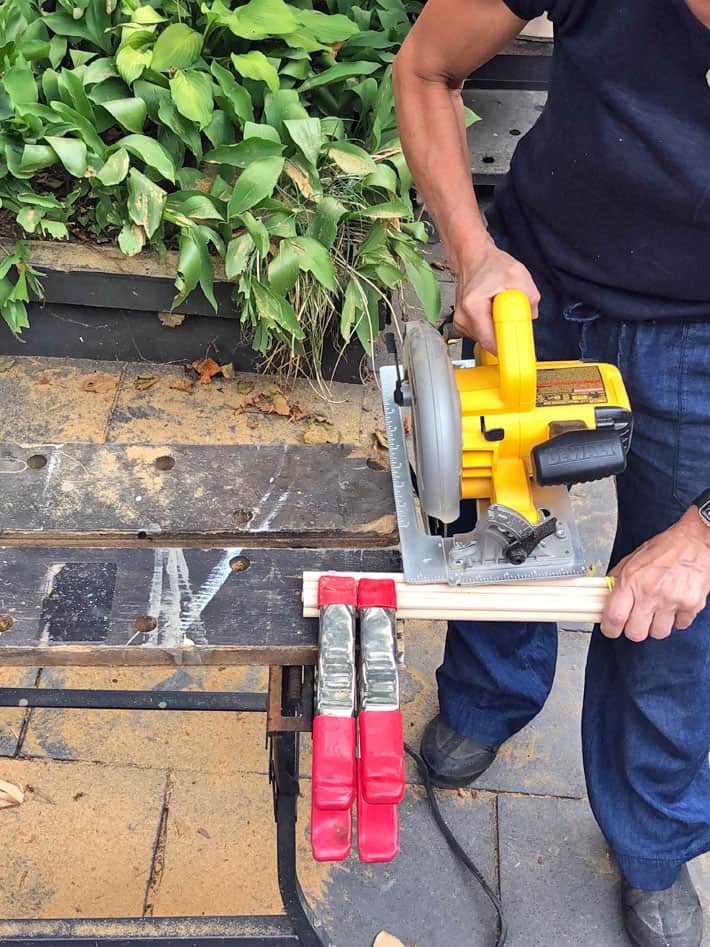
- Cut your dowels to length. To speed this process up, I tied several together with an elastic band on both ends and cut through them. I got my dowels at the Dollar store in the craft section.
- Cut your 1"x1" to length. I suggested 24" but you can make your plate rack whatever length you want.
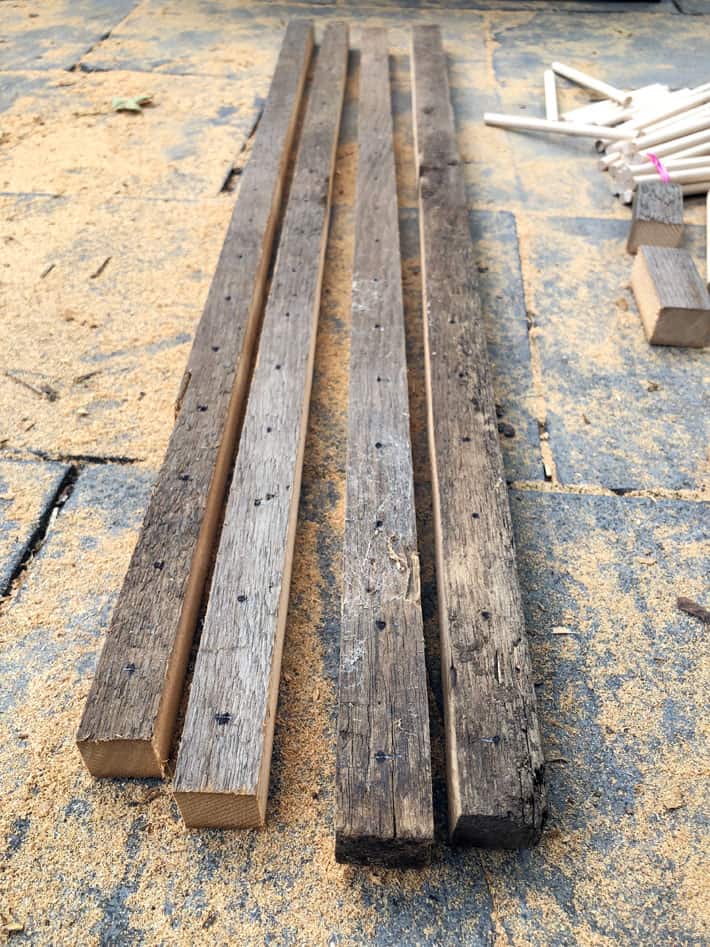
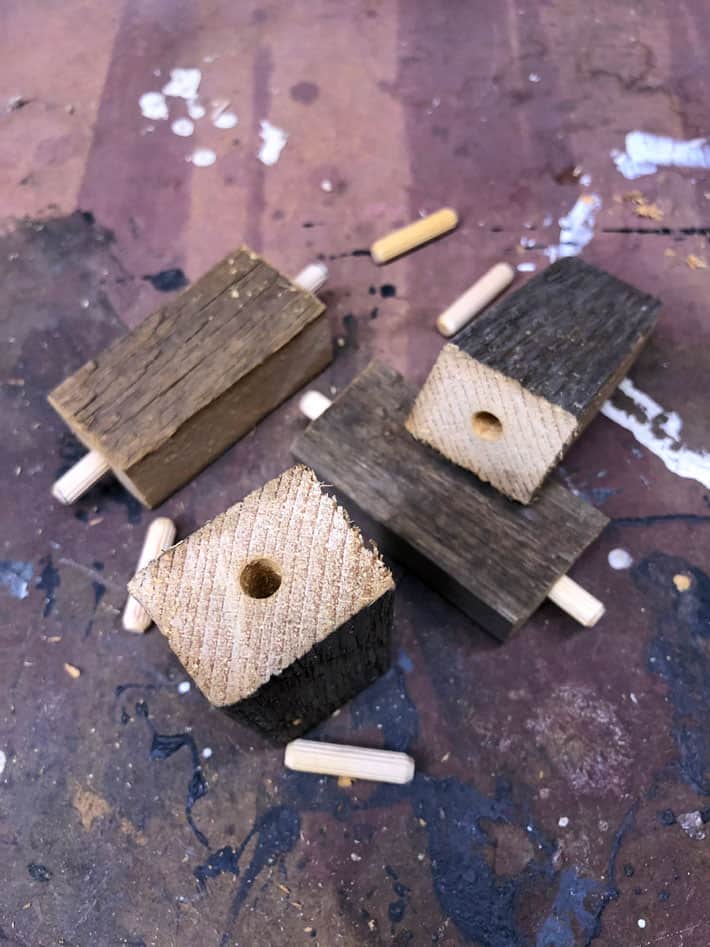
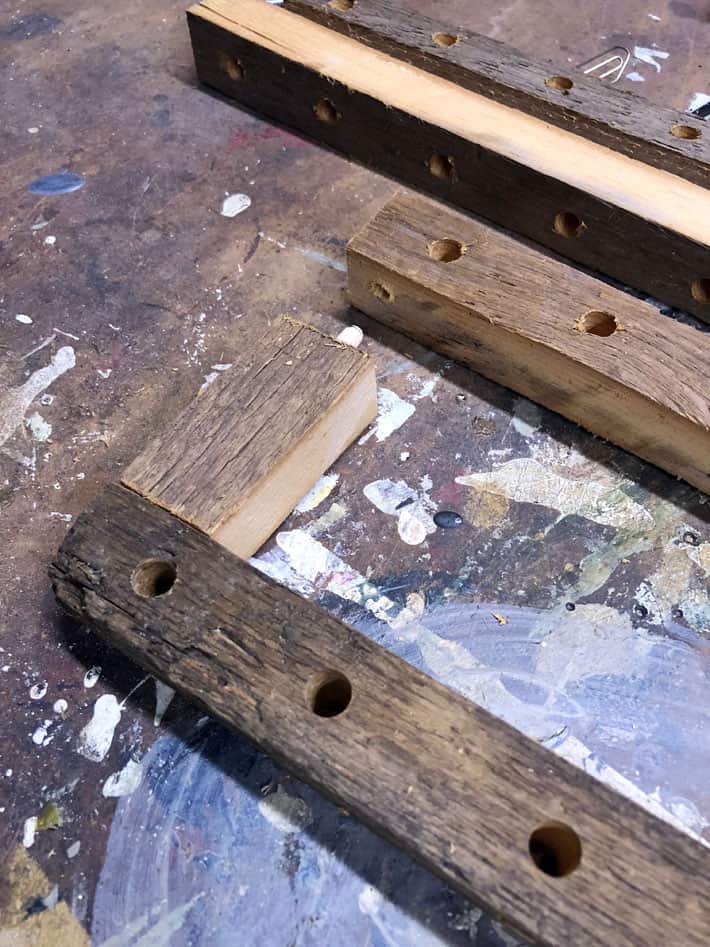
- Starting 1" in from the end, mark the centre of the wood rails every 2" with a Sharpie. This is where you dowel holes will be drilled.
- Drill straight through the wood rails at the Sharpie marks using a drill bit the same size as your dowels. In my case it was a ⅜ths of an inch drill bit for my ⅜ths of an inch dowels.
- Change to a ¼" drill bit for your dowel pins and drill through the ends of your shorter wood pieces. Don't drill all the way through. Just go in 1" or so.
- Drill corresponding ¼" holes in your long strips of wood and check to see everything lines up and fits.
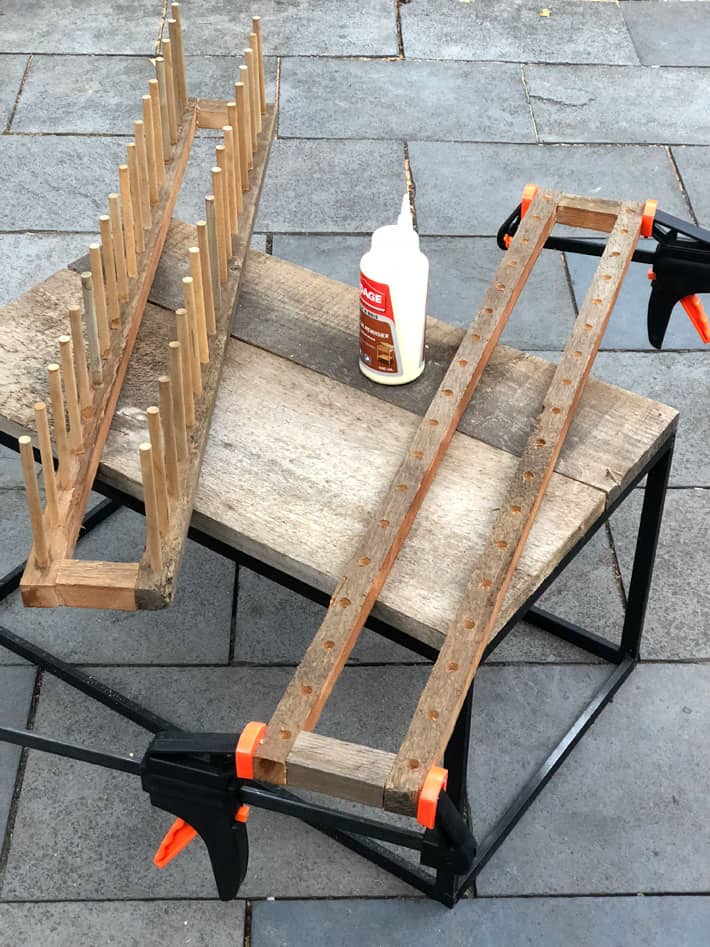
- Assemble your plate rack by gluing and clamping the ends together and inserting the dowels into the holes. There's no need to glue the plate dowels into place. That way, if you happen to have a really large platter you want to hold, you can just pull out two dowels to make a larger space.
- Stain your dowels to match your wood if you like. Since I was using strips of old barnboard and brand new dowels, I stained my dowels with my DIY barnboard stain made out of steel wool soaked in vinegar. It doesn't stain the wood, but instead creates a chemical reaction which instantly darkens it.
TIP
You can also just screw the ends in with 1 ½" screws from the outside of your rails into the end piece but you'll have a screw head showing from the outside of your plate rack.
To minimize the look of the screw head, countersink the screw which will create a small pocket. Mix some sawdust together with wood glue and fill the pocket. Once dried it'll resemble wood and camouflage the screw head.
You can see an example of that in my DIY egg rack post.
This Photo Shows it All
All of those intricate steps makes this project seem really hard, so if that's the case for you and you're more of a visual learner, this photo pretty much sums it up.
If you understand this photo, you should be able to tackle this without even using the instructions.
You can read about how to make steel wool stain and how it works here.
You're done. You now have a plate rack.
Using a Drill Press
This is where I tell you that you should get a drill press if you have room for one. Just a little one. You don't *need* one for this DIY but it does make your work faster and more accurate.
- a drill press guarantees all your holes will go straight down and not at a weird angle.
- a drill press is incredibly easy to use.
- you'll use a drill press more than you think you will.
TIP
Would you like to save this stuff?
If you're using a drill press don't forget to clamp some sort of fence to the plate. You'll use it as a guide to make sure all your holes are aligned perfectly.
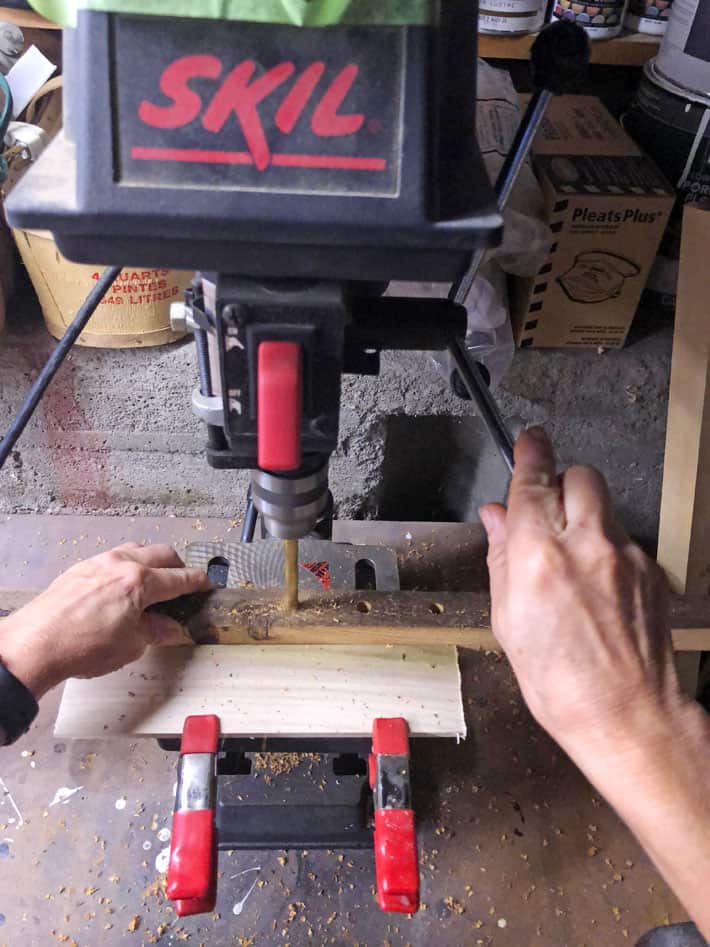
See? That's all there is to it. It's fun really. I mean, for me it's fun. Our definitions of fun might be slightly different.
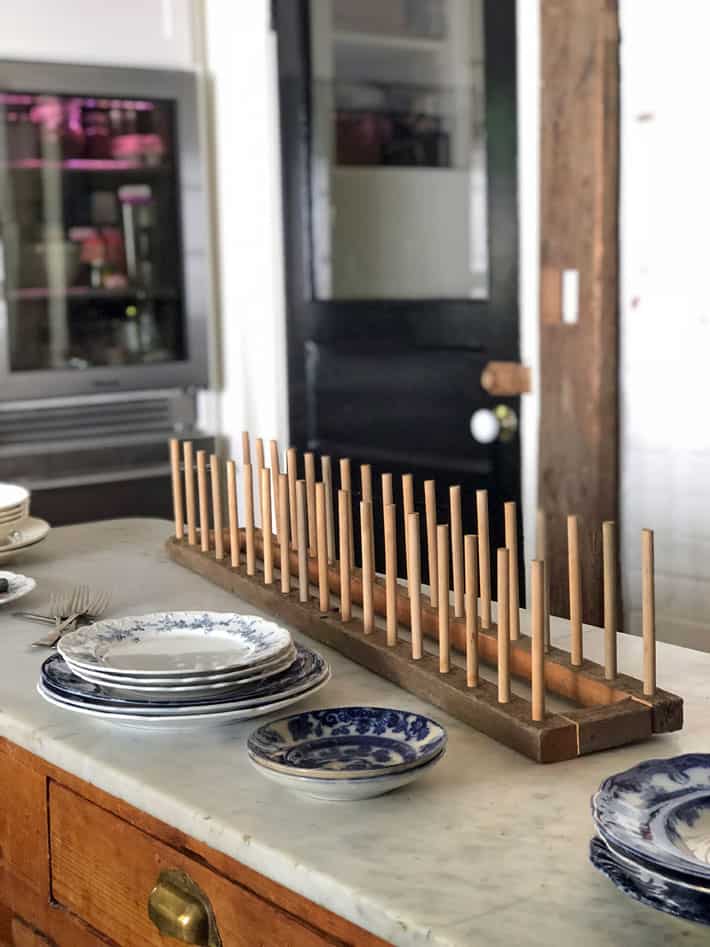
The only thing that's left is filling it up.
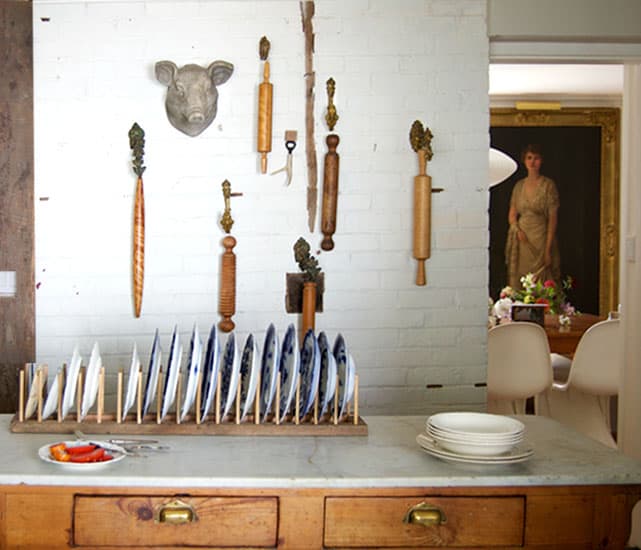
I made my plate rack REALLY big. Because I'm hoping to be able to use it on the lower shelf of my new antique hardware store cabinet. I also made 2 of them because I wanted the plates to go from one end of the cabinet shelf to the other, but one long plate rack wouldn't have fit into the space.
MEASUREMENTS
Length of entire piece - Anything you want.
Width of entire piece - 5"
Space between dowels - 2" from centre
Length of dowels - 6" but you can make them as short as 4" if you like.
OTHER USES
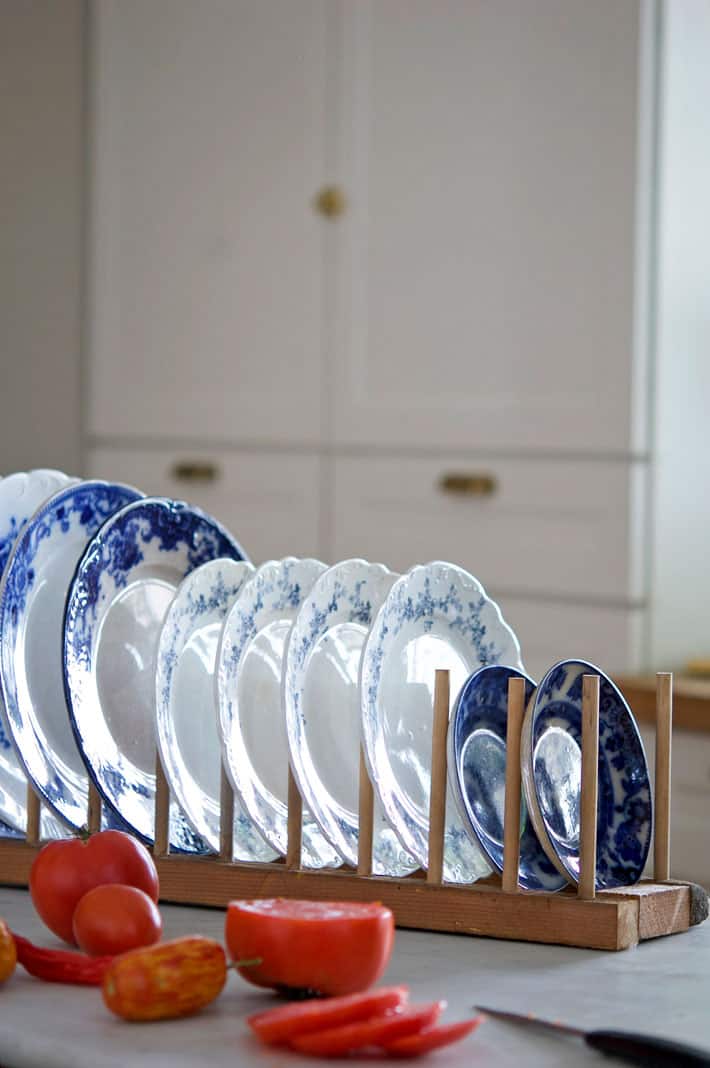
- platters
- cookie racks
- spools of ribbon (make your dowels further apart for big spools)
- pot lids
- books
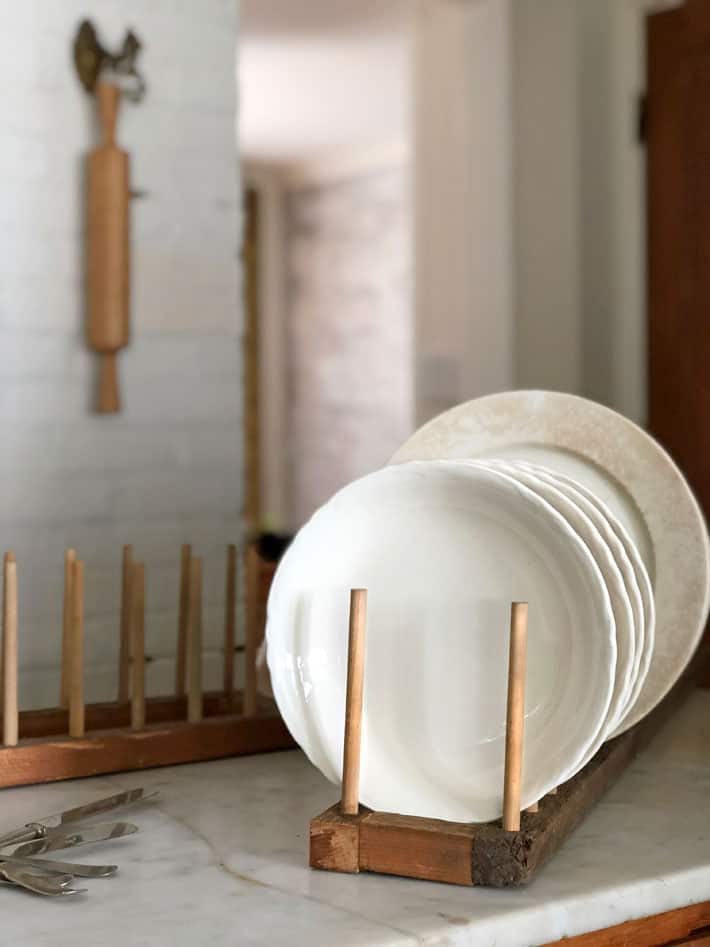
If you happen to come over ...
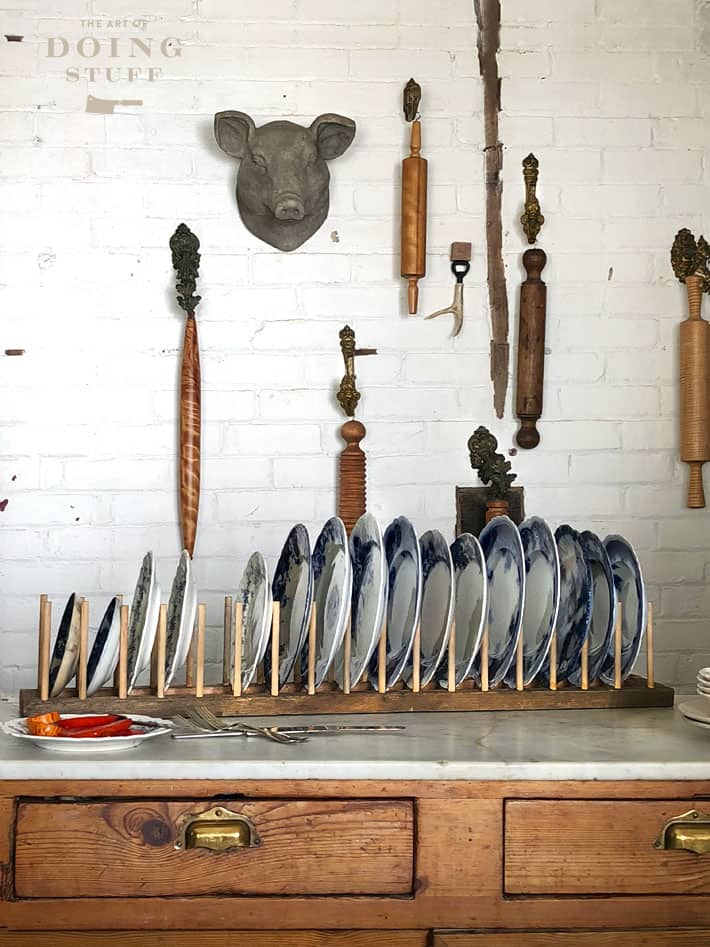
and you like my plate rack ... (and wood rolling pins)
They're not for sale. But I have a pair of overalls that are.
→Follow me on Instagram where I often make a fool of myself←




Jo-Ann
Just appreciating your wood cupboard/island thingamajig with the marble counter. So very nice. Spurred me to search your site for marble cleaning and/or restoring. Surprised me that you haven't got a post for this! I have an old piece with a fancy-shmancy profile/edge - perhaps once used for the top of a chest? - but it's got some staining and overall dinginess (is that a word?). I Know I can google it but I'm really wondering how You'd approach it.
Dan Stoudt
The same frame and dowel concept can be adapetd for drying boots or mittens and gloves.
Karen
Yes! ~ karen
Mary W
I need help in figuring out how to display in a useful way, the wooden 'pin' my grandfather carved for my grandmother back in the very early 1900's. She made biscuits with it everyday and I'm WEALTHY to claim it as mine! But I lack wall space so it would have to be useful, also. Maybe a dish towel rack? I need ideas!! HELP. Got to add to my years ago comment - your blue dishes still look amazing - beautiful - never goes out of style.
Karen
hi Mary! I'd have to see what it looks like to give you an idea. :) ~ karen
Patti_is_knittinginflashes
I’m almost 70 years old. I really, really, really want/need a drill press but can I justify it at that age?
Ei Con
If you’ve got room for it, find one at an estate sale. Cheaper than new and better quality.
Betsy Nickel
I hope so because I am also almost 70 and I want one too. I am tying to find a place for it in my modest abode.
Lauren
If you want/need one, that's the criteria for you.....not age. Go get yourself one girl!
Karen
Well yes of course you can! I mean, a breast feeding pump? Maybe no. But a drill press? Absolutely. ~ karen!
Dani
You could live to be 108. You have plenty of years left by the damn drill press! I have it on my shopping list too. Maybe we could put some places hints as a Christmas or birthday present. ♥️😘
Randy P
What can one say beyond cute plates and a nice rack, and vice versa. ( I always wanted to say that to a charming lady without fear of getting my face slapped). And I too panicked seeing that monster saw and stack of dowels. Holy Flying Fingers Batgirl! Maybe consider shopping about for a small hobby type bandsaw?
Sandra D
Just what I need for my pot lids - I was thinking of going to a Storage Supply type of store (or Jysk). Not anymore. Thanks :)
Dani
Genius idea!
Mona Arnott
Cool! Love it. I have some pretty decorative plates that I want to display (not the type you don't actually use - I do use these) and now I know how to do it. I also like the idea from one of your readers for the baking trays. I've been trying to find a solution for those too
Heather
Yours is the only blog I tell everyone, "Look for it!" I love your lust for life and the way you muck in. What a lot of work you do. It amazing! Not just gardening and raising chickens and making everything from a pizza oven to a plate rack but documenting it. Such a lot of work! Such an admirable blog! And much appreciated. :)
Karen
Thanks Heather! That's a very nice endorsement. :) ~ karen!
Pamela Marshall
I love the plate rack and it looks like a project I can do. I haven't thought about getting a drill press's but now I see I really need one. Beautiful plates and I like the idea of a drying rack. It could be like plate racks stacked on top of each other.
Praise when it is due
Lame. Not the project, but the comments. There is nothing innovative, brilliant, or genius about this. It's a design copied from others. Execution is fine.
Marian
And your comment is at the top of the lame list. Not everyone has the experience or courage to try something new. When someone is inspired by another who makes them feel they too can accomplish it, don't diminish their feelings or praise just because you don't feel that way. It makes you a very small person.
Mary
Is your name really "PRAISE WHEN IT IS DUE"? Don't be a jackass.
Ian Anderson
Oh Karen! My heart went into my mouth when I saw you using the circular saw. Horrible machines, they snatch with alarming ferocity at the drop of a hat, truly dangerous machines IMHO, especially on short workpieces! They are designed to cut sheet material really.
Best stick it in the local classifieds and then keep any eye out for a nice little mitre/cross cut saw. A million times safer and many times more accurate. You'll amaze yourself by how easy stuff is to build when your cuts are 100% square.
Phew, as the movies say "no one was harmed in the production of said plate rack" thank God ;-)
The only good circular saw is a plunge saw which sits on a rail.
Karen
As I said in an earlier comment, both of my sliding compound mitre saws (1 12", 1 10") were stolen out of my shed. I have to replace them. ~ karen!
Flash
I don't have much counter space. I am going to try angling the dowels and hanging on the wall
Sandra D
I like that idea! I was going to make this for a deep drawer I have (for pot lids), but I don't have a lot of space there, either.
Amy Watson
I'm impressed that you have a drill press.....I'm drillpressed.....if you will.
judy
Ha......chuckle...now I'm happy thanks...
Patti
Such a pretty plate rack but can we talk about your fridge I see peeking out in the pic? Did I miss a post about that fridge? Do you love it? Does it always look tidy?
Karen
I've had that fridge for years. I got it when I redid my kitchen 4 or 5 years ago. It rarely looks tidy inside. I don't worry about it. :) ~ karen!
Mary W
Love your blue plate collection - they will make anything taste better when served on them. Your Speckled Roman tomatoes are gorgeous and I love paste tomatoes since there is more meat inside. I'm beginning to wonder why Lego's don't make "blocks" for adults that glue together to create great dividers for lids, plastic or otherwise, and even plates. They are missing a target customer - the ones without a drill press.
Sarah
Love your rolling pins. That visual brings so many memories.
Joe Mota
Great plate rack. Here is an idea for you Karen. I am sure this is somewhere on the Internet. Now is the time in the garden to dry onions, garlic etc. How about Karen checking on how to build a drying STACABLE rack for these vegetables. The reason I ask is because your instructions and photos are excellent. Keep up the great work
Joe
Karen
I do like those racks. I know exactly what you mean! Just wood slats with space in between them really. ~ karen