I was able to kerf cut the very first time I tried it. So I'm pretty sure you'll be able to as well. Kerf cutting will let you bend wood, even a 2x4 into a circle. This is the method you need if you're trying to make an arch, a slight curve or even a 90 degree angle from one continuous piece of wood.
I find manual labour soothing. Measuring stuff, concentrating, contemplating a design. Hitting things really hard with a hammer. All very soothing.
One of the projects I focused on years ago was a woven round bamboo basket to cover my garbage can and giant green bin. This house has no hiding spots-nowhere to stash garbage cans, snow blowers, or empties.
It was a total failure. Not even close. A few years later I built this box for hiding my recycling bins and added gates to a section of my backyard to hide the garbage behind.
If either of those fail, I'll try something else. Maybe stack all the neighbourhood cats on top of each other around my garbage cans. Practical and soft, should you happen to fall into them.
But it wasn't a complete write-off. The one thing that did work was my first attempt at bending wood. To make my failed garbage shield, I had to bend a piece of wood.
I did it using a technique called kerf cutting. And here's how you do it ...
How to Bend Wood with Kerf Cuts
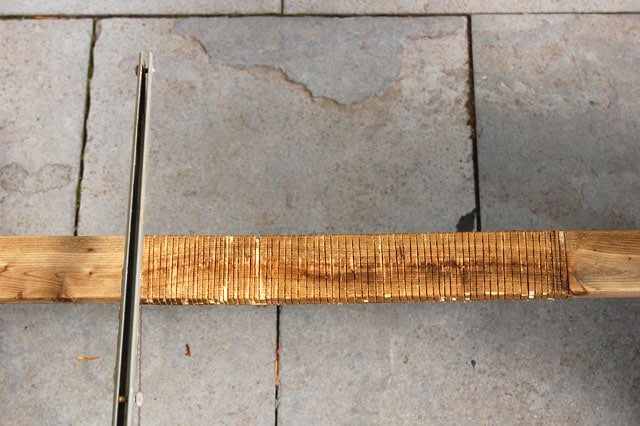
Kerf cutting is making many kerf cuts (cuts the width of your sawblade) along a piece of wood.
Kerf (def):
Kerf refers to the width of cut a saw blade makes when it's cut through wood. When you're cutting a board you have to allow for the width of the saw blade and its teeth when you're cutting.
Kerf cutting is the method I used because I didn't want to mess around with bending wood using steam or soaking.
Would you like to save this stuff?
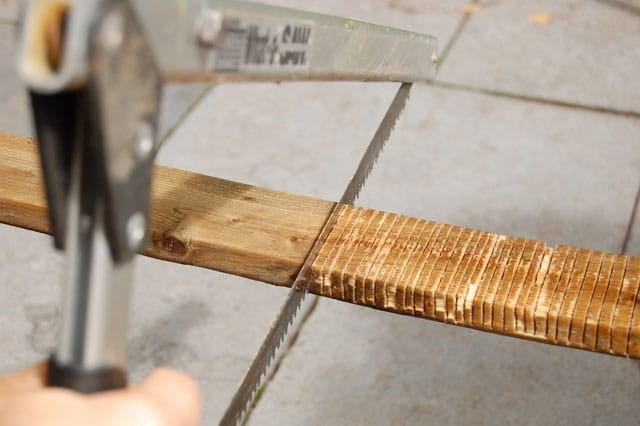
Normally you would use a table saw to do this. It would be much more precise and much easier than doing it with a handsaw. Even though I have access to a table saw, I figured many of you would not, so I wanted to see if kerf cutting was possible with a regular saw.
It is.
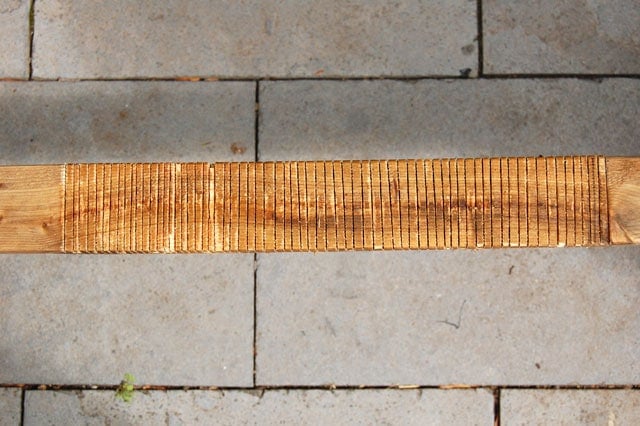
The most important thing about kerf cutting is making sure you cut through enough of the wood. You need to get so close to the edge of the wood that it's scary. If you think you're getting too close and you're going to cut your wood right off, then you're doing it right.
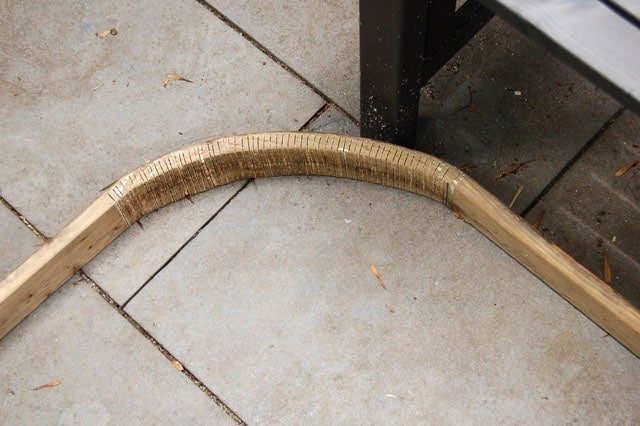
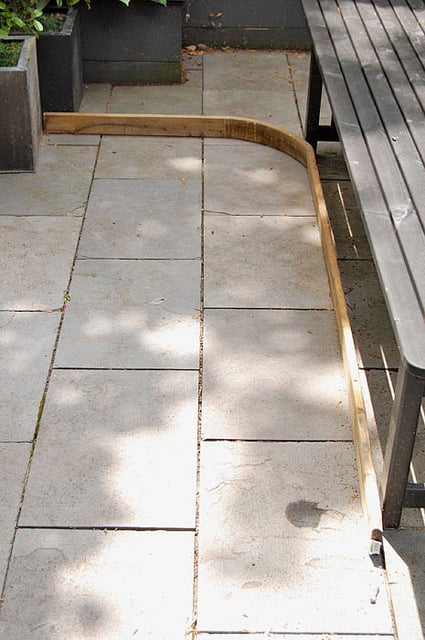
Once you have enough cuts for the amount you want the wood to bend, you cross your fingers, make an "I'm scared" face and start bending. If the wood seems to be resisting, you haven't cut through far enough. Keep going. It *will* work.
At this point you should be able to bend the wood the same way you can bend a bendable straw.
Uses for Kerf Cut Wood
- Wood Archways - Garden gates, arbors, or curved interior trim.
- Curved Raised Beds - Oval, circular, or serpentine beds.
- Baseboards Around Pipes or Curves - Custom fit without a multi-tool tantrum.
- Rounded Furniture Edges - Table skirts, shelf fronts, or dramatic headboards.
- Curved Benches - Indoor, outdoor, or around a fire pit like a DIY amphitheatre.
- Custom Cabinetry or Banquettes - Because straight lines are for quitters.
- Mailbox or Post Curves - Style your utility poles like you mean it.
- Wall Panels on Curved Walls - Like wainscoting for the advanced species.
- Circular Trellises or Plant Supports - Form meets function meets bragging rights.
- Sculptural or Art Projects - You bent it because you could, not because you had to.
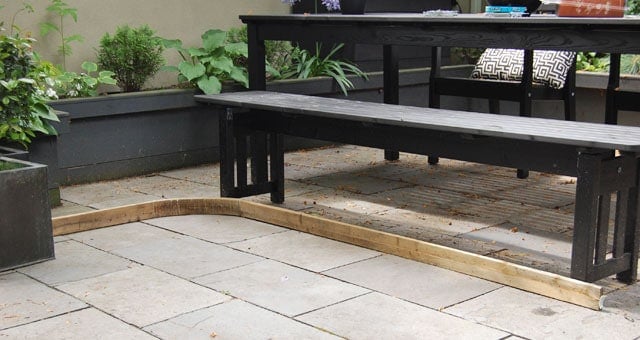
It looked good, it worked, and in 12 years I've never needed to do it again. But kerf cutting is in my brain arsenal, ready to be pulled out whenever I need it
And now it's also in yours.
→Follow me on Instagram where I often make a fool of myself←


Jody
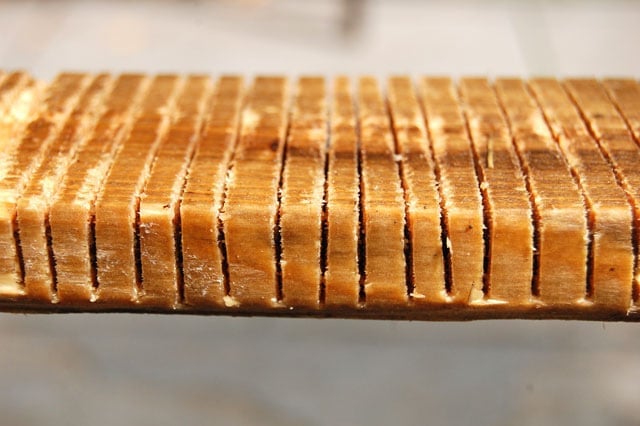
The closeup of the cuts looks like Wonderbread white bread. Now I want toast. And butter. And jam!
Karen
Just moments ago I wanted Hasselback potatoes. Now it's a peanut butter and jam sandwich. ~ karen!
Lez
First thing I thought of when seeing your photos was Hasselback potatoes! Lol
I wonder if one could use the same technique, with something like a thinner wooden spoon, or thin metal rods, each side, to make the depth even on each cut?
Brilliant job! Well done! Hasselback wood! :)
Karen
Thank you! And now I'm craving potatoes. ~ karen
Hettie
I've learned something today. Thanks, Karen! Never know when kerfed wood might come in handy.
Karen
I wish I could think of a reason to do it again! ~ karen
T S jr
brilliant, just brilliant to take on that challenge ( and without a single cat to help )
how did you estimate 1) space between cuts, and 2) how many cuts to make?