As a lifelong gardener and a garden writer (shout out to The Old Farmer's Almanac) I've accumulated a whack of information that only comes with experience. And trial and error. Lots of error. Read on for 10 GREAT Vegetable Gardening Tips.
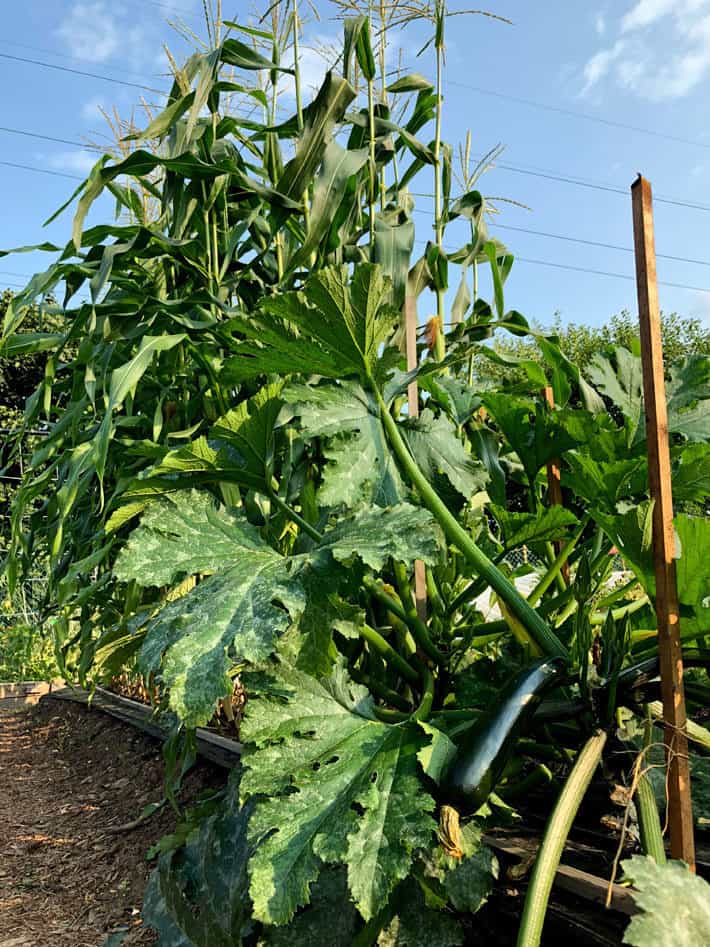
That's a zucchini. Can you see it there? I can. I also freeze, pickle and ignore them.
At the moment there are 5 zucchini in my crisper, 2 on my countertop and a stack of frozen zucchini slices and noodles in my freezer. And those are just the ones I see when my eyes are open. The second I close them I'm being chased by alarmingly large green zucchini monsters which for some reason are wearing clown shoes.
The first planting of almost everything I put in ended up having to be replanted, and my zucchini was no exception. Something ate the first go-round of zucchini seedlings, so late in the season I replanted. Which is why I'm now overrun with zucchini while everyone else is still basking in the glory of having given it all away to neighbours and strangers on the street.
10 Great Vegetable Gardening Tips
TIP #1
ZUCCHINI
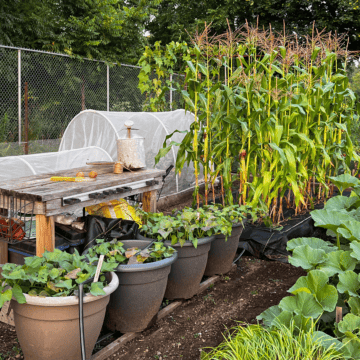
Stake your zucchini. Instead of letting my zucchini sprawl all over the garden as soon as it was up, I set a narrow stake next to its stalk and as it grows I tie the stalk to the stake. It keeps it upright, taking up less space, makes it less prone to disease and you can SEE the zucchini without hunting for them.
Also remove any leaves that are below the lowest growing fruit. They do nothing other than harbour disease. Cut them off right next to the stem.
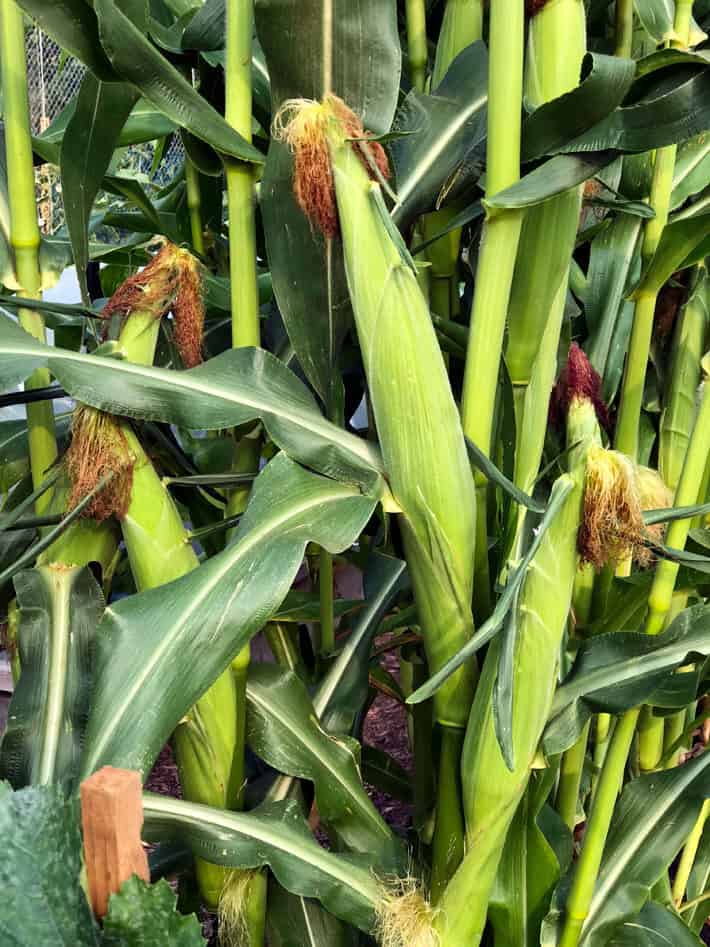
My corn was also replanted after it failed to germinate. For the second planting I used a method that professional growers use and it worked so well I could in fact become a professional corn grower now.
TIP #2
CORN
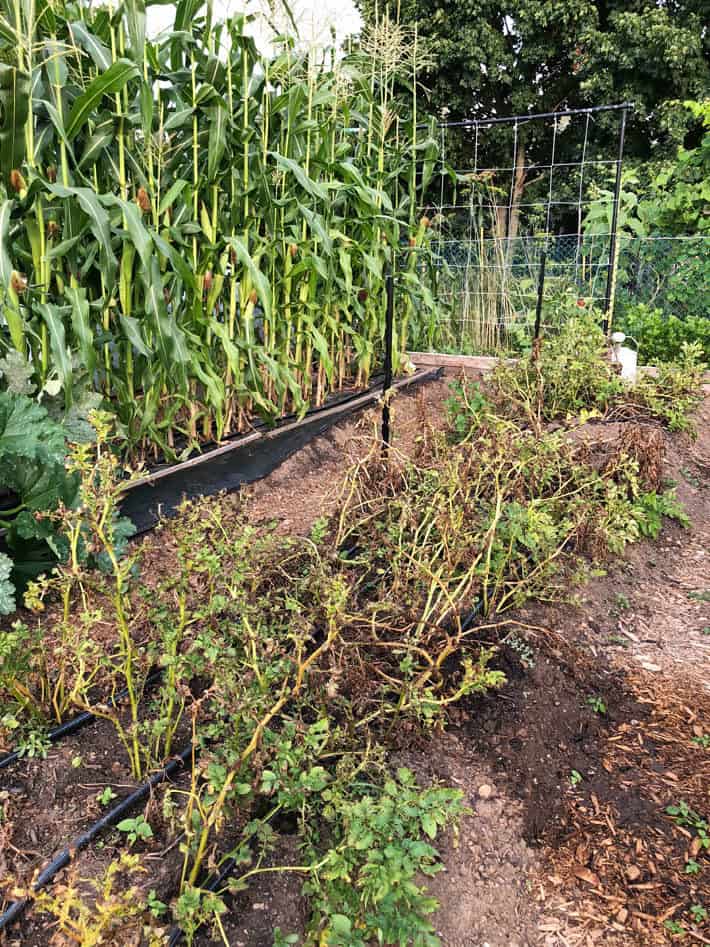
When planting your corn, lay down a film of black plastic over your planting area. This warms the soil. A week later stick a hole in the plastic with your finger, put your corn seed in the hole and cover it with soil. The plastic makes a perfect cozy house for the corn to germinate. It's warm and retains moisture. I had almost 100% germination rate using this pro method.
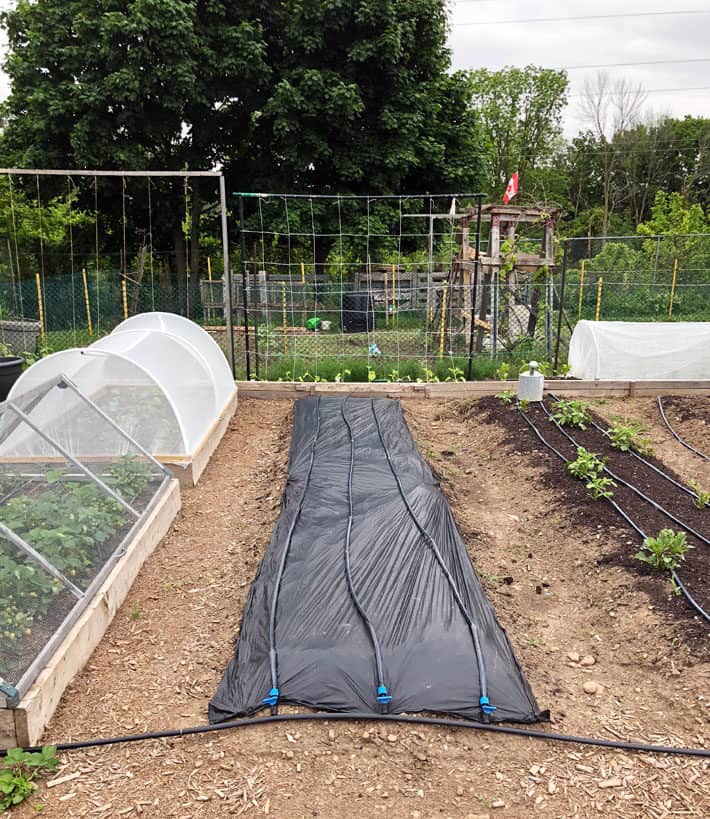
This is pre-planting, when I was just warming up the soil.
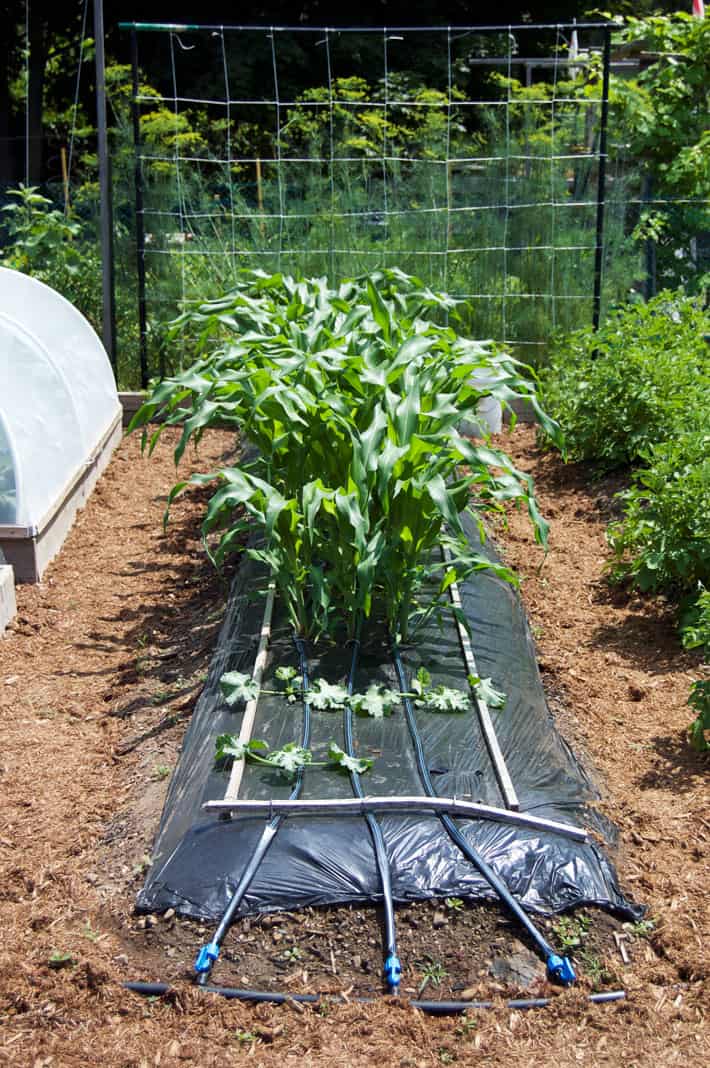
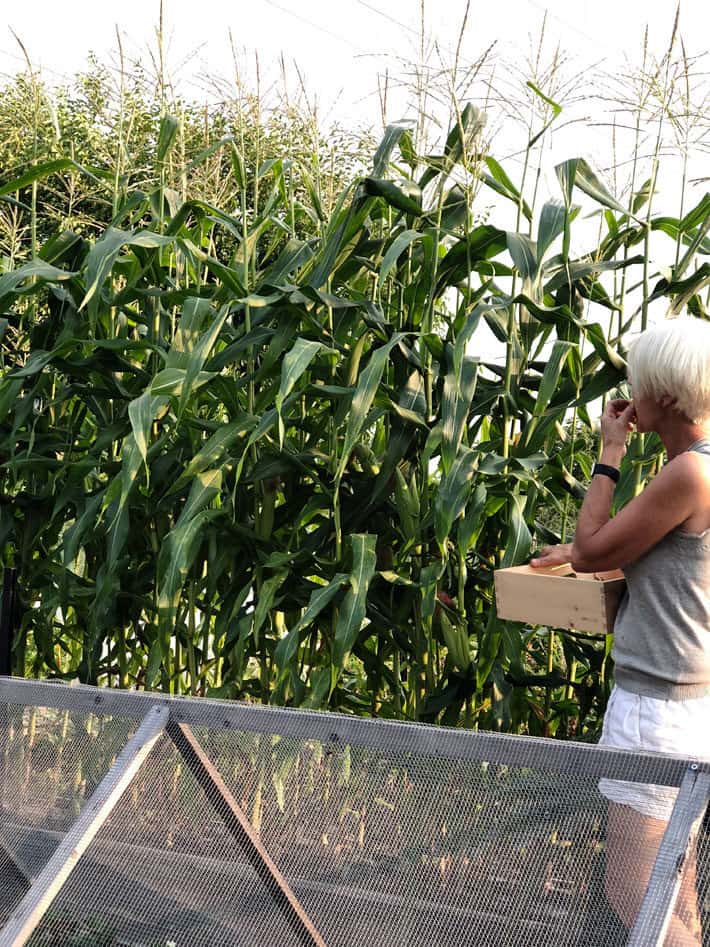
Post planting when the whack of corn has started growing. I planted around 60 plants of Honey Select corn and each plant has 2 cobs on it, some with 3.
I cannot eat all that corn. So ..
TIP #3
PRESERVING CORN
Freeze fresh corn. It's possible to can it, but if you have room in your freezer most people say the quality is better if you freeze it, plus it's less work.
How to Preserve Corn
- Blanch whole cobs of corn for 3 minutes in boiling water then submerge in a cold water bath to stop the cooking process.
- Shave the kernels off of the cob and freeze in a single layer on parchment paper.
- Once frozen, remove the corn from the parchment and place in freezer bags, glass jars, or vacu-seal them using my favourite kitchen tool, a Foodsaver.
The model I use is the Foodsaver V2244. It's the smallest and cheapest model of Foodsaver. I have limited kitchen cupboard space and I don't plan to vacu-seal a fully in tact cow so there's no need for a big one.
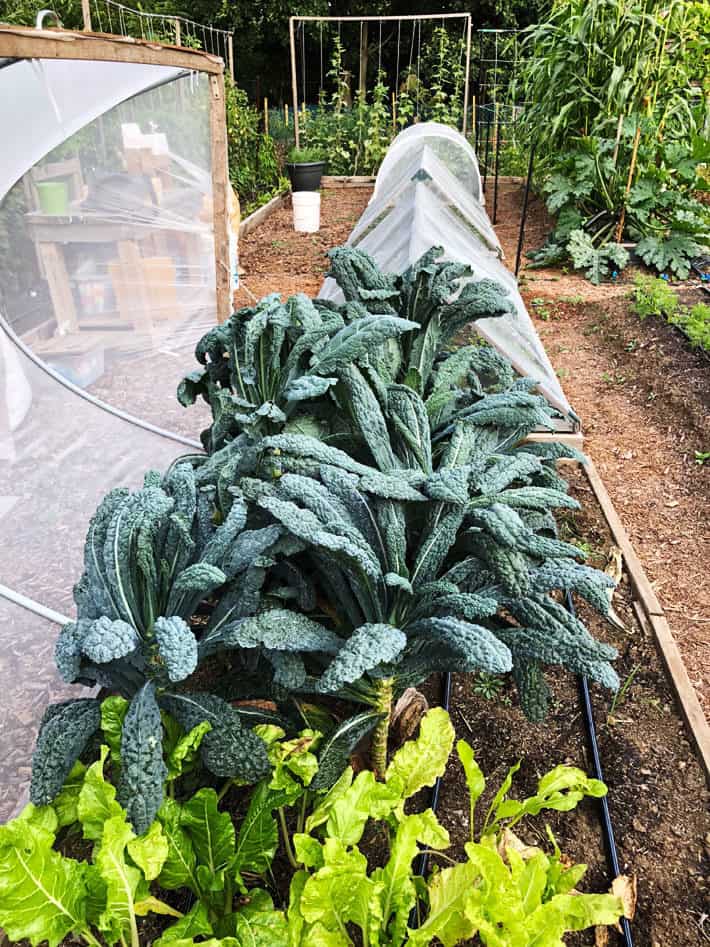
The hinged hoop houses. There is no better tip this year. Yes, they're a bit of work and expense to make but they've done more than just keep cabbage moths out.
The hinged hoop houses also seem to be creating a little bit of a microclimate and protecting all of the plants from any wind damage. People think cold is the worst thing for plants, but a lot of times it's wind that does the most damage.
I planted a variety of things in my hinged hoop houses including broccoli. I got my first harvest of broccoli that grew large heads AND was completely cabbage worm free. I grew rapini which was delicious. I grew hot and sweet peppers which will be the first ones I've had in a long time that weren't decimated by pepper worms.
And then there are the brussels sprouts. I don't even like brussels sprouts. Except if they're done like this, a recipe I snagged from Shelter restaurant in Tofino, British Columbia.
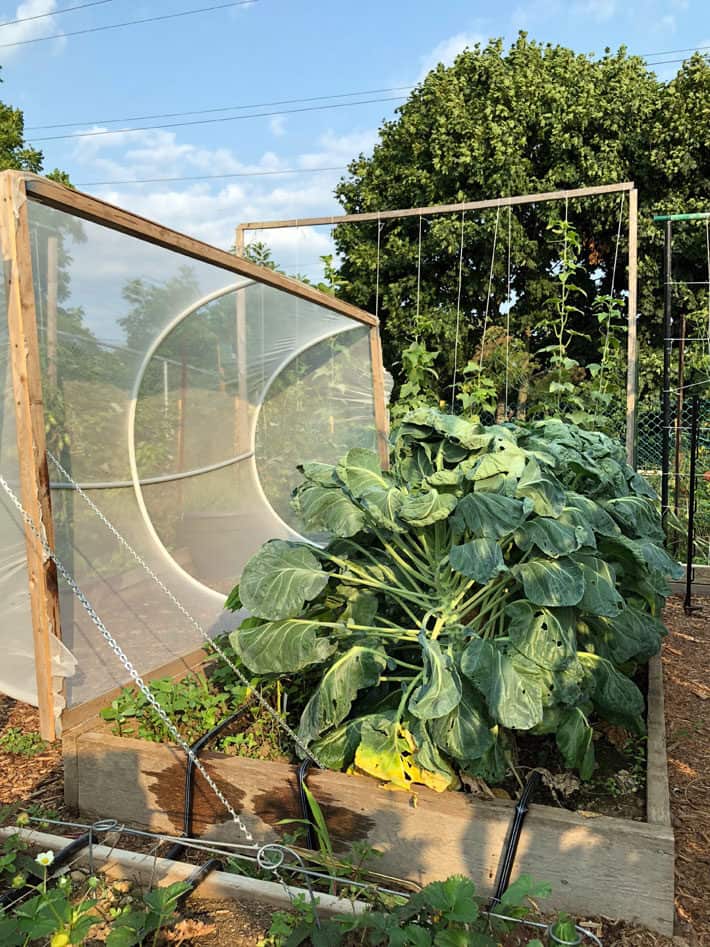
The brussels sprouts have grown so big already that hoop house isn't big enough for them. They're quite literally bursting the top off of the house and lifting it up.
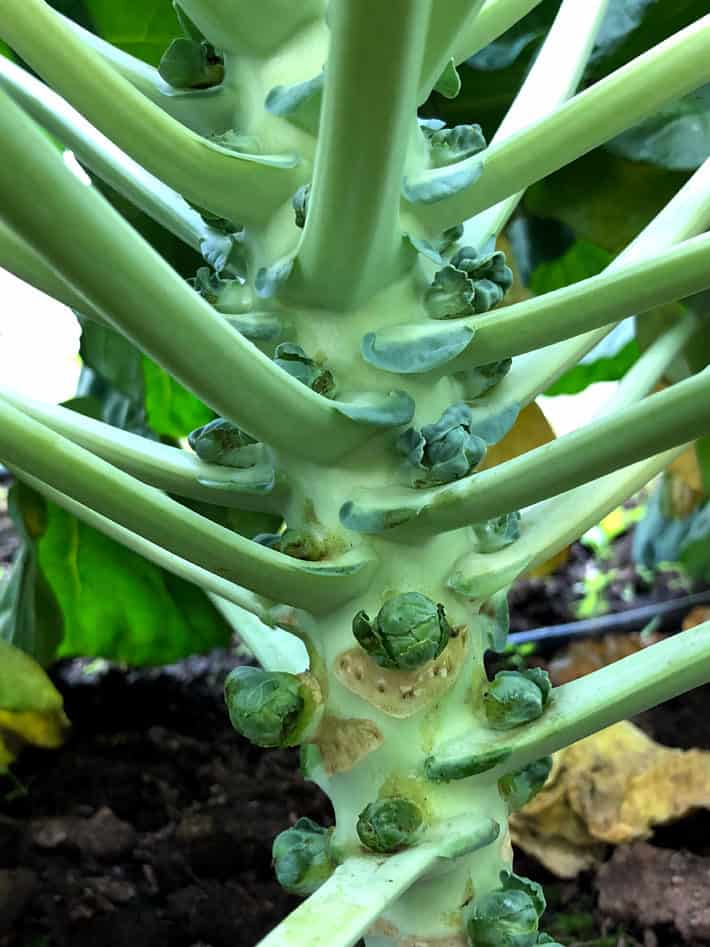
Each and every stalk is covered in - ack- brussels sprouts. Not a bit of insect damage to any of them.
The relatives who get these stalks as gifts will be mighty pleased.
Tip #4
HOOP HOUSE
BUILD A HINGED HOOP HOUSE. A regular hoop house is fine, and it's what I used for my cabbages this year, but a hinged house is life changing. You never have to worry about the row cover flying off in the wind, the cabbage moths can't get in and to weed or harvest it's just a matter of opening the lid and then closing it. No weighing down row cover with rocks or bits of wood.
I'd like to interrupt this 10 Tips post to bring you rabbits. Cottontails to be exact. Their mother gave birth to them in the middle of one of my potato patches. The mother digs out a shallow hole, gives birth to the 4-5 babies and then leaves them there covered in soil and rabbit hair until the next day. She only comes back at night to feed and check on them.
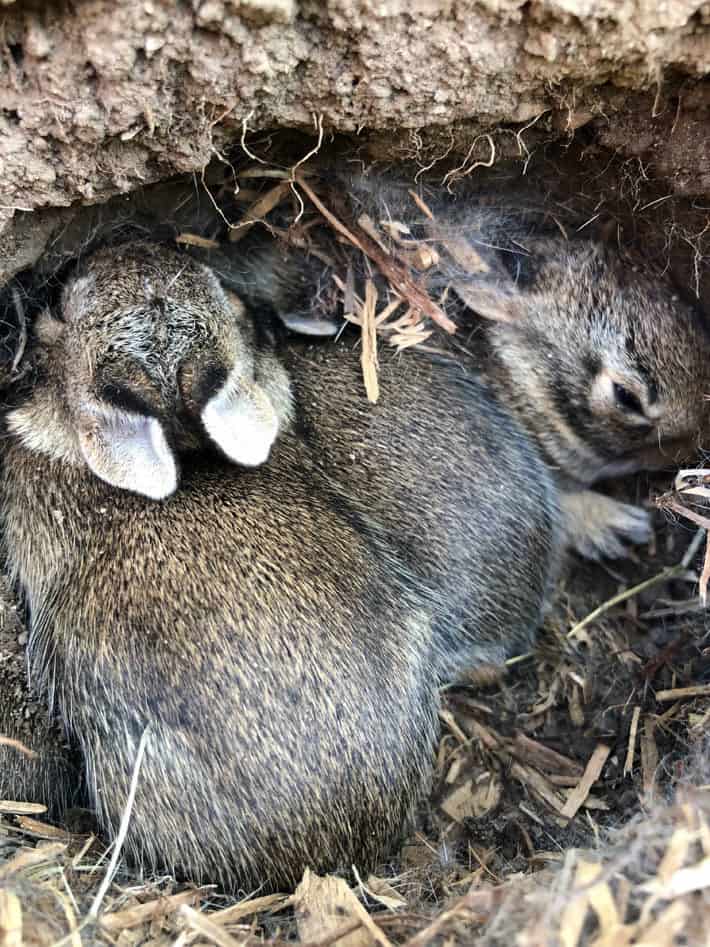
After about a week and a half the rabbits eyes are open and they emerge from their little den to venture out into the preverbal carrot patch.
Or in my case the actual carrot patch.
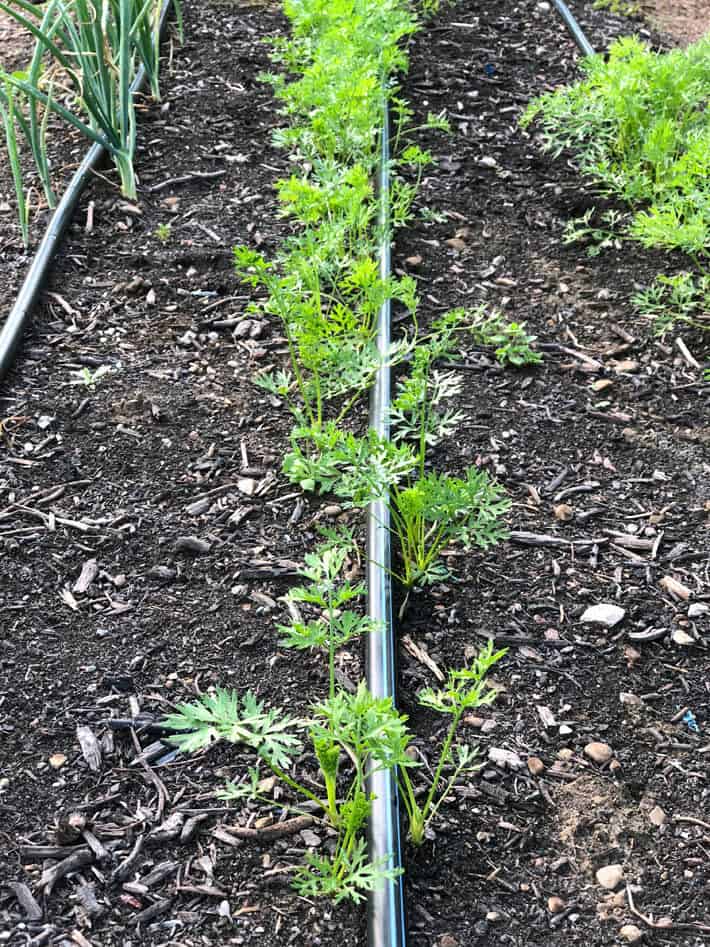
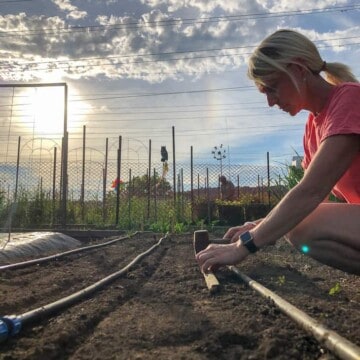
My carrots finally germinated. This was round 3 or 4 of trying to get them to go this year. I couldn't figure out why the first 3 plantings didn't germinate but I worked it out. It was a simple matter of not enough water. Normally you can put a plank of wood down on carrot seeds for a week and it's enough to keep the soil damp enough to germinate.
That would be in a year when the temperature wasn't routinely over 35 °C (or 95 °F).
Tip #5
CARROTS
Would you like to save this stuff?
To get carrots to germinate, scatter them on the soil, press them into the soil with the palm of your hand and then sprinkle a scant amount of more soil overtop of them. Press again. (seeds need to be touching soil to germinate so pressing them like this helps guarantee germination) Gently water so you don't wash the seeds away and then cover with any large, heavy, flat object like a piece of plywood or planks of regular wood. Maintain moisture in very hot weather by watering every day! After a week or so check under the wood. The moment you see any sprouts coming up, remove the wood and water normally.
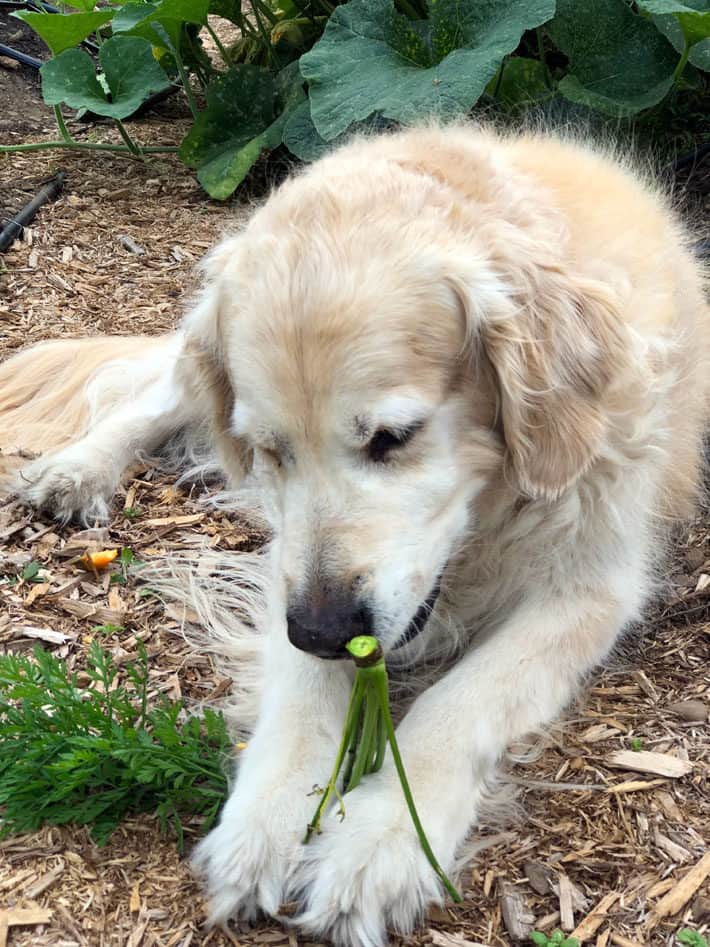
So far the rabbits have avoided my carrots, generously leaving them for this dog.
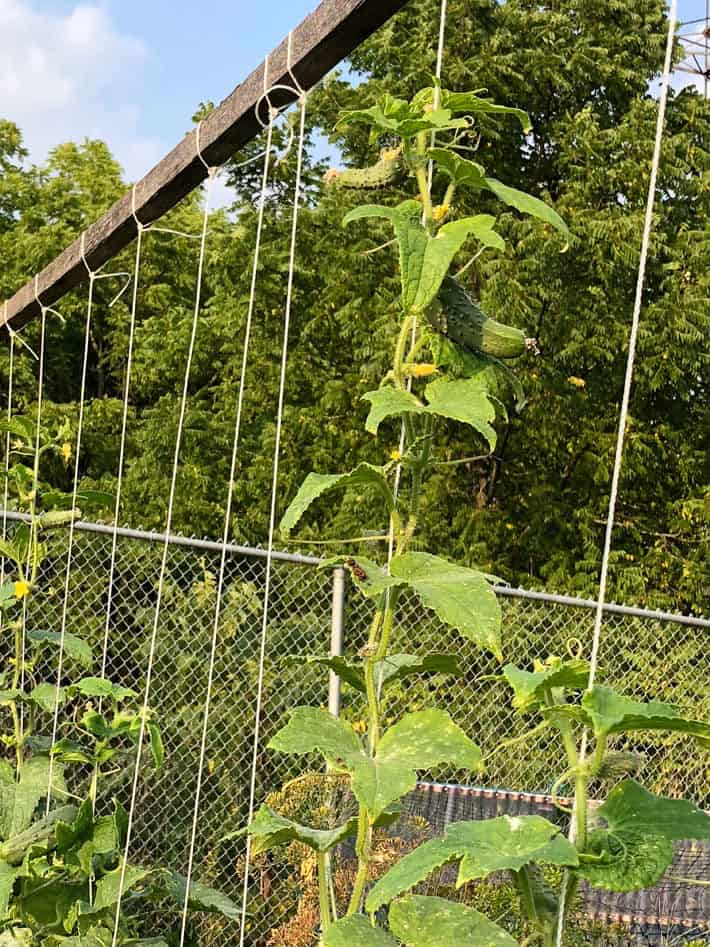
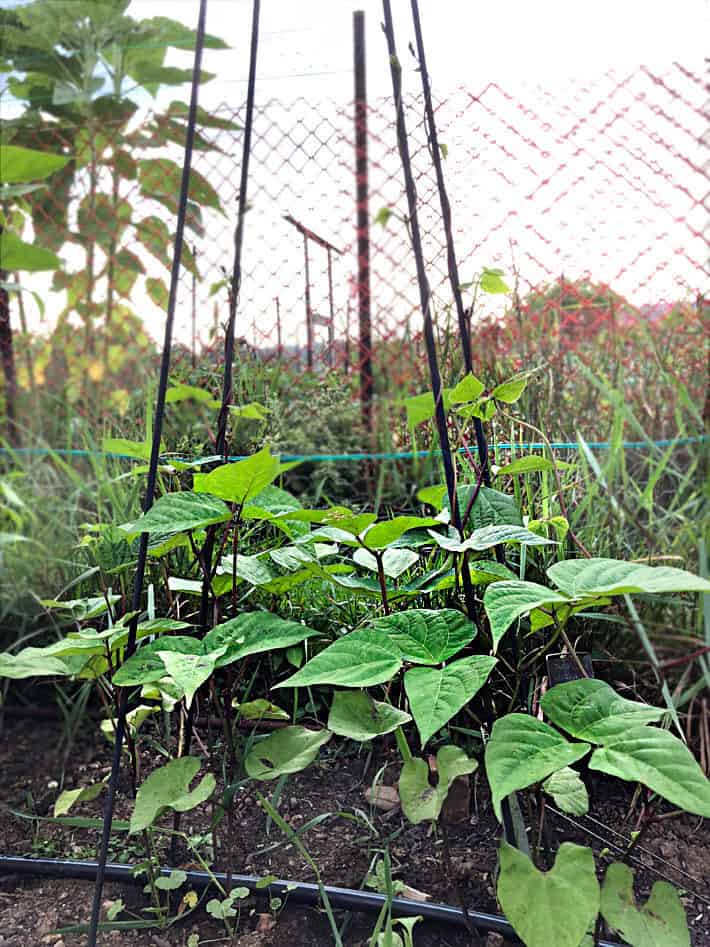
Most of you know that I grow my tomatoes using the string method. But there are a lot of you who may have missed the fact that I also grow my cucumbers this way. String training is also the best way to grow your cucumbers. It makes harvesting easier and disease less quick to take down your cukes.
Tip #6
CUCUMBERS
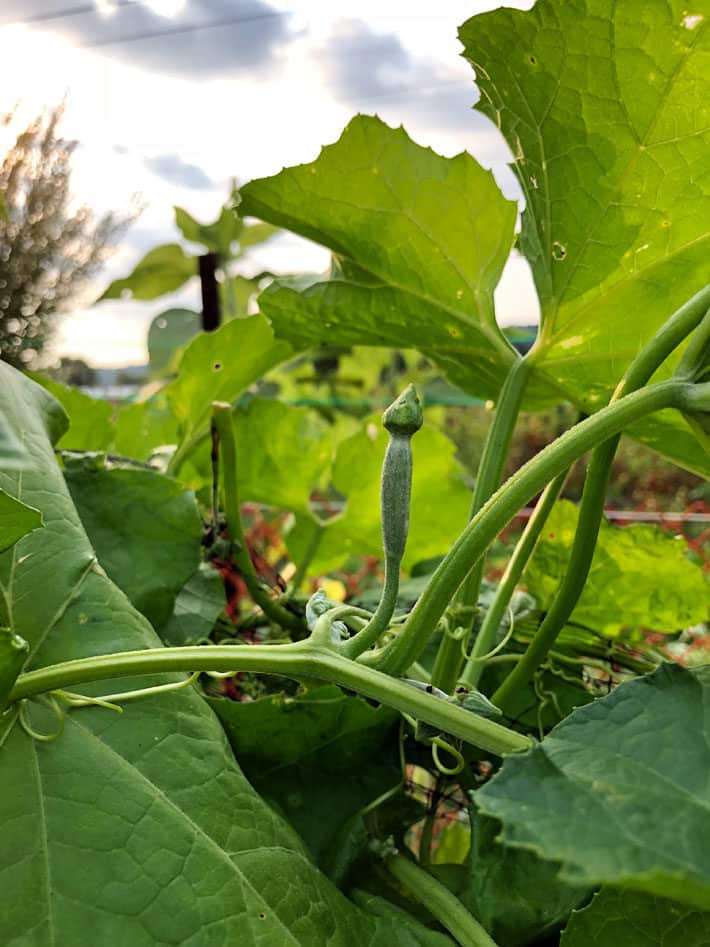
String train anything you think you can get away with. It saves space and is generally more healthy for the plant. Cucumbers, pole beans, and even sqaush and melons can be string trained.
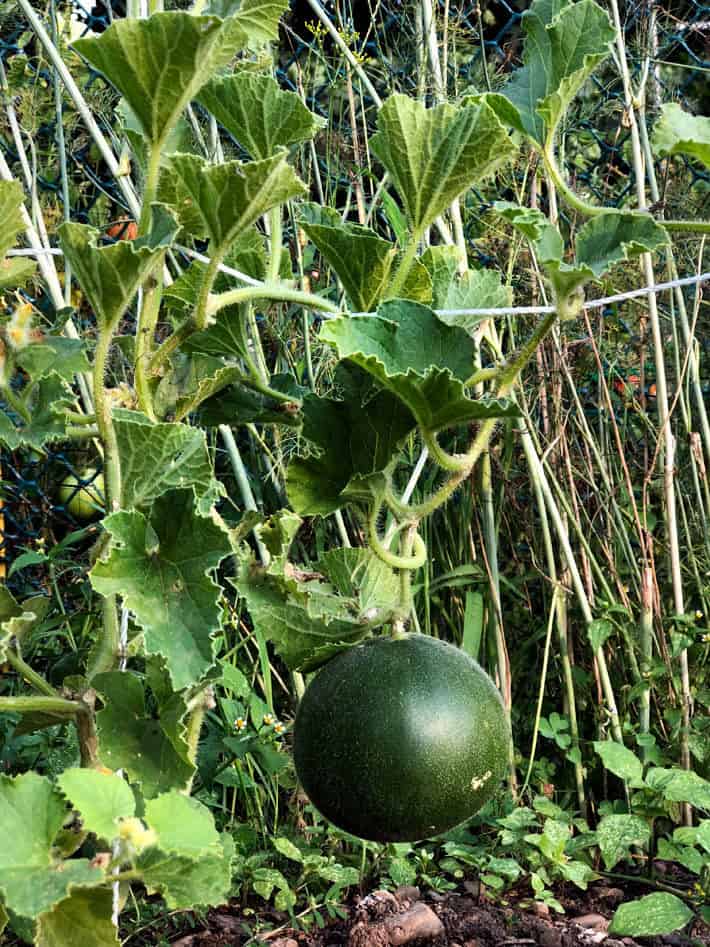
I had a lousy year for melons. Again ... I had to plant them 3-4 times before they finally took. Rabbits kept eating the seedlings right down to the ground. Then, once I finally got them going I realized they were being completely shaded by a forest of dill for most of the day. It looks like I might, MIGHT get one melon this year. A honeydew.
Tip #7
THROWING SHADE
Be aware of the shade your other plants might throw. When you're planning your garden map everything out taking the height of all your plants into consideration. If you plant your rows East to West, put the shortest things in the Southernmost rows and the tallest in the Northernmost rows.
This was the first year in a long time where I only planted a couple of heirloom tomatoes. The rest were hybrids, genetically created to resist disease. Early and late blight to be exact. Last year our community garden was attacked by evil, splashing disease spores that ravaged all of our tomato plants.
There are *some* heirlooms that have built in disease resistance but this year I tried newer hybrids to see if they held up better than the heirlooms.
Side by side I grew Speckled Roman heirloom tomatoes and a newer disease resistant hybrid called Plum Regal.
Both plants are producing well because the blight isn't as bad this year. BUT the speckled roman heirlooms are definitely showing more signs of the disease than the hybrid Plum Regals are.
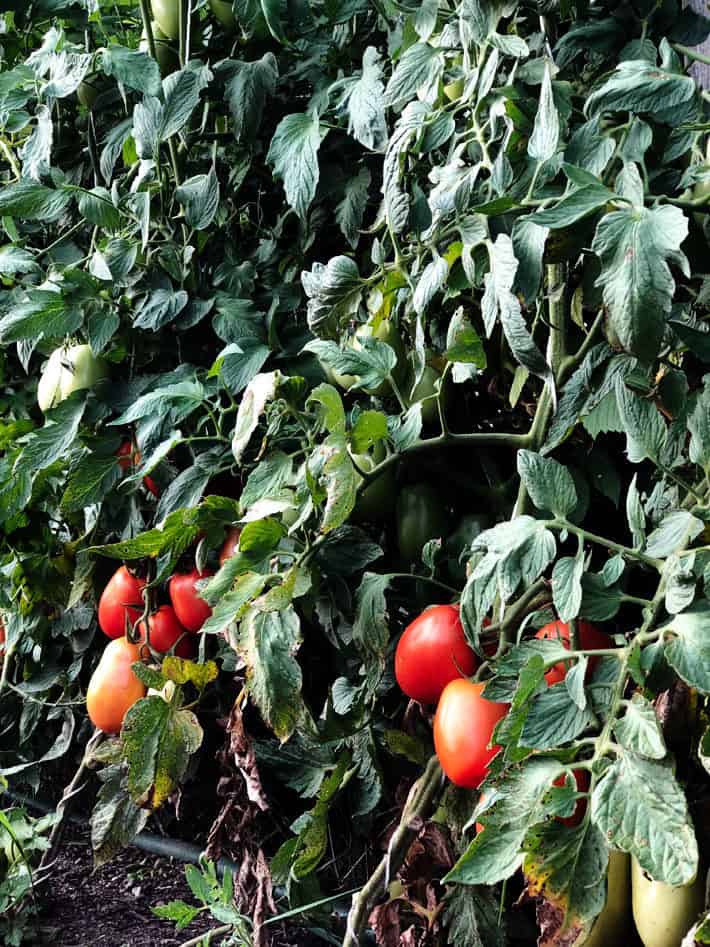
My Plum Regal tomatoes are still showing some signs of blight but as the name suggests, it is resisting it. The plants are shrivelling and dying the way a less disease resistant plant would.
TIP #8
DISEASE
Search out disease resistant varieties for whatever disease ails you in your area. Nothing will be 100% disease free but certain varieties *will* help fight against disease and pest attacks. Plum Regal worked well as a paste tomato for me in terms of disease resistance. I won't know how I feel about the flavour until I taste some of the tomatoes I've canned. I can tell you I don't like the size of them or a paste tomato because they're so big you have to cut them into quarters just to get them down the chute of the tomato press. A San Marzano on the other hand can be dropped in whole.
Except sometimes you want to grow something very specific, disease be damned.
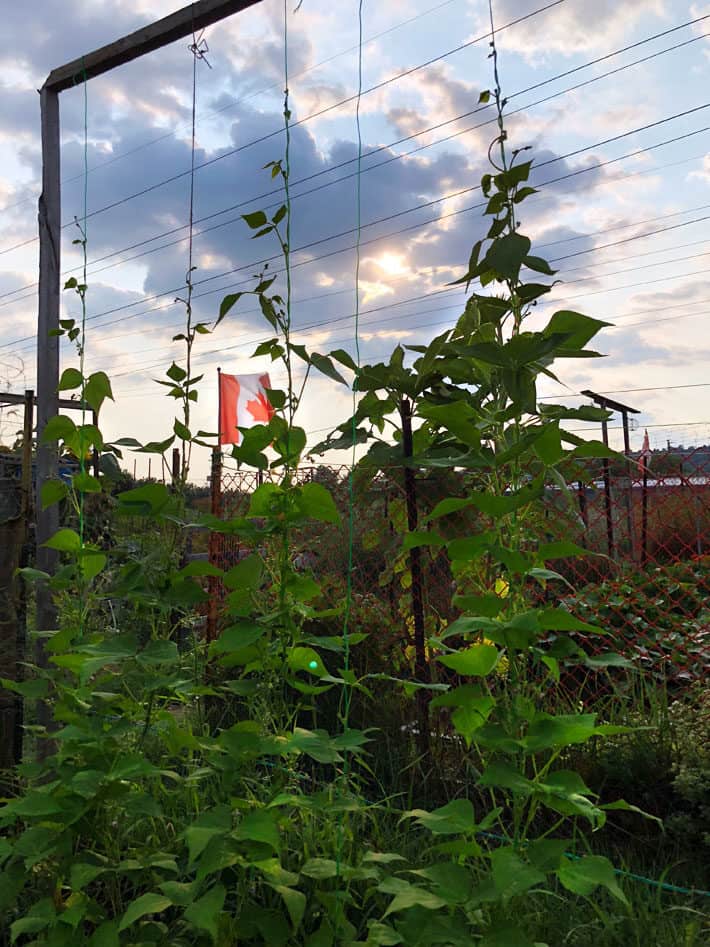
Enter the heirloom beans. I'm a newcomer to the world of bean nerds. My Internet friend Crystal from Whole-fed Homestead and Karen from Michigan Heirlooms each sent me some rare bean seeds that are NOTHING like anything you can get from a store or garden centre.
These beans up top also ... needed a few plantings. They're called Lengua de Lobo (which translates to Wolf Tongue) and are rare RARE. The pods will be an iridescent purple and the beans are flattish and white.
I got the seed for this plant originally from Crystal. When I successfully killed every one of those seedlings (actually it was cucumber beetles) Karen sent me some more. I guarded those little plants with my life and it worked. They all germinated and they all have grown.
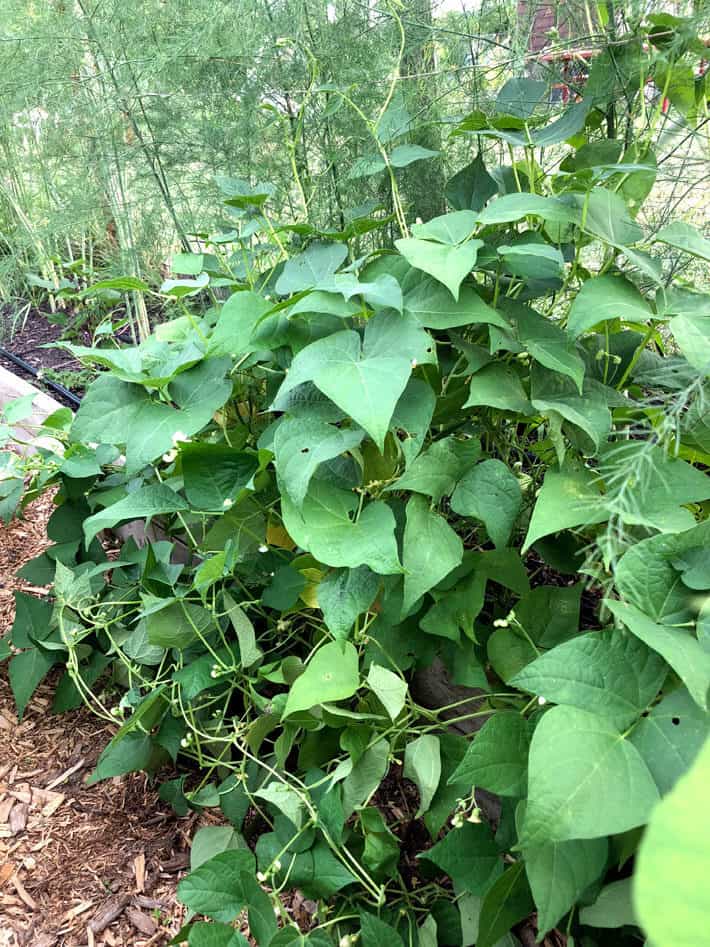
This plant will produce Zuni Golds. Not quite as rare, but probably not available from your local seed supplier either. The pods look normal, but inside the pods are beans that are gold and white with raised ridges.
I'm growing more interesting varieties but more on that later.
TIP #9
SEED SHARING
Seed sharing is where it's AT. Seed sharers have brought back varieties of near extinct vegetables through sharing seeds. Without seed sharing we will lose what little diversity is left of our vegetables. That's what seed sharing is all about. If you get a rare seed you share it with someone who wants it and is willing to share it as well.
Why do this? According to National Geographic, 94% of the world's seeds from 100 years ago ... are now gone.
Tip #10
Make a plan
So you have all this stuff. A LOT of stuff. Even if you only grew one tomato plant and one cucumber plant you probably have more tomatoes and cucumbers than you know what to do with. This spring I made a conscious effort to put it all to use. I do this every year, but this year I've been more successful than others. I realized for instance that I don't need to gather up a bushel of pickling cucumbers before I can make fermented pickles, I can do it with just 5 pounds of pickles. Instead of making a HUGE batch of things, I do small batches more often. It's changed my pickling/preserving world. Ditto for canning tomatoes.
Prior to harvesting everything, plan how you're going to cook, preserve or store this stuff. If you wait until you harvest it you may just end up with a pile of rotting zucchini on your counter.
Which of course is terrible. Although not as terrible as being chased by one wearing clown shoes.
→Follow me on Instagram where I often make a fool of myself←


JO BRAY
I’m planning on dehydrating a lot of tomatoes this year and then making tomato powder. Nice thing about this is that the powder rehydrates into paste, sauce or just about anything you might need them for. Lasts even longer in the freezer. Love your blog!
Joyce
I am cooking up red sauce as I type, yes, I am ambidextrous. As the tomatoes ripped, I wash and throw into a plastic bag or two in the freezer. Then when I have lots or need red sauce, I cook. Someplace in the middle of sauce making you have to stop, cool the mess down and fish for tomato skins. Easy Peasy.
The zucchini monsters get the soft insides pulled out and fed to my chickens or son’s quail. Sometimes my chickens get all upitty and turn their beaks up at “ more zucchini “ but their back to loving it a day later.
Jean Pratschner
I live near the sea, so I know cold wind. So I started all my garden plants, except corn, potatoes, beans, garlic, in a small deck-size starter greenhouse with heating pads under each tray of seeds. Everything sprouted, grew larger to transplant in March to my big greenhouse, where by June I was eating tomatoes, romaine, peas, others. I also planted corn in the big greenhouse and we ate some on July 4th. Planted the corn to shade the lettuce in July, which worked well, still getting giant lettuce, spinach through August. I used cardboard as a mulch this year, for pathways between rows, boy does that work well. It will last through another year since i dont water it.
susang
question I really can't do the string method next year but can I put up some kind of screening (hardware cloth?) instead? I would still tie things and there would be air circulation
Karen
Hey Susan! I'm a tiny bit confused (it happens). How come you have room for hardware cloth but not for string? If you send me a picture maybe I can help you figure it out. ~ karen!
Debbie D
Great tips. Beautiful bunnies and sweet doggie. You would love the National Heirloom Expo in the other CA--California. It is coming up soon. They will have over 4000 varieties of heirloom seeds, plants, fruits, etc., including the world's largest produce display. Maybe for next year, you can do a road trip!
Karen
Ohhhh that'd be great. ~ karen!
Heather
Hi Karen,
Those are great tips. Thanks! Your garden is so inspiring. I managed to get beans and zucchini and a few potatoes this year. Will try again (and harder) next year. I thought about posting a photo of my garden, since you inspired me and requested pics, but it's not worth looking at. Next year. Promise!
Karen
Any garden is worth looking at. :) ~ karen!
lisa
Great tips. I need to string train my tomatoes next year. I grew one san-marzano plant and it's 8 feet wide...
Also, check out http://www.foodinjars.com - this canning blogger in Philly who does small-batch canning in her teeny-tiny apartment. Awesome if you have home-grown stuff which doesn't always result in bushels of product.
Karen
Thanks Lisa, I'll have a look. ~ karen!
Myra
I second this recommendation! She's great! :)
Ian Anderson
Hiya Karen.
Love, love, LOVE the plank on the carrot seeds tip! Even after the false starts, your stuff has grown amazingly, what fertiliser/compost/manure do you use (and how do you chuck it on)?
Heidi Lee
Anything that can be done naturally for maggots that burrough into carrots?
Karen
Cover them with floating row cover. ~ karen!
Teri
Sounds like carrot rust fly - beautiful carrot tops but when you pull the carrot, tiny worm holes. Yuk.
In my area it is a real problem and carrots grow under row covers exclusively.
I’m looking at that hinged hoop house idea. That would also add another layer of protection for those of us who mulch heavily in late fall and just store the carrots (and other root crops) in the ground over the winter.
Such a useful idea, Karen, thank you.
Teri on the left coast
Karen
No problem Teri! ~ karen
Karen
I do no dig gardening. The compost I use is from my chickens, so it's chicken poop and straw that's been hot composted. If I'm in need of more I'll use our "city compost" but it's not something I recommend. In fact I think it does more harm than good, lol. City compost hasn't been hot composted, and it has a tendency to be too "hot". ~ karen!
Teri
I live on a hippie dippie Island and seed sharing is what we do. In February every year several rural-ish communities in this little slice of heaven have something called 'Seedy Saturday' where folks get together and trade seeds or sell then in recycled envelopes for $.25 for a bunch (that would be what, $.09 US?) And 'bunch' Is a generous measure. The special beauty is that not only do you get seeds that have been around so long they have names like 'Radiator Charlie’s Mortgage Lifter and Salt Spring Sunrise (both tomatoes) and Bun's Parsnips, but often the seeds have adapted to local growing conditions and do especially well.
It is a real treat to harvest something you grew from your own seed that you have been using and sharing for years.
Teri on the left coast
Karen
Seedy Saturday's are held all over North America. :) Possibly the world! It's a great place to get unusual seeds. ~ karen!
Teri
Last time I'll believe a hippie dippie seed seller!
Good to know. Thanks.
Dana
The Brussels sprouts recipe from Shelter! I have looked for that before, and am so excited you have it. If only my Brussels sprouts grew this year.
Karen
Yup. I have it! Straight from the chef. ~ karen!
Paula
This year I am buying a dehydrator to try for preserving. Have you done that? Any type that you would recommend?
Karen
I don't use one, but I do know if I bought one it would be an Excalibur. ~ karen!
Paula
The Nesco FD-1040 is a ‘newer’ model and it is programmable so I have been leaning towards this one. Why Excalibur? Why don’t you use one?
Karen
I wouldn't get enough use out of it I don't think. Excalibur because everyone I know who "seriously" dries things uses an Excalibur. :) ~ karen!
Teri
Re the tomato bounty: consider slow roasting some tomatoes and then freezing them. Amazing flavour. Concentrated like dried tomatoes but softer. Cut thick slices, lay them on a parchment paper lined half sheet pan and drizzle with olive oil. Just a drizzle on each slice. Put in the oven at no more than 200F for a couple of hours or so. Just until they soften and start to look like they are on their way to drying. Then vacuum seal (yay Food Saver of any size) and freeze in portions you will use depending on who you are feeding - single person or family of 6. Toss with pasta and fresh basil. Or add to soup to drive the flavour over the top. Or - well you’ll figure it out like you figure out everything.
Love the hinged hoop house idea, so much better than weighing down row cover with bricks, sticks and bit of broken concrete.
That is a good looking dog.
Dying to see how it goes with the floors.
Teri on the left coast
Alena
This sounds intriguing. Gotta try it. Thanks for sharing, Teri (on the left coast).
Karen - the bunnies are so cute!
Karen
Yup. I've been slow roasting them for years. I have a couple of posts on it. :) ~ karen!
Teri
Shoulda known. Off to find those posts now...