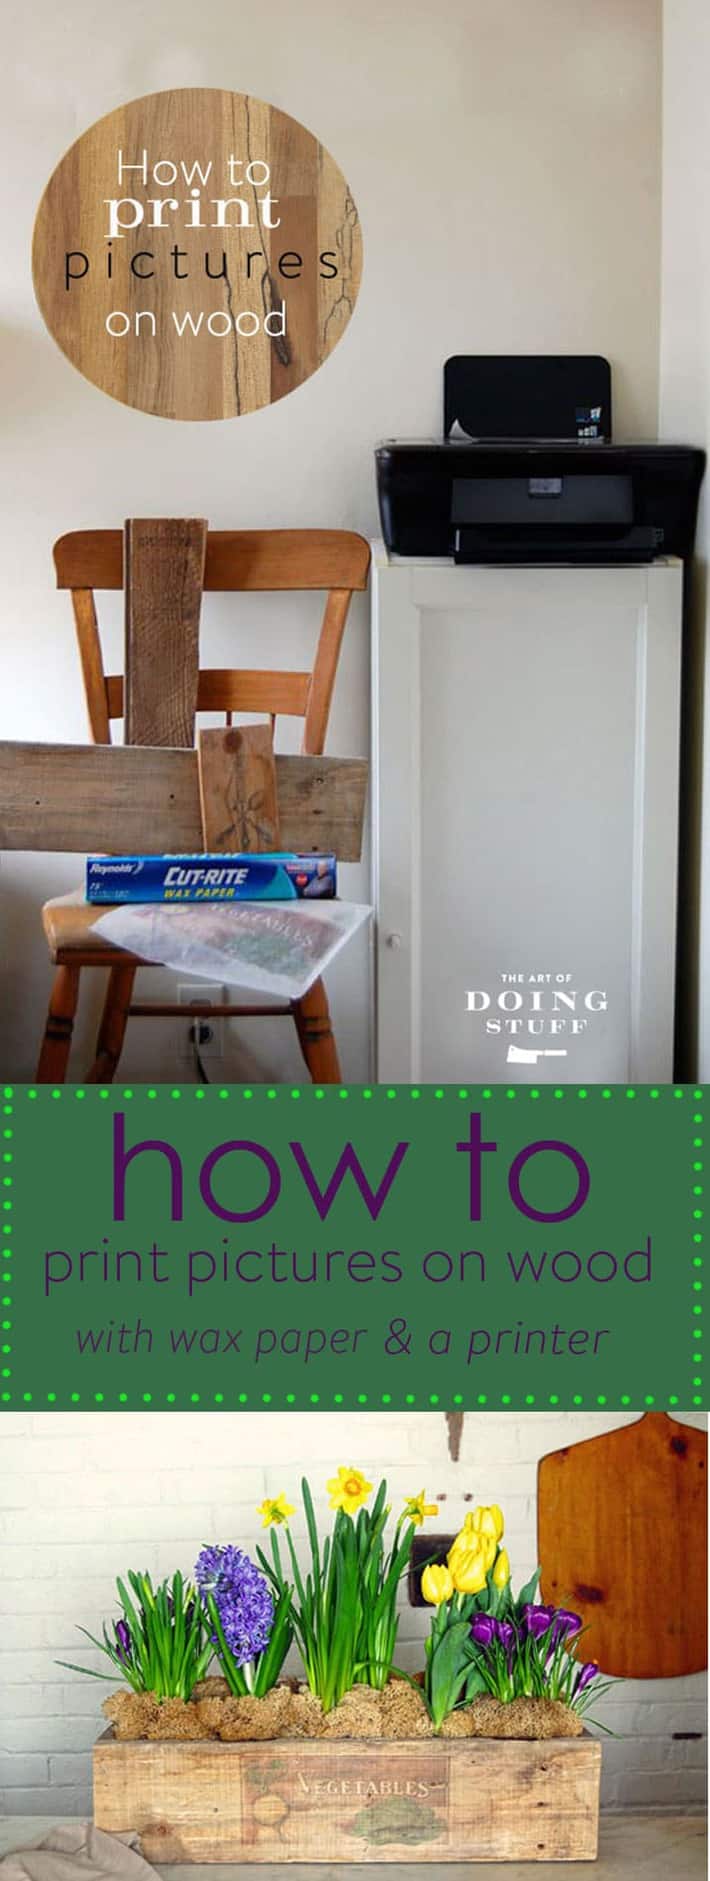
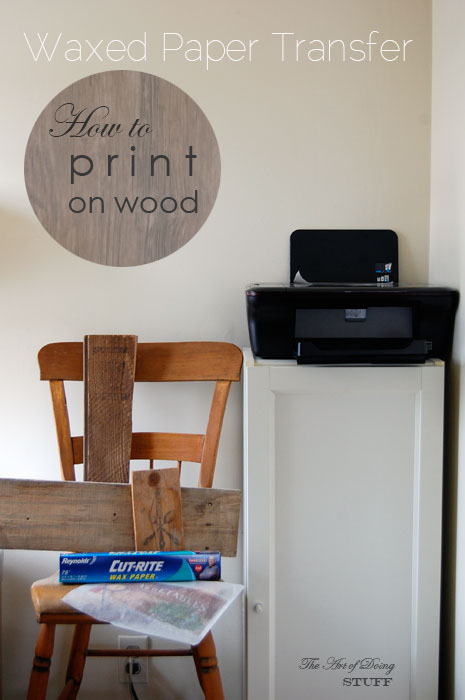
How to print on wood without any weird stuff you have to go to the store for. You need a printer, a piece of unfinished wood and waxed paper. That's it. Maybe a Tom Collins if that's your thing.

I'm funny. Sometimes ha-ha funny, sometimes left-out-of-the-fridge-too-long funny. But as we all know, there are times for funny and times for seriousness. This is one such time. For seriousness that is.
So this post will involve no funny. No laughing, no snickering, no coffee spitting. Because the information I'm about to introduce you to deserves a reverence that can't be accomplished when diluted with hilarious jokes or cutting sarcasm. When I first published this post in 2014 it got a bit of attention. Mainly because it takes a simple idea and allows you to do it at home without any special equipment.
I'm going to teach you how to transfer any photograph or picture onto wood.
You don't need mod podge or any other weird thing that you don't have on hand.
You don't know it yet, but this is the greatest day of your life. You get to produce something beautiful without any pain or tearing of your woman bits. Plus it won't turn into a whirling, dangerous ball of hormones in 13 years.
I decided I wanted to try making something but it involved transferring a photo onto wood so I did a little research. Most of the tutorials I came across involved a few specialty materials like matte gel and the backing paper of printer labels. I didn't have any printer label paper handy and don't even know what matte gel is. Like most DIYers I wanted to DIY, NOW. Right this second, NOW.
So I kept looking for a simpler solution. Mid search I suddenly remembered my mother mentioning something Mag Ruffman had done a couple of years back. It was the perfect solution and it works GREAT.
Table of Contents
Can you transfer a regular photo to wood?
You bet you can. That's what this is all about. You can use this same technique to transfer photos, text or anything else you can print onto wood.
What kind of paper do you use to transfer pictures to wood?
All you need is regular old waxed paper. And a dream of course.
That's right. All you need is a regular inkjet printer (this one is the newer version of the one I use) and regular waxed paper. I have an HP wireless printer and this technique works with this printer. It's the only printer I can guarantee this works with, although it will work with most as long as it's an ink jet.
(update: since posting this a couple of years, there's been a lot of success stories and a lot of frustration stories, mainly due to the printer you're using. I can only guarantee this works with the kind of printer I have which is a cheap, old HP printer I got at Costco. )
How to Print Pictures on Wood
1. Cut a few sheets of wax paper to the size of a standard piece of printer paper.

2. Find a smooth, light coloured piece of wood. Actually find a few so you have some to practice on.

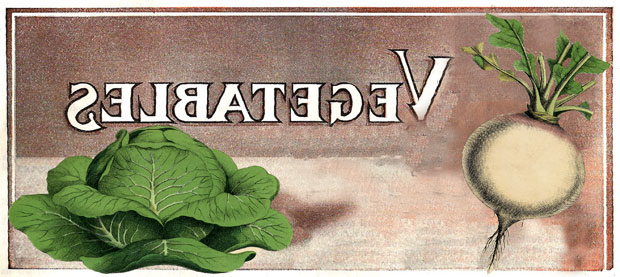
Find a high resolution image you like. Or make your own. The Graphics Fairy is a great place to start for copyright free, high resolution images.
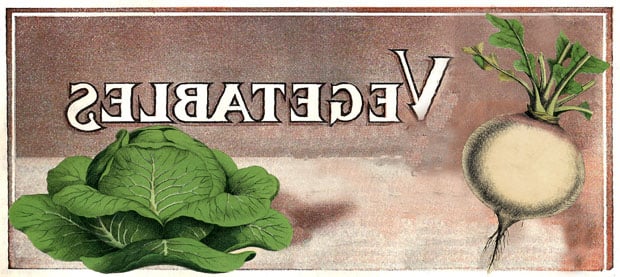
3. Once you have an image you like, reverse it using whatever photo program you have on your computer. If you're not sure how to do that just Google it.
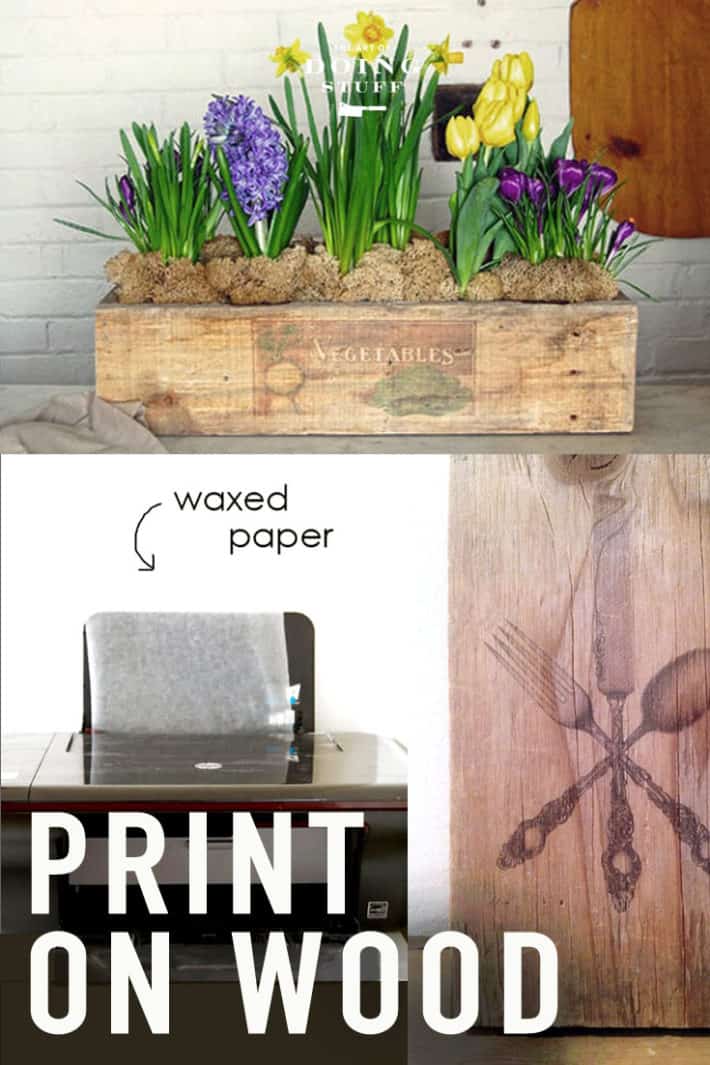
4. Put a sheet of your waxed paper into the printer and click print.
 5. As the waxed paper comes out of the printer, gently guide it. You have to be careful it doesn't roll under itself or touch itself in any other way because it will smear the ink.

6. Put your image exactly where you want it on the wood. Remember ... this can be any unfinished wood. A bench, table, box, or anything!
Once you place your image you can't move it. Do not move it. It will smudge. You will be sad. Then you will cry and it will smudge some more.

7. Holding the transfer tight to the wood, and working quickly, swipe the edge of a credit card across the image. This pushes the ink from the waxed paper down into the wood, which absorbs it.
Don't be wimpy about this. Push hard, but not so hard that you rip the waxed paper. You can gently lift the paper to see if it's transferring well. If you notice spots that haven't transferred, rub it some more with the credit card, this time burnishing it.

8. When you're pretty sure that you've transferred as much ink as possible lift off your waxed paper and get ready to call someone. Because that's the first thing you're going to want to do because this method works so well.
You'll be stunned.
You'll naturally want other people to be stunned. It's a DIYer thing.

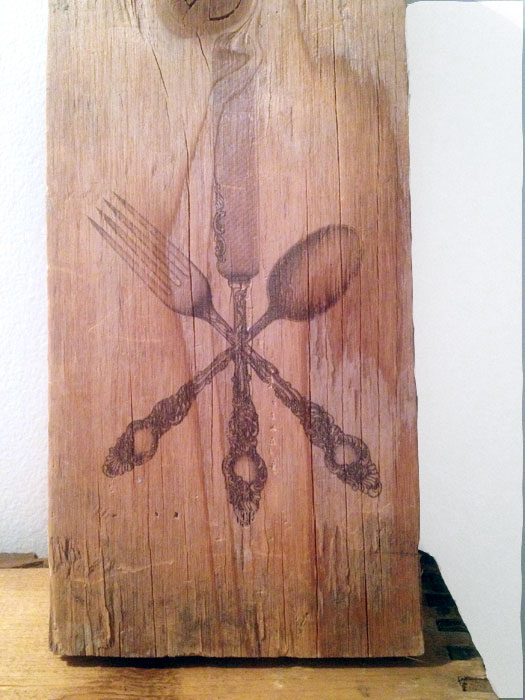
I tried a few images just because it was so fun.

Like I said earlier you can use this technique on any smooth, unfinished wood like old crates, tables, or chairs. For anything that's going to have wear and tear, just remember to spray it with a a clear matte finish after you do the print. Any wood sealer will protect it.
If you don't have a table, chair or dresser you want to print on, you can just find a nice old board and prop it against the wall, or hang it.

Quick Reference Directions:
Waxed Paper Transfer
1. Cut sheets of waxed paper to the size of computer paper.
2. Print your image onto the waxed paper with any Inkjet printer. (must reverse image first using whatever photo program you have) In answer to some of your comments, no, it doesn't matter which side you print on. Both sides of waxed paper are waxed.
3. Carefully place the image on your wood (wet side down) and then rub over it with a credit card.
4. Removed waxed paper and the ink is now transferred to the wood.
5. Seal with a matte spray wood sealer if you like.
TIPS
- Use smooth wood. Rough barn board won't work, but smooth barn board will.
- Darker colours on lighter wood works best.
- Dampening the wood a bit with a sponge will make the transfer darker, but it might blur and smudge if you're not extremely careful.
- If the waxed paper won't feed through your printer, tape it to a piece of regular printer paper before feeding it into your printer.
- Some readers have also had success by using the slippery side of freezer paper so you can try that.
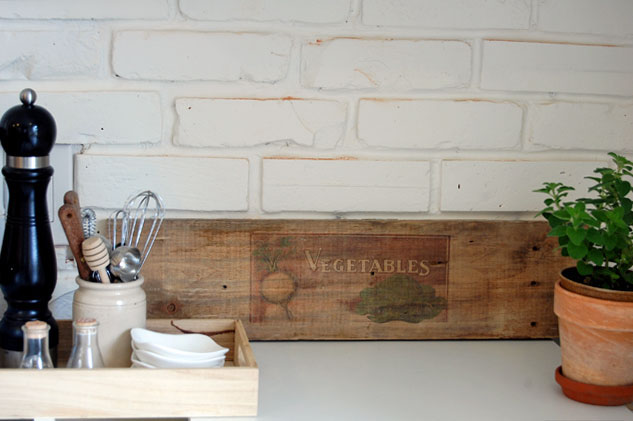
I made my piece of printed wood into a rustic planter. Read how to make your own in this post.


How to Print an Image on Wood.
Print anything on wood with wax paper and a printer.
Materials
- Wax Paper
- Unfinished Wood (board, tray, table, stool etc)
Tools
- Ink jet Printer
Instructions
- Cut a few sheets of wax paper to the size of a standard piece of printer paper.
- Find a smooth, light coloured piece of wood. Actually find a few so you have some to practice on.
- Once you have an image you like, reverse it using whatever photo program you have on your computer. If you’re not sure how to do that just Google it.
- Put a sheet of your waxed paper into the printer and click print.
- As the waxed paper comes out of the printer, gently guide it. You have to be careful it doesn’t roll under itself or touch itself in any other way because it will smear the ink.
- Put your image exactly where you want it on the wood. Remember … this can be any unfinished wood. A bench, table, box, or anything!
- Holding the transfer tight to the wood, and working quickly, swipe the edge of a credit card across the image. This pushes the ink from the waxed paper down into the wood, which absorbs it. Push hard but not so hard that you rip the waxed paper.
- When you’re pretty sure that you’ve transferred as much ink as possible lift off your waxed paper and get ready to call someone. Because that’s the first thing you’re going to want to do because this method works so well.
Notes
- Once you place your image you can’t move it. Do not move it. It will smudge. You will be sad. Then you will cry and it will smudge some more.
- Use smooth wood. Rough barn board won’t work, but smooth barn board will.
- Darker colours on lighter wood works best.
- Dampening the wood a bit with a sponge will make the transfer darker, but it might blur and smudge if you’re not extremely careful.
- If the waxed paper won’t feed through your printer, tape it to a piece of regular printer paper before feeding it into your printer.
- Some readers have also had success by using the slippery side of freezer paper so you can try that.
Laughter may now resume.
→Follow me on Instagram where I often make a fool of myself←

I love Mag Ruffman ALMOST as much as I love you! Thanks for brightening my day. I know this is an old post but it brought double delight, coming from you and reminding me of her.
Anything I Can Do was one of my all-time favorite shows. You Canadian women rock!!
Cheers!
LOL, thanks Cynthia! ~ karen
Is there a reason that a LaserJet printer can't be used?
Yes there are two reasons. This process works because it transfers the damp inkjet ink from the wax paper onto the wood. This would not work with a laserjet since there is no ink sitting on the surface of the wax paper. Secondly, a laserjet uses heat to fuse the toner to the paper which would create a major mess if you tried to feed it with wax paper.
You, m'lady, are funny. And crafty. And it looks like you're sorta fearless. That's good. I married a woman like that, who wants to do the things for herself. But now she has me and we do the things together. Your sense of humor is similar to ours, and I'm not so sure that's a good thing. But this is good information. And I share your feelings on "DIY means RIGHT NOW". I just discovered you so forgive the effusion; I'm sure others do the same on discovering your blog. You go.
Dammit. I have a laser printer. Oh well!
Can I do this on painted wood.
Needlepoint canvas? I would like to know if this technique will work on needlepoint #18 mesh white canvas...if anyone is brave enough to try and let me know, I would be very grateful!
If you need to poly or varnish over the image can you do it?
Yup. But you need to wait until it's completely dry. ~ karen!
Thanks for the step by step comparison. Being a novice, would you be able to tell if post the lacquer is the print resistant to getting washed up or lightening upon cleaning with a wet cloth ?
Thanks
Hi Gabriel. I have several pieces that I've done and none of lightened at all. But if you kept them where they were in direct sunlight for a long period of time (months) they might lighten a little. ~ karen!
Hi. I was just wondering if there's a method that doesn't involve printing? Like I'm wanting to transfer my poetry onto driftwood,.so was wondering if I would be able to write my poetry on the wax paper and transfer it that way?
Hi. After trying a couple of times, parts of the photo were not transferred. I wondered; is the density of the wood a factor? – Im using hard wood.
Thank you.
Awesome idea. Thanks for this tutorial! -- If you dont have access to a printer, is there a certain type of ink,dye etc that you might use to create your image manually? You know, that will spread evenly across the wax?
Thanks!
What an AWESOME tutorial! I love this idea, and your tray is just too cute. Pinning, and definitely going to find a way to use this!
Hi, when I printed on backing of sticker paper which I saw it's same result as wax or freezer paper, the ink was smearing as it feeded through printer & the ink was super wet.
How do I fix this problem ?
Hi Marie. Have you set your printer settings to "glossy, photo paper"? If not, that might help. ~ karen!
Where can I go to get free images to put on wood ? I'm new at this, and I am 73 years old. Don't know my ss from a whole in the ground.
Why is waxed paper crossed out??
Hi Allison! It's not actually, that's a problem with the link to Amazon. You do need waxed paper. I'll fix the link so it doesn't look crossed out right now. ~ karen!
Can you use transparency film with this technique
I haven't tried it Erin, but it might work. I have some film and might try that! In the meantime if you try and find it works let me know. :) ~ karen!
Trying to decide if I should spend the money to get a dedicated printer for this kind of project. What kind of printer has everyone else used?
Does the wax paper ever "gum up" the printer?
Hi Gabrielle. I've never had the wax paper gum up the printer ... *but* ... I don't use it to do this regularly either. ~ karen!
WOW... I hope this will work for my project. I purchased small thin wood heart pieces from Michaels. I spray painted them and hope that this kind of transfer will work. I'm going to transfer kind words onto them. I will probably also coat them as they will be placed in a frame.
Nice idea in theory, but it caused me such a bad paper jam twice I had to practically take my printer apart. This does NOT work for front loading ink jet printers.
Sorry about your frustration. It does work, not just in theory. As I said in the post, it works with the model I have. It's worked for plenty of people, but I have no doubt that the odd printer doesn't take kindly to it. ~ karen!