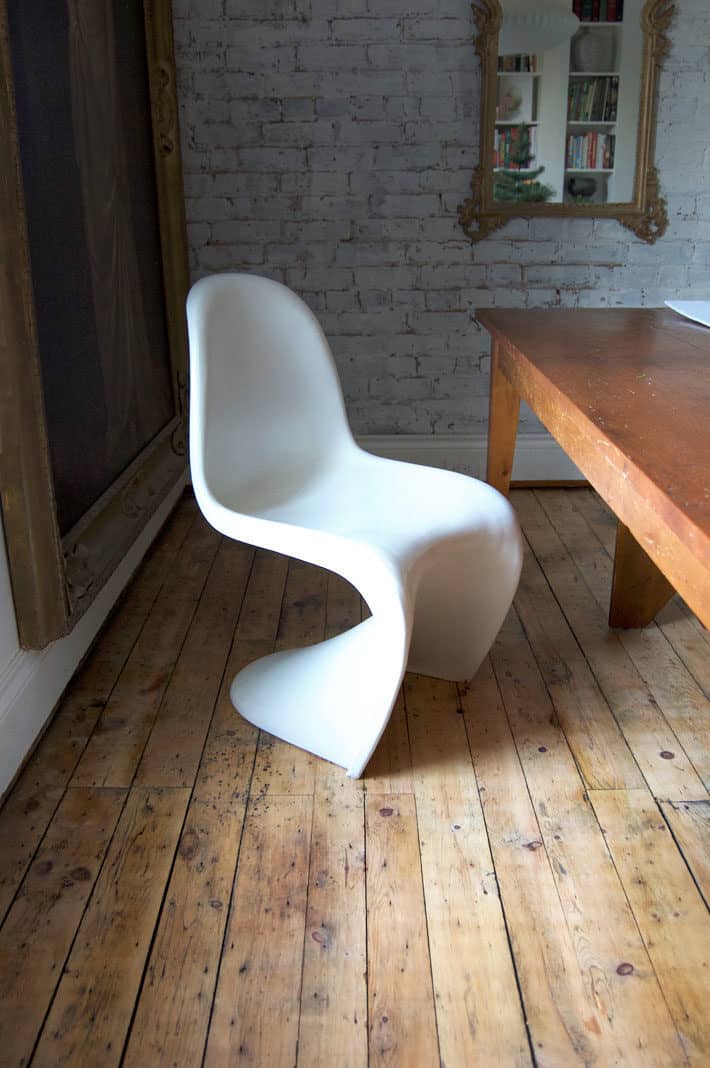
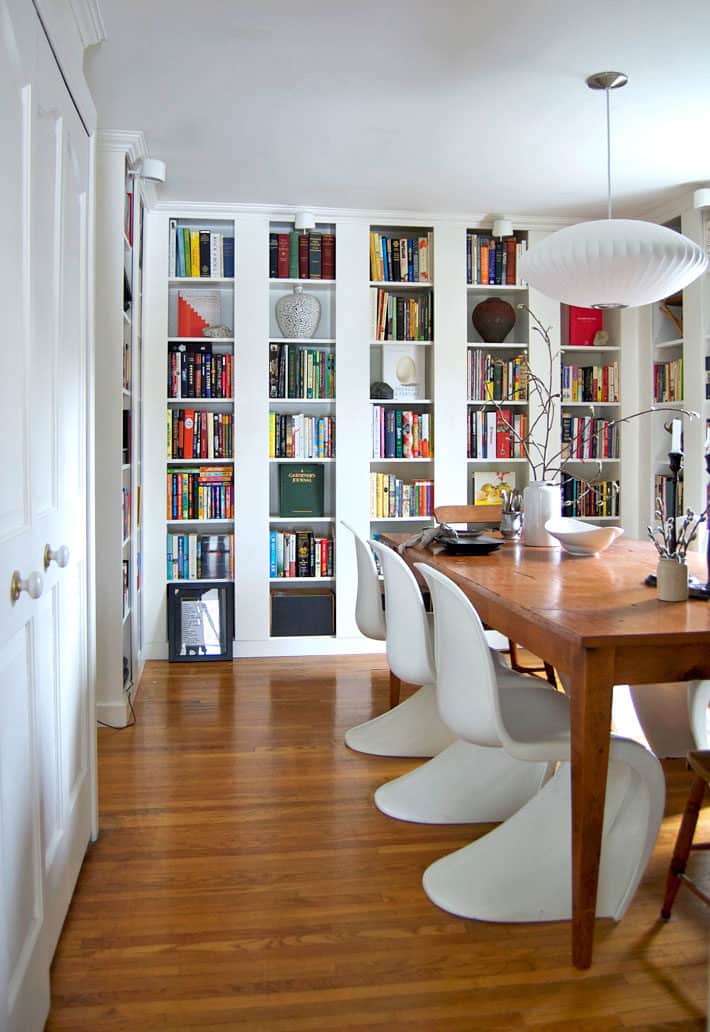
The dining room floors are sanded, sealed and finished. They're also perfect.
On the morning of August 26th I sank into my couch with a cup of coffee in my hand. It was the Sunday after my street's annual block party, which means the rest of my neighbours were still sound asleep or creeping quietly into their bathrooms in search of aspirin. The neighbourhood was quiet and it was a moment I should have savoured. I should have sat quietly like everyone else reflecting on the night before; the baskets filled with charred, herbed street corn, the plates of salad and lawn chairs dotting the road.
I didn't sit quietly.
I began ripping up my wood floors. On a whim. The way a normal person would buy Honey Nut instead of regular Cheerios on a whim.
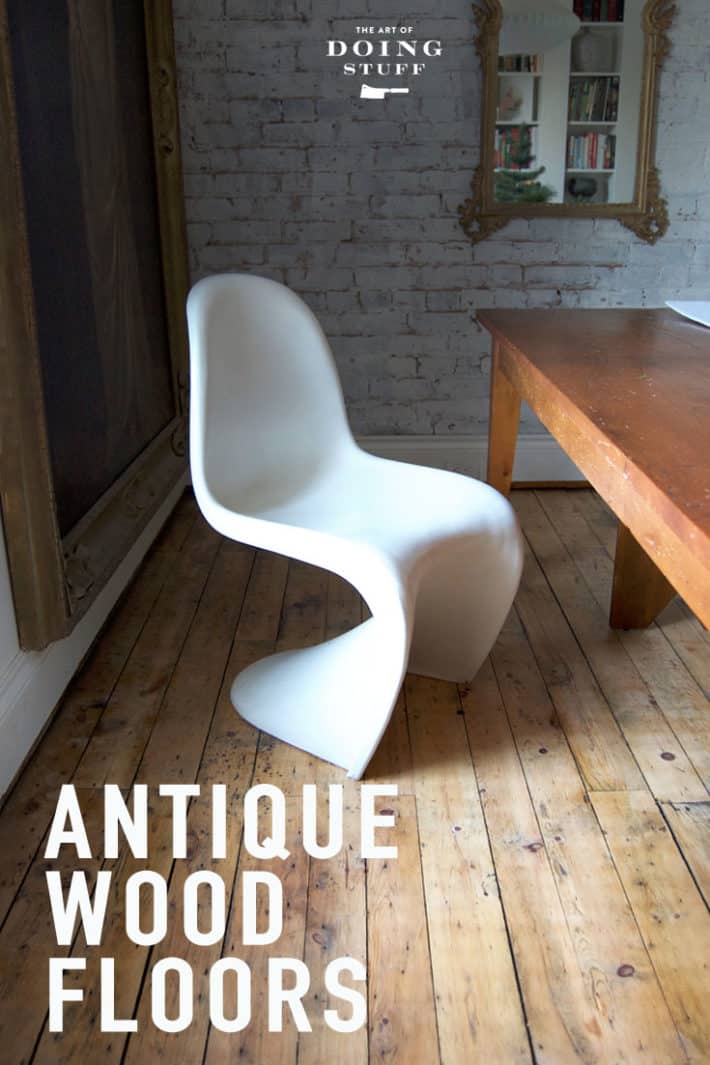
It started by lifting one piece of flooring to see what was underneath out of curiosity and ended with me ripping out all of the wood floors on the lower level of my house to reveal the original pine below.
It was 3 months ago that I lifted the first floor board and just a couple of weeks ago I managed to get the last coat of finish on my final floor, the dining room.
The finished dining room floor turned out to be very different than the foyer or living room floors because it didn't need to be professionally sanded. There was no finish on it and it it was fairly smooth.
It was hidden beneath a layer of perfectly respectable, relatively old, oak strip flooring.
I wanted to retain as much of the original patina and discolouration as possible and the only way to do that would be to hand sand it as opposed to having a professional come in with a big sanding machine. It's the the imperfections that make this floor perfect.
The square patch right under the dining room table that looks like an escape hatch for instance is my favourite thing. I have no idea what it's doing there, but I like it.
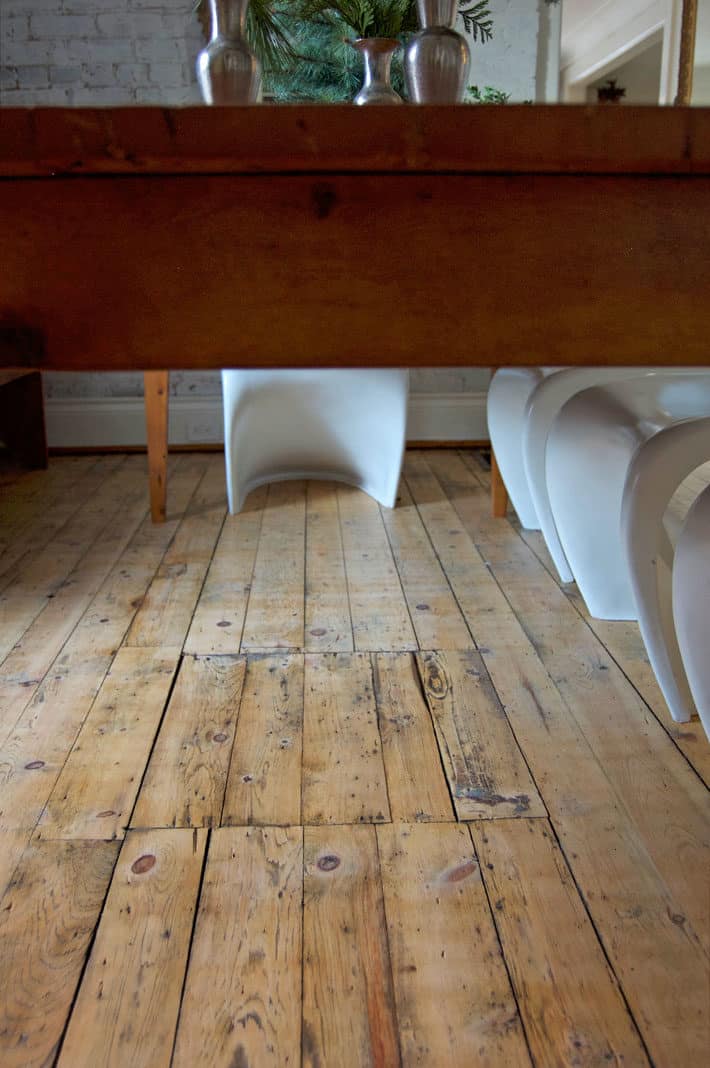
That's one of the areas I had to repair actually. One of the boards was completely cracked and none of them were particularly stable, so I fixed that. In the process I had to lift all of the boards of the square up which was about as terrifying as removing my own intestines.
Would you like to save this stuff?
You see, underneath my dining room floor is a dirt crawlspace. Which we all know is where mice, rats, centipedes, spiders and poltergeists live.
Turns out there was nothing crawling around under there so I'm considering turning the "square" into a trap door and building a box underneath it for storing things like heads.
I mean potatoes.
This is what my dining room floors looked like before, with the oak strip flooring.
As I said they were perfectly respectable.
A bit shiny. A bit orange.
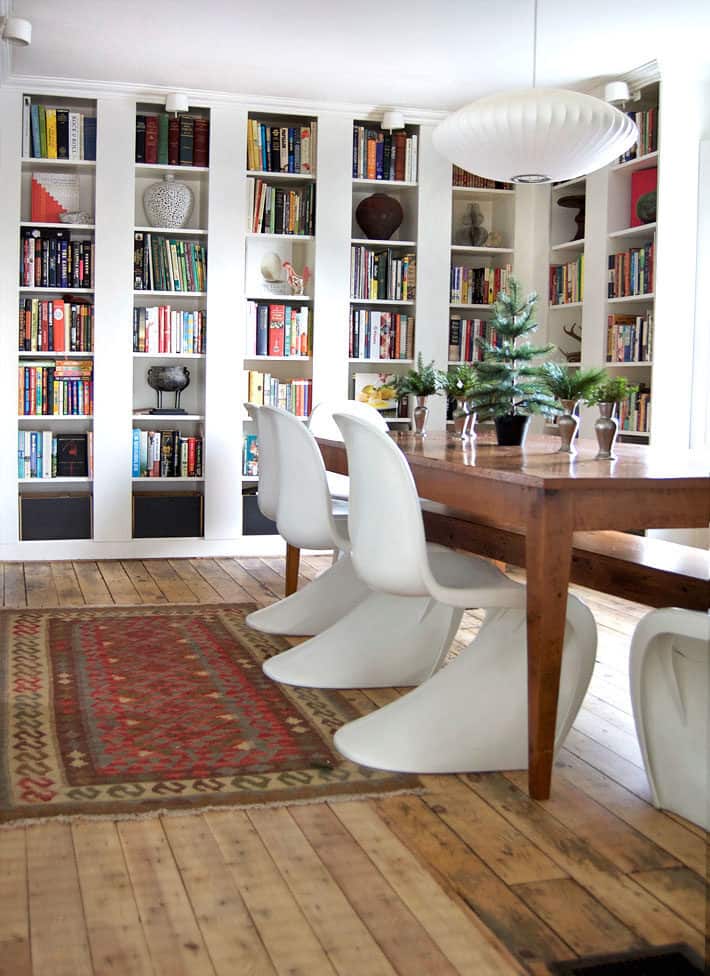
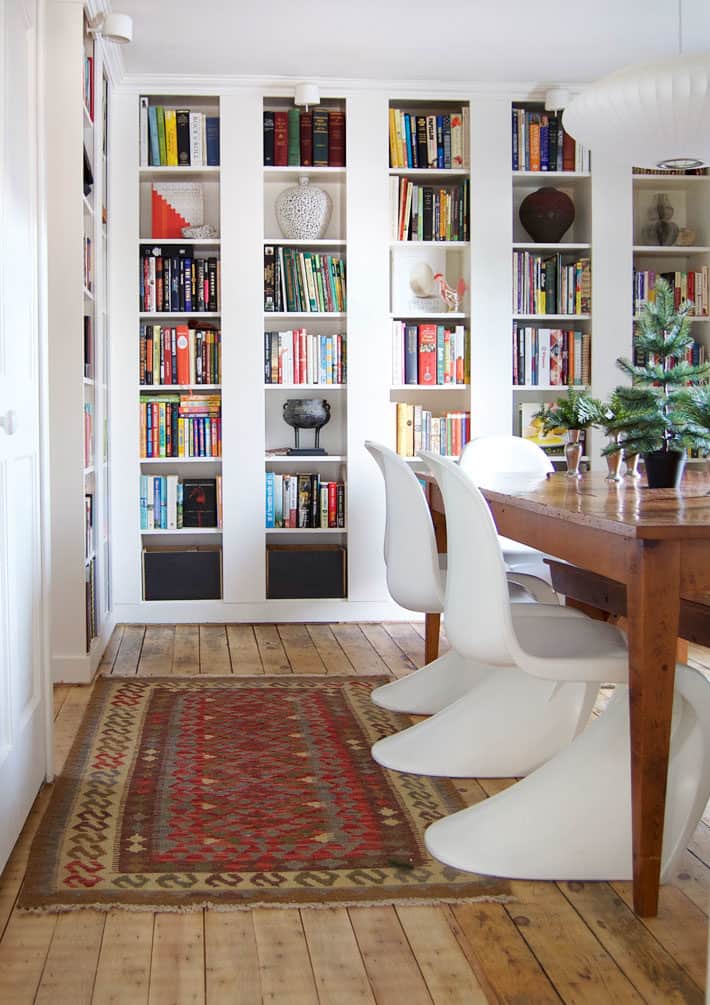
Now they're a lot more stained, a lot less uniform and a lot less shiny and orange.
Later, probably in January I'll do a post on how exactly I finished the floors and what products I used and why.
But for now I'm just going to sit quietly and savour the moment.
→Follow me on Instagram where I often make a fool of myself←


Tama O;Hearn
I love your bravery! The final floor is beautiful. I have a bedroom where I pulled up the carpet and the floors are wood but looking a bit sad. I plan on sanding them but I also notice slats like I see with your floor. Do you fill those? I have a hairy dog and worry that her hair will end up in the slats. Any advice is welcome!
Karen
Hi Tama. The spaces between the boards open and close as the humidity increases and decreases in the house. You can have a fill made by using sawdust mixed with some of the clearcoat you put over the boards and fill the cracks. These will harden but will eventually pop out over the years. You can also fill the cracks with thin rope by pushing it into the cracks! This is what they did in the olden days. ~ karen
Tama O;Hearn
Thank you so much for your reply! What a wonderful idea. I am definitely going back to read more of your columns!
April
I adore your floors! We have oak strip flooring on top of pine which was both the sub floor and walking floor in our 1865 home. From the basement, I can see separation between the boards, which are young and groove. Did you have any separation? If so how did you fix that? And what about knots that have fallen out? Where did you find suitable wood for repairs?
Karen
Hi April! I didn't have any problems with knots falling through. And the boards have separated a tiny bit but just little cracks. If the lights are off upstairs, but the basement lights are on, I can see bits of light through the floor in the odd place. To stop that, all you have to do is what they did in the olden days. Run a length of twine or cord along the plank and shove it in tight. :) ~ karen!
Yarrum Designer Homes
Great post and thank you for sharing this wonderful and beautiful post.Looking gorgeous.
Susan Sidell
You I spired me to rip up carpet and sand the pi e boards underneath. I love the color and matte look of them raw and so appreciative your post on using Bona products.
What do you do to address the transition between different wood floor colors? Just leave a straight line? Install a wood threshold (and then I'd spend 2 weeks trying to decide what color it should be)?
Any suggestions appreciated. I just perused most all of your floor posts looking for photos that show this challenge but I didnt see any pictures of awkward transitions.
Thanks, Karen! I am so glad I found your site!
Karen
Hi Susan! I really didn't address the issue at all. The only real transition is between the hall and the dining room but even then the floors are pretty similar. There's a single, very wide and old board that acts as a threshold between the two areas that's pretty much the same colour as the hall. I will have to figure out a small transition where there's a bit of a gap but that'll probably just be a thin piece of trim. :/ I guess it depends on what your transition is actually like. Is it wood to wood, wood to vinyl, wood to stone? ~ karen!
Susan Sidell
It's all the same wood floor, hallway to bedroom, but the hall was refinished 20 years ago and is "amber" or as you and I would say, orange. I cant redo all the wood at this time so the color transition from shiny orange to matte natural seems abrupt. Maybe I will just paint on a faux wood threshold.
Thanks for all your work. I love your projects and your writing.
Jacquie Gariano
Dear Karen,
How truly beautiful the floors are. What a job. I so admire you and all the work you have been doing to make the house your "own" home. I am behind on your posts as the holidays took up so much time and effort. I wanted to savor your blogs when I had time to really enjoy them. So now on the first day of the New Year I am doing just that. (My New Years resolution is to "try" to keep up with my e-mail. LOL
Kristin
I'm the kind of person who still has bare walls after 3 years because I can't decide what pictures to put up or where. Karen, your courage (or impulsivity?) is inspiring. I salute you!
Desiree
No! You can’t end it like that. I have to know what you see used to seal them. I’m in the process of redoing my pine floors too and I need to know!
They look gorgeous though. You did such a wonderful job Karen.
Karen
Thanks Desiree! All of the products I used were from the Bona professional line, but there were all from different lines of the Bona line, lol. Mainly to save money. Just so you know they aren't the same Bona products that you get at Home Depot or any home improvement store. And the matte isn't as matte as I would have liked. There's a tiny bit of glow to them, but they've grown on me. ~ karen!
Desiree
Thank you for sharing Karen! That helps so much. You’re the bomb, lol! Love knowing that there is someone out there that is “passionate” about home projects and does things on a whim just like myself.
Kate
Thanks! Really looking forward to hearing about what products you used & why. I know the post will be very informative & educational. Thanks for giving us a heads-up that you're going to do this in January!
Wishing you joyous holidays!
Danni McLaughlin
Since many people are commenting about the orange floors and many people don’t have charming zillion year old wood under their OTHER wood floor, I thought I’d mentioned that when I added some new hardwood
Flooring in my 1990s house and thus, had to refinish and restain the rear of the main Floor, I too, was despairing of the orange tone. I wanted old barnwood-looking floors but couldn’t bring myself to tear out 1500 sq ft of red oak, so my floor guy and I tried every grey stain out there and in the end MINWAX grey stain over red oak give you a luscious RH browny grey that is absolutely stunning. Matte finish.
Betsy
I thought the oak strip looked nice... until I saw the original. Good call!! Totally worth it :)
Karen
Thanks Betsy. :) ~ karen!
Leslie Barnard
I'm looking forward to the January post on the specifics of your floor treatment! One thing I'm curious about- do you have a subfloor or are those pine boards the only thing between you and nature/poltergeists?
Melissa
Karen,
These are gorgeous. I have often wanted to do this to ours as we have the same oak over pine situation. I just showed your before and after to Bob and he just laughed and shook his head. Which I am certain means “what a great idea, let’s do that”.
Karen
Yup, that's how I would interpret that! ~ karen