4 years ago I built a cob pizza oven and I love it with all of my heart. And if you start right now, you'll be able to say the same. YOU CAN DO THIS. YOU CAN BUILD YOUR OWN PIZZA OVEN.
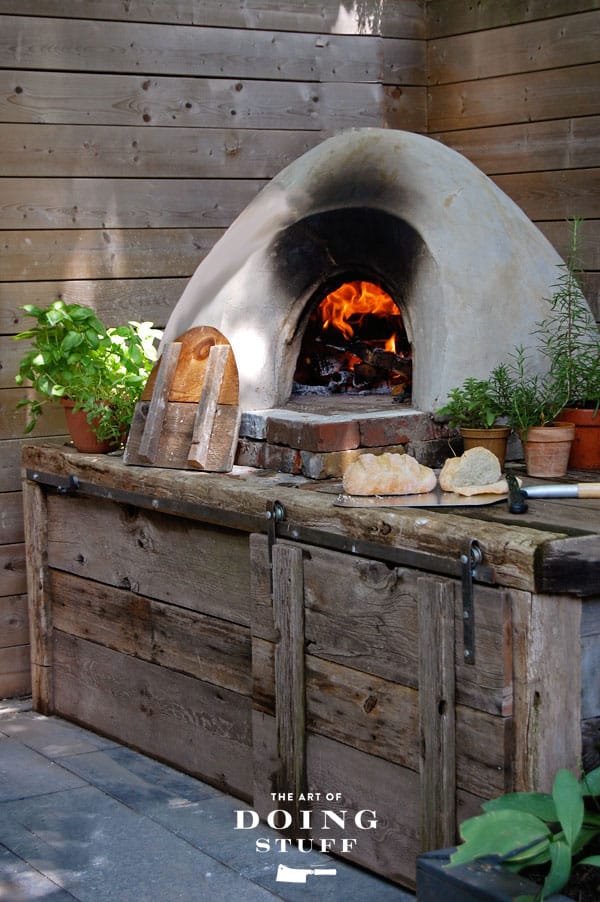
So you want to build your own pizza oven? That's the very same thought that crossed my own mind several years ago.
I wanted to build my own pizza oven because I have an unnatural love of pizza and building things. So right up until the point that my knuckles started to ooze blood (more on that in a later post) this was my DREAM project. And frankly, even with the blood oozing knuckles it was a dream project.
And I've had a lot of dream projects. Building a 40' x 40' vegetable garden, getting chickens, and after living in my house for many years one day I realized HOLY CRAP I bet I could make maple syrup from that maple tree in my backyard. And I did. And you can do it too if you want - I have answers to every maple syrup making questions you might have in this guide.
My name's Karen. My nails are rarely done and sometimes my knuckles bleed. I'm O.K. with that.
Over the next few posts I'm going to give you all the information I can on how I built my pizza oven, but even after reading my tutorial I recommend that you do even more research. I read everything I possibly could about pizza ovens before starting to build mine, so I felt like I had a really good understanding of how they worked and how to do it.
At the end of this post I'll give you a couple of my favourite resources for information.
At this point you might be thinking ... "But Karen. Wait. I'm not a lunatic. I don't want to build my own pizza oven, I just want to make really good pizza at home.". No problem. I get it. If pizza from your regular kitchen oven is what you're looking for I have an entire tutorial on how to make perfect pizza in your regular oven. Everything from how to stretch your dough (not roll out) your dough and what to look for in a perfect crust and how to get it.)
Here we go!
Building a pizza oven can be broken down into 10 steps:
1. Build the base of the oven to sit on.
2. Insulate the base of the oven.
3. Build a sand dome that will be the form your build your oven around.
4. Mix your thermal mass layer of cob (clay and sand) and build your oven around the sand form.
5. Remove the sand form to create the cavity of your pizza oven (the actual interior space).
6. Mix clay and straw to create your cob insulation material.
7. Build your insulation layer around your cob oven.
9. Finish with a weatherproofing lime plaster.
10. Make pizza.
Today I'm going to talk about the base that your pizza oven is going to sit on, the insulation layer in that base, and how to build the sand form you'll be building your pizza oven around.
The base
The base that your pizza oven stands on can be made out of anything (cinder blocks, bricks, rubble) but it has to be able to hold 600-900 pounds (depending on the size of your oven)
My first thought was to use cinder blocks, but cinder blocks aren't cheap if you need a lot of them and they're big and heavy to transport.
So I ended up building my base on a series of 3 sets of sawhorses made with sawhorse brackets and 2x4s. I raised the sawhorses on pieces of flagstone so to help stop the ends from rotting. This way they won't ever be sitting in puddles of water.
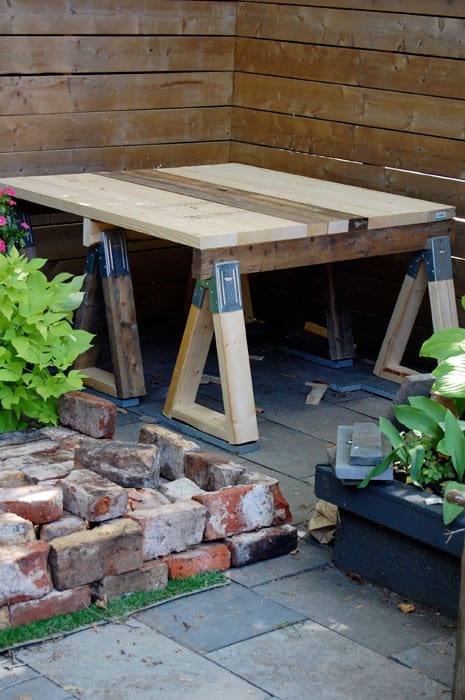
Each sawhorse bracket can carry a weight of around 300 pounds, so a series of 3 can hold a load of around 900 pounds. Which is more than my small sized pizza oven will weigh. The actual base I built out of 2x4's, nailing them into the sawhorses.
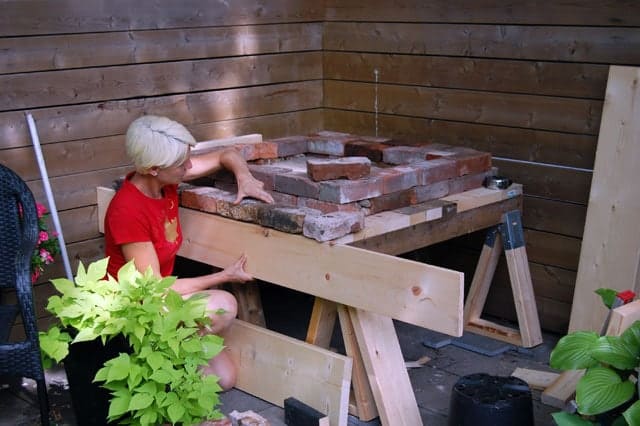
Because you don't necessarily want to build a pizza oven directly on wood, and because a bunch of sawhorses is pretty ugly, I built ANOTHER base out of antique bricks which I got for free from my neighbour.
The bricks are secured with construction adhesive. (just a tube of extra strong gunk that you put in a caulking gun and squirt on like glue). At this point you're forming a pretty base, and a space for the bottom insulation of your pizza oven to go. Which you'll see in the next picture.
A pizza oven loses most of its heat through the top of the oven so some people don't even bother to insulate the bottom, but I wanted to do everything I possibly could to hold as much heat in the oven as I could. The more heat you hold, the more pizzas and/or other food you can cook.
The perfect thing to use for insulating in this case is glass bottles. Just get drinking and then line them all up.
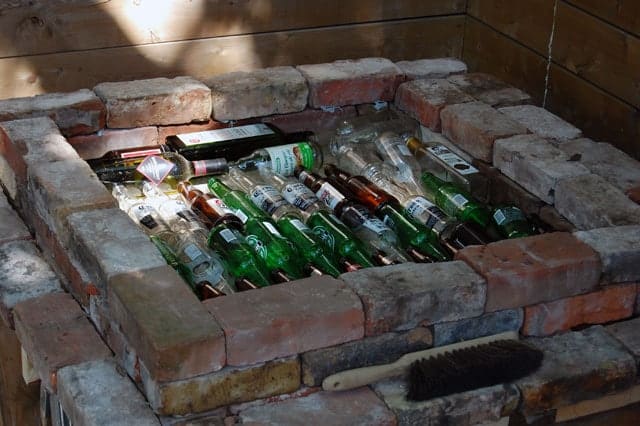
I then added a layer of a mixture of clay, sand and straw to bind everything and insulate a tiny bit more. This will also be the base for my base. If that makes any sense.
Would you like to save this stuff?
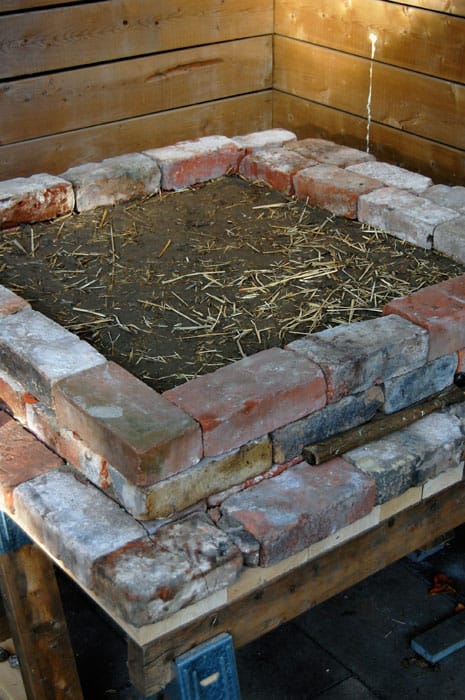
Once your bottles and clay/sand/straw mixture have dried you can add a layer of sand. The sand is going to be what you lay your fire bricks on. The fire bricks are what you'll be actually cooking your pizza on. They aren't the same as the bricks in your fireplace which dissipate heat. THESE bricks hold heat. You can get them at most stone yards or large lumber yards.
When you're laying your fire bricks you need to make sure they are PERFECTLY even, perfectly level and perfectly mashed up against each other. If they aren't level on top, when you put your pizza or bread in the oven on a pizza peel, the peel will knock into the edges of the bricks in an annoying way much the same way when you're shovelling and you hit a piece of sidewalk that isn't level with the rest.
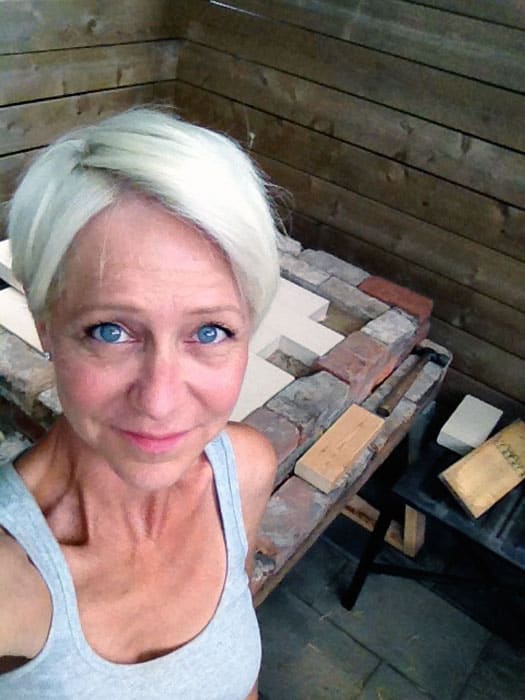
Lest you think I'm looking too cute and having an easy time of it, behold the wide shot.
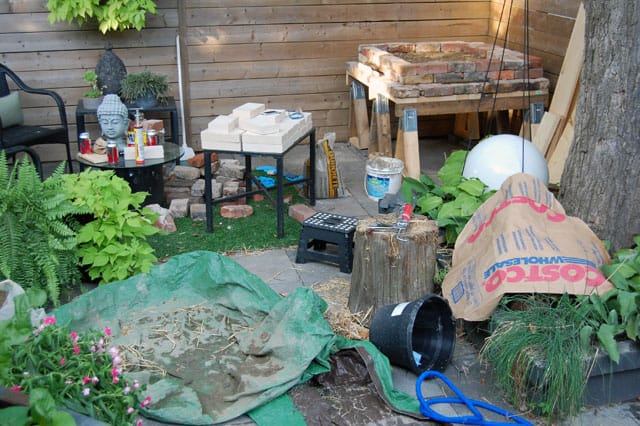
Now that you've established you aren't afraid to get your hands (or planter beds, or backcyard or face or hair or feet or ferns or Buddha head) dirty, you can move on to starting to build your actual oven! Which is the fun part of course. Because if you're onto building your oven, you're clearly just moments away from enjoying hot, crispy, gooey, delicious pizza.
A cob oven when it's finished, looks like this. I bet you've been wondering haven't you? This isn't my cob oven, but they all look pretty similar.
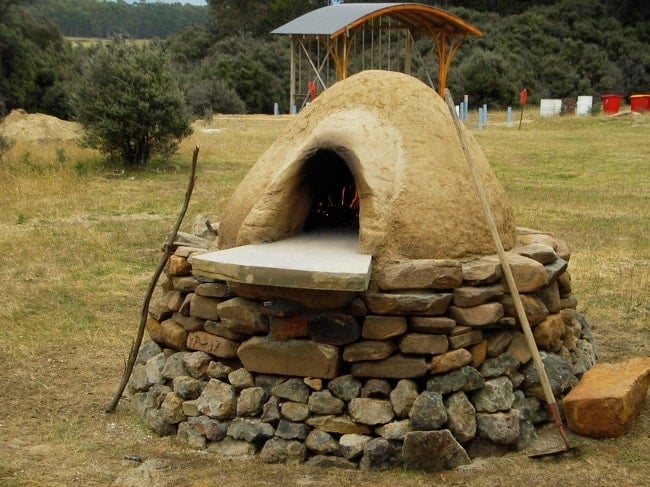
This is a really big oven. You don't need one this big, but build it as big as your space allows. The bigger the oven, the more heat it holds and the larger pizzas you can fit into it.
As you can see there's a cavity in the middle of the oven, just like a regular oven. Or a fireplace. In order to get this cavity you build your cob oven around a pile of sand. Then when the oven has dried, you scoop the sand out, which creates the oven cavity.
You will need a few large (lumberyard sized large) bags of course sand. Use regular builder's sand from the lumberyard. The book I'm going to recommend at the end of this post includes all the exact amount of materials you'll need according to the size of the oven you want to build.
Now all you do is wet the sand and start building the world's most boring sand castle.
I knew (again according to instructions from the book I'm recommending) exactly how high the peak of my sand form needed to be. So I started building my sand dome, and then stuck a stick into it. Once I got to the top o the stick then I knew I was at the height I needed to be at.

Building the sand form is easy, but also pretty boring. There's no action. No suspense. Just sand.
Building sand form for cob oven
Building the sand form of your pizza oven is the easiest part of the job. It's also the most boring. You are building the world's most boring sand castle. But it will eventually lead to ... wood ove...
And that's it. The base and the sand form of your pizza oven are now complete.
In tomorrow's post you'll be learning all about cob. How to make it, where to get your materials and how to start building the walls of your pizza oven with it.
Thinking this is too much work? It's not. It's fun and rewarding and ... you get pizza out of it.
Now I also know the other thing you're thinking. You're thinking, "Wow. Karen hasn't written a single funny sentence since she started talking about pizza ovens."
And you're right. While you're normally screaming with laughter during one of my posts, I must confess that may be the end of the funny posts. I've lost my funny bone. Literally. My skeleton is now surrounded by something akin to 7 layers of pork belly due to eating pizza. A lot of pizza.
I'm a pizza pig.
And I'm O.K. with that.
Now let's move onto the next step in Building a Cob oven, Step 2.
*********************************************
Thinking of building an wood burning pizza oven? Then you need to order the book "Build Your Own Earth Oven" by Kiko Denzer right now.
I also got a LOT of help from Sigi Koko the principle architect at Down to Earth Design. She was relentlessly patient with me and my questions. Watching her 4 part series of YouTube videos on how to build a cob oven will give you a really good idea of what's involved and how to tackle the project. I watched her videos over and over and over again. I suggest you do the same.



Trinity Wave
I love this! So inspirational. So glad that there is a woman out there doing this. Gives me hope. Thank you!!!