Build a Restoration Hardware sofa like mine! Here's how the wholeeeee thing is constructed.

I think I've mentioned before that I don't use plans when I build something. I just start nailing, cutting and cursing. Partly because I don't really know how to read plans and partly because I'm usually making something for a very specific space so I want it to be the size that I want; not what some plans want.
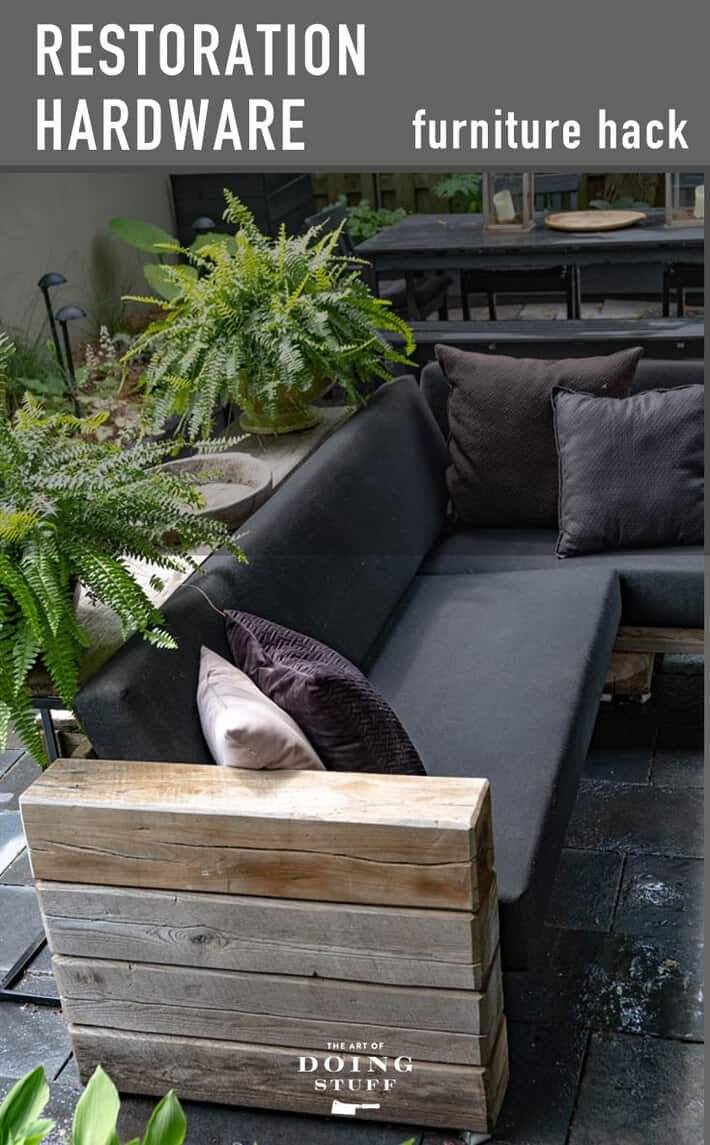
Which is exactly how I ended up building my outdoor "Restoration Hardware" furniture. I bought some wood, I started cutting and let Snarklefart and Habbityass dance off my tongue. What I ended up with was some backyard furniture that turned out way better than I thought it would and a succession of never-ending emails over the next 2 years about how it was all put together.
As I built the sectional and chair I put up posts about how I aged it with a home made vinegar and steel wool stain, how I constructed the arms and how I hacked up the wood to give it some character and chamfered the edges. What I didn't show you was exactly how I put it all together.

What seemed to cause the most confusion (for myself and you) was how I created the corner of the sectional. If the sectional weren't tilted back on a bit of an angle (to make it more comfortable), doing the corner would have been easy and pretty straight forward.
Instead it was a nightmare. The thought bubble over my head while trying to figure this out would have just been a bunch of squiggles and the letters K, C, F and U. Not necessarily in that order.
After a couple of days I finally came up with a solution. It wasn't a terribly elegant solution but it works.

In the spring when I was cleaning up my backyard I took the opportunity to take photos of the sectional while it was naked and with nothing hiding the view.
Behold my naked backyard and sectional. The next series of photos will show you exactly how it's put together.

- Most things are joined with L brackets. After building it I decided I'd like a bit more of an angle on the seat and back so I added wood. A 2x2 to the seat to tip the front of it up a bit. And a 2x4 to the bottom of the back. These work together to create even more of a V for sitting. Once the cushions are on you don't notice them at all.

- Again you can see I've used L Brackets to join the two sections at the corner on the seat.

- Extra pieces of 6x6 (the same as the arms) are under the seats as well for extra support and strength.
Now that slightly inelegant corner ...

Just ignore the little triangular notch in the top of the corner - it just split and a piece of wood fell out. It has nothing to do with the building of the corner.
Would you like to save this stuff?
Had I been thinking in advance, or had plans, or had one rice grain of sanity left in me after the construction of this thing, I would have notched out the corner so it ran even with the backs of the sofa. But I had none of those things.

- The corner is just another piece of 6x6 like the arms are made out of with both sides of the back L bracketed to it on an angle.

- The seats are also L bracketed to the corner from both the sides...

and underneath.

Other than the arms, which are made of 6x6 ash that I got from a private sawmill, the rest of the wood used to make the sectional is scrounged; old pieces of barn board and lumber I already had.
The cushions I had custom made and they're what cost a lot. Around $1000 if I remember correctly. I might not be remembering correctly because mostly when things cost a lot more than I want to pay I just throw that number of out of my brain for good.
Of course the sectional can be made to any length you want. I built it to fit my space.

I also built it to fit me. So the chairs aren't as deep as the Restoration Hardware ones.
If you're still a bit unsure of it all, here's a video walking you around the entire sectional from front to back (without the cushions on it)

I hope that answers all of the questions you've had about the construction of the Restoration Hardware outdoor sectional.


Regina
Hi Karen,
Greetings from Ohio. I thought you had dyed your patio cushions black, I've tried to search and am unsuccessful. Have I lost my mind? Or am I imagining that you dyed them? I have white cushion covers and want to dye them black/charcoal.
Karen
Hi Regina! Yes, you have lost your mind. I'm so sorry to be the one to tell you.😆 I've never dyed my patio cushions. I had them made in black fabric. ~ karen!
Aika
I built it! 😄
It's awesome, thank you very much for the idea and pictures!
Karen
That's great! I hope you love it. ~ karen!
David
Karen - Awesome build. As I’m new at attempting anything of this magnitude it would be helpful to have plans. Did your collaboration efforts produce highly desirable plans? If so, where can I purchase them? Thanks in advance.
Sharon Lourenso
Looking to build this using old beams from a Church restoration. How did you attach the 4 posts for the arms to one another?
Stephen Keegan
Thanks for sharing this Karen- I'm thinking of building it (using pine as it's cheaper/more readily available). One question: How solid are the joints that use the L-brackets? Are there any movements and/or noises from the furniture when in use?
Alison
Hi Karen. I made this! It’s amazing! Thanks for your inspiration.
Please could you post a pic of the back and sides of the cushions so I can see how they did the seams. I’m struggling to work it out, I’ve made one but it’s a bit loose because of the foam being so big, it’s hard to get it into the opening.
Thanks again
Karen
HI Alison. That's why I had my cushions made by a professional. It's almost impossible to get them tight like they can and even more impossible to try to fit foam into the cover. The cushions are away right now so I can't give you a pic but congratulations on making the sectional!! ~ karen
Jeff Pagano
Inspirational! We’re doing this project right now, April 2021!!! Amazing to think it’s been like 4 years and people are still discovering your great work!