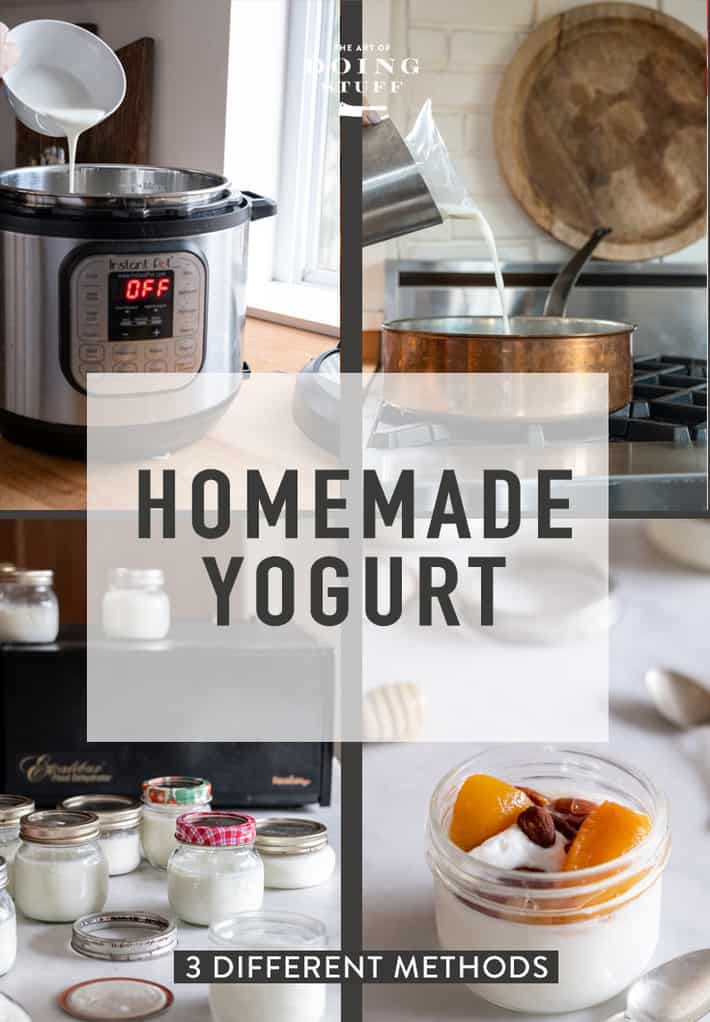
How to make yogurt every which way. Instructions for Instant Pot, stovetop & making yogurt in a dehydrator. And NOPE. This doesn't mean I now like my Instant Pot. Plus a new trick for thickening it that I learned in the past month.

Don't want to read my witty entertaining babbling? Skip right to the recipe.
I started making my own yogurt because of my imaginary world. This is the world many of us let our minds wander to when we should be thinking about insurance rates, mutual funds or other gross things.
In my imaginary world I'm usually at the cottage (that I don't own) and everyone is gathered around when we all realize, much to our horror, that we don't have any butter, or bread or ... in this case ... yogurt. "Everybody calm the hell down.", I say, my arms outstretched, palms facing the ground, in the internationally known gesture of "calm the hell down". "We have whipping cream, flour, yeast and milk. We've got this."
Butter as you know is made by shaking whipping cream.
Bread is made with flour, water, salt and yeast.
And Yogurt ... is made with milk. (And a little bit of yogurt. But that ruins imaginary world where I miraculously produce yogurt with just milk. So.)
Therefore years ago I started making my own so if I ever own a cottage and am ever stranded there with a group of starved people that I need to impress, I will be able to impress them.

Table of Contents
Yogurt Facts that'll make your head spin
(not really, it's remarkably dull actually)
- You can use whole, 2%, 1% or skim milk. The higher the fat percentage the more calories.
- Do not use ultra pasteurized milk.
- To "activate" your yogurt, you need 2 Tablespoons of plain yogurt with active cultures. Just look for the words probiotic or active cultures. Some people have had success using sour cream in a pinch as an activator/starter.
So the Instant Pot. The gadget I love to hate. There are two things it can do well. Make a small batch of chili and make yogurt. It's more complicated than just doing it on the stove. But it does work and has some pros to it.
However, I know a lot of you love your Instant Pots so I thought I'd better show you how to make it in the Instant Pot because 1) the instructions that come with the Instant Pot for almost everything are useless and 2) even online instructions for making yogurt in it don't cover the little things.
If you INSIST on buying an Instant Pot, even if you're only cooking for one, make sure you get one that's at least 6 quarts.
The process is the same no matter what you're using to make it.
The Basic Process
- Heat milk (to 180°F)
- Cool milk (to 115°F)
- Add starter culture (yogurt)
- Keep at 115°F (for 8 hours)
Here's how to accomplish that with an Instant Pot.
Instant Pot Method

THE HEATING PHASE
- Pour 2 litres (½ gallon) of milk into the inner pot. I use 1% but you can use any kind.
- Lock the lid on.
- Turn the vent to "sealing". (although I've forgotten this step before and my yogurt still turned out fine.)
- Press "Yogurt" button then,
- Press "Adjust" button. The light will switch to "more" and the word "boil" will show up.
- Wait. The Instant Pot does its thing for 35-40 minutes, heating the milk to 180° F.
- "Yogt" will show up on the display when it's done.
- Remove the lid. CHECK THE TEMPERATURE. After this part is done my yogurt is NEVER at 180° F. It gets to 175. So I put the lid on and restart the process of hitting "Yogurt" then "Adjust" to boil again until it registers as being 180° F.
- NEW TRICK below ⇓ (I learned this from Team Yogurt)
- Keep the yogurt at 180° F for 5 minutes. To do this, Press "Yogurt" then "Adjust" again. This will keep the unit warm enough to keep the yogurt at 180° F. Leave it like this for 5 minutes. Don't put the lid back on. (doing this helps to make it thicker)
- Press "Cancel" at the end of 5 minutes.

THE COOLING PHASE
-
Unplug the Instant Pot. Remove the inner pot and either let it rest on the counter until the temperature drops down to 115° F, OR put the pot in a cold water bath in your sink. This speeds up the cooling time a LOT. (instead of taking half an hour it will only take a few minutes, so keep an eye on it)
THE INOCULATION PHASE
- Put 2 tablespoons of yogurt (with active cultures) into a bowl and then temper it with a ladle of the hot milk and stir. This just makes it easier to disperse the yogurt through the entire pot.
- Pour bowl of yogurt/milk mixture into the inner pot of the Instant Pot and stir.
- Set the inner pot back into the unit.
THE INCUBATION PHASE
- Push the Yogurt button. Add or subtract with the (+) key until you reach a minimum of 8 hours. You can also let it go for 11 hours for tangier yogurt. You can even let it go longer than 11 hours for tangier yogurt. I often incubate my yogurt for 12 hours or more.
- At the end of your cycle "Yogt" will appear on the display and it's done.
- Pour off the whey from the top (or scoop it out with a spoon) and put the yogurt in mason jars or other glass containers.
** For extra thick Greek yogurt, strain the yogurt as shown in the straining method below.

Making it on the stovetop is simpler and has FAR fewer steps.
Stovetop Method
- Heat 2 litres (½ gallon) of milk in a pot on the stove until it reaches 180° F.
- Turn the heat off, put the lid on and let it sit for 5 minutes.
- Cool the milk to 115°F on the counter or in a cool water bath in the sink.
- Mix together some hot milk with 2 Tablespoons of yogurt to thin the yogurt then add the mixture to the rest of the hot milk. Stir.
- Pour into a good thermos (one that will retain the heat) and wait 8-11 hours. (or follow Dehydrator instructions)
**If you don't have a thermos then pour the hot milk into mason jars and store them in a good quality cooler wrapped in towels for 8-11 hours.


Yup. That's it. In my opinion this is much easier and faster than fiddling with the erratic behaviour of an Instant Pot.
Would you like to save this stuff?
The drawback is if you forget your milk on the stove while heating it, it can boil over.
Dehydrator Method
To make yogurt in a dehydrator, you're not really using the dehydrator for anything other than holding the yogurt at temperature.
Follow the stove top method up until the part where you hold the yogurt at 115°F for 8-11 hours. Instead of putting it in a cooler or thermos you can hold it at temperature perfectly with your dehydrator.
- Follow steps 1-4 for stovetop yogurt.
- Turn the dehydrator on and set it to 115°F
- Pour hot milk into glass mason jars. Screw on lids.
- Remove trays from dehydrator and place the jars inside.
- Set the dehydrator timer (if it has one) for 8-11 hours.
Straining to Thicken
- Dump your incubated yogurt into a sieve lined with cheese cloth or a flour sack tea towel set over a bowl or pot.
- Let drain for up to an hour or until it has reached the consistency you like.
- After 1 hour around 4 cups of whey will have drained away, leaving you with 4 cups of Greek yogurt.
When the process has finished its 8 hours of incubating it will have a lot of whey in it. That's the liquid stuff you see on top of yogurt or sour cream that you buy at the store sometimes.
Straining willt get rid of most of the whey resulting in a thicker, higher calorie yogurt. If you like it thinner you don't need to strain; just pour off the bit of whey on top and you're good.
YIELD: NOT STRAINING VS STRAINING
- Unstrained yogurt will get you the same amount of yogurt as milk used. 8 cups of milk will result in 8 cups of yogurt!
- Strained yogurt will get you thicker yogurt, but less yield. 8 cups of milk will result in 4 cups of greek yogurt.*
*the exact yield depends on how long you strain it and how much whey you remove.

Unstrained has a similar consistency to a very soft jello.
Straining is how you get that thick, Greek style yogurt.

Strained is so thick it will sit high on the spoon and even stick to it when you turn the spoon over.

I love a big spoonful of plain, tart Greek yogurt, but there are times I want to have something a little more dessert or breakfast like. THOSE are the times for toppings.

Topping Ideas
- Jam (Strawberry, raspberry, apricot etc. etc.)
- Nuts
- Granola
- Canned fruit
- Chia seeds
- Bananas
- Coconut Flakes
- Chocolate Chips
- Cocoa powder
- Honey
- Maple Syrup
- Cinnamon
- Nutmeg
- Poppyseeds
- Orange slices
- Mashed sweet potato
- Lemon zest
- Brown sugar
- Apple sauce
- Cookie crumbs

How to make Yogurt.
Ingredients
- 2 litres milk (whole, 2%, 1% or skim)
- 2 tablespoon active yogurt plain
Instructions
Instant Pot Yogurt
- Pour 2 litres (½ gallon) of milk into the inner pot. I use 1% but you can use any kind.
- Lock the lid on.
- Turn the vent to "sealing". (although I've forgotten this step before and my yogurt still turned out fine.)
- Press "Yogurt" button then,
- Press "Adjust" button. The light will switch to "more" and the word "boil" will show up.
- Wait. The Instant Pot does its thing for 35-40 minutes, heating the milk to 180° F.
- "Yogt" will show up on the display when it's done.
- Remove the lid. CHECK THE TEMPERATURE. After this part is done my yogurt is NEVER at 180° F. It gets to 175. So I put the lid on and restart the process of hitting "Yogurt" then "Adjust" to boil again until the yogurt registers as being 180° F.
- Keep the yogurt at 180° F for 5 minutes. To do this, Press "Yogurt" then "Adjust" again. This will keep the unit warm enough to keep the yogurt at 180° F. Leave it like this for 5 minutes. Don't put the lid back on.
- Press "Cancel" at the end of 5 minutes.
- Unplug the Instant Pot. Remove the inner pot and either let it rest on the counter until the temperature drops down to 115° F, OR put the pot in a cold water bath in your sink. This speeds up the cooling time a LOT. (instead of taking half an hour it will only take a few minutes, so keep an eye on it)
- Put 2 tablespoons of yogurt (with active cultures) into a bowl and then temper it with a ladle of the hot milk and stir. This just makes it easier to disperse the yogurt through the entire pot.
- Pour bowl of yogurt/milk mixture into the inner pot of the Instant Pot and stir.
- Set the inner pot back into the unit.
- Push the Yogurt button. Add or subtract with the (+) key until you reach a minimum of 8 hours. You can also let it go for 11 hours for tangier yogurt. At the end of your cycle "Yogt" will appear on the display and it's done.
- Pour off the whey from the top (or scoop it out with a spoon) and put the yogurt in mason jars or other glass containers.
Stovetop Yogurt
- Heat your milk in a saucepan over medium heat to 180 F (almost boiling, this happens quickly).
- Remove pan from heat and allow milk to cool to 115 F. This will take around 30 minutes on the counter or a few minutes in a cool water bath in your sink.
- Once the milk is at 115 degrees add some hot milk to a bowl with 2 tablespoons of yogurt in it and incorporate. Add this mixture to your pot of hot milk.
- Now your job is to keep this concoction at 115 degrees for the next 8 hours. There are a few ways to do this.
- Pour your milk mixture into a mason jar (or similar) with lid and place the entire jar into a small cooler filled with warm water. Leave for 8 - 11 hours. OR ...
- Pour your milk mixture into a good thermos, wrap it in a towel and leave it for 8 hours.
- Your yogurt is now done. Store it in glass jars and refrigerate. (If you want you can strain it to make it thicker.) Straining instructions in notes.
Dehydrator Yogurt
- Follow steps 1-3 for stovetop yogurt.
- Turn on the dehydrator and set to 115°F.
- Pour yogurt into serving sized mason jars for convenience (or use full sized mason jars).
- Set the jars into the dehydrator and allow to incubate for 8-11 hours.
Notes
- The longer you let the yogurt incubate the more tart it will be.
- 2 litres of milk will make 8 cups of yogurt.
- For extra thick Greek yogurt, strain the yogurt after it has set by pouring it into a cheesecloth lined sieve over a bowl. In about an hour 4 cups of whey will have drained out leaving you with an incredibly thick remaining 4 cups of yogurt.
- If your oven goes as low as 115°F then you can set the jars of yogurt in the oven for 8-11 hours as well to incubate it.
Nutrition
How healthy is homemade yogurt?
Really good natural yogurt is way more accessible now than it ever was. There was a time that the only yogurt you could buy was yogurt with premixed fruit and about a pound of sugar per serving.
Homemade has no sugar and no additives. Adding these two things will decrease the health benefits of this lively culture.
Homemade concoctions can be sweetened with honey, maple syrup or agave and you can add fresh fruit like peaches or strawberries as well.
By making your own you're controlling what milk it is you use to create it. Even some of the best brands of yogurt don't use the best milk and often come from cows that have been fed grain (GMO corn or soy). That means when you get that store bought healthy seeming yogurt you're actually consuming GMOs through the milk of the cow. If that's the sort of thing that worries you then homemade really is your best choice.
THOUGHTS ON WHICH IS THE BEST WAY
If I were in some sort of battle that required I choose only ONE method to make yogurt for the rest of my life what would it be?
A combination of the stovetop method for the initial heating and cooling and then finishing it in a dehydrator.


Marie Barclay
You can actually use the cheesecloth method to make the yogurt into a kind of cream cheese; just keep it draining until solid.
The amount of yogurt my youngest goes through, I've made one litre batches for years using the powdered culture mixes. Much cheaper (just add water), and nicer, and less artificial nasties - they are essentially milk powder and culture, with optional natural flavourings.
Not that we have enough left to make into cream cheese often, but it is nice. Strawberry flavoured works well!
Melody
We're restricting carbs and milk has a whole bunch. Do you think this could happen with half and half or cream?
Lois
Everyone--thanks for all the info on making yogurt & tzatziki! My head is only a little exploded from all this new knowledge
Renee Rydzewski
So going to try this. I eat so much yogurt. But in the ingredient list, it states 1 tablespoon of yogurt, but I see it should be 2 every where else. I use pure stevia extract in vanilla, or toffee or you can stir in a spoon of vanilla bean paste.
Karen
To be perfectly honest Renee, 1 - 2 Tablespoons will work. Just as long as you get the probiotics in there. :) I'll fix the recipes though so it's the same all the way through! Thx. ~ karen!
Thandi
Hang on...does this mean I can also MAKE MY OWN LABNEH?? From scratch scratch??
*Gasp*
Alison
Only recently discovered your blog, and it makes me laugh every time. I'm in England, in the Lake District, and believe me, with the amount of rain we get, we need a laugh.
My husband has bees in his bonnet every so often. One, last year, was making his own yogurt, as he eats some each lunchtime. Not making it your simple way. Oh no. He had to get hold of Kefir yogurt, which he'd recently read about. It cost £15 for a pkt of six starters, and took 2 weeks to order from a health food shop. It takes more time than it's worth to make. And is very runny.
Guess what? He made it once, and now the other pkts sit at the back of the fridge. He's forgotten all about it.
Have I reminded him? No. He makes a mess, and I'm left to clean up. So soon, I'll quietly drop it in the compost, where it'll do some good, and deny all knowledge if he one day remembers it.
But I really like your recipe. I have an AGA cooker, and nothing could be simpler than utilising the warming oven to nurture the yogurt. Or I could continue buying it from the shops...
Karen
LOVE AGAs! You're a lucky lady. :) ~ karen!
Jackie
I make 4 litres worth of yoghurt every 10 days or so. (The full three bags).
I find this to be quite a bit cheaper than buying Greek yoghurt.
I use my instant pot pressure cooker which has a yogurt setting- you can boil and incubate in the pot.
I freeze my starter in ice cube trays so I don't have to worry about keeping some for the next batch and one cube is enough for the entire batch. I also don't have to worry about failure- about using the old to make the new too many times in a row.
Lois
Holy cow! I HAVE an instant pot pressure cooker that I have owned since some fabulous sale on Amazon and have YET to use. Now if I could just figure out where it is . . .
Richard
Oh yes, she strain the grains with a nylon sieve for the next batch.
Richard
My wife does Kéfir (with billions more probiotics enzymes than yogurt). You do it the same way, except with cold milk with Kéfir grains (instead of Yogurt culture/yogurt) that you leave on the counter at room temperature overnight, and voilà! - MUCH LESS expensive than at any store, and MUCH MORE beneficial than yogurt.
Karen
I know, but I really just prefer yogourt. I even get weirded out by kids having drinkable yogourt. It just seems gross to me, lol. Plus it's much more difficult to pour honey over your kefir. ;) ~ karen!
Mel Hosgen
If you add skim milk powder at rate of 50g/L milk you will get greek yoghurt without having to strain it... I also add 100g live yoghurt/L milk... turns out thick 'pot set' yoghurt every time!
Karen
Good to know Mel. I'll give it a shot next time. ~ karen!
Lianne Raymond
I'm not an appliance pusher - but the instant pot has changed my yogurt making life. Pour the milk into the mason jars and then everything happens in the jars - you heat, you cool, you add a small scoop of yogurt to each jar, you let it culture, then put on the lids and put it in the fridge. No clean-up, no muss, no fuss. Thing of beauty.
Karen
LOL. I know, I know. EVERYone has told me I have to get one. But ... I don't know. I'm 90 percent sold on it. I'll probably buy one and review it in a post here. :) ~ karen!
Rosie Walsh
I've become addicted to whole milk and whole milk yoghurt. Get it at an Indian grocery. Bought the low fat by mistake. The difference in flavor, to me. was amazing. Won't make that mistake again because now I'll be making my own.
Renee Rydzewski
I know this is an older post, but it states 1 tablespoon in the recipe, then 2 tablespoons in the column itself. Want to try this, but which is it? I eat sooo much yogurt I would save alot of cash doing this!
Karen
HI Renee, thanks someone else pointed that out. It's either or. :) It really doesn't make a difference as long as you get some probiotics in there. 1 heaping Tablespoon is good. I'll adjust the recipe now. Thx. ~ karen!
Laura
I bought some coconut silk milk to try an copy a drink recipe (didn't work btw) I was wondering if I could use this to make the yogurt? Then it would be already flavored. What do you think Karen?
Rebecca
I have been making yogurt on and off for about a year - i find it cheaper and tastier because as a single person I just can't get through a 4-litre of milk before it expires and I can't allow myself to buy a smaller amount because the higher unit price drives me insane!! 2 litres costs nearly as much as 4 - ridiculous!
Plus I saved a dozen lavender coloured French clay yogurt pots from working abroad and get to bring them to work filled to the brim with yogurt! So cute!!
Jessica
My daughter makes yogurt in her sippy cup/bottle overnight sometimes. Sometimes she just holds that warm bottle of milk all night, and every once in a while inthe morning, it is all yogurt-y.
No one eats it, but it's very weird how it sometimes happens on its own (20-30% of the time)
Karen
Ha! That's funny. ~ karen!
Jody
Are you a mind reader? I was considering looking to make yogurt the other day. Another question. Why does pre-cut stewing beef make a stew gross?
Karen
'Cause it's made up of all different cuts of meat so they all cook at different times. Some are tougher than others etc. Cheaper and better to buy a blade roast or the like and cut it yourself into squares. ~ karen!
Mary W
What I really wish you would experiment with, Karen, is ricotta cheese. I've heard it is so easy to make but never tried. Love to use it in lasagna and desserts. There is another type of cheese that I think people make easily - just don't remember what it is right now but can you read my mind and try it, also? Thanks Karen! There really isn't anything you can't do, in my book.
Mary W
I've never tried this since the store is so close, but I would think a cat warmer would work wonderfully to keep it warm for yogurt. The cat warmer never gets above ?? (cat temp) so I may break down and try this - I ADORE yogurt and quick oats refrigerated overnight with dried cranberries and pecans. I really DO NOT like greek yogurt Sam I Am and I have tried it. I love buttermilk.
Victoria
Get an InstantPot! It makes yogurt making even easier. I follow This Old Gal's instructions from her blog. Easy peasy lemon squeezy!