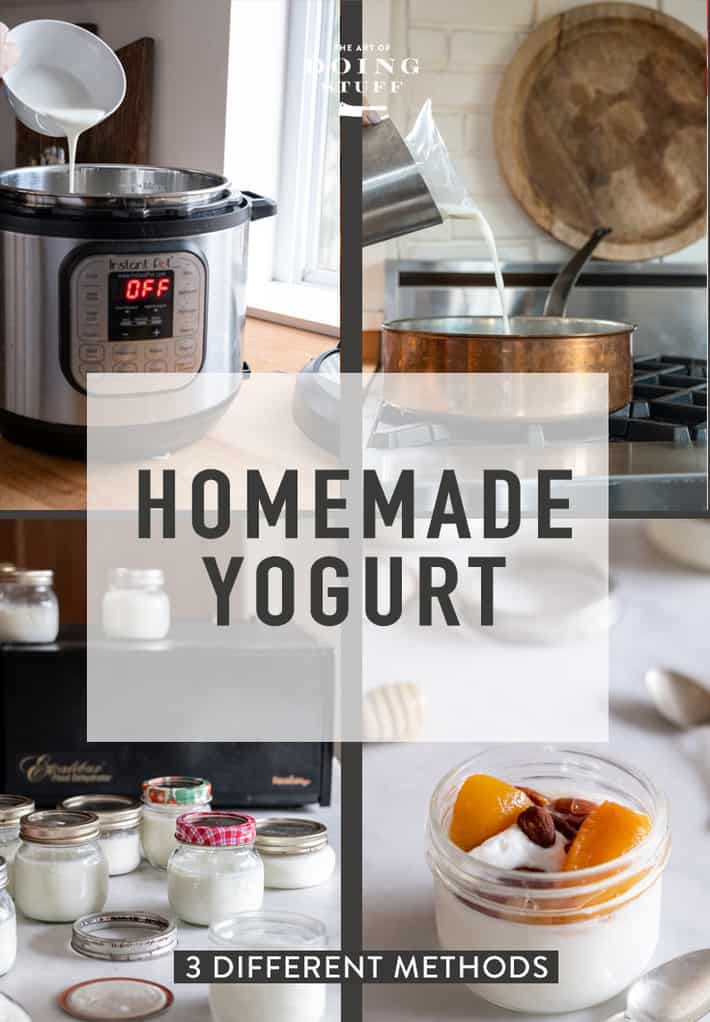
How to make yogurt every which way. Instructions for Instant Pot, stovetop & making yogurt in a dehydrator. And NOPE. This doesn't mean I now like my Instant Pot. Plus a new trick for thickening it that I learned in the past month.

Don't want to read my witty entertaining babbling? Skip right to the recipe.
I started making my own yogurt because of my imaginary world. This is the world many of us let our minds wander to when we should be thinking about insurance rates, mutual funds or other gross things.
In my imaginary world I'm usually at the cottage (that I don't own) and everyone is gathered around when we all realize, much to our horror, that we don't have any butter, or bread or ... in this case ... yogurt. "Everybody calm the hell down.", I say, my arms outstretched, palms facing the ground, in the internationally known gesture of "calm the hell down". "We have whipping cream, flour, yeast and milk. We've got this."
Butter as you know is made by shaking whipping cream.
Bread is made with flour, water, salt and yeast.
And Yogurt ... is made with milk. (And a little bit of yogurt. But that ruins imaginary world where I miraculously produce yogurt with just milk. So.)
Therefore years ago I started making my own so if I ever own a cottage and am ever stranded there with a group of starved people that I need to impress, I will be able to impress them.

Table of Contents
Yogurt Facts that'll make your head spin
(not really, it's remarkably dull actually)
- You can use whole, 2%, 1% or skim milk. The higher the fat percentage the more calories.
- Do not use ultra pasteurized milk.
- To "activate" your yogurt, you need 2 Tablespoons of plain yogurt with active cultures. Just look for the words probiotic or active cultures. Some people have had success using sour cream in a pinch as an activator/starter.
So the Instant Pot. The gadget I love to hate. There are two things it can do well. Make a small batch of chili and make yogurt. It's more complicated than just doing it on the stove. But it does work and has some pros to it.
However, I know a lot of you love your Instant Pots so I thought I'd better show you how to make it in the Instant Pot because 1) the instructions that come with the Instant Pot for almost everything are useless and 2) even online instructions for making yogurt in it don't cover the little things.
If you INSIST on buying an Instant Pot, even if you're only cooking for one, make sure you get one that's at least 6 quarts.
The process is the same no matter what you're using to make it.
The Basic Process
- Heat milk (to 180°F)
- Cool milk (to 115°F)
- Add starter culture (yogurt)
- Keep at 115°F (for 8 hours)
Here's how to accomplish that with an Instant Pot.
Instant Pot Method

THE HEATING PHASE
- Pour 2 litres (½ gallon) of milk into the inner pot. I use 1% but you can use any kind.
- Lock the lid on.
- Turn the vent to "sealing". (although I've forgotten this step before and my yogurt still turned out fine.)
- Press "Yogurt" button then,
- Press "Adjust" button. The light will switch to "more" and the word "boil" will show up.
- Wait. The Instant Pot does its thing for 35-40 minutes, heating the milk to 180° F.
- "Yogt" will show up on the display when it's done.
- Remove the lid. CHECK THE TEMPERATURE. After this part is done my yogurt is NEVER at 180° F. It gets to 175. So I put the lid on and restart the process of hitting "Yogurt" then "Adjust" to boil again until it registers as being 180° F.
- NEW TRICK below ⇓ (I learned this from Team Yogurt)
- Keep the yogurt at 180° F for 5 minutes. To do this, Press "Yogurt" then "Adjust" again. This will keep the unit warm enough to keep the yogurt at 180° F. Leave it like this for 5 minutes. Don't put the lid back on. (doing this helps to make it thicker)
- Press "Cancel" at the end of 5 minutes.

THE COOLING PHASE
-
Unplug the Instant Pot. Remove the inner pot and either let it rest on the counter until the temperature drops down to 115° F, OR put the pot in a cold water bath in your sink. This speeds up the cooling time a LOT. (instead of taking half an hour it will only take a few minutes, so keep an eye on it)
THE INOCULATION PHASE
- Put 2 tablespoons of yogurt (with active cultures) into a bowl and then temper it with a ladle of the hot milk and stir. This just makes it easier to disperse the yogurt through the entire pot.
- Pour bowl of yogurt/milk mixture into the inner pot of the Instant Pot and stir.
- Set the inner pot back into the unit.
THE INCUBATION PHASE
- Push the Yogurt button. Add or subtract with the (+) key until you reach a minimum of 8 hours. You can also let it go for 11 hours for tangier yogurt. You can even let it go longer than 11 hours for tangier yogurt. I often incubate my yogurt for 12 hours or more.
- At the end of your cycle "Yogt" will appear on the display and it's done.
- Pour off the whey from the top (or scoop it out with a spoon) and put the yogurt in mason jars or other glass containers.
** For extra thick Greek yogurt, strain the yogurt as shown in the straining method below.

Making it on the stovetop is simpler and has FAR fewer steps.
Stovetop Method
- Heat 2 litres (½ gallon) of milk in a pot on the stove until it reaches 180° F.
- Turn the heat off, put the lid on and let it sit for 5 minutes.
- Cool the milk to 115°F on the counter or in a cool water bath in the sink.
- Mix together some hot milk with 2 Tablespoons of yogurt to thin the yogurt then add the mixture to the rest of the hot milk. Stir.
- Pour into a good thermos (one that will retain the heat) and wait 8-11 hours. (or follow Dehydrator instructions)
**If you don't have a thermos then pour the hot milk into mason jars and store them in a good quality cooler wrapped in towels for 8-11 hours.


Yup. That's it. In my opinion this is much easier and faster than fiddling with the erratic behaviour of an Instant Pot.
The drawback is if you forget your milk on the stove while heating it, it can boil over.
Dehydrator Method
To make yogurt in a dehydrator, you're not really using the dehydrator for anything other than holding the yogurt at temperature.
Follow the stove top method up until the part where you hold the yogurt at 115°F for 8-11 hours. Instead of putting it in a cooler or thermos you can hold it at temperature perfectly with your dehydrator.
- Follow steps 1-4 for stovetop yogurt.
- Turn the dehydrator on and set it to 115°F
- Pour hot milk into glass mason jars. Screw on lids.
- Remove trays from dehydrator and place the jars inside.
- Set the dehydrator timer (if it has one) for 8-11 hours.
Straining to Thicken
- Dump your incubated yogurt into a sieve lined with cheese cloth or a flour sack tea towel set over a bowl or pot.
- Let drain for up to an hour or until it has reached the consistency you like.
- After 1 hour around 4 cups of whey will have drained away, leaving you with 4 cups of Greek yogurt.
When the process has finished its 8 hours of incubating it will have a lot of whey in it. That's the liquid stuff you see on top of yogurt or sour cream that you buy at the store sometimes.
Straining willt get rid of most of the whey resulting in a thicker, higher calorie yogurt. If you like it thinner you don't need to strain; just pour off the bit of whey on top and you're good.
YIELD: NOT STRAINING VS STRAINING
- Unstrained yogurt will get you the same amount of yogurt as milk used. 8 cups of milk will result in 8 cups of yogurt!
- Strained yogurt will get you thicker yogurt, but less yield. 8 cups of milk will result in 4 cups of greek yogurt.*
*the exact yield depends on how long you strain it and how much whey you remove.

Unstrained has a similar consistency to a very soft jello.
Straining is how you get that thick, Greek style yogurt.

Strained is so thick it will sit high on the spoon and even stick to it when you turn the spoon over.

I love a big spoonful of plain, tart Greek yogurt, but there are times I want to have something a little more dessert or breakfast like. THOSE are the times for toppings.

Topping Ideas
- Jam (Strawberry, raspberry, apricot etc. etc.)
- Nuts
- Granola
- Canned fruit
- Chia seeds
- Bananas
- Coconut Flakes
- Chocolate Chips
- Cocoa powder
- Honey
- Maple Syrup
- Cinnamon
- Nutmeg
- Poppyseeds
- Orange slices
- Mashed sweet potato
- Lemon zest
- Brown sugar
- Apple sauce
- Cookie crumbs

How to make Yogurt.
Ingredients
- 2 litres milk (whole, 2%, 1% or skim)
- 2 tablespoon active yogurt plain
Instructions
Instant Pot Yogurt
- Pour 2 litres (½ gallon) of milk into the inner pot. I use 1% but you can use any kind.
- Lock the lid on.
- Turn the vent to "sealing". (although I've forgotten this step before and my yogurt still turned out fine.)
- Press "Yogurt" button then,
- Press "Adjust" button. The light will switch to "more" and the word "boil" will show up.
- Wait. The Instant Pot does its thing for 35-40 minutes, heating the milk to 180° F.
- "Yogt" will show up on the display when it's done.
- Remove the lid. CHECK THE TEMPERATURE. After this part is done my yogurt is NEVER at 180° F. It gets to 175. So I put the lid on and restart the process of hitting "Yogurt" then "Adjust" to boil again until the yogurt registers as being 180° F.
- Keep the yogurt at 180° F for 5 minutes. To do this, Press "Yogurt" then "Adjust" again. This will keep the unit warm enough to keep the yogurt at 180° F. Leave it like this for 5 minutes. Don't put the lid back on.
- Press "Cancel" at the end of 5 minutes.
- Unplug the Instant Pot. Remove the inner pot and either let it rest on the counter until the temperature drops down to 115° F, OR put the pot in a cold water bath in your sink. This speeds up the cooling time a LOT. (instead of taking half an hour it will only take a few minutes, so keep an eye on it)
- Put 2 tablespoons of yogurt (with active cultures) into a bowl and then temper it with a ladle of the hot milk and stir. This just makes it easier to disperse the yogurt through the entire pot.
- Pour bowl of yogurt/milk mixture into the inner pot of the Instant Pot and stir.
- Set the inner pot back into the unit.
- Push the Yogurt button. Add or subtract with the (+) key until you reach a minimum of 8 hours. You can also let it go for 11 hours for tangier yogurt. At the end of your cycle "Yogt" will appear on the display and it's done.
- Pour off the whey from the top (or scoop it out with a spoon) and put the yogurt in mason jars or other glass containers.
Stovetop Yogurt
- Heat your milk in a saucepan over medium heat to 180 F (almost boiling, this happens quickly).
- Remove pan from heat and allow milk to cool to 115 F. This will take around 30 minutes on the counter or a few minutes in a cool water bath in your sink.
- Once the milk is at 115 degrees add some hot milk to a bowl with 2 tablespoons of yogurt in it and incorporate. Add this mixture to your pot of hot milk.
- Now your job is to keep this concoction at 115 degrees for the next 8 hours. There are a few ways to do this.
- Pour your milk mixture into a mason jar (or similar) with lid and place the entire jar into a small cooler filled with warm water. Leave for 8 - 11 hours. OR ...
- Pour your milk mixture into a good thermos, wrap it in a towel and leave it for 8 hours.
- Your yogurt is now done. Store it in glass jars and refrigerate. (If you want you can strain it to make it thicker.) Straining instructions in notes.
Dehydrator Yogurt
- Follow steps 1-3 for stovetop yogurt.
- Turn on the dehydrator and set to 115°F.
- Pour yogurt into serving sized mason jars for convenience (or use full sized mason jars).
- Set the jars into the dehydrator and allow to incubate for 8-11 hours.
Notes
- The longer you let the yogurt incubate the more tart it will be.
- 2 litres of milk will make 8 cups of yogurt.
- For extra thick Greek yogurt, strain the yogurt after it has set by pouring it into a cheesecloth lined sieve over a bowl. In about an hour 4 cups of whey will have drained out leaving you with an incredibly thick remaining 4 cups of yogurt.
- If your oven goes as low as 115°F then you can set the jars of yogurt in the oven for 8-11 hours as well to incubate it.
Nutrition
How healthy is homemade yogurt?
Really good natural yogurt is way more accessible now than it ever was. There was a time that the only yogurt you could buy was yogurt with premixed fruit and about a pound of sugar per serving.
Homemade has no sugar and no additives. Adding these two things will decrease the health benefits of this lively culture.
Homemade concoctions can be sweetened with honey, maple syrup or agave and you can add fresh fruit like peaches or strawberries as well.
By making your own you're controlling what milk it is you use to create it. Even some of the best brands of yogurt don't use the best milk and often come from cows that have been fed grain (GMO corn or soy). That means when you get that store bought healthy seeming yogurt you're actually consuming GMOs through the milk of the cow. If that's the sort of thing that worries you then homemade really is your best choice.
THOUGHTS ON WHICH IS THE BEST WAY
If I were in some sort of battle that required I choose only ONE method to make yogurt for the rest of my life what would it be?
A combination of the stovetop method for the initial heating and cooling and then finishing it in a dehydrator.


I began making my own vegan yogurt last year. I use unsweetened organic soy milk from the grocery. Vegan yogurt is hard to find in the stores in my area and it is expensive when it is available. One day I had no vegan starter and I looked online for an alternative. Imagine my surprise when I found this article that explains using chili pepper stems. Amazingly it works great! Once I made the first batch using the pepper stems, I just continued to make sure to save a bit of each batch to start the next and it'still going strong after several months. I discovered that the best way for me to incubate at the correct temperature was to use the bowl of my crock pot. It is large enough to make a half gallon at once. I heat the milk on the stove and heat the crock pot slightly as the milk is cooling. I remove the bowl and put the milk in. I cover with the lid and wrap in a heavy towel and put it in an out of the way corner of my kitchen counter away from drafts. So far this is working great. I had a lot of failures before settling on this method. I still can't get almond or coconut milk to set, so soy milk is the one I use. I make it at least once a week. http://www.wildfermentation.com/yogurt-cultured-by-chili-peppers/
I have the Wild Fermentation book, it's where I get all my super-cool hippie information, lol. Chilli peppers tough! That's crazy talk! ~ karen
Yes, I wasn't convinced it would work. It does sound crazy!
If I make my own yogurt however can I expect John Stamos to pop into my kitchen, feed me yogurt and tell me I'm beautiful?
I only have one question. How long did it take you get that glass so clean? Nice pics, as usual. Your efforts do not go unnoticed!
Love your site and your enthusiasm for new and different things you have tried and want to share. Sharing is good. Maybe not in the grocery store, LOL. Been there and done that. Looks are legion and predictable so I don't do it anymore.
Home made yogurt is great but store bought is easier for us lazy souls out here in lazy-land! Here's a couple of tips for straining yogurt. Use flat in the bottom paper coffee filters to drain yogurt in a sieve or colander in the refrigerator. Much easier to clean out the finished product. Now Karen, time to make Kefir. Super easy and delicious, provided you like the taste of buttermilk plain OR add some flavors to it. Yes, that works too. Just don't put it into pancakes because you will kill the good microbes that are beneficial to your health. Make salad dressings, smoothies and cold things.
Now, what's next on your quest for food knowledge and skills development? Artisan breads? We all wait with anticipation your new discoveries because you make what sounds difficult easy!
Karen HAS done bread ... I just don't remember when tho. There's a recipe for 3 loaves of bread on this site somewhere!
Yes, I know about the bread. My attempt at humor. Karen is a very adventurous and gifted soul with a desire to learn new skills and share. I applaud her every effort to help the rest of us learn and make our lives better!
Great post (and timely - I just started to include more yogurt into my meal plans). :)
Umm... side note - your post is dated March 28, 2017 but the comments are dated from July 15, 2012. Did I miss a time warp? It hurt my brain a little to see it first thing in the morning. X(
Sorry, Karen. I see now that some posts at the bottom of the comments section are dated for 2017 - guess it was a time warp with a fast forward. Feeling safer about the day now :)
I am totally confused. This post came into my email box today and as I scrolled though the comments I came across mention of "the fella". Then I checked the dates and they range from 2012 to 2015, nothing from 2017. Did I skim the post too quickly or is there a glitch somehow or a time warp happening? Note, I refrained from saying "The Dreaded Fella".
Have you tried making yogurt in an Instantpot yet?
I use my Instant pot for yogurt...works great. Also, I use extra large, flat bottomed coffee filters to drain the yogurt instead of cheeseclosh....works much better for me.
I use my Instant pot for yogurt...works great. Also, I use extra large, flat bottomed coffee filters to drain the yogurt instead of cheesecloth....works much better for me.
Thanks so much I'll try it!
I do the heating of the milk on the stove then cool it before using the Instantpot to maintain the temp. I found that was quicker than doing the entire process in the Instantpot.
YOU CRACKED MY ASS UP!!! Thank you for the recipe.
Thank you for sharing this information. I can't wait to get started!!! I really love a good 'healthy' yoghurt with lots of probiotics. By making your own yoghurt in this way, do you get all those great live cultures that a quality store bought yoghurt has?
Hi Deb. Yes! It's those cultures that actually turn it into yogourt. That's why you need to add a tablespoon or so of it into your milk. As it sits overnight the cultures grow and grow. :) ~ karen!
I just recently fell in love with Icelandic Skyr yogurt and will try to make it based on all of the comments in this blog. BTW, I love a tsp of real maple syrup in my plain yogurt. So yummy!!
I love banana cream Greek yogurt, I can't wait to try this recipe
How would I go about making a flavored yoguart?
Hi Brenda - Just make your regular yogurt and then add in the flavourings you want afterwards. Although Banana Cream might be a difficult one to create. You'd probably need to add mushed up bananas and possibly some vanilla and sugar. To flavour mine I usually just put a dollop of strawberry jam in it. ~ karen!
Thank you Karen this was awesome to find and I'm going to make yogurt tomorrow. I'm so excited because I love Liberte Greek yogurt but it is $ 8.00 per 1 liter tub here in Canada. I'm hooked on the coconut flavor. I hope I can get it to work. Wish me luck.
It's even easier with a yogurt-maker (available at Walmart and elsewhere). For the $30 ot so it costs it'll pay you back in no time.
I've never really understood the need for a yogourt maker. I guess I'm not sure what it does! 'Cause to make yogourt all you do is heat milk until 180 degrees the let it cool to 115. I guess you don't have to worry about keeping it in a thermos for 6-8 hours. ~ karen!
Yes, you just put your milk & a little yogurt in the glass jars provided, place in the container and turn on. No heating or temperature measuring required. And overnight: yogurt. :)
So because you posted a link about yogurt making in today's post I decided to check out how you do it. I have been making my own yogurt for about 40 years now but you never know what you might learn or discover. It is pretty basic though. Sometimes I would add non instant skim milk powder to the milk to make a thicker yogurt, sometimes just strain it, now I just scoop out some yogurt and create a well, which I collect the whey in to pour off and use elsewhere. This response though was to be about the yogurt maker. I have used the same yogurt maker all these years and I love it. It is made by Yogotherm http://yogotherm.com/yogurt-maker/ I recently saw one for sale and the design hasn't changed one bit. Oh the pattern on the outer casing yes, but the actual design, nada. You place your yogurt after mixing, into the plastic pail, then place that into the "yogurt maker" a thickly styrofoam lined plastic shell, much the same as a cooler only it fits the pail to a tee. No need to add warm water or wrap in a towel, it maintains the temperature perfectly. Screw the plug in type yogurt makers, this baby is a beauty and I swear by it. F#@#%n A.
I actually just used 2 large thermoses last night Linda and it worked perfectly. Perfectly! When I took the temperature of the yogurt this morning it was 110 after 8 hours so that's pretty good! ~ karen
Fantastic!!!! Great idea and yet along the same design!!!! I always make a large amount so that is one of the reasons why I LOVE my Yogotherm. However if I decide to make smaller amounts that would be an excellent way to go. Now that I think of it I sometimes have more than the container holds so I use a mason jar and this styrofoam form that I got something in but forms around the mason jar perfectly, same effect as Yogotherm. It's a little fussy though (two sides I have to squish together and hold in place with an elastic) so next time I will try the thermos idea instead. See, you never know what you might learn or discover :-)
Why heat the milk just to cool it? Why not just heat to 110 and add culture?
Hi Jennifer. Some people heat their milk to 180/185, some do not. Heating the milk to this higher temp. changes the proteins in the milk which gives you a thicker more tangy yogourt. ~ karen
Wow fast reply thank you. I do prefer thick tangy yogurt.
Thanks for this recipe! I will make some this afternoon! However, I do have one question -- Can I swap cow's milk for a lactose-free milk like soy or almond milk? My husband is lactose intolerant but LOVES yogurt. Or would a totally different process be needed for lactose free yogurt? I would also have to find a lactose free starter mix, I'd imagine....
Hi Kara - I've had others ask about the soy or almond milk yogourt. I believe it *can* be done but I'm pretty sure you need different directions for it. Sorry! ~ karen
Is there a source for the active cultures other than buying yogurt in the store to get started?
Hi Robyn - Yes, you can buy yogourt starter from health food stores, but it'll cost you more and be harder to locate than just buying an individual sized container of plain yogourt. Good yogourt only contains milk and cultures so it's not like you'll be getting a whole bunch of weird stuff if you don't want to. Also, it's only a Tablespoon in an entire batch of yogourt so even if there is weird stuff it'll be pretty diluted. ~ karen!
Well I'll be...my yogurt's done and it turned out great! So mild. My husband just got home from work and I gave him a little taste. He has a real sweet tooth and was surprised how good it was. He said it would need just a little jam. No jam for me....it's going down straight! Now on to my next quest....to de-mystify sour dough. Picking up a start from a friend tonight!
Isn't it great yogourt?! Good job. I'm so happy you made it and liked it. Have you read my sour dough post? https://www.theartofdoingstuff.com/how-to-make-sourdough-starter/ ~ karen!
The most fun part of reading the posts? I have discovered "fellow sisters" who have my same quirky sense of humor! Thanks!
Yup. We're all here Janis. :) ~ karen!
This was so simple to follow with the steps with photos. I've made candy, so this was SO easy. And the yogurt was great. I used the method with the cooler and the hot water from the faucet. Worked great!!
Can you use vanilla Greek yogurt as a starter?