No seriously, you can grow wheat in your average sized garden. Just a 4' x 4' plot is enough to give you wheat cred. I know this because I grow wheat in my community garden. Sad you didn't plant any? Don't worry. You have 2 times to plant wheat every year. Once in the early spring, and once in late summer/fall.
I've grown wheat, I loved growing wheat and now I'm going to show you how to grow wheat because I can't teach you how to grow your own toilet paper.
I am currently on the last steps of my wheat harvest this year which is the "threshing" step. I cut my fall planted wheat last week (end of July) and it's currently sitting in a burlap bag on my front porch waiting to be threshed.
Wheat. You picture it blowing in the wind on acres of rolling land, a white speck of a farmhouse sits off in the distance with the music of John Denver floating on the breeze. Sure, that's one way to grow wheat but what do the rest of us do? What about those of us who don't have gravel driveways and relatives named Remington or Jeb? What do WE do?
We plant it just like we plant anything else; anywhere we can.
I've been doing it for a few years now and it's consistently a lot of work, but also consistently successful.
Table of Contents
Growing Wheat
(on a super-small scale like in your front or backyard.)
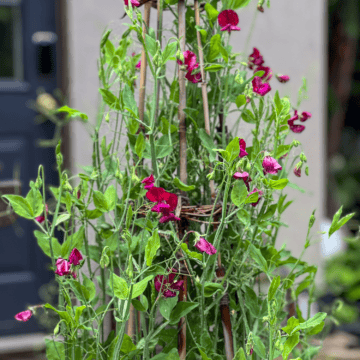
If the thought of growing your own wheat intimidates you, or you don't think you have anywhere to put it, think of it as an ornamental grass.
Wheat grows to be 3-4 feet tall.
It isn't overly huge, is beautiful, AND you can harvest it and turn it into flour in the fall or - use it for fall decoration like making your own wheat wreath.

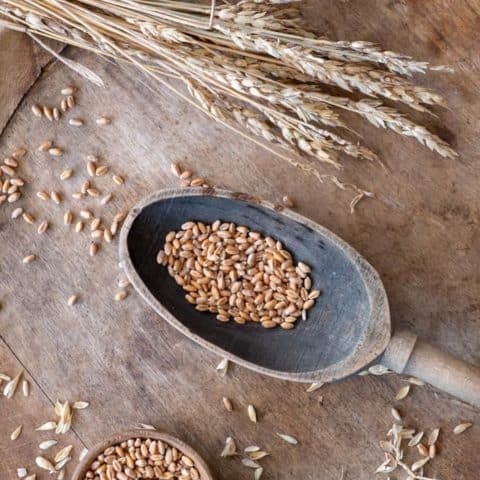
To plant it all you need are wheat berries. Wheat berries = wheat seeds.
I made the mistake of buying a very small packet of wheat seed from a seed supplier for $3. I got about 15 seeds which is plenty to make enough flour for a birthday cake if the birthday cake is for a rather underweight mouse.
You can buy a whole big bag of wheat berries meant for cooking or grinding into flour and use these for seed. That's what I eventually did. I got mine from 1847, a local source for flour and wheat berries. I recommend you try to find a local source as well, because that means you're getting wheat that's meant to be grown in your area.
How to Grow It

Wheat falls into 2 categories, spring wheat or winter wheat.
Winter wheat is planted in the fall for a summer harvest, Spring wheat is planted in the spring for a fall harvest. Spring wheat can be planted "as soon as the ground can be worked", which really doesn't mean anything to me even after decades of vegetable gardening. So to me, "when the ground can be worked" generally means when I can go out and garden without swearing about how awful it is outside. So mid to late spring.
How Long Does It Take To Grow?
Wheat likes to germinate in cooler soil. That means it will be happy germinating in soil that's 10C (50F). If you're late planting, don't get too worked up. It will germinate if the soil is warmer too.
Under normal spring conditions (10C or so) wheat will sprout in about 7 days. By 2-3 weeks it'll be big enough to impress the cast of Hee Haw.
Wheat planted in the spring will be ready to harvest after about 4 months from planting.
If it's planted in the fall it will be ready to harvest about 8 months after planting (because so much of its time is spent dormant in the winter).

Wheat at 2 weeks looks like long grass.
Wheat can be planted with 25 and 32 wheat seeds per square foot.
I planted an area that was around 2' x 15' which got me almost 2 cups of wheat berries, or almost a pound.
1 pound of wheat berries = 1 pound of unsifted flour
1 pound of flour = 3.5 cups.
The graphic below shows what I was HOPING to get, and what can be achieved.

My haul was half of what I was hoping for and predicting. However it is possible to produce 3 lbs of wheat in a 30 square foot area if you can get your wheat to produce tillers.
What are Wheat Tillers?
Wheat grows like a grass with one main stem. At the top of this stem is where the fluffy thing you recognize as wheat will grow.

If it's grown in the right conditions, wheat will "tiller" which means more stems will develop off of the main wheat shoot. More stems means more wheat.
Each spring planted wheat berry has the potential to grow the main shoot, plus that main shoot can develop 3 tillers. (winter wheat can grow up to 7 tillers)
The more tillers you have, the more wheat growing at the tips of your plant you'll get.
So without any tillering wheat will produce one head of wheat. With tillering it can produce 3 times as much.
HOW TO IMPROVE TILLERING?
Tillers in spring sown wheat form 2-3 weeks after germination. Any conditions that the wheat is pissed at during this time will stop tillering. To keep your wheat happy:
- Prior to planting make sure you amend your soil with fertilizer or compost.
- Make sure your soil is friable (not compacted like cement).
- Don't plant your seeds too deep.
- Don't stress the plants by letting them dry out.
- Plant at least 25 seeds per square foot.
- Tillering can also be reduced if the weather is too warm.
I thought I did these things last year but ... maybe not. I'll pay more attention this year especially during the critical first two weeks after germination.
But I DID grow enough wheat in my 2' x 15' plot to make bread, pizza dough and buns all winter by grinding it into flour in my Vitamix. I'm not sure if I'm ready to graduate to one of these beautiful wood flour mills.
O.K., now that I've got you all worked up over the thought of basically growing your own buns, how do you plant wheat and harvest it?
How to Plant and Harvest Wheat
(even if you only have a pathetically tiny space)

- It all starts with the wheat berry. In spring plant between 25 - 30 seeds per square foot into well amended (fertilized) moist, loose soil. Water the soil before planting if you have to to guarantee germination. Plant wheat seeds at a depth of 1".

2. Watch for germination in the first week. Once it has sprouted KEEP THE WHEAT STRESS FREE by keeping the area weeded and watered (which is hard to do because weedy grasses look very much like growing wheat.)

3. After a couple of months the wheat will grow and tiller and produce wheat heads. Once this happens the plants will slowly start to dry out.
4. To test whether your wheat is ready to harvest pull a few grains out of the wheat head and pop them in your mouth. Ready to harvest wheat berries should be hard, not chewy. If they're chewy, they aren't ready to harvest yet. The majority of the plant will be dried, the tops completely golden with no green and the heads will be bending down slightly, not standing straight up.

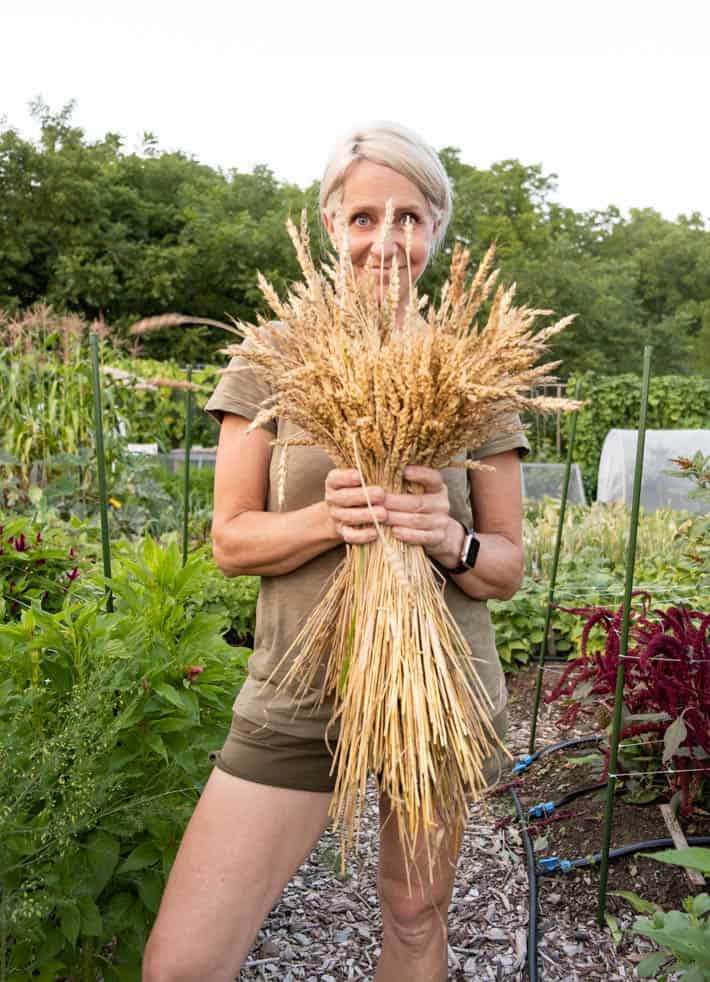
5. Cut your wheat when it's ready and further dry it by hanging it upside down somewhere with air circulation where it's protected from rain. This ensures all the wheat is completely dry if you had to harvest when some heads still had a tinge of green. I hang my wheat on my front porch under the vintage looking onion drying rack I made. Let it further dry until no trace of green remains on the heads.

If you're further drying your wheat outside, protect it from critters that might take advantage. Keeping a paper yard bag around it will catch any berries that fall and keep pests away from it.

6. Thresh the wheat. Threshing wheat is bashing it around to release the grain from the chaff and seed head.

How to Thresh Wheat
I put my wheat stalks in a linen bag and then bash the bag against my house to thresh it. Other people put the wheat in a rubber bin and stomp on the heads.

Wheat that's been threshed in a linen bag.
7. After threshing you need to winnow the wheat. Winnowing is removing the chaff, the lightweight skin that protects the wheat berry.

Winnowing can be done in a few ways but they all use moving air. You can stand outside with your grain on a sheet between two people and bounce the wheat up in the air on a windy day. The wind carries away the chaff as it rises into the air, while the heavier grain falls back down onto the sheet.
You will feel very much like a prairie woman in the 1800s if you do it this way.
I winnowed by spilling my wheat and chaff onto a linen sheet and then moved a small fan over it by hand which blew away the chaff.

After a mere 4 months and a hellofalotta work, I now had my own wheat to be turned into flour. Like I said, about 2 cups worth of wheat berries.
After harvesting and cleaning the wheat you can store it in a moisture proof container. If you're afraid of bugs in your grain, you can heat your wheat berries on a baking sheet in the oven at 130-140F for 30 minutes to an hour. You could also use a dehydrator (I use an Excalibur dehydrator) at that temperature to do the same thing.
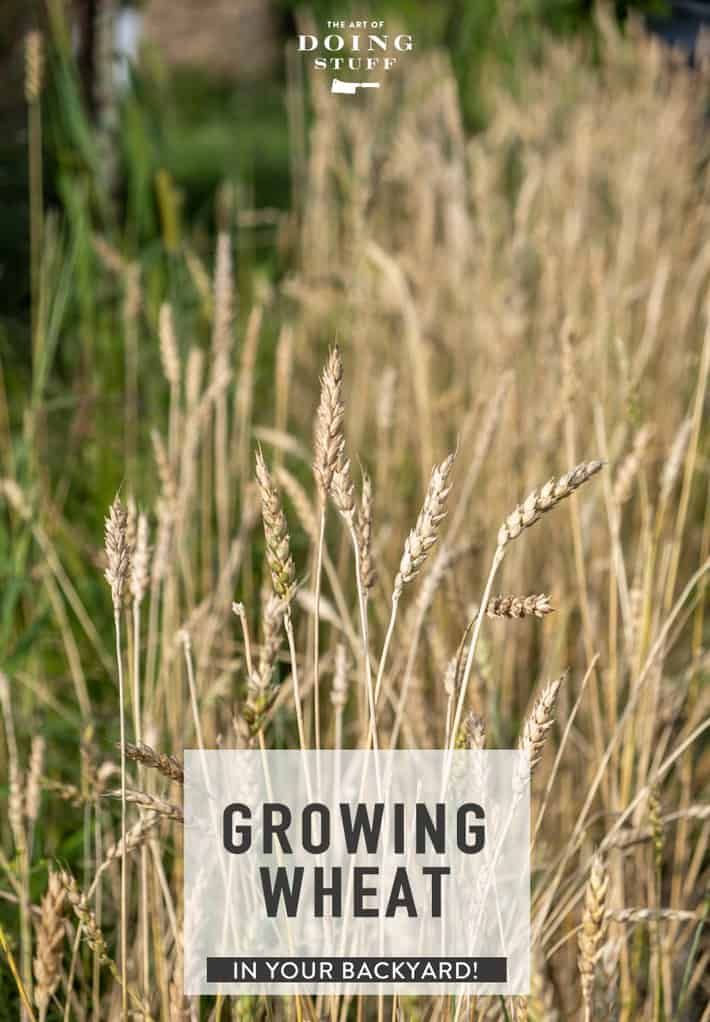
How to Grow Wheat on a Small Scale.
How to grow, harvest, thresh and winnow wheat on a small scale.
Materials
- Wheat Berries
- Garden
Instructions
- Water your soil prior to planting if it isn't moist already. Plant 25 – 30 seeds per square foot at a depth of 1" for spring wheat.
- Watch for germination in the first week. Once it has sprouted KEEP THE WHEAT STRESS FREE by keeping the area weeded and watered.
- After a couple of months the wheat will grow and tiller and produce wheat heads. Once this happens the plants will slowly start to dry out.
- To test whether your wheat is ready to harvest pull a few grains out of the wheat head and pop them in your mouth. Ready to harvest wheat berries should be hard, not chewy.
- Harvest when your wheat is dry and hard but if there are traces of green still after you harvest it, dry it further dry until no trace of green remains on the heads.
- Thresh the dry wheat by placing bundles in a cotton bag or pillow case and bashing it around to release the grain from the chaff.
- Winnow the wheat (removing the chaff from the grain) by blowing a small fan on it to blow the chaff away while the heavier grain stays where it is.
- Store in a moisture proof container.
Notes
The better your soil is the better your harvest will be. Make sure it's amended with compost or fertilizer, is nice and loose and remains watered (but not overwatered).
Doing this increases your chances of good "tillering" a process that happens within the wheat berry causing more than one stem to grow from the wheat, and therefore more wheat heads.
→Follow me on Instagram where I often make a fool of myself←


Thank you so much for all of this awesome information! Quick question, I’m in Texas. Would it be better to grow my wheat in the winter or do you think it would be ok during our crazy summer?
Hi Ashley! I wasn't actually sure, so I did a little research and it looks like for Texas you're best with a winter wheat, which make sense with your blindingly hot summers. So plant in October-November with harvesting in June-July. Good luck! ~ karen
Thank you so Much!
Hey there! Really appreciate your humor and great explanations! I'm considering/hoping to plant wheat here in southcentral PA next spring and am wondering if you always use the same plot of ground for your wheat from year to year? Rotate?
THanks!
Hi Lee! As long as you amend your soil, I don't find there's any reason to rotate crops in small spaces. Moving something 20 feet away from where it grew last year won't have any affect on disease or pest susceptibility. Having said that, since I like planting my wheat in the fall, I usually just plant in whatever bed is already harvested and is available and free at the time I want to plant. Good luck! ~ karen!
In my area, winter wheat is grown. Do you have any tips for planting wheat in the fall?
Hi Kathleen!You plant it the same way you would in the summer but plant it about a month before you expect your first frost. If you plant garlic, you can plant it around the same time as that. ~ karen!
"...because I can't teach you how to grow your own toilet paper."
I believe that plant is called Lamb's Ears. 😁
Ha! True. Yes. That would be pleasant wouldn't it. ~ karen!
This is wonderful information on spring planting. What changes do I need to make for winter wheat planting?
Hi Kathi! For a winter planting it's all the same. The wheat will sprout and grow a little bit this year and then go dormant or even die back throughout the winter, then it starts regrowing as soon as the weather is nice in the spring. ~ karen!
Always entertaining and educational. I also (thanks to that Mr. Google guy) now know the specfic difference between 'all purpose' wheat flour and 'whole wheat' flour. Flours I might add that I've been blissfully using and consuming for the majority of my 74 years.
I'm happy to be your wisdom years tutor. ~ karen!
Wow! Thanks so much for writing up your process. It is hard to find instructions for just a small area of crop. My winter wheat is looking spectacular. I heard from a farmer that the 4th of July is about the right time to cut it, but mine are tipping over and they keep dropping the grains, so I am going to cut it tomorrow and continue to dry it as you have explained. I am really excited about this and it has been so fun to grow in my raised beds. Thanks again!
You're welcome Leslie. I know how hard it is to find information on just grow a bit of wheat, it was hard to figure out. I've been doing it for several years now and still love it. I just covered my crop up a few days ago in case any birds start thinking about raiding it. It's still green so not ready yet but I expect it will be ready to harvest around the same time as my garlic - early to mid July. Good luck with your harvest and drying and threshing etc.! ~ karen
Your blog teaches me and makes me laugh :) I do have a question about this wheat post: you said you only got about 2 cups of wheat berries from your harvest and yet "But I DID grow enough wheat in my 2' x 15' plot to make bread, pizza dough and buns all winter by grinding it into flour in my Vitamix. I'm not sure if I'm ready to graduate to one of these beautiful wood flour mills."
Can you clarify? Thanks!
Oh! Sure thing. When I first grew wheat I used a Vitamix dry to grind it and it works perfectly. In the few years since then I've upgraded to a beautiful wood flour mill. And because most of my doughs only use 1/4 - 1/2 cup of whole wheat flour, 2 cups of wheat berries goes a long way. When ground, 2 cups of wheat berries makes almost 4 cups of flour. If I'm only using 1/4 cup at a time for a dough I can bake or make dough with it 16 times a year which is plenty for me. ~ karen! (I have no idea if I've confused you more with that explanation 😆 ~ karen!
Hello lovely lady! :D
This was a very fun post to read. I love how you admit it doesn't always go right, sometimes due to your own errors and sometimes because Mother Nature didn't cooperate or whatnot. Anyone that can be self-deprecating, entertaining and informative is a winner, in my opinion, and girl you ROCK! :D
God bless you and yours. Have an awesome day! :D
Hi, Karen! Thank you for the post! Do you know if the berries can be planted after they have been heated in an oven for storage?
Eep! I haven't tried that but any time you bring a seed out of its comfort zone it becomes less viable. And anything over 90 C (200F) kills most seeds. BUT! As I always say, do it and try it. It's gardening. Anything can happen. ~ karen!
Thanks for the reply, Karen. I’m heating the seeds at 170F (my oven’s lowest temperature) for storage. Hopefully, I’ll be able to plant them if I ever need to in the future.
I'm continually impressed with your detailed (proper and layperson) instructions. I feel as if I'm ready to start my own Karrie's Red Mill after never gardening but reading your tutorial! In fact, I am currently researching ancient stone grinders for purchase haha. Seriously, I'm growing wheat in the spring, dude. Even if the input far surpasses the output, I can only imagine eating bread you baked with wheat you grew yourself is beyond worth it. Beautiful photos, as always.
It's fun! I mean really fun! I planted my wheat in early September and it came up great so I should have a good crop in early summer. ~ karen!
If I wanted to save some seeds to replant with next year, do I need to winnow them and remove the chaff from the berries as well? I grew some beautiful blue wheat that I intend to dry and use for decor purposes. I would love to save some seeds for year. Thank you!
Thank you for detailed instructions and making them printable. First time gardener here and I’m really wanting to grow some wheat. Your instructions are the best I’ve found. From one Karen to another, *fist bump*.
This will be my first time working with wheat and I have planted 51 Hard Red Spring Wheat berries in a 14 x 14 planter and they have all germinated. (Hurray) They are about 3 inches tall and I was wondering as to how often they should be watered for ultimate growth. I reside in the High Desert of California and the hot temps have not arrived as of yet but when the do they can get up to 117F. Any suggestions?