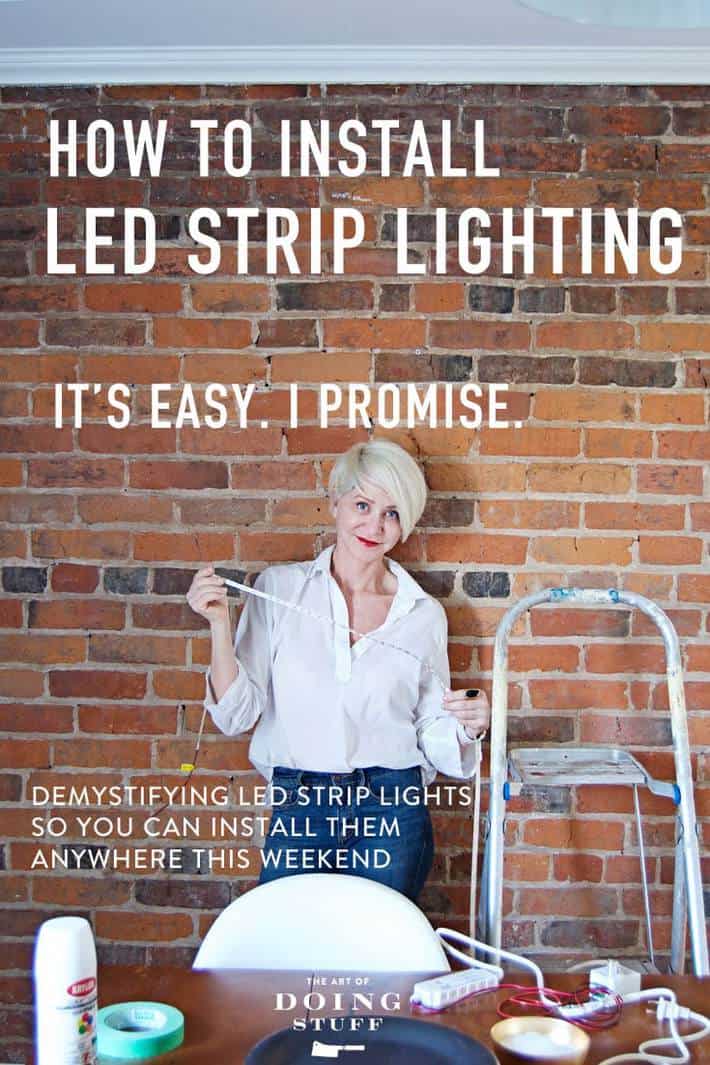
Installing LED strip lights scares a lot of people because it LOOKS like such a complicated project. In fact, they're ridiculously easy to install. Here's all you need to know.

Avoid my rambling and skip right to the tutorial.
When I was 10 years old I got a beautiful wood, handmade, dollhouse for Christmas. I remember it exactly. It was two stories high with little rooms meant for little people, little furniture and imaginary daily goings on. The roof was shingled in tiny cedar shakes and you could thoughtfully peer into each room through the thin glass windows, imagining the perfect world with perfect people within.
I hated that dollhouse.
I didn't like dolls, ergo, I didn't find it necessary to house them anywhere other than under my bed or in the kitchen trash can beneath a layer of bananas, coffee grounds and garbage juice. But my mother who really, really thought I should like dolls, commissioned the dollhouse, which sat dilapidated and uncared for in our basement hallway like Grey Gardens surrounded by shag rug instead of water.
That all changed the day my father packed my mother and I into the Woody to take a road trip across the border to A M E R I C A. The place where gum came in Watermelon flavour and the cities smelled weirdly of sulphur. I loved it. The hour long drive brought us to my Auntie Lil's place in Niagara Falls and to Brand Names, the American version of Canada's Consumer's Distributing. You know the kind of place. The store was filled with rows of catalogue covered tables and little paper pads and pencils to fill in with whatever products you wanted. There was EVERYTHING. Diamond earrings, toasters, handheld personal massage devices ... all held in the magical warehouse behind the counter.
I loved flipping through that Brand Names catalogue. I'm not sure how I ended up in the section that catered to dollhouses, but I did. I suspect my mother had something to do with it. My eyes skimmed over the miniature beds, wardrobes and green velvet couches and STOPPED dead in their sockets when they came upon actual working lights. Real outdoor lanterns and chandeliers that could be turned on and off giving the house a loving glow that an imaginary family never could.
I begged, my parent's bought the dollhouse lighting kit and I spent the next 5 years trying to figure out how to wire it up and install it. I sat on our basement floor reading the instructions over and over desperately trying to make sense of the black wires, the red wires and how it all made electricity. No matter how many times I read through them I my brain just couldn't untangle the mess of information. But I kept trying.
I never did get those lights to work and looking back on it now, I'm guessing there was another part to the kit like a transformer that we didn't buy.
The dollhouse is gone but the obsession with lighting has stuck with me.
Nothing can improve or ruin the mood and feel of a room more than lighting. Not a couch, not a chair, not a table. Only lighting. Or a raccoon.
And with the invention of LED strip lighting anyone, ANYONE can shine a light on any part of a room that they want to; bookcases, under cabinets, dark corners, all of them illuminated by a ¼" strip of tape.
Yup. LED Strip lighting is ¼" wide with an adhesive backing so you can quite literally stick it anywhere you want to and have it be virtually invisible.
LED Strip lights have been around for a while, but they're now smaller, easier to install and more readily available than ever before. Costco sells them in kits now and Amazon has incredibly easy plug and play kits too. Cut them to the length you want, stick em up, plug them in.
The ones I bought at Lee Valley are a tad more complicated and you have to order all of your parts separately, BUT they're a lot more customizable.
Amazon also has LED lighting sold in parts, it's just a bit more intimidating to buy. After the first photo I've listed all the components you need if you'd rather use individual parts. But if you're doing just one straight run of lights there really isn't a need for anything more than a simple plug and play LED light kit.
The brick wall on one end of my dining room is dark. Much darker than the other end of the room with all of its white walls and bookcases. I couldn't bring myself to paint the brick wall white (even though it would look great). So I decided on a whim to try to throw up some LED Strip lights to see if that would help. It did.
And here's how I did it.
Customizable LED Strip lighting will require you have certain components to make everything work. With the LED light kit you don't need to worry about all of the parts. You get everything you need for a short, simple, straight run of lights in a box.

You'll also need a few other little things like screws, brackets for holding the channel to the ceiling or wall and maybe even some extra wire if you need to make either run of wire longer.
If you're planning on using LED strip lights for anything more complicated than a simple straight run of lights then consider buying individual parts.
You'll need:
Channel, diffuser, and clips from Amazon.
16.5 feet of pure white LED strip lights.
Inline on/off/dimmer for LED strip lights.
Power converter for LED strip lights. (please note if you use a longer run of strip lights you may need to purchase a different power converter than the one I've linked to that can handle more load)
Confused? That's why I'm recommending you just buy a kit. Especially if all you want is to light up under your kitchen cabinets or bookcases. Easy.
Here we go! A look at the brick wall before.

You can see why I didn't want to paint the circa 1840 brick wall.
How to Install LED Strip Lights
By the way! I used 5 of the 10 Tools Every Self-Respecting Homeowner Needs in this DIY and at least 4 of the basics!
Step 1. Screw brackets into wall or ceiling and snap in the channel.

Step 2. Stick LED light strip to channel.

(if your channel came with end caps you'll have to run the wire through it before sticking up your lights)

Step 3. Cut the LED strip light to length. You can ONLY cut the LED strip lights in the centre of the copper contacts. Refer to the instructions that came with your actual lights to see what they look like. As long as you cut at the contacts that run every few inches, you can cut the lights anywhere.

Step 4. Wire everything up!

You can wire everything once the lights are up but to make it easier for you to see and me to photograph, I took pictures of the wiring against a black background.

The basic LED light kits usually come with the strip light, a hand held remote control switch and the power supply adapter. So you'll only be wiring (plugging in in most cases) your wires to your power adapter and that's it!
With my LED light configuration there's one additional step. I added a wall mounted on/off/dimmer switch which works remotely with a wireless, wall mounted dimmer switch.
If you choose to go this route the wires from your lights will run to your dimmer switch. Then the wires to your power adapter will also run out of the dimmer switch to your adapter.

Remember if you buy a kit from Costco or Amazon you don't need to worry about all this wiring stuff. The kits make it simpler. This is only for if you buy individual components, and something fancy like a dimmer switch.
It's very simple. Like I entioed, this particular dimmer switch also came with a wireless wall switch so I can place that anywhere in the room that I want.
Step 5. Test the lights.

You can see each individual LED light which isn't all that nice, which is why you have to do the next step.

Step 6. Install the diffuser so you can't see each individual LED light.

Except that you can. You can still see the blindingly bright individual dots of the LED lights even with the diffuser.
So now I had to build a tiny, dollhouse sized, valance to cover up the lights.
I found a small piece of trim in my workshop that I painted white and stuck up quickly just to test if it would work. It would.

The valance is just enough to stop you from being able to see the individual dots of the strip lights and blends right into the moulding.

I ran the wire for the lighting and power adapter behind Margaret (the large oil painting) to the receptacle.

Mission accomplished. The lights are invisible, but light up the entire wall giving more balance to the room.
This actually would have been a perfect application for one of the kits, but I like to challenge myself. Also I had a gift card for Lee Valley and it seemed like a great way to spend it.
Here's the GREAT news. These LED light strips also come in weatherproof. Which means some time this summer I'll be redoing the lighting in my backyard and including a whole whack of these.
By the time I complete that project I expect I'll be ready, or at least almost ready ... to light up a dollhouse.
→Follow me on Instagram where I often make a fool of myself←


Do you know if the Lee Valley diffuser would work with my Costco LED lights. Last fall I installed the lights under the cap of my planter boxes in the back yard. It drives me batty that I can see every individual light. I might try the valance idea but I have 9 boxes that are 5 feet in length so it would be a lot of extra work. Not to mention there are so many coats of polyurethane on the boxes that the lights will likely just reflect back on the gloss on the wood 😩
Hi Jane. Are your Costco LED lights installed with channels? If they aren't there's no way for the diffuser to attach. The diffuser clips into the channel. From what I remember the Costco ones have no channel. :/ ~ karen!
Not sure if they have channels (boxes were recycled last fall) but I do know you can cut them to size if that help answers anything?!
Well, if they're up you would know if they have channels. They're either just a strip of tape stuck to the wall, or there's a piece of metal attached to the wall first with the tape inside of it.~ karen!
Like we wouldn't know who Margaret is! Great work Karen, and I like that you MacGyver'ed the strip to cover the lights.
It really makes that beautiful brick wall (and Margaret) come alive! I know if a few places inside and outside where I can put this info to use. Thanks again for showing us how. 🙂
My pleasure Kim C! ~ karen
I like how you can really see the texture on the brick wall. It looks fantastic!
Thank you thank you thank you! In my paffle (pantry, office, laundry room), the floor beside my desk is always dark. My black doggie and my granddoggie often lie there when I am on the computer. They get stepped on at times because they sneak in and we don't know they are there! Have pondered what kind of light would be out of the way and give just enough light to save the poor beasties! Yay! Once again Karen saves the day! Will be perusing Amazon and Lowe's today and see what I can find.
You have a "paffle". Lol
When we moved there was a spare room that was to be all mine to do all the projects I'd always dreamed about.
Then my husband brought home bookshelves, "Let's just put them in here for the time being". And a standing wooden lectern, "Look at how beautiful the wood is! We will just put it in here." And an AbCoaster. And a rug shampooer. Etc., etc.
Alas, it has become a "crapht room".
Thanks for teaching me so many awesome things! Last weekend I built a raised bed for vegetable gardening. This weekend, looks like some lighting is going in under the kitchen cupboards. I don't know who is more excited about my new Karen-inspired talents - me or my husband!
By the way, Karen, your readers might want to note/remember that LED lights can come in different 'temperatures', like 2750 K / 3000 K / 4000 K, or in 'warm white' or 'daylight'. The lower 'temperatures', strangely, have a 'warmer' look, more yellowish, and the higher numbers have a more blue-ish colour... if you want to match the lighting colour of existing lights, the 'normal' incandescent lights have 2750 K colour temperature, halogen lights are more like 3200 K, and 'daylight' is 5000 K to 6300 K.
Many of the earlier LED lights had very high colour temperatures, very, very blue, like 7000 - 8000 K, which probably turned-off many people who looked at them. Today, there are many better LED lamps/light sources available
Thanks for that information!
Oh! Weatherproof? Yay! I see better patio lighting this season! Let me go flip theory's Brand Names catalog to see if they have them 😁 One of my favorite pastimes too! I distinctly remember a ping pong table I insisted my mother needed for her birthday (or maybe Mother's Day) one year...
Question, do the strips come in "warm white"? All I ever see are the cold/bluish bright white.
Good question! I don't care for the bright white either, it's hard on the eyes.
It depends on where you buy them but the ones I got came in warm, neutral (which is what I got) and cool. The neutral look just pure white in real life, slightly blue in photos. ~ karen!
I have strip lights in three rows on the windowframe above my kitchen sink. they were installed by the ex-fella. they have little bendy end bits that means it is one long snake with two 180 degree corners. (make sense? whatever, three strips). The controller is remote, and it can be set to almost any colour or brightness, or even to cycle like a Christmas tree! Personally, I am very prone to setting it to white and leaving it on all the time (the household night light) but the ex-fella would sometimes set it up to cycle. Drove me mad. ;-) but yes, some kits will let you set the colours to other colours. LEDs are amazing!
Consumers Distributing. Wow there's a store I'd forgotten all about. Loved those catalogues! Thanks for the super informative post. Will be awake now for hours thinking about where I can install around the house this weekend.
When I worked at Lee Valley, customers would frequently comment "Gee, this is just like Consumers Distributing!" And I would sweetly smile and refrain from growling "No. No it's not." However, I did reply that the difference was we had most of our stuff in stock and the employees were waaay friendlier lol.
Telepathy all the way from Canada!! Was just telling Schatzi over the weekend that I want strip lights in my kitchen.
Now I know how!! Thank You.
Fantastic!
Btw - I love your white shirt.
LOL. Thanks. :) ~ karen!
The whole time I was reading, I was thinking "but can I do it outside?" And then you answered my question! My new house has an enormously huge back deck with a beautiful gray wood stain (but *psst* it's that fake wood stuff that lasts forever) and white rails. I want to put lights under the edge of the rails. Thanks for the inspiration!
Stunning! Just stunning!
My dad built me a dollhouse in 1981, and my mom sewed tiny dolls to resemble us. I loved it. It had electricity! Tiny light switches and stained glass chandeliers that my dad made. I got rid of the dollhouse, but kept the dolls and chandeliers.
Except that if I add as much lighting as I want to, I will see more of the stuff I need to clean. Hmmmm. But thanks for showing me how.
That's what I was thinking!
Wow! That looks great, Karen. Is Margaret supported so she won't fall? I always wonder because it would suck if she ever fell forward.
It looks great! Lights like that are great in a home theater kind of room, too, especially with the dimmer. No glare, just enough light to keep you from spilling your drink or popcorn.
You might want to check out InspiredLED for your larger projects. They have a free design service and will work with you to make sure that you are happy with the price and design. Ask for Cody, he is my favorite designer!
Looks beautiful Karen! I want to live in your dining room.