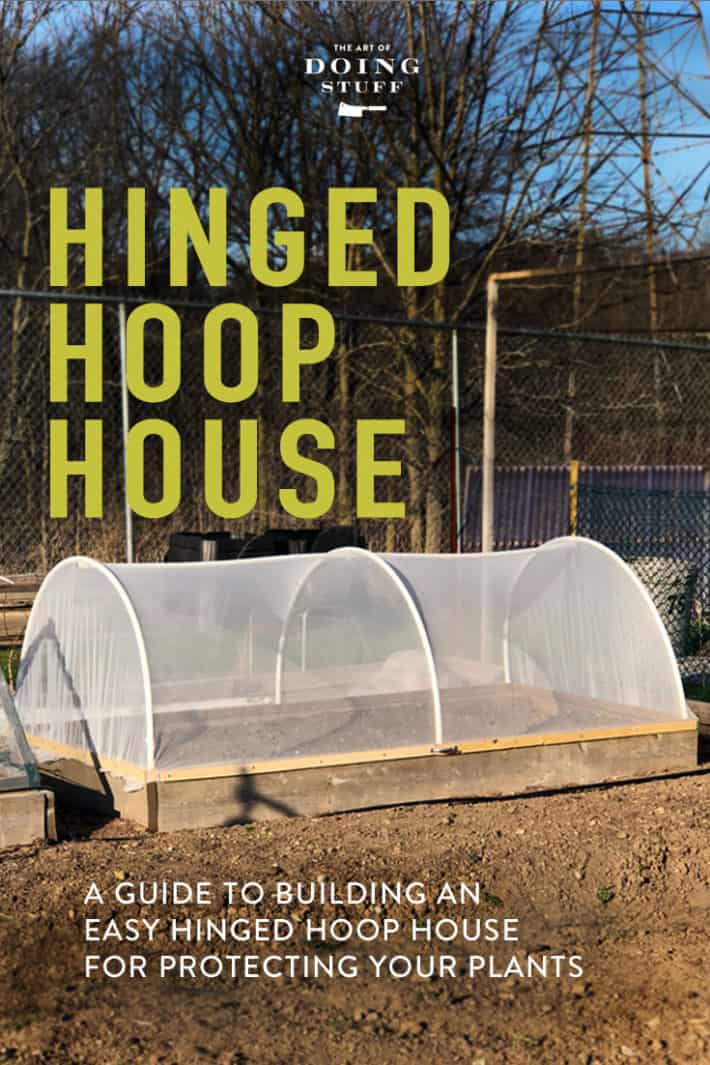
Broccoli, kale, cauliflower, rapini, cabbage, may I have your attention! You can all relax and enjoy your summer. There's no need to worry about Cabbage moths this year! I've got you covered. ~ The easy, hinged hoop house.
I was a little late getting my cool weather plants out this spring, because spring was a little late. It was really late. It was Mariah Carey late. Technically I could have put the plants out even though it was cold and miserable but this year ... THIS YEAR ... I was going to be smart. I wasn't risking putting any plants out until I could protect them 100% from cabbage moths. True, cabbage moths haven't even started flying around yet but I'm not one to be bound by the restraints of logic.
I've been planning on building these relatively simple hoop houses for almost a year now. I first saw a version of them in this Youtube video from Christopher Brandsdal in Norway. The method marries two methods that I already used - a hinged hoop house, and row covers with PVC pipe. He built his hoop house as a green house to keep peppers warm in his cold climate. I wanted to build one to keep Cabbage Moths and other pests out.
Here's are my wood hinged houses for keeping voles and birds out of my strawberries. They're made from brackets, 1x2s and ¼" hardware cloth.
And here are the hoops with row cover (low tunnels) that I've been using for the past several years.
Put the two together and you get this little piece of genius.
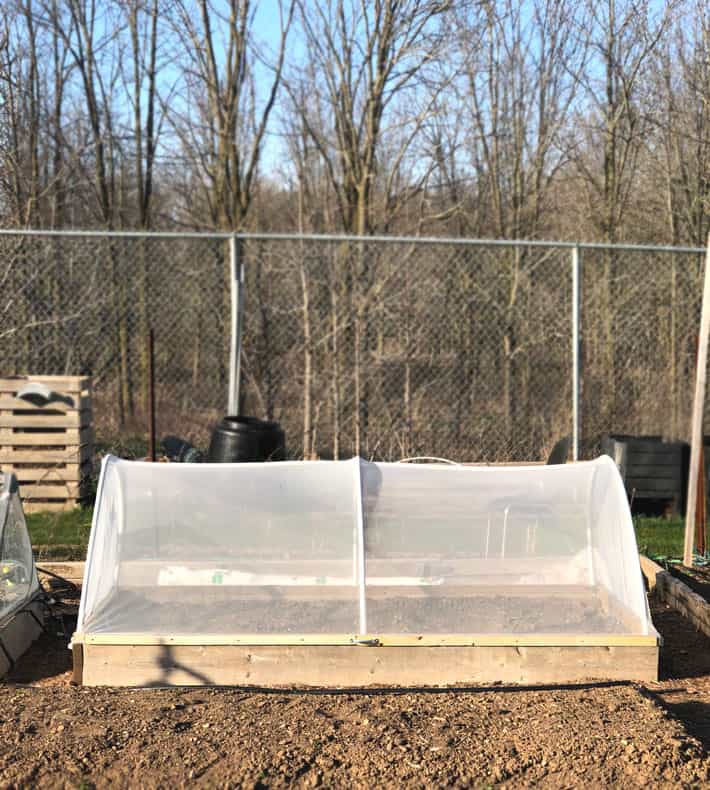
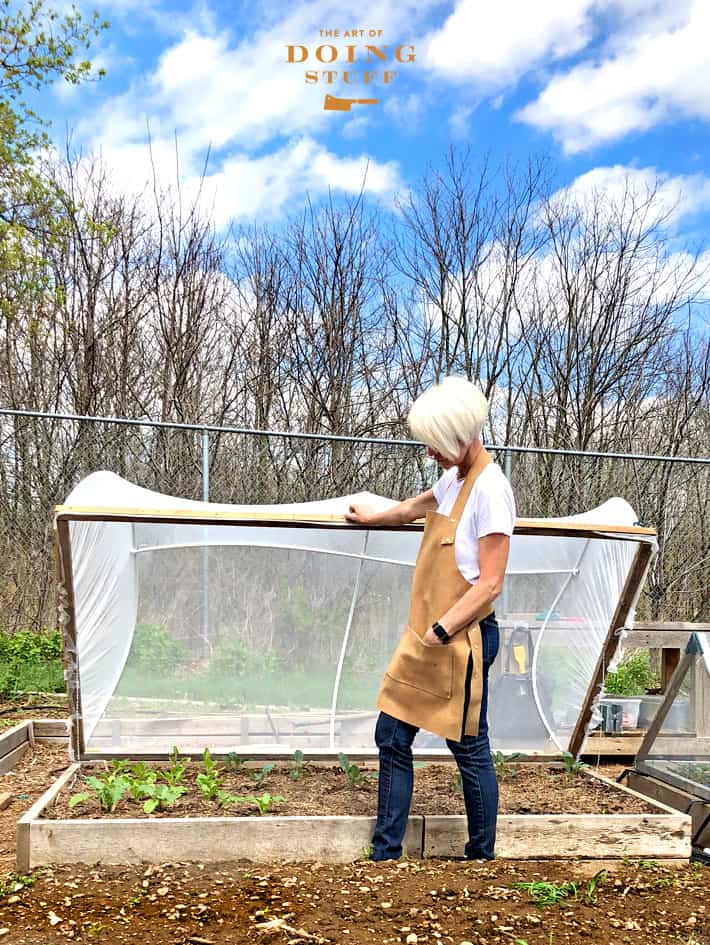
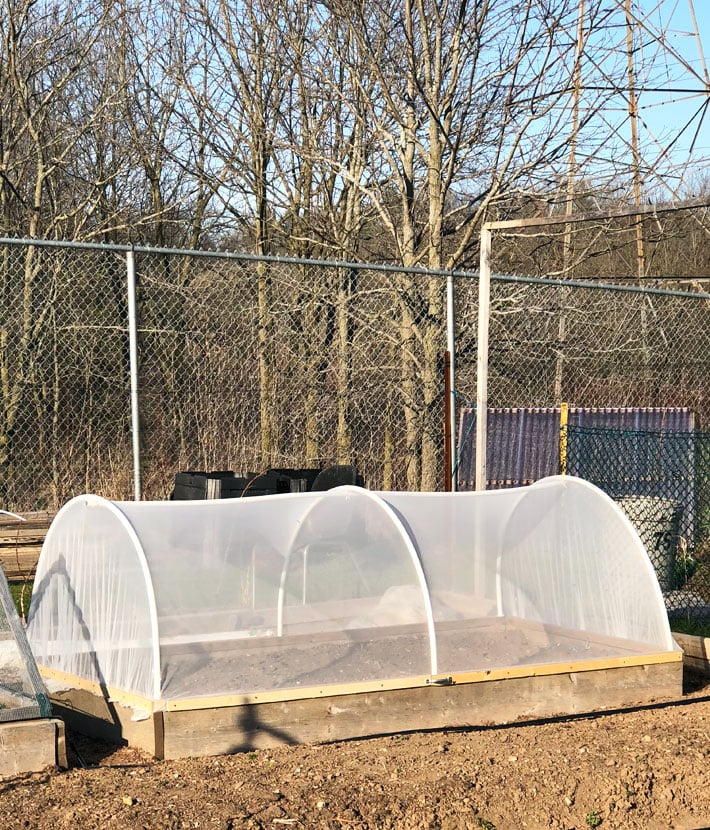
A hinged hoop house that you can lift and close with one hand covered in netting. Throw your hands in the air and scream an AMEN.
Here's how you can make one too.
Make a Hinged Hoop House
Materials (for 1, 8'x4' raised bed)
3, 8' lengths of 2x2s
Hand saw or circular saw
Drill
1 ¼" wood screws
2, 2" hinges
2, 3' lengths of lightweight chain
4 corner brackets
1 cupboard handle or knob
20' of plastic plumbing tubing (Pex Tubing)
Drill
Drill bit that's the same size as the outside measurement of the plastic pipe you're using
Insect netting
Zip ties
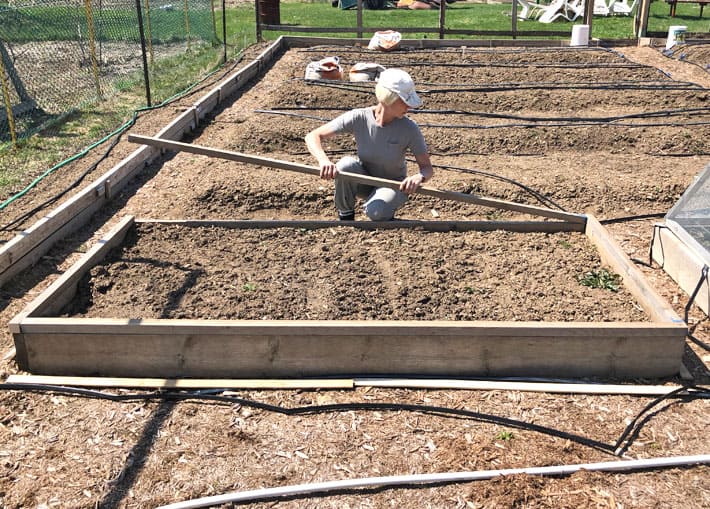
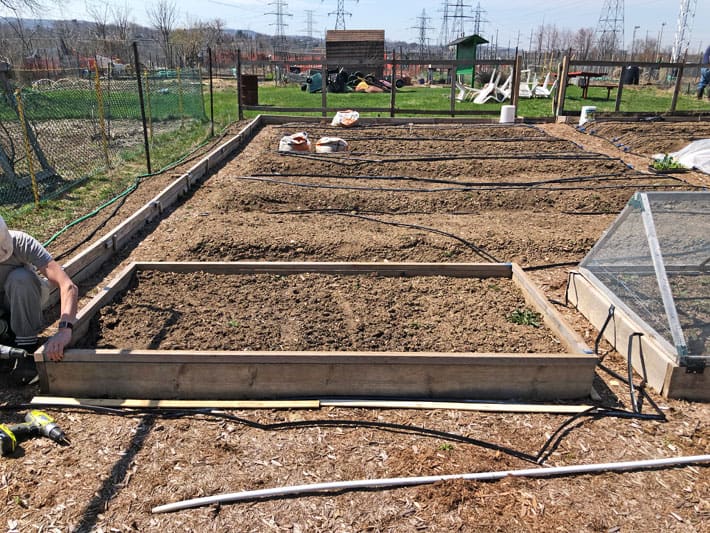
Step 1: Lay 2x2's on top of your raised bed. Mark and cut them to length if needed.
Step 2: Screw the 2x2's to each other, end to end. (don't attach them to the raised bed) The 2x2 frame will just rest on the raised bed.
Step 3: Brace the corners with either triangular cuts of wood or L Brackets.
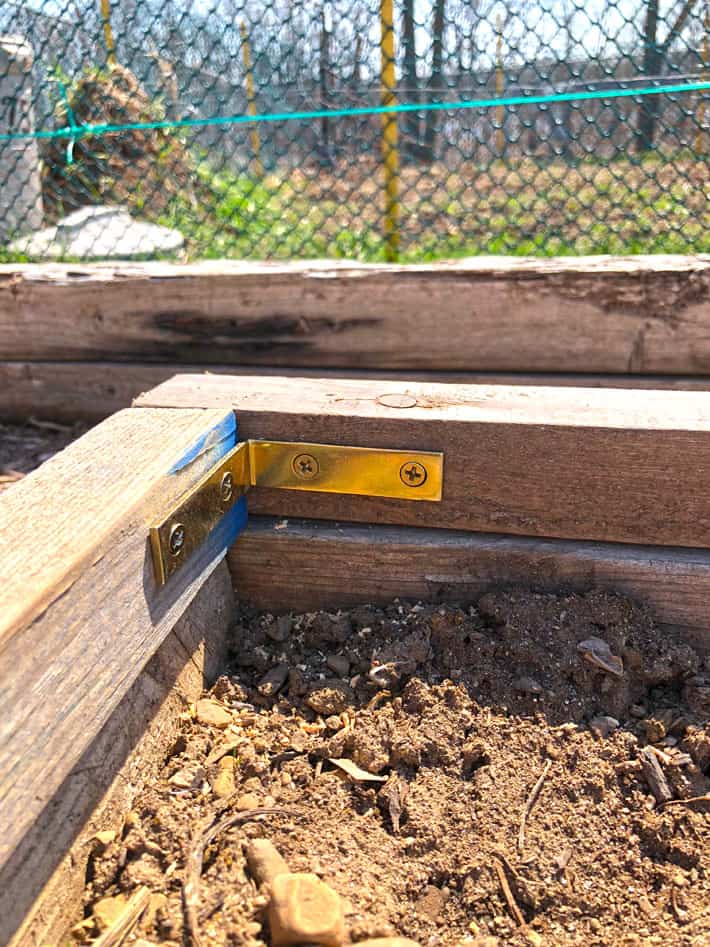
TIP: Use Zinc or galvanized brackets if you can find them. When I went to the store all they had in stock was brass, so that's what I ended up with.
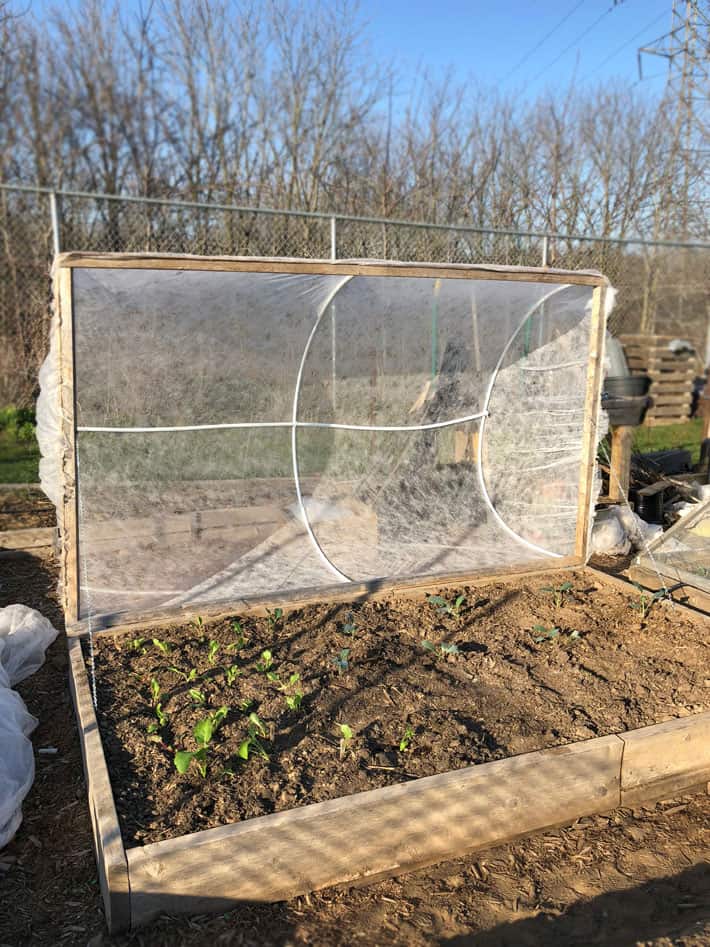
Step 4: Attach the 2x2 frame to the raised bed with hinges on one side.
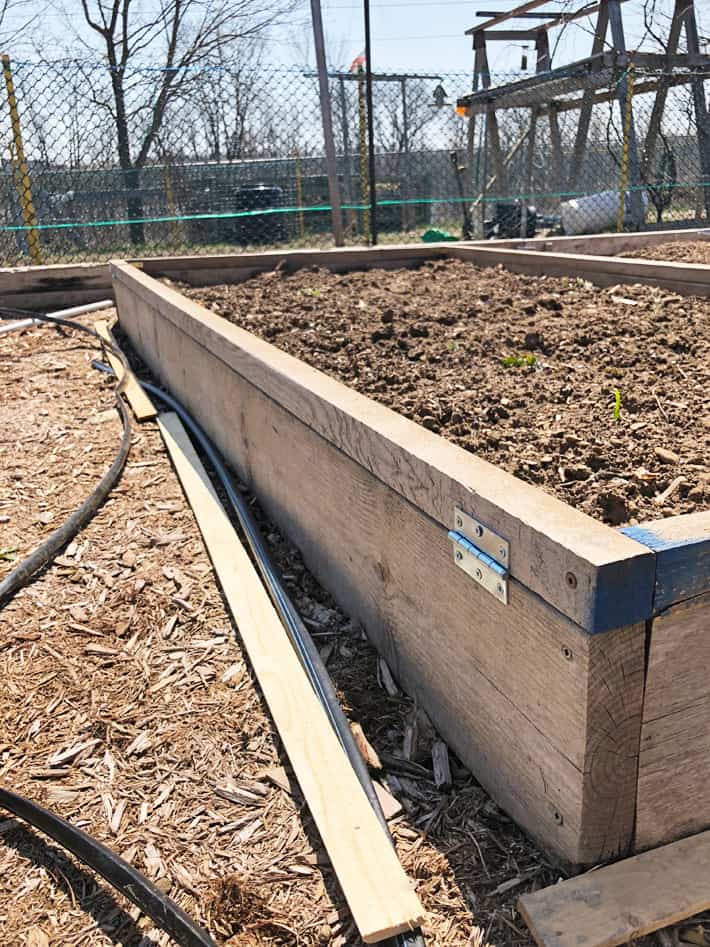
TIP: Make sure there's enough room behind the hinged side to open the hoop house.
Step 5: Drill holes along the long edges of your 2x2s. For an 8' bed, 3 on each side holes should do it.
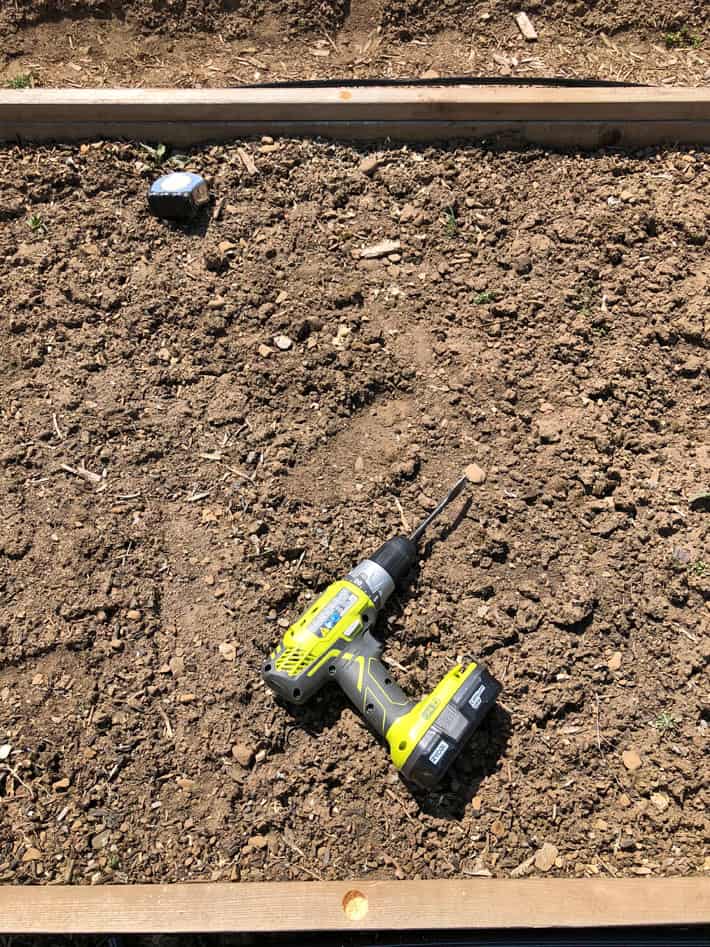
TIP: Do a few test holes with different drill bits on a scrap piece of wood. You want to make sure the tubing fits in the hole as tightly as possible to prevent it from wiggling. Drill the holes ¾s of the way through the 2X2. The deeper they are the more stable the hoop will be.
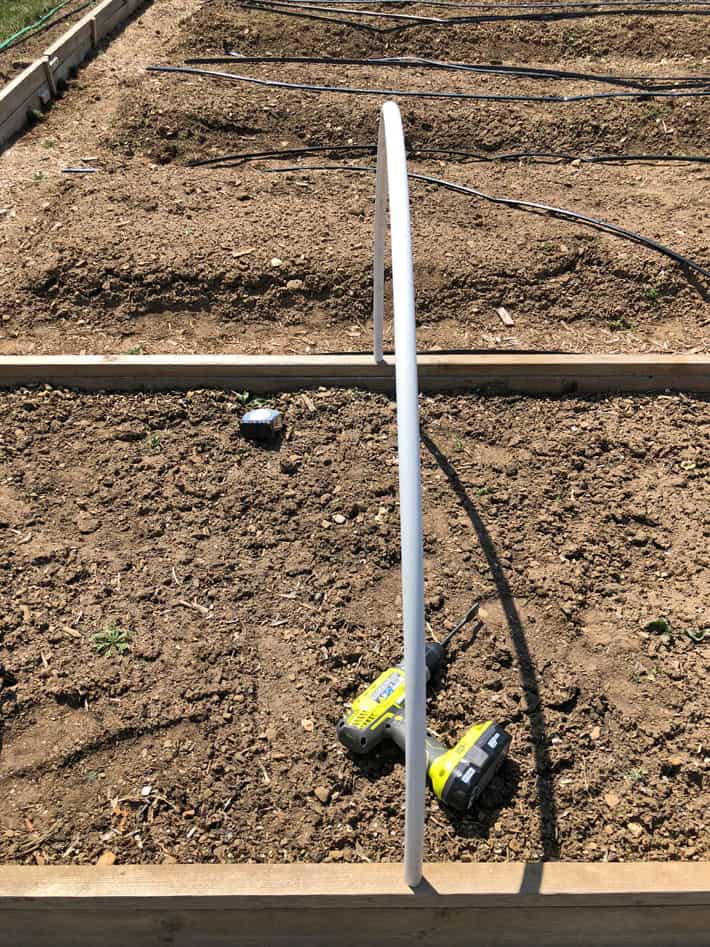
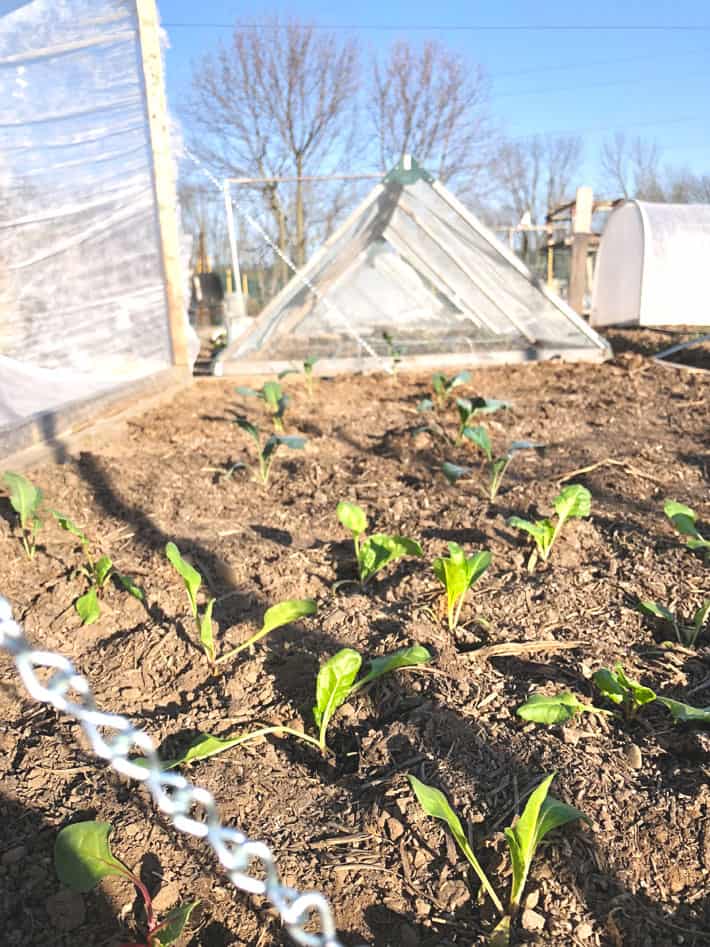
Step 6: Set your hoops inside the holes. My hoops measure 28" at the centre. They're quite high because they needed to accommodate my kale which gets tall as do my ... brussels sprouts. If you're growing lower plants you can have lower hoops.
Would you like to save this stuff?
TIP: Remember that your row cover or netting needs to big wide enough to fit over the hoops so choose your netting width or hoop heights accordingly.
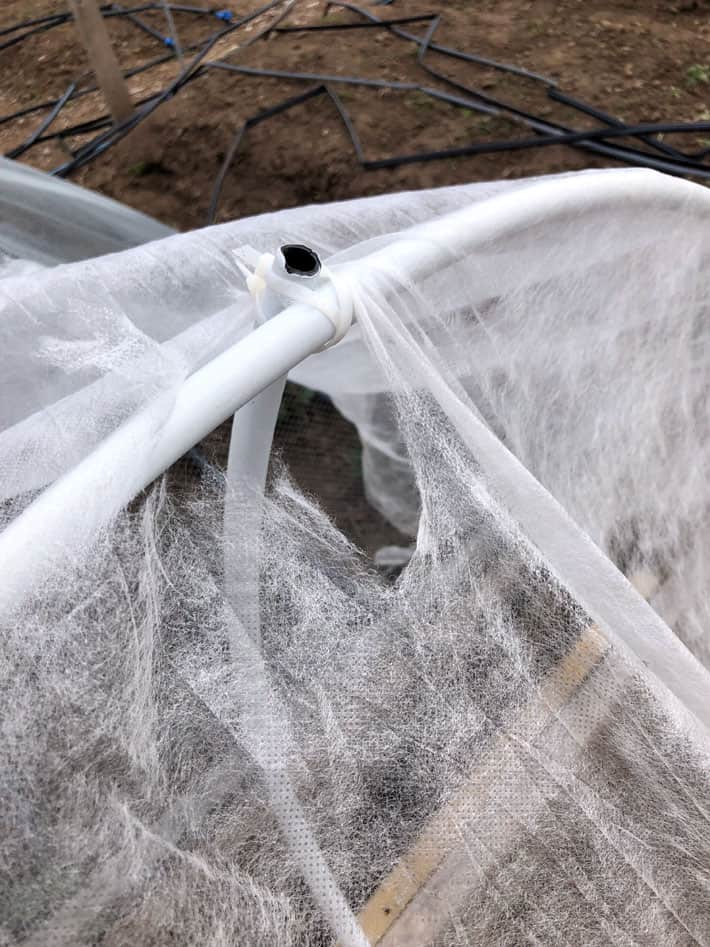
Step 7: Zip tie a length of tubing (if you can find a straight piece of tubing instead of one of the bent ones your life will be a LOT easier) across all hoops.
Step 8: Cover the entire thing with row cover or - even better - netting. If you're working on your own, hold it in place with clips.
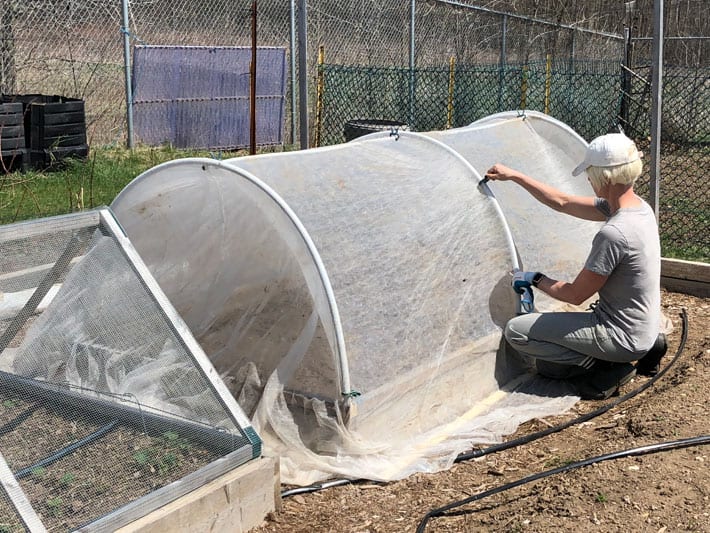
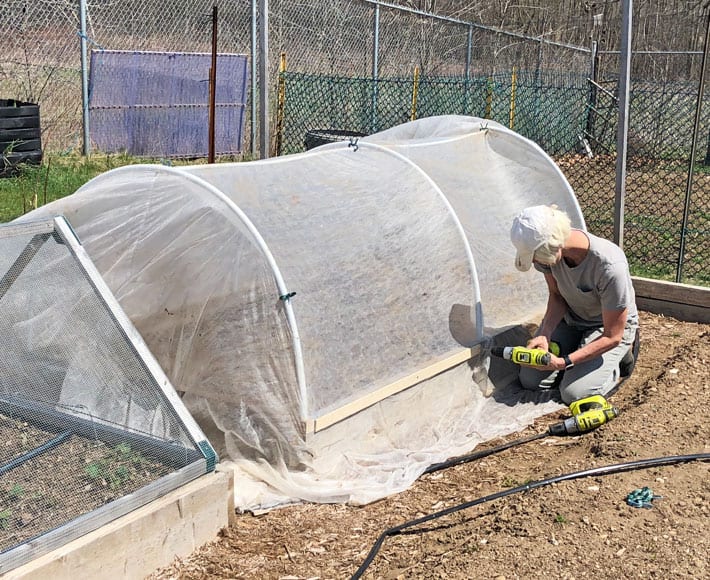
Step 9: Screw flat strapping over the netting to hold it in place. I got scraps of strapping from the lumberyard for free.
FUNNY STORY: I got this far in the building of my hinged hoop house before realizing that I'd rather use netting. So I ran up to my local seed store and bought a swath of netting. I came back, removed the floating row cover and replaced it with net.
Step 10: Trim the fabric.
See? Now it's netting.
Step 11: Install a handle.
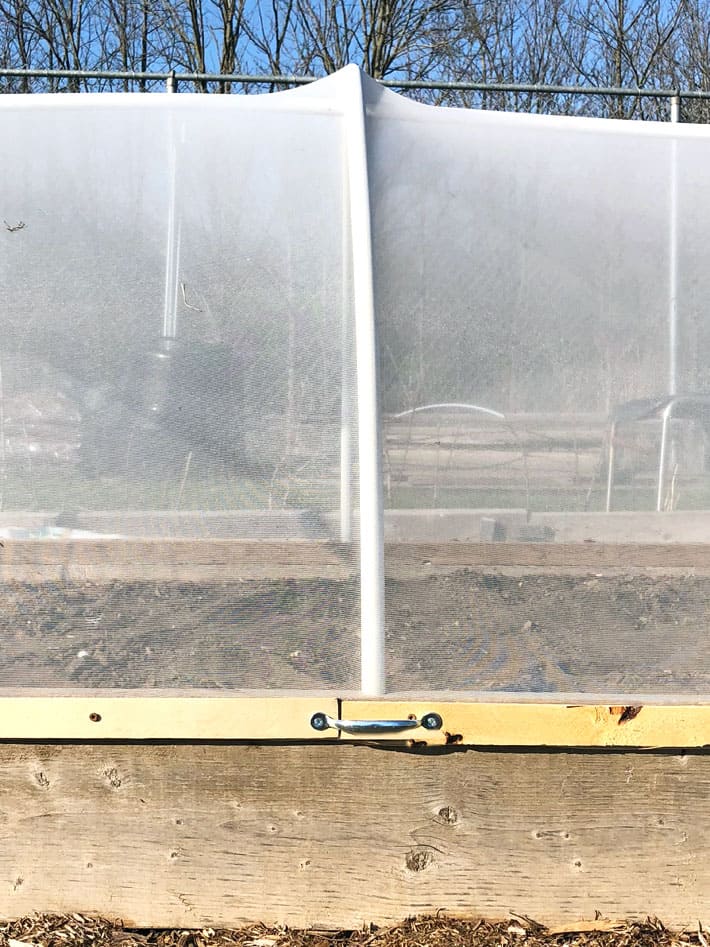
Step 12: Screw chain into the sides of the raised bed and the 2x2 frame to hold it open.
The chain really makes using the hinged cover a lot easier to work with. If you didn't have it, the cover would flop all the way to the ground
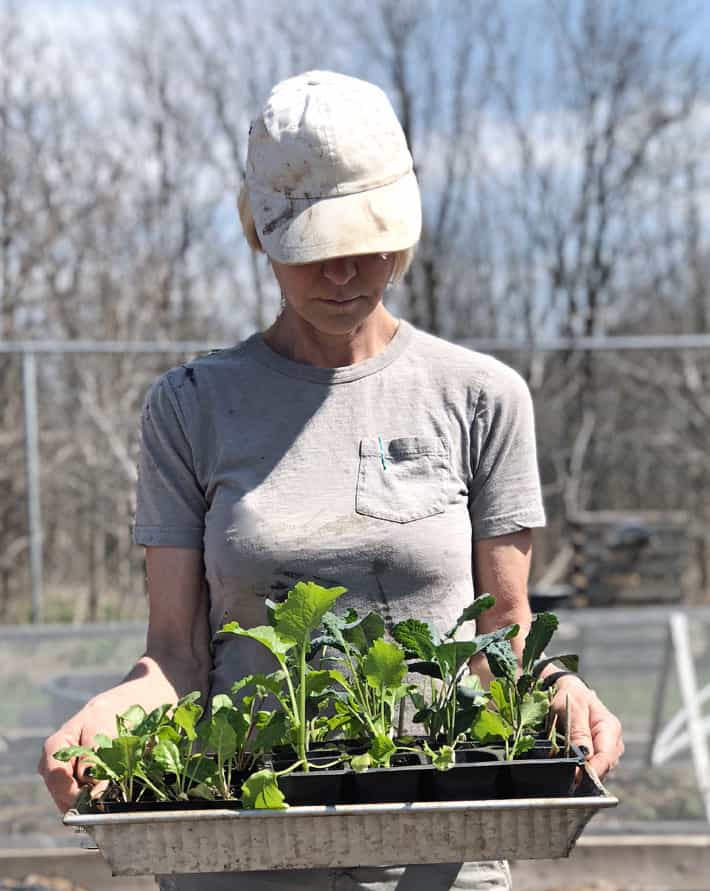
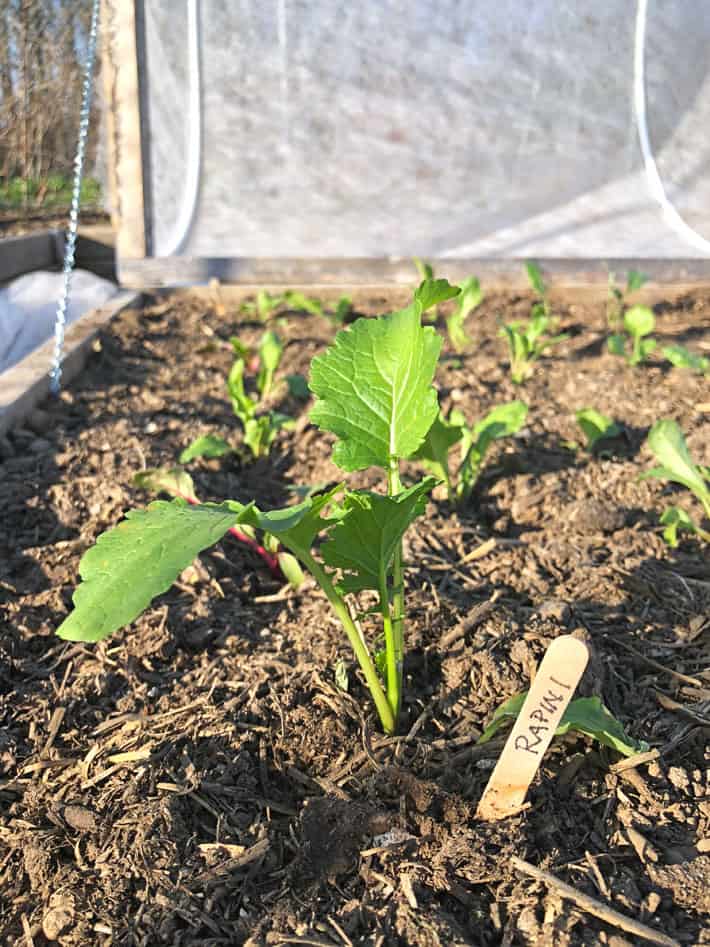
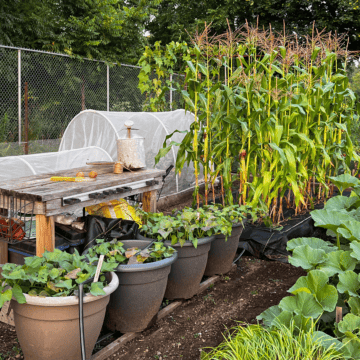
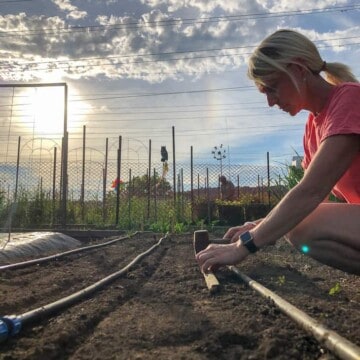
Now that you have protection you can plant your plants. I put in some kale, swiss chard and rapini. Later I'll be adding cabbage, cauliflower and leeks.
I built two of these hinged hoop houses. One with floating row cover and one with netting. I was hoping I could see the difference and whether it was worth it to use the more expensive netting.
The very day after building these hoop houses I had my answer. On that day, my area had a windstorm the likes of which we have possibly never seen. Wind gusts were 126 km per hour, which in Imperial is almost 80 mile an hour winds. Which, by the way, is hurricane force.
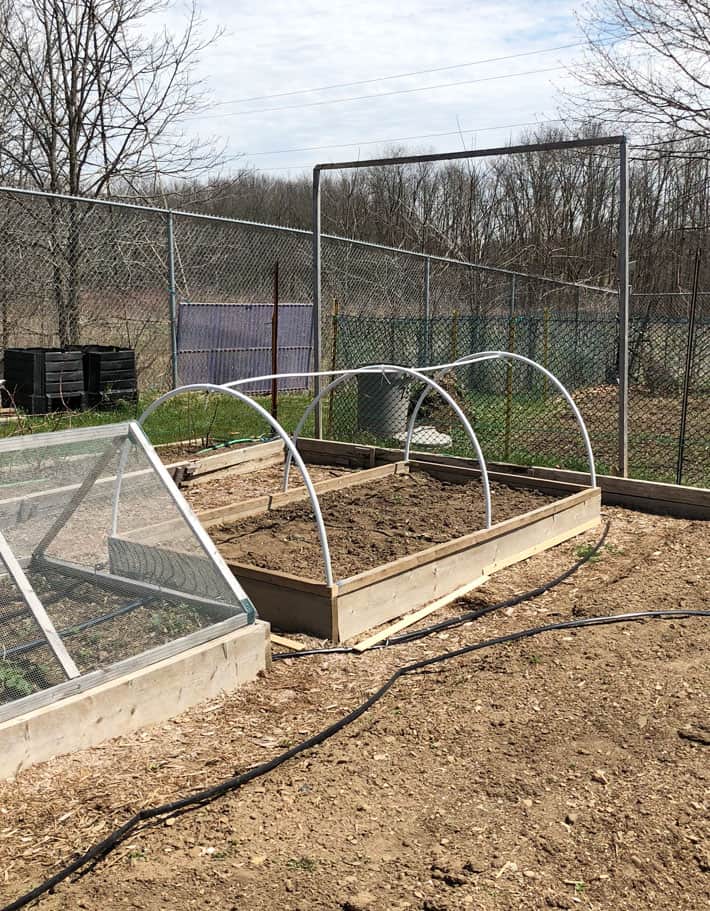
This is what I was met with the day after the storm.
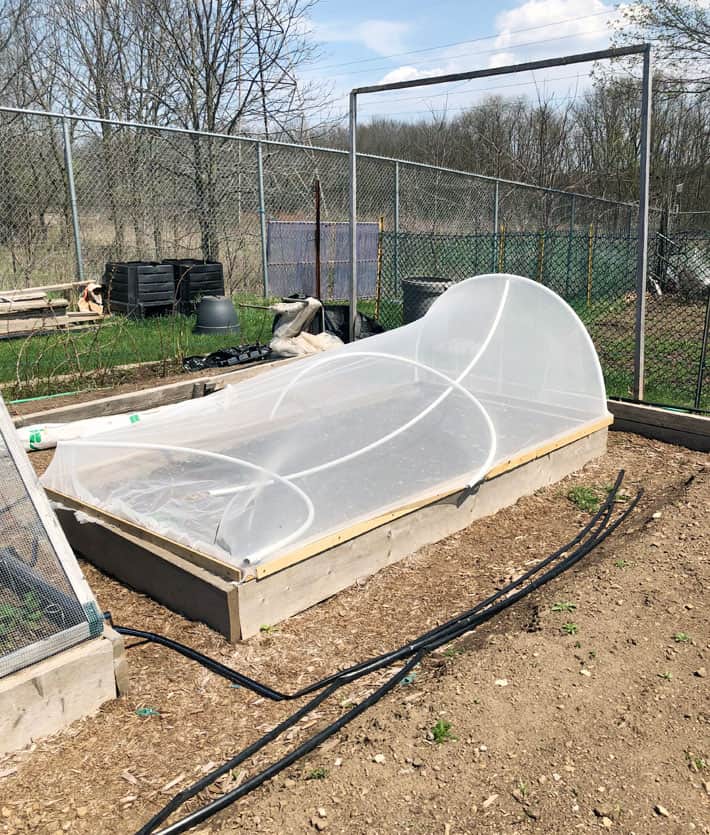
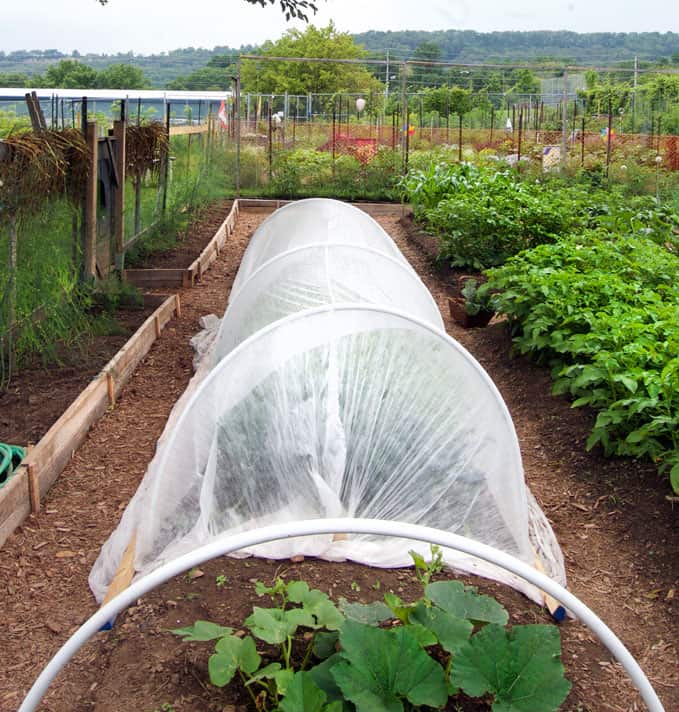
The hoop house with netting was deflated but still in tact. I just needed to reinsert the tubes into their holes on the 2x2s and everything was fine.
This is what the row cover hoop house looked like.

Similar - but the row cover was completely damaged beyond repair.
Experiment concluded, I removed the row cover and replaced it with netting. The netting is more durable plus it allows winds to pass through with less resistance.
I can see having had these for a couple of weeks now that there is some room for improvement. I'm going to brace each end somehow so the hoops don't have a tendency to lean in the wind. I'll let you know when I figure it out. I also stretched the netting too tightly on one of the hoops which ends up pulling the hoop tubes towards the centre. I'll get it figured out one day.
Better late than never. Says Mariah Carey, always.
** I've updated these hoop houses a little bit - see the newer version here**
→Follow me on Instagram where I often make a fool of myself←

Jeff McCullor
This was such an easy project, and so useful for a season of strawberries ahead of me.
Ling Williams
Hi Karen, l am inspired by your hinged hoop cover. I shall give it a go this winter.
Teresa Gale Deck
Thank you!
Karen
Would you please do a post about your triangular frame covers as well? I bought the kit from Lee Valley to replicate it for my strawberry bed, but unless I got the wrong one I suspect you might have jerryrigged the triangular corners. Even a photo would be super helpful. Thanks for considering.
Loren Kolar
Karen, where will you store the hoop house in winter? Or does it stay put throughout the year?
Karen
Hi Loren. I'll just pull the hoops out of their holes, let everything lie down flat and cover with a weighted down tarp. ~ karen!
Michelle
So, do you think it would hold up against your Ladies? I'm considering making some garden boxes in my chicken run area (it's quite large) but I've been contemplating how to keep the Ladies out (until I *want* to let them in at the end of the season)...
Karen
Hmm. I think that depends on the chicken. I don't think chickens would generally try to rip through the netting to get at the vegetables underneath though. :) ~ karen!
Bonnie Goodrich-Wilcoxson
When you say netting, are you talking about tulle?
Karen
It's similar to tulle, but it's genuine insect netting that allows light and train through but the netting is fine enough that tiny insects can't pass through it. ~ karen!
Katie Dotson
Perhaps this will help if I can explain it without pictures/diagrams. You will need 6 pieces of rebar or pipe that will fit inside the Plex tubing, about 6 inches long. Go back to step 5. Drill out the bottom of the holes you already drilled but only big enough for the rebar to fit in tightly. Drive the rebar through until flush with the bottom of the 2x2. This will leave about 4 1/2 inches sticking up.
Next you will need 3 Plex fittings. 1 Cross fitting and 2 Tee fittings. At this point you will need to decide if you want to glue those fittings in place or use small self tapping screws to secure them. If you decide on the screws, predrill the holes in the fittings about 1/2 inch from the end of each section so that the Tee fittings will have 4 holes and the Cross piece will have 4 holes.
Now cut the hoops in half and reconnect each hoop with one of the fittings. The 2 Tee fittings will go on the end hoops and the Cross fitting will go in the center.
Put the hoops on the frame buy placing the ends on the rebar, making sure to push the Plex all the way down to fill the gap between the rebar and sides of the hole that was previously drilled. The tricky part here is to make sure the fittings at the top are all aligned. For that reason, you may want to use the screws to hold the fittings in place as once they are glued, you are not going to move them.
Now cut the top rail in 2 pieces just long enough to span the distance between 2 of the hoops while fitting securely inside the fittings. Put the two top rails in place and secure by gluing or putting in a screw.
I don't know if this will be secure enough to tolerate a real high wind but it should be more stable than previously. Good luck. And if it doesn't work, don't blame me. It's only a suggestion. It's not as if I actually know what I am talking about.
Katie Dotson
Correction: The Tee fittings will only have 3 predrilled holes. I only proof read AFTER I have posted stuff.
Karen
Hi Katie! I thought of putting rebar into the holes and then through the tubing but with only 1 3/4" for the base it just enough enough to keep anything perfectly stable. That's how I keep my hoops stable when I put them directly into the ground. Pound rebar into the ground about 12" and then set the hoops onto them. But like I say with less than 2" it just isn't enough to stabilize. As long as there isn't another hurricane things should be good until I figure it out, lol. ~ karen!
Katie Dotson
You are correct in the fact that with only 1 3/4" for the base, the stability is still iffy. Geodesic dome structures are allegedly very stable but that involves more money, labor, and math. I personally prefer to avoid all three of those. Particularly the math part. I see no reason to take simple numbers and use them in such a convoluted manner.
JAnet
Interesting! What are the main differences or reasons for using the tunnel circular shape versus the pyramid shape you already had? Which one is easier to make and sturdier?
Karen
Hi Janet! The triangular one is definitely sturdier, but it is more work to make. I made those when I got some brackets that were on clearance at Lee Valley. They don't carry them anymore though. At least they didn't as of last year. I used hardware cloth because those houses protect my strawberries from voles and birds. But they need to have something covering them that has holes so insects can get through to pollinate the strawberries. Technically strawberries are self pollinating but bees and other insects help immensely. ~ karen!
PMMK
A couple years ago or so there was a covered greenhouse - raised bed design on Apartment Therapy that used large gauge wire mesh (like something you would get at Tractor Supply) zip tied to the pipe and then covered with the soft netting. A couple more pipes across too. It looks very stable. It's otherwise almost identical to yours, Karen, except that your choice of mesh fabric is probably better in that it allows for better access to sunlight. I saved a copy to my laptop and I plan to put in at least 4 of them this year. Big Dude built a bunch of 4 x 4 beds last fall. Nice birthday present, eh?
Karen
I think it's a great birthday present, lol! ~ karen