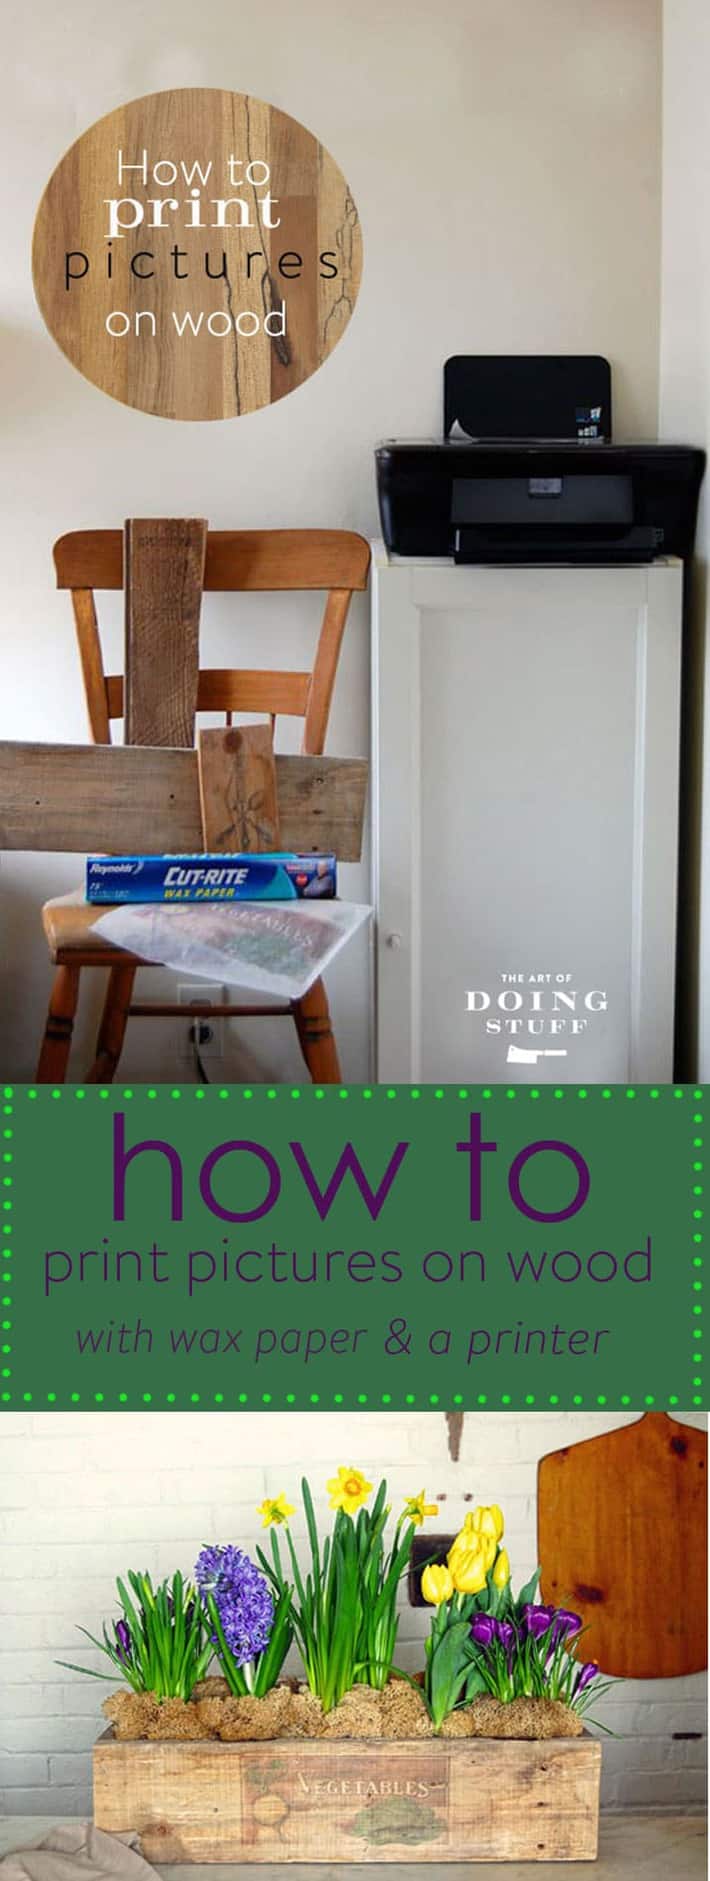
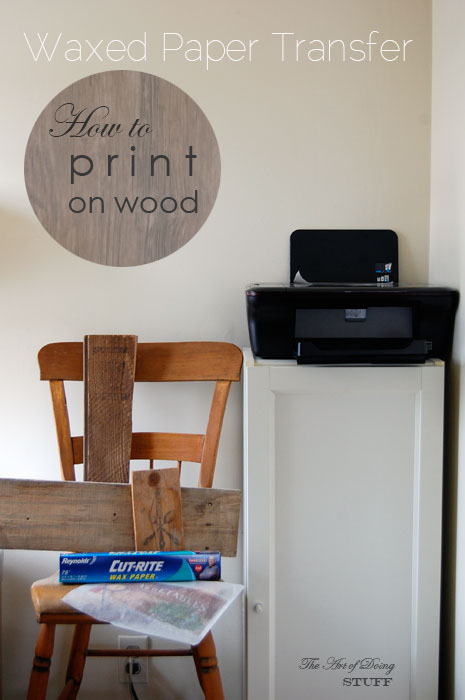
How to print on wood without any weird stuff you have to go to the store for. You need a printer, a piece of unfinished wood and waxed paper. That's it. Maybe a Tom Collins if that's your thing.

I'm funny. Sometimes ha-ha funny, sometimes left-out-of-the-fridge-too-long funny. But as we all know, there are times for funny and times for seriousness. This is one such time. For seriousness that is.
So this post will involve no funny. No laughing, no snickering, no coffee spitting. Because the information I'm about to introduce you to deserves a reverence that can't be accomplished when diluted with hilarious jokes or cutting sarcasm. When I first published this post in 2014 it got a bit of attention. Mainly because it takes a simple idea and allows you to do it at home without any special equipment.
I'm going to teach you how to transfer any photograph or picture onto wood.
You don't need mod podge or any other weird thing that you don't have on hand.
You don't know it yet, but this is the greatest day of your life. You get to produce something beautiful without any pain or tearing of your woman bits. Plus it won't turn into a whirling, dangerous ball of hormones in 13 years.
I decided I wanted to try making something but it involved transferring a photo onto wood so I did a little research. Most of the tutorials I came across involved a few specialty materials like matte gel and the backing paper of printer labels. I didn't have any printer label paper handy and don't even know what matte gel is. Like most DIYers I wanted to DIY, NOW. Right this second, NOW.
So I kept looking for a simpler solution. Mid search I suddenly remembered my mother mentioning something Mag Ruffman had done a couple of years back. It was the perfect solution and it works GREAT.
Table of Contents
Can you transfer a regular photo to wood?
You bet you can. That's what this is all about. You can use this same technique to transfer photos, text or anything else you can print onto wood.
What kind of paper do you use to transfer pictures to wood?
All you need is regular old waxed paper. And a dream of course.
That's right. All you need is a regular inkjet printer (this one is the newer version of the one I use) and regular waxed paper. I have an HP wireless printer and this technique works with this printer. It's the only printer I can guarantee this works with, although it will work with most as long as it's an ink jet.
(update: since posting this a couple of years, there's been a lot of success stories and a lot of frustration stories, mainly due to the printer you're using. I can only guarantee this works with the kind of printer I have which is a cheap, old HP printer I got at Costco. )
How to Print Pictures on Wood
1. Cut a few sheets of wax paper to the size of a standard piece of printer paper.

2. Find a smooth, light coloured piece of wood. Actually find a few so you have some to practice on.

Find a high resolution image you like. Or make your own. The Graphics Fairy is a great place to start for copyright free, high resolution images.
3. Once you have an image you like, reverse it using whatever photo program you have on your computer. If you're not sure how to do that just Google it.
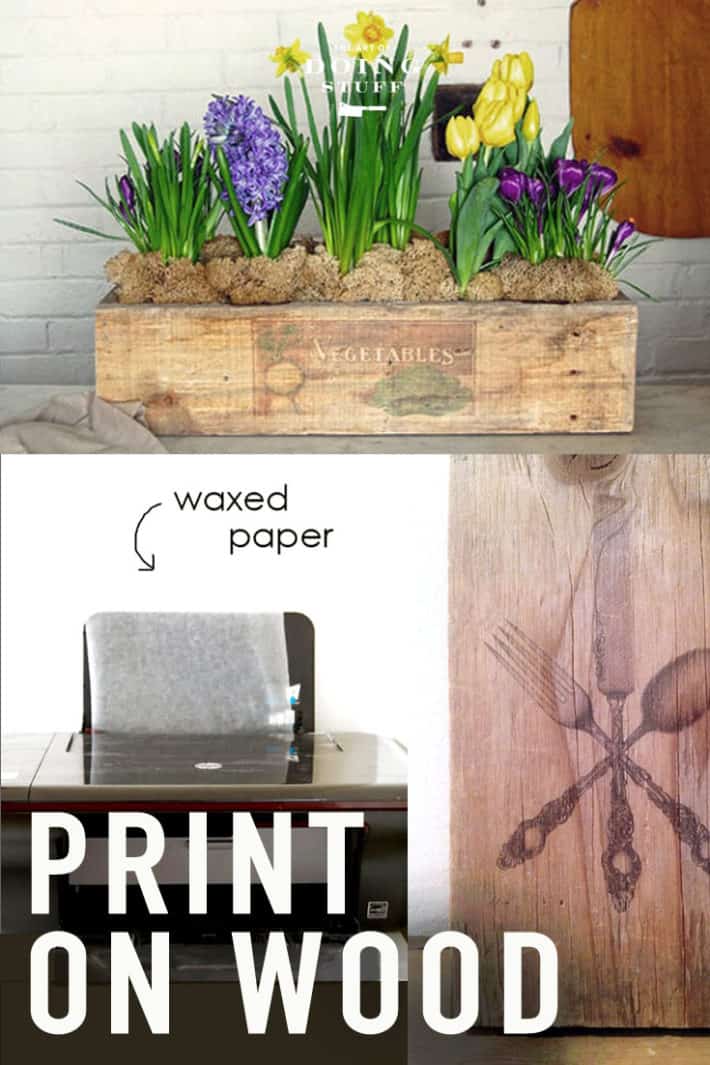
4. Put a sheet of your waxed paper into the printer and click print.
 5. As the waxed paper comes out of the printer, gently guide it. You have to be careful it doesn't roll under itself or touch itself in any other way because it will smear the ink.

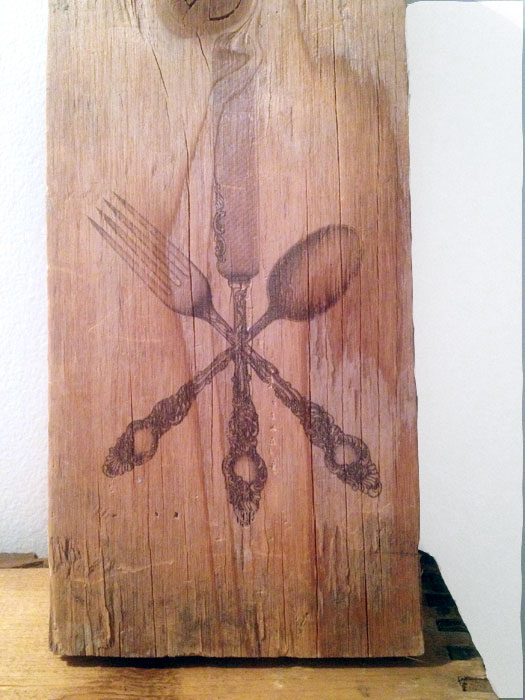
6. Put your image exactly where you want it on the wood. Remember ... this can be any unfinished wood. A bench, table, box, or anything!
Once you place your image you can't move it. Do not move it. It will smudge. You will be sad. Then you will cry and it will smudge some more.

7. Holding the transfer tight to the wood, and working quickly, swipe the edge of a credit card across the image. This pushes the ink from the waxed paper down into the wood, which absorbs it.
Don't be wimpy about this. Push hard, but not so hard that you rip the waxed paper. You can gently lift the paper to see if it's transferring well. If you notice spots that haven't transferred, rub it some more with the credit card, this time burnishing it.

8. When you're pretty sure that you've transferred as much ink as possible lift off your waxed paper and get ready to call someone. Because that's the first thing you're going to want to do because this method works so well.
You'll be stunned.
You'll naturally want other people to be stunned. It's a DIYer thing.

I tried a few images just because it was so fun.

Like I said earlier you can use this technique on any smooth, unfinished wood like old crates, tables, or chairs. For anything that's going to have wear and tear, just remember to spray it with a a clear matte finish after you do the print. Any wood sealer will protect it.
If you don't have a table, chair or dresser you want to print on, you can just find a nice old board and prop it against the wall, or hang it.

Quick Reference Directions:
Waxed Paper Transfer
1. Cut sheets of waxed paper to the size of computer paper.
2. Print your image onto the waxed paper with any Inkjet printer. (must reverse image first using whatever photo program you have) In answer to some of your comments, no, it doesn't matter which side you print on. Both sides of waxed paper are waxed.
3. Carefully place the image on your wood (wet side down) and then rub over it with a credit card.
4. Removed waxed paper and the ink is now transferred to the wood.
5. Seal with a matte spray wood sealer if you like.
TIPS
- Use smooth wood. Rough barn board won't work, but smooth barn board will.
- Darker colours on lighter wood works best.
- Dampening the wood a bit with a sponge will make the transfer darker, but it might blur and smudge if you're not extremely careful.
- If the waxed paper won't feed through your printer, tape it to a piece of regular printer paper before feeding it into your printer.
- Some readers have also had success by using the slippery side of freezer paper so you can try that.
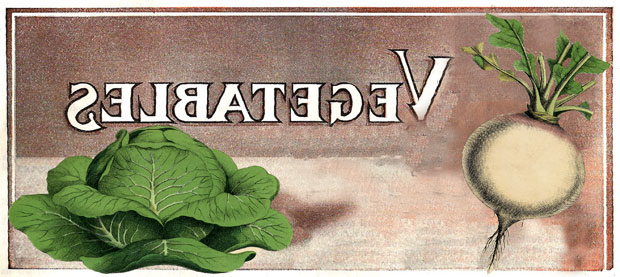
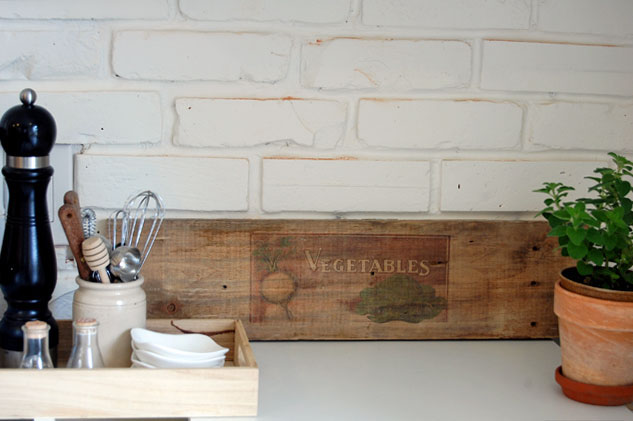
I made my piece of printed wood into a rustic planter. Read how to make your own in this post.


How to Print an Image on Wood.
Print anything on wood with wax paper and a printer.
Materials
- Wax Paper
- Unfinished Wood (board, tray, table, stool etc)
Tools
- Ink jet Printer
Instructions
- Cut a few sheets of wax paper to the size of a standard piece of printer paper.
- Find a smooth, light coloured piece of wood. Actually find a few so you have some to practice on.
- Once you have an image you like, reverse it using whatever photo program you have on your computer. If you’re not sure how to do that just Google it.
- Put a sheet of your waxed paper into the printer and click print.
- As the waxed paper comes out of the printer, gently guide it. You have to be careful it doesn’t roll under itself or touch itself in any other way because it will smear the ink.
- Put your image exactly where you want it on the wood. Remember … this can be any unfinished wood. A bench, table, box, or anything!
- Holding the transfer tight to the wood, and working quickly, swipe the edge of a credit card across the image. This pushes the ink from the waxed paper down into the wood, which absorbs it. Push hard but not so hard that you rip the waxed paper.
- When you’re pretty sure that you’ve transferred as much ink as possible lift off your waxed paper and get ready to call someone. Because that’s the first thing you’re going to want to do because this method works so well.
Notes
- Once you place your image you can’t move it. Do not move it. It will smudge. You will be sad. Then you will cry and it will smudge some more.
- Use smooth wood. Rough barn board won’t work, but smooth barn board will.
- Darker colours on lighter wood works best.
- Dampening the wood a bit with a sponge will make the transfer darker, but it might blur and smudge if you’re not extremely careful.
- If the waxed paper won’t feed through your printer, tape it to a piece of regular printer paper before feeding it into your printer.
- Some readers have also had success by using the slippery side of freezer paper so you can try that.
Laughter may now resume.
→Follow me on Instagram where I often make a fool of myself←


Such a great idea. Looking forward to Part ll.
Geez Karen...do you every get tired of being so damn smart!??? You are brilliant!! Thank you!
I tried doing this last summer and my printer totally ate the waxed paper. Other tutorials use freezer paper, which I had never seen in Canada (or heard of), but it seems to be sturdier. Lo and behold, I found a roll of it at my favourite cheapskate store--Dollarama! Now where did I put it...?
I had this same problem, trying to put our last name on a planter I built for the garden. I used waxed paper but the printer ate it up. My solution was to cut a piece of waxed paper just big enough to fit my graphic, but smaller than the standard 81/2 X 11 page. Then I taped it to a regular sheet of paper with scotch tape. To make sure the position is correct and the waxed paper is large enough just print the image on regular paper; then cut a piece just big enough to cover it and tape it on. that got the printer to cooperate and the rest worked as expected!
Thanks for the tip for readers Todd. ~ karen!
Not wanting to waste the waxed paper, I cut mine down to 4"x6"... the first few went fine, but then another got jammed... and 'disappeared'. After about 45min of opening, searching, etc., we (hubby helping... his work printer :/ ) hand-fed some cardstock through and it un-stuck it enough from wherever it was that it started to poke out when we next turned the printer on. **whew**
Moral: In my case hubs said I could print again, but only on a full-size sheet, so if it got caught somewhere we'd be able to find it. Bless him for being so supportive of my occasional endeavors!
I think Todd's taping to another sheet idea may work well, or even better-- thanks!
The lady mentioned she couldn't find freezer paper. It is usually in the grocery store with the wax paper , tin foil, parchment paper. I have also seen it in the hunting section of Walmart because the hunters wrap their game it before freezing.
Love this post, but call me stupid, but how did you get the reverse image for printing? I took a quick look at The Graphics Fairy and the images look right-sided.
Hi Carol - It depends on what computer you have and what program it came with. Google, how to reverse image. Otherwise, just use something without words. ;) ~ karen
Cool man. Really, really cool.... gotta try it... :)
OMG!!!
You have no idea what you have just done to my existence.
OMG, awesome! I'm definitely trying this too. These would be neat hanging from some rusted chain or maybe drill a couple of holes on either side along the top and string a length of leather or rope, knotted at each end. Thanks for some more inspiration Karen.=)
I have tried this with a spritz of water on the wood to dampen it and the first one worked out amazing. All the rest smudged. (six more).... I have tried it on painted surfaces with a spritz of water and it smudged again. Now I am going to try this without water and a credit card! I'm feeling lucky!
OMGOSH! I LOVE THIS!! Can't wait to try it tomorrow! Thanks Karen!
You are a goof and a genius - a goofy genius. I have seen this trick but it sounded too tricky for me, but you made it seem possible. I have a family reunion coming up, where where we take handmade silent auction items and this is going to be something I *will* be working with!
Thanks so much!
Gonna do this with my grandkids pics and put them on little pieces of wood for my key chain !
Just read your answer to my question on another post Karen, about the wax paper... and just wanted to add.....you have THE cutest pair of scissors !! Tell me they're not from the Dollar Store!!
And .....I just had a flash of inspiration thanks to your post tonight!!.....I just bought 2 Ikea RAST pine dressers, I am using as nightstands...(they were a steal at 40 bucks each btw!) I have seen how others have been finishing theirs, but I wasn't all that inspired yet....I think the photo transfer would look great on the drawer fronts....to get the hand painted look, yet still see the natural wood peeping through...I like the transparency of the photo transfers ! I'm thinking something botanical or sea inspired...;-)
Do you have to reverse the image for all graphics or only those with writing?
Hi Gloria - Just for those with writing, but I'm the kind of gal that's sometimes bugged if something is facing the wrong way even if I'm the only one who knows it's the wrong way. Also, sometimes when photos are reversed (as they would be if you didn't reverse them) they look a bit off for some reason. It also depends on how you think the image would look best on whatever you're printing onto. A face might be facing right for example, but you'd prefer if it was facing left. But, ... having said all that I reiterate ... nope ... doesn't matter, lol. ~ k!
Thanks for the clarification. I, too, am bugged by stuff that looks weird facing the wrong way. So because I've not had much success with photo programs of any kind, unless you count my 2nd grade class photo which was stunning, I shall try to find images that are palindrome-ish.
LOL!
If you struggle with graphics programs, look for Irfan View. It's a free download and sooo easy to use. You can reverse any image with one click (they call it flipping) It can't do everything the fancy programs do but for manipulating already created images it's super easy to play with. ;-)
do you have to reverse the image? i guess i don't understand the benefit of reversing it??
Karen, oooohhh...what a fantastic project ! My gosh , and it is sooo easy, thanks for sharing this ;-)
Gotta go find my driftwood stash....see what I can do with it ! I'm thinking a sign that says, <----BEACH, because the beach really is to my left LOL!!!!!
PS Is there a wrong/right side to printing on the wax paper??...I just checked mine, and there does seem to be a difference....one side is slicker, the other not as much.
You'll just have to play around with it fifi. The slicker side sounds better, but sometimes if it's too waxy the ink smears before you even get it out of the printer. ~ karen!
I haven't tried this...yet...but did make cool coasters on marble tiles using graphic fairies prints and some of them are already reversed! Have to wait until husband not home to put waxed paper in printer:) he'll swear I'm gonna ruin his printer!
This will eventually ruin your printer.. not designed to run wax paper. But a cheap one you can wreck and have fun until it breaks:-)
Genius! Does it matter what side the waxed paper is printed on?
No ma'am. Both sides of the waxed paper are covered in wax. ~ karen!
Love it!!!! A question, are wax papers waxy on both sides? Does it matter which side of the wax paper you print on?
Hi Victoria - Hah! I wondered the same thing as I was doing mine. Both sides are waxy. Good question though! ~ karen
I've heard that freezer paper works well too. You definitely have a right and wrong side.
it says in the above instructions it does NOT matter both sides are waxed I was wondering if it did any damage to the printer or inkheads
I was also wondering if it would damage the printer in anyway! I'm so happy I found your page and can't wait to complete my photo projects that I am surprising my children and their spouses with of thier kids, my grandkids,thank you for taking the time to make your website, I love it!
The Graphics Fairy has great vintage images that are free! I have an old breadboard that I now have plans for.
OMG that is so cool. But my heart is breaking because the one object I would love to subject this to has been painted (an old cedar chest that has actually been stained, coated with whatever passed for polyurethane in the '50s, painted, then painted again, so stripping seems daunting). Could this possibly work on a flat latex painted surface?
Hi Erika - I haven't tried it so I can't say for sure, but I think you'd have a shot on flat latex painted surfaces. If the underside of the chest is painted as well, try a tiny transfer there. Or anywhere that won't be noticeable. ~ karen!
It's likely to work on a latex printed surface. I do image transfers onto acrylic painted surfaces all the time, and a latex surface is essentially the same thing. Just give the ink ample time to dry after transferring to avoid smudging, and make sure you seal it.
The key here is 'flat'. If you have a high sheen latex it will not transfer properly (guessing, but that is how latex paint is designed: the higher the gloss/sheen, the less it will absorb moisture). That's why they tell you to use a pearl or higher gloss paint when painting the kitchen, so the paint will hold up. Curious to see if someone tries it with a flat or eggshell sheen latex paint!
Sand the painted surface and the transfer will work.
Use this green product to remove the finish (paints and urethanes), let dry.
Sorry, website:
http://www.rockler.com/soy-geltrade-paint-and-urethane-remover-quart
My mind is going WILD with excitement.
A. Because I'm in a different time zone and that therefore means that I'm awake to see your post :) woot woot!
B. Mind blown. There are so many cool things we can possibly do from your coolio idea. How about little pieces of wood with prints- as fridge magnets ?! Oh la la.
Wood + photo + magnet = gorgeousness. Yessss.
Thanks a bunch !
Lynne
LOVE the magnet idea. Thx. Lynne! ~ karen
Fridge magnet is a good idea to combine, thax for sharing
~foloe