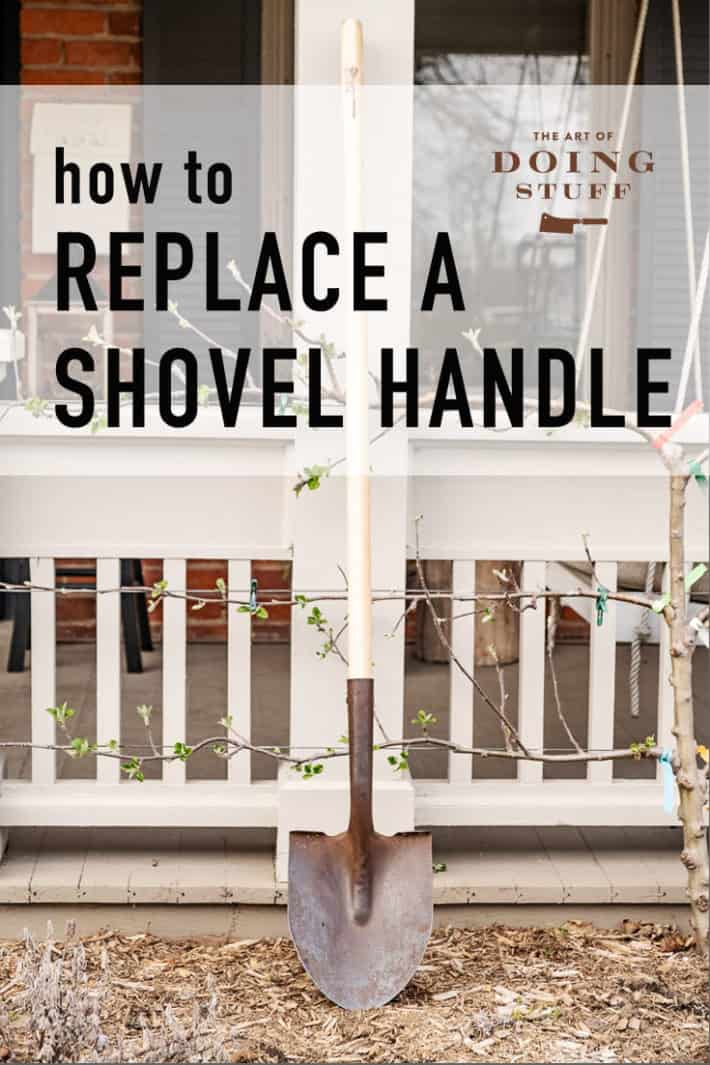
I know. You have superhuman strength and you broke your shovel handle. Way to go Wonder Woman or Strongman. Here's how to replace that shovel handle.

In 2019 I dug a hole and broke my shovel. Last season I broke a shovel handle and a fork handle. I'm a gardening beast with the strength of 12 oxen who just watched the movie Rocky. There's no other explanation for all the handles I break.
Either that or I don't take care of my shovel handles and leave them out in the sun and rain every garden season since always.
If it's a good one, instead of buying a new shovel, I clean up my old shovels and replace the handle.
If you too are super human and have broken shovel handles, here's how you can replace them.
How to Replace a Broken Shovel Handle
like I'll be doing this weekend
Materials
new shovel handle
rivets (often come with shovel handle)
chisel (an old one that's past its prime)
hacksaw
hammer
drill & bits
Steps
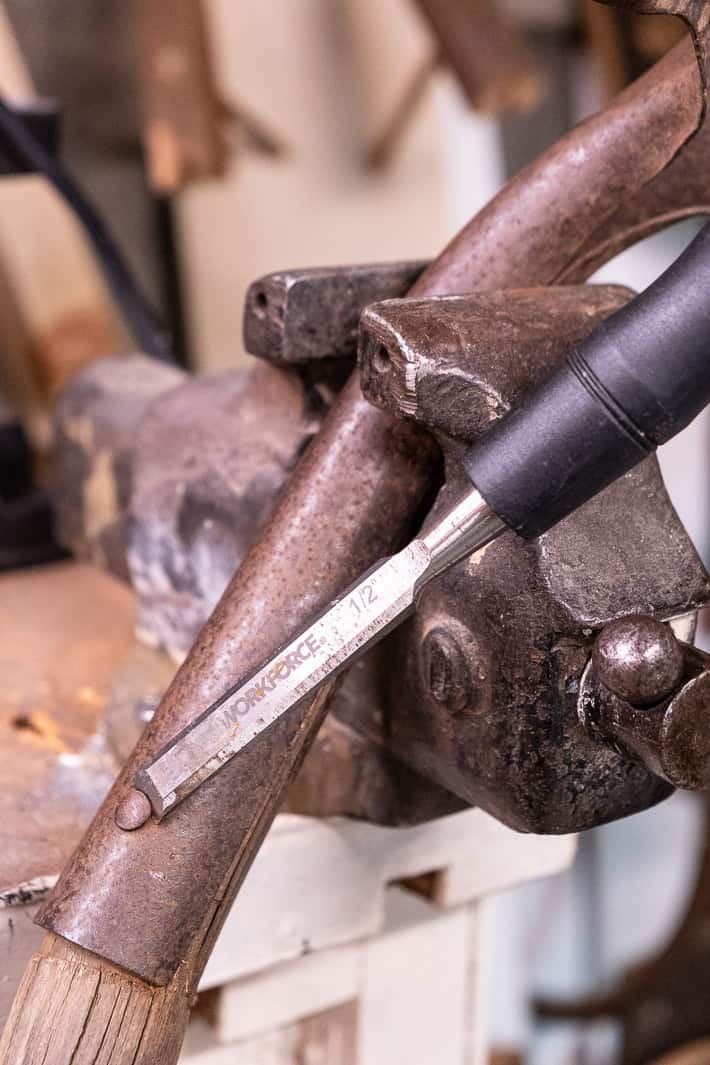
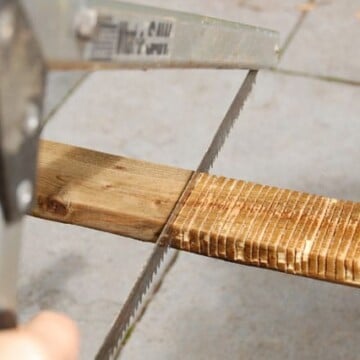
- Clamp your shovel tightly into a vice. Using a chisel, angle grinder or hacksaw remove the rivet holding your broken handle on to the shovel head shaft. If the rivet is very tight use a chisel to pry it up just enough to maneuver a hacksaw blade into the space.
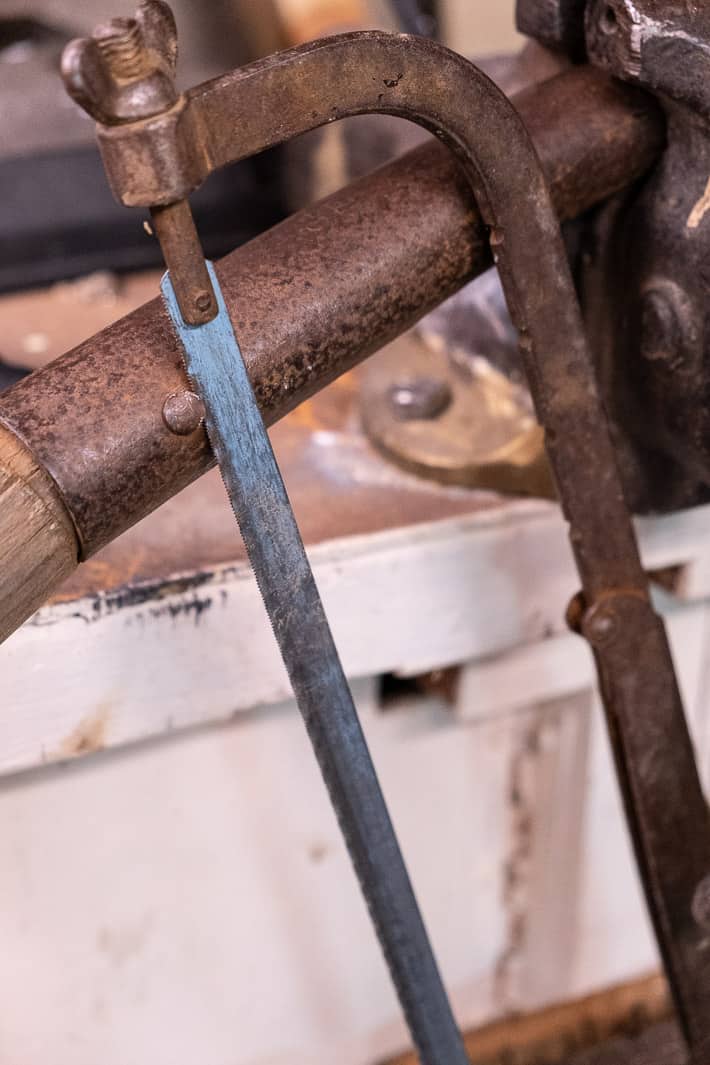
- Once you have enough room for your hacksaw blade, use it to cut the head of the rivet off.
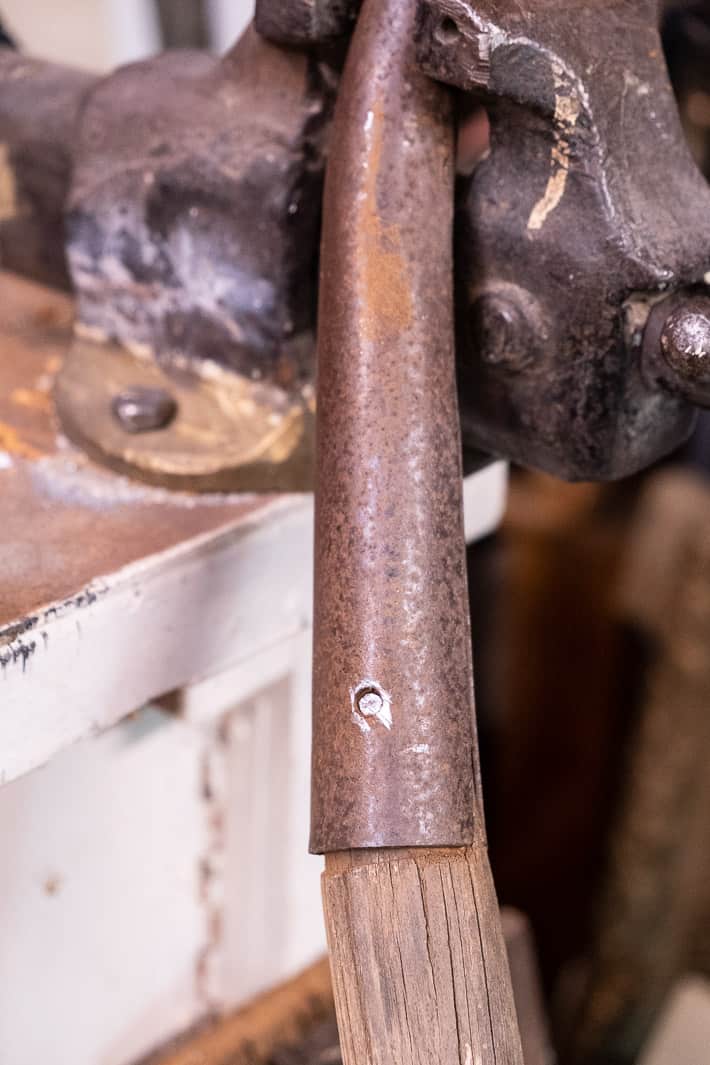
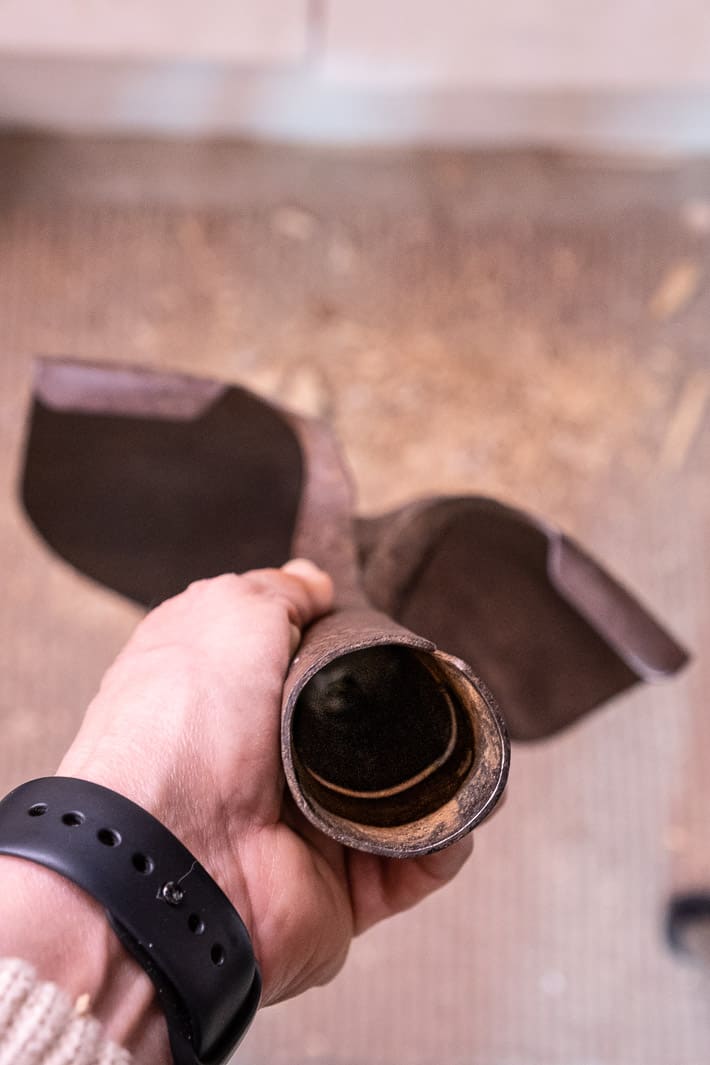
Rivet head cut off.
- Using a punch or a narrow screwdriver, pop out the rivet.
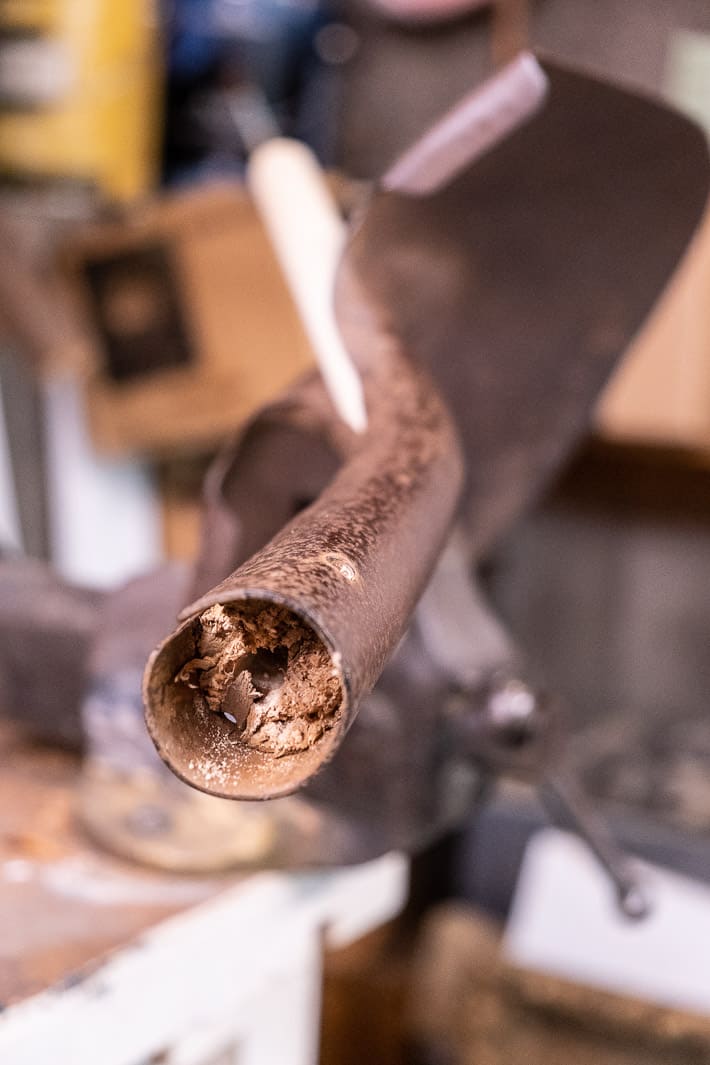
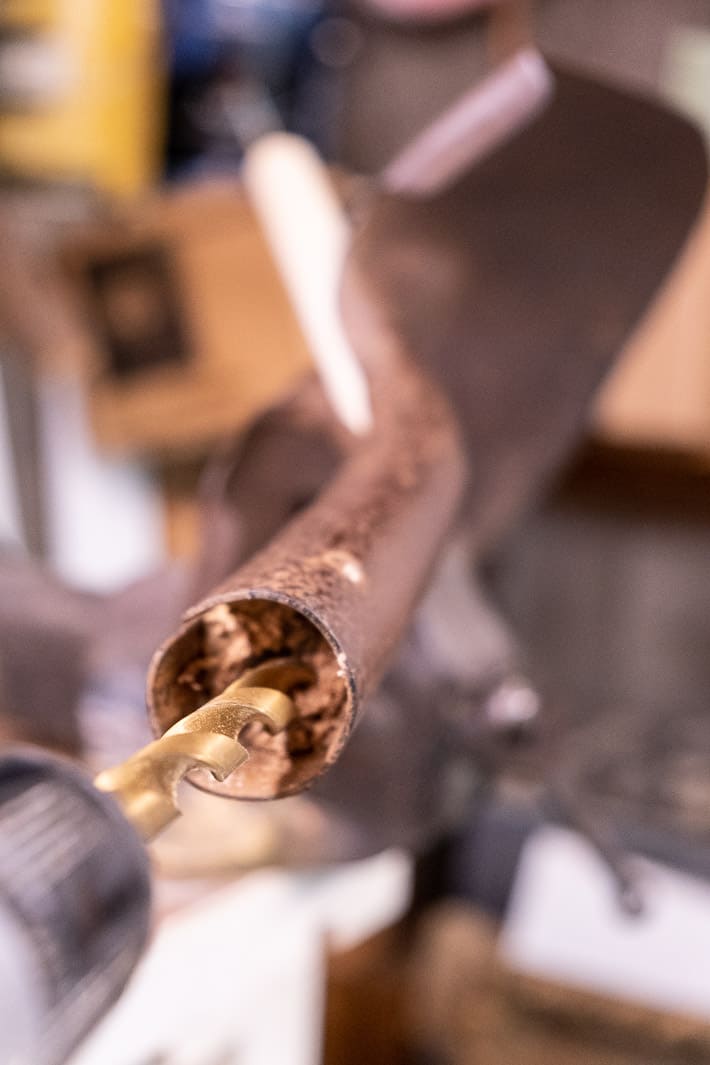
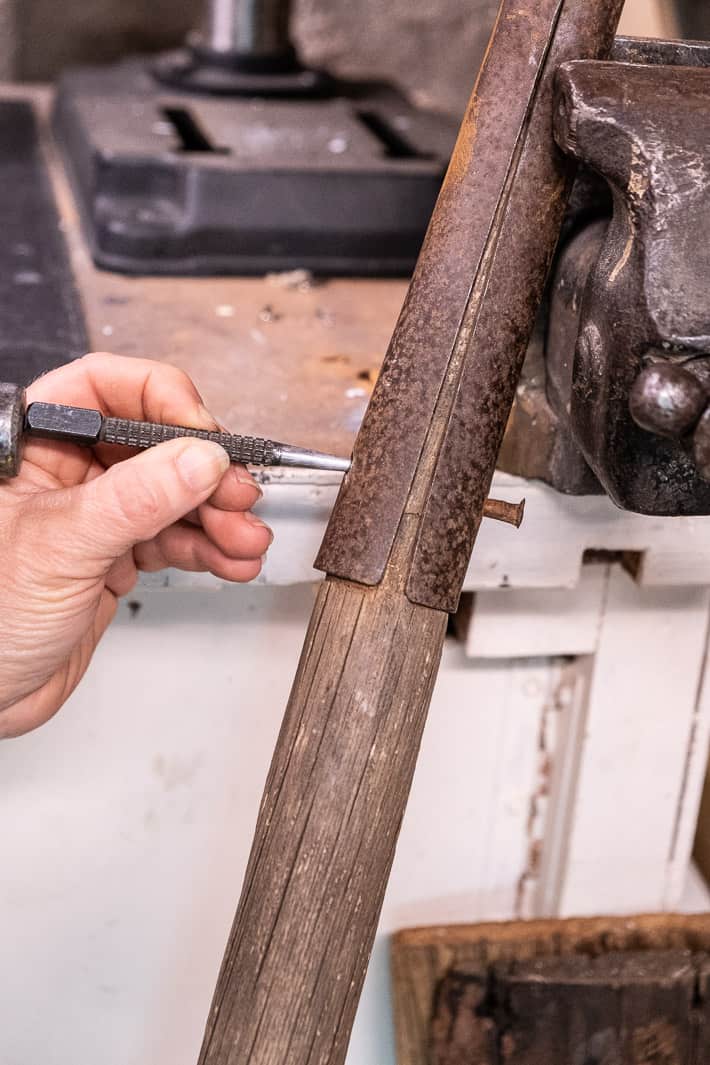
- Once the rivet is out you have the mess of a handle left inside the shaft to deal with. All the wood needs to come out.
- Removing the wood is the biggest pain in this whole process. You have to chisel and hammer and drill until all the wood comes out.

- Get it good and cleaned out.
- Grab yourself a new shovel handle.
for everyone in the comment section having a heart attack over using a chisel, please note you should use an old chisel. Anything with a very thin, flat, beveled edge could work.
Would you like to save this stuff?
TOP TIP
If you know your shovel handle is on its last legs, replace it BEFORE it breaks. That way when you remove the rivet holding the handle to the shaft, you can just pull the shovel handle out with a couple of whacks to the shovel head. This is a lot easier than chiseling out the broken wood.
TIPS
- Shovel handles are different than broom handles. They're thicker and longer.
- When you're picking a shovel handle, pick one that has obvious straight lines and obvious grain. This is important when you're positioning your new handle into the shovel head.
- Some shovels come with rivets. Others don't. If yours doesn't, make sure you buy a couple of rivets.
** MAKE SURE THE STRAIGHT GRAIN IS AT THE FRONT AND BACK OF THE SHOVEL HEAD. The curvy grain should be at the sides.**
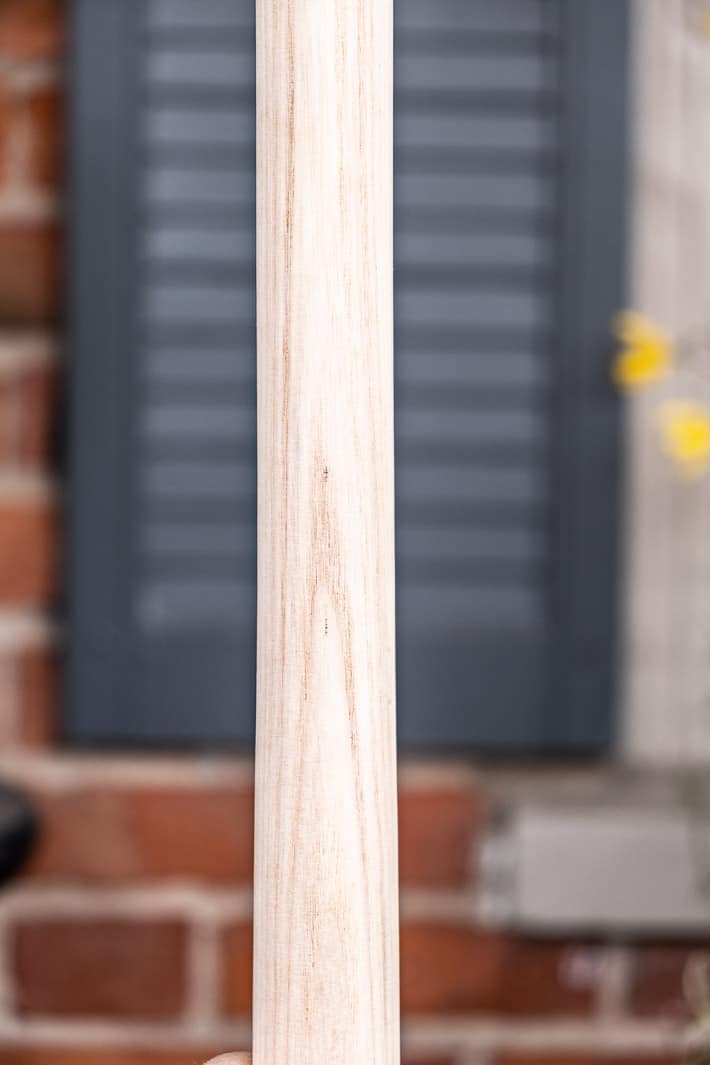
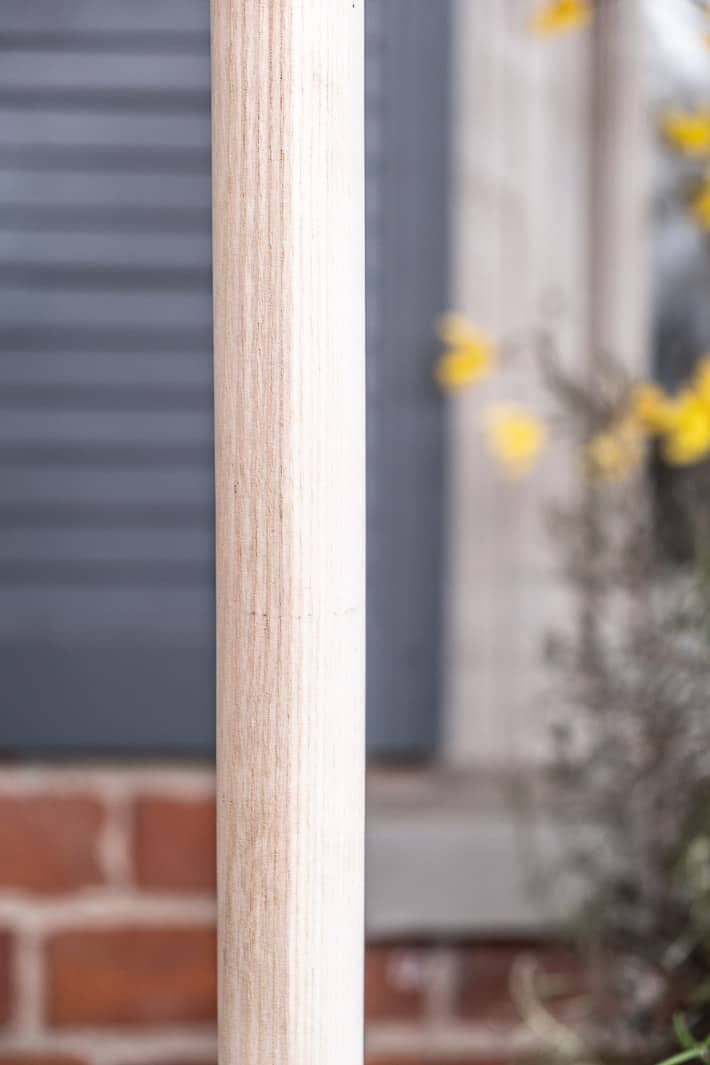
This is a good example of seeing the face grain of the wood. It's the stuff that looks wiggly.
This is a good example of the edge grain of the wood. It looks like straight lines.
Your handle should have visible straight lines and visible wiggly lines. Pay attention to these.
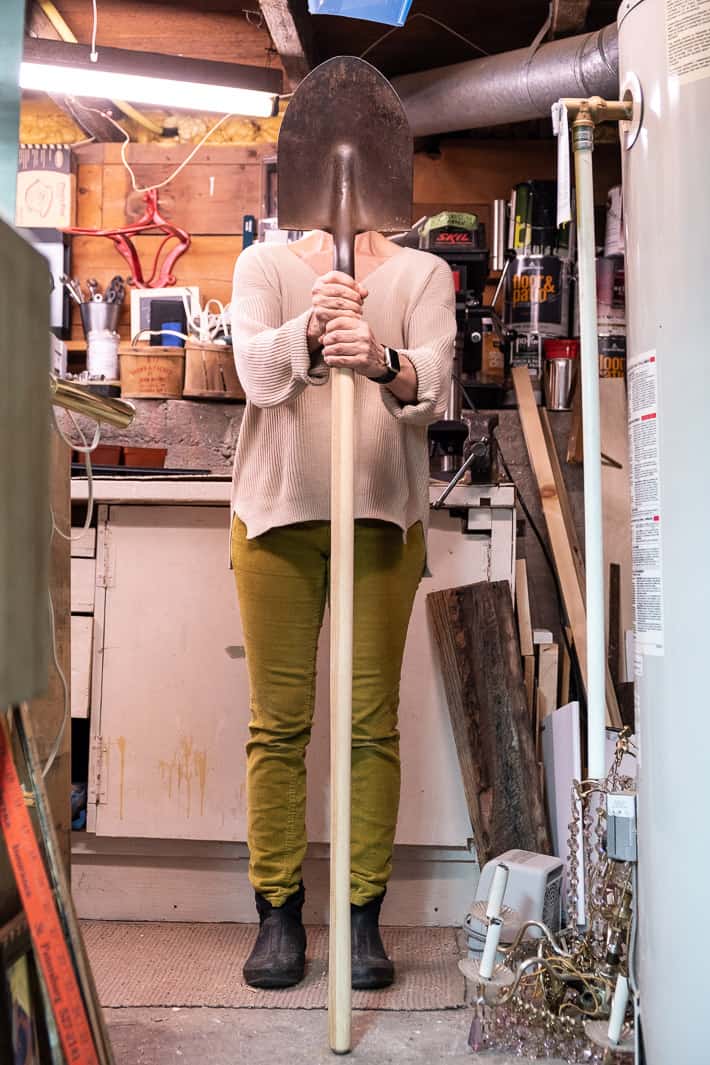
- Seat your new handle into the shovel head by holding it like you see in the picture giving it a few whacks against a cement floor or sidewalk. REMEMBER: The wavy grain at the sides and the straight grain at the front and back.
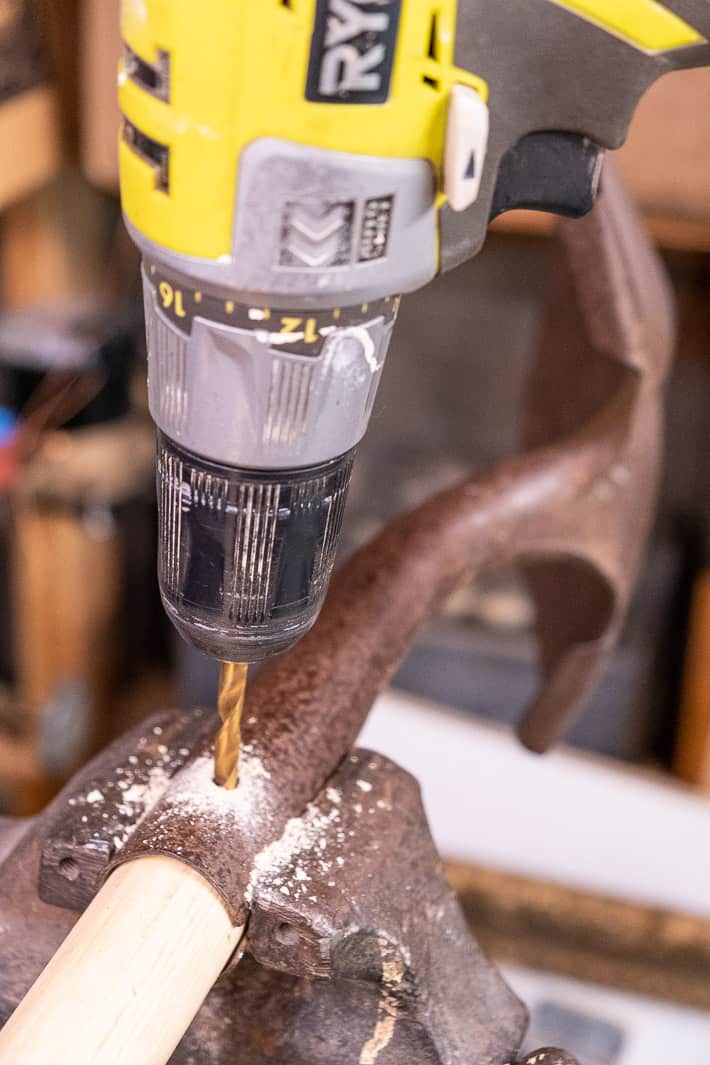
- Once the handle is seated you can drill a hole through the handle where the new rivet(s) will go.
My handle came with a plug in the end. Inside were two rivets. Shovel rivets have a head only on one end. They hold in place when you hammer the other end which flattens it out.


- When the hole is drilled into your handle, knock a rivet through it. It should slide in fairly easily.
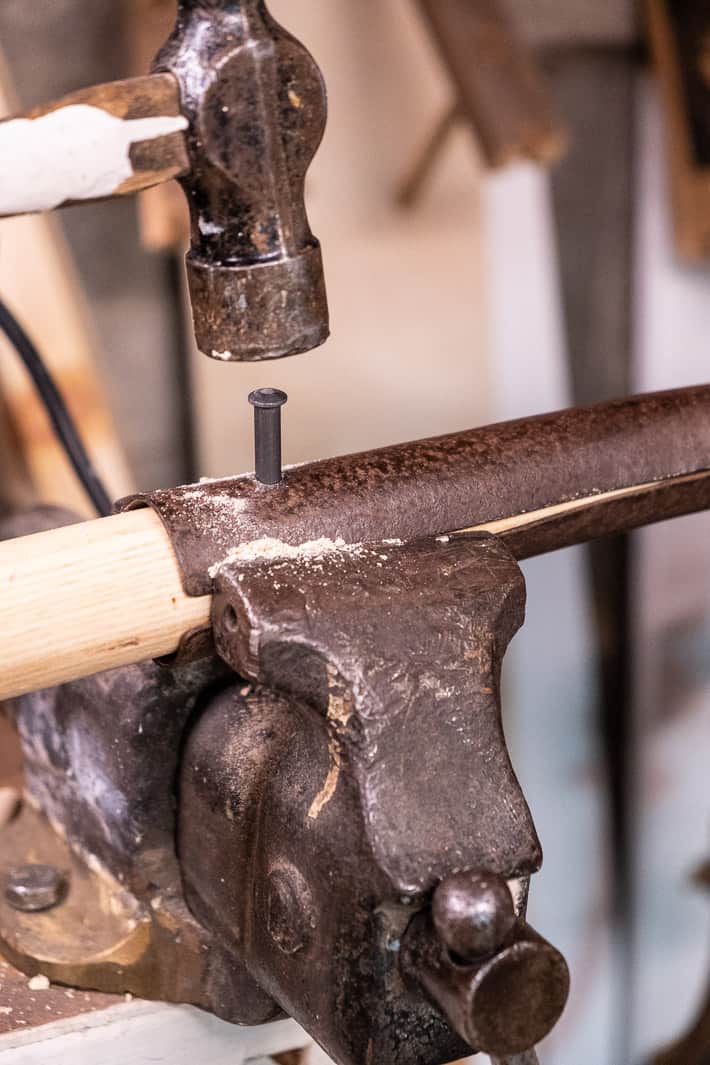
- Flip the shovel over so the end of the rivet without a head is facing up. Place your handle on a strong solid surface and whack the end of the rivet several times with a hammer to flatten it out.
Flattened out, now the rivet has two heads and can't fall out.

Add a coat of beeswax and mineral oil (like my Beeswax Board Butter) to your shovel handle to protect it from the elements. You can also use something like Thompson's Water Seal.

You're done! Unless of course you want to add your maker's mark.
Why do all this? Why not just get a new shovel? Reduce, reuse, recycle, revamp. You can do it, you're Wonder Woman, only better.
You're Wonder Woman with a shovel.


Gina
I wouldnt use a chisel for this, even an old one. Chisels don't go bad with age, they do go bad by being abused.
In addition to the other options for getting a rivet out, it might be possible to use a drill.
The Other Guy
There is a much easier way. Yes, take the rivet out (I'd use a grinder myself) but then you don't have to " chisel and hammer and drill until all the wood comes out". Just heat the sleeve with a torch until the wood starts to smoke. You then only need to tap the side and it will fall straight out.
Mark
This is just in appreciation of your post which promotes the ethic of conservation. Maybe...treating the handle before installing it would help preserve the part down inside the shovel which is most prone to breaking?
You are a more diligent repairer than I am. I could not figure out the rivet problem (plus the old wood stuck inside), did not want to sacrifice a chisel, and so got a new shovel. Strangely it was the exact price of a new handle at the same hardware store (why?). I am keeping the old broken one intending to fix it sometime ...
Karen
Absolutely! I should have done that. ~ karen!
Colleen
I hoping for a column on how to move an asparagus patch! Mine needs a new spot,
Colleen
Dan Stoudt
I recommend that every fall you give all the wooden handles of your garden tools a good coat of boiled linseed oil. Clean the dirt and rust off the metal parts and oil them. Also, a sharp shovel is much easier to use than a dull one.
Marguerite Floyd
You really are a wonder woman!
Kat
If you have vine maple or hawthorne growing anywhere close by, then you have all the shovel handles you'll ever need. Vine maple grows long, straight, vertical trunks from the base of the plant. Cut one off, strip the leaves, and take the thin bark off only if you want to. Recut the branch where the girth matches your shovel hole (new words?), shove it in there, and then use a bolt where above you'd use the rivet(s). The best part of this is that you can then cut the handle to the EXACT length that works best for you.
Cheverly
This. Is. Fabulous!!!
I actually have a handle-less shovel that has been lurking around the homestead for too long (my husband might actually say it's been years... probably because it HAS been years). I had grown very attached to that old shovel head. It was my first real tool that I purchased when I bought my very first home as a single mother (pre-husband) AGES ago, you see, so how could I be expected to part with it?! At one point I may or may not have called him a monster when he suggested throwing it away.
I am now imagining alllll the smug faces I will be able to shoot at his direction now that I know how to do this! THANK YOU, Karen! I heart you so hard!
Linda clark
Hey guys its a lot of fiddling about for a new handle and after landscaping for years my hubby bought me a nice lee-valley shovel and spade for Christmas I will never need a shovel or spade
again for the rest of my life or my kid's life as I will leave them to my kids when I am gone.
give it a try! you can just get a lee valley catalogue now and order online done:
Karen
Hi Linda! I actually work for Lee Valley. (I write gardening articles for them) And I own both their spade and fork. But this is a garden tool that I leave out at my community plot all year long. That's not something you want to do with the Lee Valley stuff if you can help it. Even their handles will rot and fall apart if they're left outside all year. Also, I really wanted to repurpose, not throw out in this instance. :) ~ karen!
Joanne
I never knew how to care for my shovels, and break (with my superhuman strength) a shovel handle every year or so. I am getting some board-butter out and will treat the remaining handles this weekend!!!! and then I think I'll go crazy and sharpen the shovels as well (something else I had no idea about)!!!
I was digging last weekend and heard the first sound of a crack in handle - your post is very timely for me!
thank you Karen!
MelissaM
I broke my shovel last year digging out giant miscanthus. However, I recently found a shovel 75% off and couldn't pass up that deal (it had a bit of rust, but nothing I couldn't handle.) However, if replacing the handle is this easy, I may do that as well. Once I locate where the end of that broken shovel is.... (Once spring chores and planting are done, it's clean the garage time!)
Alena
Ha - no surprise there. My Miscanthus is so stubborn that since a few years back I always ask my handy neighbour who has a very good sawzall. It turned out to be a very solution to a pesky problem.
Sheila
nice pants too
Jenny W
I don't need a new shovel handle at the moment, but I do need that Chandy laying on your shed floor!
Jeanne
Funny, I noticed the Chandy as well!
Jonathan Skrine
I have been the family's handle fixer for a few decades and there is a 'cunning trick' you didn't use.
Put the old shovel complete with bits of wood into a fire. Even if all the handle remains do not burn the remainder comes out easily as you sit and watch with a nice cup of tea....
The easiest hand tool for removing the rivet is a metal file. round is best but a flat one will do. Yes they are called bastards, it is the correct technical term.
The rivet can be replaced with a bolt. Just rounding off the nut and head is good enough. If anyone is holding a shovel that far down ....... Touch of loctite or superglue stops most from coming loose.
If you have an angle grinder use the time saved by burning to grind off the surface rust (a flap disc is best), and sharpen the edge. You'll be amazed how much less mud sticks and how much easier you get through the odd root or two without resorting to secateurs.
A little motor oil on the blade and a few applications of boiled linseed (or similar) on the new handle and it will be better than new.
If by any chance your fire gets hot enough to affect the temper of the blade you can cure this by just dumping it in cold water whilst still hot. Or even better, if cleaned first into old engine oil which will rust proof it slightly.
Unfortunately in the UK replacement handles are like hens teeth and often cost more than a new item. Rivets for shovels are unavailable which is why I've used a nut and bolt on every one I've done for over 50 years.
I shudder at the use of the chisel. The steel is too brittle and you'll probably have to re-grind the edge (both bevels) if you have the facilities. A chisel with chunks out of the edge will take days of work to re-profile by hand, if ever.
lisamc
Excellent tips!
There's nothing quite as nice as the voice of experience telling you "it isn't that difficult". Well, except the voice of experience telling you "just leave it here and I'll fix it for you"!
Jonathan Skrine
It's all tricks and short cuts - and I'll be drummed out of the Craftsmen's union for saying so....
One of the first things I taught my wife to do was sharpen her own knives. I think that's really called me being lazy.
Tina
Jonathon, I'd never let ANYONE sharpen my knives! I'm so particular about a good edge on my knives. If anyone wants to cook at my house, I have a crappy set of knives in the back of the cupboard. They can use those!
Karen
Hi Jonathan. Yep, I know about putting the shovel in fire. Most readers don't have a fire to throw their shovel into. And I'm not sure the average person wants to deal with being aware of whether they've affected the temper of their steel by heating it up too much. The chisel is an old one. I'll make note of that in the post. I appreciate all your thoughts, but I can assure you I know what I'm doing. ;) ~ karen!
Mike St John Cooper
Another short cut which reduces the chances of the metal losing its temper is to first screw in a good big long screw into the remains of the wood (after removing the rivers) and then use a torch (or even a camping gas stove) to heat the metal just to the point where the wood starts to smoke, grab the protruding screw with a pair of pliers and just pull out the remains of the wood. I was uncertain about this first time but it really works and is the easiest method by far.
TucsonPatty
When my shovel handle broke, I went to the hardware store to buy a new handle, and they didn’t want to sell me one! They said “Oh, it’s cheaper to just buy an entire new shovel.” I was very offended that I wasn’t able to convince them that All I wanted was a new handle. This was a great shovel! It was the only shovel left at my house (accidentally) after the great AW (A$$Wipe) removal of all tools from my home. It was a lonely shovel blade left to rust under an outbuilding, found by a very resourceful young man helping me out with clean-up chores. He found a broom handle and a couple of screws to cobble it together for the job needed, and I shamefully used it that way for about 5 more years. I haven’t riveted it together yet - I didn’t realize how to do that. I just keep giving it good hard whacks into the hard caliche here in Arizona and that is keeping it all together. You have once again given great instructions, Karen. I shall go forth and procure rivets.
SuzNKton
Cobbled together solutions are the method for discovering new innovations!
If it worked all this time, good job on you!
My *method * for hanging things on walls is apparently "not going to work" but the stuff stayed hung!
Lol *AW*!
Barbara H.
Thank you! I have garden forks with broken handles and a shovel with a worthless fiberglass handle. I've been meaning to replace the handles but those rivets and broken wood kept me from getting serious. No more excuses now.
Beth
Mrs. Pickie MacGrammarpants here, who is pretty sure the correct word is ‘vise’, not ‘vice’, which means something quite different. And which would certainly not hold your shovel very well on a workbench.
Martina
And while we’re at it...brook handle...?? I actually had to mull that over and finally...doh...you meant broom handle...lol smh
ina
Yes vise it is. I also always notice those things
Peter Oster
She's in Canada, eh! Its VICE!
Carrie
Well, I'm pretty sure nobody else makes mistakes, ever! I am very thankful for the humorous, helpful posts, and I think we should only be encouraging to our wonderful author! I'm pretty sure you can figure out what she means by what she says, don't be so nit picky. Little dose of grace anyone?
Marilyn
No kidding! Yes, I wondered about the 'brook' handle too, but it hardly mattered. Some people need to get a life!
Kirstin Jacques
I'm with you! I'm weary of negativity in comments. Not helpful.
Teri on the left coast
Is not. Still a vise. ‘Vice’ means the same here as everywhere. My particular one is using my long handled shovel as a pry bar for rocks etc. With the resultant need to replace the handle.
Heidi
Merriam Webster says 'vice' IS the British spelling...it is not incorrect, and is also how I learned to spell it. (I live in Ontario as well)
Joanne
LOVE your comment! Just the right amount and type of humor for a response to Karen!
Letty Regan
Yes, and a new handle is about $15 vs. a new shovel at $40!
billy sharpstick
Pic 1: Never use a wood chisel on anything metal.
Pic 2: Yes, hacksaw, grinder, dremel to remove rivet.
Otherwise, good job!
Karen
omg It's an OLD chisel! Obviously I wouldn't use a top grade, new chisel. I'll make note of it in the post. ~ karen!
Brad
Coming across this post a couple years later after I already removed the old handle from my busted shovel and all of these guys mansplaining chisels has me cracking up. (Just used an angle grind and old chisel to pop mine off too.)
Karen
I get lots of that, lol. :) ~ karen!
Tina
I use a plastic grain shovel for snow. The neck cracked this year. I don’t leave it outside, it lives in my mud room. I was thinking to have someone put a metal collar around the neck to help it last a couple more years but it seems like it’ll just put more pressure on it and make it crack more. Ideas? But my garden shovels are great, thanks anyway!
Jan in Waterdown
Hey Tina, I’m thinking maybe a couple of strategically placed plastic zip ties might do the trick?
Tina
Wise idea! And I AM the queen of zip ties!