I wanted to test this system out for a couple of seasons before I recommended it to you. Now is the time to let you all know about this plant waterer I've been using for my seedlings because it's life changing. Today I introduce you to the capillary mat.
The quickest way to kill a plant is by jumping up and down on it. Just behind that is over or under watering. If you underwater a plant it will die. If you overwater a plant it will die. The smaller the plant is the more quickly it will croak from either of these things.
Watering is where most people get into trouble when they're starting seeds.
Table of Contents
Problems from under watering
Letting the soil dry out during the germination phase of a seed is deadly. If the seed has already cracked open when the soil dries out, all of the insides of the seed dry out too. That means its reproductive organs shrivel up and croak.
Letting the soil dry out during a plants growing phase will either kill the plant because of lack of hydration or it can stress it so much that it might continue to grow but not the way you want it to. Stress on hot peppers can make them even hotter by triggering them to produce more capsaicin (the oil that makes peppers hot.) Although this is a bit of a contested theory.
Problems from over watering
Letting the soil remain too wet during the seedling phase of growing can often cause a condition called Damping Off. Damping off is a soil borne disease that LOVES wet conditions. You might have the fungus in your soil and not even know it if you never overwater.
Damping Off
Damping off is a fungal disease that causes seedlings to rot at the soil line. The stem just turns black, withers up and seemingly dies overnight. One day you have perfectly healthy looking seedlings, the next morning they've all croaked and fallen over.
Damping off normally only kills seedlings, not larger more established plants.
O.K. that's enough blah, blah, blah because I really want you to see this watering system I've been using because it's SO effective. It works EXACTLY how it says it's going to.
The Capillary Mat
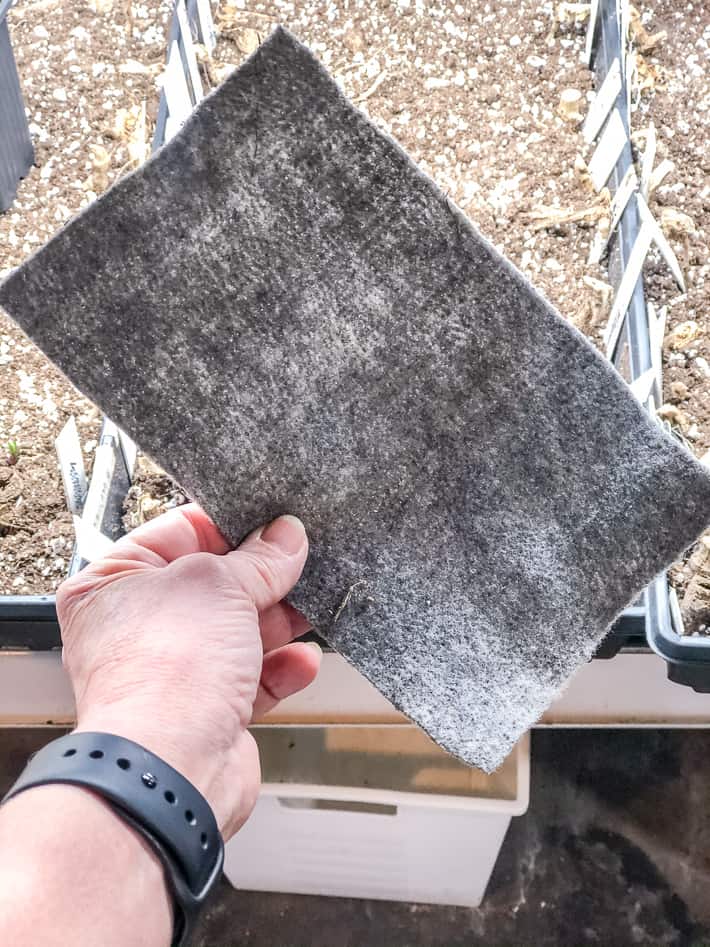
It's called a capillary mat system. A capillary mat looks like a piece of felt and is similar to felt, but it's not the same. For this to work as well as it has for me, you need to get genuine capillary mats. You can get them on Amazon or at Lee Valley.
Most local hardware or garden centres (around here anyway) don't carry them but I suspect they will in a couple of years the same way they didn't used to carry seed starting mats but now do
What the hell is a capillary mat?
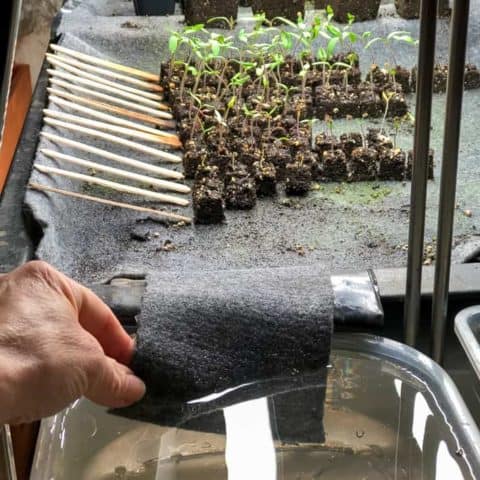
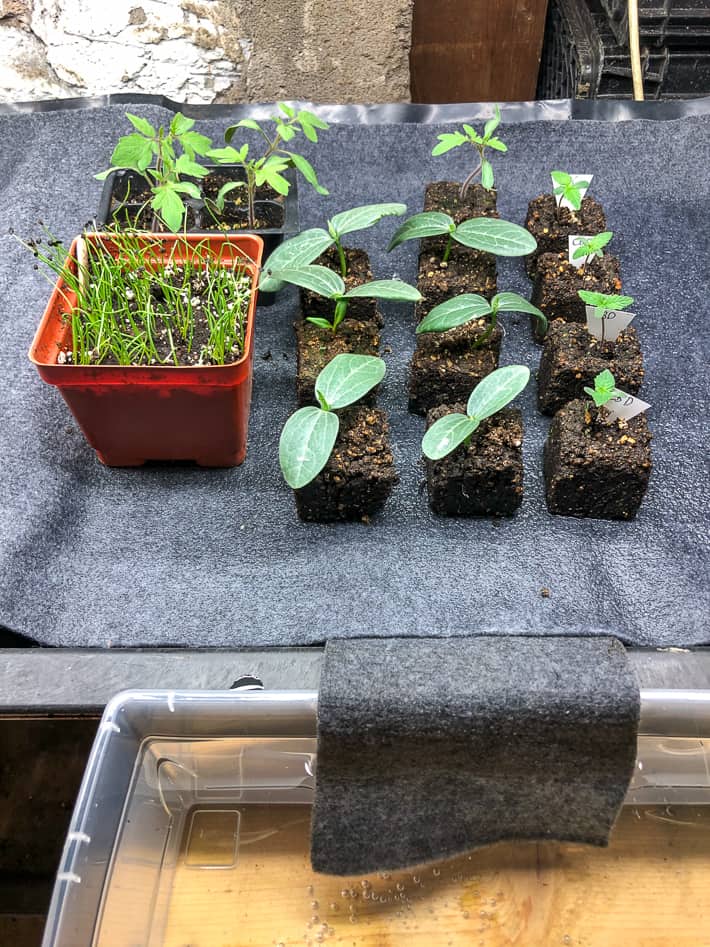
A capillary mat is a piece of fabric that you cut to whatever size you need and lay it down on a flat surface. It wicks up water from an external water source (a bucket or other container of water) and releases the exact right amount of water to any plants sitting on it.
That means with a capillary mat ...
- You never, ever have to water your plants.
- You never, ever have to guess if your plants are too wet or too dry.
- You can go on vacation and your plants will water themselves - for weeks.
This has changed everything for me. And it will change everything for you too.
Once you learn how to *properly* set it up it's foolproof.
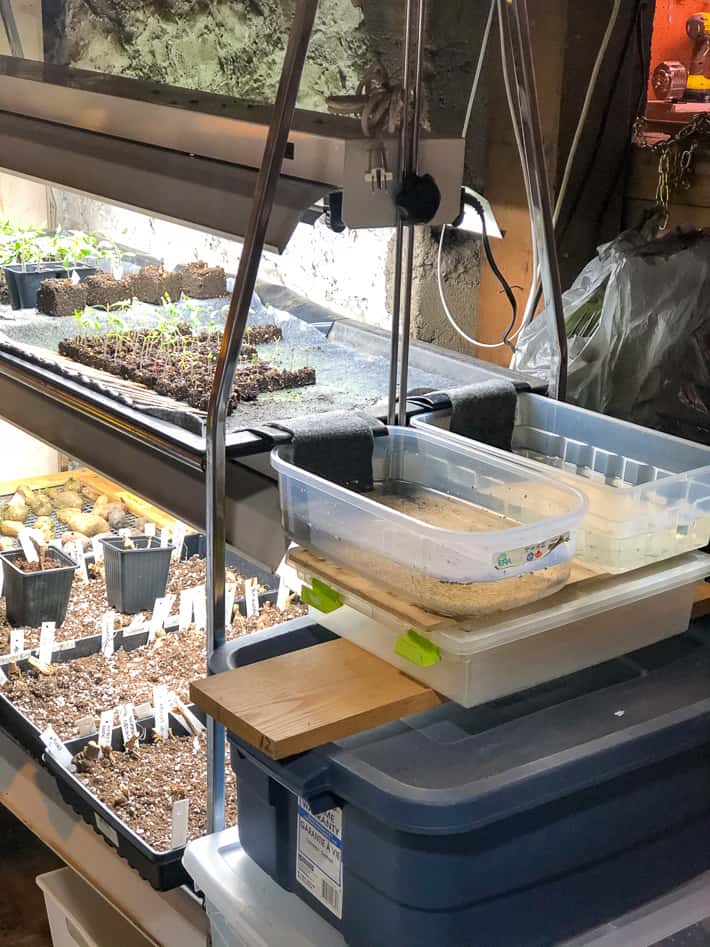
Please ignore my ugly setup. You can make a "cute" setup if you have it in you.
Setting up a Capillary Mat System
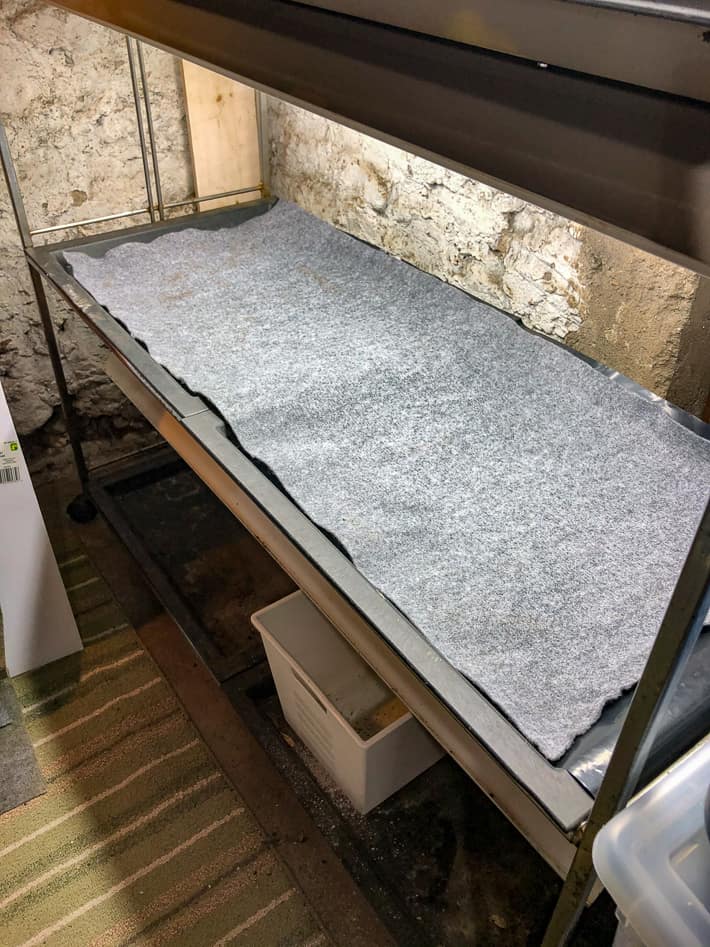
- Pick the area you want to set your plants. In my case, plants always go in my 3 tier grow light stand.
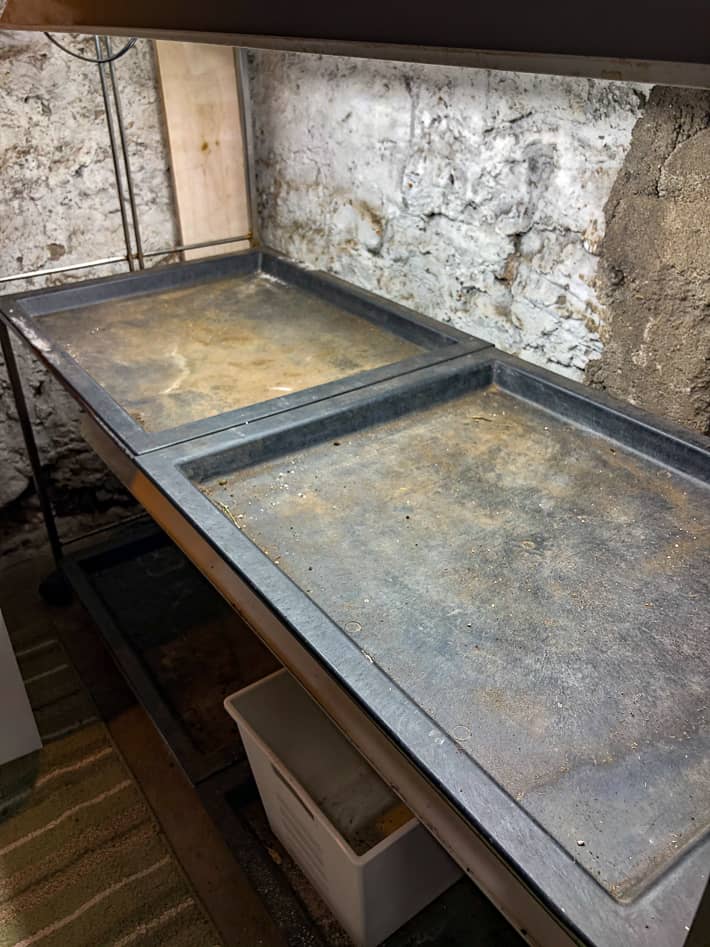
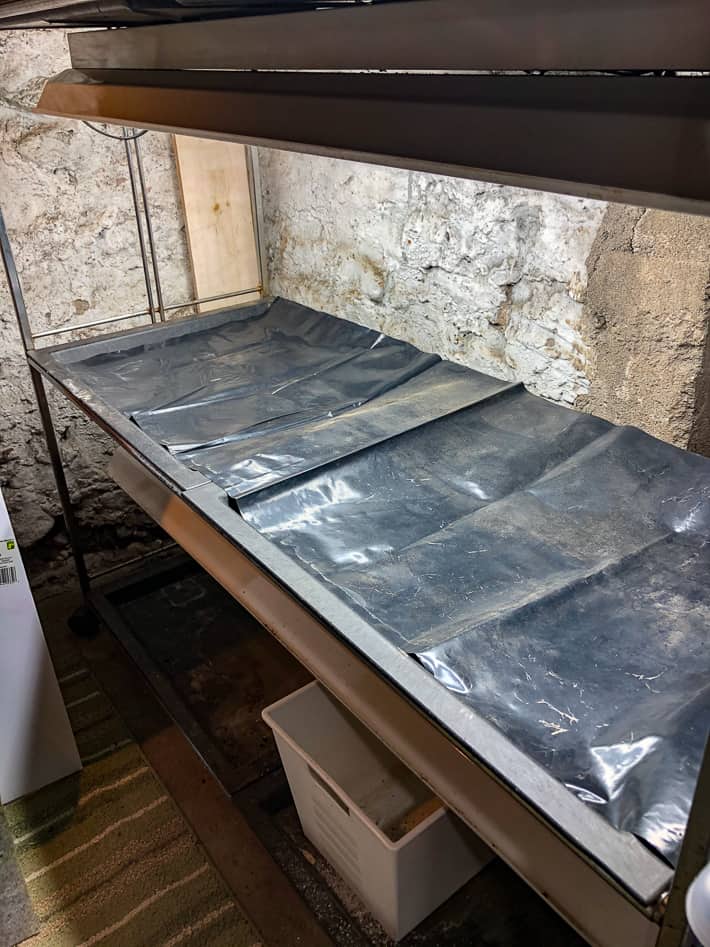
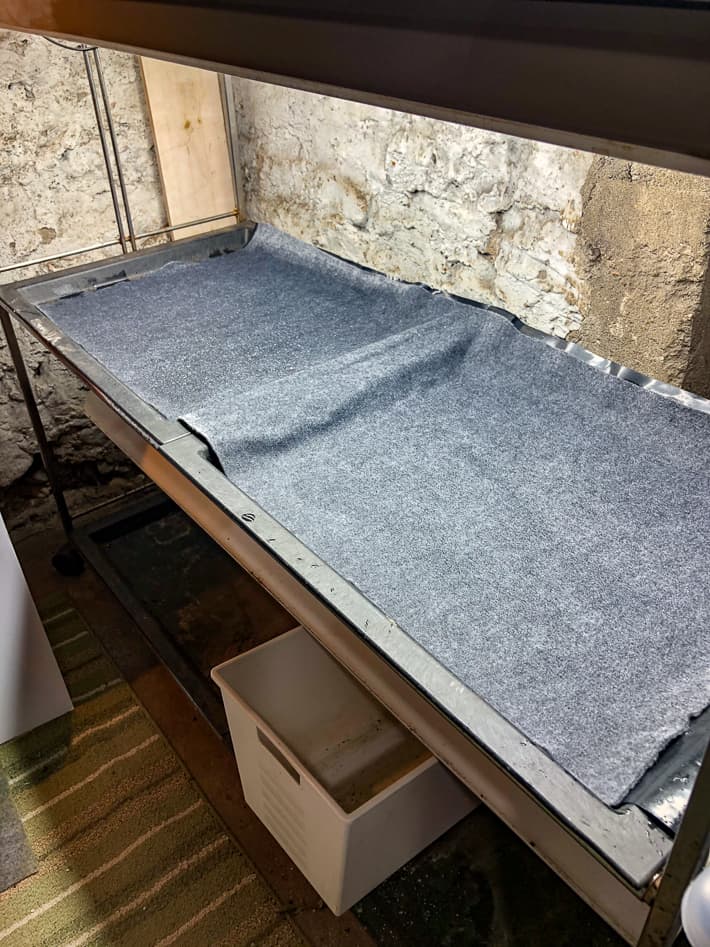
- Lay down plastic sheeting (it'll come with your mat) if you're placing the mat on wood or anything else you don't want to get wet. I laid plastic so the water wouldn't leak through the crack in between my two black trays.
- Cut the felt to fit the area, making it a little smaller than that plastic.
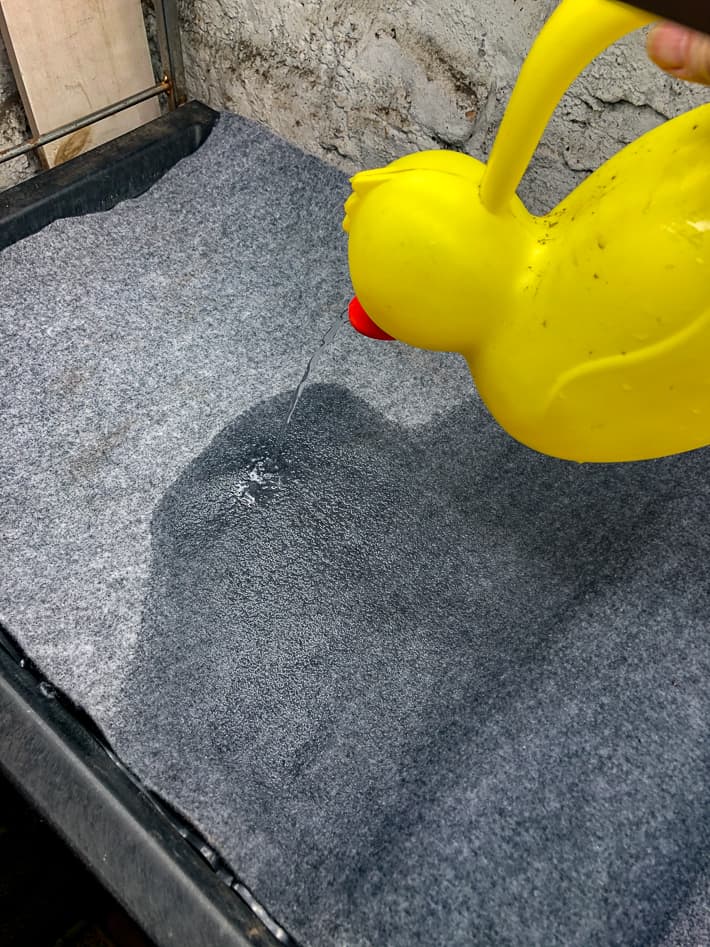
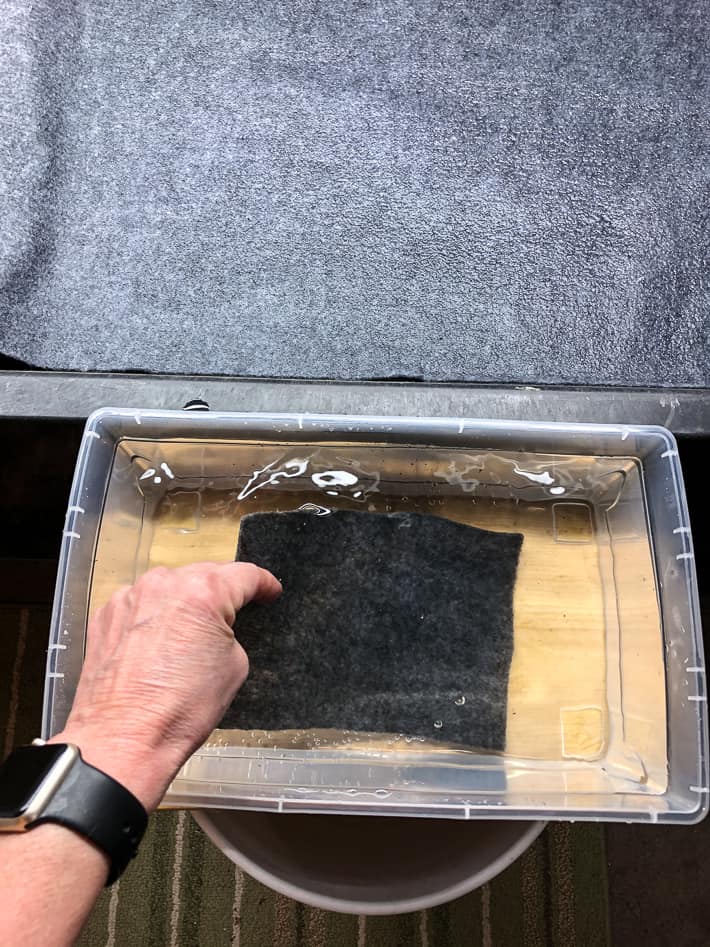
- Soak the mats thoroughly. New Mats won't soak the water immediately and you'll have to push the water around the mat with your hand. Older mats that have been used before soak more easily.
Would you like to save this stuff?
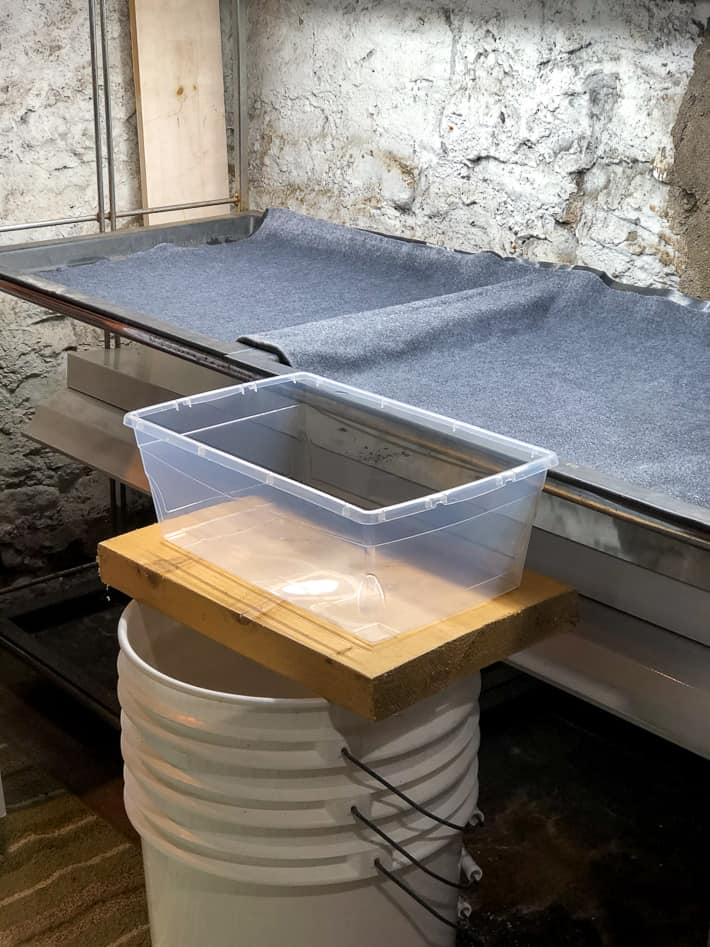
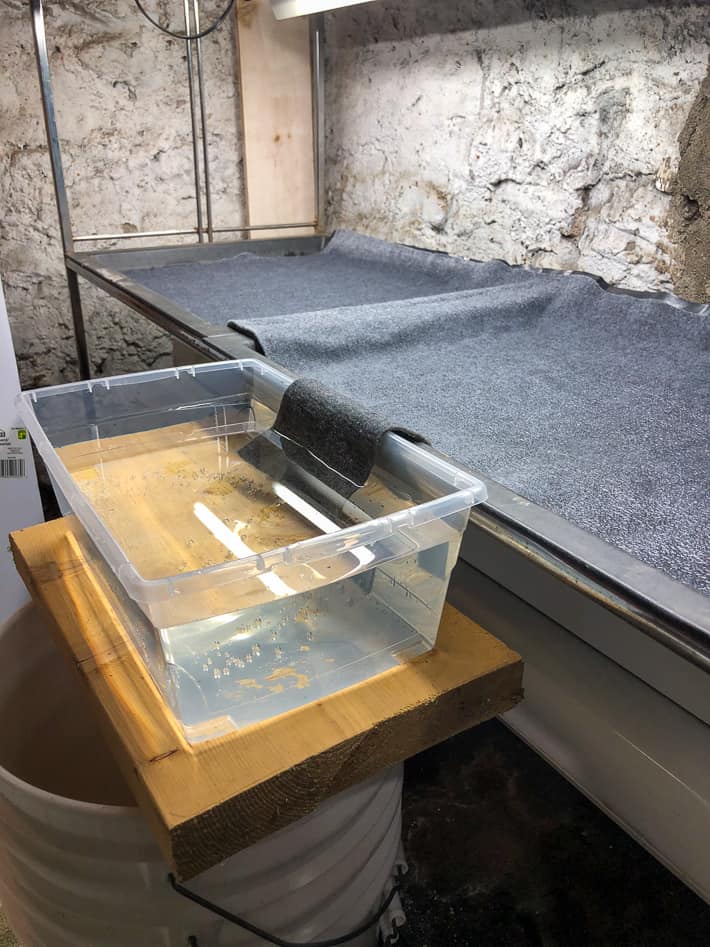
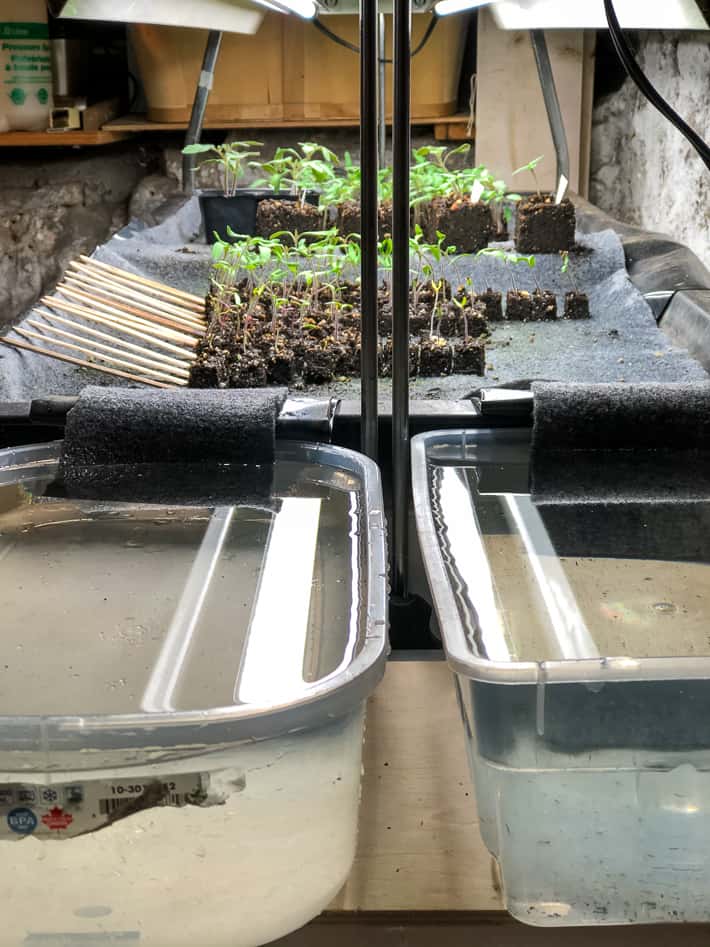
5. Once the mat is soaked, set up a water tight bucket, bin or planter so the lip of the container is level with the surface of the mat. **THIS IS VERY IMPORTANT** If the container you hold your water in is too low, the system won't work properly.
6. Fill the container with water.
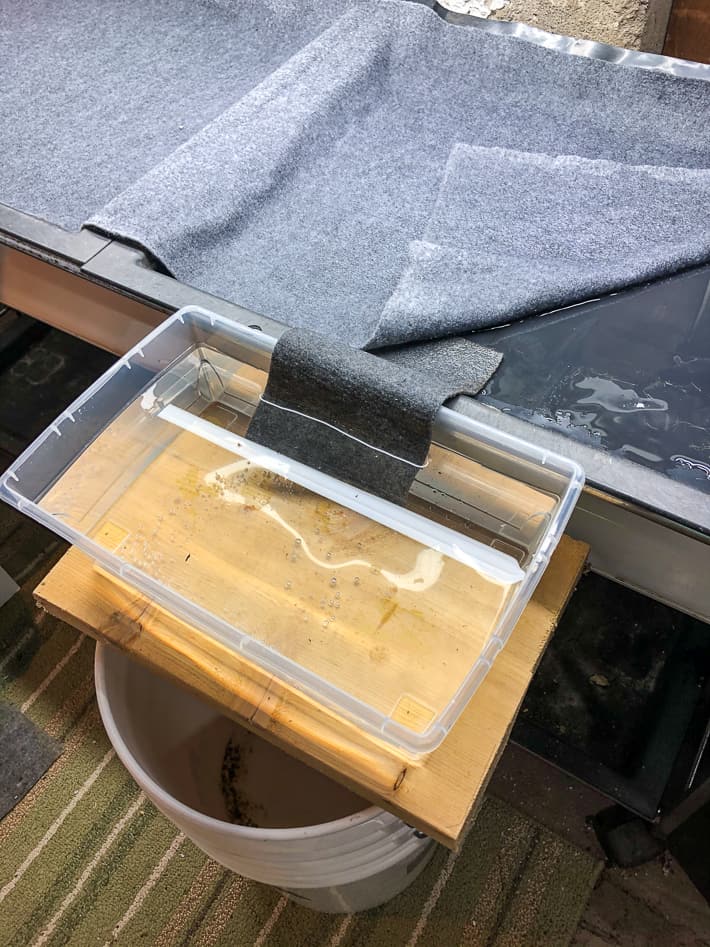
7. Cut a strip of capillary mat so it's long enough to run from the bucket to underneath the mat by several inches.
8. Soak the strip so it's fully absorbed water and then run it from the bucket or bin to underneath the capillary mat like a wick.
You're done. That's it. All you have to do is check to make sure there's still water in your bucket every once in a while.
The mat will automatically absorb the exact amount of water you need to water plants from beneath the perfect amount.
Capillary mats will work with soil blocks or pots that have holes right on the bottom. If the post has a raised bottom where the drainage holes are raised up, it won't work as well.
The reason your water source has to be level with the capillary mat is because it can only wick upwards for a few inches. If the drop down to the water is more than a few inches, the water won't be able to make it all the way up to the mat.
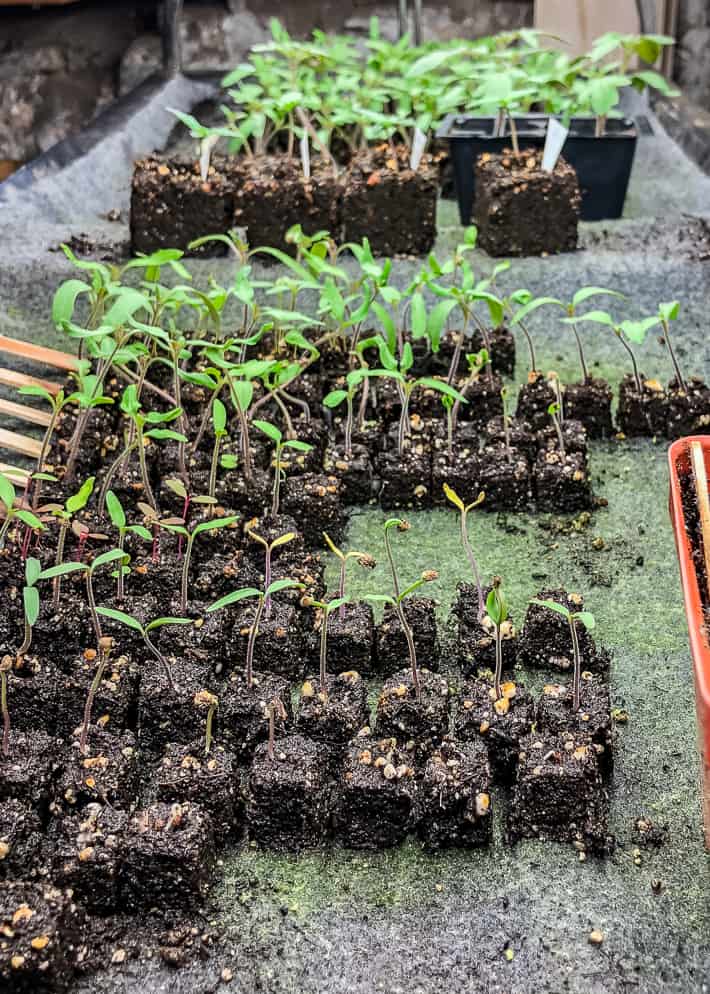
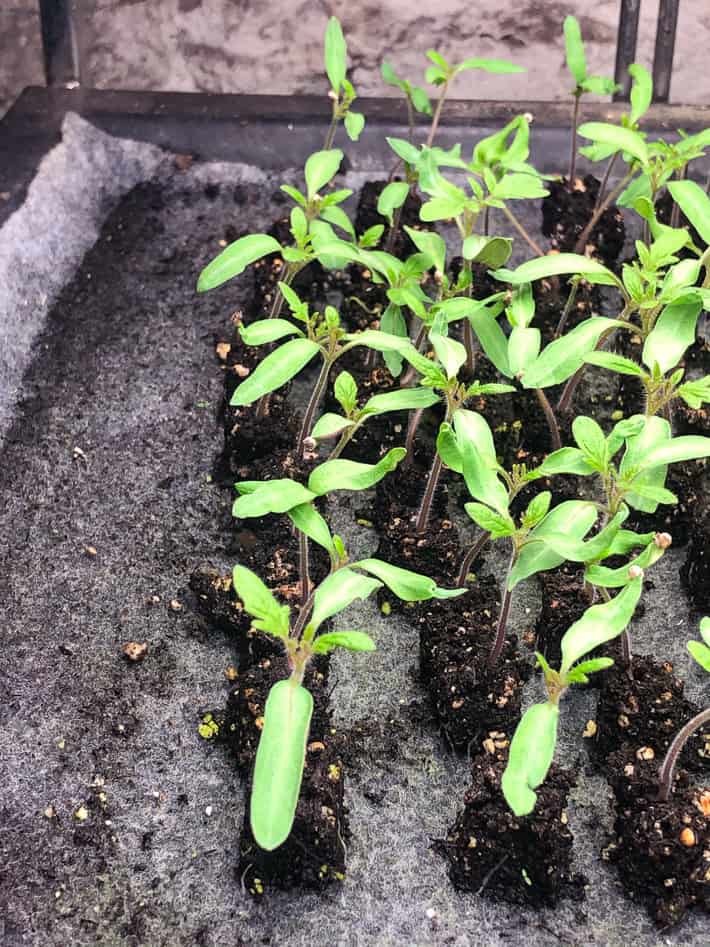
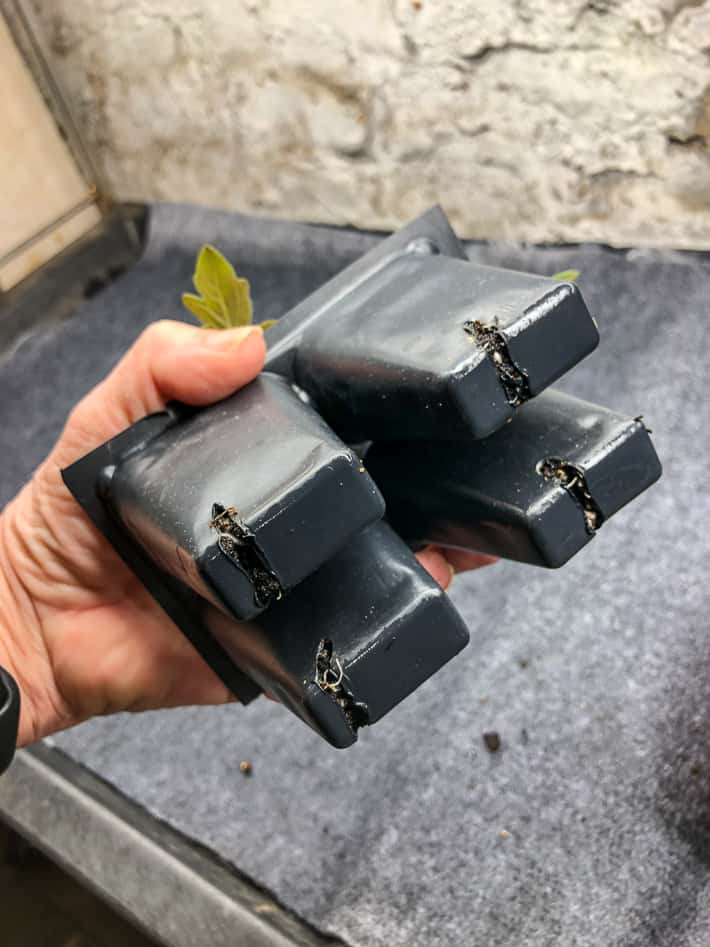
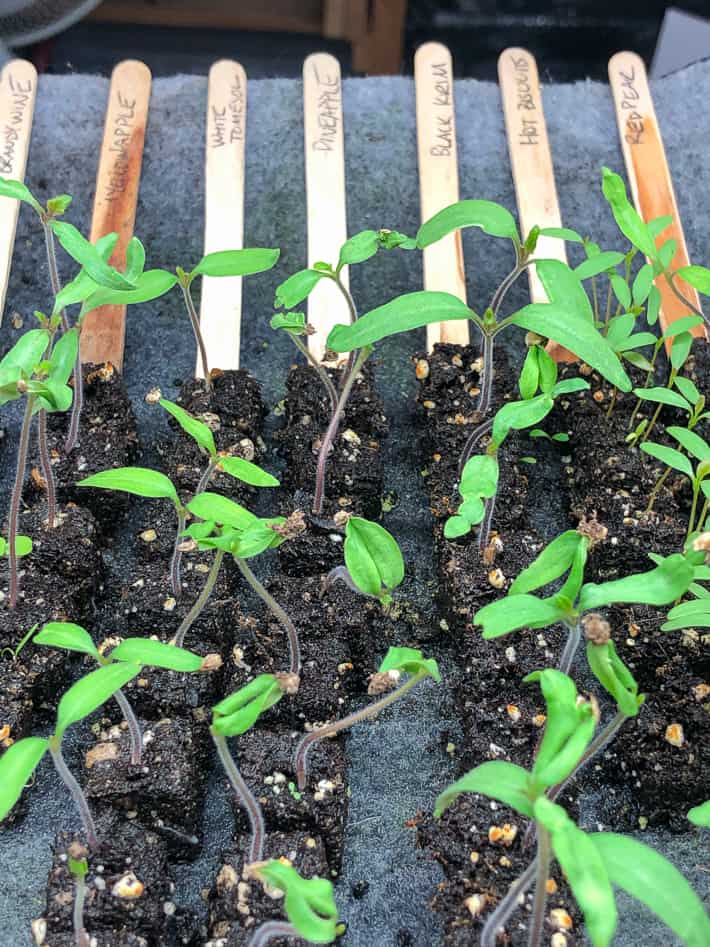
Capillary mats are ESPECIALLY kartwheel worthy when it comes to tiny, mini soil blocks. These tiny little cubes of soil are so small that they can dry out in hours. With a capillary mat they always have the perfect level of moisture.
I wrote a whole love letter to soil blocks and how to make them in this post. I use them for starting most of my seedlings.
PERFECT FOR COTTAGERS OR ANYONE WHO GOES ON VACATION
If you don't start your own seeds, don't reject this SYSTEM based on that fact! If you ever go away you can use these mats inside or outside to water your plants for weeks at a time.
Care tips for the capillary mat.
- When the season is over, I let the mats dry out then take them outside and brush all the dried dirt off of them. I shake them out like a rug (you could probably vacuum them too) and then I roll them up and store them in a bin.
- Don't ever squeeze water out of mats. Squeezing the material breaks it down and ruins its wicking quality.
- If it doesn't seem to be wicking make sure the mat is wet (if it isn't it won't wick) and the water source is level with the mat.
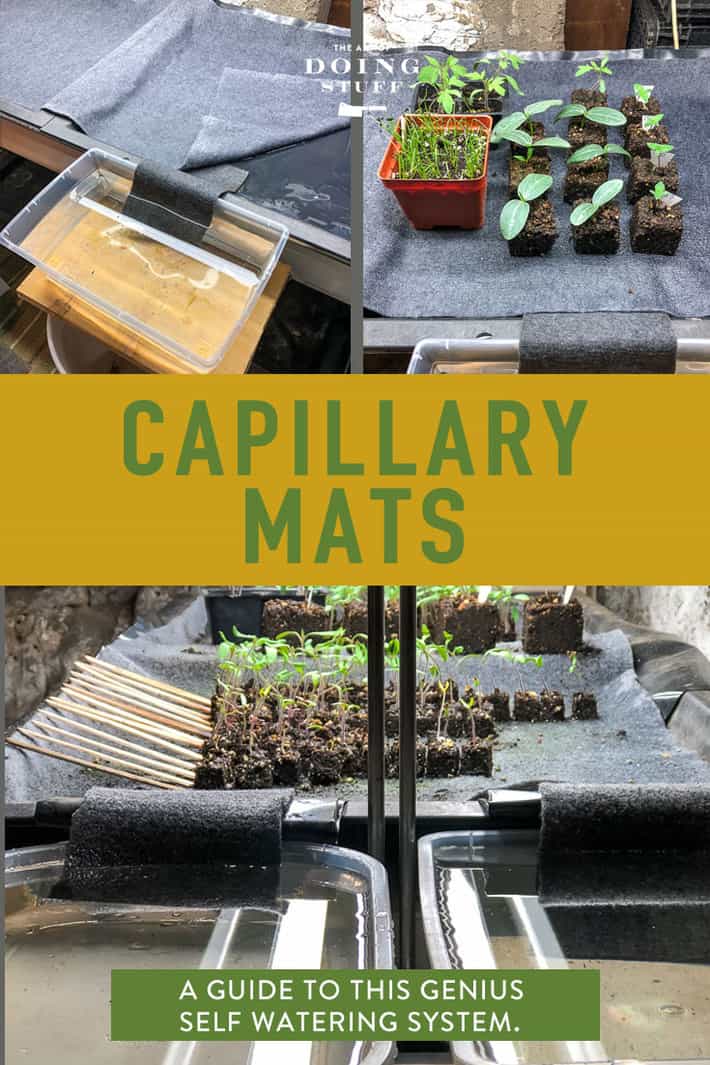
Automatic plant waterer.
How to set up and use a capillary mat system to automatically water your plants.
Materials
- Capillary mat
- Plastic sheet
- Bucket or tub
- Water
Instructions
- Pick the area you want to set your plants. In my case, plants always go in my 3 tier grow light stand.
- Lay down plastic sheeting (it’ll come with your mat) if you’re placing the mat on wood or anything else you don’t want to get wet. I laid plastic so the water wouldn’t leak through the crack in between my two black trays.
- Cut the felt to fit the area, making it a little smaller than that plastic.
- Soak the mats thoroughly. New Mats won’t soak the water immediately and you’ll have to push the water around the mat with your hand. Older mats that have been used before soak more easily.Once the mat is soaked, set up a water tight bucket, bin or planter so the lip of the container is level with the surface of the mat. THIS IS VERY IMPORTANT If the container you hold your water in is too low, the system won’t work properly.
- Fill the container with water.
- Cut a strip of capillary mat so it’s long enough to run from the bucket to underneath the mat by several inches.
- Soak the strip so it’s fully absorbed water and then run it from the bucket or bin to underneath the capillary mat like a wick.
- Place your plants on top of the mat and you're done!
- Water when you see your water source is getting low.
Notes
- Don't squeeze excess water out of the mats - squeezing can ruin the structure of the mat so it won't work as well.
- Using a shallow wide container for your source water is best because the felt can't wick water up any higher than 3".,
- Great for soil blocks or plants in pots.
- When you first soak the mat you may need to swish the water around on top with your hand to get it to soak in. Don't squish. Just swish.
If this watering system interests you in any way don't be an idiot and put it off for years like I did. Just get it. It works.
Get it on Amazon in the US.
Get it on Amazon in Canada or at Lee Valley.
If you have anyyyyyy questions about it just ask me. I might not have the answer but I'll put a really valiant effort into making something up. Promise.



JENNIFER RICE
Hello! In your 3rd photo in the article that shows the two side-by-side reservoirs and the plants on the capillary mat, how long would you estimate that water would last before needing to be refilled? I'm trying to figure out how much water I'll need for a 3-week vacation. Thank you!
Karen
Hi Jennifer. It depends on the size of your water container and the size of your plants. Big plants go through a lot more water than small ones. And remember the water container can't be deep because the wick can only lift water a few inches. You need a wide container for holding a large volume of water, not a deep one. ~ karen!
Lina
Amazing idea! I’m so excited to try this out with my indoor plant collection. One question though, how do you fertilise with this method? I normally do that during watering with liquid fertiliser added to the mix. I don’t assume the mats will absorb the fertiliser as well but rather filter it out, also it could cause the mats to have unpleasant growth on them of some kind.
Would love to learn more.
Karen
Hi Lina! I used liquid fertilizer right in the water last year and it worked very well. :) ~ karen!
Andre
Hi Karen
I setup in my indoor home nursery several propagators with capillary mats to grow tomatoes and peppers from seeds to transfer them to raised beds
for full grow. How do you fertilize your seedlings, from the reservoir or on seedlings directly?
Thank you kindly for tips.
With Regards
Andre
Karen
Hi Andre! I have a post on that coming up. I fertilize twice. The first way is by wetting the starter soil before planting with a seed starting fertilizer. I keep a tub of this soil (moistened with fertilized water) ready for starting seeds. When I pot *up* seedlings I do the same thing with a different fertilzer using it to water the tub of potting up soil. These are the only two times I fertilize the seedlings. In the past I've also added a small amount of liquid fertilizer to the reservoirs and that works well too. ~ karen!
Tami
Karen, we tried this recently and we had a few questions. How wet is too wet for soil blocks? Also, the capillary mats kept the bottom 2/3 of the 2" soil blocks very wet, but the top 1/3 where the seeds are seemed to dry out. Any help would be appreciated.
Karen
Hi Tami! Sometimes you have to give the watering system a little help in balancing itself if it isn't acting properly. For best results, everything should be evenly wet when you set the system up. So the mat should be moistened until wet but not puddling, and the soil in the plants you're adding to it should be wet as well. This allows the soil to easily suck up the water. Does that make sense?
What you should do is carefully water the top of the soil blocks until they're just damp if you can. This will help them suck up water on their own in the future.
If you're just starting seeds they also need to be in a controlled environment so they don't dry out. They need to be covered with a clear plastic dome or something until the seeds sprout, then it can be removed.
Finally - with soil blocks, when you're making them you'll think the soil is too wet, but that usually means it's just right. ;). Once you pack the soil blocker and press the block out, excess moisture will be squished out.
If you need clarification just let me know. ~ karen!
lyanne
“Don't squish. Just swish.” that’s weirdly and perfectly descriptive! lol
Karen
O.K. now you're going to make me go back to reread this post so I can remember what I wrote, lol. ~ karen!
Gail
Hi, when you use the soil blocker and the capillary mat, do you release the soil blocker directly onto the capillary mat? I have ordered my supplies! Excited to get started! Gail
Karen
Hi Gail! I usually release them onto my workbench or a table. Then I get them planted, or seeded and place them on the mat. ~ karen!
Leasa Dornbier
I've been anxiously awaiting seed starting time for a year since I first saw this article! I set it all up and in 24 hours went to check on my soil blocks and my water wicking worked so well that it made dirt soup out of my little blocks. Do you think my wicking piece was too thick? My water source and seedling container were equal in height. What do you think I did wrong? TIA
Pamela
I have the same question. I set up the system so the top of the tray is equal with the top of the water container, but it is wicking too well! I have puddles in my tray.
Karen
Hi Leasa,
I remember mine doing that once last year and I can't remember why! All I can remember is I did resolve it. It could just be a matter of overwatering it before you add the wick. Try letting the mat dry out until it's just evenly wet all over (just remove the wick) and add the wick back in. Good luck!
karen
Ramona
Lower the level of the stored water.
Lyanne
I think that the mats fill up with puddles when first watered..I just let mine dry out, and start again. They work fine now.
Gail Wilson
I set up your system but am doing it (this year) with larger plants (vegies) in larger pots with holes in bottom. The mat seems to be wet enough and wicking but should I have first pre-watered the larger pots? You know how a slightly damp sponge can get wetter faster than a dry one? Wondering if same might be true here. In other words, the way bigger pots than your tiny seedling soil blocks may not be able to suck up water fast enough. After 48 hours, I felt the need to top water some. Still watching to see what happens in next few days. The reason I have such larger pots is letting my purchased broccoli, cabbage, kale, etc. seedlings get enough true leaves so flea beetles don't make lace out of them. And soil to be warm enough here in NH to plant the tomatoes and squashes.
Karen
Hi Gail! Sorry for the delay. Yes if your pots or plants are dry it's best to make sure they're watered the first time they're on the mat, but they generally suck up the water anyway. ~ karen!
Erin Michelle Hall
Where did you get your large black trays from?
Jenni
I would also like to know!
Grace
I purchased a capillary mat and love it! Quick multi-part question. Do you fertilize your seedlings? And if so, do you use the capillary mat to fertilize? Do you put the fertilizer in the reservoir or on your seedlings directly?
Love your blog, by the way. I often discuss your insights with anyone that will listen.
Ada Berry
Hi Karen,
This is probably going to be one of those "DUH" questions.
If I leave for 2 weeks, or even 1, the water may evaporate...so, is it a problem to fill the water tubs so that the water level is above the level of the soil blocks?
Thank you
Karen
Hi Ada. The more plants you have on the mat the more it will go through water. So the best solution would be to put fewer plants on more mats if that makes sense? In terms of using less water. If you're worried about evaporation from the actual water container, just put something over the top of it like a lid. ~ karen!
Clare Shaw
Hi Karen
I'm going away in a couple of weeks, and having seen your post I set up a system of capillary matting in my greenhouse, with enough time to check it all works. I have a big tub as a reservoir, and I have it sitting on the bench. The trouble is, it's wicking up so much water it's dripping everywhere and the water is only lasting about 24 hours. I need it to last a week! I've reduced the size of the 'wick' but it hasn't done much. If I drop the reservoir to the level of the bench will that help? I know that's what you said, but it means rigging up a complicated stack of stuff to hold the reservoir, so I've been avoiding it! Thanks for all the great tips!
Karen
Hi Clare, keep the reservoir level with the mat. It's important. ALSO if the mats are soaking wet and drowning they're going to stay that way until you let them dry out. So remove the wick until the mat has dried out then start again with around a 4" wide wick. ~ karen!
Clare Shaw
Great, thank you. I managed to set that up last night and the uptake of water has gone down dramatically. Now I'm just keeping an eye on whether it's uptaking enough to keep the mat wet. There are lots of plants on there so I think they've absorbed the excess water. The mat is also on a slatted bench so most of the excess has dripped onto the floor. Thanks again! I'm really excited to have got this set up and hope it will be really useful for routine watering.
James
Karen,
I have some pieces of civil construction felt fabric that is about 1/8th" (3 cm) thick, it is thicker than fabric felt sold in garden supply stores. Do you think it would work as a wicking material for my starters?
Karen
You'd have to try it James, but part of what makes this material (which is similar to but not felt) is its excellent wicking quality and the fact that it delivers just the right amount of moisture. But if you have some fabric you might as well try and see if it works! Let me know how it goes. ~ karen
Deborah Kukla
After I ordered the mat through your link, I had happy visions of you becoming fabulously wealthy from all the orders placed by your fans. (I hope you get a %?)
Now I see everyone proudly stating they’re buying the mat elsewhere!!!
Anyway, thanks for all you do. I really appreciate it!!
Xoxo❤️