I wanted to test this system out for a couple of seasons before I recommended it to you. Now is the time to let you all know about this plant waterer I've been using for my seedlings because it's life changing. Today I introduce you to the capillary mat.
The quickest way to kill a plant is by jumping up and down on it. Just behind that is over or under watering. If you underwater a plant it will die. If you overwater a plant it will die. The smaller the plant is the more quickly it will croak from either of these things.
Watering is where most people get into trouble when they're starting seeds.
Table of Contents
Problems from under watering
Letting the soil dry out during the germination phase of a seed is deadly. If the seed has already cracked open when the soil dries out, all of the insides of the seed dry out too. That means its reproductive organs shrivel up and croak.
Letting the soil dry out during a plants growing phase will either kill the plant because of lack of hydration or it can stress it so much that it might continue to grow but not the way you want it to. Stress on hot peppers can make them even hotter by triggering them to produce more capsaicin (the oil that makes peppers hot.) Although this is a bit of a contested theory.
Problems from over watering
Letting the soil remain too wet during the seedling phase of growing can often cause a condition called Damping Off. Damping off is a soil borne disease that LOVES wet conditions. You might have the fungus in your soil and not even know it if you never overwater.
Damping Off
Damping off is a fungal disease that causes seedlings to rot at the soil line. The stem just turns black, withers up and seemingly dies overnight. One day you have perfectly healthy looking seedlings, the next morning they've all croaked and fallen over.
Damping off normally only kills seedlings, not larger more established plants.
O.K. that's enough blah, blah, blah because I really want you to see this watering system I've been using because it's SO effective. It works EXACTLY how it says it's going to.
The Capillary Mat
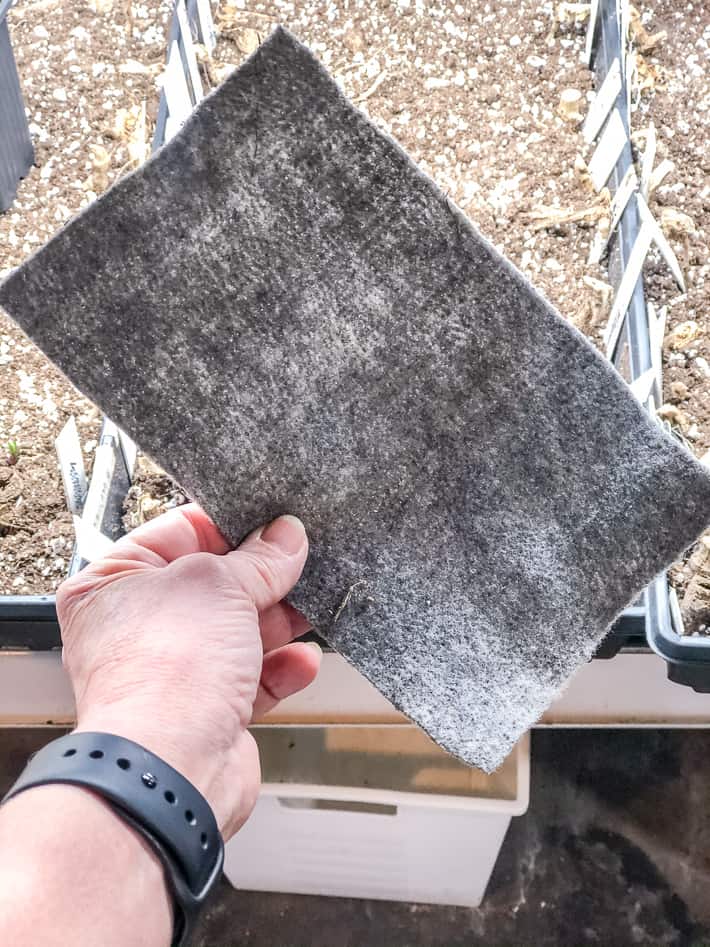
It's called a capillary mat system. A capillary mat looks like a piece of felt and is similar to felt, but it's not the same. For this to work as well as it has for me, you need to get genuine capillary mats. You can get them on Amazon or at Lee Valley.
Most local hardware or garden centres (around here anyway) don't carry them but I suspect they will in a couple of years the same way they didn't used to carry seed starting mats but now do
What the hell is a capillary mat?
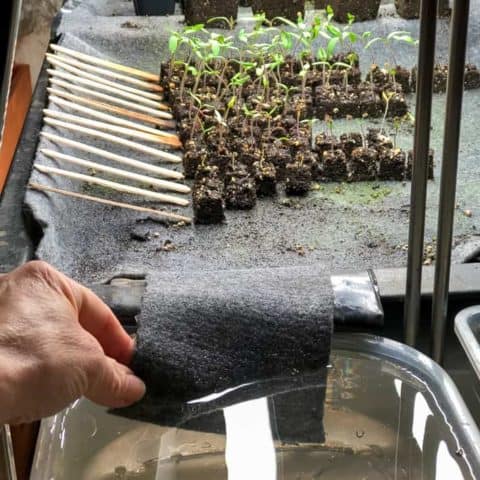
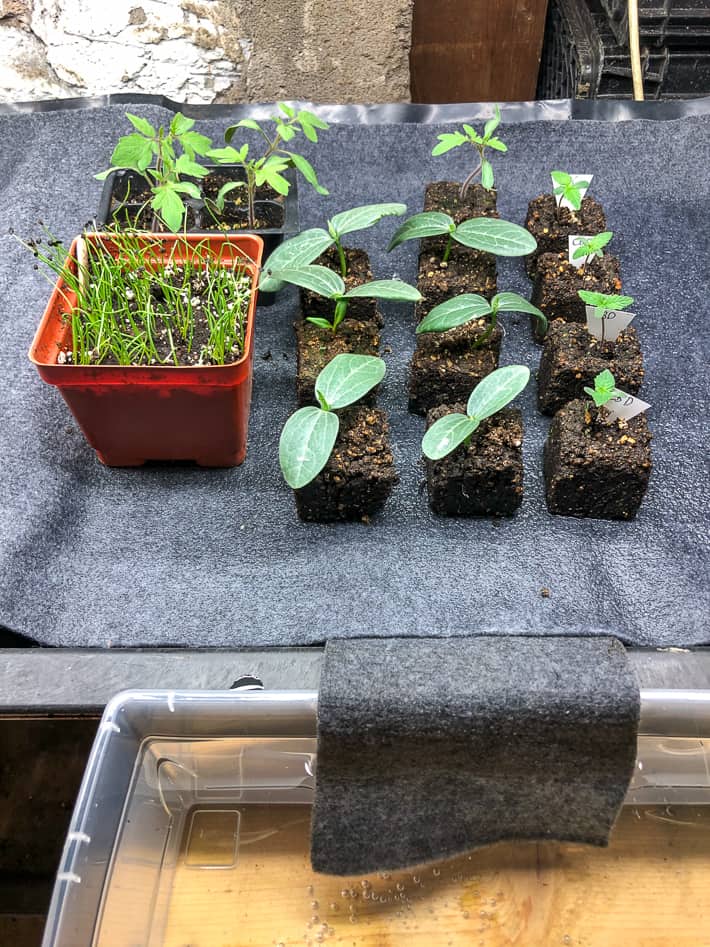
A capillary mat is a piece of fabric that you cut to whatever size you need and lay it down on a flat surface. It wicks up water from an external water source (a bucket or other container of water) and releases the exact right amount of water to any plants sitting on it.
That means with a capillary mat ...
- You never, ever have to water your plants.
- You never, ever have to guess if your plants are too wet or too dry.
- You can go on vacation and your plants will water themselves - for weeks.
This has changed everything for me. And it will change everything for you too.
Once you learn how to *properly* set it up it's foolproof.
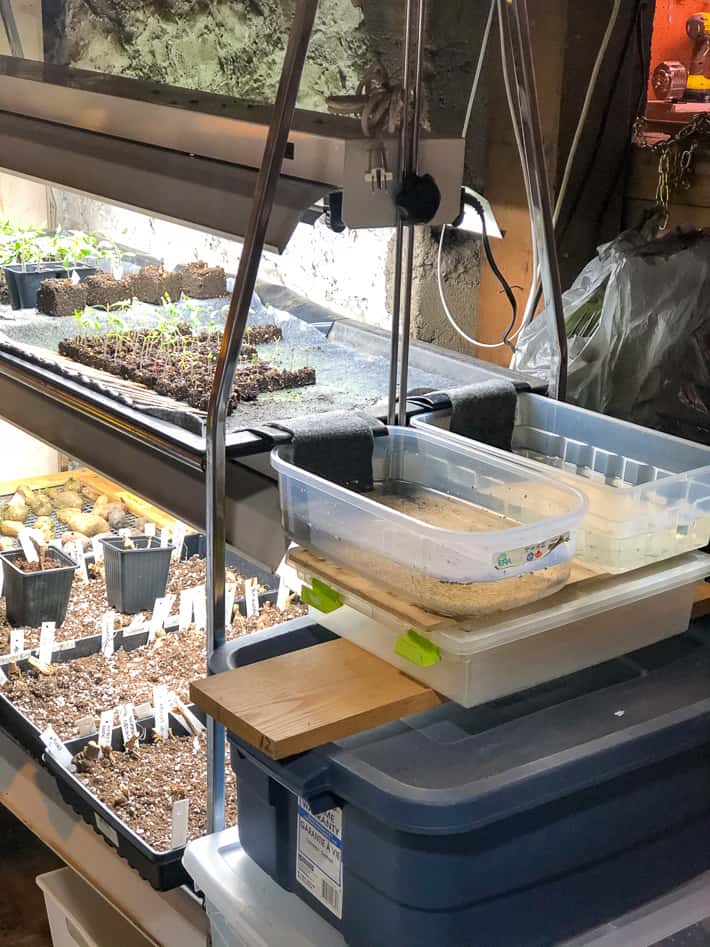
Please ignore my ugly setup. You can make a "cute" setup if you have it in you.
Setting up a Capillary Mat System
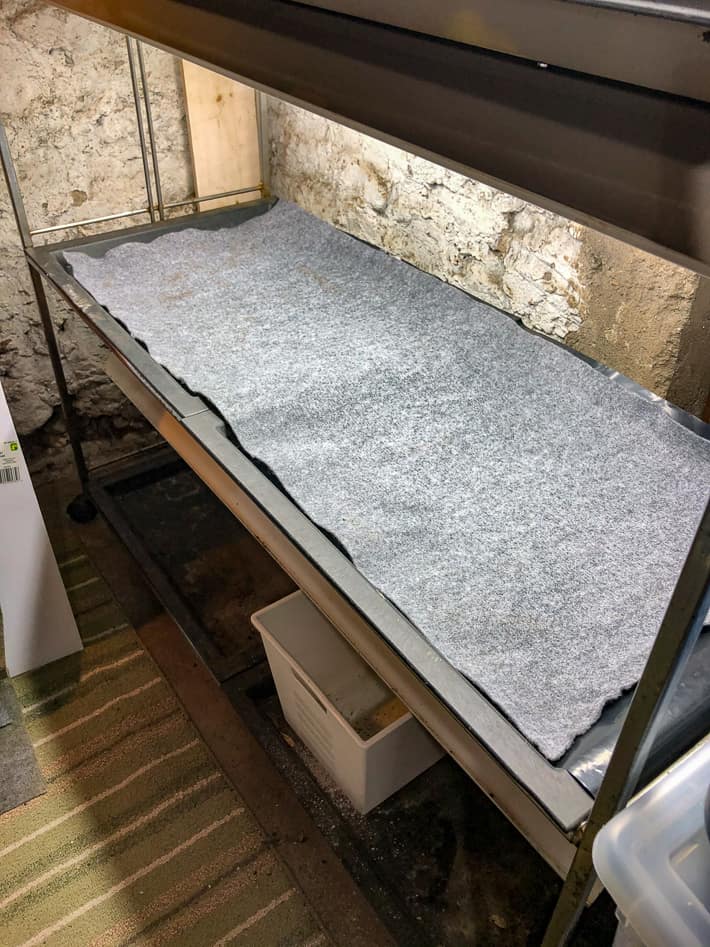
- Pick the area you want to set your plants. In my case, plants always go in my 3 tier grow light stand.
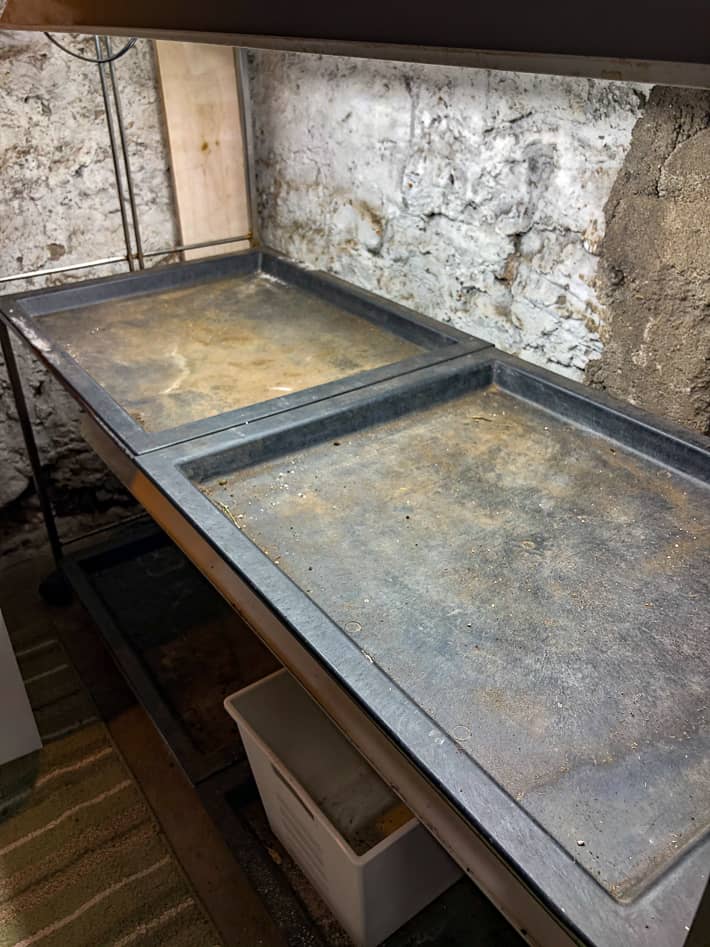
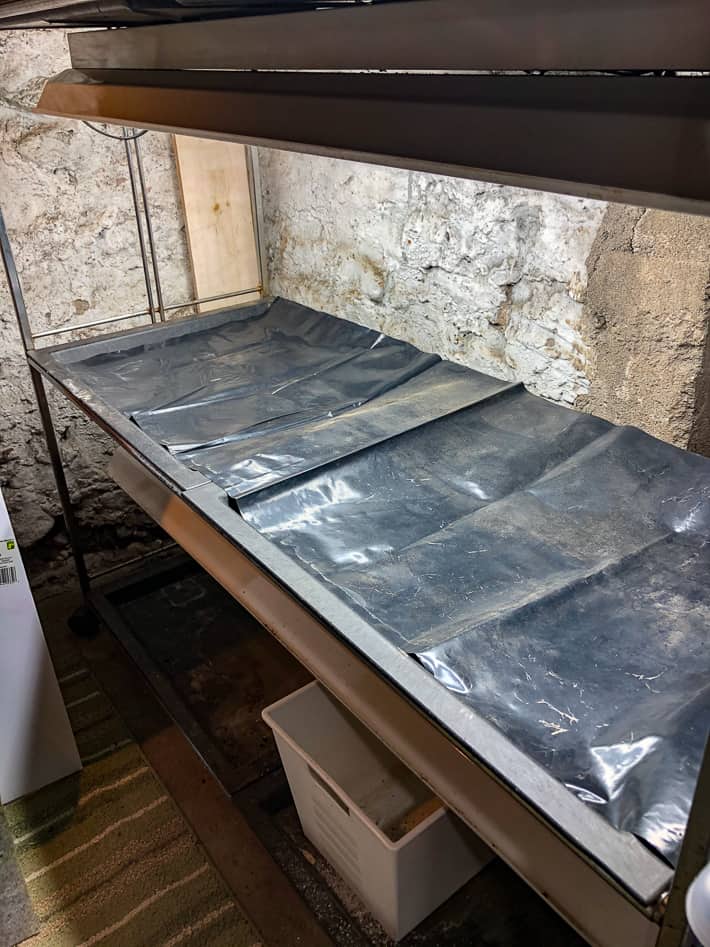
- Lay down plastic sheeting (it'll come with your mat) if you're placing the mat on wood or anything else you don't want to get wet. I laid plastic so the water wouldn't leak through the crack in between my two black trays.
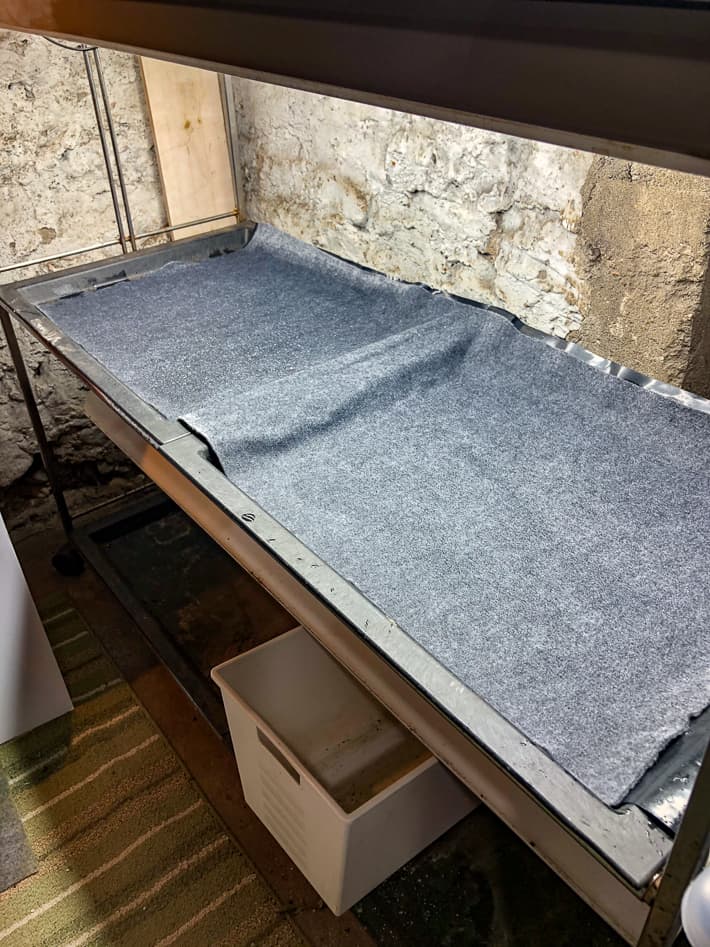
- Cut the felt to fit the area, making it a little smaller than that plastic.
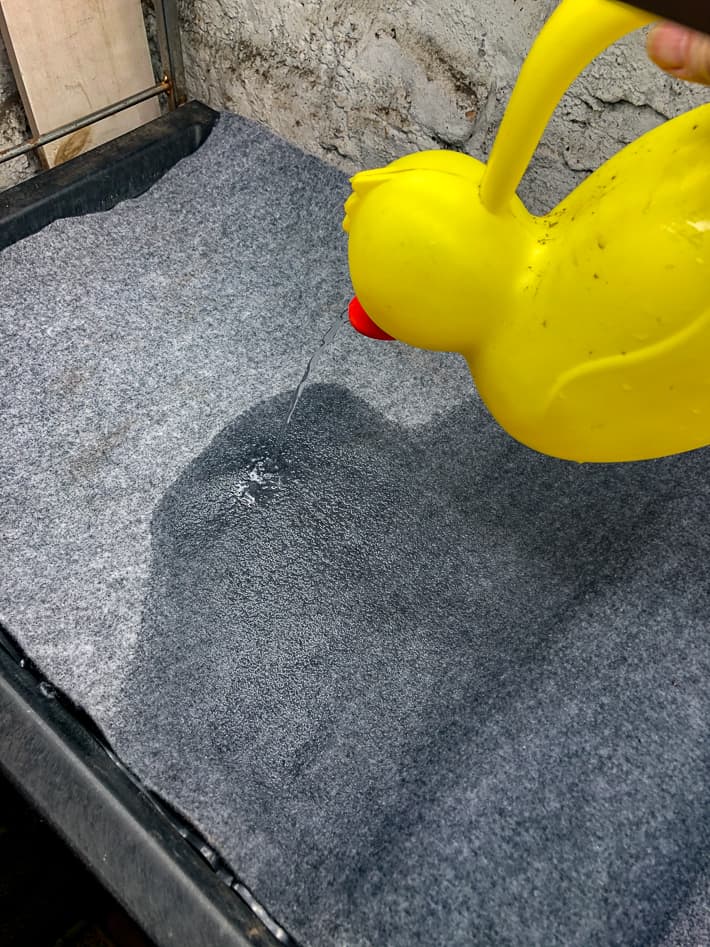
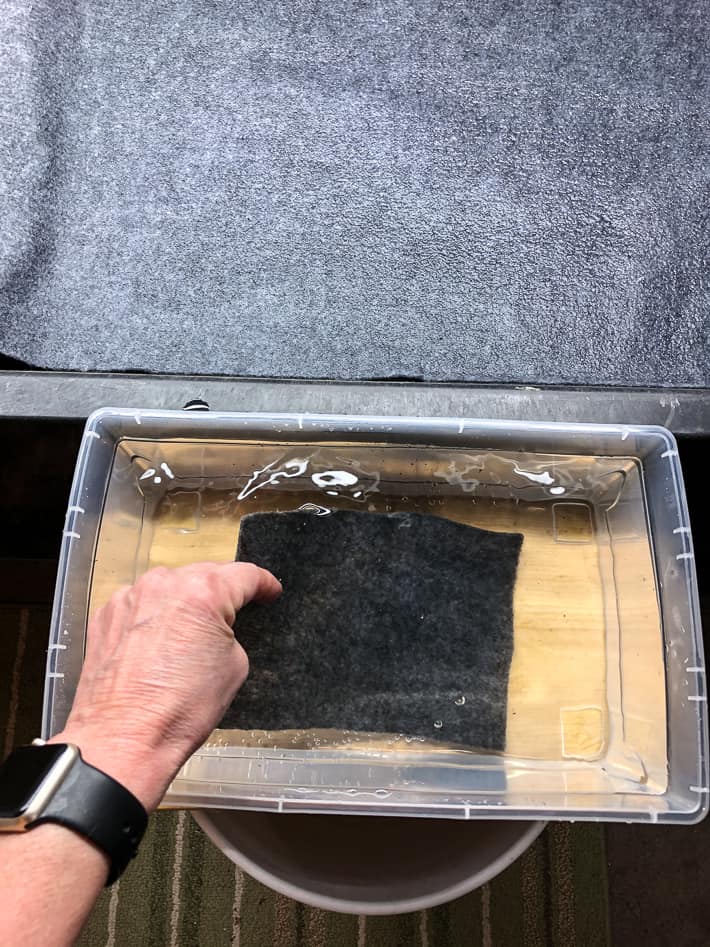
- Soak the mats thoroughly. New Mats won't soak the water immediately and you'll have to push the water around the mat with your hand. Older mats that have been used before soak more easily.
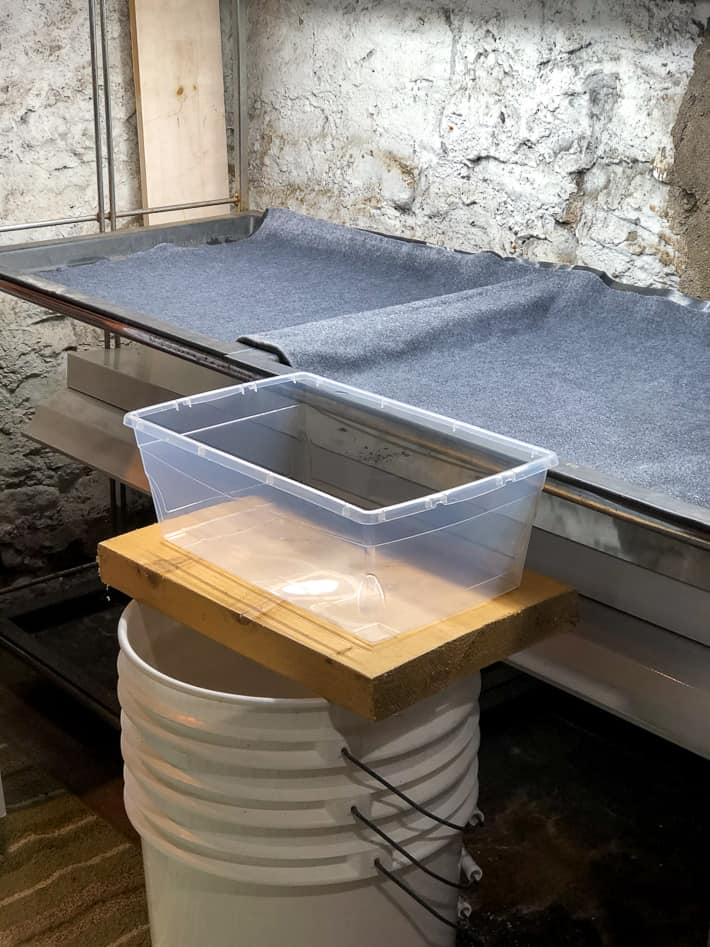
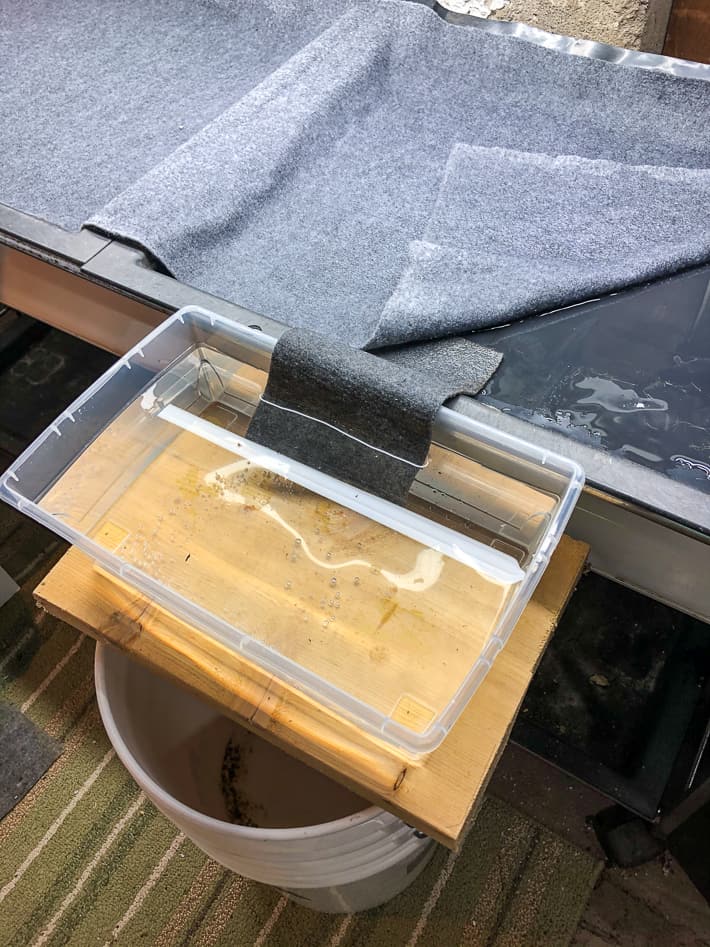
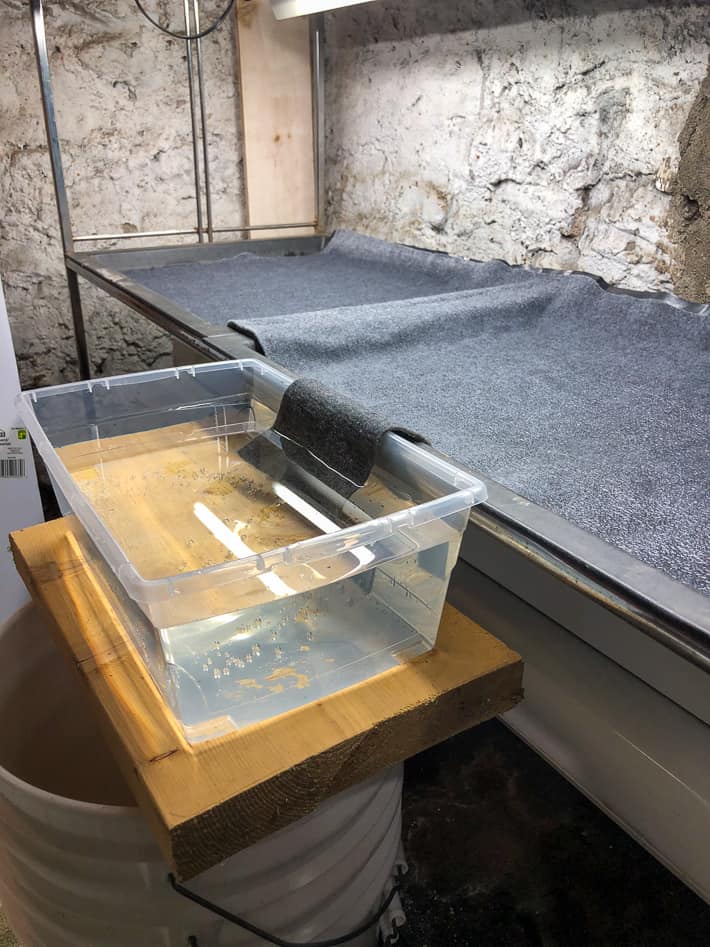
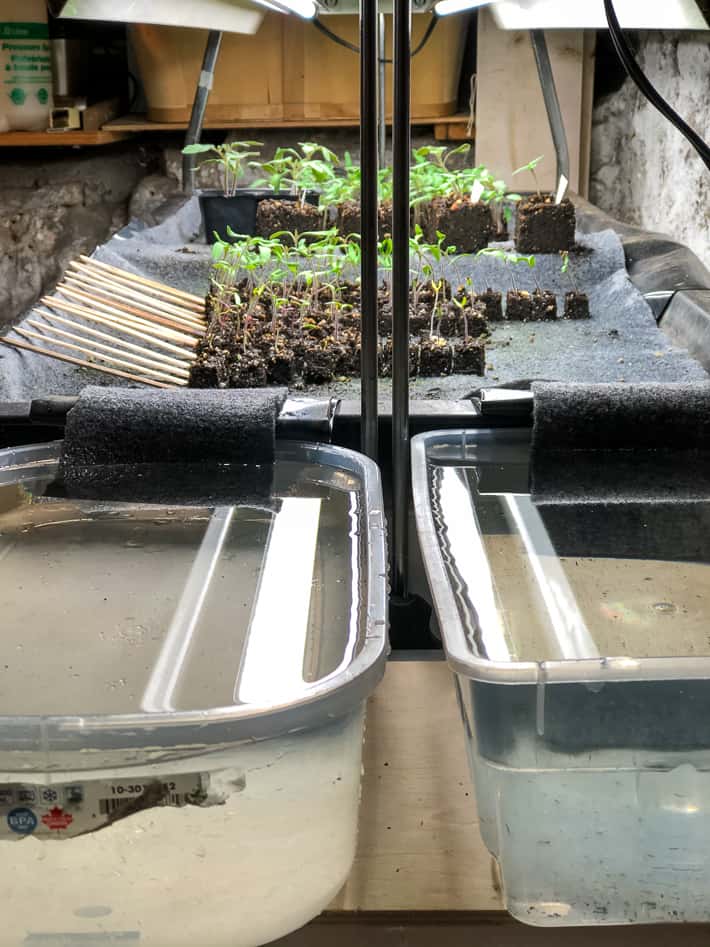
5. Once the mat is soaked, set up a water tight bucket, bin or planter so the lip of the container is level with the surface of the mat. **THIS IS VERY IMPORTANT** If the container you hold your water in is too low, the system won't work properly.
6. Fill the container with water.
7. Cut a strip of capillary mat so it's long enough to run from the bucket to underneath the mat by several inches.
8. Soak the strip so it's fully absorbed water and then run it from the bucket or bin to underneath the capillary mat like a wick.
You're done. That's it. All you have to do is check to make sure there's still water in your bucket every once in a while.
The mat will automatically absorb the exact amount of water you need to water plants from beneath the perfect amount.
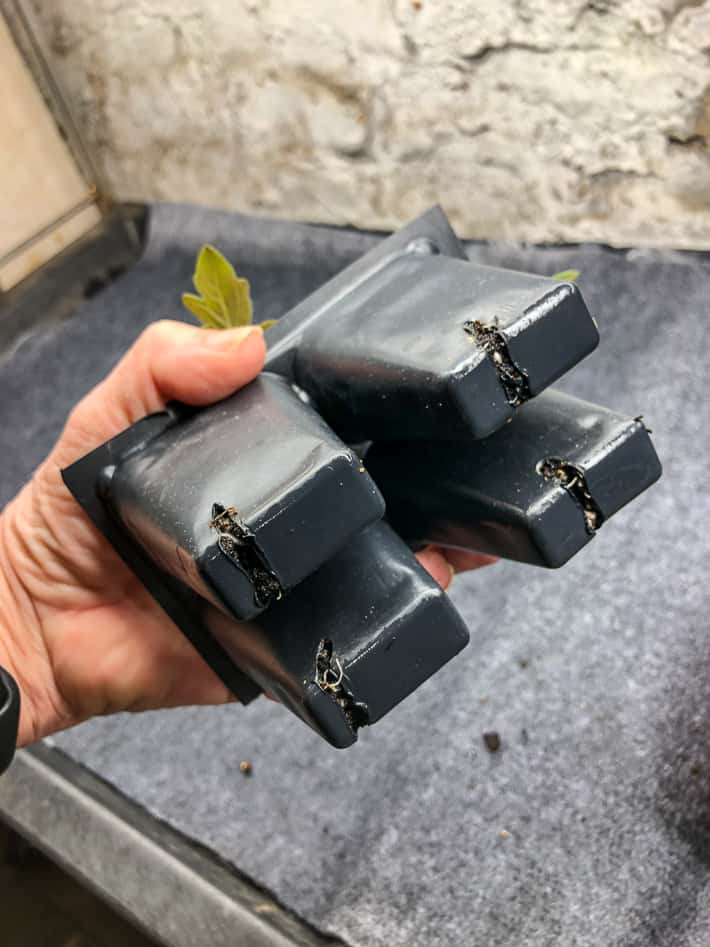
Capillary mats will work with soil blocks or pots that have holes right on the bottom. If the post has a raised bottom where the drainage holes are raised up, it won't work as well.
The reason your water source has to be level with the capillary mat is because it can only wick upwards for a few inches. If the drop down to the water is more than a few inches, the water won't be able to make it all the way up to the mat.
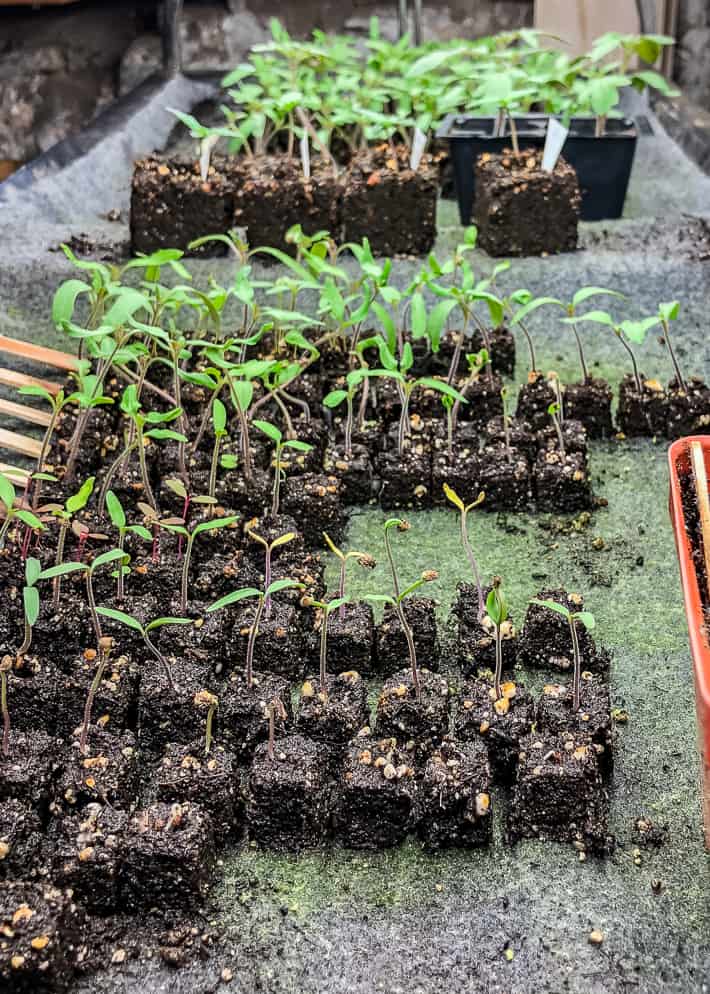
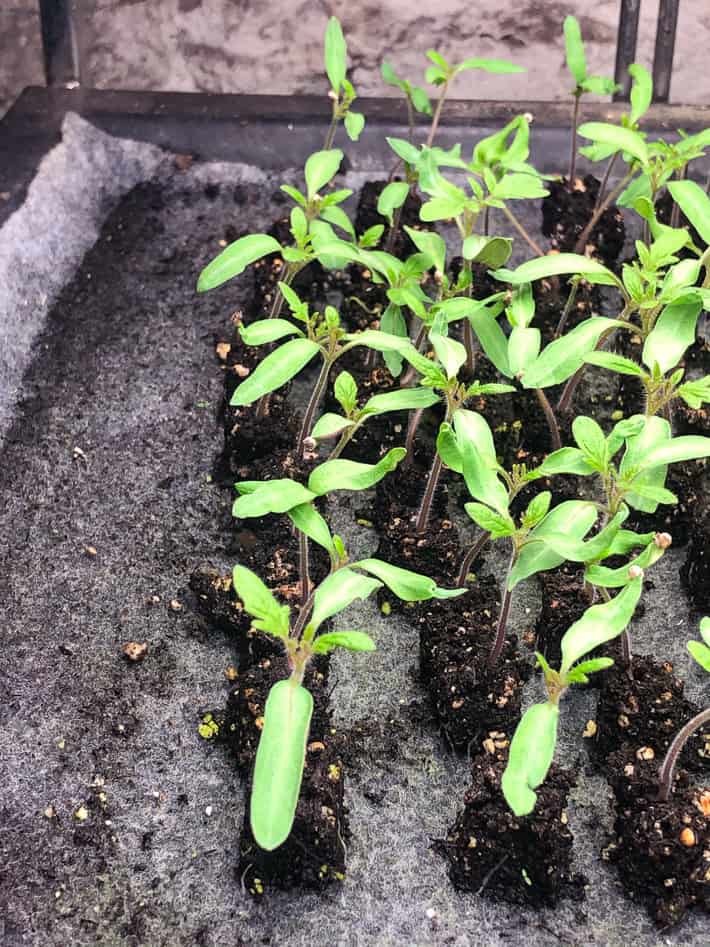
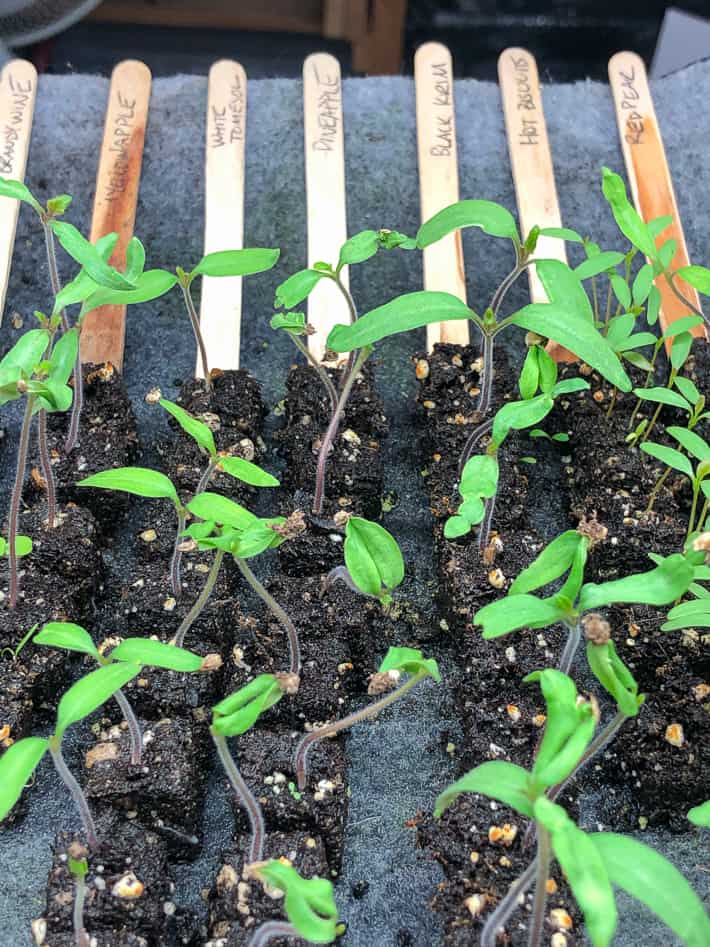
Capillary mats are ESPECIALLY kartwheel worthy when it comes to tiny, mini soil blocks. These tiny little cubes of soil are so small that they can dry out in hours. With a capillary mat they always have the perfect level of moisture.
I wrote a whole love letter to soil blocks and how to make them in this post. I use them for starting most of my seedlings.
PERFECT FOR COTTAGERS OR ANYONE WHO GOES ON VACATION
If you don't start your own seeds, don't reject this SYSTEM based on that fact! If you ever go away you can use these mats inside or outside to water your plants for weeks at a time.
Care tips for the capillary mat.
- When the season is over, I let the mats dry out then take them outside and brush all the dried dirt off of them. I shake them out like a rug (you could probably vacuum them too) and then I roll them up and store them in a bin.
- Don't ever squeeze water out of mats. Squeezing the material breaks it down and ruins its wicking quality.
- If it doesn't seem to be wicking make sure the mat is wet (if it isn't it won't wick) and the water source is level with the mat.
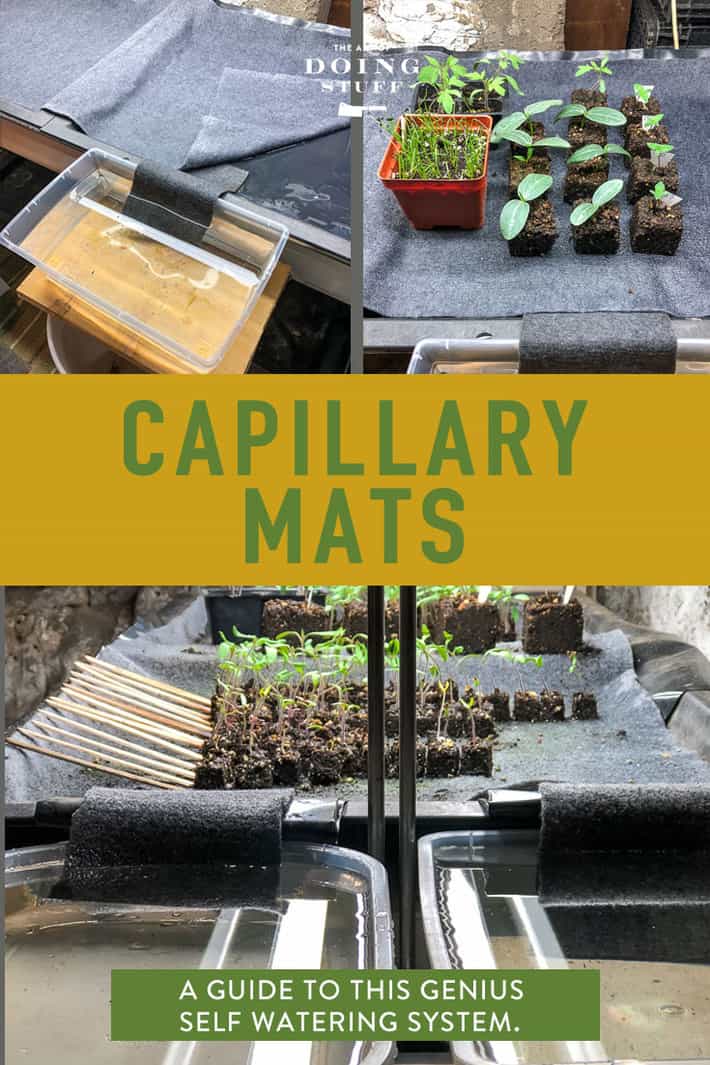
Automatic plant waterer.
How to set up and use a capillary mat system to automatically water your plants.
Materials
- Capillary mat
- Plastic sheet
- Bucket or tub
- Water
Instructions
- Pick the area you want to set your plants. In my case, plants always go in my 3 tier grow light stand.
- Lay down plastic sheeting (it’ll come with your mat) if you’re placing the mat on wood or anything else you don’t want to get wet. I laid plastic so the water wouldn’t leak through the crack in between my two black trays.
- Cut the felt to fit the area, making it a little smaller than that plastic.
- Soak the mats thoroughly. New Mats won’t soak the water immediately and you’ll have to push the water around the mat with your hand. Older mats that have been used before soak more easily.Once the mat is soaked, set up a water tight bucket, bin or planter so the lip of the container is level with the surface of the mat. THIS IS VERY IMPORTANT If the container you hold your water in is too low, the system won’t work properly.
- Fill the container with water.
- Cut a strip of capillary mat so it’s long enough to run from the bucket to underneath the mat by several inches.
- Soak the strip so it’s fully absorbed water and then run it from the bucket or bin to underneath the capillary mat like a wick.
- Place your plants on top of the mat and you're done!
- Water when you see your water source is getting low.
Notes
- Don't squeeze excess water out of the mats - squeezing can ruin the structure of the mat so it won't work as well.
- Using a shallow wide container for your source water is best because the felt can't wick water up any higher than 3".,
- Great for soil blocks or plants in pots.
- When you first soak the mat you may need to swish the water around on top with your hand to get it to soak in. Don't squish. Just swish.
If this watering system interests you in any way don't be an idiot and put it off for years like I did. Just get it. It works.
Get it on Amazon in the US.
Get it on Amazon in Canada or at Lee Valley.
If you have anyyyyyy questions about it just ask me. I might not have the answer but I'll put a really valiant effort into making something up. Promise.




Karen, I’m going to do this, did you stop using a heat pad? Where would I put my heat pad?
Have you had problems with fungus gnats with this? I sometimes have a fungus gnat problem with my indoor plants and the constant moistness seems like it might make my population explode.
I haven't, but I suppose it could be a problem. Because with gardening everything has the potential to be a problem.🤣 ~ karen!
I use BT to keep the fungus gnats down. You can use the liquid and put it in the water or sprinkle the granules on top of the soil if you top water. Great stuff and it's organic.
Good to know. I've never heard of BT for fungus gnats, but it makes sense if they start out as a larvae. :) ~ karen!
I've been using these for years and they are great. Thanks for bringing attention to them to a wider audience.
My small Garland system came with these and I was so excited to see that I could get replacements for them when/if the others disintegrated. I have one of the grow light apparatus like your three tier one and would like to have one or two more, but Lee Valley doesn't seem to carry them anymore which is where I got the first one. Who knew how addictive starting your own seedlings can be? And now, the real reason for this post -- to cuss you out, Gal, because now I just have to look at Lee Valley online for the mats -- I never did get them for the other grow lights -- and who in the dickens can look at the Lee Valley catalogue and buy only what they signed on to look for? If you can do that, you are a much more disciplined gardener than I.LOL
LOL - love Lee Valley - I have the same problem but it's worse because I signed up for their promo emails....silly me !
This is awesome! Now to get your potting mix recipe and where you purchased your potting stand. I am doing research for a greenhouse we are buying. Hope to have it here by fall.
Thank You So Much!
since there is only 7 comments so far....maybe you could answer a quik question? well, it’s quik for me.
What do you have planted in the large containers with no dividers or separate blocks?
please and ty!
Wicked cool. Now I've gotta put the lights on timers and go on vacation to.......well, doesn't matter. Not worrying about it is a a great help. Thanks for all you do.
Do you think it really would work outdoors with potted plants? I'm thinking water in the tub might evaporate, or a terra cotta pot sitting on a wet mat might promote root rot, etc etc.
Well, how brilliant is this?!? I didn’t know this existed. We’re growing seedlings for the first time this year and these mats sure would make it easier!! THANK YOU.
Excellent tip! I wonder what the difference is between capillary mats and things like absorbent shammy cloths, felt, etc. I might buy the capillary mats and do a little experiment.
Woot woot....ready for pick up at Lee Valley later today. I'll start my Toothache seeds and Envy zinnia seeds with my block maker as well.
It's going to be An Art of Doing Stuff kind of day for you, lol. The only thing missing is talking to Betty a few times in the day. Want her number? ~ karen!
Definitely interested in giving this a try...probably next year after the puppy is grown!
Thanks for trialing it for us and giving us the skinny.
I bought a small system just like this for the first time this year. Game Changer! Soon, when I step up my seed starting (ya know - after I get grow lights), this looks like just the trick to keep those bad boys alive! Thanks!
The last picture of mixed plants... to the right... 4 is the amount you're allowed?
I grew some a few years ago, just let them go crazy and bloom, the bees were INSANE for them!! Could not get enough! I let them have the plants, but damn! I wish I could find the honey comb from that! :D
I actually don't even know how many we're allowed, lol. Those are CBD so I'm not even sure it would be an issue, but I grew 4 because you had to buy the seeds as a package of 5. And one didn't germinate. :) ~ karen!
All very interesting & useful, per usual, but my Burning Question is: Where did you acquire the Yellow Rubber Ducky Watering Can?????
I was totally wondering that too!
Dollar Store! ~ karen
OMG! This is really going to be a life-changer for me!
I've been potting up my tiny seedlings and I can never keep up with the watering. I'm off to Lee Valley right away to get these.
Thank you!
You will never need to worry about tiny seedlings drying out AGAIN. ~ karen
You just solved all my problems. Life is good.
It is AMAZING! ~ karen
Where’d you get those cool large trays?
Those came with the plant stand. :) ~ karen!
Lee Valley is also in the States! https://www.leevalley.com/en-us/shop/garden/indoor-gardening/watering/44627-watering-mat?item=PM121
Hi Karen
I wonder if it would work in mini greenhouse with tomatoes, what do you think?
OMG am I first 🤪
Hi Lynn! It works anywhere if you set it up properly. ~ karen!