When last we met I told you I was going to have a video for you that showed how I was putting together my version of the Restoration Hardware Aspen collection. The outdoor furniture would have cost me $20,000 if I'd bought it from Restoration Hardware. Which I wouldn't have, because I spent my last $20,000 on a tiara. Damnit.
Building it myself is still going to cost $1,500 (mainly because of the cushions) but that's what a cheap store bought outdoor set would have cost me and I wouldn't have liked it as much. Besides. This set will match my tiara.
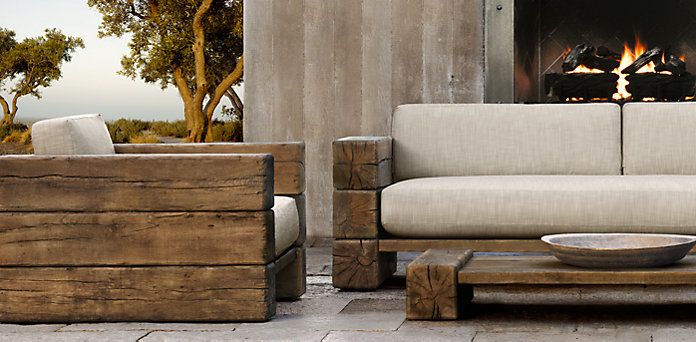
Here's a reminder of what the Restoration Hardware set looks like.
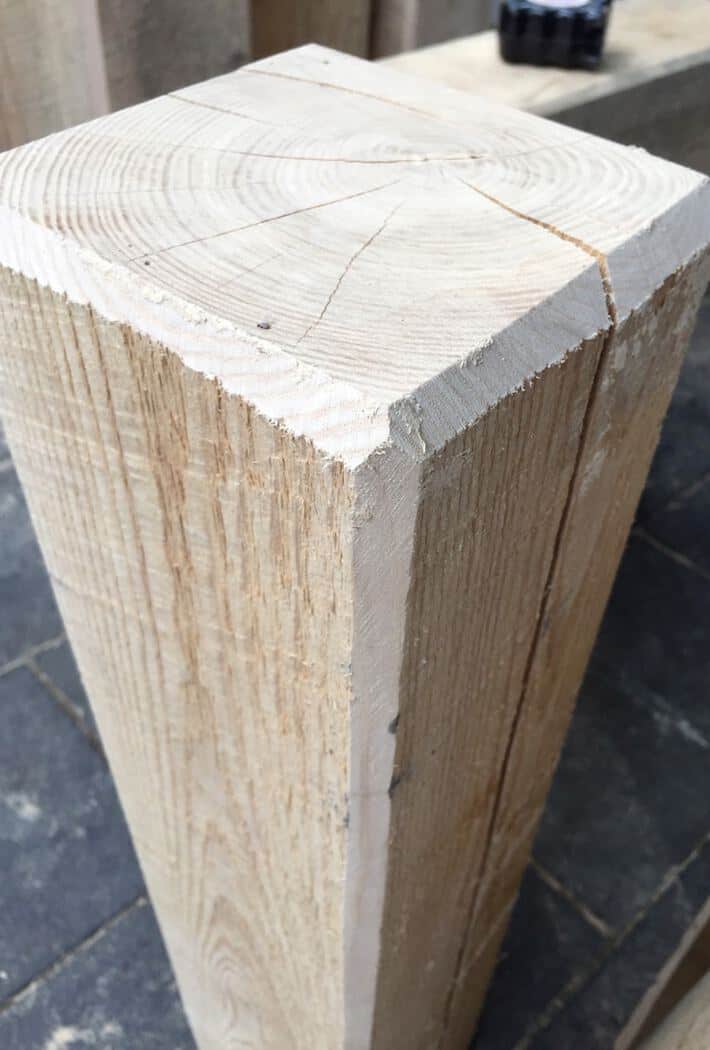
To copy this I had 6" thick cushions custom made for in weather resistant/fade resistant fabric. Then I bought several rough posts of untreated Ash from a sawmill. I cut the posts into shorter lengths of 29". I needed 16 of them to make the arms with a few left over for support under the sectional and to make a coffee table with.
Restoration Hardware has used wood posts that are 8" high, but I went with 6" so it wouldn't look quite so massive in my backyard. To get the same height on the arms that meant I had to stack 4, 6" posts instead of the 3 posts Restoration Hardware has used for their arms.
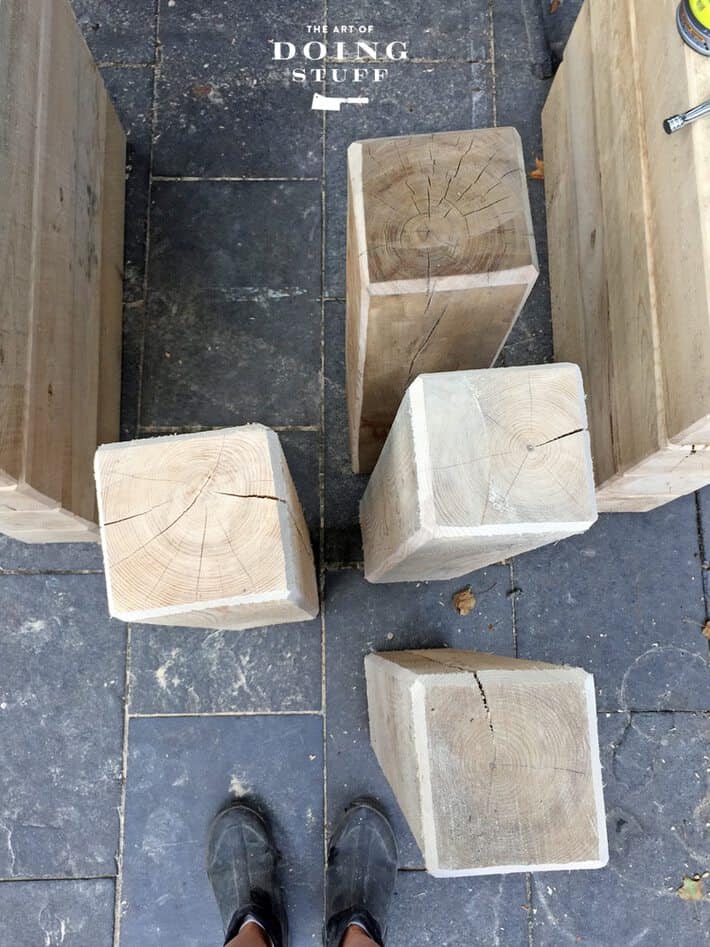
After cutting them all to 29" long, I beveled all the edges with a belt sander (there are 12 edges on each post).
Would you like to save this stuff?
Then I stacked 4 of them on top of each other until I was satisfied with how they looked, and then started securing them using lag bolts.
Obviously I didn't want any of the bolts to show so I flipped the posts over and worked from the underside of them. You'll see what I mean in the video. Once 4 posts were bolted together, I had an arm. Then I sanded the sides and one arm was complete.
Like so.
My Uncle was here visiting the other week and he asked me if I got everything done I had set out to do this summer. Um. No. No I did not. The chicken coop still needs a new roof, my house isn't painted yet (although some of it is), and my front yard isn't quite looking right yet. BUT I'M BUILDING MY OWN OUTDOOR FURNITURE! Like a fool. So it's not like I didn't get the other stuff done because I was busy shining my tiara. I just needed a place to sit more than the chickens needed a dry coop. Just kidding. I got rid of the chickens. They don't match my tiara. Just kidding. I threw a tarp over their roof. They're dry.
Once my arms are done (I have one more set to assemble), I have to hack them all up so they look like they've lived a little and then put together the supports for the seats and back. Which in my head seems like a quick and easy job.
In fact, in my head, building this entire set was only going to take about half a day. I have NO idea why I ever would have thought anything so ridiculous. Actually, I'm pretty sure I can chalk it up to my tiara being too tight.
Shouldda laid out the extra $5,000 for the adjustable one.


Laurie
Did you ever finish the video on the DIY RH Aspen Outdoor Furniture Collection? We are following your every move 🥰
Karen
Hi Laurie! I didn't do a step by step video but last year I did a post and video that showed all the sections of the sectional so you could see exactly how it's built. You can see that here ... https://www.theartofdoingstuff.com/how-to-build-my-restoration-hardware-sectional/ :) ~ karen!
laurie
Thanks Karen!
Ziad
Beautiful Work. will be doing this next weekend. I was wondering, if you dont mind sharing, what type of wood did you use?
Karen
Hi Ziad. I used ash for my furniture. ~ karen!
Oscar
Looks good, I copied the same chair, I made a couple of changes, used 6x6's and bought a store cushion. Drilled a hole for a drink holder.
Stacey
Hi, you did an amazing job on this furniture. Where did you find the 6x6 wood to build all this beautiful stuff? I can find treated lumbar only.
Karen
Hi Stacey. Thanks. :) In one of the posts on the furniture (maybe the post on how to scar up the wood a bit?) I mention that I actually had to source out a private lumber mill. Literally a guy who lives in the bush (his own forest) and has a mill on his property. It's not as rare as you think! I found him by searching Kijiji (which is similar to Craigslist) ~ karen!
David
WHere is the video link
amartin
Hi,
Did you seal or oil the wood at all?
Michael Hughes
Hello Karen,
First off, great job!
Do you happen to have the plans as to how you secured the boards for the seat and back? Will be finishing making the arms today, and wanted to start on the seat and back, but want to make sure my measurements are correct for the L-Brackets.
Feel free to email me if that is easier.
Thanks!
-Michael
Karen
Hi Michael! I'm afraid I don't have plans. I just build everything from scratch and hope for the best. But I'm going to do my best to figure out how to draw up plans for it because I know how many people would like them. If there's a specific measurement you want let me know and I'll do my best to measure and let you know. Like is it the distance between the arms you're looking for? ~ karen!
Michael Hughes
Oh no worries! Really I was hoping to get way you set up the seat boards. I am planning on using three 2"x8" at 8' each to make a 96" seating area. I was wondering if you ended up using L brackets, and if so, did you mount them flush to the front of the sitting area or start them a few inches back? Hope this makes sense.
Thanks!
Karen
Hi Michael! I used 2"x2"s to set the boards on and then (for some bizarre reason) used a bracket on the 1st and last board. So in your case you'd have the one in the middle that isn't bracketed. I have NO idea why I did this but I'm sure I had a reason, lol. The 2x2's are recessed 2" back from the front of the stacked arms. Hope that helps. ~ karen!
Kate
I have my arms ready.... Desperate for the remaining instructions.... You rock by the way... Loving your site
Katie
I cannot find how to attach the back of the aspen chair or sofa
Jessica Cadavid
Hello Karen,
I absolutely love your post! I am embarking on this project as well. I wanted to know how you made your corner piece, how its supported or is there any way we can see a picture of the back of the L-Shape sofa. I would like to get a better idea on how I could finish this project for my home.
Best,
Karen
Hi Jessica! I'm actually going to be doing a more in depth post on the construction of it in the spring. By the time I finished the sectional it was almost fall and I figured no one would be starting this behemoth until the spring so I was O.K. to leave the details post until then. :) ~ karen!